主要组件
- 最先进的扩散管道 diffusion pipelines,只需几行代码即可进行推理。
- 可交替使用的各种噪声调度器 noise schedulers,用于平衡生成速度和质量。
- 预训练模型 models,可作为构建模块,并与调度程序结合使用,来创建您自己的端到端扩散系统。
开始学习
一个快速的推理程序
from diffusers import DDPMPipeline

ddpm = DDPMPipeline.from_pretrained("google/ddpm-cat-256", use_safetensors=True).to("cuda")
image = ddpm(num_inference_steps=25).images[0]
image
结果
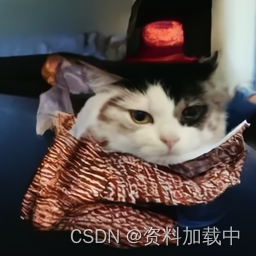
上面这个例子,这个管线包括一个UNet2DModel和一个DDPMScheduler。这个管线对一个要输出图像尺寸大小的随机噪声输入UNet2DModel多次进行迭代去噪。在每一个时间步,这个模型会预测一个噪声残差然后通过调度器策略计算一个减少噪声的图像。这个管线将会不断地重复这个过程直到达到指定的推理时间步。
下面时重新创建这个管线,这一次是将模型和采样策略分开。
- 加载模型和调度策略
from diffusers import DDPMScheduler, UNet2DModel scheduler = DDPMScheduler.from_pretrained("google/ddpm-cat-256") model = UNet2DModel.from_pretrained("google/ddpm-cat-256", use_safetensors=True).to("cuda") - 设置去噪过程的时间步数
scheduler.set_timesteps(50) - 设置调度程序时间步长会创建一个张量,其中的元素间隔均匀,在本例中为 50。每个元素对应于模型对图像进行降噪的时间步长。稍后创建去噪循环时,将遍历此张量以对图像进行降噪:
scheduler.timesteps tensor([980, 960, 940, 920, 900, 880, 860, 840, 820, 800, 780, 760, 740, 720, 700, 680, 660, 640, 620, 600, 580, 560, 540, 520, 500, 480, 460, 440, 420, 400, 380, 360, 340, 320, 300, 280, 260, 240, 220, 200, 180, 160, 140, 120, 100, 80, 60, 40, 20, 0]) -
创建一些与所需输出形状相同的随机噪声:
import torch sample_size = model.config.sample_size noise = torch.randn((1, 3, sample_size, sample_size), device="cuda") -
编写一个循环来遍历时间步长。在每个时间步长,模型都会执行 UNet2DModel.forward() 传递并返回噪声残差。调度程序的 step() 方法采用噪声残差、时间步长和输入,并预测前一个时间步的图像。该输出成为去噪循环中模型的下一个输入,并将重复,直到到达
timesteps数组的末尾。input = noise for t in scheduler.timesteps: with torch.no_grad(): noisy_residual = model(input, t).sample previous_noisy_sample = scheduler.step(noisy_residual, t, input).prev_sample input = previous_noisy_sample -
最后一步是将降噪后的输出转换为图像:
from PIL import Image
import numpy as np

image = (input / 2 + 0.5).clamp(0, 1).squeeze()
image = (image.permute(1, 2, 0) * 255).round().to(torch.uint8).cpu().numpy()
image = Image.fromarray(image)
image
结果
参考链接
https://huggingface.co/docs/diffusers/main/en/using-diffusers/write_own_pipeline
