10.tftp服务安装
板子有有线网卡,需有线连接到电脑
主机安装TFTP服务
$ sudo apt-get install xinetd tftpd tftp
$ sudo vim /etc/xinetd.d/tftp /*添加下面内容,
service tftp
{
protocol        = udp
port            = 69
socket_type     = dgram
wait            = yes
user            = nobody
server          = /usr/sbin/in.tftpd
server_args     = /tftpboot
disable         = no
}

注意: win10下内容拷贝不过来 需要去掉.vimrc " 启用鼠标 部分内容如 if has('mouse') set mouse=a endif

 */

$ sudo mkdir /tftpboot
$ sudo chmod -R 777 /tftpboot   //改变文件权限
$ sudo chown -R nobody /tftpboot   //递归改变文件权限
$ vim /tftpboot/test   //创建测试文件
$ sudo service xinetd restart  //新系统的重启服务
$ sudo /etc/init.d/xinetd restart  	//老系统的重启服务

$ tftp localhost  //自环测试
tftp> get  test
Received 7 bytes in 0.0 seconds  //有下载到文件,表示tftp服务安装成功
tftp> q //退出
板子与虚拟机能ping通
用网线连接板子和电脑  //需买网线,笔记本电脑还需买 usb转网卡 设备

//win10设置:
  右下脚无线网图标上右键 -> 打开网络和internet设置 -> 以太网 -> 网络和共享中心
  -> 点以太网(有线网卡) -> 属性 -> TCP/ipv4-> 选使用下面的ip地址
  -> IP地址    192.168.9.120   -> 确定
     子网掩码  255.255.255.0
     网关      192.168.9.1

  关闭防火墙 // 右下角向上箭头 -> 点盾牌的图标 -> 把域网络 专有网络 公有网络 防火墙全部关闭(否则是ping不通的)
命令行输入  > ipconfig      //能看到以太网适配器里右ip  192.168.9.120表示设置成功
//==================板子IP192.168.9.110=============
//==================板子设置====================:putty串口进入应用层
//板子先在U-boot阶段激活网卡才行,最下面有写
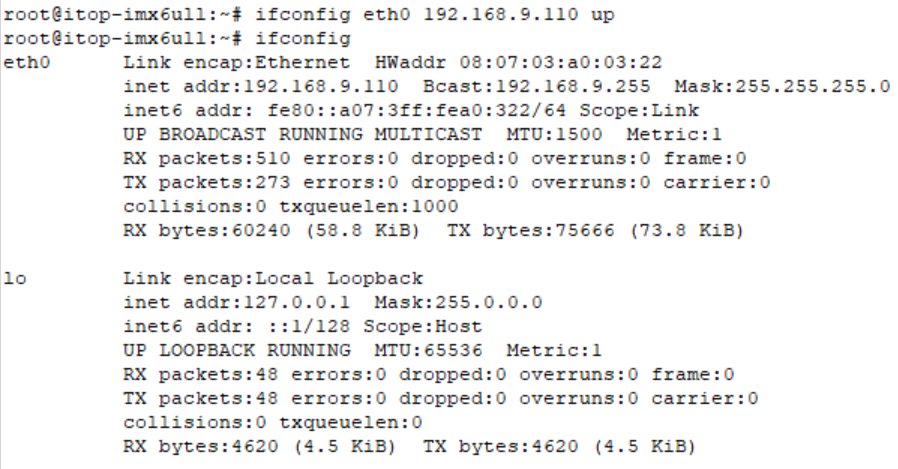
$ sudo ifconfig eth0 192.168.9.110 up  //设置有线网卡的ip地址(默认eth0是有线网卡)
$ ifconifg   //看到 eth0 设为 192.168.9.110 表示设置成功
$ ping 192.168.9.120 /*如果有回下面信息表示板子与电脑网络连接成功
    PING 192.168.9.120 (192.168.9.120) 56(84) bytes of data.
    64 bytes from 192.168.9.120: icmp_seq=1 ttl=128 time=1.67 ms
    64 bytes from 192.168.9.120: icmp_seq=2 ttl=128 time=1.90 ms
   	*/
//==================电脑IP192.168.9.120=============
//==================主机关联有线网卡设定静态ip================

//==================虚拟机IP192.168.9.119===========
//不太行,按下面的双网卡并行来设置
WorkStation -> 编辑 -> 虚拟网络编辑器 -> 更改设置 -> 桥接模式 -> 选usb有线网卡 -> 确定退出
WorkStation -> 虚拟机 -> 设置 -> 自定义 -> 选Vnet0 //需和前一个一致
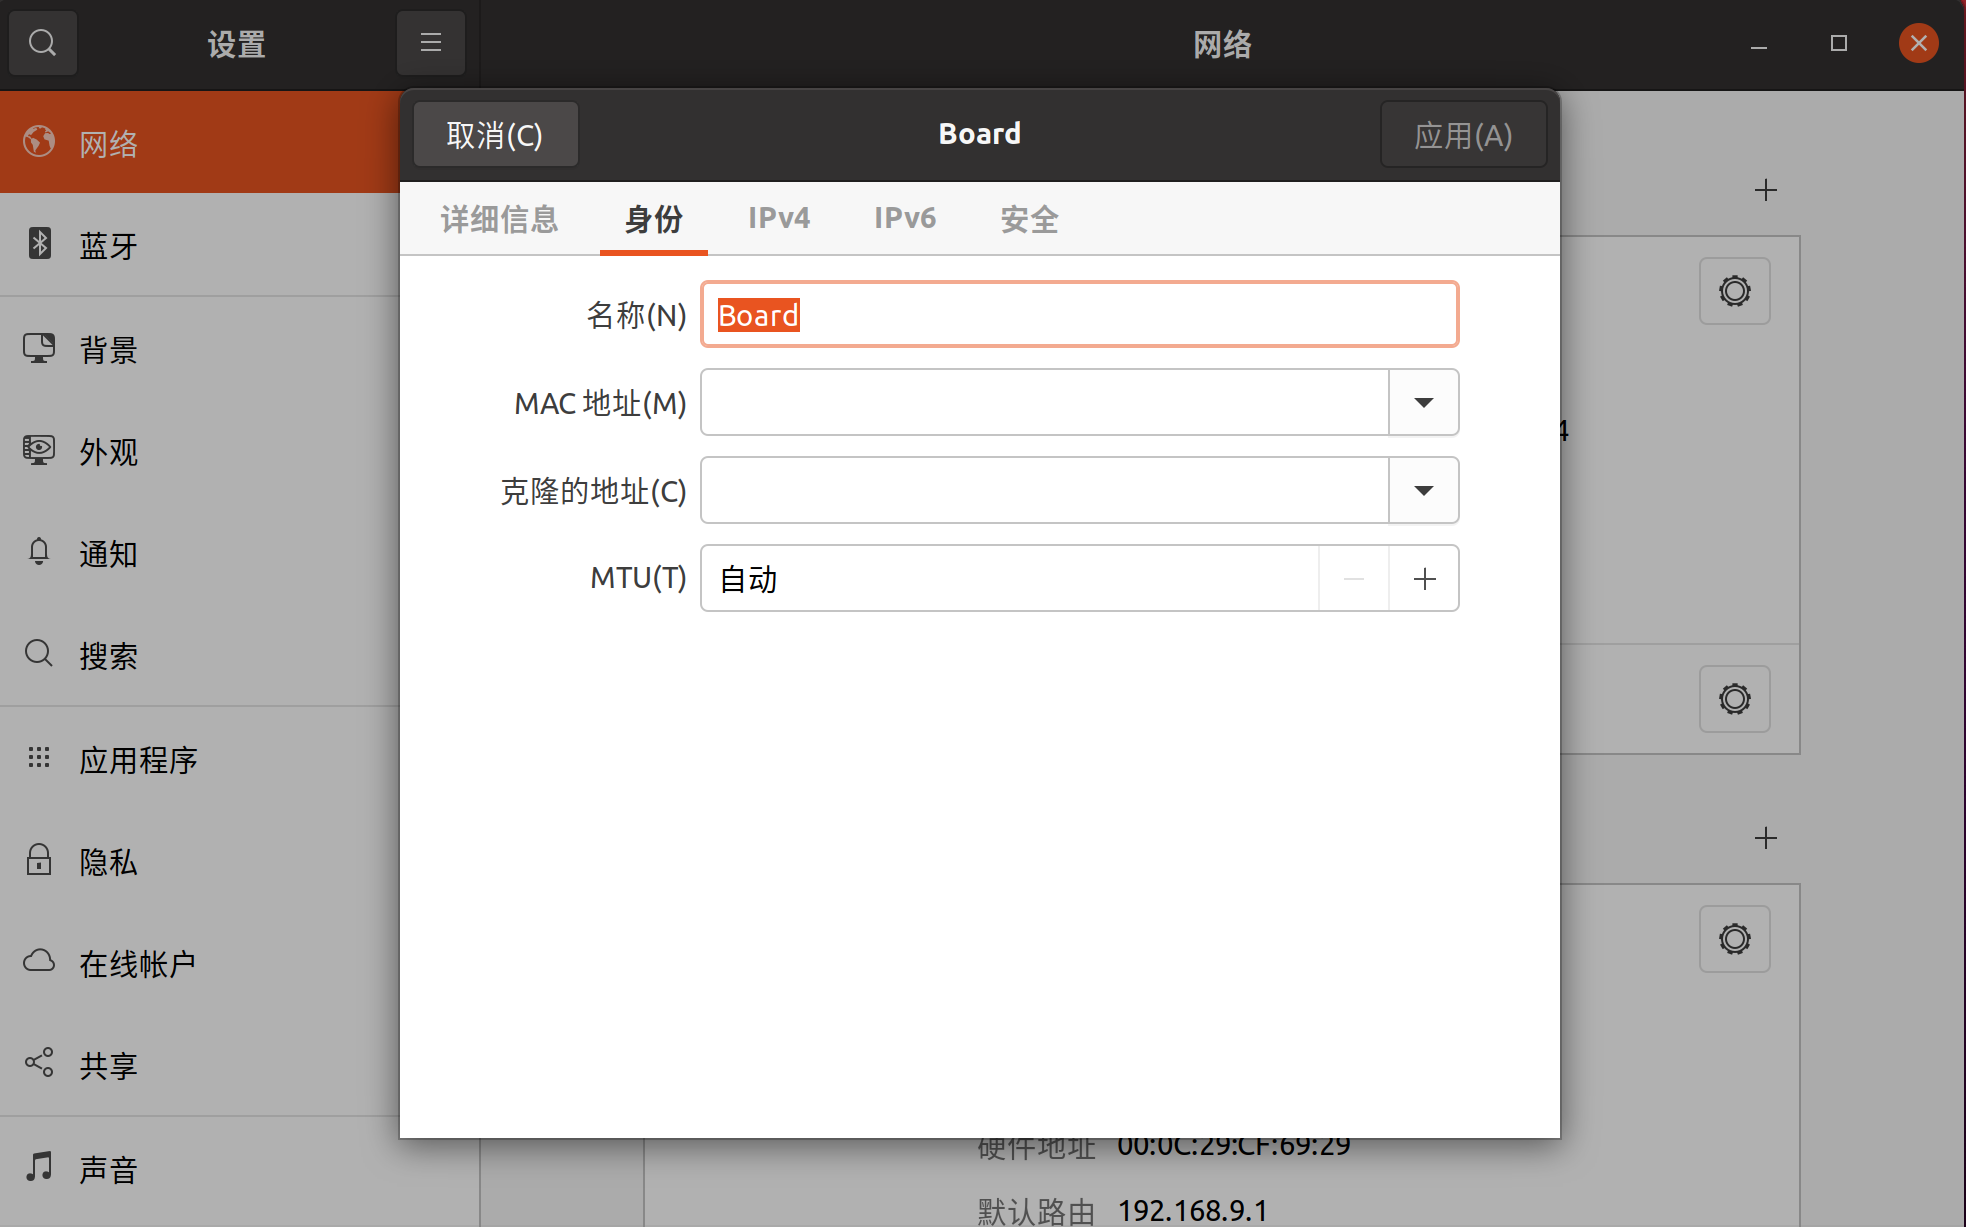
ubuntu -> 右键右上角的网络图标 -> 设置 -> 点+ 号新加网卡 -> 身份 名称设为 board ->
选ipv4 -> 手动 -> 地址 设为192.168.9.119  子网掩码 255.255.255.255.0  网关:192.168.9.1 -> 确定退出
$ ifconfig //如果看到有 192.168.9.119 的网卡,表示设置成功
板子有线网口IP设置
- 第一种,上电启动板子到文件系统
$ sudo ifconfig eth0 192.168.9.110 up  //设置有限网卡的ip地址(默认eth0是有些网卡)
$ ifconifg   //看到 eth0 设为 192.168.9.110 表示设置成功
- 第二种,停在uboot阶段的设置
# pci enum;pci  /* 激活pci设备(否则ping时报:No ethernet found.)
Scanning PCI devices on bus 0
BusDevFun  VendorId   DeviceId   Device Class       Sub-Class
_____________________________________________________________
00.01.00   0x10de     0x0fae     Bridge device           0x04
00.02.00   0x10de     0x0faf     Bridge device           0x04
  */
# setenv serverip  192.168.9.119
# setenv ipaddr 192.168.9.9
# ping 192.168.9.120 /*先ping通win10
  Using eth_rtl8169 device
  host 192.168.9.120 is alive
	*/
# ping  192.168.9.119   /*再ping通虚拟机(如果不通,看一下前面 主机关联有线网卡设定静态ip)
   Using eth_rtl8169 device
   host 192.168.9.119 is alive
    */
# saveeenv
# tftp Image  /*内核33M下载要3分钟(太慢了,为什么)
	Using eth_rtl8169 device
	TFTP from server 192.168.9.119; our IP address is 192.168.9.9
	Filename 'Image'.
	Load address: 0x84000000
	Loading: ##########....

         ####################################################
         308.6 KiB/s
	done
	Bytes transferred = 34484232 (20e3008 hex)

	占用地址范围  0x84000000 ~ 0x84000000+20e3008
   */
# tftp 0x88000000 tegra210-p3448-0002-p3449-0000-b00.dtb
Windows有线网口配置
网线连接电脑和板子
打开控制面板

点网络和Internet

点网络和共享中心
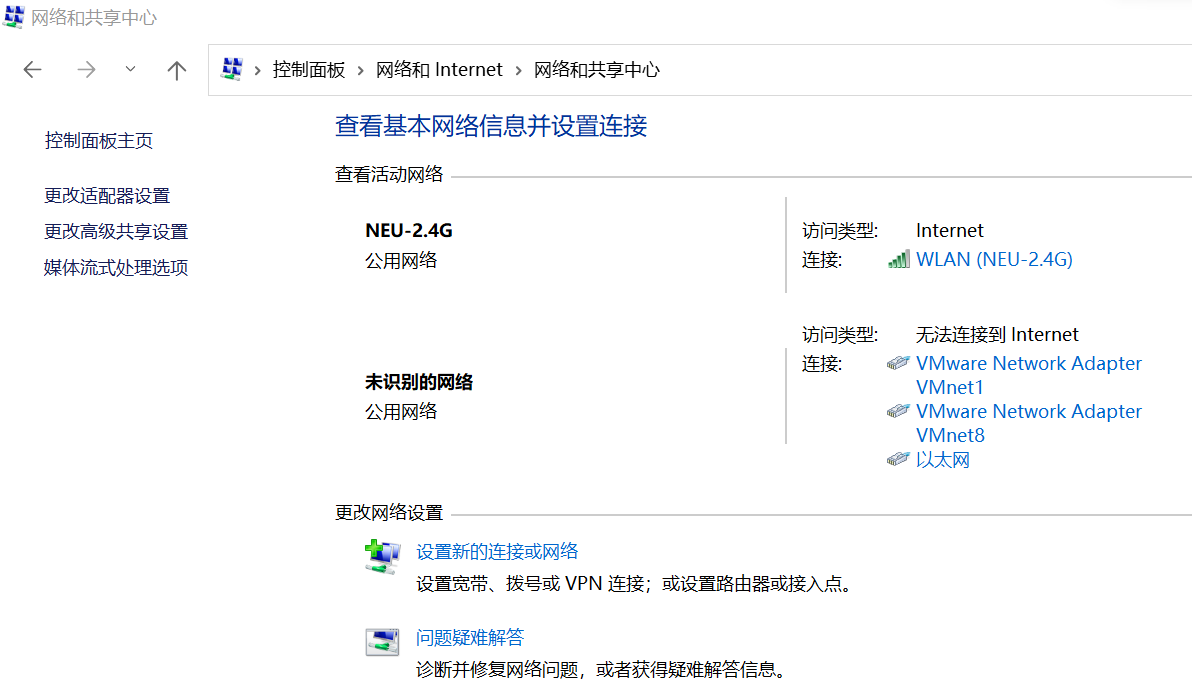
点以太网

点属性
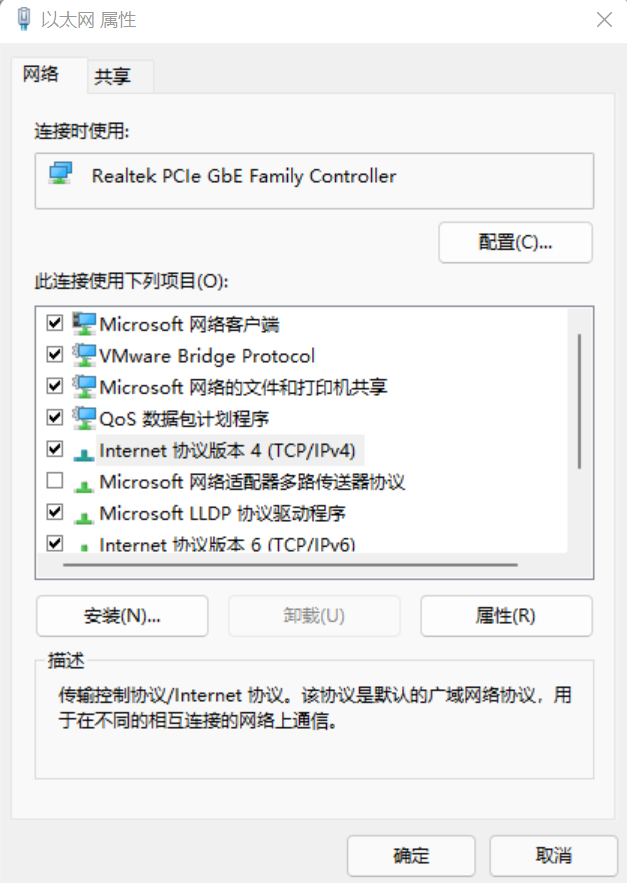
双击IPv4
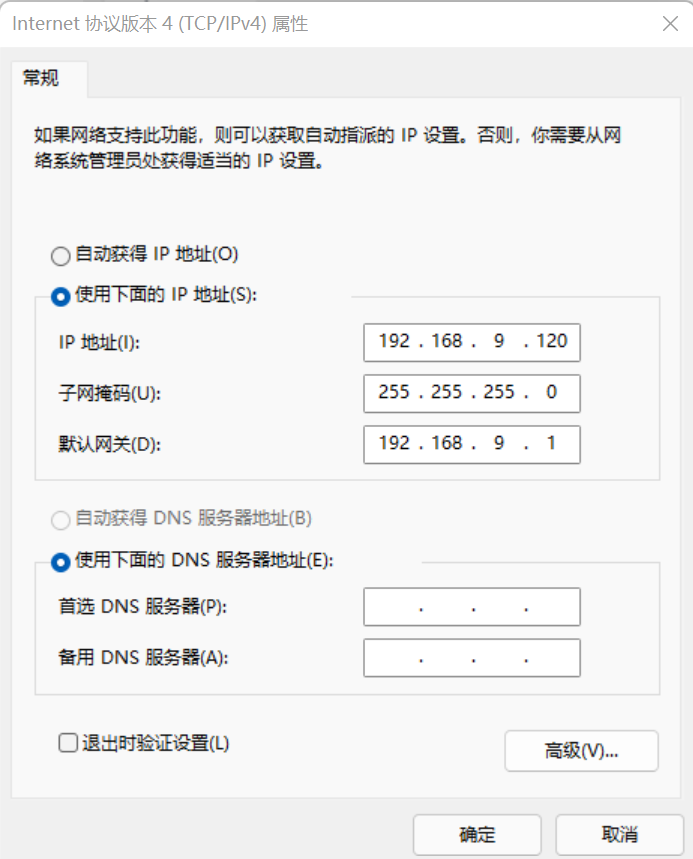
改成如图-然后一路确定到关闭
到此Windows有线网口配置完成(记得关所有防火墙)
板子和Windows ping通
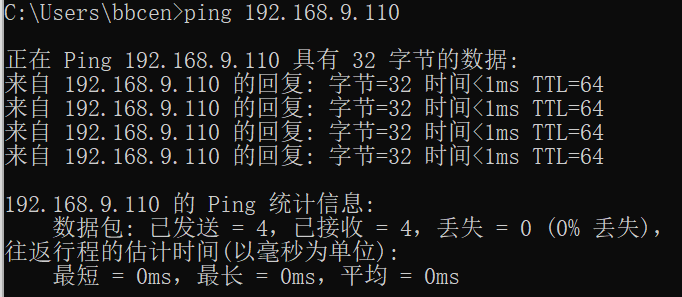

虚拟机TFTP双网卡并行
虚拟机设置
编辑 ->虚拟网络编辑器	-> 更改设置 -> 选VMnet1 -> 桥接选择 usb网卡 (如 TP-Link的)-> 确定


虚拟机里 右上角,设置一个网卡 连接wifi上外网, 一个网卡,连接usb网卡,连接板子。
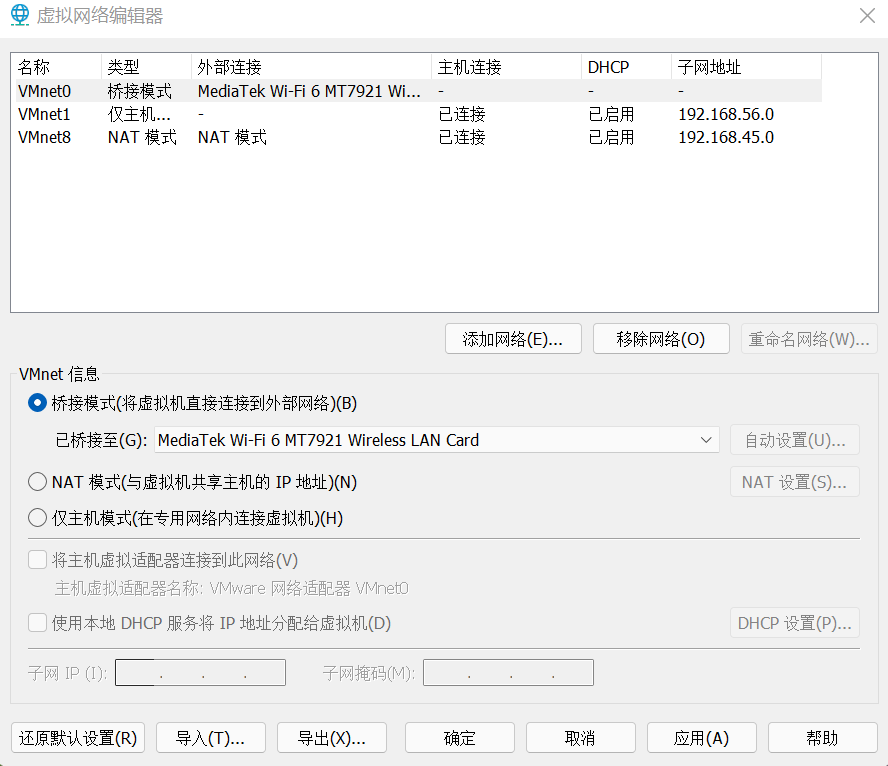
VMnet0接无线网口
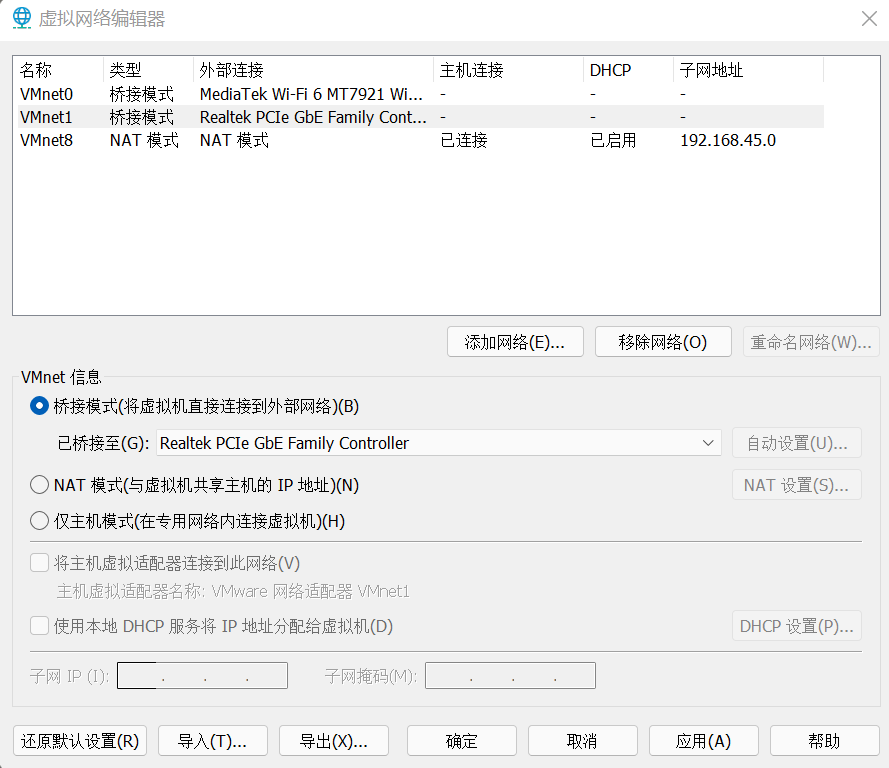
VMnet1接有线网口
两个设置好后,点应用-点确定
虚拟机 -> 设置 -> 添加 -> 网路适配器 -> 自定义 -> 选VMnet1 -> 确定
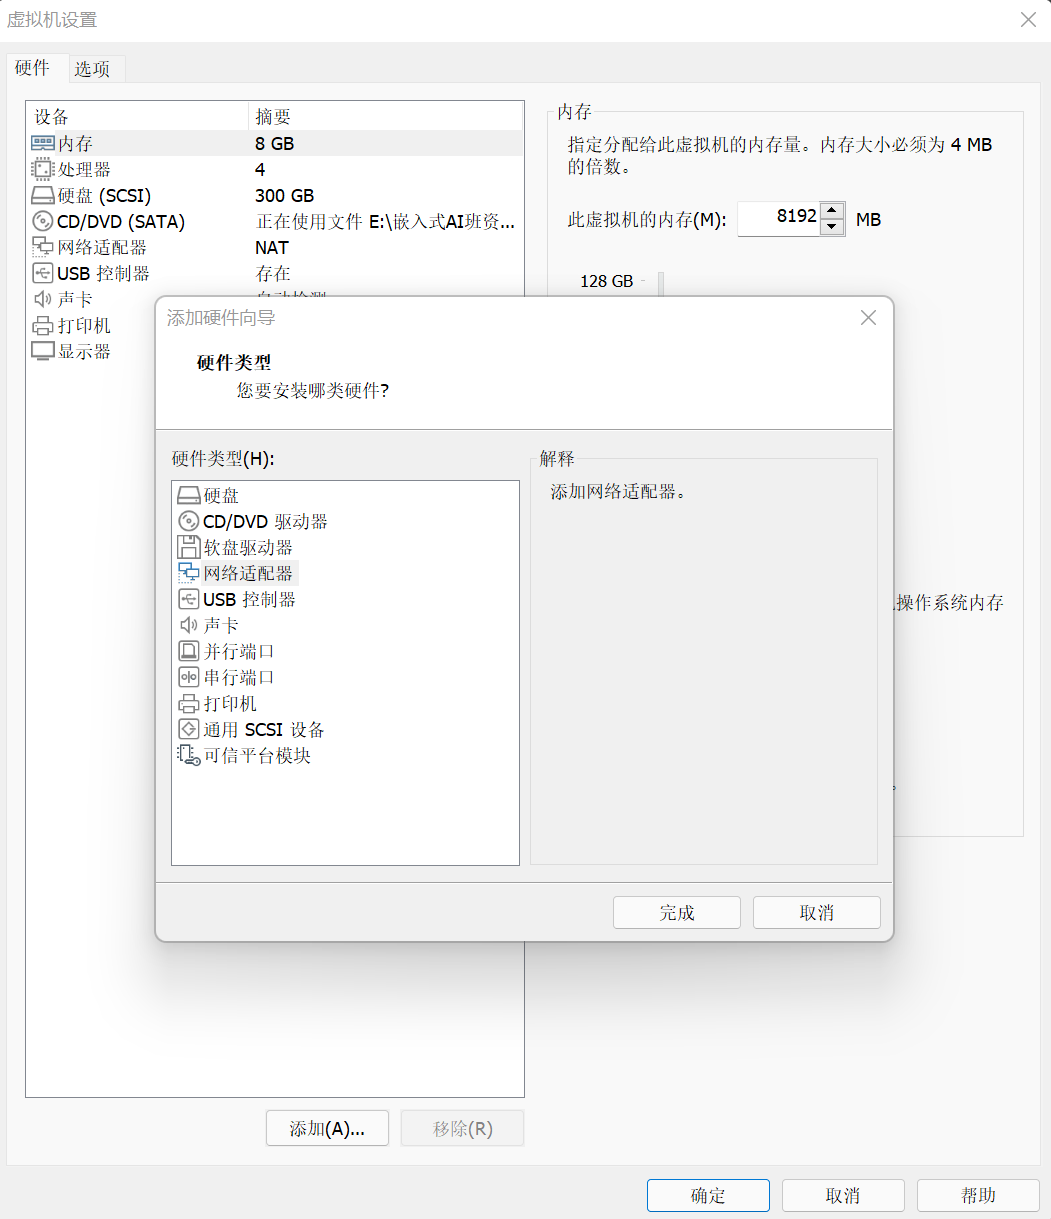
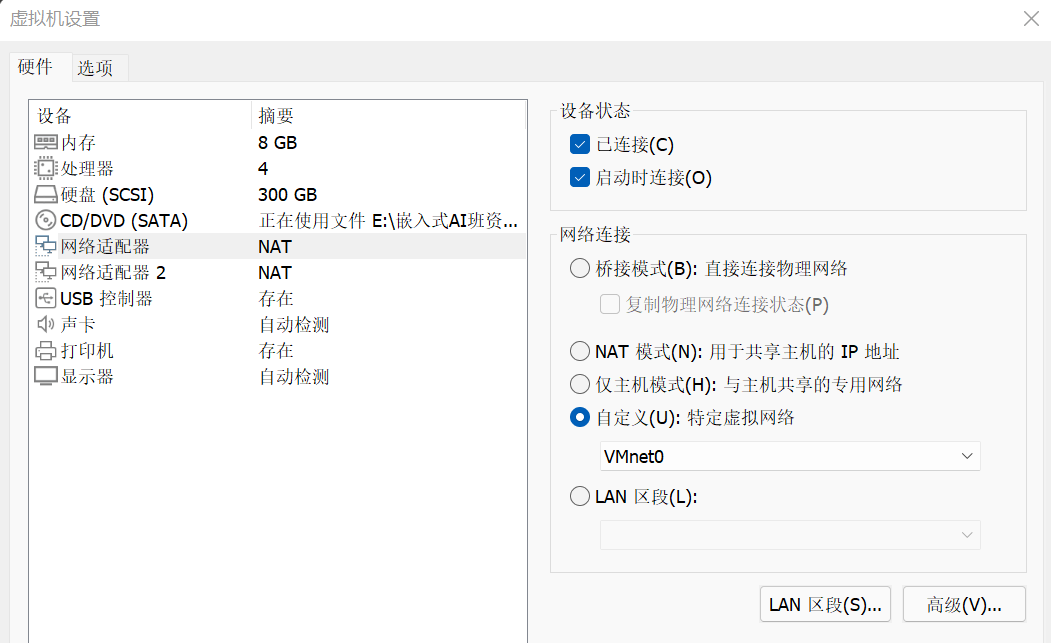
无线网卡的
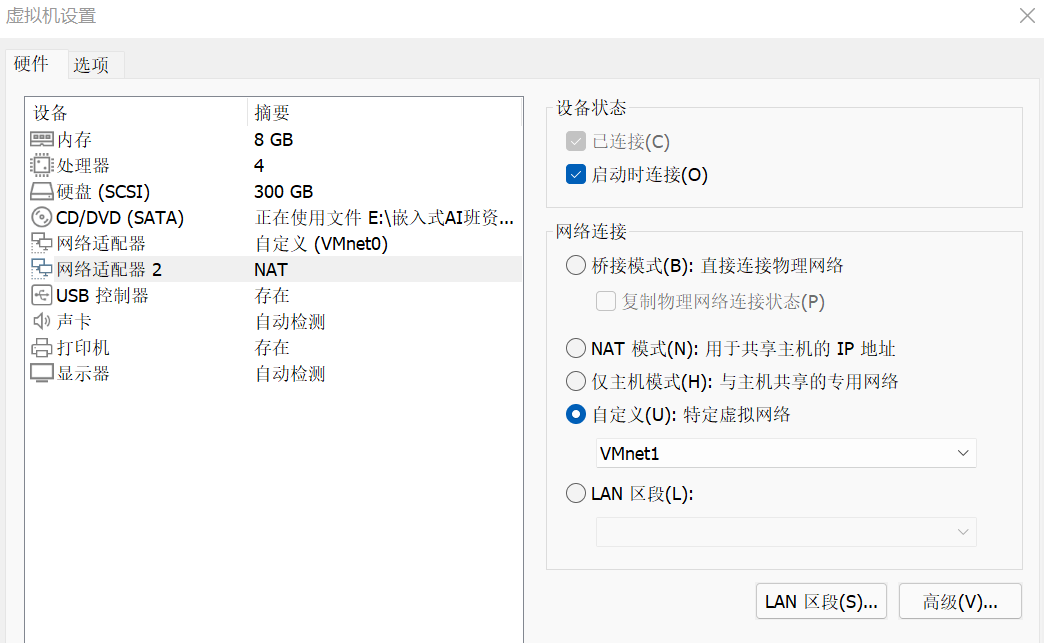
有线网卡的
两个设置完-点确定
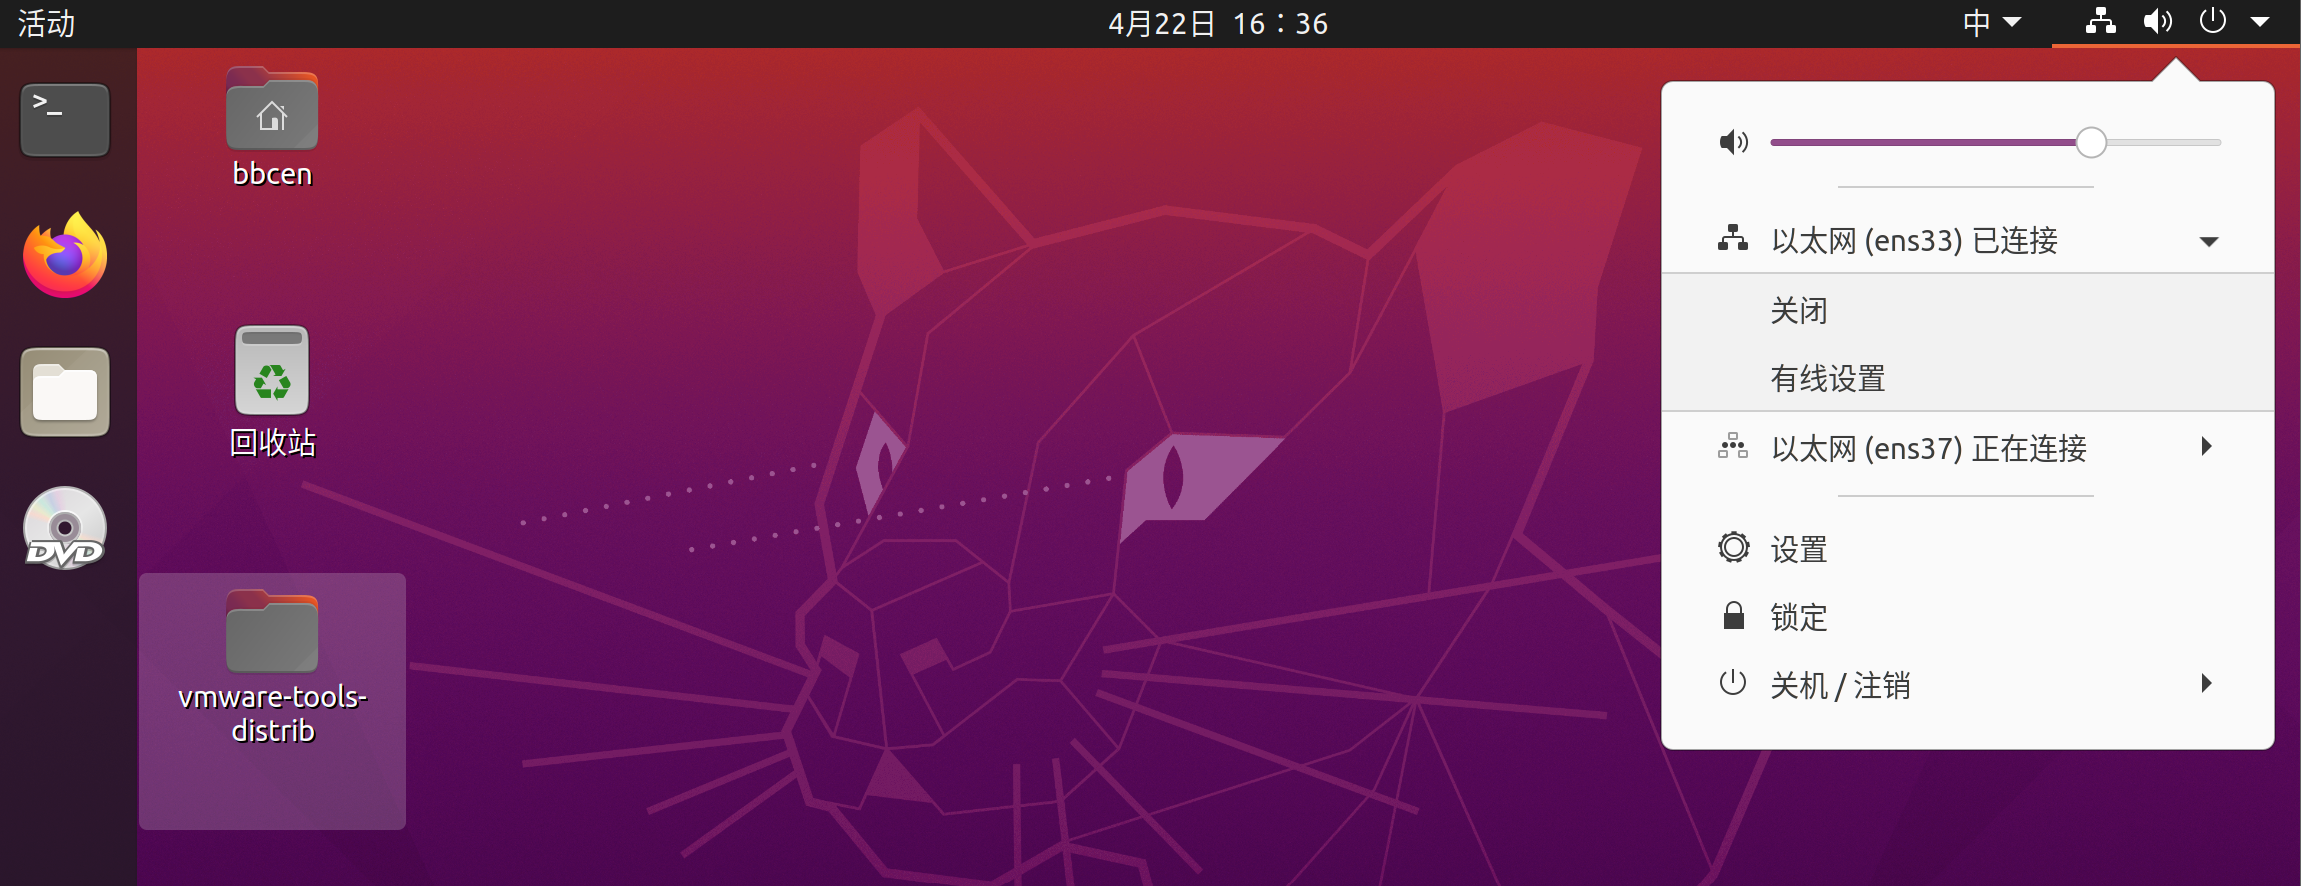
有线设置
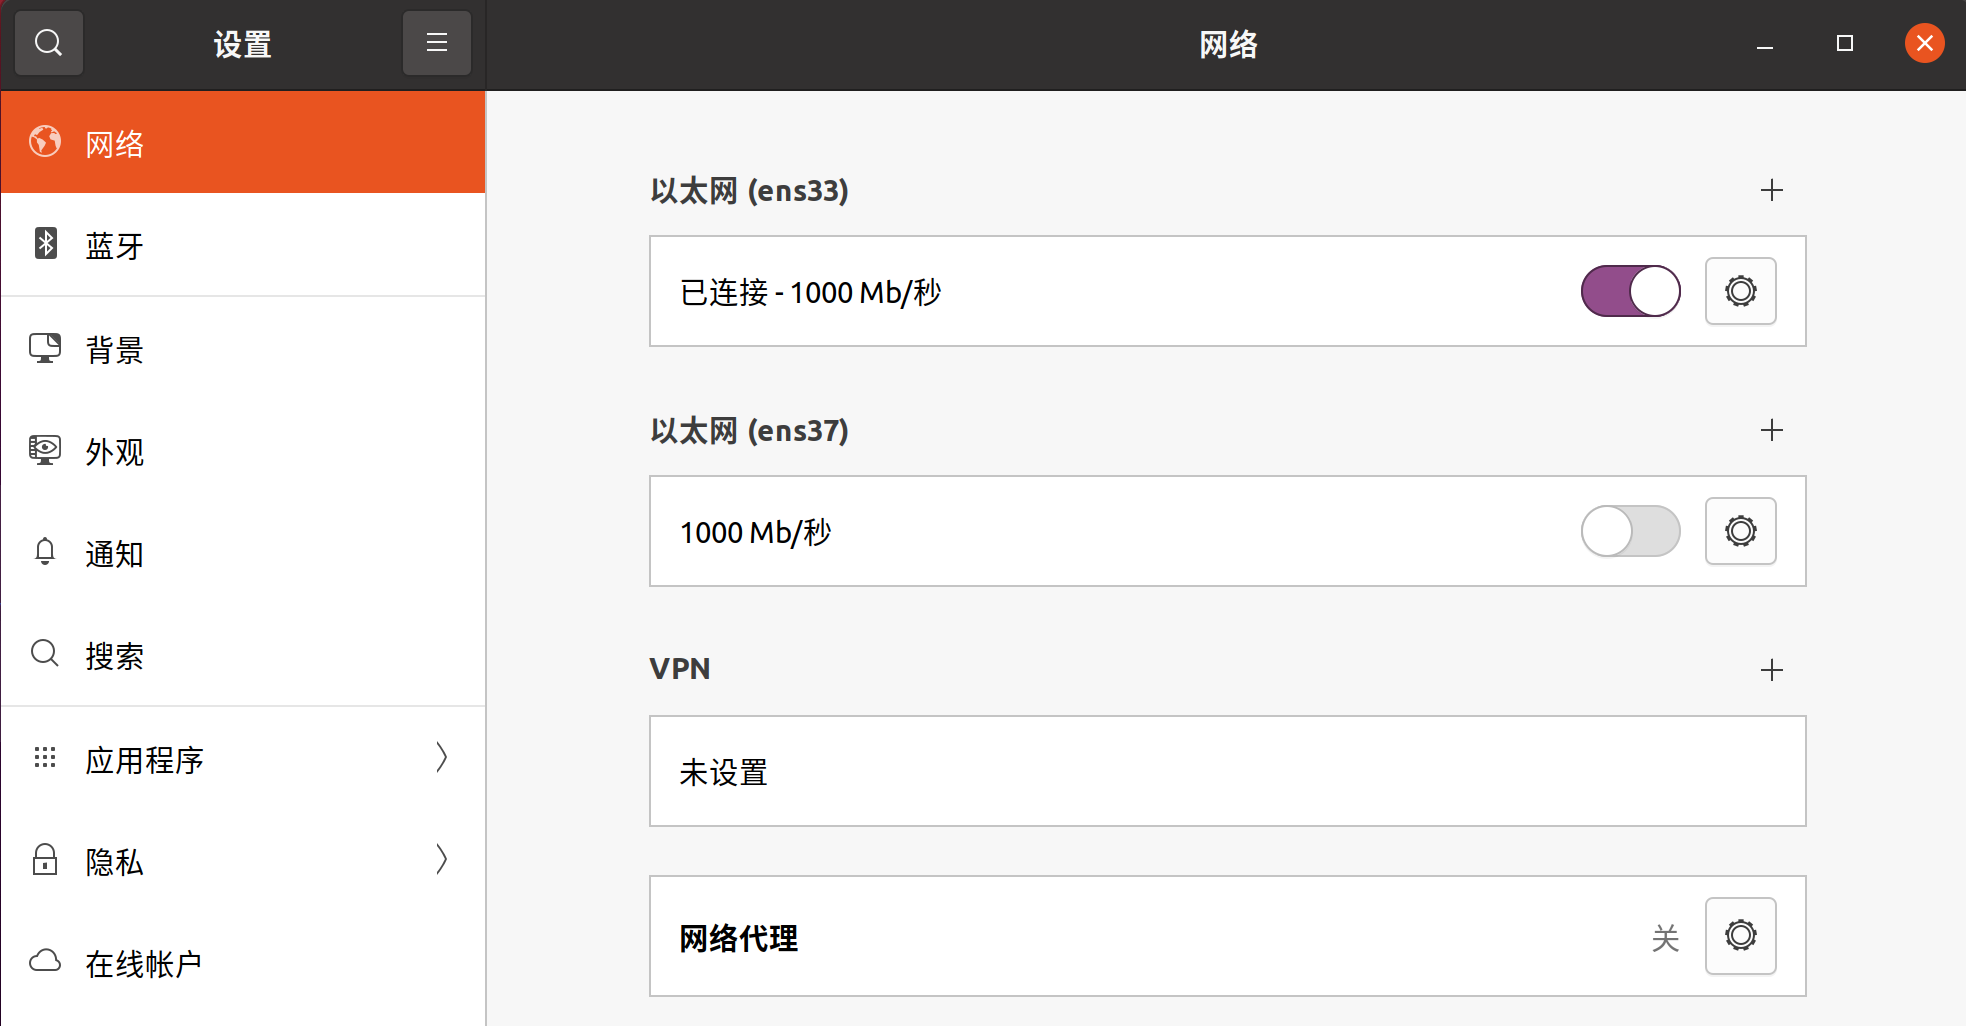
点ens33右边设置符号,改个名字就行
或者右上角+号
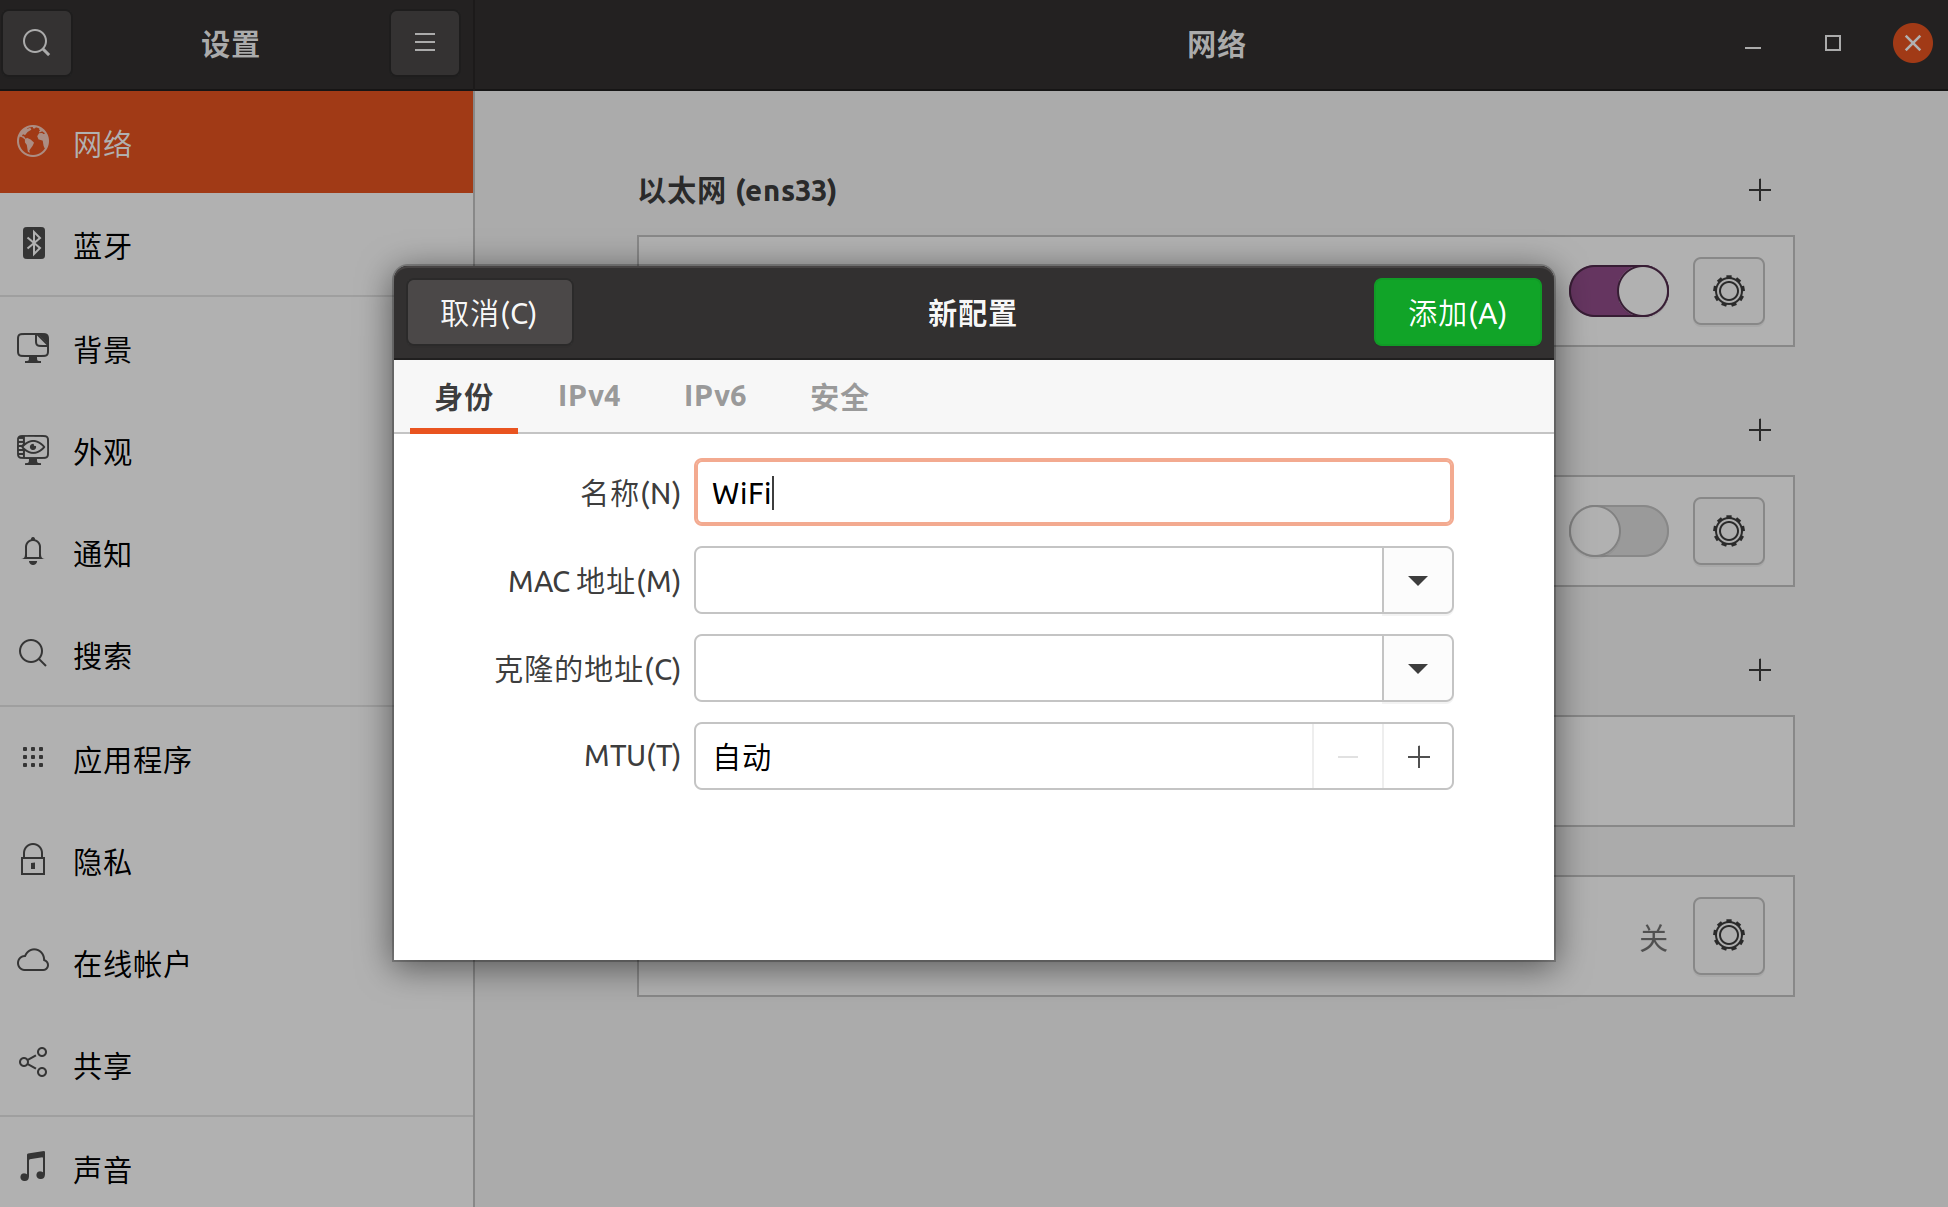
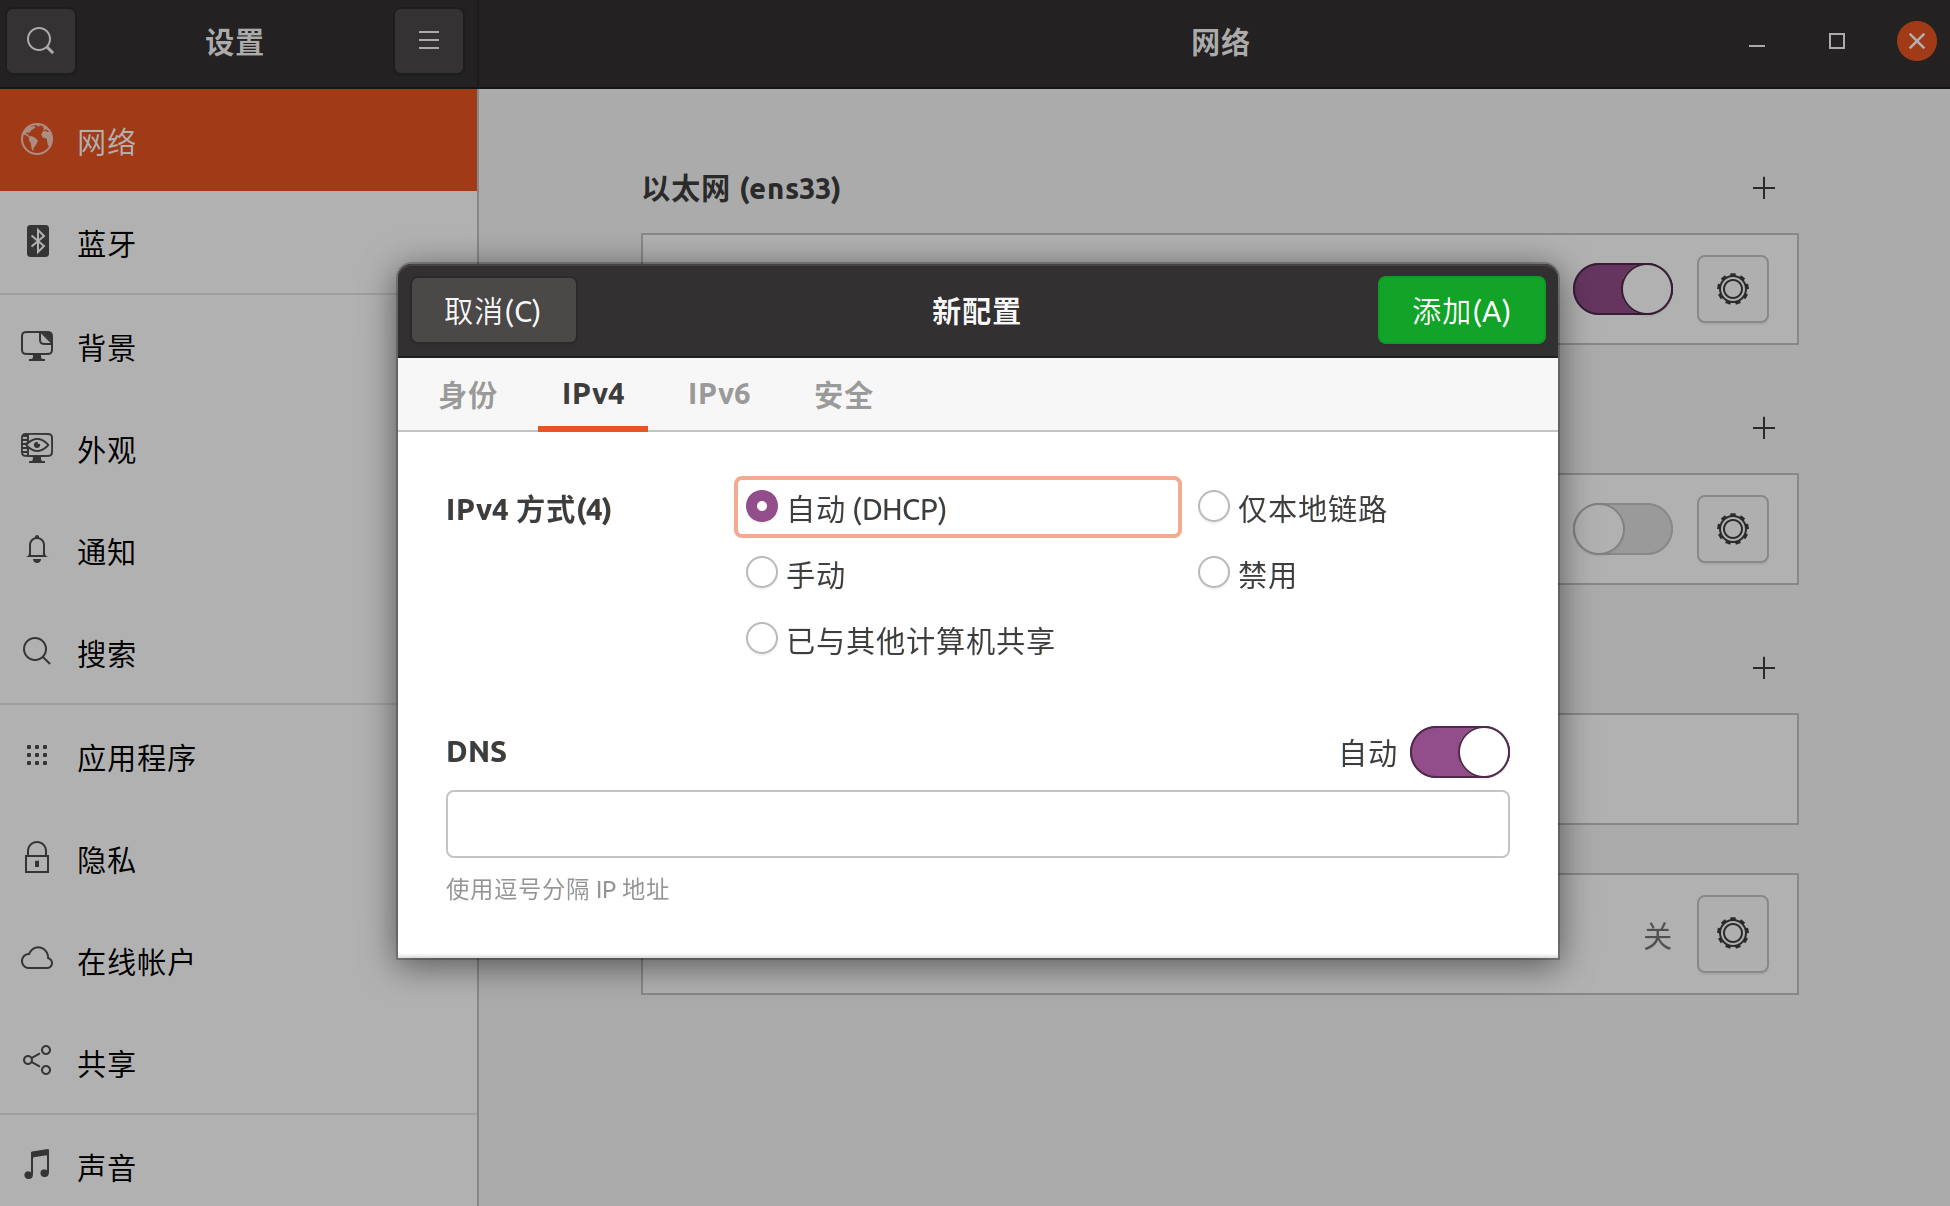
接下来设置有线的
ens37右边点设置符号,改名字,改IPv4
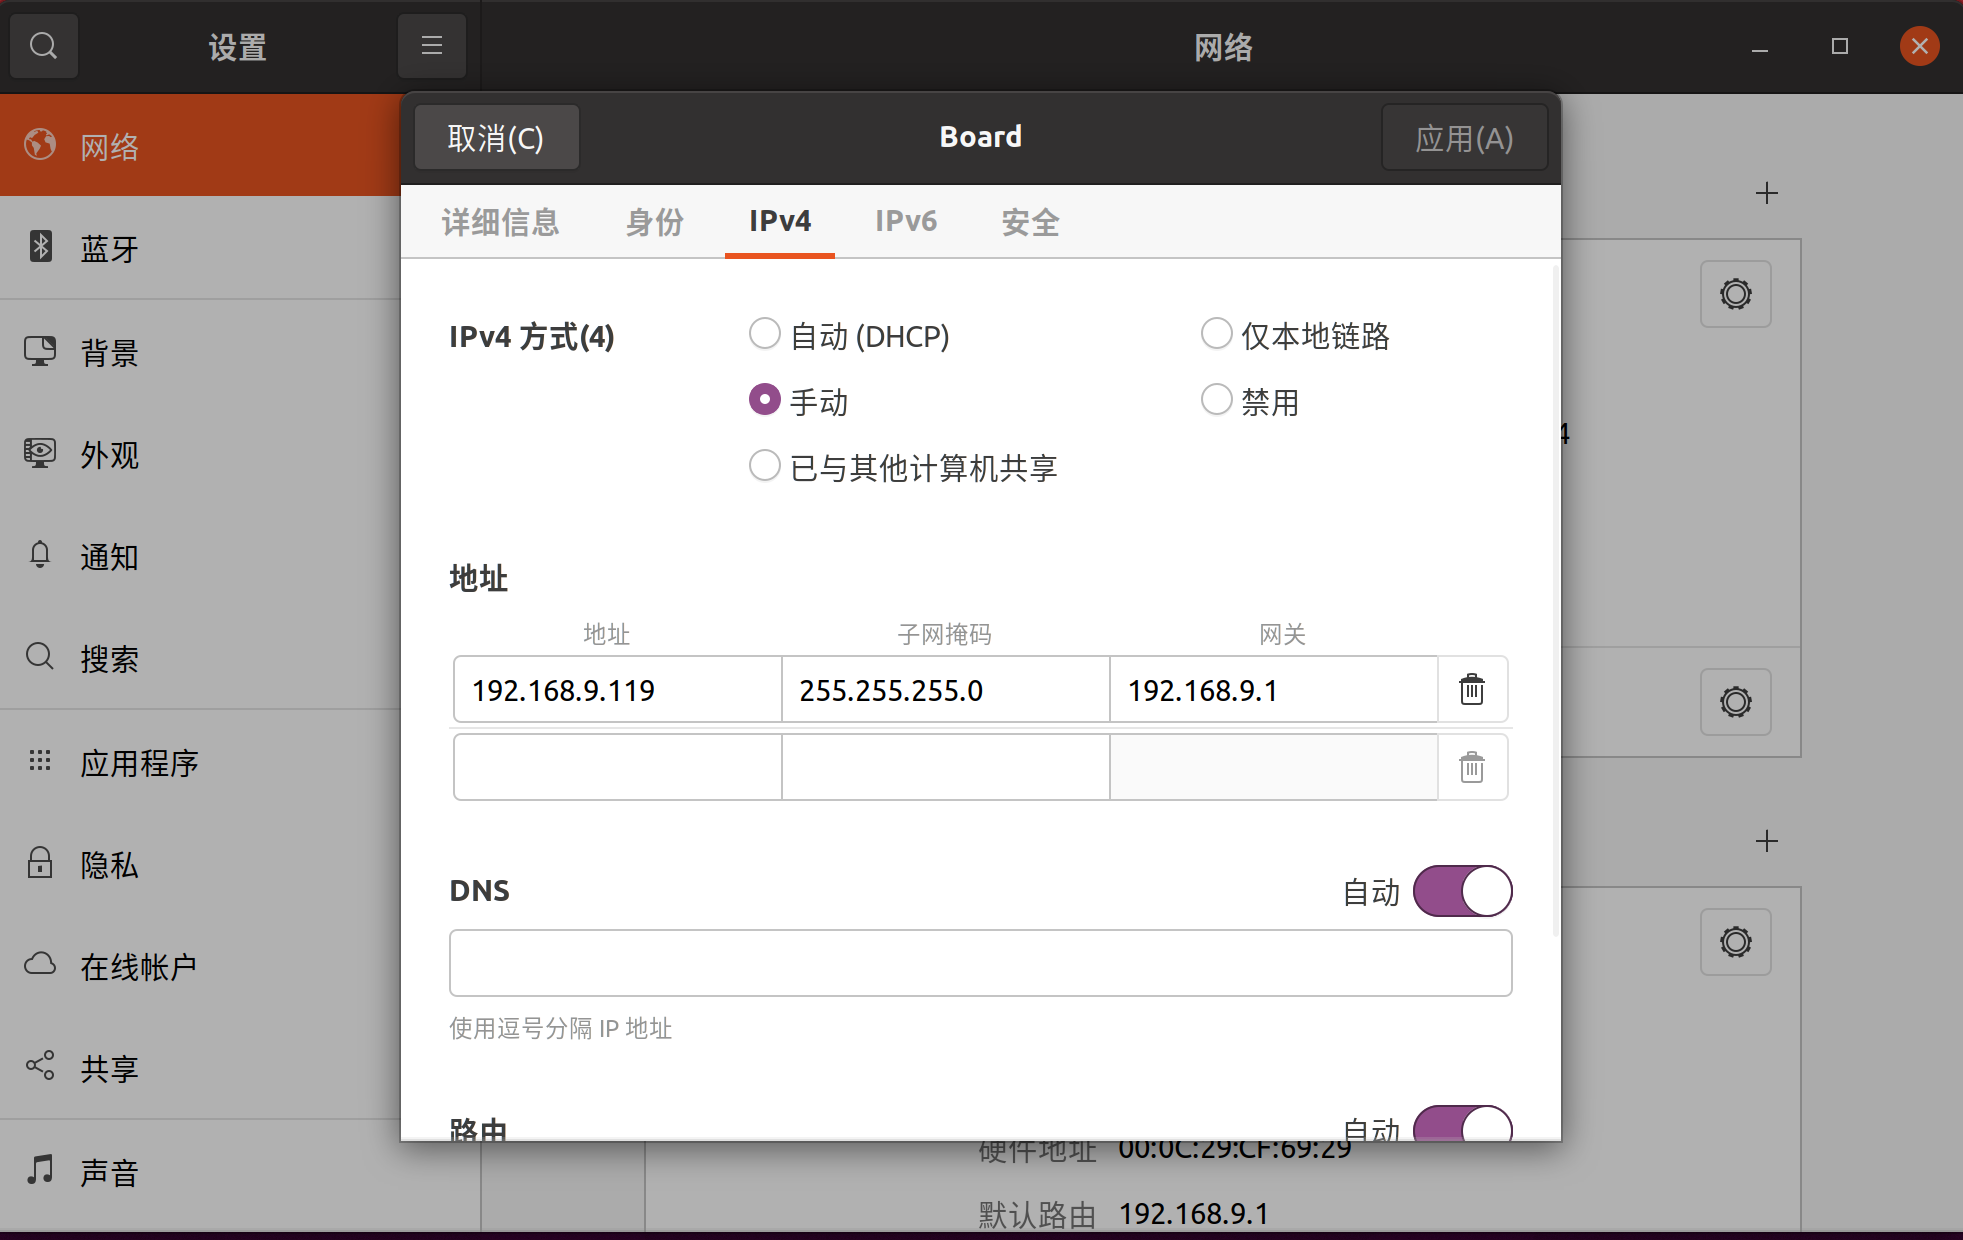
设置完了,看看对不
测试
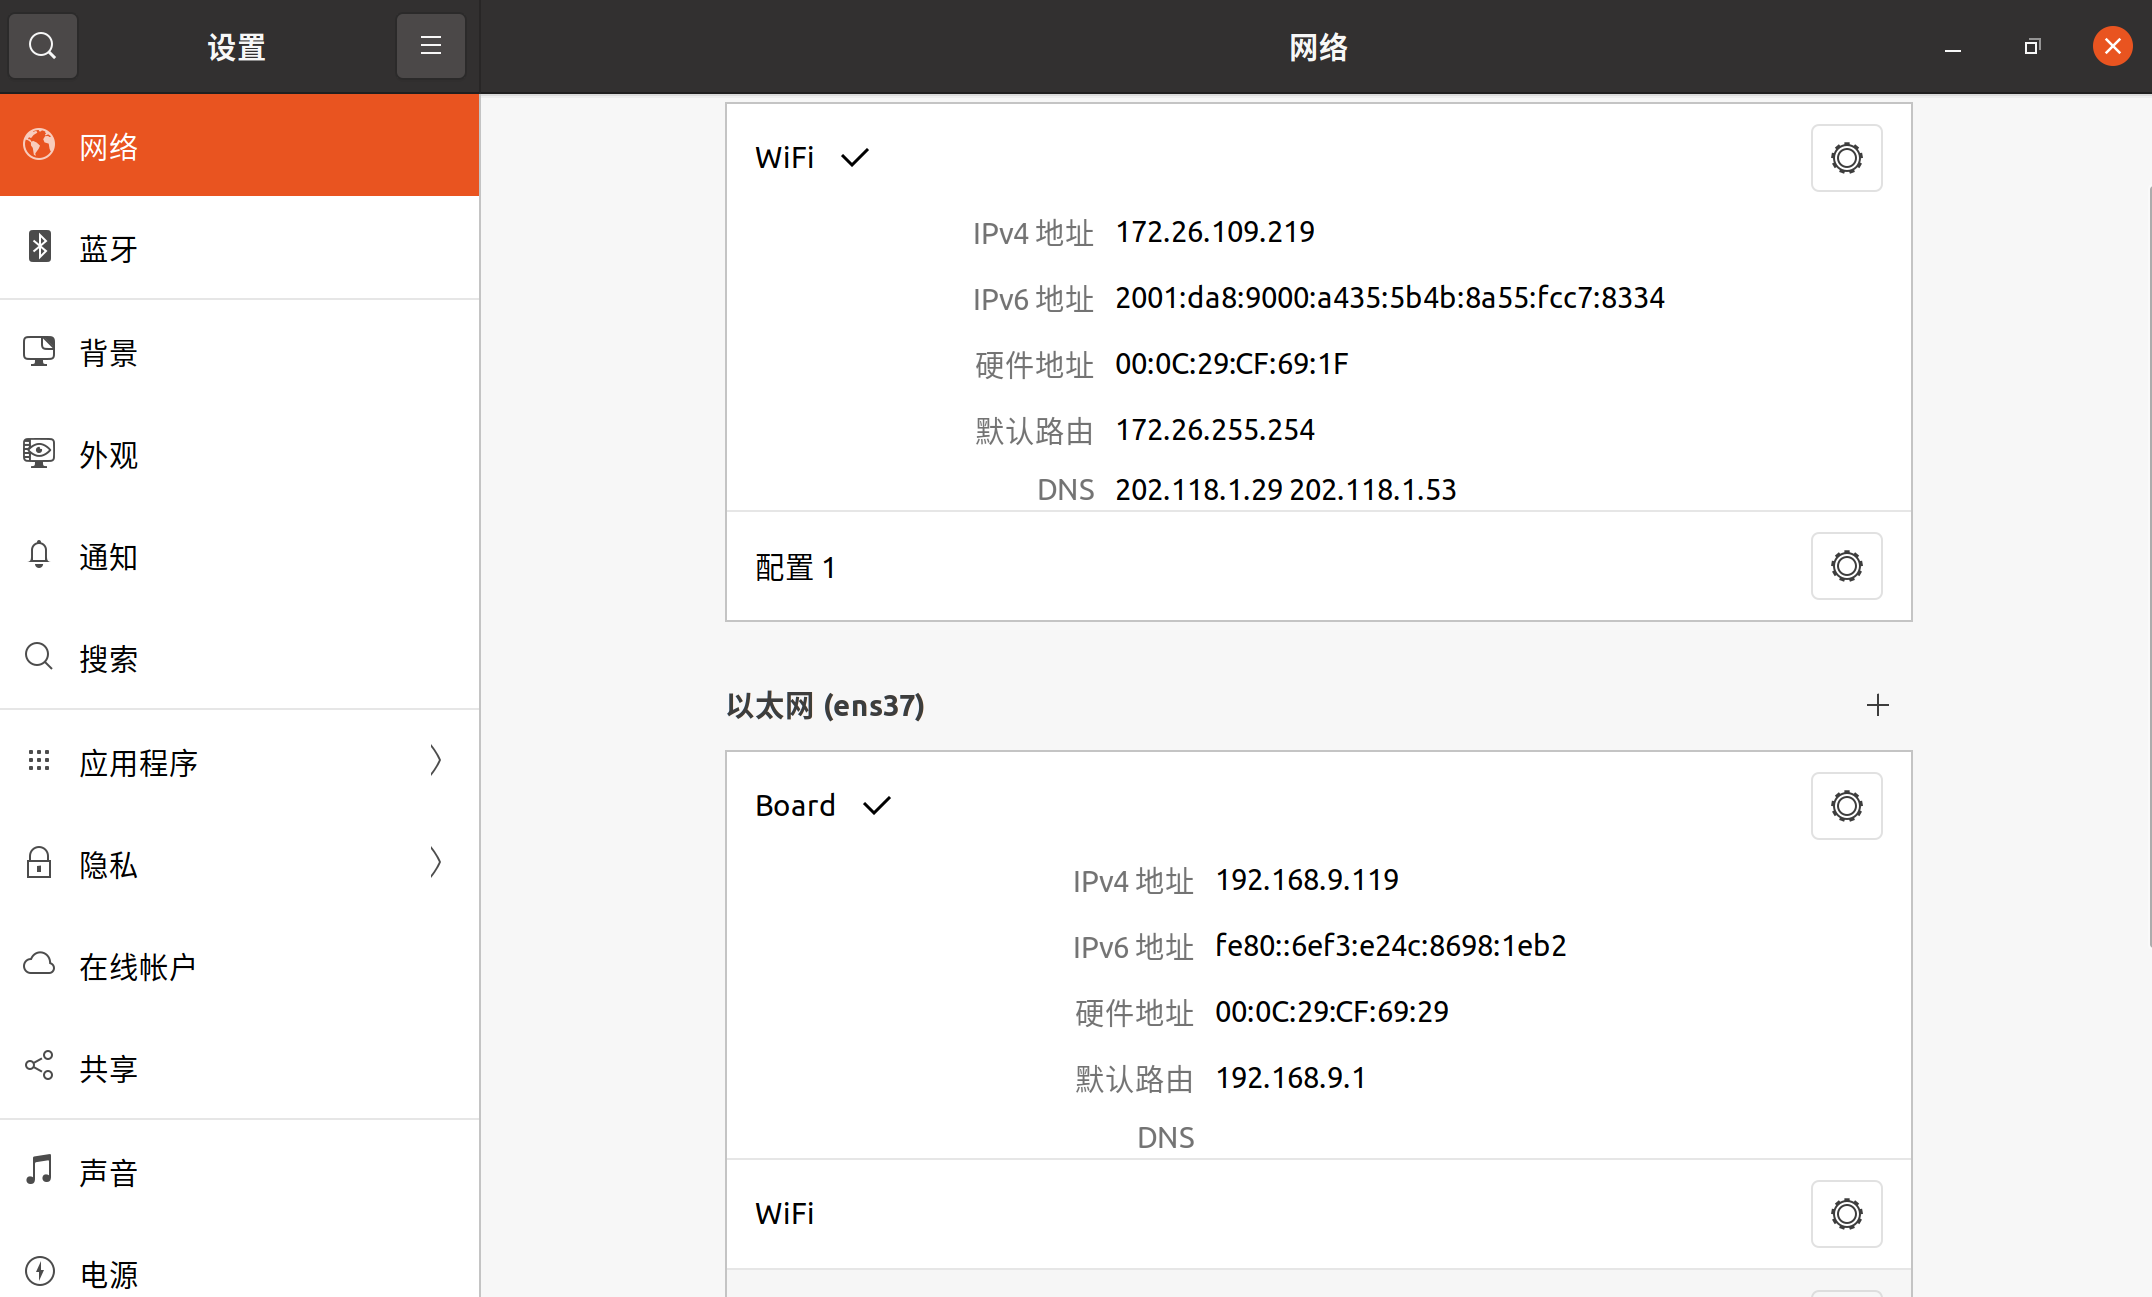
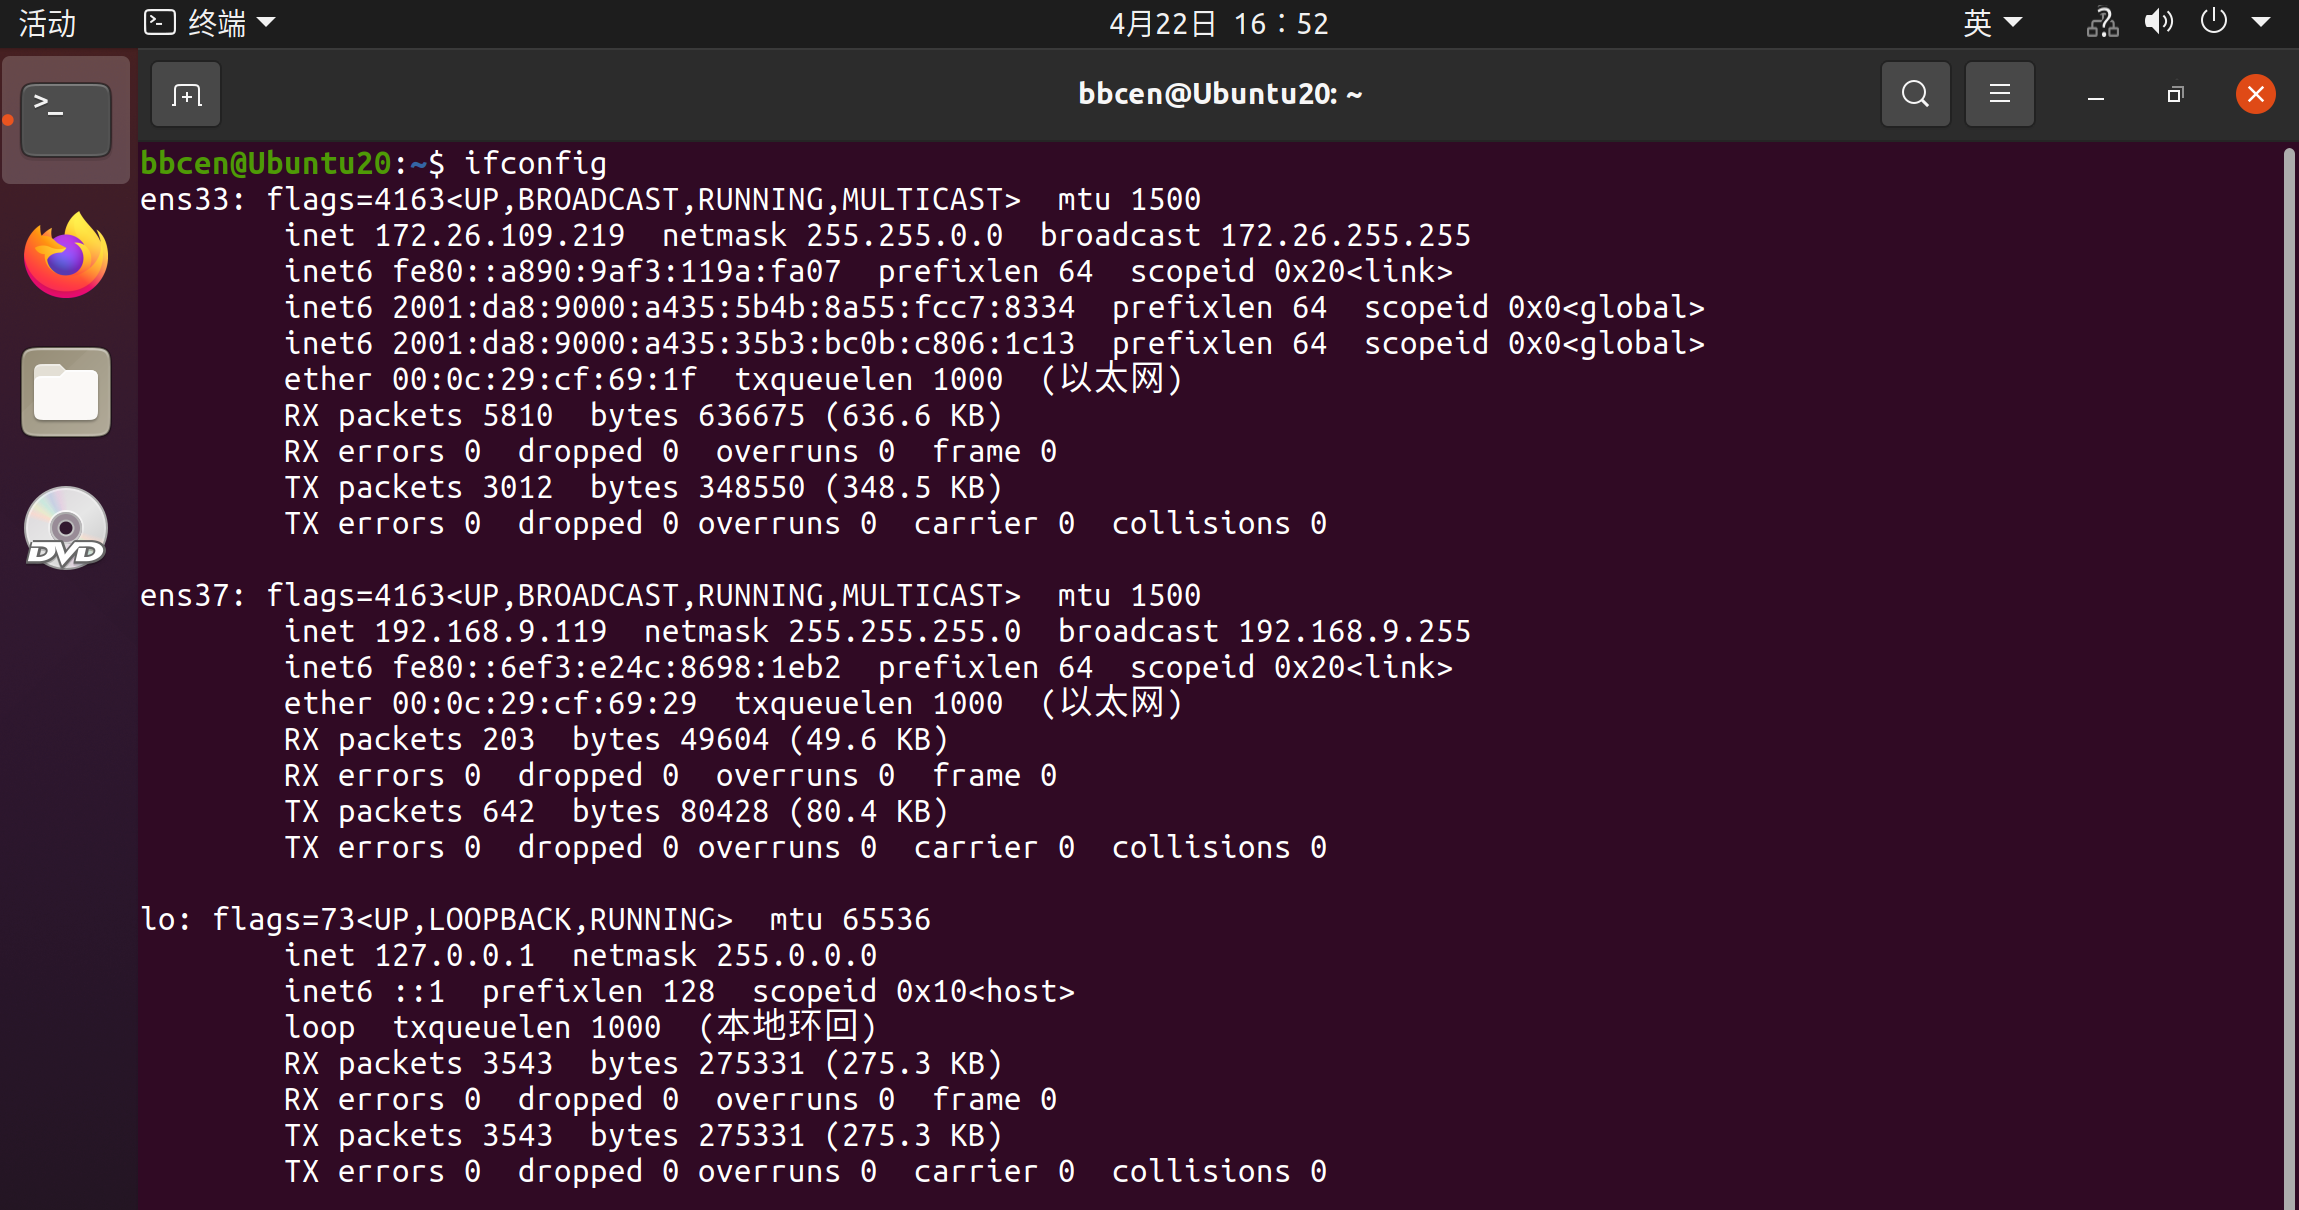
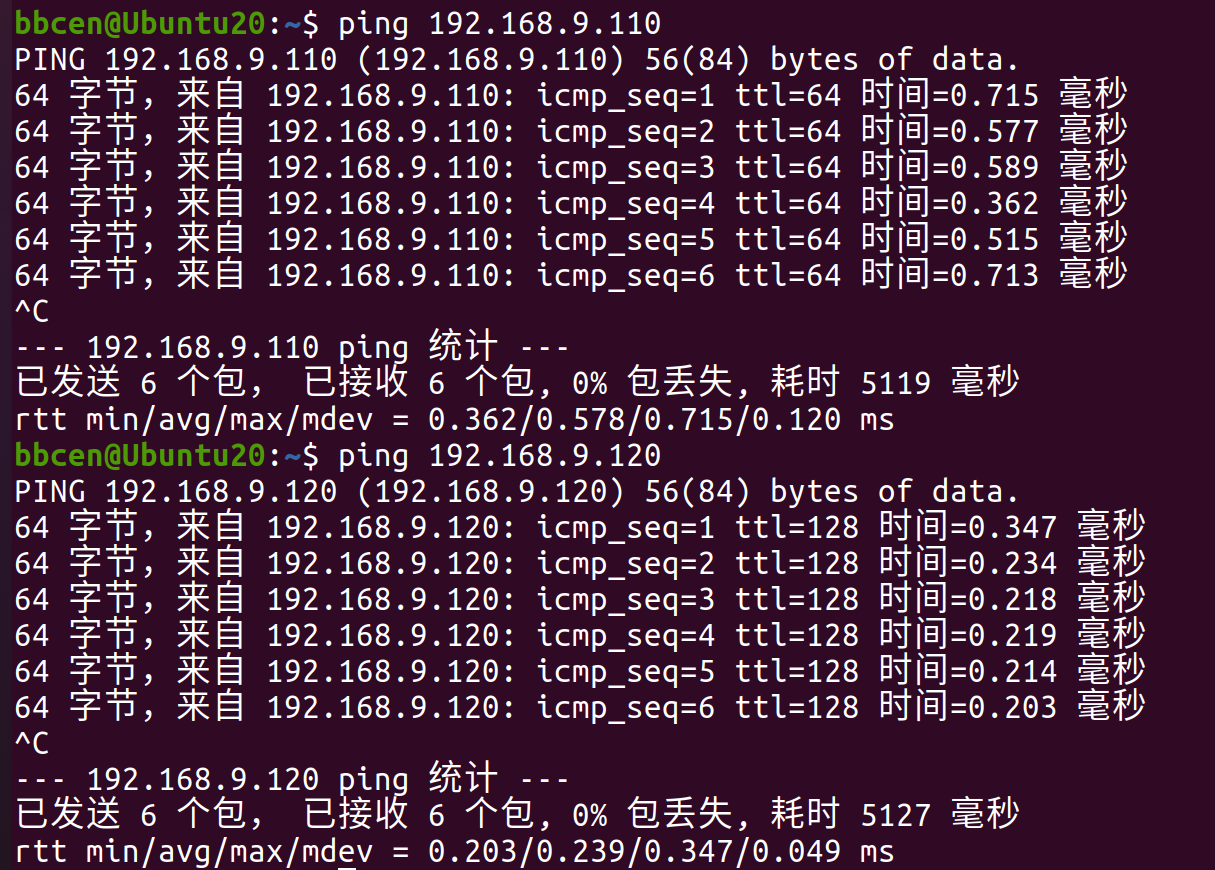
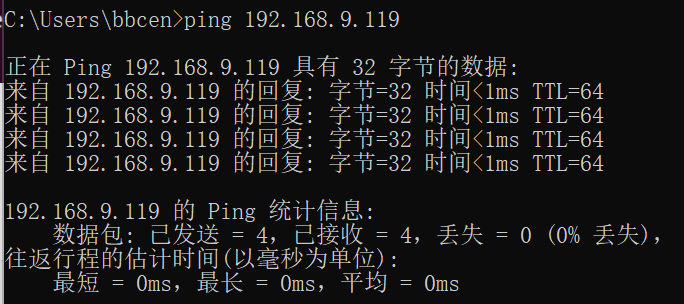
右上角两个已连接
ifconfig能看到信息
windows和板子能有线ping通

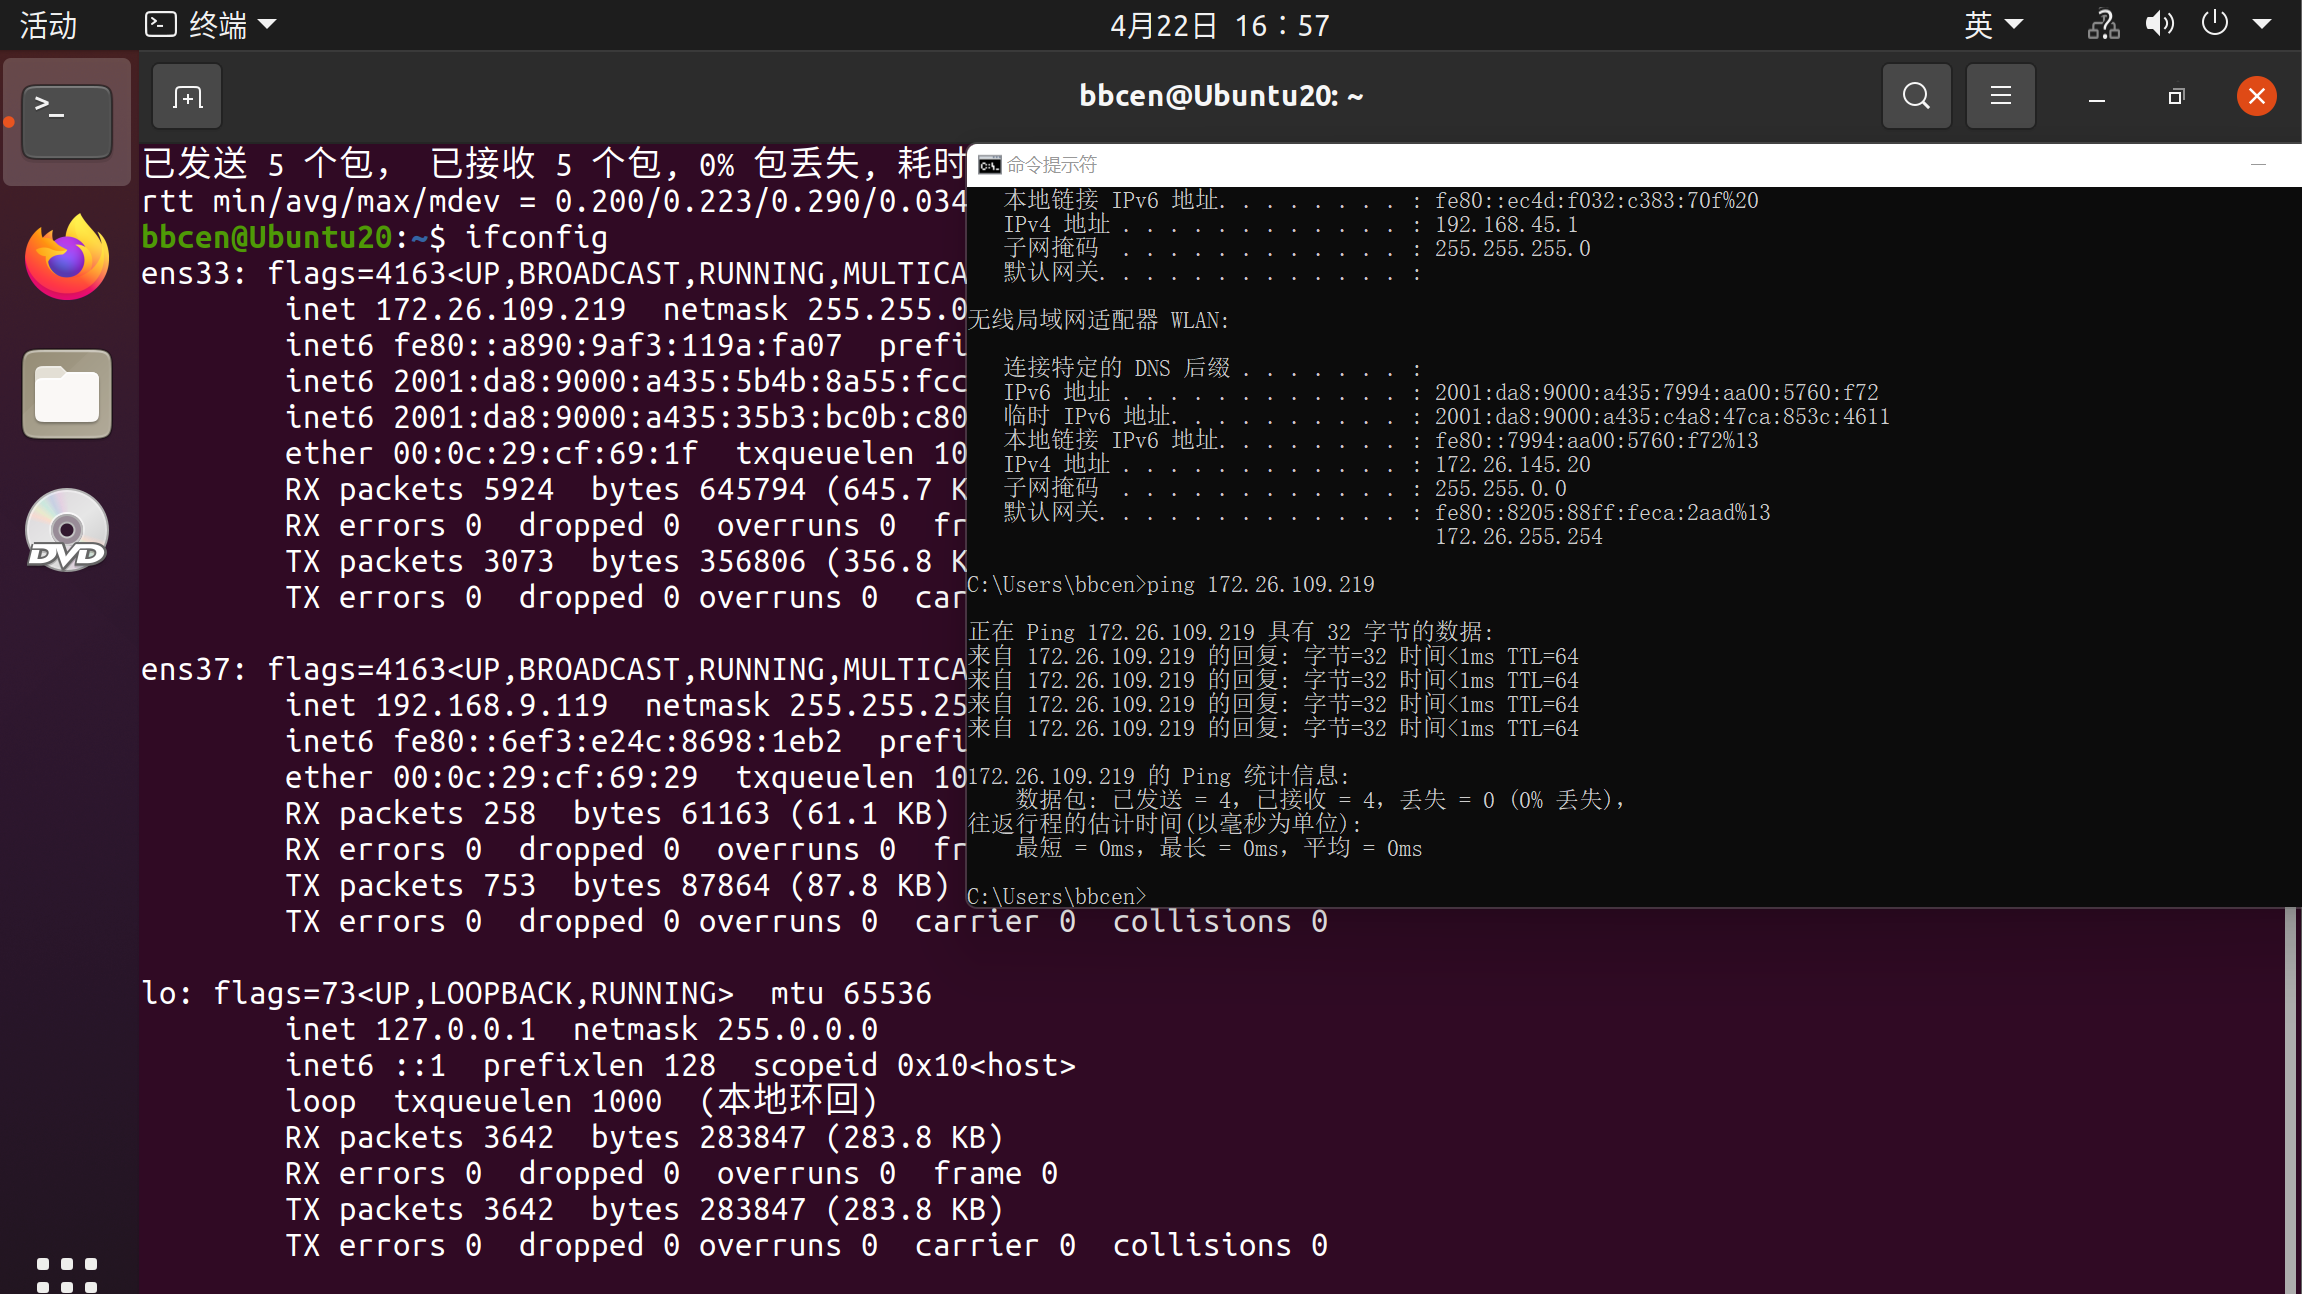
无线也都能ping通
板子联通虚拟机
imx6ull
setenv serverip 192.168.9.119     //服务器的 IP 地址(Ubuntu)
setenv gatewayip 192.168.9.1      //网关
setenv ipaddr 192.168.9.110       //开发板的 ip 地址
setenv netmask 255.255.255.0      //子网掩码
setenv ethaddr 42:03:07:3B:15:5F  //设置物理地址
saveenv                           //保存环境变量
reset                             //重启
jeston nano
板子重启 停在u-boot处
# pci enum;pci
# setenv serverip  192.168.9.119
# setenv ipaddr 192.168.9.1
# ping  192.168.9.119   /*再ping通虚拟机
		Using eth_rtl8169 device
		host 192.168.9.119 is alive
    */
# saveeenv
# tftp u-boot.bin //能tftp下载,表示tftp服务ok
TFTP下载文件到板子上
# pci enum;pci  /* 激活pci设备(否则ping时报:No ethernet found.)
Scanning PCI devices on bus 0
BusDevFun  VendorId   DeviceId   Device Class       Sub-Class
_____________________________________________________________
00.01.00   0x10de     0x0fae     Bridge device           0x04
00.02.00   0x10de     0x0faf     Bridge device           0x04
  */
# setenv serverip  192.168.9.119
# setenv ipaddr 192.168.9.9
# ping 192.168.9.120 /*先ping通win10
  Using eth_rtl8169 device
  host 192.168.9.120 is alive
	*/
# ping  192.168.9.119   /*再ping通虚拟机(如果不通,看一下前面 主机关联有线网卡设定静态ip)
   Using eth_rtl8169 device
   host 192.168.9.119 is alive
    */
# saveenv
# tftp Image  /*内核33M下载要3分钟(太慢了,为什么)
	Using eth_rtl8169 device
	TFTP from server 192.168.9.119; our IP address is 192.168.9.9
	Filename 'Image'.
	Load address: 0x84000000
	Loading: ##########....

         ####################################################
         308.6 KiB/s
	done
	Bytes transferred = 34484232 (20e3008 hex)

	占用地址范围  0x84000000 ~ 0x84000000+20e3008
   */
# tftp 0x88000000 tegra210-p3448-0002-p3449-0000-b00.dtb

运行裸机程序
$ make
$ cp led.bin  /tftpboot

//板子重启 停在u-boot处
# pci enum;pci
# tftp led.bin
# go 84000000  //运行程序
               //如果是异常重启,可能是顺序执行到非法区域,或某指令写非法地址


