引言
上篇文章介绍了如何在多GPU上分布式训练,本文介绍大模型常用的一种推理加速技术——KV缓存。
KV Cache
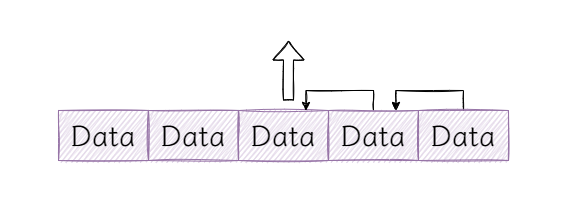
KV缓存(KV Cache)是在大模型推理中常用的一种技巧。我们知道在推理阶段,Transformer也只能像RNN一样逐个进行预测,也称为自回归。KV cahce是用在注意力阶段缓存key和value状态,具体的我们可以看图示:

上图(灰色区域表示掩码)是在没有KV缓存的情况下,在每一步生成时,我们都在重新计算相同的之前的Token注意力,而实际上我们只想计算新Token的注意力。
比如在最后一步,即第4步时,我们再次计算了之前步骤已经算好的Token注意力Attention1到Attention3,实际上这是没有必要的。
如果我们可以缓存之前计算好的Key和Value,那么就可以不需要这么多重复计算,每次只关注最新Token的注意力:

上图(蓝色表示缓存起来的Key或Value)在有KV缓存的情况下,每次只需要传入新的Query,然后计算新的Key和Value,并且与之前的Key和Value缓存矩阵拼接在一起,最后计算出最新Token的注意力。这就是KV缓存的主要思想。可以看到这里不再需要掩码。
这里描述的是自注意力中的KV缓存,如果是交叉注意力那么更简单,因为编码器生成的memory不会改变,因此可以直接缓存memory计算出来的Key和Value矩阵,而不需要拼接。
为了让我们的Transformer能支持KV缓存技术,我们需要进行一些改造。首先对MultiHeadAttention模块动刀,主要修改它的forward方法:
 def forward(
        self,
        query: Tensor,
        key_value: Tensor = None,
        mask: Tensor = None,
        past_key_value: Tuple[Tensor] = None,
        use_cache: bool = False,
        keep_attentions: bool = False,
    ) -> Tuple[Tensor, Tensor]:
        """

        Args:
            query (Tensor): (batch_size, q_len, d_model)
            key_value (Tensor, optional): (batch_size, k_len/v_len, d_model) key and value are same.
            mask (Tensor, optional): mask for padding or decoder. Defaults to None.
            past_key_value (Tuple[Tensor], optional): cached past key and value states. Defaults to None.
            use_cache (bool, optional): whether to use kv cache during inference. Defaults to False.
            keep_attentions (bool): whether to keep attention weigths or not. Defaults to False.

        Returns:
            output (Tensor): (batch_size, q_len, d_model) attention output
            present_key_value (Tuple[Tensor], optional): Cached present key and value states
        """

        if past_key_value is not None:
            assert self.is_decoder is True, "Encoder cannot cache past key value states"

        is_self_attention = key_value is None

        _query = query

        query = self._transform_and_split(self.q, query)

        if is_self_attention:
            # the 'self' attention
            key = self._transform_and_split(self.k, _query, is_key=True) # 即先进行Q/K/V转换,再拆分成多头
            value = self._transform_and_split(self.v, _query)
            key, value = self._concat_key_value(key, value, past_key_value) # 分情况拼接最新的key和value
        elif past_key_value is None:
            # the cross attention, key_value is memory
            key = self._transform_and_split(self.k, key_value, is_key=True)
            value = self._transform_and_split(self.v, key_value)
        else:
            # if is_self_attention == False and past_key_value is not None
            # key_value is memory and use cache(past_key_value not None) we do not need to calculate the key and value again because it was cached.
            # since memory will not change during inference.
            key, value = past_key_value

        if self.is_decoder and use_cache:
            # cache newest key and value
            present_key_value = (key, value)
        else:
            present_key_value = None

        attn_output = self.attenion(query, key, value, mask, keep_attentions)

        # Concat
        concat_output = self.merge_heads(attn_output)
        # the final liear
        # output (batch_size, q_len, d_model)
        output = self.concat(concat_output)

        return output, present_key_value
其参数发生了一些变换,由原来的query,key,value变成了query,key_value。
首先,这里将key和value合并了起来,因为如果是自注意力query=key=value,而如果是交叉注意力key=value=memory,然后我们可以通过判断key_value是否为空来分辨本次计算的是自注意力还是交叉注意力;
其次,增加了两个参数past_key_value和use_cache,use_cache表示是否使用kv缓存,而past_key_value代表缓存的kv,注意缓存的k和v是不同的,因为它们经过了Key和Value矩阵映射。
然后我们深入方法内部,注意只有在推理阶段的Decoder中才能使用kv cache。
这里要分两种情况:自注意力和交叉注意力。
如果是自注意力直接使用传入的query就可以计算映射后的query,key,value,见代码行32到37。当使用缓存时,传入的query的长度一定是1,因为我们只需要为最新的query去计算注意力分数,算出一个预测的token。但还是需要当前query对应K和V矩阵映射后的key和value,将它们与历史(缓存)的拼接起来去计算新的token。
如果是交叉注意力,即Decoder中第二个注意力模块,其query来自decoder,而key和value(即memory)来自encoder。显然这个memory在整个推理阶段都是一样的,因此只需要计算一次,然后存入past_key_value缓存,后续就不再需要重复计算,对应上面的代码行47。
只有在使用缓存且为Decoder的时候才会缓存最新的key和value。
最后和之前一样计算注意力得分即可。
接下来修改DecoderBlock中的forward代码:
 def forward(
        self,
        tgt: Tensor,
        memory: Tensor,
        tgt_mask: Tensor = None,
        memory_mask: Tensor = None,
        past_key_value: Tuple[Tensor] = None,
        use_cache: bool = True,
        keep_attentions: bool = False,
    ) -> Tuple[Tensor, Tensor]:
        """

        Args:
            tgt (Tensor):   (batch_size, tgt_seq_len, d_model) the (target) sequence to the decoder block.
            memory (Tensor):  (batch_size, src_seq_len, d_model) the sequence from the last layer of the encoder.
            tgt_mask (Tensor, optional):  (batch_size, 1, tgt_seq_len, tgt_seq_len) the mask for the tgt sequence.
            memory_mask (Tensor, optional): (batch_size, 1, 1, src_seq_len) the mask for the memory sequence.
            past_key_values (Tuple[Tensor], optional): the cached key and value states. Defaults to None.
            use_cache (bool, optional): whether use kv cache during inference or not. Defaults to False.
            keep_attentions (bool): whether keep attention weigths or not. Defaults to False.


        Returns:
            tgt (Tensor): (batch_size, tgt_seq_len, d_model) output of decoder block
        """
        if past_key_value is not None:
            # first two elements in the past_key_value tuple are self-attention
            # past_key_value是一个元组,其中前2个元素为自注意力层的key和value
            # 后2个元素为交叉注意力层的key和value
            self_attn_past_key_value = past_key_value[:2]
            cross_attn_past_key_value = past_key_value[2:]
        else:
            self_attn_past_key_value = None
            cross_attn_past_key_value = None

        x = tgt
        # 自注意力
        self_attn_outputs = self._sa_sub_layer(
            x,
            tgt_mask,
            self_attn_past_key_value,
            use_cache,
            keep_attentions,
        )
        # self attention output and present key value state
        # x和之前的输出一样,多了一个保存key和value的present_key_value_state
        x, present_key_value_state = self_attn_outputs
    # 交叉注意力
        cross_attn_outputs = self._ca_sub_layer(
            x,
            memory,
            memory_mask,
            cross_attn_past_key_value,
            use_cache,
            keep_attentions,
        )

        x = cross_attn_outputs[0]
        if present_key_value_state is not None:
            # append the cross-attention key and value states to present key value states
            # 拼接注意力和交叉注意力中的key和value,得到元组的4个元素
            present_key_value_state = present_key_value_state + cross_attn_outputs[1]

        x = self._ff_sub_layer(x)
    # 别忘了返回
        return x, present_key_value_state
其中调用了两个子层对应的方法如下:
def _sa_sub_layer(
    self,
    x: Tensor,
    attn_mask: Tensor,
    past_key_value: Tensor,
    use_cache: bool,
    keep_attentions: bool,
) -> Tensor:
    residual = x
    x, present_key_value = self.masked_attention(
        query=self.norm1(x),
        past_key_value=past_key_value,
        use_cache=use_cache,
        mask=attn_mask,
        keep_attentions=keep_attentions,
    )
    x = self.dropout1(x) + residual
    return x, present_key_value

# cross attention sub layer
def _ca_sub_layer(
    self,
    x: Tensor,
    mem: Tensor,
    attn_mask: Tensor,
    past_key_value: Tensor,
    use_cache: bool,
    keep_attentions: bool,
) -> Tensor:
    residual = x
    x, present_key_value = self.cross_attention(
        query=self.norm2(x),
        key_value=mem,
        mask=attn_mask,
        past_key_value=past_key_value,
        use_cache=use_cache,
        keep_attentions=keep_attentions,
    )
    x = self.dropout2(x) + residual
    return x, present_key_value
这里改成了默认Pre-LN的形式,即先计算层归一化,最后再进行残差连接。
还有一个非常重要的修改是PositionalEncoding:
def forward(self, x: Tensor, position_ids: Union[int, list[int]] = None) -> Tensor:
    """

    Args:
        x (Tensor): (batch_size, seq_len, d_model) embeddings
        position_ids (Union[int, list[int]]): singe position id or list

    Returns:
        Tensor: (batch_size, seq_len, d_model)
    """
    if position_ids is None:
        position_ids = range(x.size(1))
    return self.dropout(x + self.pe[:, position_ids, :])
增加了一个参数表示位置id,我们知道如果使用缓存传入的seq_len恒等于1,但实际上它对应的位置ID是不停增加的,若不修改此处,默认通过range(x.size(1))永远只能获取索引等于0时的位置编码,导致表现大幅下降。因此我们要传入当前的位置。
由于缓存只对Decoder生效,因此我们可以直接修改Transformer模块的decode方法:
def decode(
    self,
    tgt: Tensor,
    memory: Tensor,
    tgt_mask: Tensor = None,
    memory_mask: Tensor = None,
    past_key_values: Tuple[Tensor] = None,
    use_cache: bool = False,
    keep_attentions: bool = False,
) -> Tensor:
    """

    Args:
        tgt (Tensor):  (batch_size, tgt_seq_len) the sequence to the decoder.
        memory (Tensor): (batch_size, src_seq_len, d_model) the  sequence from the last layer of the encoder.
        tgt_mask (Tensor, optional): (batch_size, 1, 1, tgt_seq_len) the mask for the target sequence. Defaults to None.
        memory_mask (Tensor, optional): (batch_size, 1, 1, src_seq_len) the mask for the memory sequence. Defaults to None.
        past_key_values (Tuple[Tensor], optional): the cached key and value states. Defaults to None.
        use_cache (bool, optional): whether use kv cache during inference or not. Defaults to False.
        keep_attentions (bool, optional): whether keep attention weigths or not. Defaults to False.

    Returns:
        Tensor: output (batch_size, tgt_seq_len, tgt_vocab_size)
    """
    if past_key_values is None:
        past_key_values = [None] * len(self.decoder.layers)
        # 未使用缓存则传None
        position_ids = None
    else:
        # when use_cache we only care about the current position
        # 否则传入当前位置对应的ID
        position_ids = past_key_values[0][1].size(2)

    tgt_embed = self.dec_pos(self.tgt_embedding(tgt), position_ids)
    # logits (batch_size, tgt_seq_len, d_model)
    logits, past_key_values = self.decoder(
        tgt_embed,
        memory,
        tgt_mask,
        memory_mask,
        past_key_values,
        use_cache,
        keep_attentions,
    )

    return logits, past_key_values
代码增加了注释,大概意思是如果使用缓存,那么我们需要知道缓存的key或value对应的长度。而刚好seq_len恒等于1,因此不需要增加这个seq_len,past_key_values[0][1].size(2)的值刚好就是我们想要的位置ID。
最后对贪心解码的实现进行一些小修改:
def _greedy_search(
    self,
    src: Tensor,
    src_mask: Tensor,
    max_gen_len: int,
    use_cache: bool,
    keep_attentions: bool,
):
    memory = self.transformer.encode(src, src_mask)

    batch_size = src.shape[0]

    device = src.device

    # keep track of which sequences are already finished
    unfinished_sequences = torch.ones(batch_size, dtype=torch.long, device=device)

    decoder_inputs = torch.LongTensor(batch_size, 1).fill_(self.bos_idx).to(device)

    input_ids = decoder_inputs

    eos_idx_tensor = torch.tensor([self.eos_idx]).to(device)

    finished = False

    past_key_values = None

    tgt_mask = None # 使用缓存的情况下可以传None,因为此时query可以看到所有的key。

    while True:
        if not use_cache:
            tgt_mask = self.generate_subsequent_mask(decoder_inputs.size(1), device)

        outputs = self.transformer.decode(
            input_ids,
            memory,
            tgt_mask=tgt_mask,
            memory_mask=src_mask,
            past_key_values=past_key_values,
            use_cache=use_cache,
            keep_attentions=keep_attentions,
        )

        logits = self.lm_head(outputs[0])

        past_key_values = outputs[1]

        next_tokens = torch.argmax(logits[:, -1, :], dim=-1)

        # finished sentences should have their next token be a pad token
        next_tokens = next_tokens * unfinished_sequences + self.pad_idx * (
            1 - unfinished_sequences
        )

        decoder_inputs = torch.cat([decoder_inputs, next_tokens[:, None]], dim=-1)

        # set sentence to finished if eos_idx was found
        unfinished_sequences = unfinished_sequences.mul(
            next_tokens.tile(eos_idx_tensor.shape[0], 1)
            .ne(eos_idx_tensor.unsqueeze(1))
            .prod(dim=0)
        )

        if use_cache:
            # only need the last tokens
            input_ids = next_tokens[:, None]
        else:
            input_ids = decoder_inputs

        # all sentences have eos_idx
        if unfinished_sequences.max() == 0:
            finished = True

        if decoder_inputs.shape[-1] >= max_gen_len:
            finished = True

        if finished:
            break

    return decoder_inputs
在使用缓存的时候 input_ids = next_tokens[:, None],这样保证每次只传入最新预测的Token。
最后在测试集上进行推理来验证下加了kv cache速度提升了多少:
$ python train.py
source tokenizer size: 32000
target tokenizer size: 32000
Loads cached dataframes.
The model has 93255680 trainable parameters
begin train with arguments: {'d_model': 512, 'n_heads': 8, 'num_encoder_layers': 6, 'num_decoder_layers': 6, 'd_ff': 2048, 'dropout': 0.1, 'max_positions': 5000, 'source_vocab_size': 32000, 'target_vocab_size': 32000, 'attention_bias': False, 'pad_idx': 0, 'dataset_path': 'nlp-in-action/transformers/transformer/data/wmt', 'src_tokenizer_file': 'nlp-in-action/transformers/transformer/model_storage/source.model', 'tgt_tokenizer_path': 'nlp-in-action/transformers/transformer/model_storage/target.model', 'model_save_path': 'nlp-in-action/transformers/transformer/model_storage/best_transformer.pt', 'dataframe_file': 'dataframe.{}.pkl', 'use_dataframe_cache': True, 'cuda': True, 'num_epochs': 40, 'batch_size': 32, 'gradient_accumulation_steps': 1, 'grad_clipping': 0, 'betas': (0.9, 0.98), 'eps': 1e-09, 'label_smoothing': 0, 'warmup_steps': 4000, 'warmup_factor': 0.5, 'only_test': True, 'max_gen_len': 60, 'use_wandb': False, 'patient': 5, 'calc_bleu_during_train': True, 'use_kv_cache': False}
total train steps: 221200
  0%|                                                                                                                                                                        | 0/1580 [00:00<?, ?it/s]
100%|█████████████████████████████████████████████████████████████████████████████████████████████████████████████████████████████████████████████████████████████| 1580/1580 [17:25<00:00,  1.51it/s]
TEST loss=0.0021 bleu score: 26.74


$ python train.py
source tokenizer size: 32000
target tokenizer size: 32000
Loads cached dataframes.
The model has 93255680 trainable parameters
begin train with arguments: {'d_model': 512, 'n_heads': 8, 'num_encoder_layers': 6, 'num_decoder_layers': 6, 'd_ff': 2048, 'dropout': 0.1, 'max_positions': 5000, 'source_vocab_size': 32000, 'target_vocab_size': 32000, 'attention_bias': False, 'pad_idx': 0, 'dataset_path': 'transformers/transformer/data/wmt', 'src_tokenizer_file': 'transformers/transformer/model_storage/source.model', 'tgt_tokenizer_path': 'transformers/transformer/model_storage/target.model', 'model_save_path': 'transformers/transformer/model_storage/best_transformer.pt', 'dataframe_file': 'dataframe.{}.pkl', 'use_dataframe_cache': True, 'cuda': True, 'num_epochs': 40, 'batch_size': 32, 'gradient_accumulation_steps': 1, 'grad_clipping': 0, 'betas': (0.9, 0.98), 'eps': 1e-09, 'label_smoothing': 0, 'warmup_steps': 4000, 'warmup_factor': 0.5, 'only_test': True, 'max_gen_len': 60, 'use_wandb': False, 'patient': 5, 'calc_bleu_during_train': True, 'use_kv_cache': True}
total train steps: 221200
  0%|                                                                                                                                                                        | 0/1580 [00:00<?, ?it/s]
100%|█████████████████████████████████████████████████████████████████████████████████████████████████████████████████████████████████████████████████████████████| 1580/1580 [13:37<00:00,  1.93it/s]
TEST loss=0.0021 bleu score: 26.74
这里加载之前训练效果最好的模型,可以看到计算出来的BLEU 分数都为26.74,使用kv cache耗时(单GPU推理)由17:25降到了13:37,快了接近4分钟。
kv cache实际上是一种空间换时间的技术,那么它会占多大的空间呢?
从上面代码可以看到,我们为每个Token都保存了4个向量,2个k和2个v,那么保存的字节数为:
4
⋅
4
⋅
num_layers
⋅
num_heads
⋅
d_head
4 \cdot 4 \cdot \text{num\_layers} \cdot \text{num\_heads} \cdot \text{d\_head}
4⋅4⋅num_layers⋅num_heads⋅d_head
第一个4表示有4个向量;第二个4表示假设在float-32下需要4个字节;为每层都保存kv cahce;每个向量的大小为
num_heads
×
d_head
\text{num\_heads} \times \text{d\_head}
num_heads×d_head。
在base设定下(层数=6,d_model=512)批大小等于1,一个Token需要48kb的显存,假设最终生成512个长度的序列时,那么需要24M的显存。看起来不大,但对于大模型的参数量来说,显存占用就显著上升了。
我们这次结合多GPU和KV缓存进行训练:
$ sh train.sh
Number of GPUs used: 3
Running  DDP on rank 2.
  0%|          | 0/1844 [00:00<?, ?it/s]Running  DDP on rank 1.
  0%|          | 0/1844 [00:00<?, ?it/s]Running  DDP on rank 0.
source tokenizer size: 32000
target tokenizer size: 32000
Loads cached train dataframe.
Loads cached dev dataframe.
The model has 93255680 trainable parameters
begin train with arguments: {'d_model': 512, 'n_heads': 8, 'num_encoder_layers': 6, 'num_decoder_layers': 6, 'd_ff': 2048, 'dropout': 0.1, 'max_positions': 5000, 'source_vocab_size': 32000, 'target_vocab_size': 32000, 'attention_bias': False, 'pad_idx': 0, 'dataset_path': 'nlp-in-action/transformers/transformer/data/wmt', 'src_tokenizer_file': 'nlp-in-action/transformers/transformer/model_storage/source.model', 'tgt_tokenizer_path': 'nlp-in-action/transformers/transformer/model_storage/target.model', 'model_save_path': 'nlp-in-action/transformers/transformer/model_storage/best_transformer.pt', 'dataframe_file': 'dataframe.{}.pkl', 'use_dataframe_cache': True, 'cuda': True, 'num_epochs': 40, 'batch_size': 32, 'gradient_accumulation_steps': 1, 'grad_clipping': 0, 'betas': (0.9, 0.98), 'eps': 1e-09, 'label_smoothing': 0, 'warmup_steps': 4000, 'warmup_factor': 0.5, 'only_test': False, 'max_gen_len': 60, 'use_wandb': False, 'patient': 5, 'calc_bleu_during_train': True, 'use_kv_cache': True}
total train steps: 73760
[GPU0] TRAIN  loss=7.033506, learning rate=0.0001612: 100%|██████████| 1844/1844 [03:57<00:00,  7.76it/s]
[GPU1] TRAIN  loss=7.085324, learning rate=0.0001612: 100%|██████████| 1844/1844 [03:57<00:00,  7.76it/s]
[GPU2] TRAIN  loss=6.532835, learning rate=0.0001612: 100%|██████████| 1844/1844 [03:57<00:00,  7.76it/s]
  0%|          | 0/264 [00:00<?, ?it/s]
| ID | GPU | MEM |
------------------
|  0 |  0% | 22% |
|  1 | 87% | 80% |
|  2 | 83% | 72% |
|  3 | 87% | 74% |
begin evaluate
100%|██████████| 264/264 [00:07<00:00, 36.57it/s]
100%|██████████| 264/264 [00:07<00:00, 36.18it/s]
calculate bleu score for dev dataset
100%|██████████| 264/264 [00:07<00:00, 35.56it/s]
100%|██████████| 264/264 [02:47<00:00,  1.57it/s]
100%|██████████| 264/264 [02:51<00:00,  1.54it/s]
100%|██████████| 264/264 [02:52<00:00,  1.53it/s]
[GPU1] end of epoch   1 [ 421s]| train loss: 8.0776 | valid loss: 7.1336 |  valid bleu_score 0.42
[GPU0] end of epoch   1 [ 421s]| train loss: 8.0674 | valid loss: 7.1126 |  valid bleu_score 0.41
Save model with best bleu score :0.41

[GPU0] end of epoch   2 [ 403s]| train loss: 6.5031 | valid loss: 5.8428 |  valid bleu_score 6.66
Save model with best bleu score :6.66

[GPU0] end of epoch   3 [ 400s]| train loss: 5.2757 | valid loss: 4.6797 |  valid bleu_score 16.64
Save model with best bleu score :16.64

[GPU0] end of epoch   4 [ 400s]| train loss: 4.2989 | valid loss: 4.1087 |  valid bleu_score 21.78
Save model with best bleu score :21.78

[GPU0] end of epoch   5 [ 396s]| train loss: 3.7218 | valid loss: 3.8263 |  valid bleu_score 23.51
Save model with best bleu score :23.51


[GPU0] end of epoch   6 [ 396s]| train loss: 3.3296 | valid loss: 3.6755 |  valid bleu_score 24.84
Save model with best bleu score :24.84


[GPU0] end of epoch   8 [ 391s]| train loss: 2.8033 | valid loss: 3.5605 |  valid bleu_score 25.86
Save model with best bleu score :25.86

[GPU0] end of epoch  10 [ 386s]| train loss: 2.4323 | valid loss: 3.5600 |  valid bleu_score 26.43
Save model with best bleu score :26.43

[GPU0] end of epoch  11 [ 400s]| train loss: 2.2831 | valid loss: 3.5782 |  valid bleu_score 26.91
Save model with best bleu score :26.91

[GPU0] end of epoch  12 [ 390s]| train loss: 2.1463 | valid loss: 3.6085 |  valid bleu_score 26.77


[GPU0] end of epoch  13 [ 397s]| train loss: 2.0249 | valid loss: 3.6398 |  valid bleu_score 26.61


[GPU0] end of epoch  14 [ 389s]| train loss: 1.9126 | valid loss: 3.6763 |  valid bleu_score 26.41


[GPU0] end of epoch  15 [ 388s]| train loss: 1.8102 | valid loss: 3.7161 |  valid bleu_score 26.15

| ID | GPU | MEM |
------------------
|  0 |  1% | 22% |
|  1 | 81% | 81% |
|  2 | 80% | 75% |
|  3 | 89% | 89% |

[GPU0] end of epoch  16 [ 399s]| train loss: 1.7163 | valid loss: 3.7508 |  valid bleu_score 26.38
stop from early stopping.
基本上每个epoch快了个30秒左右,可以明显的看到第一个epoch训练大概用了3分57秒,但推理时只用了2分50秒左右,并且比上篇文章省了一个epoch。
注意,这里为了性能,虽然设置了随机种子,但并不是完全确定的,即每次结果可能稍微有点不同,如果想实现完全可复现,可参考 https://pytorch.org/docs/stable/notes/randomness.html 。
