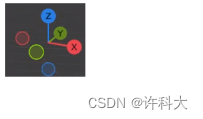
效果:

代码:
<template>
  <div>
    <el-container>
      <el-main>
        <div class="box-card-left">
          <div id="threejs" style="border: 1px solid red"></div>

          <div class="box-right">
            <el-button type="primary" @click="start">循环播放</el-button>
            <el-button type="primary" @click="start_once">播放一次</el-button>
            <el-button type="primary" @click="start_clamp"
              >保持播放结束效果</el-button
            >
            <el-button type="primary" @click="stop">结束动画</el-button>
            <el-button type="primary" @click="pausedFn">暂停</el-button>
            <el-button type="primary" @click="time_scale"
              >2倍速循环播放</el-button
            >
            <el-button type="primary" @click="time_duration"
              >控制动画播放特定时间开始(2秒)</el-button
            >
            <div style="margin-top: 20px;"></div>
            <el-progress
              :percentage="percentage"
              :format="format"
            ></el-progress>
            <el-button-group>
              <el-button icon="el-icon-minus" @click="decrease"
                >播放速度</el-button
              >
              <el-button icon="el-icon-plus" @click="increase"
                >播放速度</el-button
              >
            </el-button-group>
            <el-slider v-model="value1" @change="change"></el-slider>
            动画播放(拖动任意时间状态)
          </div>
        </div>
      </el-main>
    </el-container>
  </div>
</template>
<script>
// 引入轨道控制器扩展库OrbitControls.js
import { OrbitControls } from "three/examples/jsm/controls/OrbitControls.js";
import { GLTFLoader } from "three/examples/jsm/loaders/GLTFLoader.js";
// 效果制作器
import { EffectComposer } from "three/examples/jsm/postprocessing/EffectComposer.js";
// 渲染通道
import { RenderPass } from "three/examples/jsm/postprocessing/RenderPass.js";
// 发光描边OutlinePass
import { OutlinePass } from "three/examples/jsm/postprocessing/OutlinePass.js";
import {
  CSS2DObject,
  CSS2DRenderer,
} from "three/examples/jsm/renderers/CSS2DRenderer.js";

export default {
  data() {
    return {
      value1: 0,
      percentage: 20,
      name: "",
      scene: null,
      camera: null,
      renderer: null,
      effectComposer: null,
      mesh: null,
      geometry: null,
      group: null,
      material: null,
      texture: null,
      position: null,
      outlinePass: null,
      clock: null,
      mixer: null,
      clip_action: null,
      request_animation_frame: null,
      canvasWidth: 1000,
      canvasHeight: 800,
      color: [],
      meshArr: [],
    };
  },
  created() {},
  mounted() {
    this.name = this.$route.query.name;
    this.init();
  },
  methods: {
    goBack() {
      this.$router.go(-1);
    },
    // 动画播放(拖动任意时间状态)
    change(e) {
      console.log("e:", e);
      this.clip_action.paused = true;
      this.clip_action.clampWhenFinished = true;
      this.clip_action.time = 0.1 * e;
    },
    format(percentage) {
      return percentage / 10 + "倍";
    },
    increase() {
      this.percentage += 10;
      if (this.percentage > 100) {
        this.percentage = 100;
      }
      this.clip_action.timeScale = this.percentage / 10;
    },
    decrease() {
      this.percentage -= 10;
      if (this.percentage < 0) {
        this.percentage = 0;
      }
      this.clip_action.timeScale = this.percentage / 10;
    },
    init() {
      //  创建场景对象
      this.scene = new this.$three.Scene();
      // 创建立方几何体对象
      this.geometry = new this.$three.BoxGeometry(60, 50, 90);
      // 创建材质对象
      this.material = new this.$three.MeshBasicMaterial({
        color: 0xaabbdd,
      });
      // 创建网格对象
      this.mesh = new this.$three.Mesh(this.geometry, this.material);
      this.scene.add(this.mesh);

      this.clock = new this.$three.Clock();
      this.animation();

      // 调用play方法
      // clip_action.play();
      // 创建相机对象
      this.camera = new this.$three.PerspectiveCamera(60, 1, 0.01, 2000);
      this.camera.position.set(300, 300, 300);
      this.camera.lookAt(0, 0, 0);
      // 创建网格辅助对象
      const axesHelper = new this.$three.AxesHelper(100);
      this.scene.add(axesHelper);
      const gridHelper = new this.$three.GridHelper(
        300,
        20,
        0xffaaaa,
        0xaabbcc
      );
      this.scene.add(gridHelper);
      // 创建渲染器对象
      this.renderer = new this.$three.WebGLRenderer();
      this.renderer.setSize(1000, 800);
      this.renderer.render(this.scene, this.camera);
      window.document
        .getElementById("threejs")
        .appendChild(this.renderer.domElement);
      const controls = new OrbitControls(this.camera, this.renderer.domElement);
      controls.addEventListener("change", () => {
        this.renderer.render(this.scene, this.camera);
      });
    },
    // 创建关键帧的方法
    animation() {
      // 给模型定义name
      this.mesh.name = "Box";
      // 定义时间范围
      const time = [0, 3, 6, 8, 10]; // 对应时间轴上的0,3,6秒
      // 定义0,3,6秒对应的坐标值
      const values = [0, 0, 0, 100, 0, 0, 0, 0, 100, 0, 100, 0, 0, 0, 0];
      // 创建关键帧 KeyframeTrack(params: String, timeRange: Array, valueRange: Array)
      // params 模型的属性,timeRange: 时间范围,valueRange: 值范围
      const position_kf = new this.$three.KeyframeTrack(
        "Box.position",
        time,
        values
      );
      // 设置在2-6秒内颜色变化,颜色三个数一组表示 rgb格式的
      /**
       * .setRGB ( r, g, b ) this
          r — 红色通道值在1和0之间。
          g — 绿色通道值在1和0之间。
          b — 蓝色通道值在1和0之间。

          设置颜色的RGB值。
       */
      const color_kf = new this.$three.KeyframeTrack(
        "Box.material.color",
        [2, 6],
        [1, 0.2, 0.3, 0.1, 0.8, 0.3]
      );
      // 创建关键帧动画对象  AnimationClip(name:String, time:Number, value: Array)
      const clip = new this.$three.AnimationClip("clip_name", 10, [
        position_kf,
        color_kf,
      ]);
      // 创建动画播放器
      this.mixer = new this.$three.AnimationMixer(this.mesh);
      this.clip_action = this.mixer.clipAction(clip);
    },
    renderFun() {
      this.renderer.render(this.scene, this.camera);
      const frameT = this.clock.getDelta();
      // 更新播放器相关的时间(如果不更新,则没有动画效果)
      if (this.mixer) {
        this.mixer.update(frameT);
      }
      this.request_animation_frame = window.requestAnimationFrame(
        this.renderFun
      );
    },
    start() {
      this.clip_action.loop = this.$three.LoopRepeat;
      this.clip_action.paused = false;
      // play() 控制动画播放,默认循环播放
      this.clip_action.play();
      this.renderFun();
    },
    start_once() {
      this.clip_action.loop = this.$three.LoopOnce;
      // play() 控制动画播放,默认循环播放
      this.clip_action.play();
      this.renderFun();
    },
    start_clamp() {
      // 物体状态停留在动画结束的时候
      this.clip_action.clampWhenFinished = true;
      this.clip_action.loop = this.$three.LoopOnce;
      // play() 控制动画播放,默认循环播放
      this.clip_action.play();
      this.renderFun();
    },
    stop() {
      // play() 控制动画播放,默认循环播放
      this.clip_action.stop();
      // // 物体状态停留在动画结束的时候
      this.clip_action.clampWhenFinished = true;
      // this.renderFun();
    },
    pausedFn() {
      console.log(this.clip_action.paused);
      if (this.clip_action.paused) {
        this.clip_action.paused = false;
      } else {
        this.clip_action.paused = true;
      }
      this.renderFun();
    },
    time_scale() {
      this.clip_action.timeScale = 2;
      this.clip_action.play();
      this.renderFun();
    },
    time_duration() {
      // 控制动画播放特定时间段;需要设置为非循环模式、同时设置动画播放完定留在结束状态,
      // 设置为非循环模式
      this.clip_action.loop = this.$three.LoopOnce;
      this.clip_action.clampWhenFinished = true;
      this.clip_action.time = 2; // 动画开始时间
      // this.clip_action.duration = 2; // 动画结束时间
      this.clip_action.play();
      this.renderFun();
    },
  },
};
</script>
//
<style lang="less" scoped>
.box-card-left {
  display: flex;
  align-items: flex-start;
  flex-direction: row;

  width: 100%;

  .box-right {
    img {
      width: 500px;
      user-select: none;
    }
  }
}
</style>
