一、平台
Windows 10
GPU RTX 3090 + CUDA 11.1 + cudnn 8.9.6
Python 3.9
Torch 1.9.1+cu111
所用的原始代码:https://github.com/fxia22/pointnet.pytorch
二、数据
shapenetcore_partanno_segmentation_benchmark_v0
三、代码
分享给有需要的人,代码质量勿喷。
对源代码进行了简化和注释。
不搞原作者的可视化工具,分割结果保存成txt,或者利用 laspy 生成点云。
别问为啥在C盘,问就是2T的三星980Pro
3.1 文件组织结构

3.2 dataset.py
修改了部分txt文件的路径
from __future__ import print_function
import os
import os.path
import numpy as np
import sys
from tqdm import tqdm
import json
from plyfile import PlyData, PlyElement
import torch
import torch.utils.data as data


def get_segmentation_classes(root):
    catfile = os.path.join(root, 'synsetoffset2category.txt')
    cat = {}
    meta = {}

    with open(catfile, 'r') as f:
        for line in f:
            ls = line.strip().split()
            cat[ls[0]] = ls[1]

    for item in cat:
        dir_seg = os.path.join(root, cat[item], 'points_label')
        dir_point = os.path.join(root, cat[item], 'points')
        fns = sorted(os.listdir(dir_point))
        meta[item] = []
        for fn in fns:
            token = (os.path.splitext(os.path.basename(fn))[0])
            meta[item].append((os.path.join(dir_point, token + '.pts'), os.path.join(dir_seg, token + '.seg')))

    with open(os.path.join(os.path.dirname(os.path.realpath(__file__)), 'num_seg_classes.txt'), 'w') as f:
        for item in cat:
            datapath = []
            num_seg_classes = 0
            for fn in meta[item]:
                datapath.append((item, fn[0], fn[1]))

            for i in tqdm(range(len(datapath))):
                l = len(np.unique(np.loadtxt(datapath[i][-1]).astype(np.uint8)))
                if l > num_seg_classes:
                    num_seg_classes = l

            print("category {} num segmentation classes {}".format(item, num_seg_classes))
            f.write("{}\t{}\n".format(item, num_seg_classes))

def gen_modelnet_id(root):
    classes = []
    with open(os.path.join(root, 'train.txt'), 'r') as f:
        for line in f:
            classes.append(line.strip().split('/')[0])
    classes = np.unique(classes)
    with open(os.path.join(os.path.dirname(os.path.realpath(__file__)), 'modelnet_id.txt'), 'w') as f:
        for i in range(len(classes)):
            f.write('{}\t{}\n'.format(classes[i], i))


class ShapeNetDataset(data.Dataset):
    def __init__(self,
                 root,
                 npoints=2500,
                 classification=False,
                 class_choice=None,
                 split='train',
                 data_augmentation=True):
        self.npoints = npoints
        self.root = root
        self.catfile = os.path.join(self.root, 'synsetoffset2category.txt')
        self.cat = {}
        self.data_augmentation = data_augmentation # 数据扩充
        self.classification = classification
        self.seg_classes = {}

        # 读synsetoffset2category.txt中的数据,并以字典的形式存储到self.cat中
        with open(self.catfile, 'r') as f:
            for line in f:
                # strip():移除字符串头尾指定的字符(默认为空格或换行符)
                # split():指定分隔符对字符串进行切片,返回分割后的字符串列表(默认为所有的空字符,包括空格、换行\n、制表符\t等)
                ls = line.strip().split()
                # cat为字典,通过[键]索引。键:类别;值:文件夹名称
                self.cat[ls[0]] = ls[1]
        # print(self.cat) #所有类和代号

        if not class_choice is None:
            self.cat = {k: v for k, v in self.cat.items() if k in class_choice}

        self.id2cat = {v: k for k, v in self.cat.items()} # key和value互换

        self.meta = {}
        # json文件类似xml文件,可存储键值对和数组等
        # split=train
        # format():字符串格式化函数,使用{}代替之前的%
        splitfile = os.path.join(self.root, 'train_test_split', 'shuffled_{}_file_list.json'.format(split))
        #from IPython import embed; embed()
        filelist = json.load(open(splitfile, 'r'))

        # for item in self.cat:item为键
        # for item in self.cat.values():item为值
        # for item in self.cat.items():item为键值对(元组的形式)
        # for k, v in self.cat.items():更为规范的键值对读取方式
        # meta为字典,键为类别,键值为空
        for item in self.cat:
            self.meta[item] = []

        for file in filelist:
            _, category, uuid = file.split('/')
            if category in self.cat.values():
                self.meta[self.id2cat[category]].append((os.path.join(self.root, category, 'points', uuid+'.pts'),
                                        os.path.join(self.root, category, 'points_label', uuid+'.seg')))

        self.datapath = []
        # cat存储类别及其所在文件夹,item访问键,即类别
        for item in self.cat:
            # meta为字典,fn访问值,即路径
            for fn in self.meta[item]:
                # item为类别,fn[0]为点云路径,fn[1]为用于分割的标签路径
                self.datapath.append((item, fn[0], fn[1]))
                # sorted():对所有可迭代兑现进行排序,默认为升序;sorted(self.cat)对字典cat中的键(种类)进行排序,排序结果的类型为list
                # zip():  函数用于将可迭代的对象作为参数,将对象中对应的元素打包成一个个元组
                # dict(): 创建字典。dict(zip(['one', 'two'], [1, 2])) -> {'two': 2, 'one': 1}

        self.classes = dict(zip(sorted(self.cat), range(len(self.cat))))
        # print(self.classes) #训练所用的类别

        with open(os.path.join(os.path.dirname(os.path.realpath(__file__)), 'num_seg_classes.txt'), 'r') as f:
            for line in f:
                ls = line.strip().split()
                self.seg_classes[ls[0]] = int(ls[1])
        self.num_seg_classes = self.seg_classes[list(self.cat.keys())[0]]
        # print(self.seg_classes, self.num_seg_classes) #所有类和被分割的数量

    # 该方法的实例对象可通过索引取值,自动调用该方法
    def __getitem__(self, index):
        # 获取类别、点云路径、分割标签路径元组
        fn = self.datapath[index]
        # 获取数字编码的类别标签
        cls = self.classes[self.datapath[index][0]]
        # 读取pts点云
        point_set = np.loadtxt(fn[1]).astype(np.float32)
        # 读取分割标签
        seg = np.loadtxt(fn[2]).astype(np.int64)
        #print(point_set.shape, seg.shape)

        # 重新采样到self.npoints个点
        choice = np.random.choice(len(seg), self.npoints, replace=True)
        #resample
        point_set = point_set[choice, :]

        # 去中心化
        point_set = point_set - np.expand_dims(np.mean(point_set, axis = 0), 0) # center
        # 计算到原点的最远距离
        dist = np.max(np.sqrt(np.sum(point_set ** 2, axis = 1)),0)
        # 归一化
        point_set = point_set / dist #scale

        # 默认False  开启旋转任意角度并加上一个bias,增强数据的抗干扰能力
        if self.data_augmentation:
            theta = np.random.uniform(0,np.pi*2)
            rotation_matrix = np.array([[np.cos(theta), -np.sin(theta)],[np.sin(theta), np.cos(theta)]])
            point_set[:,[0,2]] = point_set[:,[0,2]].dot(rotation_matrix) # random rotation
            point_set += np.random.normal(0, 0.02, size=point_set.shape) # random jitter

        seg = seg[choice]
        point_set = torch.from_numpy(point_set) #转换数据格式
        seg = torch.from_numpy(seg)
        cls = torch.from_numpy(np.array([cls]).astype(np.int64)) #cls为对应的代号,比如Airplane对应0

        if self.classification:
            return point_set, cls
        else:
            return point_set, seg

    def __len__(self):
        return len(self.datapath)


class ModelNetDataset(data.Dataset):
    def __init__(self,
                 root,
                 npoints=2500,
                 split='train',
                 data_augmentation=True):
        self.npoints = npoints
        self.root = root
        self.split = split
        self.data_augmentation = data_augmentation
        self.fns = []
        with open(os.path.join(root, '{}.txt'.format(self.split)), 'r') as f:
            for line in f:
                self.fns.append(line.strip())

        self.cat = {}
        with open(os.path.join(os.path.dirname(os.path.realpath(__file__)), '../misc/modelnet_id.txt'), 'r') as f:
            for line in f:
                ls = line.strip().split()
                self.cat[ls[0]] = int(ls[1])

        print(self.cat)
        self.classes = list(self.cat.keys())

    def __getitem__(self, index):
        fn = self.fns[index]
        cls = self.cat[fn.split('/')[0]]
        with open(os.path.join(self.root, fn), 'rb') as f:
            plydata = PlyData.read(f)
        pts = np.vstack([plydata['vertex']['x'], plydata['vertex']['y'], plydata['vertex']['z']]).T
        choice = np.random.choice(len(pts), self.npoints, replace=True)
        point_set = pts[choice, :]

        point_set = point_set - np.expand_dims(np.mean(point_set, axis=0), 0)  # center
        dist = np.max(np.sqrt(np.sum(point_set ** 2, axis=1)), 0)
        point_set = point_set / dist  # scale

        if self.data_augmentation:
            theta = np.random.uniform(0, np.pi * 2)
            rotation_matrix = np.array([[np.cos(theta), -np.sin(theta)], [np.sin(theta), np.cos(theta)]])
            point_set[:, [0, 2]] = point_set[:, [0, 2]].dot(rotation_matrix)  # random rotation
            point_set += np.random.normal(0, 0.02, size=point_set.shape)  # random jitter

        point_set = torch.from_numpy(point_set.astype(np.float32))
        cls = torch.from_numpy(np.array([cls]).astype(np.int64))
        return point_set, cls


    def __len__(self):
        return len(self.fns)

if __name__ == '__main__':
    dataset = sys.argv[1]
    datapath = sys.argv[2]

    if dataset == 'shapenet':
        d = ShapeNetDataset(root = datapath, class_choice = ['Chair'])
        print(len(d))
        ps, seg = d[0]
        print(ps.size(), ps.type(), seg.size(),seg.type())

        d = ShapeNetDataset(root = datapath, classification = True)
        print(len(d))
        ps, cls = d[0]
        print(ps.size(), ps.type(), cls.size(),cls.type())
        # get_segmentation_classes(datapath)

    if dataset == 'modelnet':
        gen_modelnet_id(datapath)
        d = ModelNetDataset(root=datapath)
        print(len(d))
        print(d[0])
3.3 model.py
没变化
3.4 train_segmentation.py
修改了部分文件的路径,我看起来更舒服
# 参考
# 牙牙要健康 https://blog.csdn.net/yangyu0515/article/details/129362565
# LingbinBu https://blog.csdn.net/yuanmiyu6522/article/details/121435650

#使用最新版本的 print 函数
from __future__ import print_function
import numpy as np
import os
import random
import torch
import torch.nn.parallel
import torch.nn.functional as F
import torch.optim as optim
import torch.utils.data
from tqdm import tqdm
#不显示warnning
import warnings
warnings.filterwarnings('ignore')

from pointnet.dataset import ShapeNetDataset
from pointnet.model import PointNetDenseCls, feature_transform_regularizer


# region 超参数
batchSize = 8
learn_rate = 0.001
epochs = 100
workers = 0
outFolder = 'C:/xinjiang/py/xjPointNet/trainModelSeg'
try:
    os.makedirs(outFolder)
except OSError:
    pass
pathModel = ''
pathDataset = 'C:/xinjiang/py/xjPointNet/shapenetcore_partanno_segmentation_benchmark_v0/'
class_choice = 'Chair'
featureTransform = False
# endregion


if __name__ == "__main__":

    # region 随机数
    # 返回1~10000间的一个整数,作为随机种子 opt的类型为:<class 'argparse.Namespace'>
    manualSeed = random.randint(1, 10000)  # fix seed
    print("Random Seed: ", manualSeed)
    # 保证在有种子的情况下生成的随机数都是一样的
    random.seed(manualSeed)
    # 设置一个用于生成随机数的种子,返回的是一个torch.Generator对象
    torch.manual_seed(manualSeed)
    # endregion


    # region 数据集 分割
    train_dataset = ShapeNetDataset(
        root=pathDataset,
        classification=False,
        class_choice=[class_choice])
    train_dataloader = torch.utils.data.DataLoader(
        train_dataset,
        batch_size=batchSize,
        shuffle=True,                       #shuffle=True 打乱数据顺序
        num_workers=int(workers))
    test_dataset = ShapeNetDataset(
        root=pathDataset,
        classification=False,
        class_choice=[class_choice],
        split='test',
        data_augmentation=False)
    testdataloader = torch.utils.data.DataLoader(
        test_dataset,
        batch_size=batchSize,
        shuffle=True,
        num_workers=int(workers))

    #训练集-验证集-测试集 位于数据集文件夹中的 train_test_split
    print('Amount of train =',len(train_dataset), '. Amount of test =',len(test_dataset))
    num_classes = train_dataset.num_seg_classes
    print(class_choice,'is segmented into {', num_classes,'} sections.')
    # endregion


    # region 点云分割模型 实例化
    classifier = PointNetDenseCls(k=num_classes, feature_transform=featureTransform)
    # 如果有预训练模型,将预训练模型加载
    if pathModel != '':
        classifier.load_state_dict(torch.load(pathModel))

    #Adam优化器,用于优化神经网络的权重
    #betas是Adam优化器的两个衰减因子,分别用于一阶矩估计(mean)和二阶矩估计(uncentered variance)
    #0.9 是用于计算梯度的指数移动平均的衰减因子
    #0.999 是用于计算梯度平方的指数移动平均的衰减因子
    optimizer = optim.Adam(classifier.parameters(), lr=learn_rate, betas=(0.9, 0.999))

    #学习率调度器,用于调整优化器的学习率。StepLR 是一种简单的调度器,它在每个指定的步数(step_size)降低学习率。
    #每经过 20 个epoch(训练数据集的完整循环),学习率将被调整
    #将当前学习率乘以gamma来降低学习率。每经过step_size步,学习率将变为当前学习率的一半。
    scheduler = optim.lr_scheduler.StepLR(optimizer, step_size=10, gamma=0.5)

    #将模型移动到 GPU 上进行计算
    classifier.cuda()
    # endregion


    # region 训练

    #将输入字符串 x 用深蓝色着色,通常用于在命令行界面中打印带有颜色的文本。
    test_blue = lambda x: '\033[94m' + x + '\033[0m'

    for epoch in range(epochs):
        # 表示完成了一个训练周期,更新学习率。
        scheduler.step()

        # 遍历
        for i, data in enumerate(train_dataloader, 0):
            # 点-标签
            points, target = data # points: torch.Size([batchSize,2500,3])。target:torch.Size([batchSize,1,2500])
            points = points.transpose(2, 1) # points:torch.Size([batchSize, 3, 2500]) = batchSize个3行2500列

            # cuda() 方法用于将张量的数据存储在GPU。
            points, target = points.cuda(), target.cuda()

            # 模型参数的梯度归零。避免backward时梯度累加。通常在每个训练迭代的开始处调用
            optimizer.zero_grad()

            # 训练
            classifier = classifier.train()
            # 预测:pred=torch.Size([batchSize, 2500, 4]);trans=torch.Size([2, 3, 3]);trans_feat不保存,为None。
            pred, trans, trans_feat = classifier(points)

            # 将张量 pred 重新调整为一个二维张量,其中每行有num_classes列。-1表示由PyTorch自动计算该维度的大小,以保持原有张量元素的总数不变。
            pred = pred.view(-1, num_classes)       #torch.Size([batchSize*2500, 4])

            # target.view(-1, 1):通过view方法将target调整为一个二维张量,其中每行有一个元素。-1表示由PyTorch自动计算该维度的大小,以保持原有张量元素的总数不变。
            # [:, 0]:使用切片操作,保留每行的第一个元素。
            # -1:将每个元素减去1。这样的操作可能用于调整标签的范围,使其符合模型输出的范围。
            target = target.view(-1, 1)[:, 0] - 1   #torch.Size([batchSize*2500, 4])

            # 负对数似然损失(Negative Log Likelihood Loss)
            loss = F.nll_loss(pred, target)

            # 将计算得到的正则项乘以一个系数(0.001)后添加到原始的损失上。防止过拟合或者提高模型的泛化能力。
            # 对feature_transform中64X64的变换矩阵做正则化,满足AA^T=I
            if featureTransform:
                loss += feature_transform_regularizer(trans_feat) * 0.001

            # loss反向传播。计算损失相对于模型参数的梯度。在前向传播之后,通过调用该方法,PyTorch会自动计算各个模型参数对损失的梯度。这些梯度将被存储在相应参数的.grad 属性中。
            loss.backward()
            # 梯度下降,参数优化。根据优化算法的规则,使用梯度信息来更新模型的参数,使损失函数值减小,从而让模型更好地适应训练数据。
            optimizer.step()

            # pred_choice包含了每个样本的模型预测的类别索引。
            # max(1):对底层数据进行操作,沿着第 1 个维度(通常是类别的维度)找到每行的最大值。返回一个元组,包含最大值和对应的索引。
            # [1]:取元组中的第二个元素,即最大值对应的索引。
            pred_choice = pred.data.max(1)[1] # torch.Size([batchSize*2500])

            # 当前批次中模型的正确预测数量。eq:逐元素比较
            correct = pred_choice.eq(target.data).cpu().sum()

            # 输出信息
            print('[%d: %d/%d] train loss=%f; accuracy=%f' % (
            epoch, i, len(train_dataset)/batchSize, loss.item(), correct.item()/float(batchSize*2500)))


            # ---------- 每隔10个批次,验证一次
            if i % 10 == 0:
                j, data = next(enumerate(testdataloader, 0))
                points, target = data
                points = points.transpose(2, 1)
                points, target = points.cuda(), target.cuda()
                classifier = classifier.eval()
                pred, _, _ = classifier(points)
                pred = pred.view(-1, num_classes)
                target = target.view(-1, 1)[:, 0] - 1
                loss = F.nll_loss(pred, target)
                pred_choice = pred.data.max(1)[1]
                correct = pred_choice.eq(target.data).cpu().sum()
                print('[%d: %d/%d] %s loss: %f  accuracy: %f' % (
                epoch, i, len(train_dataset)/batchSize, test_blue('test==='), loss.item(), correct.item() / float(batchSize * 2500)))

        # 保存模型
        torch.save(classifier.state_dict(), '%s/seg_model_%s_%d.pth' % (outFolder, class_choice, epoch))
    # endregion


    # region benchmark mIOU
    shape_ious = []
    # tqdm 进度条,以显示循环迭代的进度。tqdm 的名称来自阿拉伯语 "taqaddum",意为 "进展" 或 "前进"。
    for i, data in tqdm(enumerate(testdataloader, 0)):
        points, target = data
        points = points.transpose(2, 1)
        points, target = points.cuda(), target.cuda()
        classifier = classifier.eval()
        pred, _, _ = classifier(points)
        pred_choice = pred.data.max(2)[1] #第 2 个维度的最大值

        pred_np = pred_choice.cpu().data.numpy()
        target_np = target.cpu().data.numpy() - 1 #标签的取值范围调整为从0开始

        for shape_idx in range(target_np.shape[0]):
            parts = range(num_classes)
            part_ious = []
            for part in parts:
                I = np.sum(np.logical_and(pred_np[shape_idx] == part, target_np[shape_idx] == part))#计算当前类别 part 的交集数量
                U = np.sum(np.logical_or(pred_np[shape_idx] == part, target_np[shape_idx] == part)) #计算当前类别 part 的并集数量
                if U == 0:
                    # 如果交集和并集为空,将 IoU 设置为 1。这是为了处理分母为零的情况,确保 IoU 在这种情况下被定义为 1。
                    iou = 1  # If the union of groundtruth and prediction points is empty, then count part IoU as 1。
                else:
                    iou = I / float(U)
                part_ious.append(iou) #将每个类别 part 的 IoU 添加到 part_ious 列表中
            shape_ious.append(np.mean(part_ious)) # 计算所有类别的 IoU 的平均值,并将其添加到 shape_ious 列表中,表示当前形状的平均 IoU。

    print("mIOU for class {}: {}".format(class_choice, np.mean(shape_ious)))
    # endregion
3.5 show_seg.py
生成txt,或者利用 laspy 生成点云。不费那老鼻子劲搞原作者的可视化工具。
from __future__ import print_function
import numpy as np
import matplotlib.pyplot as plt
import torch
import torch.nn.parallel
import torch.utils.data
from torch.autograd import Variable
import warnings
warnings.filterwarnings('ignore')

from pointnet.dataset import ShapeNetDataset
from pointnet.model import PointNetDenseCls


pathModel = 'C:/xinjiang/py/xjPointNet/trainModelSeg/seg_model_Chair_9.pth'
pathDataset = 'C:/xinjiang/py/xjPointNet/shapenetcore_partanno_segmentation_benchmark_v0/'
choicedClass = 'Earphone'


if __name__ == "__main__":
    test_ds = ShapeNetDataset(
        root=pathDataset,
        class_choice=[choicedClass],
        split='test',
        data_augmentation=False)

    idx = 5
    print("model %d/%d" % (idx, len(test_ds)))

    # torch.Size([2500, 3]),torch.Size([2500])
    point, seg = test_ds[idx]

    # xyz <class 'numpy.ndarray'>    (2500, 3)
    point_np = point.numpy()

    cmap = plt.cm.get_cmap("hsv", 10)
    cmap = np.array([cmap(i) for i in range(10)])[:, :3]
    gt = cmap[seg.numpy() - 1, :]

    state_dict = torch.load(pathModel)
    classifier = PointNetDenseCls(k= state_dict['conv4.weight'].size()[0])
    classifier.load_state_dict(state_dict)
    classifier.eval()

    point = point.transpose(1, 0).contiguous()

    point = Variable(point.view(1, point.size()[0], point.size()[1]))
    pred, _, _ = classifier(point)
    # label <class 'torch.Tensor'> torch.Size([1, 2500])
    pred_choice = pred.data.max(2)[1]
    # label <class 'numpy.ndarray'> (2500, 1)
    pred_choice_np = np.reshape(pred_choice.numpy(), (pred_choice.numpy().size, 1))

    # rgb <class 'numpy.ndarray'>    (2500, 3)
    pred_color = cmap[pred_choice.numpy()[0], :]

    # xyzrgbl <class 'numpy.ndarray'>    (2500, 7)
    pcrgbl = np.hstack((point_np, pred_color*255, pred_choice_np))

    # # ---------- 保存成 txt ----------
    # pathResTxt = 'result_' + choicedClass+'_'+str(idx) + '.txt'
    # np.savetxt(pathResTxt, pcrgbl, fmt='%f', delimiter='\t')

    # ---------- 保存成 las ----------
    import laspy
    # data
    newx = point_np[:, 0]
    newy = point_np[:, 1]
    newz = point_np[:, 2]
    newred = 255*pred_color[:, 0]
    newgreen = 255*pred_color[:, 1]
    newblue = 255*pred_color[:, 2]
    newclassification = pred_choice_np[:, 0]
    minx = min(newx)
    miny = min(newy)
    minz = min(newz)
    # create a new header
    newheader = laspy.LasHeader(point_format=3, version="1.2")
    newheader.scales = np.array([0.0001, 0.0001, 0.0001])
    newheader.offsets = np.array([minx, miny, minz])
    newheader.add_extra_dim(laspy.ExtraBytesParams(name="Classification", type=np.uint8))
    # create a Las
    newlas = laspy.LasData(newheader)
    newlas.x = newx
    newlas.y = newy
    newlas.z = newz
    newlas.red = newred
    newlas.green = newgreen
    newlas.blue = newblue
    newlas.Classification = newclassification
    # write
    newLasPath = 'result_' + choicedClass + '_' + str(idx) + '.las'
    newlas.write(newLasPath)
四、结果
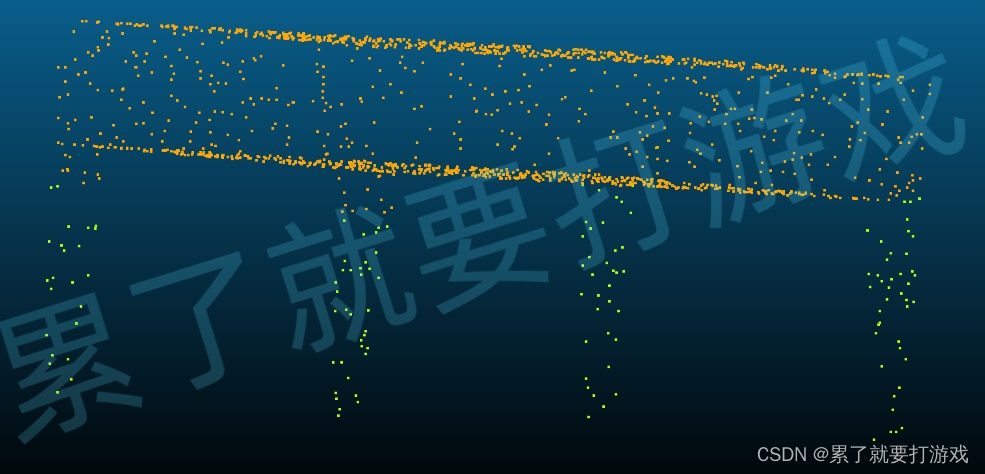
训练了10个Chair的epoch,用最后一个模型分割某个Table
