本文主要讨论如何通过监听codecommit仓库自动触发codebuild的构建,以及为codebuild配置正向代理
通过codecommit更新触发codebuild
codecommit触发器相关
每个codecommit最多配置10个触发器
sns触发器
为sns创建lambda函数订阅,在lambda日志中查看sns的触发器事件
{
  Records: [
    {
      EventSource: 'aws:sns',
      EventVersion: '1.0',
      EventSubscriptionArn: 'arn:aws-cn:sns:cn-north-1:xxx:testlamda:b7b7562c-62d0-4c39-9de2-b0cfa667ad5b',
      Sns: [Object]
    }
  ]
}
lambda触发器
在lambda日志中查看lambda的触发器事件,发现如下错误
An error occurred (ResourceNotFoundException) when calling the GetPolicy operation: The resource you requested does not exist.
坑点:貌似是codecommit触发器的创建并不会为lambda函数添加基于资源的策略
可以通过在 Lambda 控制台中创建触发器来配置 Lambda 函数,将其作为函数的一部分。这是最简单的方法,因为在 Lambda 控制台中创建的触发器会自动包含调用 Lambda 函数所需的权限。 CodeCommit 如果您在中创建触发器 CodeCommit,则必须包含 CodeCommit 允许调用该函数的策略。
参考文档手动配置lambda的基于资源的策略如下
{
  "Version": "2012-10-17",
  "Id": "default",
  "Statement": [
    {
      "Sid": "my-lambda-test",
      "Effect": "Allow",
      "Principal": {
        "Service": "codecommit.amazonaws.com"
      },
      "Action": "lambda:InvokeFunction",
      "Resource": "arn:aws-cn:lambda:cn-north-1:xxxxxxxxxx:function:test-event",
      "Condition": {
        "ArnLike": {
          "AWS:SourceArn": "arn:aws-cn:codecommit:cn-north-1:xxxxxxxxxx:test-pipeline-variable"
        }
      }
    }
  ]
}
事件记录如下
{
  Records: [
    {
      awsRegion: 'cn-north-1',
      codecommit: [Object],
      customData: null,
      eventId: '5396c72c-4234-42da-a773-8bce2f16272d',
      eventName: 'TriggerEventTest',
      eventPartNumber: 1,
      eventSource: 'aws:codecommit',
      eventSourceARN: 'arn:aws-cn:codecommit:cn-north-1:xxxxxxxxxx:test-pipeline-variable',
      eventTime: '2023-01-01T07:03:49.408+0000',
      eventTotalParts: 1,
      eventTriggerConfigId: '5396c72c-4234-42da-a773-8bce2f16272d',
      eventTriggerName: 'test-trigger',
      eventVersion: '1.0',
      userIdentityARN: 'arn:aws-cn:iam::xxxxxxxxxx:user/zhaojie'
    }
  ]
}
context上下文对象,貌似是老版本的写法,主要是提供执行环境的信息
{
  callbackWaitsForEmptyEventLoop: [Getter/Setter],
  succeed: [Function (anonymous)],
  fail: [Function (anonymous)],
  done: [Function (anonymous)],
  functionVersion: '$LATEST',
  functionName: 'test-trigger',
  memoryLimitInMB: '128',
  logGroupName: '/aws/lambda/test-trigger',
  logStreamName: '2023/01/01/[$LATEST]5161dce816af46529bbe3e668b54e5df',
  clientContext: undefined,
  identity: undefined,
  invokedFunctionArn: 'arn:aws-cn:lambda:cn-north-1:xxxxxxxxxx:function:test-trigger',
  awsRequestId: '8690deaf-8b1d-4414-ac6d-ffd6ef0c4e06',
  getRemainingTimeInMillis: [Function: getRemainingTimeInMillis]
}
参考文档创建lambda函数,对codecommit进行处理
https://gist.github.com/hassy/eaea5a958067211f2fed02ead13c2678
context.succeed / failaren’t documented anymore, probably meaning that they will be deprecated along with the0.10runtime in October 2016.
var aws = require('aws-sdk');
var codecommit = new aws.CodeCommit({ apiVersion: '2015-04-13' });

exports.handler = function(event, context) {
    var references = event.Records[0].codecommit.references.map(function(reference) {return reference.ref;});
    console.log('References:', references);
    var repository = event.Records[0].eventSourceARN.split(":")[5];
    var params = {
        repositoryName: repository
    };
    codecommit.getRepository(params, function(err, data) {
        if (err) {
            console.log(err);
            var message = "Error getting repository metadata for repository " + repository;
            console.log(message);
            context.fail(message);
        } else {
            console.log('Clone URL:', data.repositoryMetadata.cloneUrlHttp);
            context.succeed(data.repositoryMetadata.cloneUrlHttp);
        }
    });
};
配置codecommit更新触发codebuild
参考资料
- https://aws.amazon.com/cn/blogs/infrastructure-and-automation/how-to-trigger-aws-codebuild-jobs-for-selective-file-changes-in-aws-codecommit/
- https://docs.aws.amazon.com/zh_cn/codecommit/latest/userguide/how-to-notify.html
- https://github.com/aws-samples/aws-codecommit-selective-build-trigger/blob/8fba919e0b/README.md
本次的source使用codecommit,为了方便测试,使用官方的触发器方案配置类似webhook的功能。

主要思路是通过lambda检测codecommit变更,然后主动触发build行为。
拉取代码失败
CLIENT_ERROR: Get "https://git-codecommit.cn-north-1.amazonaws.com.cn/v1/repos/test-pipeline-variable/info/refs?service=git-upload-pack": dial tcp 54.222.20.71:443: i/o timeout for primary source and source version refs/heads/master^{20225df73e15e7f903df07372d69322dab2f18c0}
lambda函数的执行逻辑如下
https://github.com/aws-samples/aws-codecommit-selective-build-trigger/blob/8fba919e0b/src/lambda_code.py
- 获取最细您的codecommit提交id
- 检查代码是否发生更改
- 如果更改则通过codebuild客户端触发build
通过eventbridge触发build行为
通过触发器的方式需要自行编写lambda函数,虽然更加灵活但是复杂度也上来了。较为简单的方式是通过事件驱动的方式,在eventbridge捕获codecommit事件,然后触发build行为
创建规则捕获codecommit的push操作即可
{
  "source": ["aws.codecommit"],
  "detail-type": ["AWS API Call via CloudTrail"],
  "detail": {
    "eventSource": ["codecommit.amazonaws.com"],
    "eventName": ["GitPush"],
    "requestParameters": [ { "exists": true  } ]
  }
}
之后指定目标为codebuild项目

此时git push会触发build行为,这种方式比codecommit触发器要简单很多
aws codebuild 配置squid正向代理
- 将 AWS CodeBuild 与代理服务器结合使用
为codebuild启用代理,不在需要在vpc中配置nat,并控制codebuild对外访问
codebuild默认的构建环境启动在aws托管网络中,如果需要配置使用代理,则需要指定vpc
可以配置两种类型的代理服务器
-
显示代理,需要在codebuild中配置环境变量
NO_PROXY、HTTP_PROXY, 和HTTPS_PROXY -
透明代理,不需要额外配置
整体的架构如下图

在公有子网中启动ec2示例并配置squid
sudo yum update -y
sudo yum install -y squid
配置squid主要是修改配置文件
$ ll /etc/squid
total 48
-rw-r--r-- 1 root squid   692 Apr 12  2021 cachemgr.conf
-rw-r--r-- 1 root root    692 Apr 12  2021 cachemgr.conf.default
-rw-r--r-- 1 root root   1817 Apr 12  2021 errorpage.css
-rw-r--r-- 1 root root   1817 Apr 12  2021 errorpage.css.default
-rw-r--r-- 1 root root  12077 Apr 12  2021 mime.conf
-rw-r--r-- 1 root root  12077 Apr 12  2021 mime.conf.default
-rw-r----- 1 root squid  2315 Apr 12  2021 squid.conf
-rw-r--r-- 1 root root   2315 Apr 12  2021 squid.conf.default
配置https流量
sudo mkdir /etc/squid/ssl
cd /etc/squid/ssl
sudo openssl genrsa -out squid.key 2048
sudo openssl req -new -key squid.key -out squid.csr -subj "/C=XX/ST=XX/L=squid/O=squid/CN=squid"
sudo openssl x509 -req -days 3650 -in squid.csr -signkey squid.key -out squid.crt
sudo cat squid.key squid.crt | sudo tee squid.pem
添加以下规则
acl localnet src 10.1.0.0/16 #Only allow requests from within the VPC
acl allowed_sites dstdomain .github.com #Allows to download source from GitHub
acl allowed_sites dstdomain .bitbucket.com #Allows to download source from Bitbucket
acl download_src dstdom_regex .*s3\.cn-north-1\.amazonaws\.com\.cn
acl download_src dstdom_regex git-codecommit\.cn-north-1\.amazonaws\.com.cn
查看squid日志
sudo tail -f /var/log/squid/access.log
访问成功

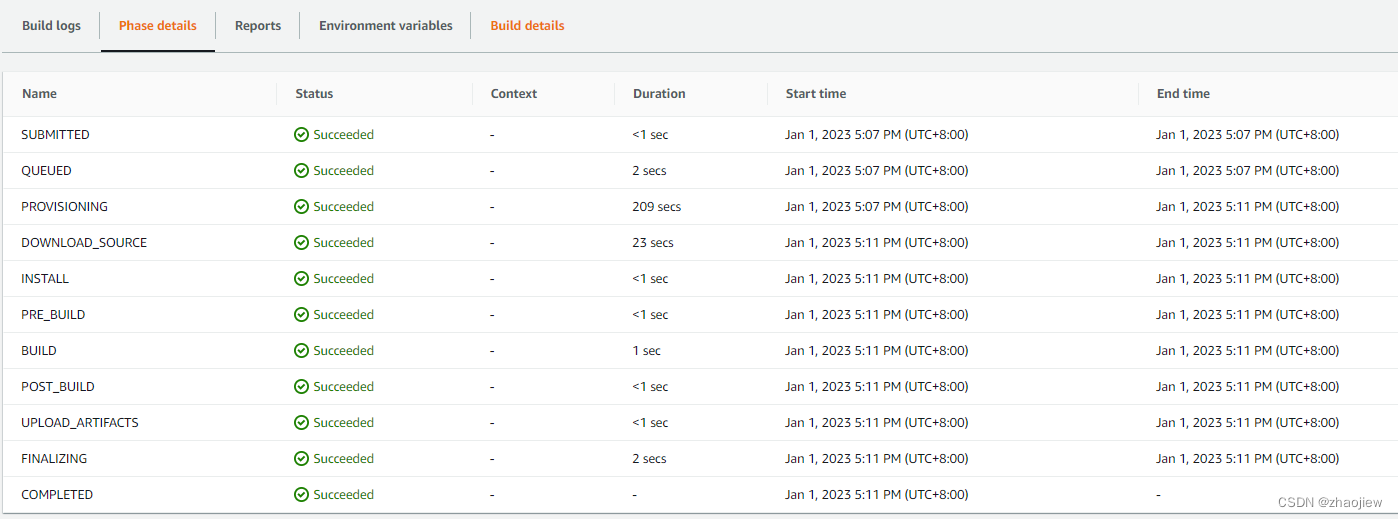
私有子网成功访问s3,构建成功
