CloudSimExampleA.java
1准备
1.1操作系统
本实验在Windows 7 或Windows 10系统运行均可。
1.2软件
cloudsim-3.0.3.zip;
commons-math3-3.2-bin.zip;
jdk-8u152-windows-x64.exe;
eclipse-jee-neon-3-win32-x86_64
所需资料链接:https://pan.baidu.com/s/1AE4UsmFW0rOny6BFCQiPMA?pwd=2023
2安装JDK
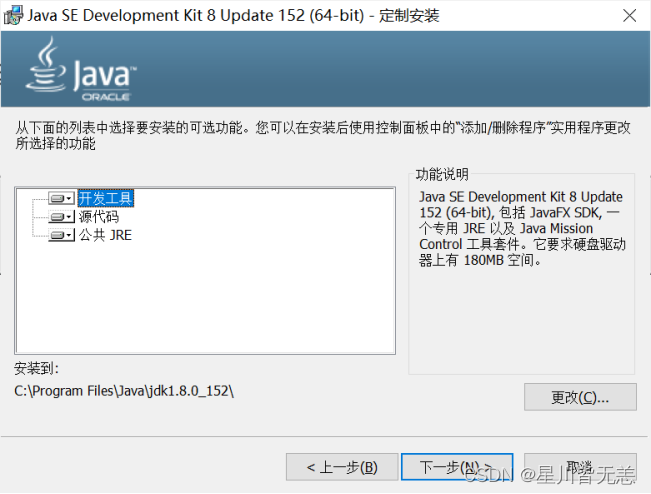
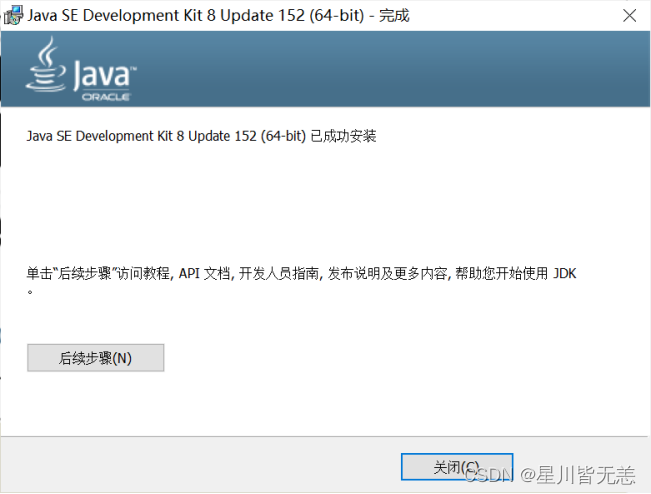
2.1安装JDK
双击运行jdk-8u152-windows-x64.exe。
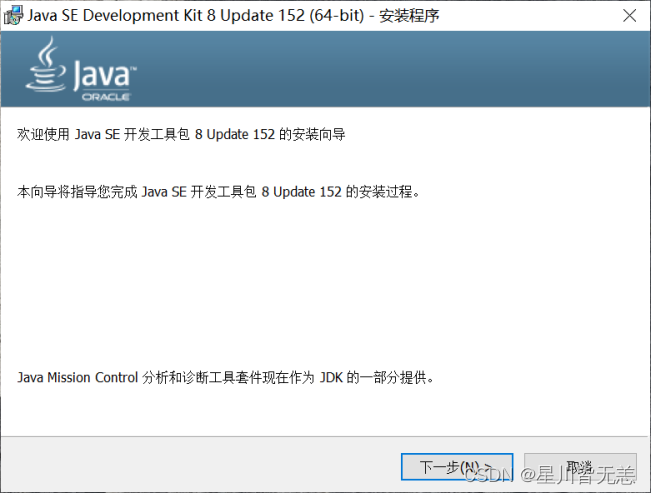
在上面对话框中选择默认目录或更改目录安装。
3配置Eclipse集成开发环境
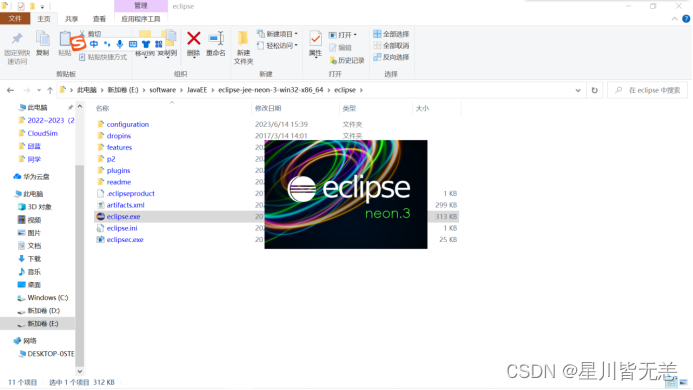
3.1启动Eclipse
运行…\eclipse-jee-neon-3-win32-x86_64\eclipse目录下的eclipse.exe可执行文件。
注意:首次运行eclipse会提示选择WorkSpace,及工作目录,用于存放项目文件,根据自己情况选择一个文件夹即可。
3.2配置Java运行时环境JRE
在上一步打开的Eclipse集成开发环境窗口中,点击菜单“Window”“Preferences”菜单项:
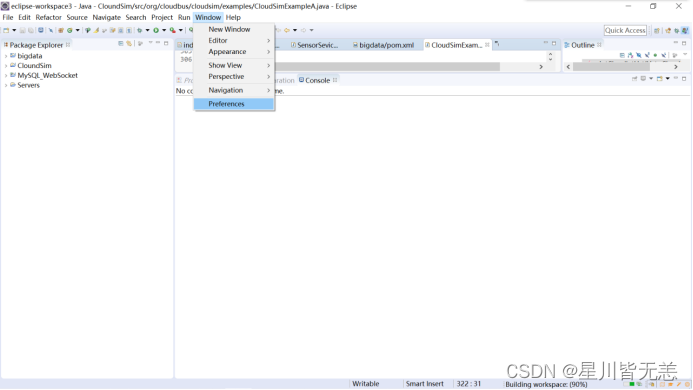
打开“Preferences”对话框:
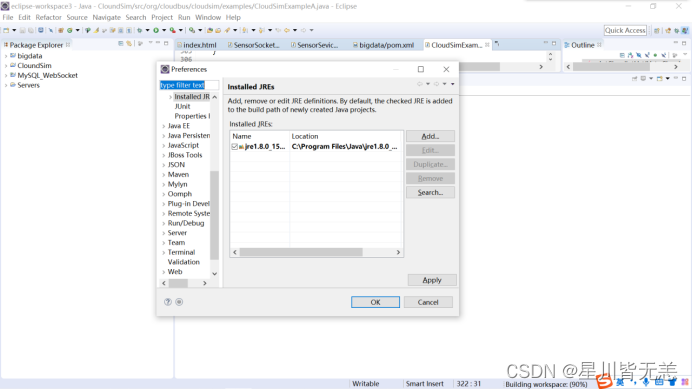
在“Preferences”窗口中点击“Java”左侧箭头,再点击其下方弹出的“Installed JREs”的左侧箭头(下面这幅图可能不一样,因为我当前这一步已经设置过,故“Installed JRE”中会有内容):
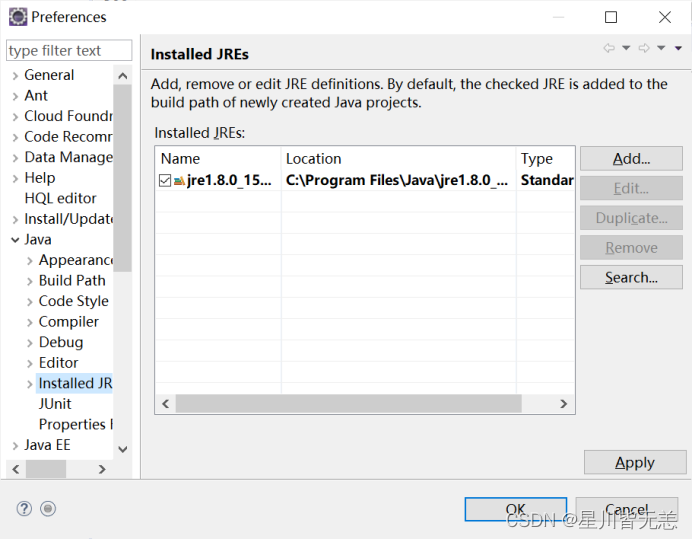
点击右侧窗口中的“Add”按钮,打开“Add JRE”窗口。
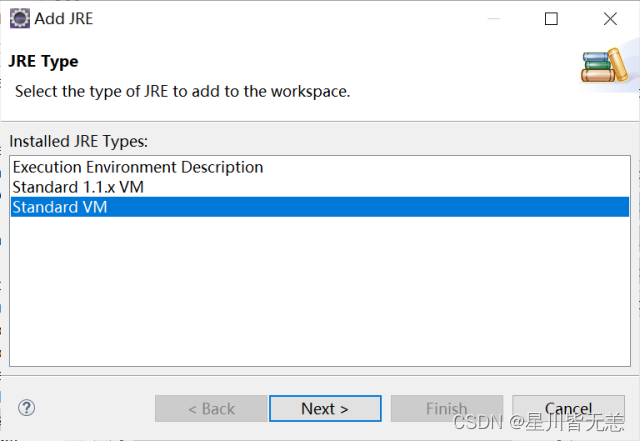
选择“Standard VM”项,点击下方“Next”按钮,在接下来的对话框中点击“Directory”按钮:
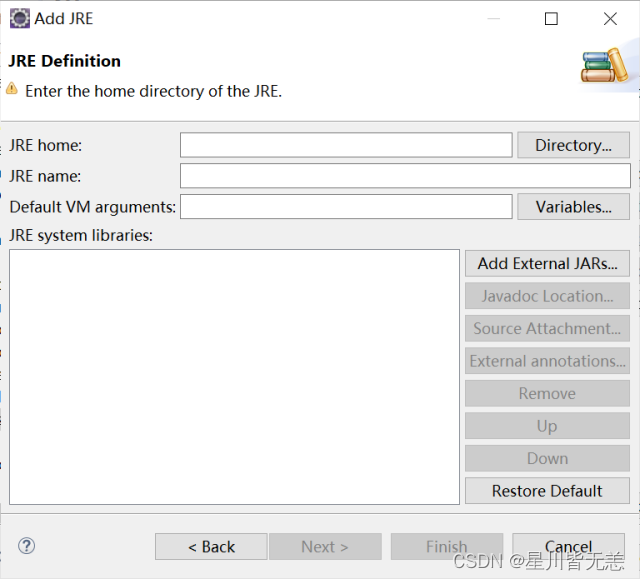
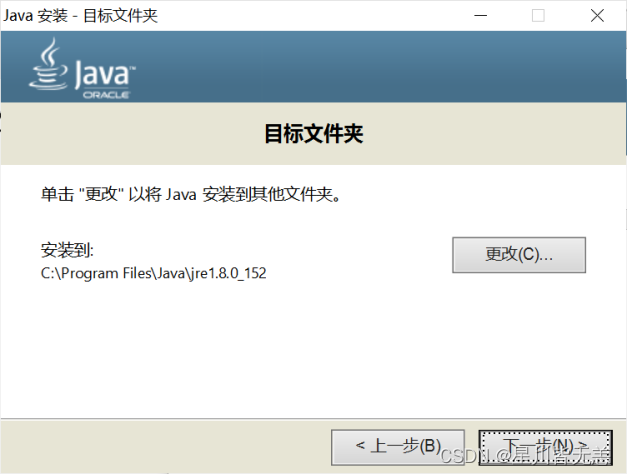
在弹出的“浏览文件夹”对话框中选择Java运行时环境所在的路径C:\Program Files\Java\jre1.8.0_152(视自己JDK具体安装路径而定):
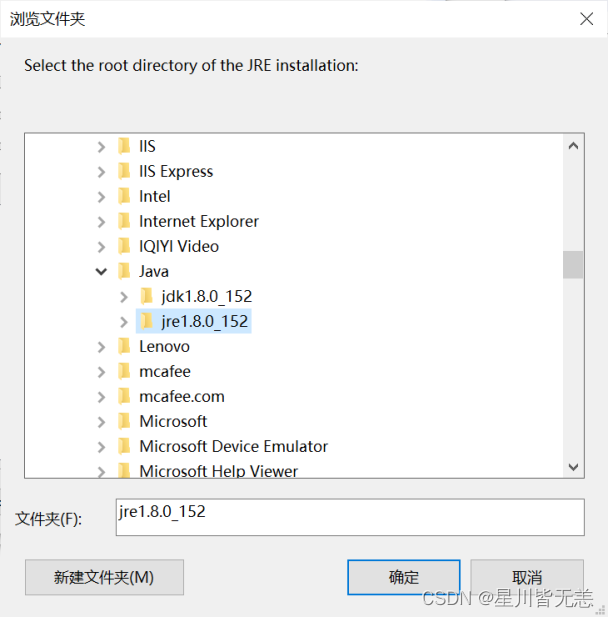
点击“确定”按钮返回。
4创建Java项目
4.1创建项目
在Eclipse集成开发窗口中,单击“File”“New”“Java Project”,新建Java项目,命名为“CloudSim”:
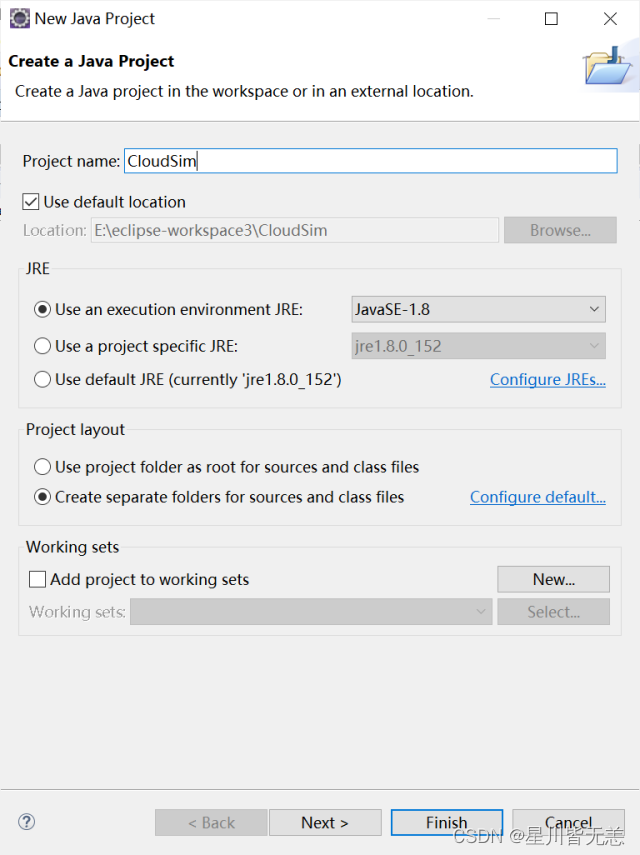
一直点击“Next”或“Finish”按钮即可。
4.2导入jar包
4.2.1导入CloudSim开发包
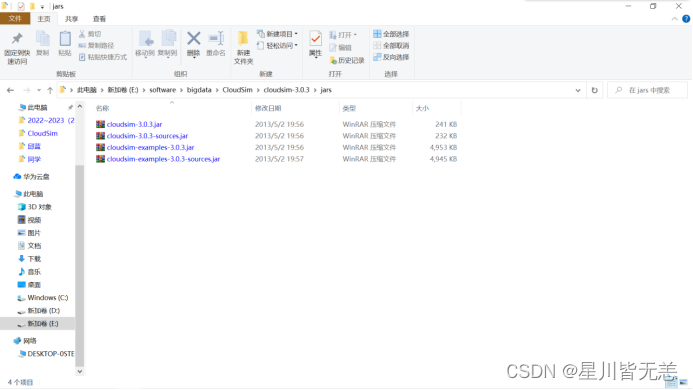
4.2.1.1.1解压CloudSim开发包
需要使用的CloudSim API在cloudsim-3.0.3.jar包中,该jar包可通过解压cloudsim-3.0.3.zip得到,位于解压后的…\cloudsim-3.0.3\jars文件夹下。
4.2.1.1.2导入CloudSim开发包
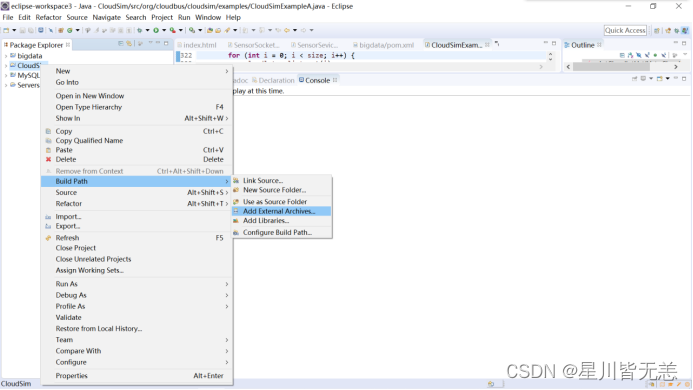
在Eclipse中,在左侧树状结构中,右键单击“CloudSim”项目,选择“Build Path”“Add External Archive”,导入cloudsim-3.0.3.jar。
4.2.2导入math库
4.2.2.1.1解压math库
因本项目中用到了math里面的类,需要引入commons-math3-3.2.jar这个库。此库通过解压commons-math3-3.2-bin.zip文件可以得到。
4.2.2.1.2导入math库
在Eclipse中,右键单击“CloudSim”项目,选择“Build Path”“Add External Archive”,导入commons-math3-3.2.jar。
4.3运行测试程序
4.3.1导入测试程序代码
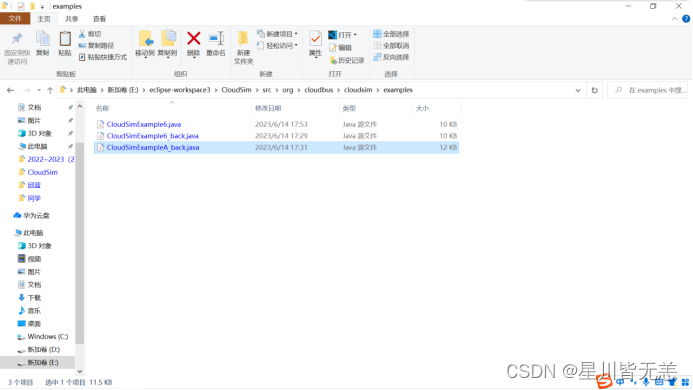
CloudSim提供的实例程序放在CloudSim\cloudsim-3.0.3\examples\org\cloudbus\cloudsim\examples目录下。
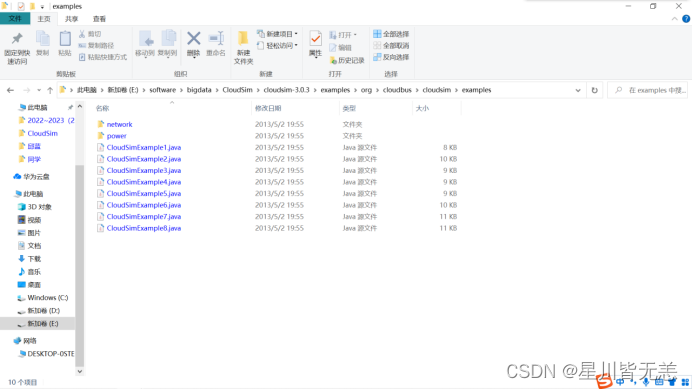
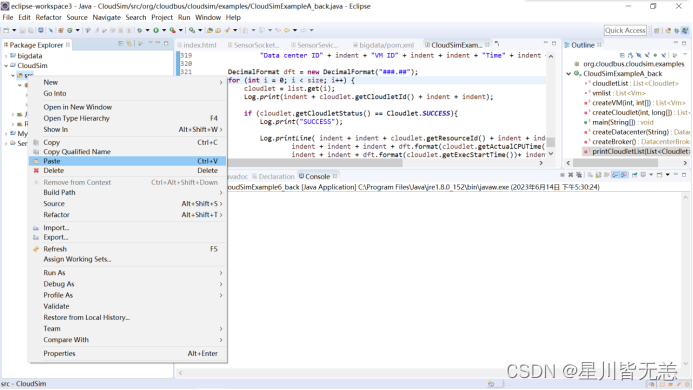
在以上examples文件夹中复制CloudSimExample6.java文件,在Eclipse中的“Package Explorer”树形结构中,展开“CloudSim” “src”,右键点击“src”文件夹,在弹出的上下文菜单中选择“Paste”菜单,将CloudSimExample6.java复制到工程中。
4.3.2修改错误
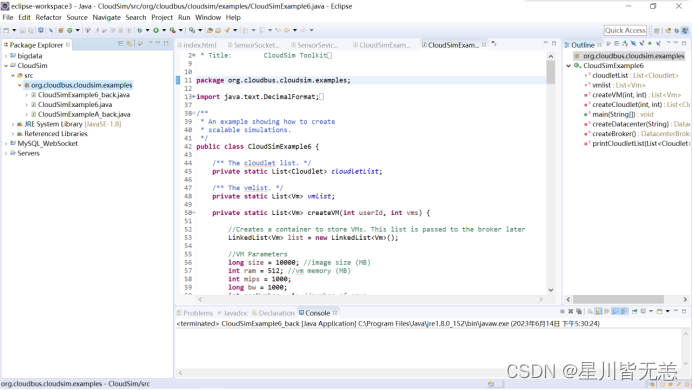
复制后CloudSimExample6.java文件显示效果及位置如下:
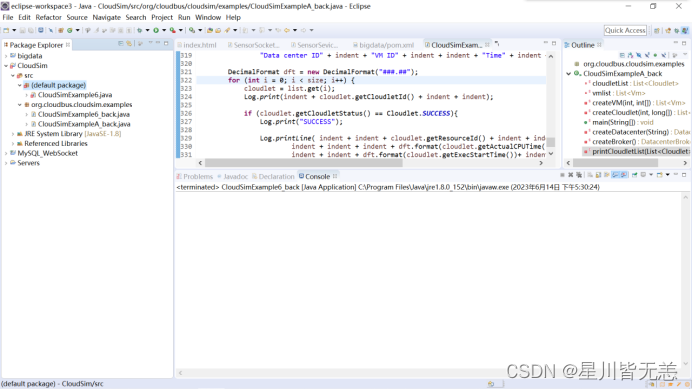
可以看出其位于“default package”默认包中。但注意上图中CloudSimExample6.java文件前面的图标左下角有个红色的“×”符号,意思是CloudSimExample6.java代码中有错误。接下来排除错误。
在Eclipse中双击CloudSimExample6.java文件,在右侧编辑窗口中打开它。
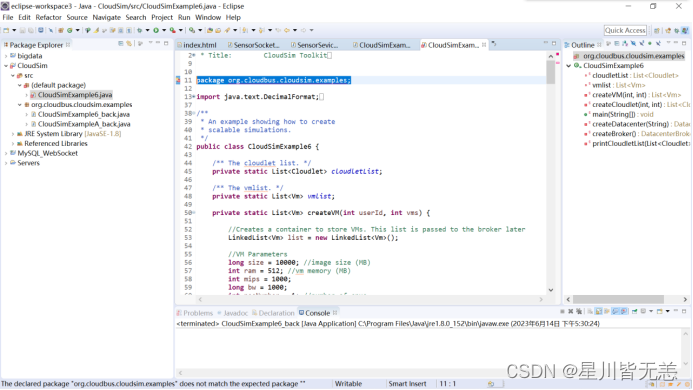
可以看到这条语句package org.cloudbus.cloudsim.examples;中有红色波浪下划线,表明有语法问题。鼠标放到该语句上,显示:
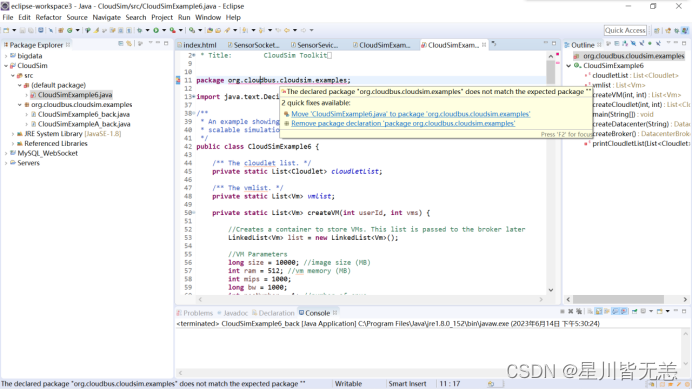
点击2行蓝色文字中的第一行,“Move ‘CloudSimExample6.java to package org.cloudbus.cloudsim.examples’”,表示将CloudSimExample6.java文件放到Eclipse窗口左面的树形结构的org.cloudbus.cloudsim.examples包中。这样代码中原先带红色波浪线的语句就与实际的包(代码的存放位置)相符,其错误得到了修改。修改之后的效果如下:
包的存放文件夹与包的对应关系(此图仅为帮助理解):
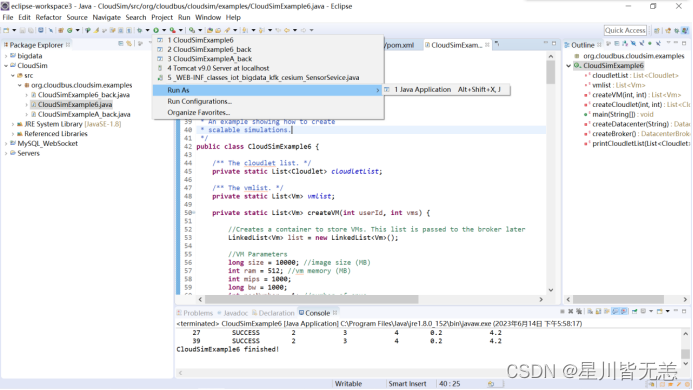
4.3.3运行
保证右侧编辑区当前活动(当前正在编辑状态)的窗口为CloudSimExample6.java。
点击工具栏上的绿色三角形按钮Run AsJava Application Alt+Shift+X,J,运行程序,如图:
5数据中心仿真实例
5.1导入实例代码
1.将我随本Word文档打包的CloudSimExampleA.java代码导入项目,具体步骤同4.3.1,不同的是由原来导入CloudSimExample6.java文件,改为现在导入CloudSimExampleA.java文件。
2.遵照4.3.2步骤将CloudSimExampleA放到org.cloudbus.cloudsim.examples包中,如下图。
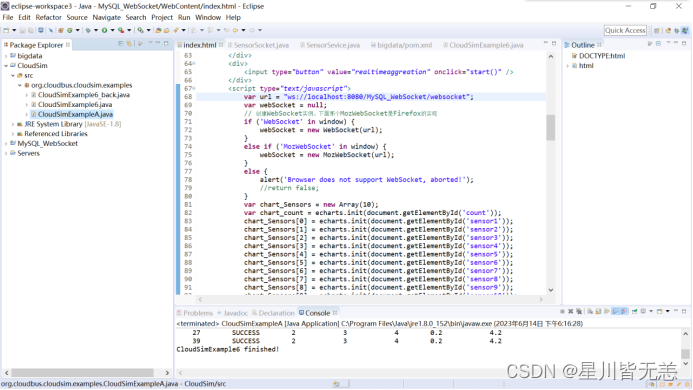
5.2运行
附CloudSimExampleA.java代码:
/*
 * Title:        CloudSim Toolkit
 * Description:  CloudSim (Cloud Simulation) Toolkit for Modeling and Simulation
 *               of Clouds
 * Licence:      GPL - http://www.gnu.org/copyleft/gpl.html
 *
 * Copyright (c) 2009, The University of Melbourne, Australia
 */


package org.cloudbus.cloudsim.examples;//qiuzhuli, 2023-06-11

import java.text.DecimalFormat;
import java.util.ArrayList;
import java.util.Calendar;
import java.util.LinkedList;
import java.util.List;

import org.cloudbus.cloudsim.Cloudlet;
import org.cloudbus.cloudsim.CloudletSchedulerTimeShared;
import org.cloudbus.cloudsim.Datacenter;
import org.cloudbus.cloudsim.DatacenterBroker;
import org.cloudbus.cloudsim.DatacenterCharacteristics;
import org.cloudbus.cloudsim.Host;
import org.cloudbus.cloudsim.Log;
import org.cloudbus.cloudsim.Pe;
import org.cloudbus.cloudsim.Storage;
import org.cloudbus.cloudsim.UtilizationModel;
import org.cloudbus.cloudsim.UtilizationModelFull;
import org.cloudbus.cloudsim.Vm;
import org.cloudbus.cloudsim.VmAllocationPolicySimple;
import org.cloudbus.cloudsim.VmSchedulerTimeShared;
import org.cloudbus.cloudsim.core.CloudSim;
import org.cloudbus.cloudsim.provisioners.BwProvisionerSimple;
import org.cloudbus.cloudsim.provisioners.PeProvisionerSimple;
import org.cloudbus.cloudsim.provisioners.RamProvisionerSimple;

/**
 * An example showing how to create
 * scalable simulations.
 */
//public class CloudSimExample6 {//qiuzhuli, 2023-06-11
public class CloudSimExampleA {//qiuzhuli, 2023-06-11

	/** The cloudlet list. */
	private static List<Cloudlet> cloudletList;

	/** The vmlist. */
	private static List<Vm> vmlist;

	//private static List<Vm> createVM(int userId, int vms) {//qiuzhuli, 2023-06-11
	private static List<Vm> createVM(int userId, int mips[]) {//qiuzhuli, 2023-06-11

		//Creates a container to store VMs. This list is passed to the broker later
		LinkedList<Vm> list = new LinkedList<Vm>();

		//VM Parameters
		long size = 10000; //image size (MB)
		int ram = 512; //vm memory (MB)
		//int mips = 1000;//qiuzhuli, 2023-06-11
		long bw = 1000;
		int pesNumber = 1; //number of cpus
		String vmm = "Xen"; //VMM name

		//create VMs
		//Vm[] vm = new Vm[vms];//qiuzhuli, 2023-06-11
		Vm[] vm = new Vm[mips.length];//qiuzhuli, 2023-06-11

		for(int i=0;i<mips.length;i++){
			//vm[i] = new Vm(i, userId, mips, pesNumber, ram, bw, size, vmm,//qiuzhuli, 2023-06-11
			//new CloudletSchedulerTimeShared());//qiuzhuli, 2023-06-11
			vm[i] = new Vm(i, userId, mips[i], pesNumber, ram, bw, size, vmm,
					new CloudletSchedulerTimeShared());//qiuzhuli, 2023-06-11
			//for creating a VM with a space shared scheduling policy for cloudlets:
			//vm[i] = Vm(i, userId, mips, pesNumber, ram, bw, size, priority, vmm, new CloudletSchedulerSpaceShared());

			list.add(vm[i]);
		}

		return list;
	}


	//private static List<Cloudlet> createCloudlet(int userId, int cloudlets){//qiuzhuli, 2023-06-11
	private static List<Cloudlet> createCloudlet(int userId, long cloudlets[]){//qiuzhuli, 2023-06-11
		// Creates a container to store Cloudlets
		LinkedList<Cloudlet> list = new LinkedList<Cloudlet>();

		//cloudlet parameters
		//long length = 1000;//qiuzhuli, 2023-06-11
		long fileSize = 300;
		long outputSize = 300;
		int pesNumber = 1;
		UtilizationModel utilizationModel = new UtilizationModelFull();

		//Cloudlet[] cloudlet = new Cloudlet[cloudlets];//qiuzhuli, 2023-06-11
		Cloudlet[] cloudlet = new Cloudlet[cloudlets.length];//qiuzhuli, 2023-06-11

		//for(int i=0;i<cloudlets;i++){//qiuzhuli, 2023-06-11
		for(int i=0;i<cloudlets.length;i++){
			/*cloudlet[i] = new Cloudlet(i, length, pesNumber, fileSize, outputSize,
					utilizationModel, utilizationModel, utilizationModel);*///qiuzhuli, 2023-06-11
			cloudlet[i] = new Cloudlet(i, cloudlets[i], pesNumber, fileSize,
					outputSize, utilizationModel, utilizationModel, utilizationModel);//qiuzhuli, 2023-06-11
			// setting the owner of these Cloudlets
			cloudlet[i].setUserId(userId);
			list.add(cloudlet[i]);
		}

		return list;
	}


	// STATIC METHODS ///

	/**
	 * Creates main() to run this example
	 */
	public static void main(String[] args) {
		//Log.printLine("Starting CloudSimExample6...");//qiuzhuli, 2023-06-11
		Log.printLine("Starting CloudSimExampleA...");//qiuzhuli, 2023-06-11

		try {
			// First step: Initialize the CloudSim package. It should be called
			// before creating any entities.
			int num_user = 1;   // number of grid users
			Calendar calendar = Calendar.getInstance();
			boolean trace_flag = false;  // mean trace events

			// Initialize the CloudSim library
			CloudSim.init(num_user, calendar, trace_flag);

			// Second step: Create Datacenters
			//Datacenters are the resource providers in CloudSim. We need at list one of them to run a CloudSim simulation
			@SuppressWarnings("unused")
			Datacenter datacenter0 = createDatacenter("Datacenter_0");
			@SuppressWarnings("unused")
			Datacenter datacenter1 = createDatacenter("Datacenter_1");

			//Third step: Create Broker
			DatacenterBroker broker = createBroker();
			int brokerId = broker.getId();

			//Fourth step: Create VMs and Cloudlets and send them to broker
			/*vmlist = createVM(brokerId,20); //creating 20 vms
			cloudletList = createCloudlet(brokerId,40); // creating 40 cloudlets*/

			int mips[] = {278,289,132,209,286,333,212,423};//虚拟机的CPU性能(mips)//qiuzhuli, 2023-06-11
			/*所需的指令数*/
			long cloudlets[] = new long[] {19365, 49809, 30218, 44157, 16754, 18336,
					20045, 31493, 30727, 31017, 59008, 32000, 46790, 77779, 93467,
					67853};//qiuzhuli, 2023-06-11
			//vmlist = createVM(brokerId,20); //creating 20 vms//qiuzhuli, 2023-06-11
			vmlist = createVM(brokerId, mips); //creating 20 vms//qiuzhuli, 2023-06-11
			//cloudletList = createCloudlet(brokerId,40); // creating 40 cloudlets//qiuzhuli, 2023-06-11
			cloudletList = createCloudlet(brokerId, cloudlets); // creating 40 cloudlets//qiuzhuli, 2023-06-11

			broker.submitVmList(vmlist);
			broker.submitCloudletList(cloudletList);

			// Fifth step: Starts the simulation
			CloudSim.startSimulation();

			// Final step: Print results when simulation is over
			List<Cloudlet> newList = broker.getCloudletReceivedList();

			CloudSim.stopSimulation();

			printCloudletList(newList);

			//Log.printLine("CloudSimExample6 finished!");//qiuzhuli, 2023-06-11
			Log.printLine("CloudSimExampleA finished!");//qiuzhuli, 2023-06-11
		}
		catch (Exception e)
		{
			e.printStackTrace();
			Log.printLine("The simulation has been terminated due to an unexpected error");
		}
	}

	private static Datacenter createDatacenter(String name){

		// Here are the steps needed to create a PowerDatacenter:
		// 1. We need to create a list to store one or more
		//    Machines
		List<Host> hostList = new ArrayList<Host>();

		// 2. A Machine contains one or more PEs or CPUs/Cores. Therefore, should
		//    create a list to store these PEs before creating
		//    a Machine.
		List<Pe> peList1 = new ArrayList<Pe>();

		int mips = 1000;

		// 3. Create PEs and add these into the list.
		//for a quad-core machine, a list of 4 PEs is required:
		peList1.add(new Pe(0, new PeProvisionerSimple(mips))); // need to store Pe id and MIPS Rating
		peList1.add(new Pe(1, new PeProvisionerSimple(mips)));
		peList1.add(new Pe(2, new PeProvisionerSimple(mips)));
		peList1.add(new Pe(3, new PeProvisionerSimple(mips)));

		//Another list, for a dual-core machine
		List<Pe> peList2 = new ArrayList<Pe>();

		peList2.add(new Pe(0, new PeProvisionerSimple(mips)));
		peList2.add(new Pe(1, new PeProvisionerSimple(mips)));

		//4. Create Hosts with its id and list of PEs and add them to the list of machines
		int hostId=0;
		int ram = 2048; //host memory (MB)
		long storage = 1000000; //host storage
		int bw = 10000;

		hostList.add(
    			new Host(
    				hostId,
    				new RamProvisionerSimple(ram),
    				new BwProvisionerSimple(bw),
    				storage,
    				peList1,
    				new VmSchedulerTimeShared(peList1)
    			)
    		); // This is our first machine

		hostId++;

		hostList.add(
    			new Host(
    				hostId,
    				new RamProvisionerSimple(ram),
    				new BwProvisionerSimple(bw),
    				storage,
    				peList2,
    				new VmSchedulerTimeShared(peList2)
    			)
    		); // Second machine


		//To create a host with a space-shared allocation policy for PEs to VMs:
		//hostList.add(
    	//		new Host(
    	//			hostId,
    	//			new CpuProvisionerSimple(peList1),
    	//			new RamProvisionerSimple(ram),
    	//			new BwProvisionerSimple(bw),
    	//			storage,
    	//			new VmSchedulerSpaceShared(peList1)
    	//		)
    	//	);

		//To create a host with a oportunistic space-shared allocation policy for PEs to VMs:
		//hostList.add(
    	//		new Host(
    	//			hostId,
    	//			new CpuProvisionerSimple(peList1),
    	//			new RamProvisionerSimple(ram),
    	//			new BwProvisionerSimple(bw),
    	//			storage,
    	//			new VmSchedulerOportunisticSpaceShared(peList1)
    	//		)
    	//	);


		// 5. Create a DatacenterCharacteristics object that stores the
		//    properties of a data center: architecture, OS, list of
		//    Machines, allocation policy: time- or space-shared, time zone
		//    and its price (G$/Pe time unit).
		String arch = "x86";      // system architecture
		String os = "Linux";          // operating system
		String vmm = "Xen";
		double time_zone = 10.0;         // time zone this resource located
		double cost = 3.0;              // the cost of using processing in this resource
		double costPerMem = 0.05;		// the cost of using memory in this resource
		double costPerStorage = 0.1;	// the cost of using storage in this resource
		double costPerBw = 0.1;			// the cost of using bw in this resource
		LinkedList<Storage> storageList = new LinkedList<Storage>();	//we are not adding SAN devices by now

		DatacenterCharacteristics characteristics = new DatacenterCharacteristics(
                arch, os, vmm, hostList, time_zone, cost, costPerMem, costPerStorage, costPerBw);


		// 6. Finally, we need to create a PowerDatacenter object.
		Datacenter datacenter = null;
		try {
			datacenter = new Datacenter(name, characteristics, new VmAllocationPolicySimple(hostList), storageList, 0);
		} catch (Exception e) {
			e.printStackTrace();
		}

		return datacenter;
	}

	//We strongly encourage users to develop their own broker policies, to submit vms and cloudlets according
	//to the specific rules of the simulated scenario
	private static DatacenterBroker createBroker(){

		DatacenterBroker broker = null;
		try {
			broker = new DatacenterBroker("Broker");
		} catch (Exception e) {
			e.printStackTrace();
			return null;
		}
		return broker;
	}

	/**
	 * Prints the Cloudlet objects
	 * @param list  list of Cloudlets
	 */
	private static void printCloudletList(List<Cloudlet> list) {
		int size = list.size();
		Cloudlet cloudlet;

		String indent = "    ";
		Log.printLine();
		Log.printLine("========== OUTPUT ==========");
		Log.printLine("Cloudlet ID" + indent + "STATUS" + indent +
				"Data center ID" + indent + "VM ID" + indent + indent + "Time" + indent + "Start Time" + indent + "Finish Time");

		DecimalFormat dft = new DecimalFormat("###.##");
		for (int i = 0; i < size; i++) {
			cloudlet = list.get(i);
			Log.print(indent + cloudlet.getCloudletId() + indent + indent);

			if (cloudlet.getCloudletStatus() == Cloudlet.SUCCESS){
				Log.print("SUCCESS");

				Log.printLine( indent + indent + cloudlet.getResourceId() + indent + indent + indent + cloudlet.getVmId() +
						indent + indent + indent + dft.format(cloudlet.getActualCPUTime()) +
						indent + indent + dft.format(cloudlet.getExecStartTime())+ indent + indent + indent + dft.format(cloudlet.getFinishTime()));
			}
		}

	}
}