文章目录
- 新建仓库
- 执行命令
新建仓库
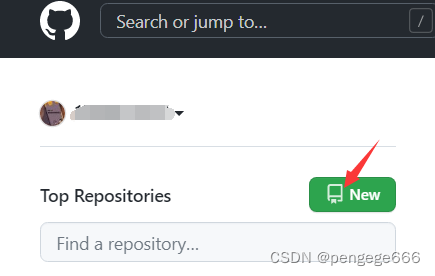
首先先创建一个仓库(在主页面中点击New即可创建)
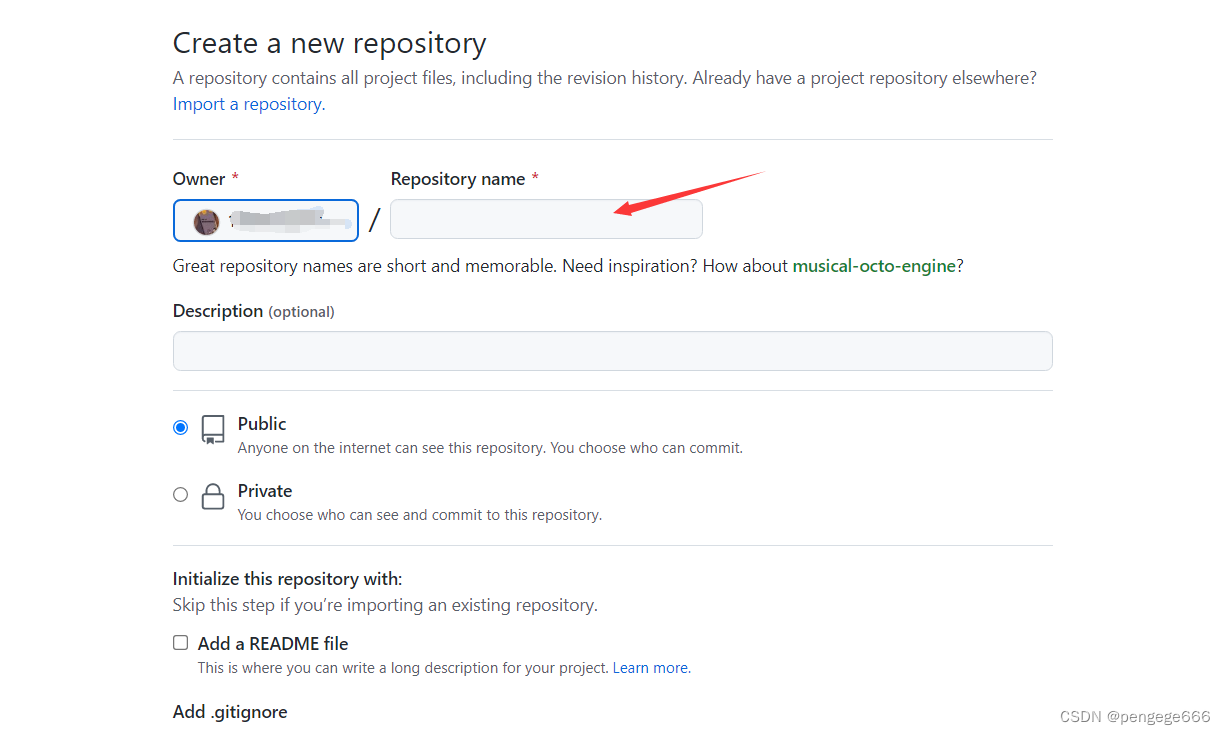
填写仓库名称(剩下的可以不用点击选择)
创建完成之后,github上就会出现提交的提示代码。我们选择第一个进行代码的提交。
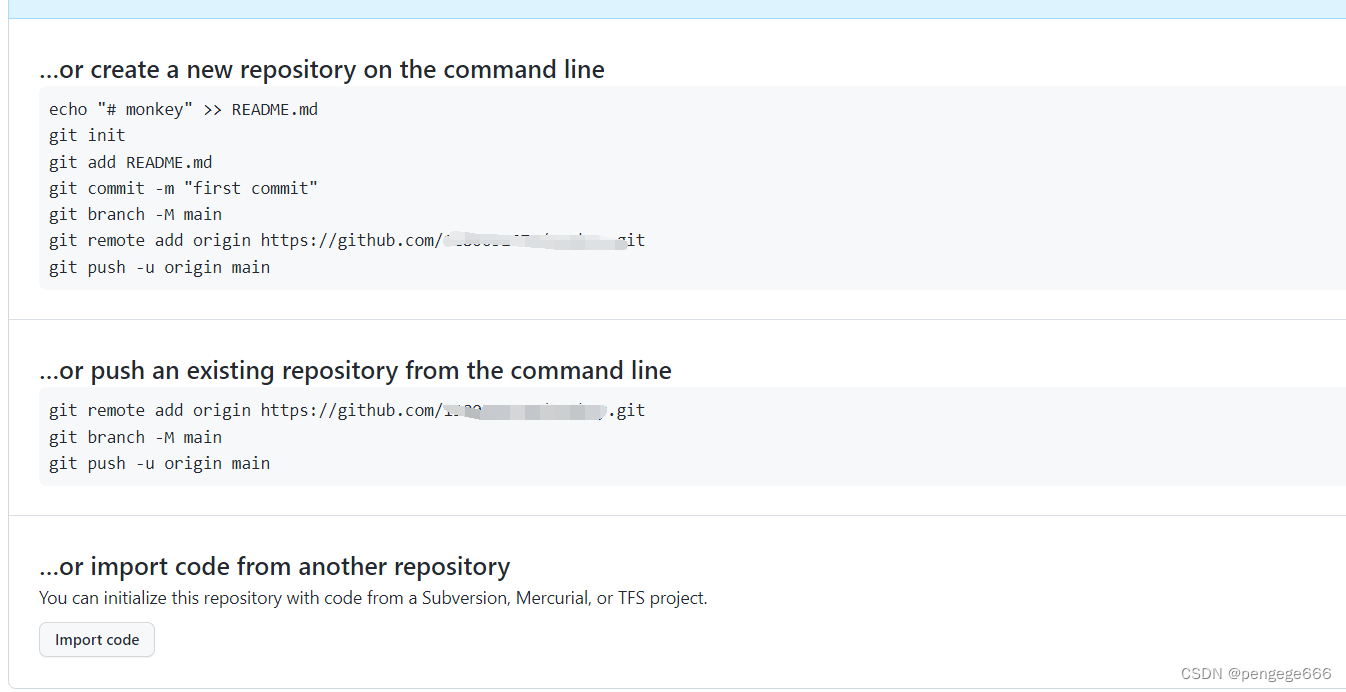
执行命令
…or create a new repository on the command line
echo "# monkey" >> README.md
git init
git add README.md
git commit -m "first commit"
git branch -M main
git remote add origin https://github.com/X/monkey.git
git push -u origin main
接下来,我们就根据github上的提示进行操作。
首先,用git-bash进入要上传的代码文件夹下。
git status:git status命令用于显示版本库和暂存区的状态。它允许我们看到被追踪的、未被追踪的文件和变化。这个命令不会显示任何提交记录或信息。
$ git status
fatal: not a git repository (or any of the parent directories): .git
第一步:git init 命令用于在目录中创建新的 Git 仓库。
$ git init
Initialized empty Git repository in E:/Lab/cs143/monkey/.git/
git add 命令可将该文件添加到暂存区。
第二步:git add . 添加当前目录下的所有文件到暂存区.
$ git add .
warning: LF will be replaced by CRLF in ast/ast.go.
The file will have its original line endings in your working directory
...
The file will have its original line endings in your working directory
第三步:git commit提交到本地仓库。由于是第一次提交,因此后面注释写成"first commit"。
$ git commit -m "first commit"
[master (root-commit) 5453ceb] first commit
 21 files changed, 4077 insertions(+)
 create mode 100644 .idea/.gitignore
第四步:git branch -M main:github把master默认分支改为了main
$ git branch -M main
第五步:git remote add origin如果本地已经初始化仓库,关联远端git仓库:
$ git remote add origin https://github.com/X/monkey.git
第六步:git push -u origin main本地的main分支送到origin主机,同时指定origin为默认主机。
$ git push -u origin main
Enumerating objects: 31, done.
Counting objects: 100% (31/31), done.
Delta compression using up to 8 threads
Compressing objects: 100% (28/28), done.
Writing objects: 100% (31/31), 21.14 KiB | 3.02 MiB/s, done.
Total 31 (delta 0), reused 0 (delta 0), pack-reused 0
To https://github.com/X/monkey.git
 * [new branch]      main -> main
Branch 'main' set up to track remote branch 'main' from 'origin'.
这样就可以将本地代码提交到仓库中啦
【BUG】在最后一步可能会出现以下问题
- fatal: unable to access ‘https://github.com/X/monkey.git/’: OpenSSL SSL_read: Connection was reset, errno 10054
- fatal: unable to access ‘https://github.com/X/monkey.git/’: Failed to connect to github.com port 443: Timed out
笔者是通过换网解决这个问题的。






![[ Linux Audio 篇 ] Type-C 转 3.5mm音频接口介绍](https://img-blog.csdnimg.cn/480365a2c1cc47639ea99fe178bb83f4.jpeg#pic_center)

