Java后端开发——SpringMVC商品管理程序
今日目标
- Spring MVC框架介绍
- 掌握SpringMVC的核心类的原理及配置
- 掌握SpringMVC的常用注解
- 掌握SpringMVC的增删改查编程
Spring MVC框架介绍
Spring MVC(Model-View-Controller)是一个基于Java的开源框架,用于构建Web应用程序。它提供了一种模型-视图-控制器架构模式,通过这种模式,开发人员可以将应用程序分成三个部分:
1.模型(Model):表示应用程序的业务逻辑和数据。通常包括数据库交互、数据处理以及其他与数据相关的操作。在Spring MVC中,模型可以是一个POJO(Plain Old Java Object)或者一个使用Spring框架的类。
2.视图(View):负责渲染模型数据并展示给用户。它可以是JSP(JavaServer Pages)、Thymeleaf模板、FreeMarker模板或其他类型的UI模板。
3.控制器(Controller):充当应用程序的中心枢纽,处理用户请求并相应地更新模型和视图。它接收来自用户的请求,调用相应的业务逻辑来处理这些请求,并最终选择合适的视图展示给用户。
Spring MVC的工作流程通常如下:
4.用户发送HTTP请求至Spring的DispatcherServlet。
5.DispatcherServlet根据请求中的URL找到对应的Handler(控制器)。
6.Handler处理请求,调用业务逻辑并返回一个ModelAndView对象。
7.DispatcherServlet根据ModelAndView选择相应的视图。
8.最终,视图渲染模型数据,将结果返回给用户。
通过将应用程序分离成模型、视图和控制器,Spring MVC提供了松耦合、模块化和可维护的Web应用程序开发方式。它也提供了丰富的功能,如表单处理、数据验证、拦截器等,使得开发者能够更高效地构建健壮的Web应用。
一、Spring MVC入门程序
1.Eclipse创建web项目,勾选创建web.xml配置文件
<?xml version="1.0" encoding="UTF-8"?>
<web-app xmlns:xsi="http://www.w3.org/2001/XMLSchema-instance" xmlns="http://xmlns.jcp.org/xml/ns/javaee" xsi:schemaLocation="http://xmlns.jcp.org/xml/ns/javaee http://xmlns.jcp.org/xml/ns/javaee/web-app_4_0.xsd" id="WebApp_ID" version="4.0">
  <display-name>myspringmvc</display-name>
  <welcome-file-list>
    <welcome-file>index.html</welcome-file>
    <welcome-file>index.jsp</welcome-file>
    <welcome-file>index.htm</welcome-file>
    <welcome-file>default.html</welcome-file>
    <welcome-file>default.jsp</welcome-file>
    <welcome-file>default.htm</welcome-file>
  </welcome-file-list>
<filter>
   <filter-name>encoding</filter-name>
   <filter-class>org.springframework.web.filter.CharacterEncodingFilter</filter-class>
   <init-param>
       <param-name>encoding</param-name>
       <param-value>utf-8</param-value>
   </init-param>
</filter>
<filter-mapping>
   <filter-name>encoding</filter-name>
   <url-pattern>/*</url-pattern>
</filter-mapping>


    <servlet>
        <servlet-name>dispatcher</servlet-name>
        <servlet-class>org.springframework.web.servlet.DispatcherServlet</servlet-class>
        <load-on-startup>1</load-on-startup>
    </servlet>
    <servlet-mapping>
        <servlet-name>dispatcher</servlet-name>
        <url-pattern>/</url-pattern>
    </servlet-mapping>

</web-app>
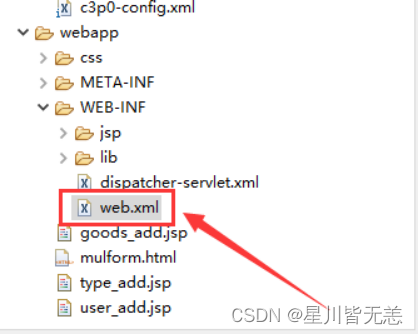
2.添加Spring MVC 依赖引入
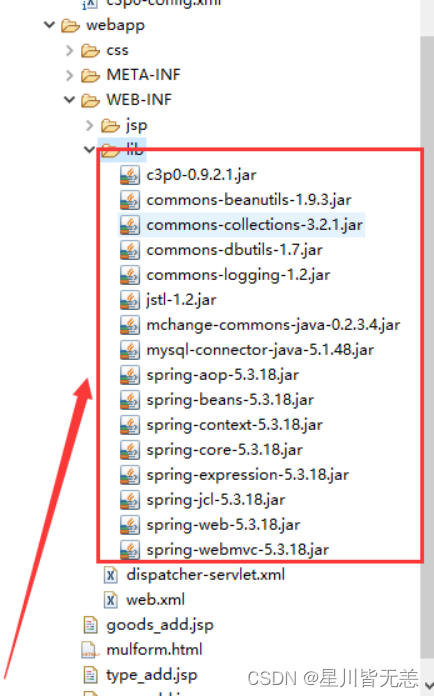
3.web.xml添加DispatcherServlet 声明
<servlet>
<servlet-name>dispatcher</servlet-name>
<servlet-class>org.springframework.web.servlet.DispatcherServlet</servlet-class>
<load-on-startup>1</load-on-startup>
</servlet>
<servlet-mapping>
<servlet-name>dispatcher</servlet-name>
<url-pattern>/</url-pattern>
</servlet-mapping>

4.添加SpringMVC配置文件
添加springmvc配置文件,在WEB-INF目录下,创建配置文件dispatcher-servlet.xml,并在文件中配置控制器信息。
<?xml version="1.0" encoding="UTF-8"?>
<beans xmlns="http://www.springframework.org/schema/beans"
xmlns:xsi="http://www.w3.org/2001/XMLSchema-instance"
xmlns:context="http://www.springframework.org/schema/context"
xmlns:mvc="http://www.springframework.org/schema/mvc"
xsi:schemaLocation="http://www.springframework.org/schema/beans
http://www.springframework.org/schema/beans/spring-beans.xsd
http://www.springframework.org/schema/context
https://www.springframework.org/schema/context/spring-context.xsd
http://www.springframework.org/schema/mvc
https://www.springframework.org/schema/mvc/spring-mvc.xsd">
<context:component-scan base-package="com.javaweb.controller"/> <!-- 声明注解扫描 -->
<mvc:default-servlet-handler/> <!-- 启用默认Servlet处理静态资源 -->
<mvc:annotation-driven/> <!-- 开启 SpringMVC 的注解模式 -->
<bean class="org.springframework.web.servlet.view.InternalResourceViewResolver"> <!-- 视图解析器 -->
<property name="prefix" value="/WEB-INF/jsp/"></property>
<property name="suffix" value=".jsp"></property>
</bean>
</beans>
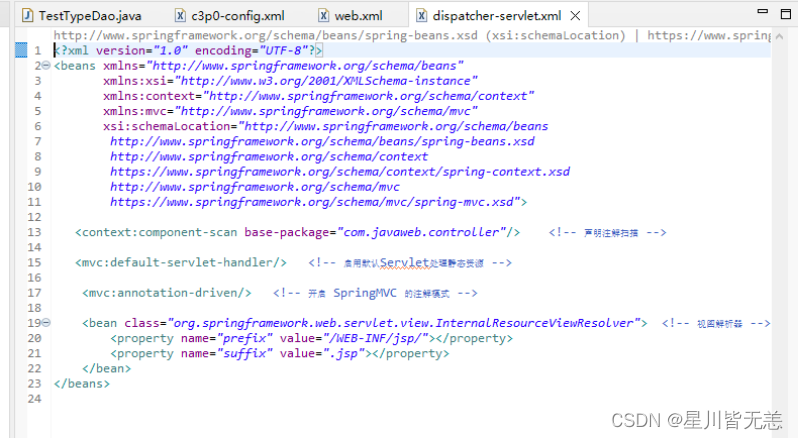
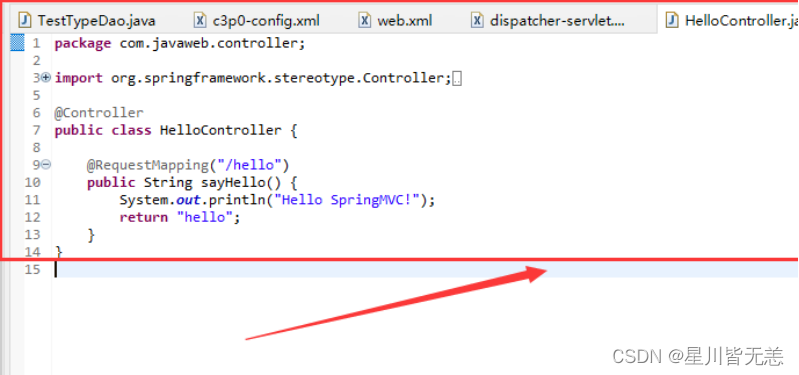
5.创建控制器类HelloController
在包com.javaweb.controller中,创建控制器类HelloController:
package com.javaweb.controller;

import org.springframework.stereotype.Controller;
import org.springframework.web.bind.annotation.RequestMapping;

@Controller
public class HelloController {

	@RequestMapping("/hello")
	public String sayHello() {
		System.out.println("Hello SpringMVC!");
		return "hello";
	}
}
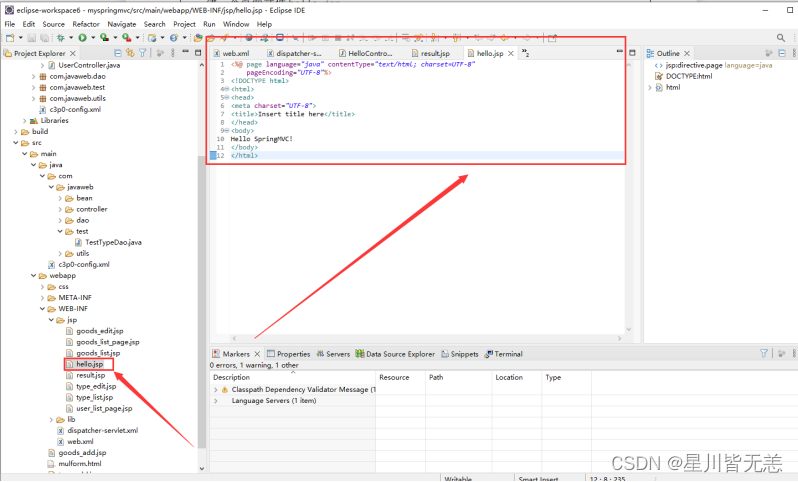
6.添加视图jsp页面
添加视图页面:hello.jsp,在WEB-INF目录下,创建一个jsp文件夹,并在文件夹中创建一个页面文件hello.jsp
<%@ page language="java" contentType="text/html; charset=UTF-8"
pageEncoding="UTF-8"%>
<!DOCTYPE html>
<html>
<head>
<meta charset="UTF-8">
<title>Insert title here</title>
</head>
<body>
Hello SpringMVC!
</body>
</html>
7.测试
启动项目并测试。
http://localhost:8080/myspringmvc/hello
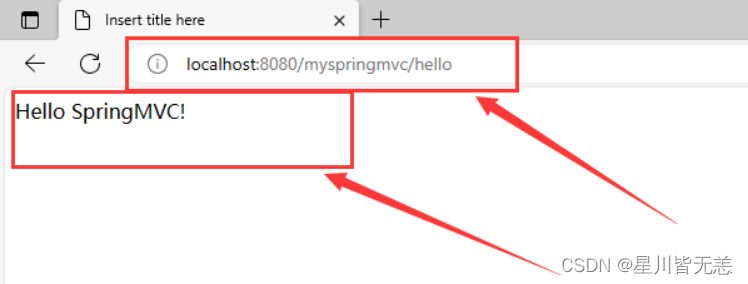
控制台打印的信息

二、Spring MVC九九乘法口诀表
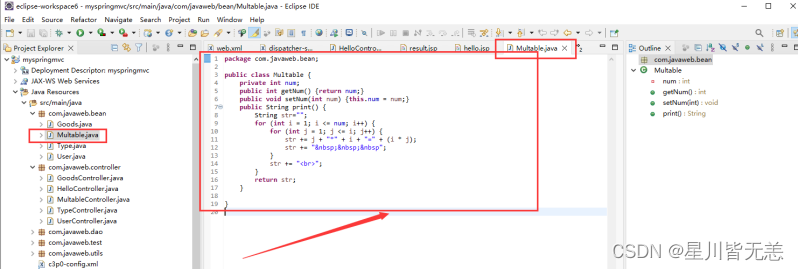
1.在com.javaweb.bean包创建Multable.java
package com.javaweb.bean;
public class Multable {
private int num;
public int getNum() {return num;}
public void setNum(int num) {this.num = num;}
public String print() {
String str="";
for (int i = 1; i <= num; i++) {
for (int j = 1; j <= i; j++) {
str += j + "*" + i + "=" + (i * j);
str += "  ";
}
str += "<br>";
}
return str;
}
}
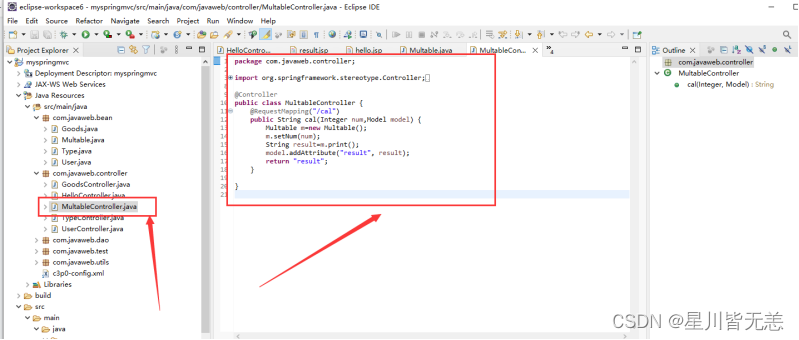
2.在com.javaweb.controller创建MultableController.java,接收参数num,并调用Multable完成口诀表计算,得到结果在model中缓存,转发到result.jsp页面显示
package com.javaweb.controller;

import org.springframework.stereotype.Controller;
import org.springframework.ui.Model;
import org.springframework.web.bind.annotation.RequestMapping;

import com.javaweb.bean.Multable;

@Controller
public class MultableController {
	@RequestMapping("/cal")
	public String cal(Integer num,Model model) {
		Multable m=new Multable();
		m.setNum(num);
		String result=m.print();
		model.addAttribute("result", result);
		return "result";
	}

}
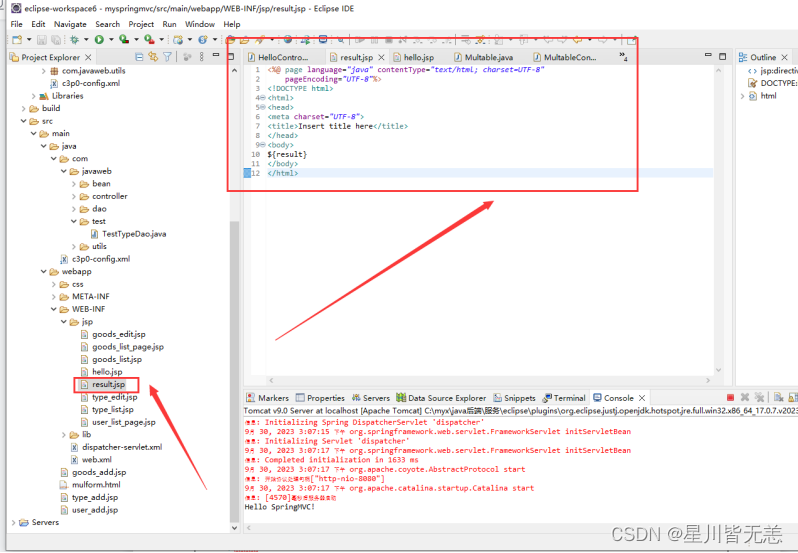
3.在WEB-INF/jsp文件夹中创建result.jsp,显示计算结果。
result.jsp:
<%@ page language="java" contentType="text/html; charset=UTF-8"
pageEncoding="UTF-8"%>
<!DOCTYPE html>
<html>
<head>
<meta charset="UTF-8">
<title>Insert title here</title>
</head>
<body>
${result}
</body>
</html>
4.在webapps下新建一个mulform.html页面,让用户输入阶数提交给服务器计算。
<!DOCTYPE html>
<html>
<head>
<meta charset="UTF-8">
<title>Insert title here</title>
</head>
<body>
<h3>乘法口诀表</h3>
<form action="/myspringmvc/cal">
阶数:<input type="text" name="num"/>
<input type="submit" value="提交"/>
</form>
</body>
</html>
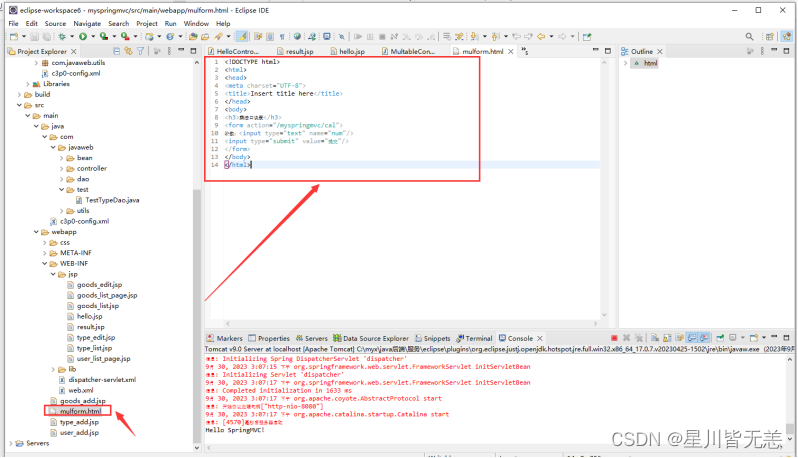
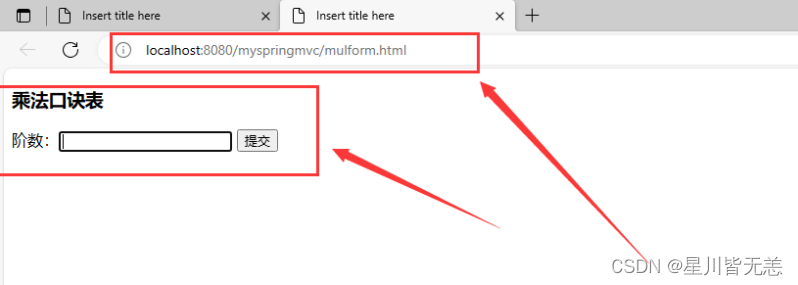
5.启动服务器并预览结果
启动服务器并预览结果。http://localhost:8080/myspringmvc/mulform.html
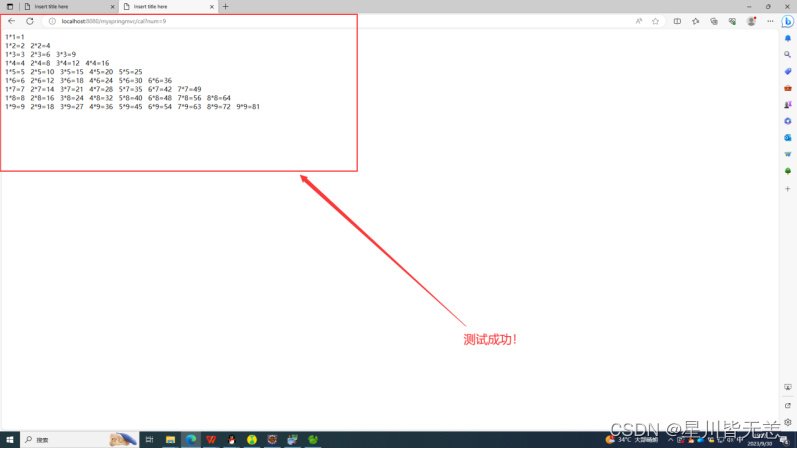
测试一下阶数为9:
三、SpringMVC商品管理程序
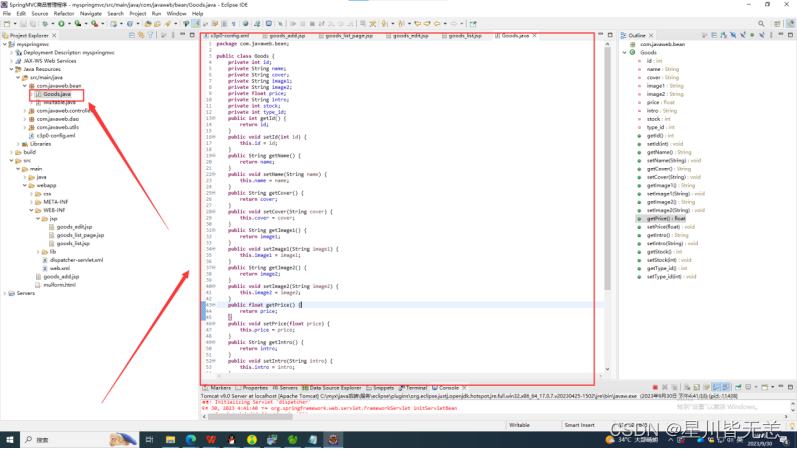
1.在com.javaweb.bean包里创建Goods.java
package com.javaweb.bean;

public class Goods {
private int id;
private String name;
private String cover;
private String image1;
private String image2;
private float price;
private String intro;
private int stock;
private int type_id;
public int getId() {
return id;
}
public void setId(int id) {
this.id = id;
}
public String getName() {
return name;
}
public void setName(String name) {
this.name = name;
}
public String getCover() {
return cover;
}
public void setCover(String cover) {
this.cover = cover;
}
public String getImage1() {
return image1;
}
public void setImage1(String image1) {
this.image1 = image1;
}
public String getImage2() {
return image2;
}
public void setImage2(String image2) {
this.image2 = image2;
}
public float getPrice() {
return price;
}
public void setPrice(float price) {
this.price = price;
}
public String getIntro() {
return intro;
}
public void setIntro(String intro) {
this.intro = intro;
}
public int getStock() {
return stock;
}
public void setStock(int stock) {
this.stock = stock;
}
public int getType_id() {
return type_id;
}
public void setType_id(int type_id) {
this.type_id = type_id;
}

}
2.在com.javaweb.controller包里创建GoodsController.java
package com.javaweb.controller;

import java.sql.SQLException;
import java.util.List;

import org.springframework.stereotype.Controller;
import org.springframework.ui.Model;
import org.springframework.web.bind.annotation.GetMapping;
import org.springframework.web.bind.annotation.PostMapping;
import org.springframework.web.bind.annotation.RequestMapping;
import org.springframework.web.bind.annotation.RequestParam;

import com.javaweb.bean.Goods;
import com.javaweb.dao.goodsDao;
import com.javaweb.utils.Page;

@Controller
@RequestMapping("/goods")
public class GoodsController {
	    goodsDao goodsDao=new goodsDao();
	    @PostMapping("/add")
	    public String add(Goods goods) {
	        System.out.println(goods.getId()+" | "+goods.getName()+" | "+goods.getPrice());
	        try {
	             goodsDao.insert(goods);
	         } catch (SQLException e) {
	              e.printStackTrace();
	         }
	             return "redirect:find";
	     }


	    @GetMapping("/findByPage")
	    public String findByPage(@RequestParam(value = "type", defaultValue = "0") Integer type,
	    @RequestParam(value = "pageNumber", defaultValue = "1") Integer pageNumber,Model model) {
	        if (pageNumber <= 0)
	                 pageNumber = 1;
	                  int pageSize = 5;
	                  List<Goods> glist = null;
	                 int totalCount = 0;
	               try {
	                    glist = goodsDao.findByTypeID(type, pageNumber, pageSize);
	                    totalCount = goodsDao.getCountByTypeID(type);
	                 } catch (SQLException e) {
	                       e.printStackTrace();
	                  }
	                      Page<Goods> p = new Page<Goods>(pageNumber, pageSize, totalCount);
	                       p.setList(glist);
	                        model.addAttribute("p", p);
	                       return "goods_list_page";
	     }


	@GetMapping("/delete")
	public String delete(Integer id) {
		try {
		      goodsDao.delete(id);
		} catch (SQLException e) {
		     e.printStackTrace();
		}
		return "redirect:find";
	}

	@GetMapping("/findById")
	public String findById(Integer id,Model model) {
		Goods g=null;
		try {
		       g=goodsDao.findById(id);
		} catch (SQLException e) {
		       e.printStackTrace();
		}
		model.addAttribute("g", g);
		return "goods_edit";
	}

	@GetMapping("/find")
	public String find(@RequestParam(value = "type",defaultValue = "0") Integer type,Model model) {
	    List<Goods> glist=null;
	    try {
	         glist=goodsDao.findByTypeID(type);
	         model.addAttribute("glist",glist);
	     } catch (SQLException e) {
	          e.printStackTrace();
	     }
	          return "goods_list";
	}

	@PostMapping("/update")
	public String update(Goods goods) {
		try {
		     goodsDao.update(goods);
		} catch (SQLException e) {
		     e.printStackTrace();
		}
		return "redirect:/goods/find";
	}

}
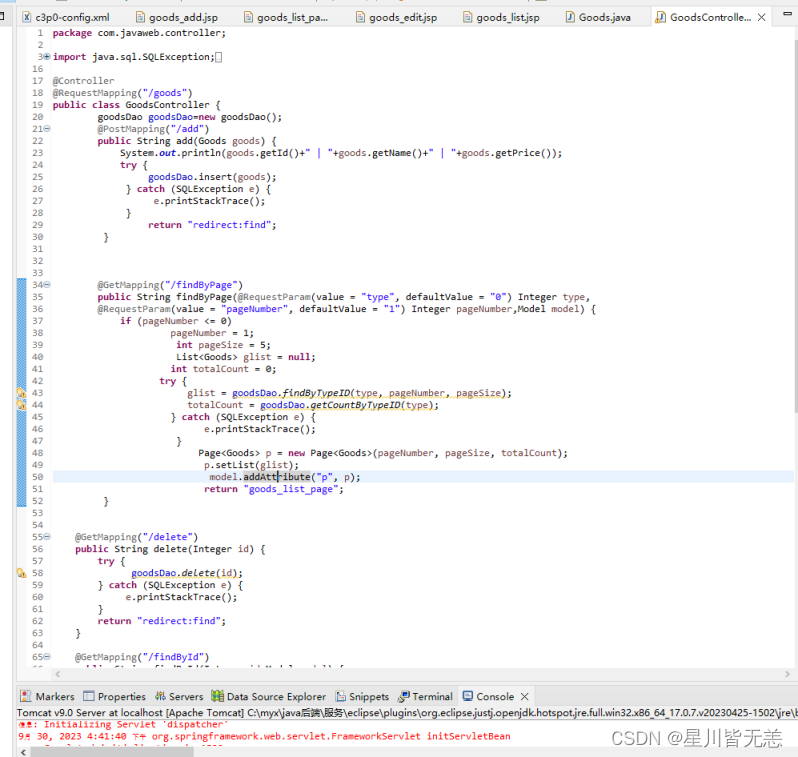
3.完成add()方法,实现参数接收、类型转换和自动封装成Goods对象
@PostMapping("/add")
public String add(Goods goods) {
      System.out.println(goods.getId()+" | "+goods.getName()+" | "+goods.getPrice());
      return "";
}
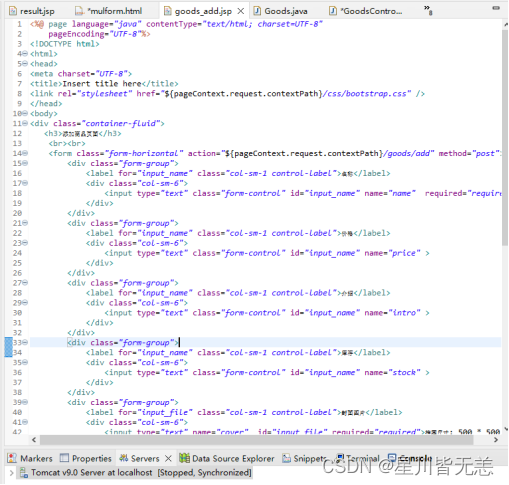
4.添加商品添加页面:goods_add.jsp页面
<%@ page language="java" contentType="text/html; charset=UTF-8"
pageEncoding="UTF-8"%>
<!DOCTYPE html>
<html>
<head>
<meta charset="UTF-8">
<title>Insert title here</title>
<link rel="stylesheet" href="${pageContext.request.contextPath}/css/bootstrap.css" />
</head>
<body>
<div class="container-fluid">
<h3>添加商品页面</h3>
<br><br>
<form class="form-horizontal" action="${pageContext.request.contextPath}/goods/add" method="post">
<div class="form-group">
<label for="input_name" class="col-sm-1 control-label">名称</label>
<div class="col-sm-6">
<input type="text" class="form-control" id="input_name" name="name" required="required">
</div>
</div>
<div class="form-group">
<label for="input_name" class="col-sm-1 control-label">价格</label>
<div class="col-sm-6">
<input type="text" class="form-control" id="input_name" name="price" >
</div>
</div>
<div class="form-group">
<label for="input_name" class="col-sm-1 control-label">介绍</label>
<div class="col-sm-6">
<input type="text" class="form-control" id="input_name" name="intro" >
</div>
</div>
<div class="form-group">
<label for="input_name" class="col-sm-1 control-label">库存</label>
<div class="col-sm-6">
<input type="text" class="form-control" id="input_name" name="stock" >
</div>
</div>
<div class="form-group">
<label for="input_file" class="col-sm-1 control-label">封面图片</label>
<div class="col-sm-6">
<input type="text" name="cover" id="input_file" required="required">推荐尺寸: 500 * 500
</div>
</div>
<div class="form-group">
<label for="input_file" class="col-sm-1 control-label">详情图片1</label>
<div class="col-sm-6">
<input type="text" name="image1" id="input_file" required="required">推荐尺寸: 500 * 500
</div>
</div>
<div class="form-group">
<label for="input_file" class="col-sm-1 control-label">详情图片2</label>
<div class="col-sm-6">
<input type="text" name="image2" id="input_file" required="required">推荐尺寸: 500 * 500
</div>
</div>
<div class="form-group">
<label for="select_topic" class="col-sm-1 control-label">类目</label>
<div class="col-sm-6">
<select class="form-control" id="select_topic" name="type_id">
<option value="1">食品</option>
<option value="2">生活用品</option>
<option value="3">学习用品</option>
</select>
</div>
</div>
<div class="form-group">
<div class="col-sm-offset-1 col-sm-10">
<button type="submit" class="btn btn-success">提交保存</button>
</div>
</div>
</form>
</div>
</body>
</html>
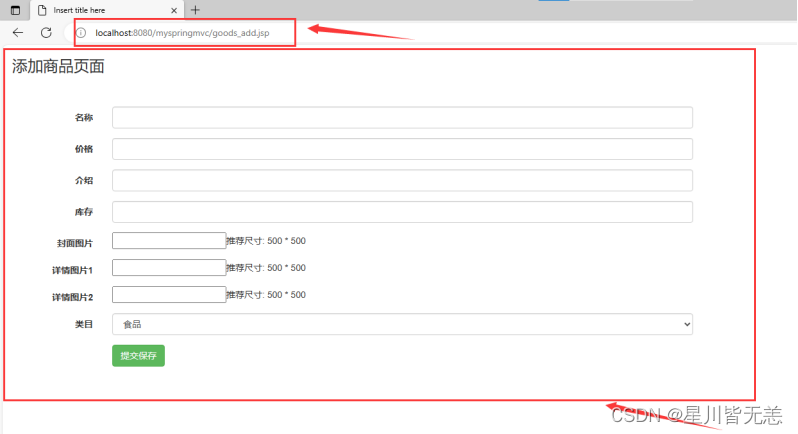
5.测试商品表单数据接收
插入一条数据,数据内容全部为1:
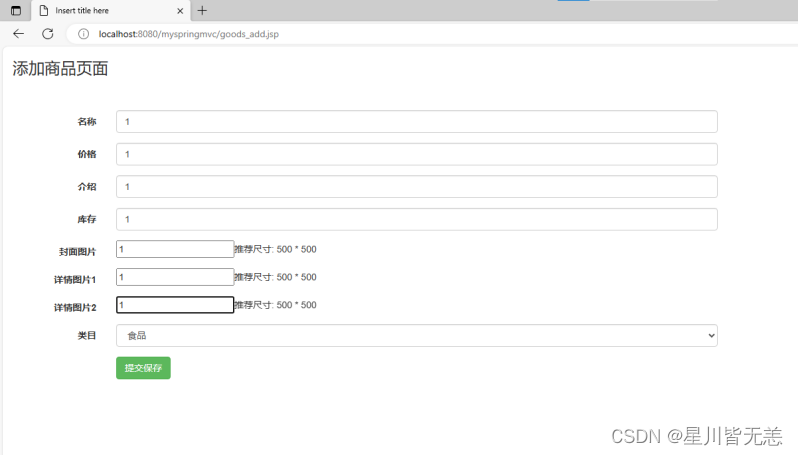
提交保存,控制台打印信息,发现数据添加成功!

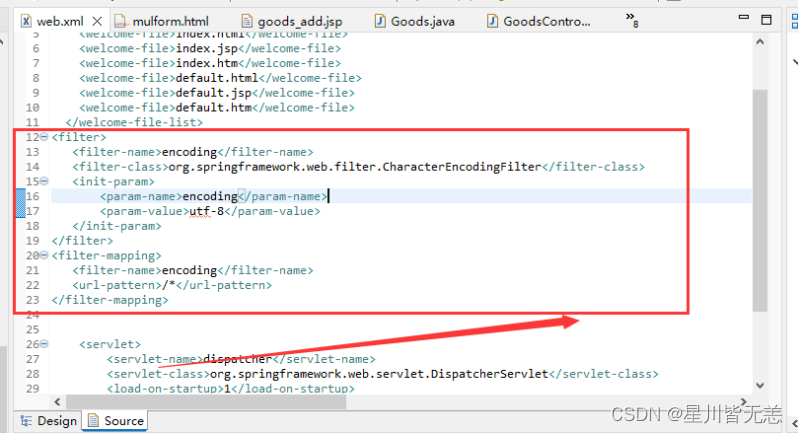
6.在web.xml文件中配置Spring为我们提供的编码过滤器
使用Spring为我们提供的编码过滤器,在web.xml文件中配置
<filter>
   <filter-name>encoding</filter-name>
   <filter-class>org.springframework.web.filter.CharacterEncodingFilter</filter-class>
   <init-param>
       <param-name>encoding</param-name>
       <param-value>utf-8</param-value>
   </init-param>
</filter>
<filter-mapping>
   <filter-name>encoding</filter-name>
   <url-pattern>/*</url-pattern>
</filter-mapping>
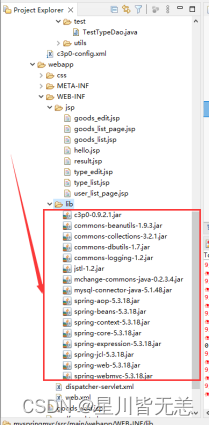
7.在WEB-INF/lib中引入上一个实验的MVC商品管理系统的jar包
引入商品管理系统的库
8.在src下引入商品C3P0配置文件c3p0-config.xml
引入商品C3P0配置文件c3p0-config.xml,存放在src下,我的数据库账号和密码都是root
<?xml version="1.0" encoding="UTF-8"?>
<c3p0-config>
<default-config>
<property name="driverClass">com.mysql.jdbc.Driver</property>
<property name="jdbcUrl">
jdbc:mysql://localhost/db_mygoods?useSSL=false&serverTimezone=UTC&useUnicode=true&characterEncoding=utf-8
</property>
<property name="user">root</property>
<property name="password">root</property>
<property name="checkoutTimeout">30000</property>
<property name="initialPoolSize">5</property>
<property name="maxIdleTime">30</property>
<property name="maxPoolSize">10</property>
<property name="minPoolSize">2</property>
<property name="maxStatements">200</property>
</default-config>
</c3p0-config>
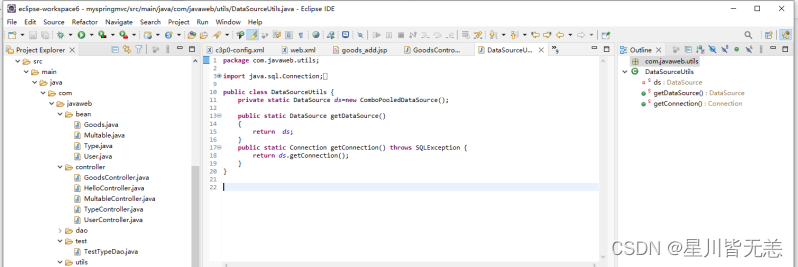
9.引入com.javaweb.utils.DataSourceUtils文件
package com.javaweb.utils;
import java.sql.Connection;
import java.sql.SQLException;
import javax.sql.DataSource;
import com.mchange.v2.c3p0.ComboPooledDataSource;
public class DataSourceUtils {
private static DataSource ds=new ComboPooledDataSource();
public static DataSource getDataSource()
{
return ds;
}
public static Connection getConnection() throws SQLException {
return ds.getConnection();
}
}
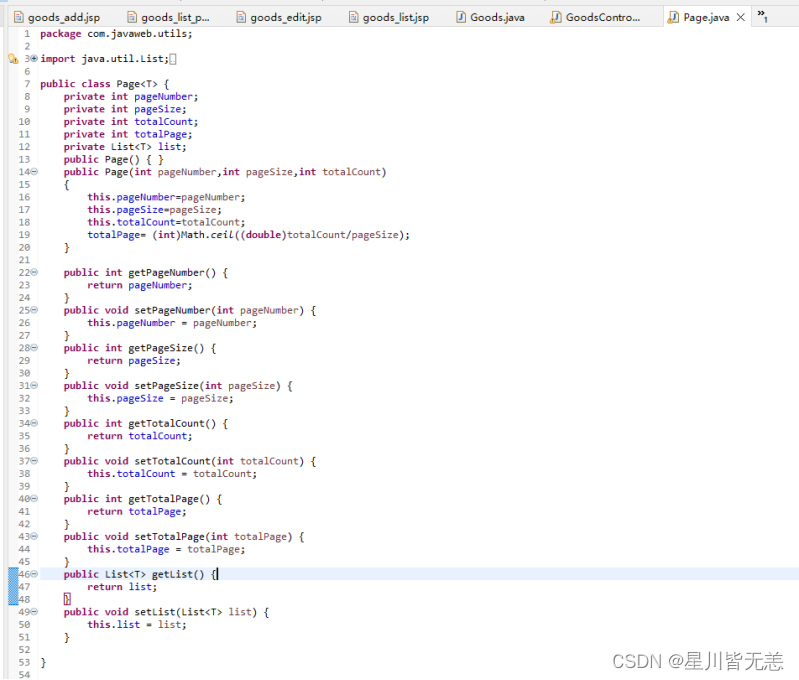
10.引入com.javaweb.utils.Page文件
package com.javaweb.utils;

import java.util.List;

import com.javaweb.bean.Goods;

public class Page<T> {
    private int pageNumber;
    private int pageSize;
    private int totalCount;
    private int totalPage;
    private List<T> list;
    public Page() { }
    public Page(int pageNumber,int pageSize,int totalCount)
    {
        this.pageNumber=pageNumber;
    	this.pageSize=pageSize;
        this.totalCount=totalCount;
        totalPage= (int)Math.ceil((double)totalCount/pageSize);
    }

	public int getPageNumber() {
		return pageNumber;
	}
	public void setPageNumber(int pageNumber) {
		this.pageNumber = pageNumber;
	}
	public int getPageSize() {
		return pageSize;
	}
	public void setPageSize(int pageSize) {
		this.pageSize = pageSize;
	}
	public int getTotalCount() {
		return totalCount;
	}
	public void setTotalCount(int totalCount) {
		this.totalCount = totalCount;
	}
	public int getTotalPage() {
		return totalPage;
	}
	public void setTotalPage(int totalPage) {
		this.totalPage = totalPage;
	}
	public List<T> getList() {
		return list;
	}
	public void setList(List<T> list) {
		this.list = list;
	}

}
11.完善add()方法,实现保存数据到数据库中
public class GoodsController {
    GoodsDao goodsDao=new GoodsDao();
    @PostMapping("/add")
    public String add(Goods goods) {
    System.out.println(goods.getId()+" | "+goods.getName()+" | "+goods.getPrice());
    try {
           goodsDao.insert(goods);
     } catch (SQLException e) {
           e.printStackTrace();
      }
           return "";
    }
12.测试数据提交和保存
添加一条关于黑糖珍奶的商品信息,提交保存。
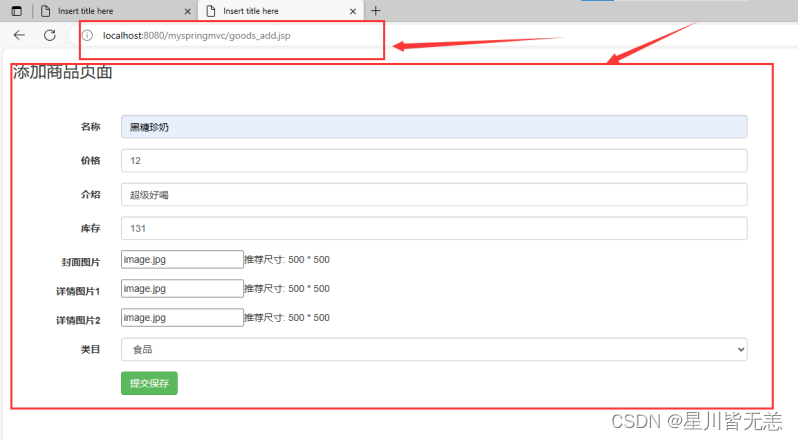
数据插入成功!
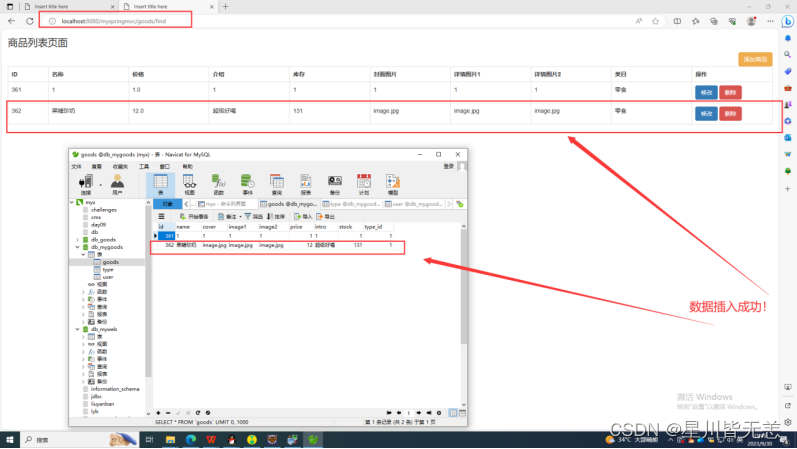
13.完成find()方法,实现查询全部数据
@GetMapping("/find")
public String find(@RequestParam(value = "type",defaultValue = "0") Integer type,Model model) {
    List<Goods> glist=null;
    try {
         glist=goodsDao.findByTypeID(type);
         model.addAttribute("glist",glist);
     } catch (SQLException e) {
          e.printStackTrace();
     }
          return "goods_list";
}

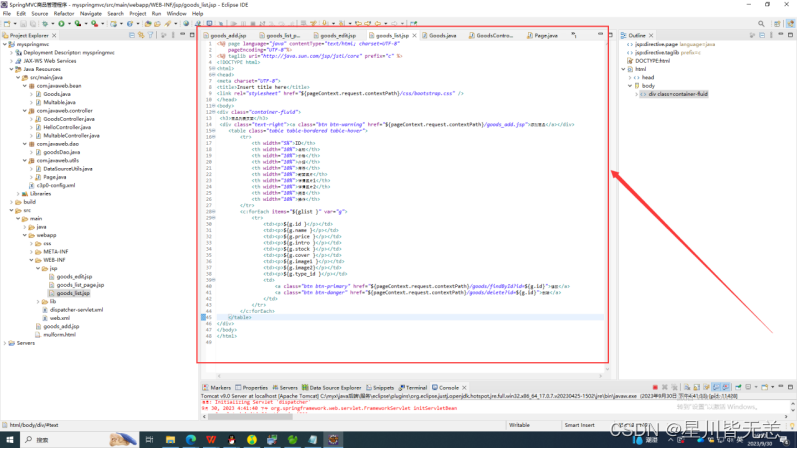
14.在WEB-INF/jsp创建goods_list.jsp页面,显示查询列表数据
创建goods_list.jsp页面
<%@ page language="java" contentType="text/html; charset=UTF-8"
pageEncoding="UTF-8"%>
<%@ taglib uri="http://java.sun.com/jsp/jstl/core" prefix="c" %>
<!DOCTYPE html>
<html>
<head>
<meta charset="UTF-8">
<title>Insert title here</title>
<link rel="stylesheet" href="${pageContext.request.contextPath}/css/bootstrap.css" />
</head>
<body>
<div class="container-fluid">
<h3>商品列表页面</h3>
<div class="text-right"><a class="btn btn-warning" href="${pageContext.request.contextPath}/goods_add.jsp">添加商品</a></div>
<table class="table table-bordered table-hover">
<tr>
<th width="5%">ID</th>
<th width="10%">名称</th>
<th width="10%">价格</th>
<th width="10%">介绍</th>
<th width="10%">库存</th>
<th width="10%">封面图片</th>
<th width="10%">详情图片1</th>
<th width="10%">详情图片2</th>
<th width="10%">类目</th>
<th width="10%">操作</th>
</tr>
<c:forEach items="${glist }" var="g">
<tr>
<td><p>${g.id }</p></td>
<td><p>${g.name }</p></td>
<td><p>${g.price }</p></td>
<td><p>${g.intro }</p></td>
<td><p>${g.stock }</p></td>
<td><p>${g.cover }</p></td>
<td><p>${g.image1 }</p></td>
<td><p>${g.image2}</p></td>
<td><p>${g.type_id }</p></td>
<td>
<a class="btn btn-primary" href="${pageContext.request.contextPath}/goods/findById?id=${g.id}">修改</a>
<a class="btn btn-danger" href="${pageContext.request.contextPath}/goods/delete?id=${g.id}">删除</a>
</td>
</tr>
</c:forEach>
</table>
</div>
</body>
</html>
15.测试查询全部
启动tomact服务,预览地址:http://localhost:8080/myspringmvc/goods/find
成功测试查询全部商品信息。

16.完善delete()方法,删除后,再发送查询全部请求
@GetMapping("/delete")
	public String delete(Integer id) {
		try {
		      goodsDao.delete(id);
		} catch (SQLException e) {
		     e.printStackTrace();
		}
		return "redirect:find";
	}

17.完善findById()方法,查询指定ID记录后,转发到编辑页面
@GetMapping("/delete")
public String delete(Integer id) {
try {
goodsDao.delete(id);
} catch (SQLException e) {
e.printStackTrace();
}
return "redirect:find";
}

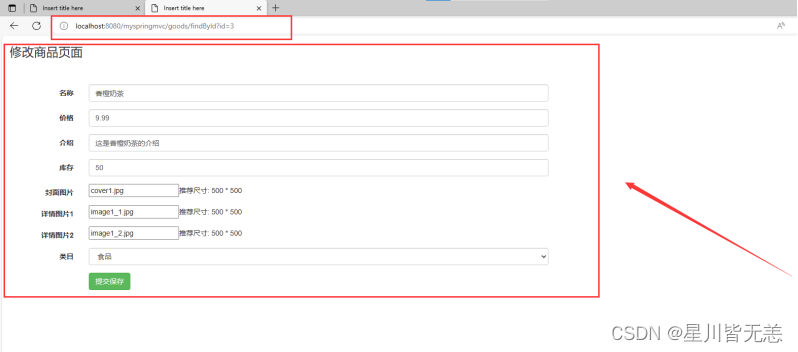
18.在WEB-INF/jsp创建goods_edit.jsp页面,点击商品列表页面的编辑按钮后,转到修改商品页面
<%@ page language="java" contentType="text/html; charset=UTF-8"
pageEncoding="UTF-8"%>
<!DOCTYPE html>
<html>
<head>
<meta charset="UTF-8">
<title>Insert title here</title>
<link rel="stylesheet" href="css/bootstrap.css" />
</head>
<body>
<div class="container-fluid">
<h3>添加商品页面</h3>
<br><br>
<form class="form-horizontal" action="${pageContext.request.contextPath}/goods/add" method="post">
<div class="form-group">
<label for="input_name" class="col-sm-1 control-label">名称</label>
<div class="col-sm-6">
<input type="text" class="form-control" id="input_name" name="name" required="required">
</div>
</div>
<div class="form-group">
<label for="input_name" class="col-sm-1 control-label">价格</label>
<div class="col-sm-6">
<input type="text" class="form-control" id="input_name" name="price" >
</div>
</div>
<div class="form-group">
<label for="input_name" class="col-sm-1 control-label">介绍</label>
<div class="col-sm-6">
<input type="text" class="form-control" id="input_name" name="intro" >
</div>
</div>
<div class="form-group">
<label for="input_name" class="col-sm-1 control-label">库存</label>
<div class="col-sm-6">
<input type="text" class="form-control" id="input_name" name="stock" >
</div>
</div>
<div class="form-group">
<label for="input_file" class="col-sm-1 control-label">封面图片</label>
<div class="col-sm-6">
<input type="text" name="cover" id="input_file" required="required">推荐尺寸: 500 * 500
</div>
</div>
<div class="form-group">
<label for="input_file" class="col-sm-1 control-label">详情图片1</label>
<div class="col-sm-6">
<input type="text" name="image1" id="input_file" required="required">推荐尺寸: 500 * 500
</div>
</div>
<div class="form-group">
<label for="input_file" class="col-sm-1 control-label">详情图片2</label>
<div class="col-sm-6">
<input type="text" name="image2" id="input_file" required="required">推荐尺寸: 500 * 500
</div>
</div>
<div class="form-group">
<label for="select_topic" class="col-sm-1 control-label">类目</label>
<div class="col-sm-6">
<select class="form-control" id="select_topic" name="type_id">
<option value="1">食品</option>
<option value="2">生活用品</option>
<option value="3">学习用品</option>
</select>
</div>
</div>
<div class="form-group">
<div class="col-sm-offset-1 col-sm-10">
<button type="submit" class="btn btn-success">提交保存</button>
</div>
</div>
</form>
</div>
</body>
</html>
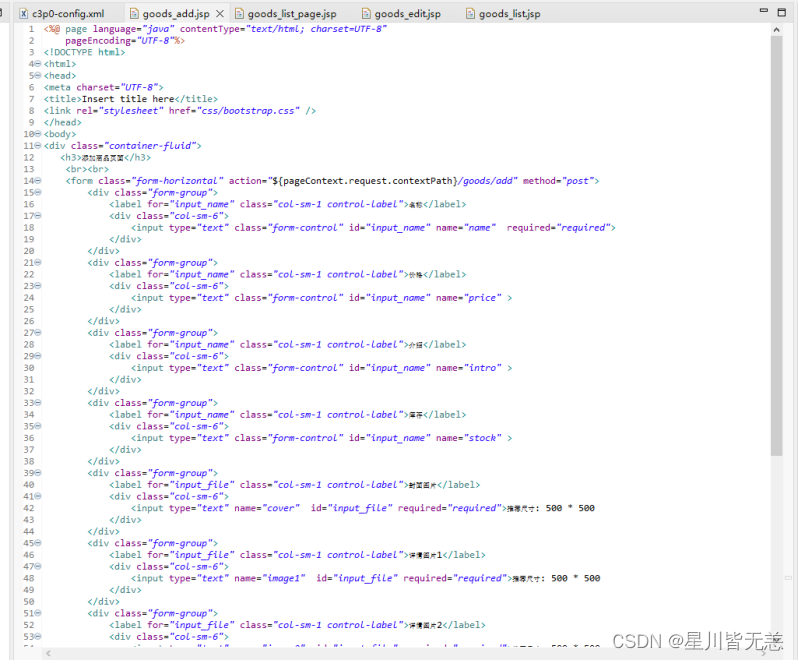
点击商品列表页面的编辑按钮后,转到修改商品页面

19.完善update方法,更新记录,完成后转发列表页面
	@PostMapping("/update")
	public String update(Goods goods) {
		try {
		     goodsDao.update(goods);
		} catch (SQLException e) {
		     e.printStackTrace();
		}
		return "redirect:/goods/find";
	}

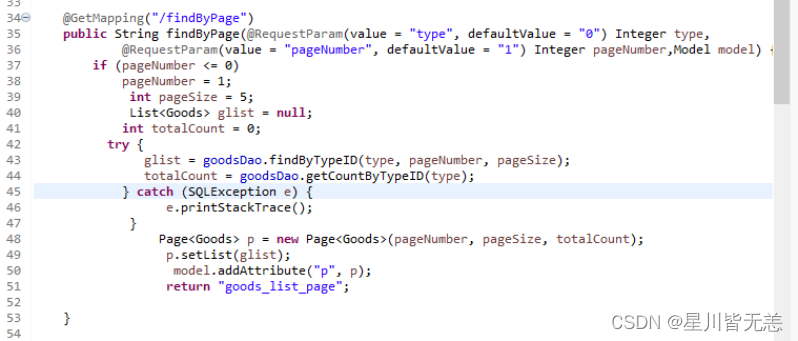
20.完善分页查询findByPage()方法
@GetMapping("/findByPage")
public String findByPage(@RequestParam(value = "type", defaultValue = "0") Integer type,
@RequestParam(value = "pageNumber", defaultValue = "1") Integer pageNumber,Model model) {
if (pageNumber <= 0)
pageNumber = 1;
int pageSize = 5;
List<Goods> glist = null;
int totalCount = 0;
try {
glist = goodsDao.findByTypeID(type, pageNumber, pageSize);
totalCount = goodsDao.getCountByTypeID(type);
} catch (SQLException e) {
e.printStackTrace();
}
Page<Goods> p = new Page<Goods>(pageNumber, pageSize, totalCount);
p.setList(glist);
model.addAttribute("p", p);
return "goods_list_page";

}
21.在WEB-INF/jsp 创建goods_list_page.jsp页面
<%@ page language="java" contentType="text/html; charset=UTF-8"
pageEncoding="UTF-8"%>
<%@ taglib uri="http://java.sun.com/jsp/jstl/core" prefix="c" %>
<!DOCTYPE html>
<html>
<head>
<meta charset="UTF-8">
<title>Insert title here</title>
<link rel="stylesheet" href="${pageContext.request.contextPath}/css/bootstrap.css" />
</head>
<body>
<div class="container-fluid">
<h3>商品列表页面</h3>
<div class="text-right"><a class="btn btn-warning" href="${pageContext.request.contextPath}/goods_add.jsp">添加商品</a></div>
<table class="table table-bordered table-hover">
<tr>
<th width="5%">ID</th>
<th width="10%">名称</th>
<th width="10%">价格</th>
<th width="10%">介绍</th>
<th width="10%">库存</th>
<th width="10%">封面图片</th>
<th width="10%">详情图片1</th>
<th width="10%">详情图片2</th>
<th width="10%">类目</th>
<th width="10%">操作</th>
</tr>
<c:forEach items="${p.list }" var="g">
<tr>
<td><p>${g.id }</p></td>
<td><p>${g.name }</p></td>
<td><p>${g.price }</p></td>
<td><p>${g.intro }</p></td>
<td><p>${g.stock }</p></td>
<td><p>${g.cover }</p></td>
<td><p>${g.image1 }</p></td>
<td><p>${g.image2}</p></td>
<td><p>${g.type_id }</p></td>
<td>
<a class="btn btn-primary" href="${pageContext.request.contextPath}/goods/findById?id=${g.id}">修改</a>
<a class="btn btn-danger" href="${pageContext.request.contextPath}/goods/delete?id=${g.id}">删除</a>
</td>
</tr>
</c:forEach>
</table>
<br>
<div style='text-align:center;'>
<a class='btn btn-info' <c:if test="${p.pageNumber==1 }">disabled</c:if> <c:if test="${p.pageNumber!=1 }">href="findByPage?pageNumber=1"</c:if>>首页</a>
<a class='btn btn-info' <c:if test="${p.pageNumber==1 }">disabled</c:if> <c:if test="${p.pageNumber!=1 }">href="findByPage?pageNumber=${p.pageNumber-1}"</c:if>>上一页</a>
<h3 style='display:inline;'>[${p.pageNumber }/${p.totalPage }]</h3>
<h3 style='display:inline;'>[${p.totalCount }]</h3>
<a class='btn btn-info' <c:if test="${p.totalPage==0 || p.pageNumber==p.totalPage }">disabled</c:if> <c:if test="${p.pageNumber!=p.totalPage }">href="findByPage?pageNumber=${p.pageNumber+1}"</c:if>>下一页</a>
<a class='btn btn-info' <c:if test="${p.totalPage==0 || p.pageNumber==p.totalPage }">disabled</c:if> <c:if test="${p.pageNumber!=p.totalPage }">href="findByPage?pageNumber=${p.totalPage}"</c:if>>尾页</a>
<input type='text' class='form-control' style='display:inline;width:60px;' value=''/><a class='btn btn-info' href='javascript:void(0);' onclick='location.href="findByPage?pageNumber="+(this.previousSibling.value)'>GO</a>
</div>
</div>
</body>
</html>
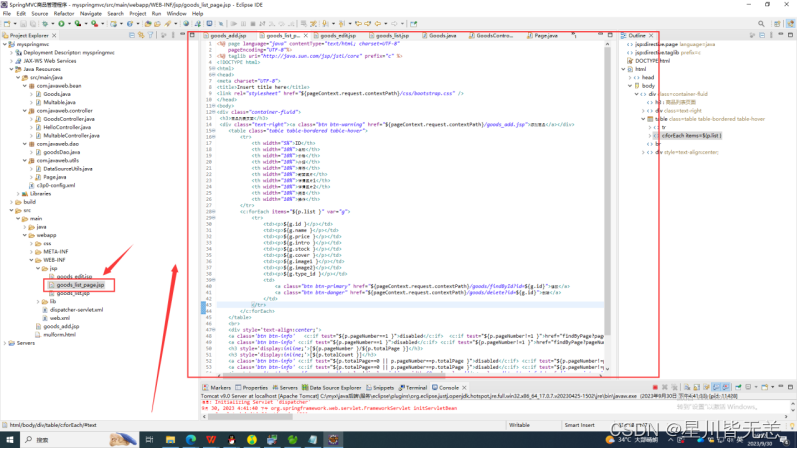
运行服务goods_list_page.jsp,开始测试分页查询findByPage()方法
http://localhost:8080/myspringmvc/goods/findByPage

测试成功!成功显示分页查询!
后面有时间精力会持续更新更多优质内容,感谢各位的支持!
