SAS Planet下载地图瓦片请看上一篇 详细介绍了下载方法
【SAS Planet 下载地图瓦片】-CSDN博客
准备工作:
1.提前下载好地图瓦片数据
SAS Planet下载地图瓦片默认存储路径如下
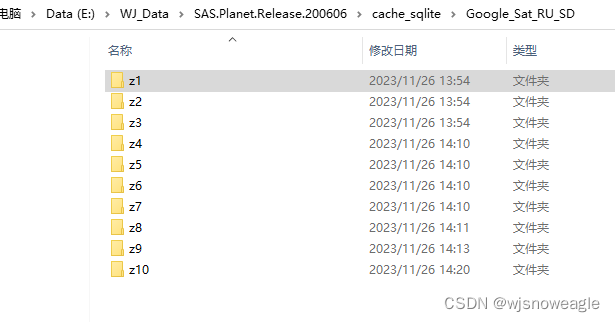
默认存储格式为 .sqlitedb

2.提前准备好 java开发环境和开发工具,新建 一个 spring boot 工程,集成 maven。
在pom.xml 下新增sqlite3驱动包配置,然后更新工程 maven
<!-- sqlite3驱动包 -->
<dependency>
    <groupId>org.xerial</groupId>
    <artifactId>sqlite-jdbc</artifactId>
    <version>3.32.3.2</version>
</dependency>
读取SAS Planet下载的地图瓦片后台代码如下:
package com.api.controller;

import io.swagger.annotations.Api;
import org.springframework.beans.factory.annotation.Autowired;
import org.springframework.http.HttpHeaders;
import org.springframework.http.MediaType;
import org.springframework.http.ResponseEntity;
import org.springframework.web.bind.annotation.CrossOrigin;
import org.springframework.web.bind.annotation.GetMapping;
import org.springframework.web.bind.annotation.PathVariable;
import org.springframework.web.bind.annotation.RestController;

import java.io.BufferedInputStream;
import java.io.IOException;
import java.sql.*;
import java.util.HashMap;
import java.util.List;
import java.util.Map;


@Api(value="读取sqlite文件瓦片",tags={"读取sqlite文件瓦片"})
@CrossOrigin  // 允许跨域访问
@RestController
public class sqliteTilesController {

    @GetMapping(value = "/getCacheTiles/{layerName}/{level}/{x}/{y}")
    public ResponseEntity<byte[]> getCacheTiles(@PathVariable("layerName")String layerName, @PathVariable("level")Integer level, @PathVariable("x")Integer x, @PathVariable("y")Integer y) {
        ResponseEntity<byte[]> response=null;

        Statement stmt = null;
        Connection conn = null;
        try {
            //String path="E:\\WJ_Data\\SAS.Planet.Release.200606\\cache_sqlite\\Google_Sat_RU_SD\\"+layerName+"\\z"+level+"\\0\\0\\0.0.sqlitedb";

            String basePath="E:\\WJ_Data\\SAS.Planet.Release.200606\\cache_sqlite\\";


            //地图下载(SAS.Planet) 下载的瓦片存储在sqlitedb文件里 路径规则 规则计算
            // 将十进制数转换为二进制字符串再右移后还原成十进制数
            Integer shrX1= shrnNumberValue(x,10);//
            Integer shrY1= shrnNumberValue(y,10);//

            Integer shrX2= shrnNumberValue(x,8);//
            Integer shrY2= shrnNumberValue(y,8);//
            String  fullPath=basePath+layerName+"\\z"+level+"\\"+shrX1+"\\"+shrY1+"\\"+shrX2+"."+shrY2+".sqlitedb";
            //jdbc url
            String urlStr="jdbc:sqlite:"+fullPath;

            conn = DriverManager.getConnection(urlStr);
            conn.setAutoCommit(false);

            System.out.println("Opened database successfully");
            stmt = conn.createStatement();
            //ResultSet rs = stmt.executeQuery( "SELECT * FROM 't'" );
            String sqlStr="SELECT * FROM  't' where x="+x+" and y="+y;//"SELECT * FROM 't'
            ResultSet rs = stmt.executeQuery(sqlStr);
            while ( rs.next() ) {
                int tilesX = rs.getInt("x");
                int tilesY = rs.getInt("y");
                int v= rs.getInt("v");
                String c= rs.getString("c");
                long h= rs.getLong("h");
                long d= rs.getLong("d");

                String Str="瓦片信息  level:"+level+", x:"+x+", y="+y;
                System.out.println( Str );

                //获取图片,图片列的索引为8
                byte[] bytes = (byte[] )rs.getObject(8);
                response= ResponseEntity.ok().contentType(MediaType.parseMediaType("image/jpg")).body(bytes);

            }
            rs.close();
            stmt.close();
            conn.close();
        } catch ( Exception e ) {
            System.err.println( e.getClass().getName() + ": " + e.getMessage() );
        }
        System.out.println("Operation done successfully");
        return response;
    }

    //将十进制数转换为二进制字符串再右移后还原成十进制数
    public int shrnNumberValue(int value,int shr) {
        // value 十进制数
        // shr  将一个数在二进制上右位移位数
        String binary = Integer.toString(value, 2); // 十进制转换为二进制字符串
        int length= binary.length();
        if(length>shr){
            String  newBinary=binary.substring(0,binary.length()-shr);
            int decimal = Integer.parseInt(newBinary, 2); // 二进制字符串解析为十进制数
            return  decimal;
        }else{
            return  0;
        }
    }

}
获取瓦片接口:"http://localhost:2022/getCacheTiles/Google_Sat_RU_SD/{z}/{x}/{y}"
前端页面调用代码如下
<html lang="en">
<head>
<meta charset="utf-8" />
<meta name="viewport" content="initial-scale=1,maximum-scale=1,user-scalable=no" />
<title>Custom LERC Layer | Sample | ArcGIS Maps SDK for JavaScript 4.28</title>
<link rel="stylesheet" href="https://js.arcgis.com/4.28/esri/themes/light/main.css" />
<style>
html,
body,
#viewDiv {
padding: 0;
margin: 0;
height: 100%;
width: 100%;
}
</style>
<script>
var dojoConfig = {
paths: {
// see https://github.com/Esri/lerc
lerc: "https://cdn.jsdelivr.net/gh/Esri/lerc@b0650ff915a05b2a045641235323d59b26a40550/OtherLanguages/js/"
}
};
</script>
<script src="https://js.arcgis.com/4.28/"></script>
<script>
require([
"esri/Map",
"esri/views/MapView",
"esri/layers/BaseTileLayer",
"esri/request",
"lerc/LercDecode"
], (Map, MapView, BaseTileLayer, esriRequest, LercDecode) => {
const LercLayer = BaseTileLayer.createSubclass({
properties: {
urlTemplate: null,
minElevation: 0,
maxElevation: 4000
},
// Generates the URL to an image to be requested from the server
getTileUrl: function(level, row, col) {
return this.urlTemplate
.replace("{z}", level)
.replace("{x}", col)
.replace("{y}", row);
},
// fetch tiles visible in the view
fetchTile: function(level, row, col, options) {
const url = this.getTileUrl(level, row, col);
// requested encoded elevation information
// the signal option ensures that obsolete requests are aborted
return esriRequest(url, {
responseType: "array-buffer",
signal: options && options.signal
}).then((response) => {
// create a canvas to draw the processed image
const canvas = document.createElement("canvas");
const context = canvas.getContext("2d");
const width = this.tileInfo.size[0];
const height = this.tileInfo.size[1];
canvas.width = width;
canvas.height = height;
const lerc = LercDecode.decode(response.data, { noDataValue: 0 });
const pixels = lerc.pixels[0];
const stats = lerc.statistics[0];
const min = this.minElevation;
const max = this.maxElevation;
const noDataValue = stats.noDataValue;
const imageData = context.createImageData(width, height);
const data = imageData.data;
const factor = 256 / (max - min);
let value = 0;
let j;
for (let i = 0; i < width * height; i++) {
j = i + Math.floor(i / width);
value = (pixels[j] - min) * factor;
data[i * 4] = value; // r
data[i * 4 + 1] = value; // g
data[i * 4 + 2] = 0; // b
data[i * 4 + 3] = pixels[i] === noDataValue ? 0 : value; // a
}
context.putImageData(imageData, 0, 0);
return canvas;
}
);
}
});
var vUrl="http://localhost:2022/getCacheTiles/Google_Sat_RU_SD/{z}/{x}/{y}";
const lercLayer = new LercLayer({
urlTemplate:vUrl,
title: "Google_Sat_RU_SD"
});
const map = new Map({
basemap: "dark-gray-vector",
layers: [lercLayer]
});
const view = new MapView({
container: "viewDiv",
map: map
zoom: 5
});
});
</script>
</head>
<body>
<div id="viewDiv"></div>
</body>
</html>
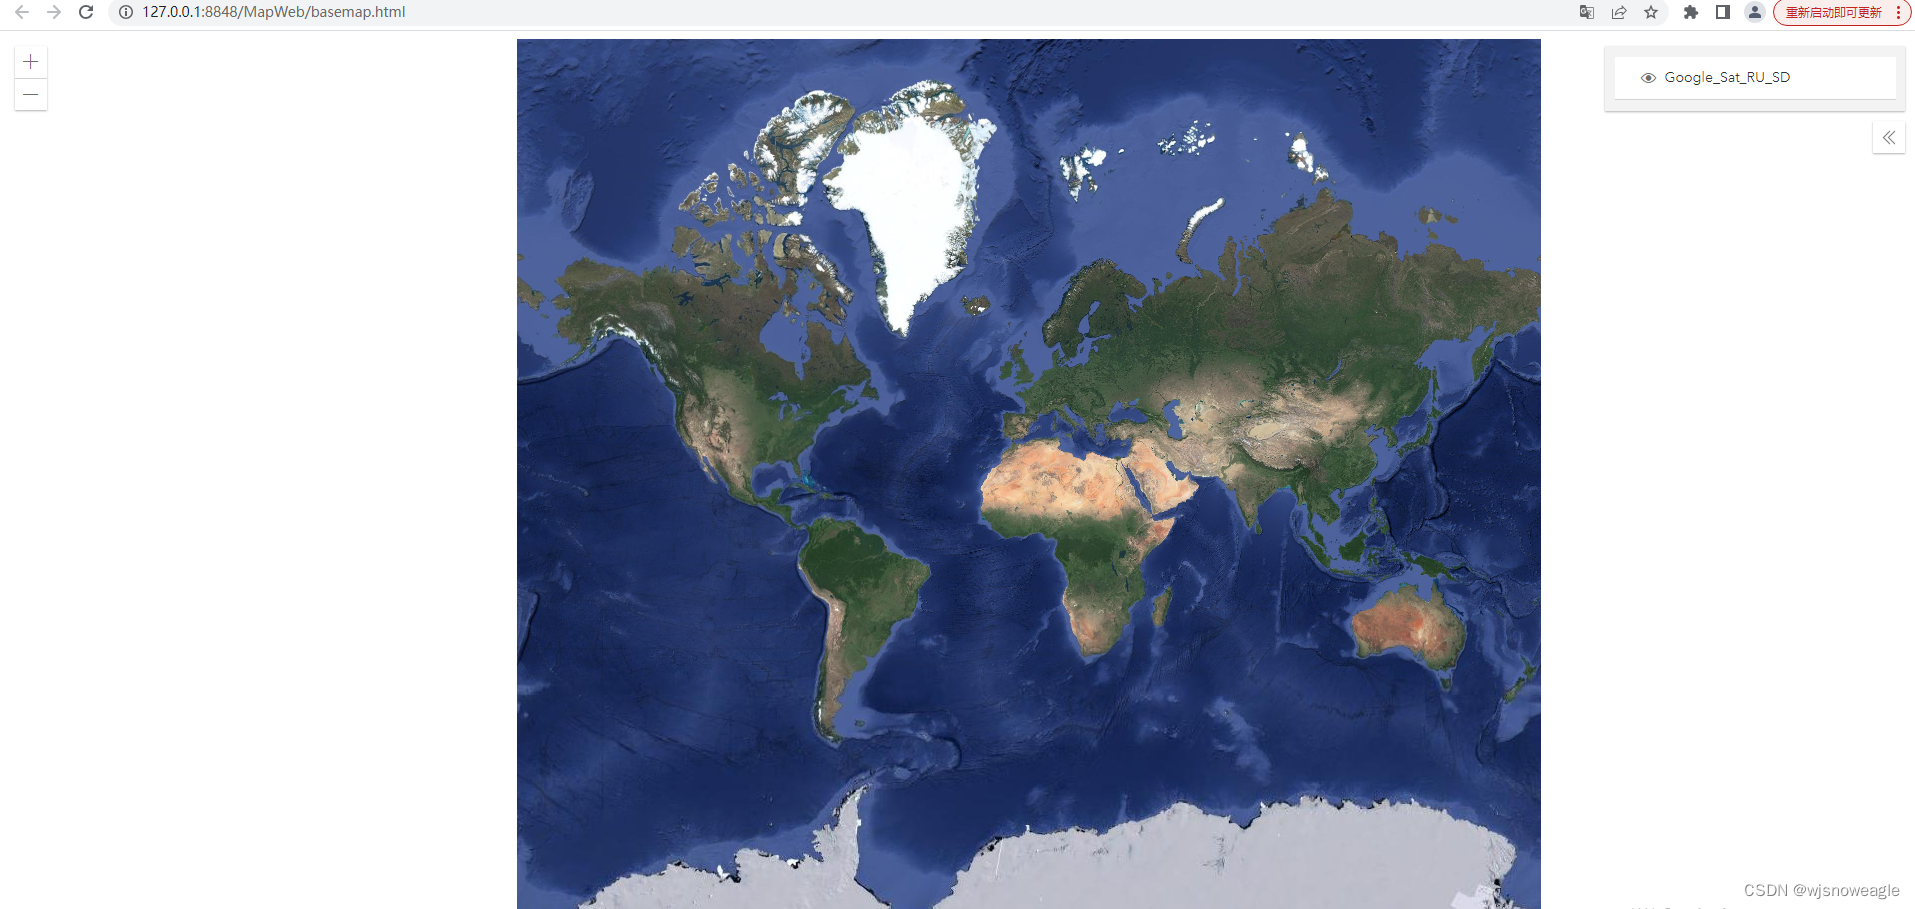
效果如下



![[Linux]进程等待](https://img-blog.csdnimg.cn/b0f651abc48d4f19bad26d1b288bb730.png)


