Openlayer【二】—— 绘制不同的点、线以及给其添加监听事件
接上篇:OpenLayer初始化
在openlayer当中,图层Layer与地图源Source是一对一的关系。当创建了一个图层Layer,相应的需要给图层添加地图源Source,然后将图层Layer添加到地图Map上,就可以得到我们想要的地图了
在Source当中主要包含以下三种Tile、Image、Vector
- ol.source.Tile对应的是瓦片数据源,现在网页地图服务中,绝大多数都是使用的瓦片地图,而OpenLayers 作为一个WebGIS引擎,理所当然应该支持瓦片。
- ol.source.Image对应的是一整张图,而不像瓦片那样很多张图,从而无需切片,也可以加载一些地图,适用于一些小场景地图。
- ol.source.Vector对应的是矢量地图源,点,线,面等等常用的地图元素(Feature),就囊括到这里面了。
1、绘制点
1.1、绘制单个默认点
所以在这一步,我们首先需要创建一个Layer和Source对象,并且把layer加到地图上,最后再往source对象当中添加对应点对象就完成了点的绘制,这里的点(Point)对象需要添加给到source.Vector的Feature元素当中
import VectorLayer from "ol/layer/Vector";
import VectorSource from "ol/source/Vector";

const vectorSource = new VectorSource();
const vectorLayer = new VectorLayer({
  source: vectorSource
});
this.map.addLayer(vectorLayer);

const marker = new Feature({
  geometry: new Point([120, 20])
});
vectorSource.addFeature(marker);
如上代码就添加了一个点到地图上了,在官网可以看到new Point()构造需要传递两个参数,一个是点的位置,一个是对象的布局,其是一个可选参数,默认参数是ol.geom.GeometryLayout.XY,还可以设置为ol.geom.GeometryLayout.XYZ、ol.geom.GeometryLayout.XYM 或 ol.geom.GeometryLayout.XYZM,可以通过以下代码进行调整对象的布局
import { GeometryLayout } from 'ol/geom/Geometry';

var point = new Point([10, 20, 100]);
point.setLayout(GeometryLayout.XYZ);
1.2、绘制颜色填充的点
在Feature对象当中可以给整个对象统一设置样式,通过setStyle(),首先我们给点设置为圆形红色并且半径为6 单位(米)并且给圆的外面加上一个绿色宽度为3的边
marker.setStyle(
  new Style({
    image: new Circle({
      radius: 6,
      fill: new Fill({ color: "red" }),
      stroke: new Stroke({
        color: "green",
        width: 3
      })
    })
  })
);
1.3、绘制多个点
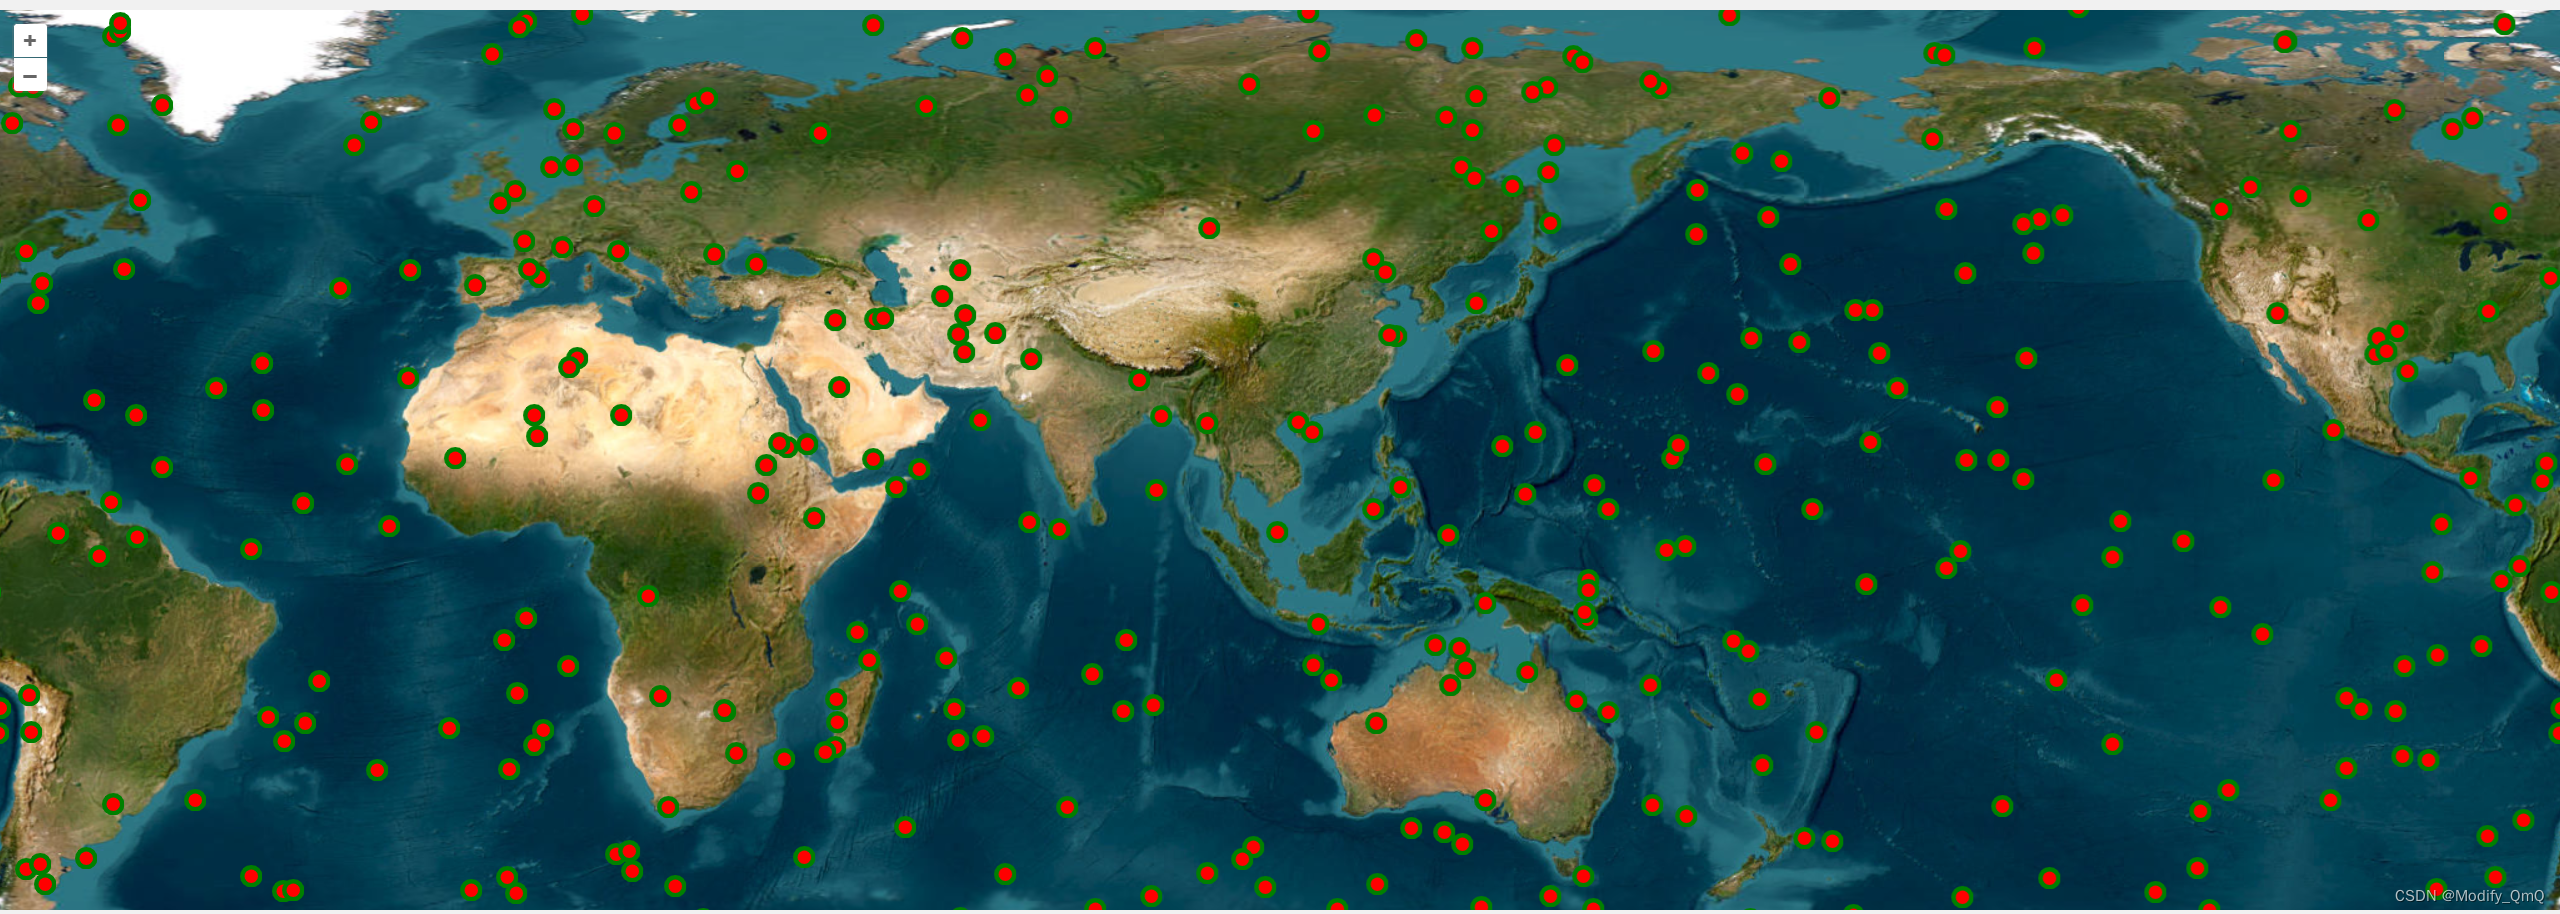
只需要循环创建圆点之后,将圆通过addFeature方法添加进去即可
const vectorSource = new VectorSource();
const vectorLayer = new VectorLayer({
  source: vectorSource
});
this.map.addLayer(vectorLayer);

for (let i = 0; i < 500; i++) {
  const marker = new Feature({
    geometry: new Point(this.getRandomCoordinate())
  });

  marker.setStyle(
    new Style({
      image: new Circle({
        radius: 6,
        fill: new Fill({ color: "red" }),
        stroke: new Stroke({
          color: "green",
          width: 3
        })
      })
    })
  );
  vectorSource.addFeature(marker);
}

/**
* 随机生成经纬度
*/
getRandomCoordinate() {
    const minLon = -180; // 最小经度
    const maxLon = 180; // 最大经度
    const minLat = -90; // 最小纬度
    const maxLat = 90; // 最大纬度

    const lon = Math.random() * (maxLon - minLon) + minLon;
    const lat = Math.random() * (maxLat - minLat) + minLat;

    return [lon, lat];
}
1.4、绘制图标点
绘制图标点只需要给style加上image的相关图标配置即可绘制图标到地图上,如下,这里的anchor表示图标的锚点(图标的中心位置)、opacity表示透明度、scale表示放大缩小层级,src指向对应的图标文件的位置、color表示图标的颜色(对图标进行着色)
marker.setStyle(
  new Style({
    image: new Icon({
      anchor: [0.5, 1],
      opacity: 1,
      scale: 1,
      src: require("./icon/point.png"),
      color: 'green'
    })
  })
);
其中对Icon的属性可以参考官方文档:OpenLayers v8.2.0 API - 类:图标
1.5、给图标点加上文字
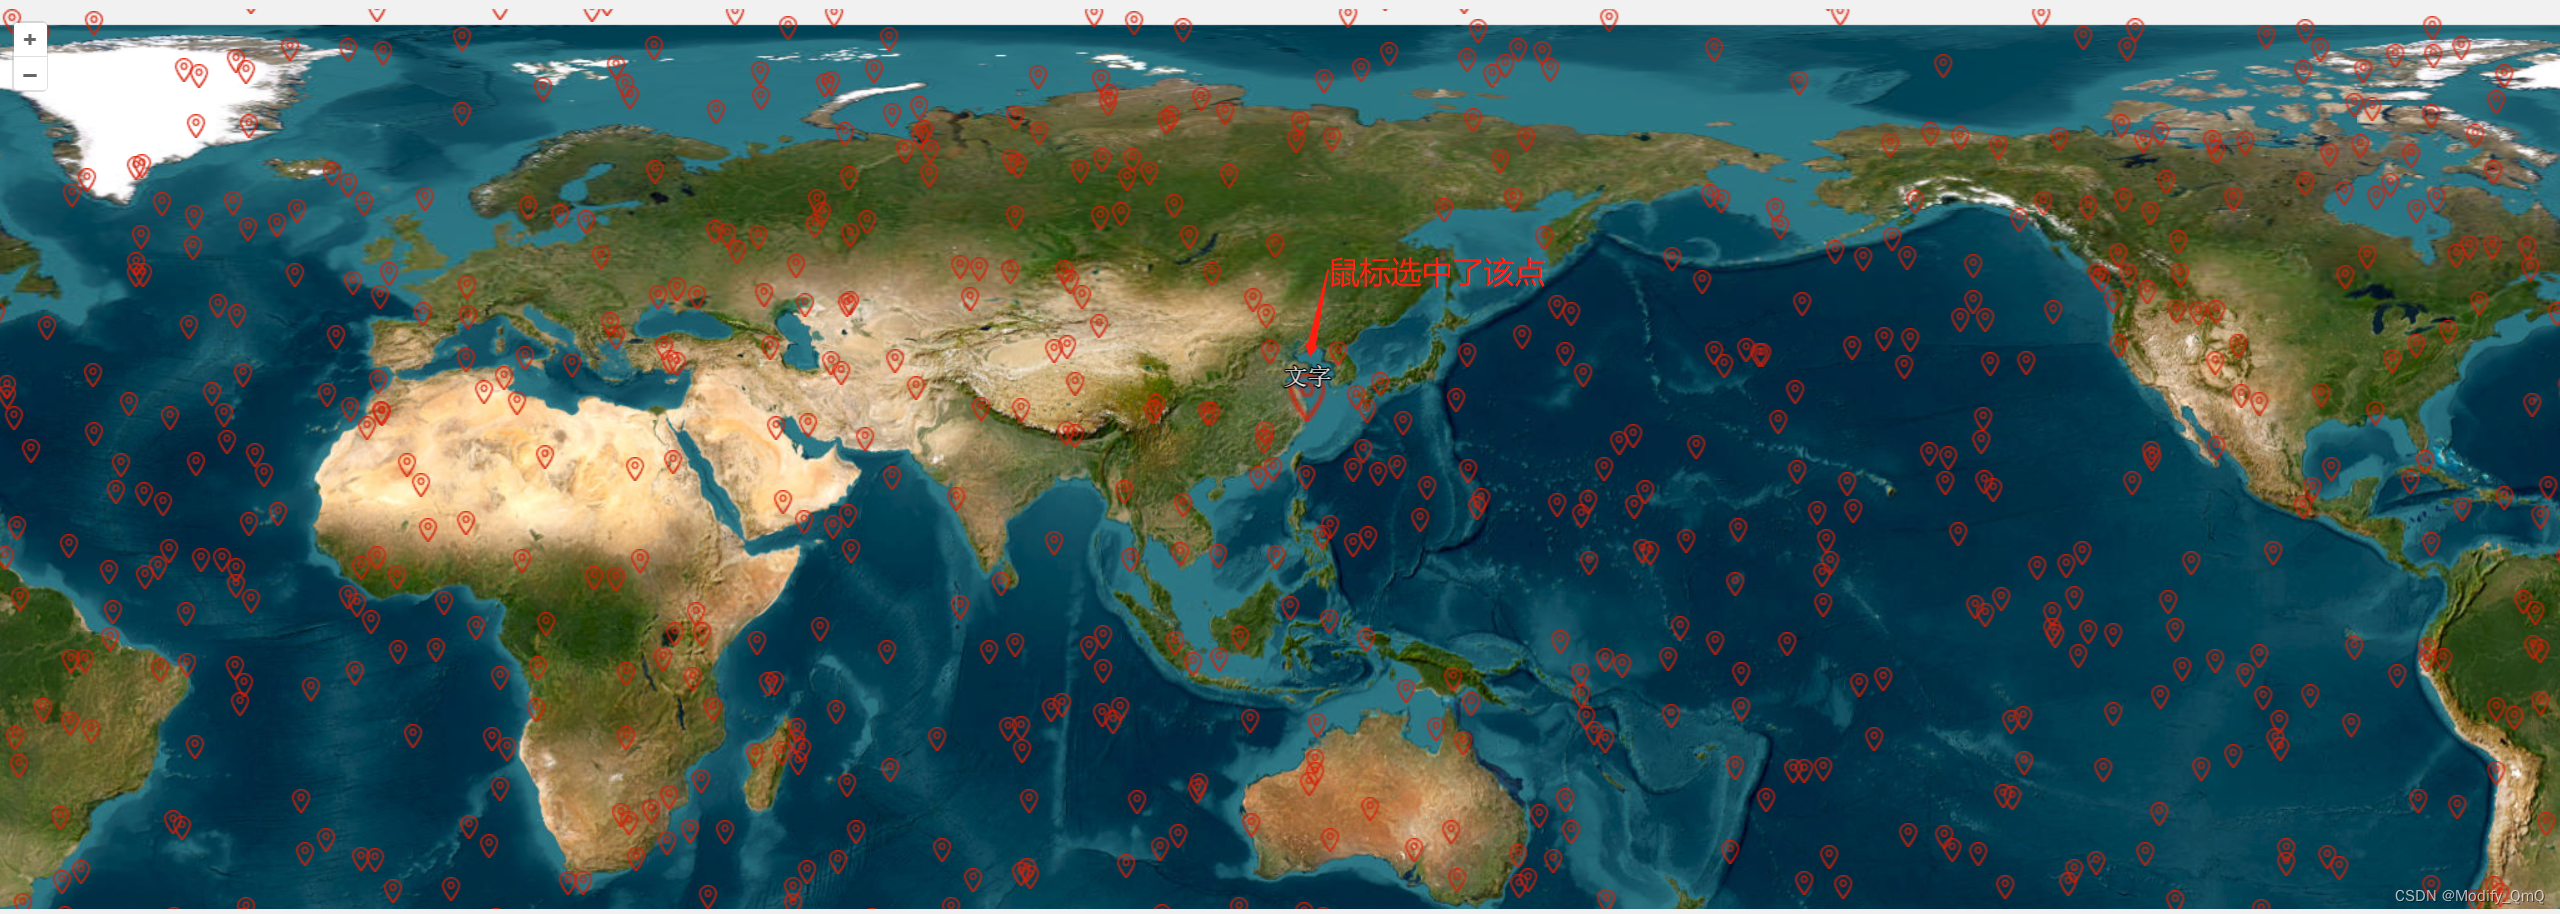
给图标加文字和前面设置图标一样,都是直接给style当中添加属性即可,这里添加的是text属性。这里的fill的color表示文字的填充颜色为白色、font属性可以设置文字大小和字体类型、text表示展示的文字内容、scale是一个数组表示横向(x)和纵向(y)的放大缩小层级、offsetX和offsetY分别表示文本在水平和垂直上的偏移量、最后的storke表示文字的描边
feature.setStyle(
  new Style({
    image: new Icon({
      anchor: [0.5, 1],
      opacity: 1,
      scale: 1,
      src: require("./icon/point.png"),
      color: "green"
    }),
    text: new Text({
      fill: new Fill({
        color: "rgba(255,255,255,0.9)"
      }),
      font: "16px monospace",
      text: "文字",
      scale: [1, 1],
      offsetY: -30,
      stroke: new Stroke({ color: "rgba(0,0,0,0.9)", width: 2 })
    })
  })
);
这里对Text的属性可以参考官方文档:OpenLayers v8.2.0 API - 类:文本
1.6、鼠标移入和鼠标移出点事件监听
1.6.1、实现事件监听
在这里可以在给每一个Feature初始化好了之后通过map的pointermove事件(当鼠标在地图上进行移动时触发事件)用来监听,并且获取当前鼠标移动的位置是否包含了这个Feature对象,之后通过目标的featureTarget(地图监听得到的)和最开始初始化得到的进行对比,如果相同则表示鼠标移入到了当前图标,获取对应的样式scale(放大缩小的层级)设置为2即为放大一倍,不相同表示移出,设置会成原来的样式,
当然同理,这里我简化了样式的设置,如果给图标设置了文字的属性可以通过originalStyle.getText().setScale([2, 2])把字体也给放大一倍,其余的样式也同理如此进行设置即可。这样就给页面添加了一些交互事件使得页面看起来更加活泼一点。
let source = new VectorSource();
for (let i = 0; i < 10; i++) {
  let feature = new Feature({
    id: "ddss",
    geometry: new Point(this.getRandomCoordinate())
  });
  feature.setStyle(
    new Style({
      image: new Icon({
        scale: 1,
        src: require("./icon/point.png")
      })
    })
  );
  this.map.on("pointermove", function(event) {
    const featureTarget = this.forEachFeatureAtPixel(event.pixel, function(feature) {
      return feature;
    });

    if (feature === featureTarget) {
      // 鼠标进入
      const originalStyle = feature.getStyle();
      originalStyle.getImage().setScale(2);
      feature.setStyle(originalStyle);
    } else {
      // 鼠标移出
      const originalStyle = feature.getStyle();
      originalStyle.getImage().setScale(1);
      feature.setStyle(originalStyle);
    }
  });
  source.addFeature(feature);
}
let layer = new VectorLayer({
  opacity: 1
});
layer.setSource(source);
this.map.addLayer(layer);
1.6.2、上述实现存在的问题 —— n次监听
在这里其实乍一看这样子用来实现事件监听没什么问题,每一个点都给加上了监听事件,而且去页面上测试一下当鼠标移入移出图标的大小确实会发生变化。那问题究竟在哪呢?
大数据量的情况:
在上面只初始化了10个点到页面上,当初始化100个点呢?1000个点呢?10000个点呢?在里面是循环加上的监听事件,而这个监听事件是很消耗性能的,10个点100个点看起来还不卡,但是1000个点就明显会有卡顿了,当鼠标移入后要两三秒后才回放大,当10000个点整上去之后整个页面直接卡死了,这个时候就需要给这段代码进行优化了,如何优化这个呢?很显然只需要把监听事件挪出来,由10000次监听变成1次监听就好了,后面监听完之后再去判断给哪个图标去放大缩小也就只有n次循环的事了。用循环n次+1次监听来替换掉n次监听性能消耗一下子就被降下去了。
1.6.3、解决方案 —— 一次监听+n次循环
在前面去掉那个事件监听,在把图层Layer添加进去之后,再进行监听,实现如下,在移动的时候进行监听,在监听的时候获取到feature对象也就是单个点对象,之后遍历地图层级上所有的点进行相等匹配,如果满足条件则修改其大小、文字,反之还原成原始样式。
this.map.addLayer(layer);

this.map.on("pointermove", event => {
  const featureTarget = this.map.forEachFeatureAtPixel(event.pixel, feature => {
    return feature;
  });

  source.getFeatures().forEach(feature => {
    const originalStyle = feature.getStyle();
    if (feature === featureTarget) {
      originalStyle.getImage().setScale(2);
      originalStyle.getText().setScale([1, 1]);
      featureTarget.setStyle(originalStyle);
    } else {
      console.log("鼠标移出");
      originalStyle.getImage().setScale(1);
      originalStyle.getText().setScale([0, 0]);
      feature.setStyle(originalStyle);
    }
  });
});
2、绘制线
2.1、绘制单个默认线
绘制线和绘制点是一样一样的,就是将点对象换成线对象即可。这里的LineString就是线对象。实例化线对象和点对象也是一样,入参分别是一个坐标和一个布局。之后就是创建一个Source把线的Feature添加进去,再创建一个Layer添加到Source里面,最后将Layer线图层添加给到Map即可。这个的LineString对象的坐标可以添加多个,表示多个点连成的线。
let featureLine = new Feature({
  geometry: new LineString([
    [120,20],
    [130,22],
    [135,26]
  ])
});
let source = new VectorSource();
source.addFeature(featureLine);
let layer = new VectorLayer({ opacity: 1 });
layer.setSource(source);
this.map.addLayer(layer);
2.2、添加样式线
和前面给点添加样式一样,这里只需要给线加上Style也就是给线加上了样式,这里还可以直接把style加给Layer图层,那么这个图层下所有的线都会应用这个样式。
const vectorLayer = new VectorLayer({
  source: new VectorSource(),
  style: new Style({
    stroke: new Stroke({
      color: "red",
      width: 2
    })
  })
});
这里的stroke对象可以参考官网:OpenLayers v8.2.0 API - 类:Stroke
2.3、给线添加文字
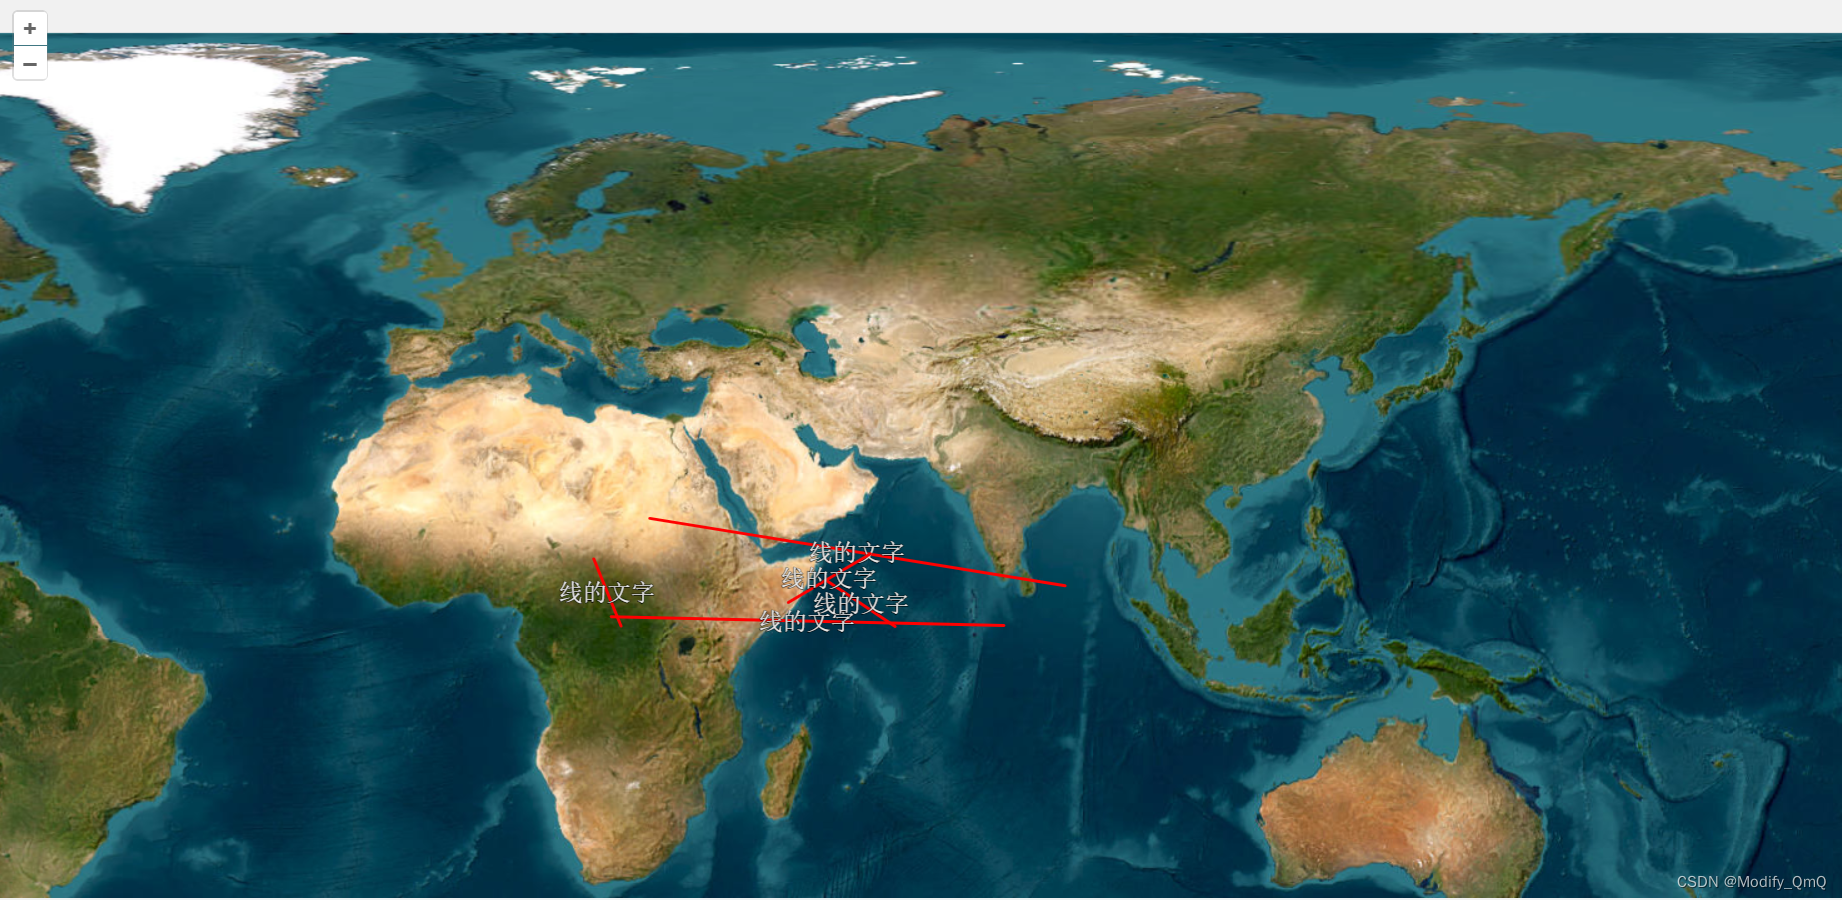
同2.2一样把text属性添加到Style当中去,但是这里设置的样式是layer的,所以字是在图层上的,如果你需要吧字添加到线上面去,就需要在得到线的Feature对象featureLine,给他重新设置样式
text: new Text({
	// 这里就省略了,和给点加的text属性一致
});

lineFeature.setStyle(
  new Style({
    stroke: new Stroke({...省略}),
    text: new Text({
      fill: new Fill({...省略})
  })
);
2.4、选中线
在进行选中线的操作和上面选中点是一样的,可以直接沿用前面的方法进行操作。但是这里还可以通过Select对象用来判断线是否被选中的事件
import { Select } from 'ol/interaction'
import { pointerMove } from 'ol/events/condition';

const interaction = new Select({
  condition: pointerMove, // 设置条件为鼠标移动
  layers: [vectorLayer], // 设置监听的图层
  style: function() {
    const style = lineFeature.getStyle();

    // 修改线的样式
    const stroke = style.getStroke();
    stroke.setWidth(5);

    // 修改文字样式
    const text = style.getText();
    text.setScale([1, 1]);

    // 返回新的样式
    return new Style({
      stroke,
      text
    });
  }
});

// 将交互对象添加到地图上
this.map.addInteraction(interaction);
这里的Select对象用于选择矢量特征的交互。默认情况下,所选功能包括 样式不同,因此这种交互可用于视觉突出显示, 以及为其他操作选择功能。同样的在这里对于上面鼠标移入点事件也可以通过该方法进行实现,这里就不做说明了。
| 属性 | 说明 |
|---|---|
| condition | 设置监听事件,默认是singleClick单击事件,还可以设置以下事件 pointerMove:鼠标移动时触发事件。 singleClick:鼠标单击时触发事件。 dblclick:鼠标双击时触发事件。 pointerDown:鼠标按下时触发事件。 pointerUp:鼠标释放时触发事件。 pointerEnter:鼠标进入图层时触发事件。 pointerLeave:鼠标离开图层时触发事件。 pointerDrag:鼠标拖动时触发事件。 |
| layers | 从中选择要素的图层列表 |
| style | 所选要素的样式,未设置则使用默认样式 |
这里的Select对象可以参考官网:OpenLayers v8.2.0 API - 类:Select

