目录
前言
1.预期效果
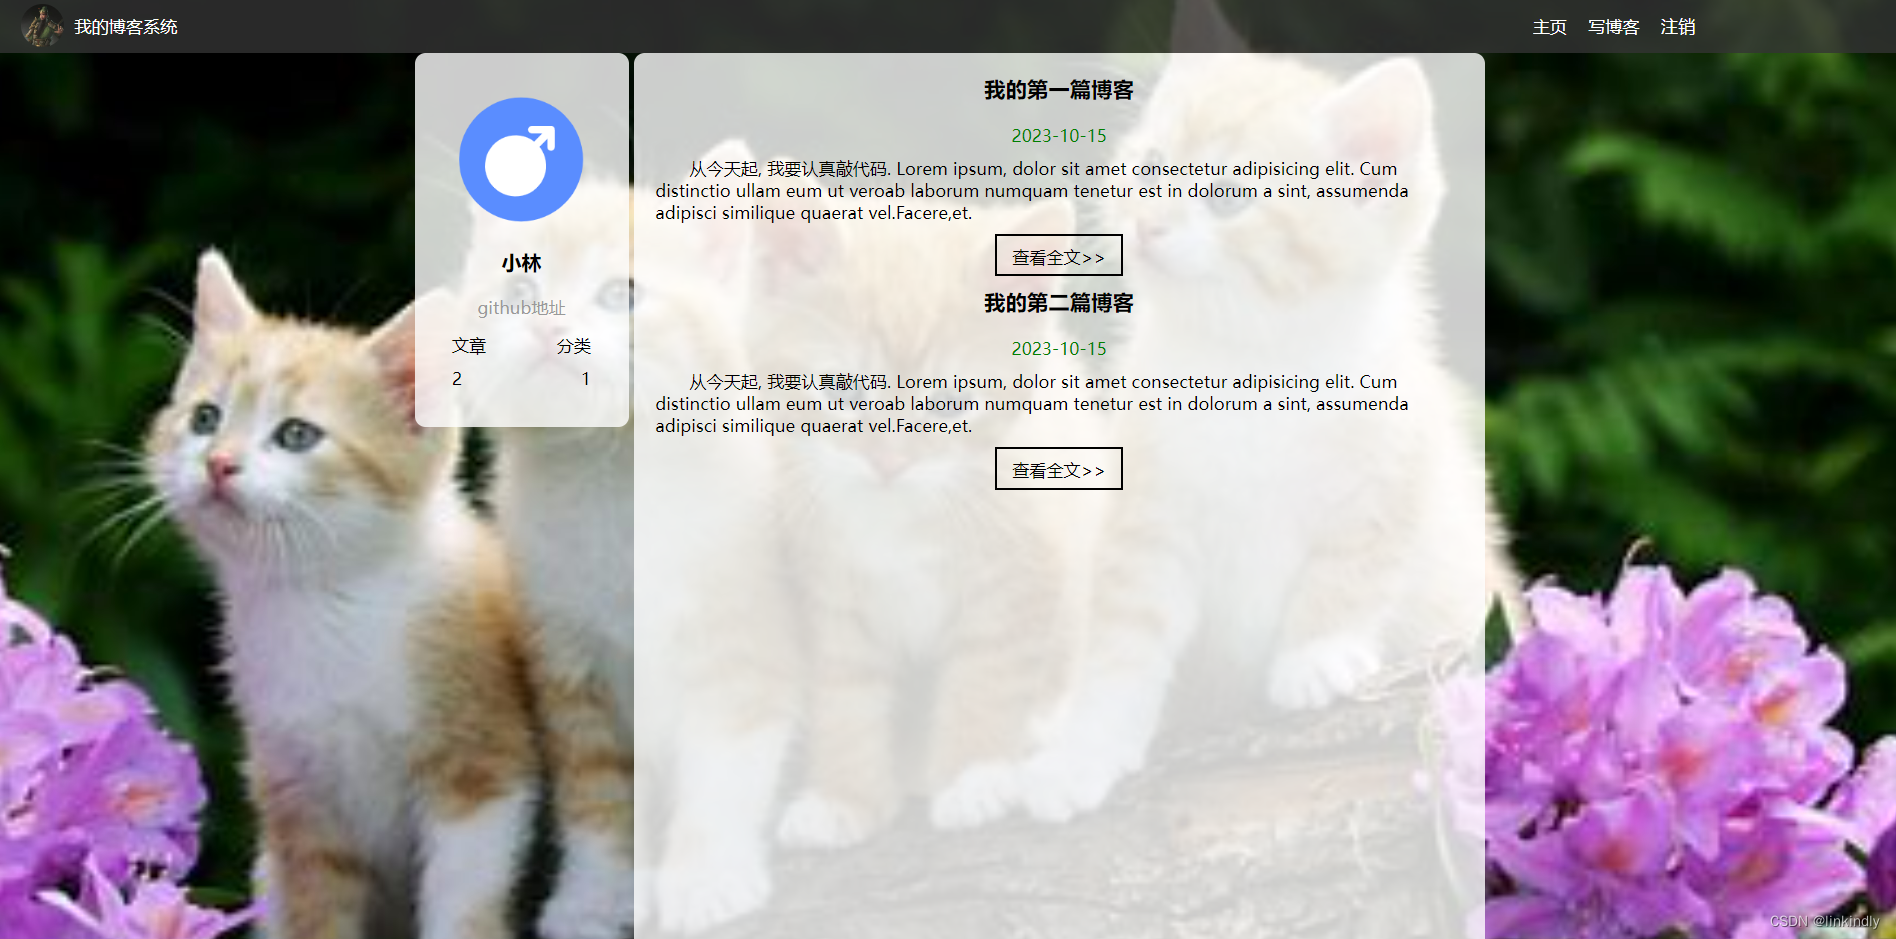
1.1博客列表页效果
1.2博客详情页效果
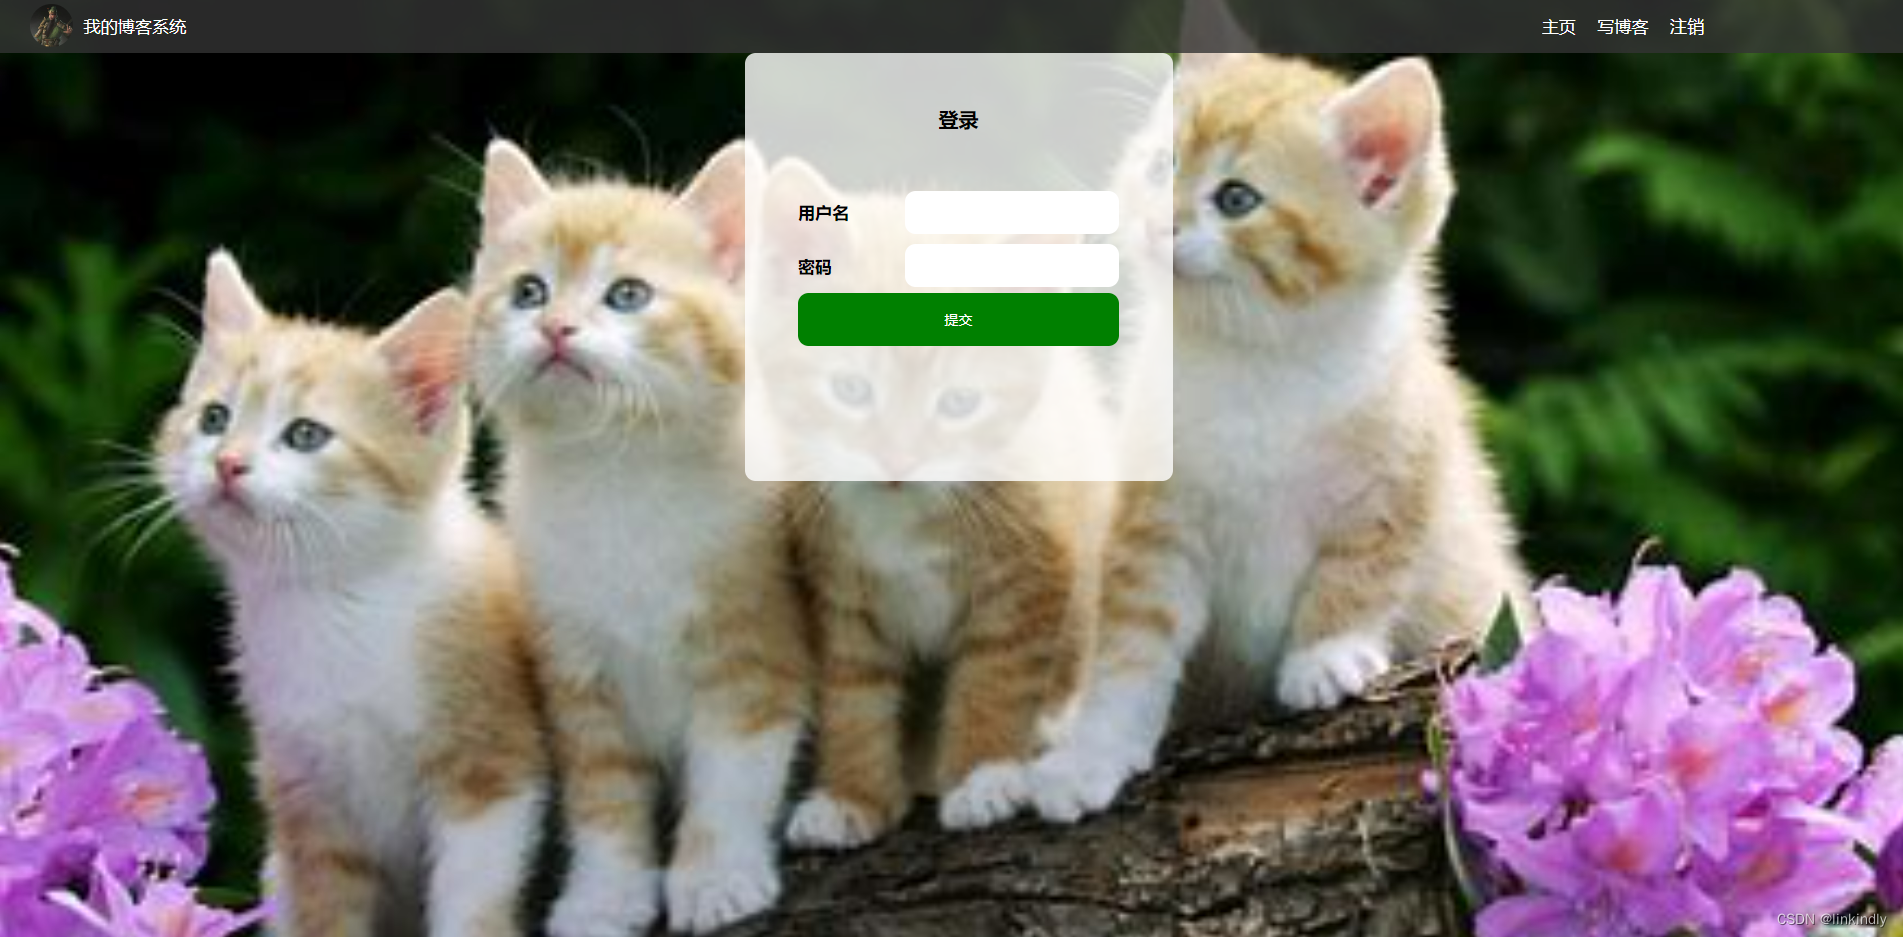
1.3博客登陆页效果
2.实现博客列表页
2.1实现导航栏
2.2实现版心
2.3实现个人信息
2.4实现博客列表
3.实现博客正文页
3.1引入导航栏
3.2引入版心
3.3引入个人信息
3.4实现博客正文
4.实现博客登陆页
4.1引入导航栏
4.2实现版心
4.3实现登陆框
5.实现博客编辑页
5.1引入导航栏
5..2实现编辑区
5.3引入 editor.md
前言
实现一个简单的博客系统.
当前先完成页面设计的部分. 通过前面学习的前端知识来构建出网页.
主要分成四个页面:
博客列表页
博客正文页
博客登陆页
博客编辑页
1.预期效果
1.1博客列表页效果
1.2博客详情页效果

1.3博客登陆页效果
2.实现博客列表页
创建 blog_list.html, 编写博客列表页.
2.1实现导航栏
编辑 blog_list.html, 创建导航栏的 html 代码.
导航栏里面包含 logo, 标题, 以及一些按钮(跳转链接).
为了实现左右排列, 在 logo 和 按钮 之间加一个 spacer 作为占位器.
<!-- 导航栏 -->
<div class="nav">
  <img src="img/logo2.jpg" alt="">
  <span class="title">我的博客系统</span>
  <!-- 用来占据中间位置 -->
  <span class="spacer"></span>
  <a href="blog_list.html">主页</a>
  <a href="blog_edit.html">写博客</a>
  <a href="logout">注销</a>
</div>
准备一个 logo2.jpg, 放到 img 目录中.
创建 common.css .
对于导航栏来说, 每个页面都需要, 因此把样式提取出来.
先清除浏览器默认样式
准备一个 cat.jpg 作为背景图.
需要把 html 和 body 高度都设为 100%, 使背景的高度和浏览器窗口高度一样.
导航栏 nav 内部使用 flex 布局, 用来排列 logo 和一些按钮.
* {
  margin: 0;
  padding: 0;
  box-sizing: border-box;
}
/* 设置整体页面高度 */
html, body {
  height: 100%;
  background-image: url(../img/cat.jpg);
  background-position: center center;
  background-size: cover;
  background-repeat: no-repeat;
}
/* 上方导航栏 */
.nav {
  width: 100%;
  height: 50px;
  background-color: rgba(51, 51, 51, 0.4);
  color: #fff;
  display: flex;
  justify-content: left;
  align-items: center;
}
/* 导航栏中的图标 */
.nav img {
  width: 40px;
  height: 40px;
  margin-left: 30px;
  margin-right: 10px;
  border-radius: 50%;
}
/* 导航栏中的占位器 */
.nav .spacer {
  width: 70%;
}
/* 导航栏中的按钮 */
.nav a {
  color: #fff;
  text-decoration: none;
  padding: 0 10px;
}
引入 common.css
<link rel="stylesheet" href="css/conmmon.css">2.2实现版心
编辑 blog_list.html
container 作为版心, 实现居中对齐的效果.
左侧放用户信息
右侧放博客列表
<!-- 版心 -->
<div class="container">
  <!-- 左侧个人信息 -->
  <div class="container-left">
  </div>
  <!-- 右侧内容详情 -->
  <div class="container-right">
  </div>
</div>
编辑 common.css
/* 页面内容容器, 版心 */
.container {
  /* 使用 calc 计算高度 */
  height: calc(100% - 50px);
  /* 设置版心宽度 */
  width: 1000px;
  /* 水平居中 */
  margin: 0 auto;
  /* 使用弹性布局 */
  display: flex;
  justify-content: space-between;
  align-items: center;
}
/* 左侧部分, 用来放置用户信息 */
.container-left {
  height: 100%;
  width: 200px;
}
/* 右侧部分, 用来放置正文 */
.container-right {
  height: 100%;
  /* 和左侧部分中间留出 5px 间隙 */
  width: 795px;
  /* 如果内容溢出就自动加上滚动条 */
  overflow: auto;
  background-color: rgba(255, 255, 255, 0.8);
  border-radius: 10px;
}
2.3实现个人信息
编辑 blog_list.html
把个人信息放到一个 .card div 中.
个人信息中包含 头像 (img), 用户名 (h3), 用户的 github (a), 用户的文章数量和分类数量.
<!-- 左侧个人信息 -->
<div class="container-left">
  <div class="card">
    <img src="img/doge.jpg" class="avtar" alt="">
    <h3>小林</h3>
    <a href="http:www.github.com">github 地址</a>
    <div class="counter">
      <span>文章</span>
      <span>分类</span>
    </div>
    <div class="counter">
      <span>2</span>
      <span>1</span>
    </div>
  </div>
</div>
编辑 common.css
/* 展示用户信息的卡片 */
.card {
  background-color: rgba(255, 255, 255, 0.8);
  border-radius: 10px;
  padding: 30px;
}
/* 用户头像 */
.card img {
  width: 140px;
  height: 140px;
  border-radius: 50%;
}
/* 用户名 */
.card h3 {
  text-align: center;
  padding: 10px;
}
/* 用户 github 链接 */
.card a {
  display: block;
  text-align: center;
  color: #999;
  text-decoration: none;
  padding: 10px;
}
/* 展示文章数目的面板 */
.card .counter {
  padding: 5px;
  display: flex;
  justify-content: space-around;
}
2.4实现博客列表
编辑 blog_list.html
每个博客使用 div.blog 来表示.
每个博客中包含标题, 发布时间, 描述, 查看全文按钮.
<div class="container-right">
<div class="blog">
<div class="title">我的第一篇博客</div>
<div class="date">2023-10-15</div>
<div class="desc">
从今天起, 我要认真敲代码. Lorem ipsum, dolor sit amet consectetur
adipisicing elit. Cum distinctio ullam eum ut
veroab laborum numquam tenetur est in dolorum a sint, assumenda
adipisci similique quaerat vel.Facere,et.
</div>
<a href="content.html" class="detail">查看全文>></a>
<div class="title">我的第二篇博客</div>
<div class="date">2023-10-15</div>
<div class="desc">
从今天起, 我要认真敲代码. Lorem ipsum, dolor sit amet consectetur
adipisicing elit. Cum distinctio ullam eum ut
veroab laborum numquam tenetur est in dolorum a sint, assumenda
adipisci similique quaerat vel.Facere,et.
</div>
<a href="content.html" class="detail">查看全文>></a>
</div>
</div>创建 blog_list.css
这部分内容不再是公共部分了, 放到单独的 css 中.
使用伪类选择器 .blog .detail:hover , 实现光标悬停时修改样式的功能.
给 .blog .detail 中加上过度效果 transition: all 0.3s; 使悬停的样式改变更 逼真 .
/* 表示第一篇博客 */
.blog {
    width: 100%;
    padding: 10px 20px;
}
/* 博客的标题 */
.blog .title {
    color: black;
    font-size: 20px;
    font-weight: 700;
    text-align: center;
    padding: 10px 0;
}
/* 博客的摘要 */
.blog .desc {
    color: #000;
    text-indent: 2em;
    margin-top: 10px;
}
/* 博客的日期 */
.blog .date {
    color: #008000;
    margin-top: 10px;
    text-align: center;
}
/* 查看详情按钮 */
.blog .detail {
    display: block;
    width: 120px;
    height: 40px;
    line-height: 40px;
    color: black;
    text-align: center;
    text-decoration: none;
    margin: 10px auto 0 auto;
    border: 2px solid black;
    /* 给颜色加上过渡效果 */
    transition: all 0.3s;
}
/* 查看详情按钮的鼠标hover效果 */
.blog .detail:hover {
    background-color: #000;
    color: #fff;
}
引入 blog_list.css
<link rel="stylesheet" href="css/blog_content.css">3.实现博客正文页
创建 blog_content.html
3.1引入导航栏
编辑 blog_content.html
这部分代码和 blog_list.html 中相同, 直接复制即可.
<!-- 导航栏 -->
<div class="nav">
  <img src="img/logo2.jpg" alt="">
  <span class="title">我的博客系统</span>
  <!-- 用来占据中间位置 -->
  <span class="spacer"></span>
  <a href="blog_list.html">主页</a>
  <a href="blog_edit.html">写博客</a>
  <a href="logout">注销</a>
</div>
引入样式 common.css
<link rel="stylesheet" href="css/conmmon.css">3.2引入版心
编辑 blog_content.html
这部分代码和 blog_list.html 相同, 直接复制
<!-- 版心 -->
<div class="container">
  <!-- 左侧个人信息 -->
  <div class="container-left">
  </div>
  <div class="container-right">

  </div>
</div>
3.3引入个人信息
编辑 blog_content.html
这部分代码和 blog_list.html 相同, 直接复制
<!-- 左侧个人信息 -->
<div class="container-left">
  <div class="card">
    <img src="img/doge.jpg" class="avtar" alt="">
    <h3>小林</h3>
    <a href="http:www.github.com">github 地址</a>
    <div class="counter">
      <span>文章</span>
      <span>分类</span>
    </div>
    <div class="counter">
      <span>2</span>
      <span>1</span>
    </div>
  </div>
</div>
3.4实现博客正文
编辑 blog_content.html
博客内容整体放到 div.blog-content 中.
博客内容中包含博客标题 (h3), 博客时间(div.date), 博客正文(p)
<div class="blog-content">

  <!-- 博客标题 -->
  <h3>我的第一篇博客</h3>
  <!-- 博客时间 -->
  <div class="date">2021-06-02</div>
  <!-- 博客正文 -->
  <p>
   从今天起我要好好敲代码.
   Lorem ipsum dolor sit amet, consectetur adipisicing elit. Aut recusandae
omnis natus ut! Autem alias
   ullam sit facilis ipsa dolore, molestiae neque aperiam in a facere dolor
mollitia dolorum animi.
   Lorem ipsum dolor sit amet, consectetur adipisicing elit. Aut recusandae
omnis natus ut! Autem alias
   ullam sit facilis ipsa dolore, molestiae neque aperiam in a facere dolor
mollitia dolorum animi.
   Lorem ipsum dolor sit amet, consectetur adipisicing elit. Aut recusandae
omnis natus ut! Autem alias
   ullam sit facilis ipsa dolore, molestiae neque aperiam in a facere dolor
mollitia dolorum animi.
  </p>
  <p>
   Lorem ipsum dolor sit amet consectetur adipisicing elit. Laudantium sint
accusantium, enim iste
   corrupti itaque, omnis alias maiores nemo quae rerum deleniti facere
officiis iure velit. Blanditiis
   pariatur delectus perferendis.
   Lorem ipsum dolor sit amet consectetur adipisicing elit. Laudantium sint
accusantium, enim iste
   corrupti itaque, omnis alias maiores nemo quae rerum deleniti facere
officiis iure velit. Blanditiis
   pariatur delectus perferendis.
  </p>
</div>
创建 blog_content.css
/* 博客正文容器 */
.blog-content {
  padding: 30px;
}
/* 博客标题 */
.blog-content h3 {
  text-align: center;
  padding: 20px 0;
}
/* 博客日期 */
.blog-content .date {
  color: #008000;
  padding: 10px 0;
  text-align: center;
}
/* 博客内容段落 */
.blog-content p {
  text-indent: 2em;
  padding: 10px 0;
}
引入 blog_content.css
<link rel="stylesheet" href="css/blog_content.css">4.实现博客登陆页
4.1引入导航栏
编辑 login.html
这部分代码和 blog_list.html 中相同, 直接复制即可.
<!-- 导航栏 -->
<div class="nav">
  <img src="img/logo2.jpg" alt="">
  <span class="title">我的博客系统</span>
  <!-- 用来占据中间位置 -->
  <span class="spacer"></span>
  <a href="blog_list.html">主页</a>
  <a href="blog_edit.html">写博客</a>
  <a href="logout">注销</a>
</div>
引入样式 common.css
<link rel="stylesheet" href="css/conmmon.css">4.2实现版心
编辑 login.html
使用 flex 使登陆对话框能够在页面中水平垂直居中.
<!-- 版心 -->
<div class="login-container">

</div>
创建 login.css
.login-container {
  width: 100%;
  height: calc(100% - 50px);
  display: flex;
  justify-content: center;
  align-items: center;
}
引入 login.css
<link rel="stylesheet" href="css/login.css">4.3实现登陆框
编辑 login.html
登陆框整体放到 div.login-dialog 中.
内部包含三个行, 使用 div.row 表示.
每个行里分别包含, 用户名输入框, 密码输入框, 提交按钮.
编辑 login.css
使用 #submit:active 伪类选择器, 实现点击按钮时样式切换的效果.
.login-dialog {
  width: 400px;
  height: 400px;
  background-color: rgba(255, 255, 255, 0.8);
  border-radius: 10px;
}
.login-dialog h3 {
  padding: 50px 0;
  text-align: center;
}
.login-dialog .row {
  height: 50px;
  display: flex;
  justify-content: center;
  align-items: center;
}
.login-dialog .row span {
  display: block;
  width: 100px;
  font-weight: 700;
}
#username,
#password {
  width: 200px;
  height: 40px;
  line-height: 40px;
  font-size: 24px;
  border-radius: 10px;
  border: none;
  outline: none;
  text-indent: 10px;
}
#submit {
  width: 300px;
  height: 50px;
  color: white;
  background-color: green;
  border: none;
  border-radius: 10px;
}
#submit:active {
  background-color: #666;
}
5.实现博客编辑页
创建 blog_edit.html
5.1引入导航栏
编辑 blog_edit.html
这部分代码和 blog_list.html 中相同, 直接复制即可.
<!-- 导航栏 -->
<div class="nav">
  <img src="img/logo2.jpg" alt="">
  <span class="title">我的博客系统</span>
  <!-- 用来占据中间位置 -->
  <span class="spacer"></span>
  <a href="blog_list.html">主页</a>
  <a href="blog_edit.html">写博客</a>
  <a href="logout">注销</a>
</div>
引入样式 common.css
<link rel="stylesheet" href="css/conmmon.css">5..2实现编辑区
编辑 blog_edit.html
整个编辑区放到 div.blog-edit-container 中.
里面包含一个标题编辑区, 和内容编辑区.
标题编辑区, 包含一个 input, 用来填写标题, 以及一个 button 按钮用于提交.
内容编辑区先创建一个 div#editor, 后面将使用 editor.md 进行初始化.
<!-- 编辑框容器 -->
<div class="blog-edit-container">
  <!-- 标题编辑区 -->
  <div class="title">
    <input type="text" placeholder="在这里写下文章标题" id="title">
    <button id="submit">发布文章</button>
  </div>
  <!-- 创建编辑器标签 -->
  <div id="editor"></div>
</div>
创建 blog_edit.css
#editor 需要使用 opacity: 80%; 设置透明度. 如果直接使用 background-color 后面会被
editor.md 给覆盖掉.
.blog-edit-container {
width: 1000px;
height: calc(100% - 50px);
margin: 0 auto;
}
.blog-edit-container .title {
width: 100%;
height: 50px;
display: flex;
justify-content: space-between;
align-items: center;
}
#title {
height: 40px;
width: 890px;
text-indent: 10px;
border-radius: 10px;
outline: none;
border: none;
background-color:rgba(255, 255, 255, 0.8);
}
#submit {
height: 40px;
width: 100px;
color: white;
background-color: orange;
border: none;
outline: none;
border-radius: 10px;
}
#editor {
border-radius: 10px;
/* 针对 #editor 用 bgc 属性无法设置半透明了. 里面包含的内容带了背景色 */
/* background-color:rgba(255, 255, 255, 0.8); */
/* 可以使用 opacity 属性实现 */
opacity: 80%;
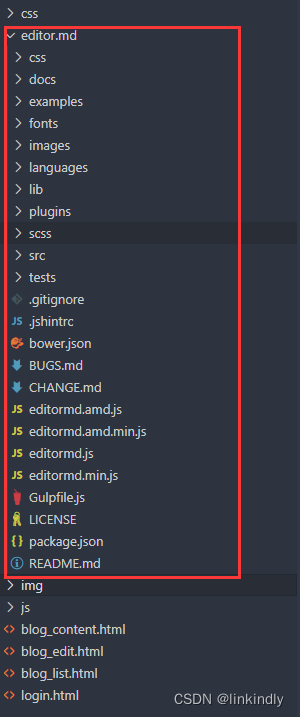
}5.3引入 editor.md
editor.md 是一个开源的页面 markdown 编辑器组件.
官网参见: https://pandao.github.io/editor.md/
用法可以参考代码中的 examples 目录中的示例. 非常丰富.
1) 下载 editor.md
从官网上下载到压缩包. 放到目录中. 目录结构如下:
2) 引入 editor.md
<!-- 引入 editor.md 的依赖 -->
<link rel="stylesheet" href="editor.md/css/editormd.min.css" />
<script src="js/jquery.min.js"></script>
<script src="editor.md/lib/marked.min.js"></script>
<script src="editor.md/lib/prettify.min.js"></script>
<script src="editor.md/editormd.js"></script>
3) 初始化 editor.md
编辑 blog_edit.html
// 初始化编辑器
var editor = editormd("editor", {
  // 这里的尺寸必须在这里设置. 设置样式会被 editormd 自动覆盖掉.
  width: "100%",
  // 高度 100% 意思是和父元素一样高. 要在父元素的基础上去掉标题编辑区的高度
  height: "calc(100% - 50px)",
  // 编辑器中的初始内容
  markdown: "# 在这里写下一篇博客",
  // 指定 editor.md 依赖的插件路径
  path: "editor.md/lib/"
});