文章目录
- 环境准备
- 资源查看
- MindFormers安装
- MindSpore安装
- CANN安装(失败)
- 镜像拉取
- 模型下载
- 模型单卡单次推理
- 基于高阶接口推理
- 基于Pipeline推理
- 模型单卡多次推理
- 模型多卡多次推理
- 微调
- 数据模型准备
- 全参微调
- Lora微调
环境准备
首先尝试从分配的默认环境适配Baichuan2(剧透:最终因文件上传和权限原因配置失败),然后通过拉取镜像解决,可以直接跳到最后一部分
资源查看
输入npu-smi info,可得
+------------------------------------------------------------------------------------------------+
| npu-smi 23.0.rc2                 Version: 23.0.rc2                                             |
+---------------------------+---------------+----------------------------------------------------+
| NPU   Name                | Health        | Power(W)    Temp(C)           Hugepages-Usage(page)|
| Chip                      | Bus-Id        | AICore(%)   Memory-Usage(MB)  HBM-Usage(MB)        |
+===========================+===============+====================================================+
| 0     910B                | OK            | 70.7        37                0    / 0             |
| 0                         | 0000:C1:00.0  | 0           1382 / 15137      0    / 32768         |
+===========================+===============+====================================================+
| 1     910B                | OK            | 67.6        37                0    / 0             |
| 0                         | 0000:81:00.0  | 0           2035 / 15137      0    / 32768         |
+===========================+===============+====================================================+
| 2     910B                | OK            | 69.0        37                0    / 0             |
| 0                         | 0000:41:00.0  | 0           2537 / 15137      2    / 32768         |
+===========================+===============+====================================================+
| 3     910B                | OK            | 67.2        36                0    / 0             |
| 0                         | 0000:01:00.0  | 0           2347 / 15039      0    / 32768         |
+===========================+===============+====================================================+
| 4     910B                | OK            | 69.6        36                0    / 0             |
| 0                         | 0000:C2:00.0  | 0           1263 / 15137      0    / 32768         |
+===========================+===============+====================================================+
| 5     910B                | OK            | 67.7        36                0    / 0             |
| 0                         | 0000:82:00.0  | 0           1495 / 15137      1    / 32768         |
+===========================+===============+====================================================+
| 6     910B                | OK            | 69.3        36                0    / 0             |
| 0                         | 0000:42:00.0  | 0           2365 / 15137      1    / 32768         |
+===========================+===============+====================================================+
| 7     910B                | OK            | 68.1        35                0    / 0             |
| 0                         | 0000:02:00.0  | 0           3159 / 15039      4    / 32768         |
+===========================+===============+====================================================+
+---------------------------+---------------+----------------------------------------------------+
| NPU     Chip              | Process id    | Process name             | Process memory(MB)      |
+===========================+===============+====================================================+
| No running processes found in NPU 0                                                            |
+===========================+===============+====================================================+
| No running processes found in NPU 1                                                            |
+===========================+===============+====================================================+
| No running processes found in NPU 2                                                            |
+===========================+===============+====================================================+
| No running processes found in NPU 3                                                            |
+===========================+===============+====================================================+
| No running processes found in NPU 4                                                            |
+===========================+===============+====================================================+
| No running processes found in NPU 5                                                            |
+===========================+===============+====================================================+
| No running processes found in NPU 6                                                            |
+===========================+===============+====================================================+
| No running processes found in NPU 7                                                            |
+===========================+===============+====================================================+
MindFormers安装
参考gitee1
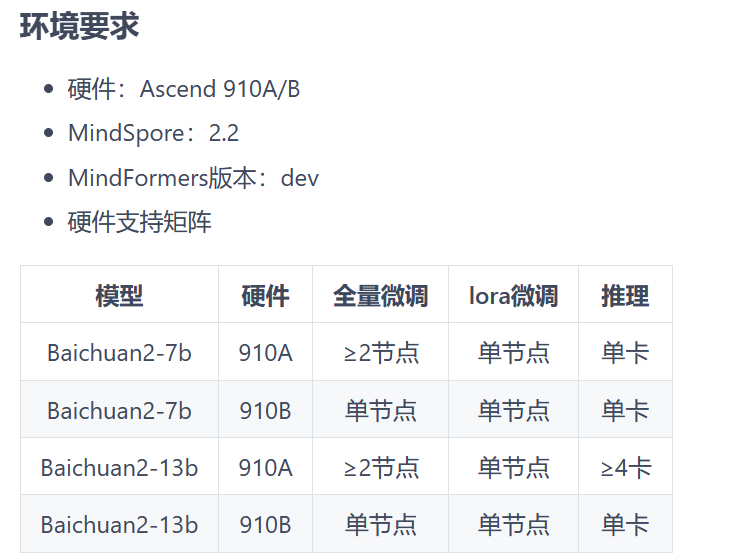
和gitee2的环境要求

创建虚拟环境,conda create -n wjn python=3.7.10(官网上没有给出MindSpore 2.2.0版本对应的python,但是MindSpore 2.0对应的版本是3.7.5,而且服务器上默认的Python版本是3.7.10,比3.7.5略大,因此大胆假设该用3.7.10)
在当前目录下安装MindFormers
git clone -b dev https://gitee.com/mindspore/mindformers.git
cd mindformers
bash build.sh
MindSpore安装
使用uname -a查看服务器架构

根据教程,使用如下命令安装
export MS_VERSION=2.2.0
# aarch64 + Python3.7
pip install https://ms-release.obs.cn-north-4.myhuaweicloud.com/${MS_VERSION}/MindSpore/unified/aarch64/mindspore-${MS_VERSION/-/}-cp37-cp37m-linux_aarch64.whl --trusted-host ms-release.obs.cn-north-4.myhuaweicloud.com -i https://pypi.tuna.tsinghua.edu.cn/simple
执行python -c "import mindspore;mindspore.set_context(device_target='Ascend');mindspore.run_check()"得到报错,原因是cann的版本不对:
RuntimeError: Unsupported device target Ascend. This process only supports one of the ['CPU']. Please check whether the Ascend environment is installed and configured correctly, and check whether current mindspore wheel package was built with "-e Ascend". For details, please refer to "Device load error message".
CANN安装(失败)
根据cann查看教程输入cat ascend_toolkit_install.info,原cann的版本为:

结合版本对照表,需更新至7.0:
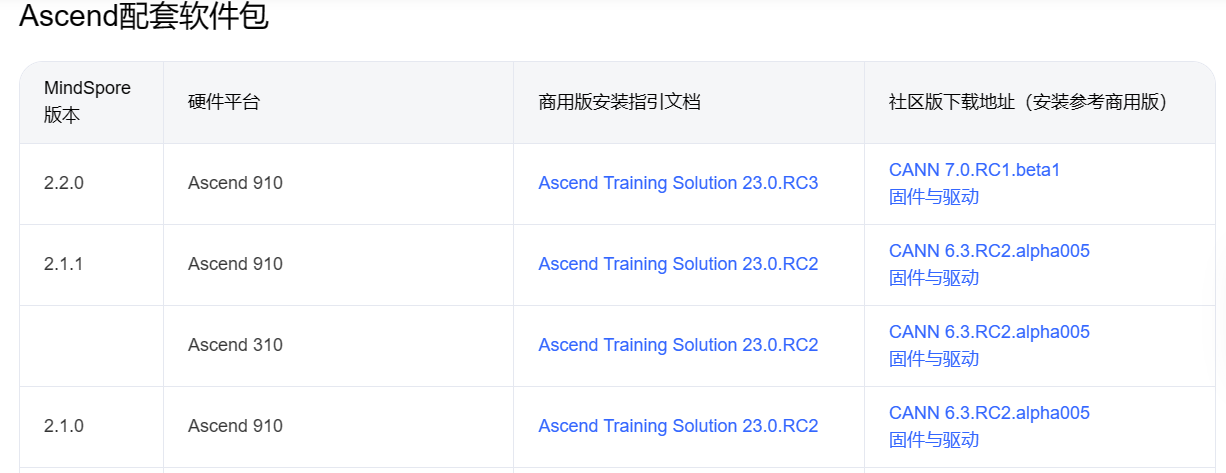
根据安装教程,toolkit和kernels这俩东西比较重要:

在资源网站上下载对应安装包:

下载到本地后尝试通过obs上传到云,很不幸,连续三次都失败了:
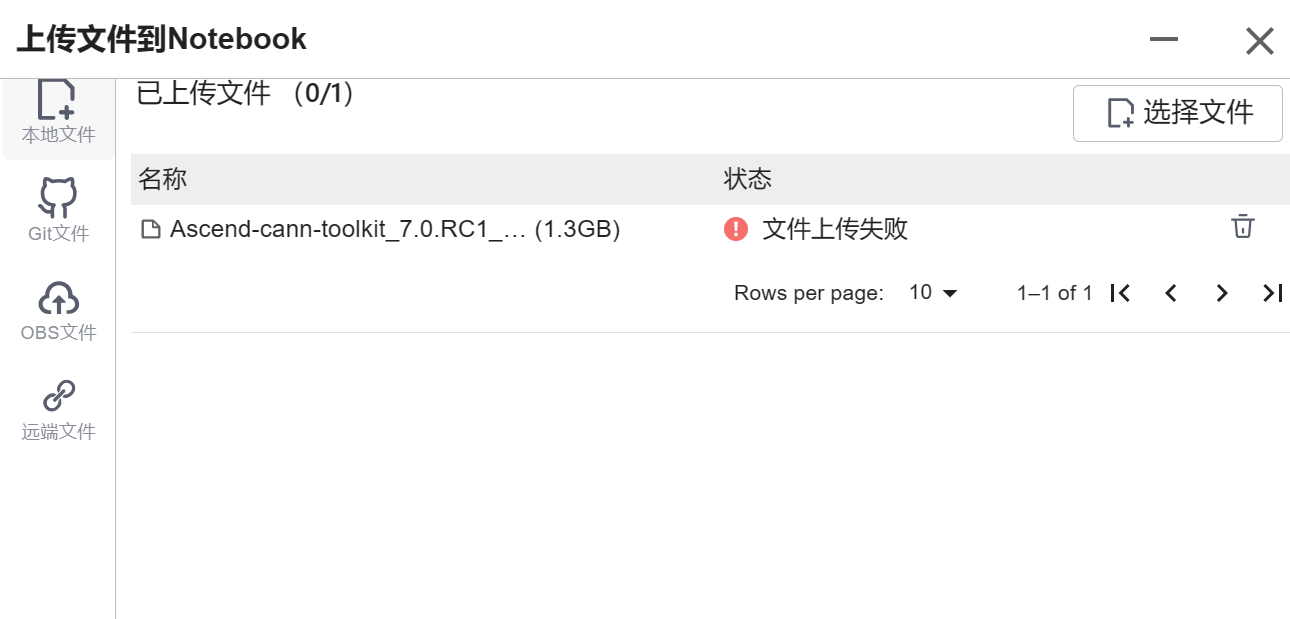
俗话说得好,事不过三,而且我发现云用户压根没有root权限,估计也没办法改cann,所以,还是老老实实用默认的环境吧。
镜像拉取
点击镜像管理,突然发现有个2_2_0,赶紧新建了一个,成功
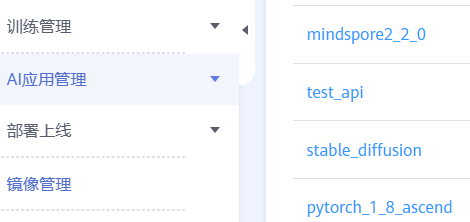
接下来再完成前述的MindFormers安装步骤即可,pip list的结果为:

模型下载
根据Baichuan教程,将下列模型文件和词表文件下载到本地


wget https://ascend-repo-modelzoo.obs.cn-east-2.myhuaweicloud.com/MindFormers/baichuan2/Baichuan2_7B_Chat.ckpt
wget https://ascend-repo-modelzoo.obs.cn-east-2.myhuaweicloud.com/MindFormers/baichuan2/Baichuan2_7B_Base.ckpt
wget https://ascend-repo-modelzoo.obs.cn-east-2.myhuaweicloud.com/MindFormers/baichuan2/tokenizer.model

模型单卡单次推理
基于高阶接口推理
其实就是基于配置文件推理,将run_baichuan2_7b.yaml中的内容修改为:
runner_config:
  epochs: 1
  batch_size: 1
  sink_mode: True
  sink_size: 2
...
checkpoint_name_or_path: "Baichuan2/models/Baichuan2_7B_Chat.ckpt"
...
device_id: 1
...
vocab_file: 'Baichuan2/models/tokenizer.model'
...
执行以下代码,注意上面修改的部分也可以直接写在命令行中:
%run run_baichuan2.py \
--config "run_baichuan2_7b.yaml" \
--run_mode predict \
--use_parallel False \
--predict_data '将以下内容翻译成英文:你今天真好看。'
不知道为啥,乱码了

发现上面有这么一句报错:
2023-11-06 16:59:56,800 - mindformers[mindformers/modules/layers.py:549] - WARNING - The user passed the custom defined activation function True. If the user want to enable shard for the activation cell, the user should set the shard for each primitives in the cell.
2023-11-06 17:00:59,340 - mindformers[mindformers/models/base_model.py:121] - INFO - model built, but weights is unloaded, since the config has no checkpoint_name_or_path attribute or checkpoint_name_or_path is None.
原来是配置文件里面的模型路径没改全,开头改为:
load_checkpoint: '/Baichuan2/models/Baichuan2_7B_Chat.ckpt'
成功,耗时七分钟


基于Pipeline推理
run_baichuan2_pipeline.py文件内容:
from mindspore import context
from mindformers.pipeline import pipeline
from mindformers.models import LlamaConfig

from baichuan2_7b import Baichuan7BV2ForCausalLM
from baichuan2_tokenizer import Baichuan2Tokenizer

context.set_context(device_id=1, mode=0)
# init model
baichuan2_model_path = "Baichuan2/models/Baichuan2_7B_Chat.ckpt"    # Baichuan2-7B ckpt path
baichuan2_config = LlamaConfig(
    vocab_size=125696,
    pad_token_id=0,
    rms_norm_eps=1.0e-6,
    checkpoint_name_or_path=baichuan2_model_path,
    use_past=True
)
baichuan2_model = Baichuan7BV2ForCausalLM(
    config=baichuan2_config
)
# init tokenizer
tokenizer_path = "Baichuan2/models/tokenizer.model"            # Baichuan2-7B tokenizer.model path
tokenizer = Baichuan2Tokenizer(
    vocab_file=tokenizer_path
)
pipeline_task = pipeline(task="text_generation", model=baichuan2_model, tokenizer=tokenizer)
pipeline_result = pipeline_task("将以下内容翻译成英文:你今天真好看。",
                                do_sample=False,
                                repetition_penalty=1.05,
                                max_length=64)
print(pipeline_result)
成功执行,就是生成速度好像更慢了


模型单卡多次推理
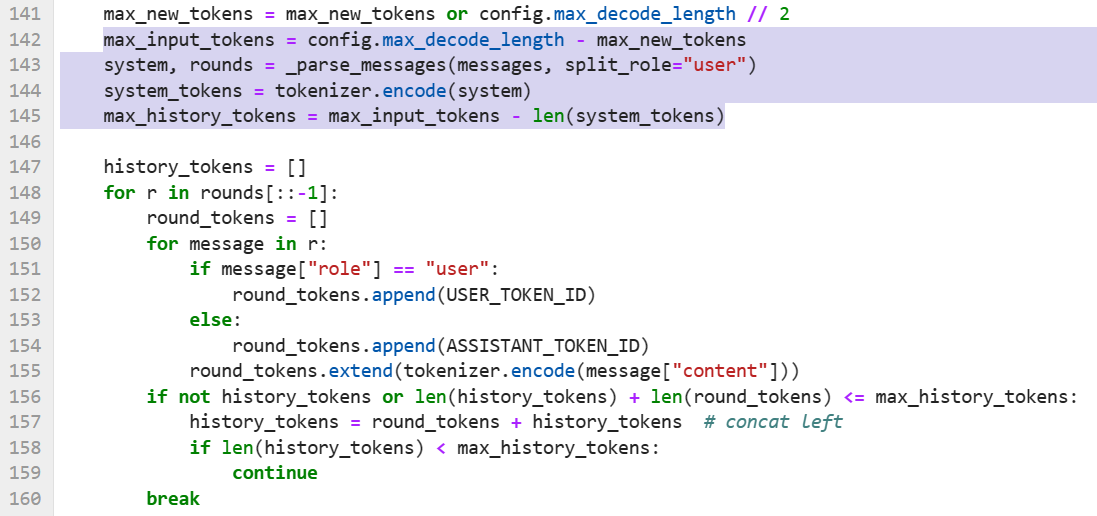
为实现多轮对话中记忆对话历史,将run_baichuan2_7b.yaml中的内容修改为:
max_decode_length: 2048
这是因为历史长度由下列run_baichuan2_chat.py代码计算,只有保证max_decode_length和max_new_tokens(默认为512)之间的差值够大才不会对对话历史进行裁剪:
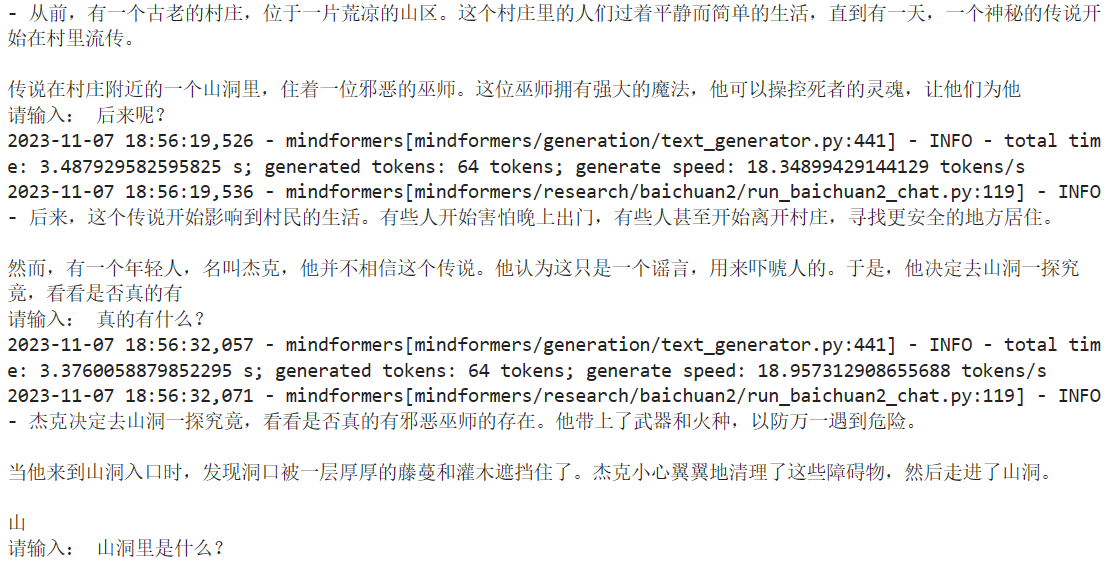
成功达成慢慢讲鬼故事成就:

模型多卡多次推理
首先需要生成RANK_TABLE_FILE文件
尝试在mindformers文件夹下使用命令python mindformers/tools/hccl_tools.py --device_num "[0,8)"生成,喜提报错:

查了一下issue,原来只能用现成的:

接下来写脚本run_predict.sh:
export RANK_TABLE_FILE=$1

# define variable
export RANK_SIZE=8
export START_RANK=0 # this server start rank
export END_RANK=8 # this server end rank

# run
for((i=${START_RANK}; i<${END_RANK}; i++))
do
    export RANK_ID=$i
    export DEVICE_ID=$((i-START_RANK))
    echo "Start distribute running for rank $RANK_ID, device $DEVICE_ID"
    python3 ./run_baichuan2_chat.py --use_parallel True &> minformers_$RANK_ID.log &
done
执行bash run_predict.sh /user/config/jobstart_hccl.json
打开当前路径下的minformers_0.log文件发现报错:ValueError: The pipeline stage 2 in auto_parallel_context is not equal to the pipeline_stage 1 in the config. 再进到run_baichuan2_7b.yaml`,发现默认设备数是16卡,对应的pipeline_stage为2,但实际是8卡,那就改成下面的试试看

再次运行,八卡推理成功
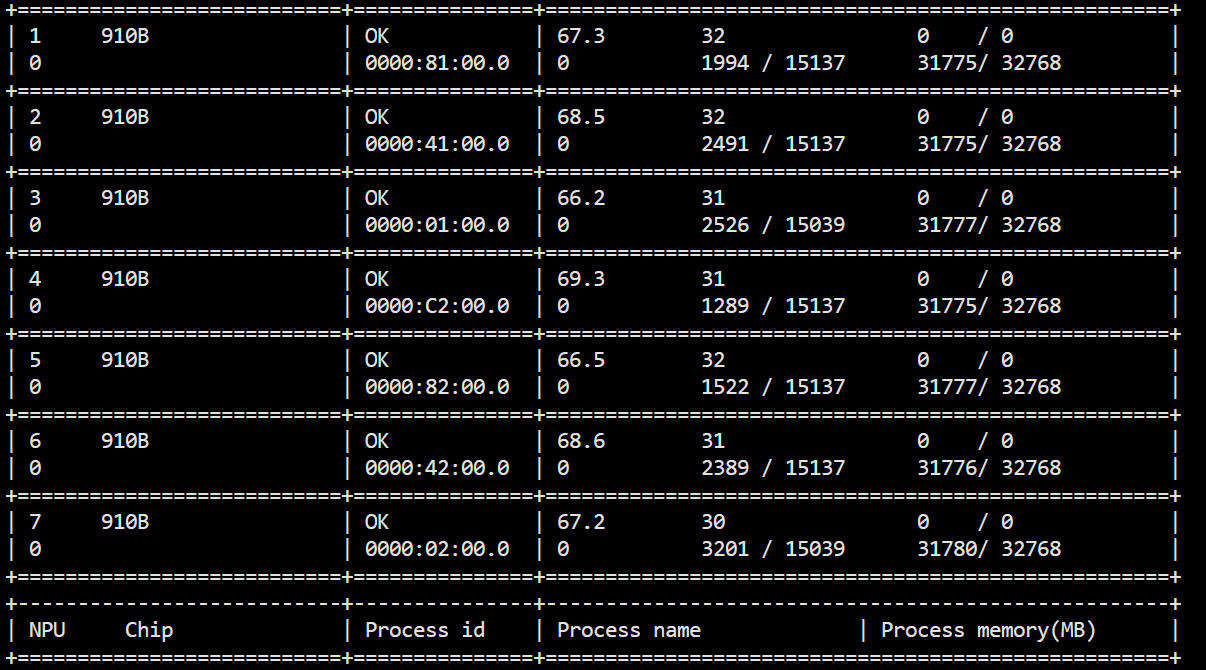
但是会有这样的报错
model.layers.0.attention.wo.weight in the argument 'net' should have the same shape as model.layers.0.attention.wo.weight in the argument 'parameter_dict'. But got its shape (512, 4096) in the argument 'net' and shape (4096, 4096) in the argument 'parameter_dict'.May you need to check whether the checkpoint you loaded is correct or the batch size and so on in the 'net' and 'parameter_dict' are same.
可以看到4096和512之间差了个8,这就是模型权重切分没有设置的问题,在脚本run_predict.sh里额外设一个--auto_trans_ckpt True的参数试试。
这次又换了另一个错误
line 435, in transform_ckpt
    raise ValueError("The load_checkpoint must be a dir and "
ValueError: The load_checkpoint must be a dir and ckpt should be stored in the format of load_checkpoint/rank_x/xxx.ckpt,but get /home/ma-user/work/Baichuan2/models/Baichuan2_7B_Chat.ckpt.
直接新建路径Baichuan2/network/rank_0,将Baichuan2_7B_Chat.ckpt文件复制进去,将run_baichuan2_7b.yaml中的内容修改为:
load_checkpoint: 'Baichuan2/network'
运行成功

但还是没法真正做到多轮对话,因为网页上有这么一句话:

尽管在云服务器上执行npu-smi info查到的是910B卡,但是华为实际上是910A卡,这也是需要注意到的一个点。
微调
数据模型准备
使用wget https://ghproxy.com/https://github.com/baichuan-inc/Baichuan2/blob/main/fine-tune/data/belle_chat_ramdon_10k.json命令将数据集下载到data目录下
其内容为:
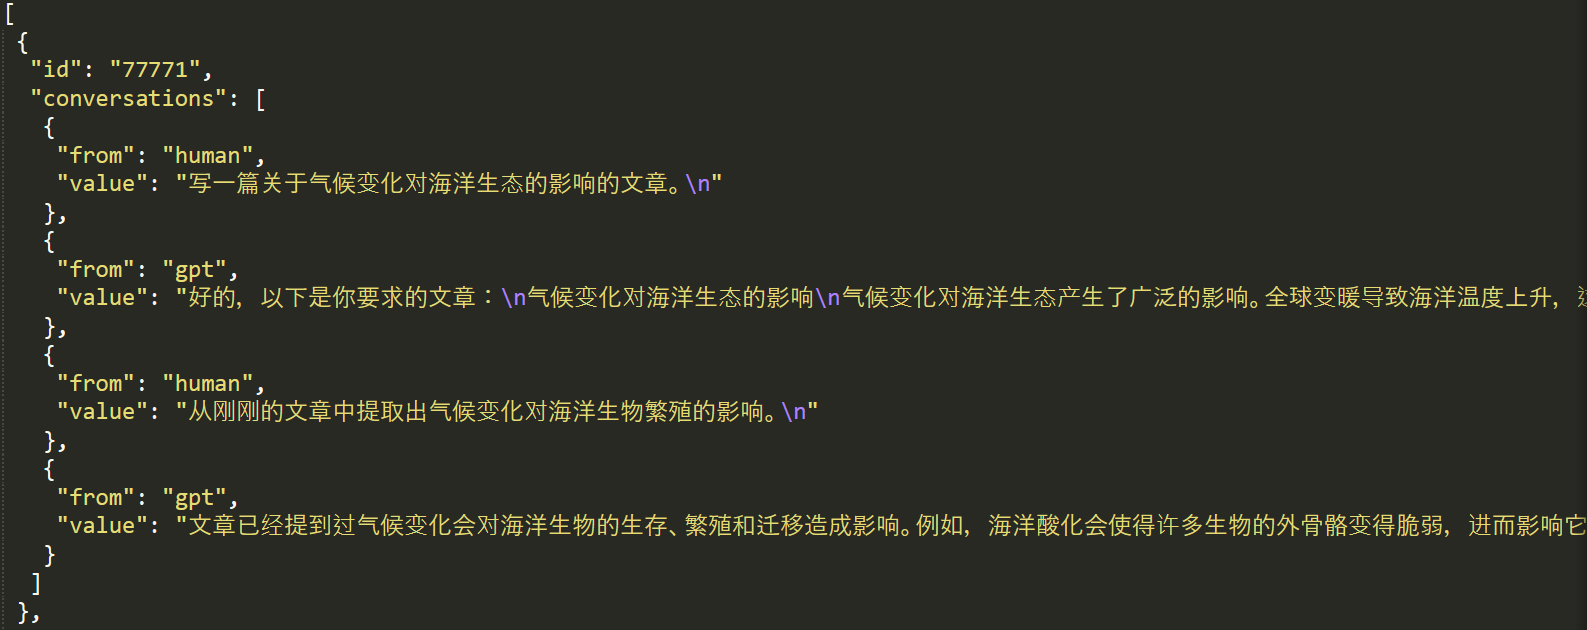
执行下列命令对其做预处理:
python belle_preprocess.py \
--input_glob Baichuan2/data/belle_chat_ramdon_10k.json \
--model_file Baichuan2/models/tokenizer.model \
--output_file Baichuan2/data/belle_512.mindrecord \
--seq_length 512
执行后得到以下输出:

新建路径Baichuan2/network1/rank_0,将Baichuan2_7B_Base.ckpt文件复制进去
全参微调
修改run_baichuan2_7b.yaml中相关配置
load_checkpoint: 'Baichuan2/network1'
auto_trans_ckpt: True  # If true, auto transform load_checkpoint to load in distributed model
use_parallel: True
run_mode: 'finetune'
checkpoint_name_or_path: "Baichuan2/models/Baichuan2_7B_Base.ckpt"
dataset_dir: "Baichuan2/data"
batch_size: 1
parallel_config:
  data_parallel: 8
  model_parallel: 1
  pipeline_stage: 1
  micro_batch_num: 1
  vocab_emb_dp: True
  gradient_aggregation_group: 4
执行
bash run_singlenode.sh \
"python run_baichuan2.py \
--config run_baichuan2_7b.yaml \
--train_data /home/ma-user/work/Baichuan2/data" \
/user/config/jobstart_hccl.json [0,8] 8
结果为

