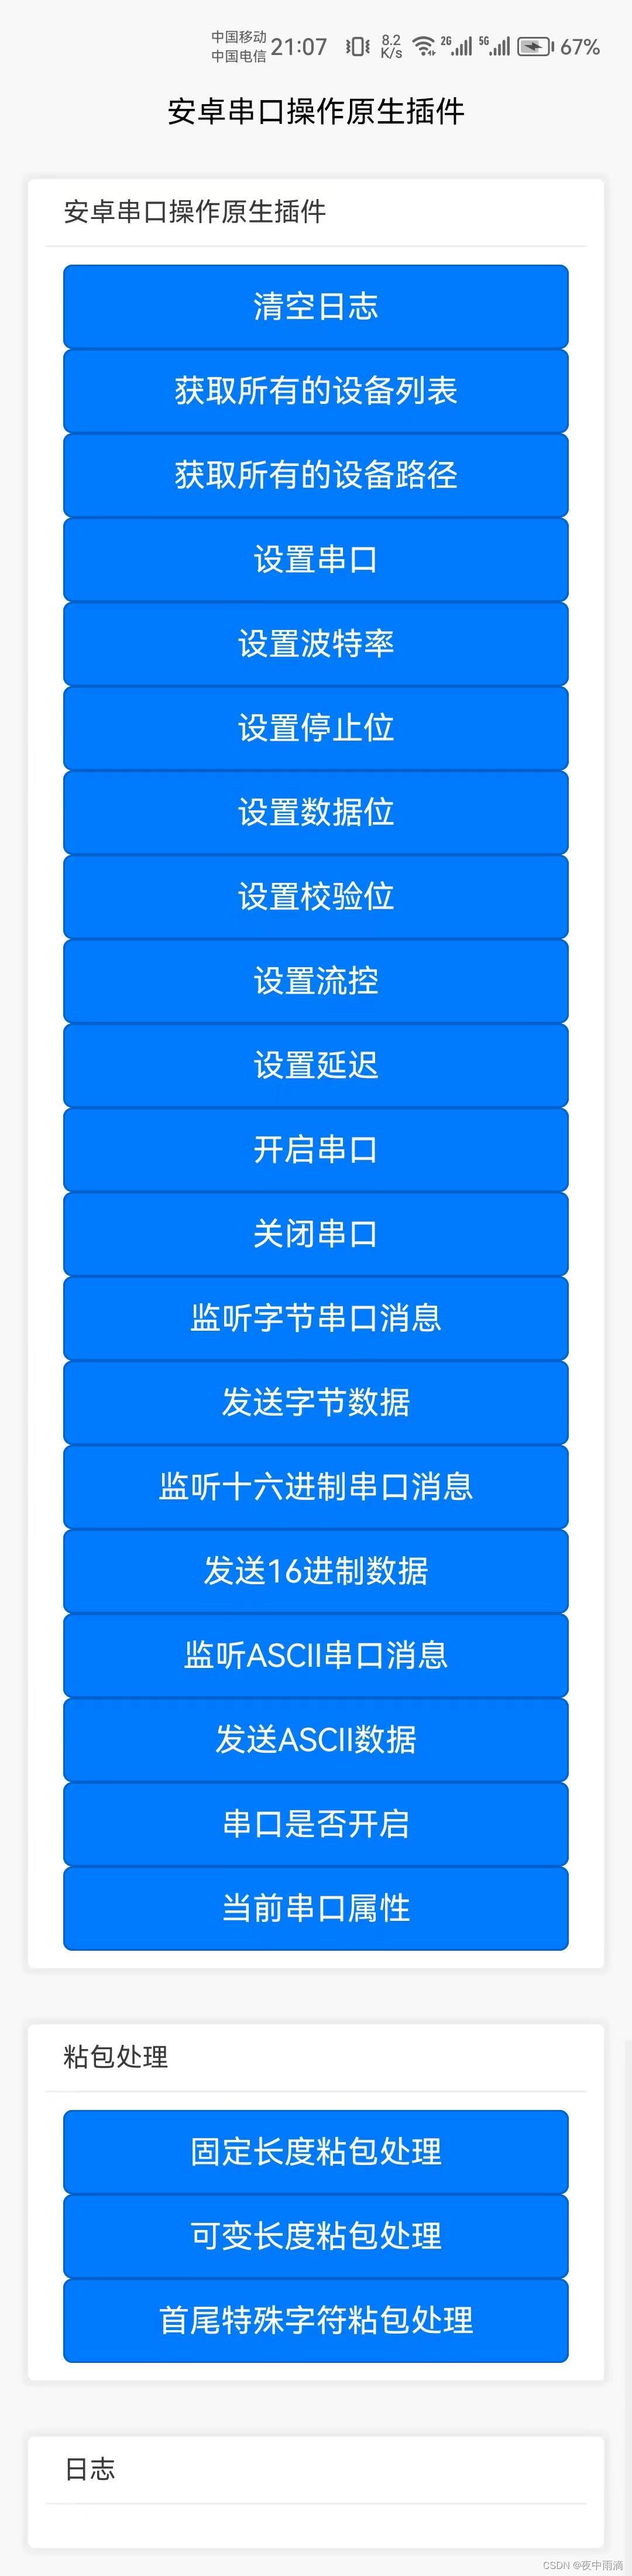
插件介绍
安卓串口操作原生插件,支持设置串口,波特率,停止位,数据位,校验位,流控以及延迟,支持粘包处理解决分包问题,支持多串口操作,无需root
插件地址
安卓串口操作原生插件 - DCloud 插件市场
超级福利
uniapp 插件购买超级福利
详细使用文档
uniapp 安卓串口操作原生插件使用文档
用法
在需要使用插件的页面加载以下代码
const module = uni.requireNativePlugin("leven-serial-SerialModule");多串口操作
如果您的项目涉及到多串口的话,可以多引入一些module,目前插件提供了以下几个module
const module = uni.requireNativePlugin("leven-serial-SerialModule");
const module2 = uni.requireNativePlugin("leven-serial-SerialTwoModule");
const module3 = uni.requireNativePlugin("leven-serial-SerialThreeModule");
const module4 = uni.requireNativePlugin("leven-serial-SerialFourModule");
const module5 = uni.requireNativePlugin("leven-serial-SerialFiveModule");
如果您不想这样使用,多串口可以直接使用
const module = uni.requireNativePlugin("leven-serial-SerialModule");然后在使用时打开不用时关闭即可(即按需使用)
如果多串口一直保持打开状态的话就需要引入上面的module
页面内容
<template>
  <view>
    <view>
      <uni-card title="安卓串口操作原生插件">
        <view>
          <button type="primary" @click="logStr = ''">清空日志</button>
          <button type="primary" @click="getAllDevices">获取所有的设备列表</button>
          <button type="primary" @click="getAllDevicesPath">获取所有的设备路径</button>
          <button type="primary" @click="setPort">设置串口</button>
          <button type="primary" @click="setBaudRate">设置波特率</button>
          <button type="primary" @click="setStopBits">设置停止位</button>
          <button type="primary" @click="setDataBits">设置数据位</button>
          <button type="primary" @click="setParity">设置校验位</button>
          <button type="primary" @click="setFlowCon">设置流控</button>
          <button type="primary" @click="setDelay">设置延迟</button>
          <button type="primary" @click="open">开启串口</button>
          <button type="primary" @click="close">关闭串口</button>
          <button type="primary" @click="onListenerBytes">监听字节串口消息</button>
          <button type="primary" @click="sendBytes">发送字节数据</button>
          <button type="primary" @click="onListenerHex">监听十六进制串口消息</button>
          <button type="primary" @click="sendHex">发送16进制数据</button>
          <button type="primary" @click="onListenerText">监听ASCII串口消息</button>
          <button type="primary" @click="sendText">发送ASCII数据</button>
          <button type="primary" @click="isOpen">串口是否开启</button>
          <button type="primary" @click="getSerialProperty">当前串口属性</button>
        </view>
      </uni-card>
      <uni-card title="粘包处理">
        <view>
          <button type="primary" @click="setStaticLenStickPackage">固定长度粘包处理</button>
          <button type="primary" @click="setVariableLenStickPackage">可变长度粘包处理</button>
          <button type="primary" @click="setSpecifiedStickPackage">首尾特殊字符粘包处理</button>
        </view>
      </uni-card>
    </view>
    <view>
      <uni-card class="uni-card-box" title="日志">
        <view><text style="font-size: 14px; flex-wrap: wrap;">{{logStr}}</text></view>
      </uni-card>
    </view>
  </view>
</template>

<script>
  const module = uni.requireNativePlugin("leven-serial-SerialModule");
  export default {
    data() {
      return {
        logStr: ""
      }
    },
    mounted() {
      // 动态开启应用权限
      // this.openAndroidPermission();
    },
    methods: {
      // 获取所有设备列表
      getAllDevices() {
        let that = this;
        module.getAllDevices(res => {
          that.writeLog(JSON.stringify(res));
        })
      },
      // 获取所有设备路径
      getAllDevicesPath() {
        let that = this;
        module.getAllDevicesPath(res => {
          that.writeLog(JSON.stringify(res));
        })
      },
      // 设置串口
      setPort() {
        let that = this;
        module.setPort("/dev/ttyS1", res => {
          that.writeLog(JSON.stringify(res));
        })
      },
      // 设置波特率
      setBaudRate() {
        let that = this;
        module.setBaudRate(9600, res => {
          that.writeLog(JSON.stringify(res));
        })
      },
      // 设置停止位
      setStopBits() {
        let that = this;
        module.setStopBits(1, res => {
          that.writeLog(JSON.stringify(res));
        })
      },
      // 设置数据位
      setDataBits() {
        let that = this;
        module.setDataBits(1, res => {
          that.writeLog(JSON.stringify(res));
        })
      },
      // 设置校验位
      setParity() {
        let that = this;
        module.setParity(1, res => {
          that.writeLog(JSON.stringify(res));
        })
      },
      // 设置流控
      setFlowCon() {
        let that = this;
        module.setFlowCon(1, res => {
          that.writeLog(JSON.stringify(res));
        })
      },
      // 设置延迟
      setDelay() {
        let that = this;
        module.setDelay(500, res => {
          that.writeLog(JSON.stringify(res));
        })
      },
      // 开启串口
      open() {
        let that = this;
        module.open(res => {
          that.writeLog(JSON.stringify(res));
        })
      },
      // 关闭串口
      close() {
        let that = this;
        module.close(res => {
          that.writeLog(JSON.stringify(res));
        })
      },
      // 监听字节串口消息
      onListenerBytes() {
        let that = this;
        module.onListenerBytes(res => {
          that.writeLog(JSON.stringify(res));
        })
      },
      // 发送字节数据
      sendBytes() {
        let that = this;
        module.sendBytes("ab", res => {
          that.writeLog(JSON.stringify(res));
        })
      },
      // 监听十六进制串口消息
      onListenerHex() {
        let that = this;
        module.onListenerHex(res => {
          that.writeLog(JSON.stringify(res));
        })
      },
      // 发送16进制数据
      sendHex() {
        let that = this;
        module.sendHex("F001020F", res => {
          that.writeLog(JSON.stringify(res));
        })
      },
      // 监听ASCII消息串口消息
      onListenerText() {
        let that = this;
        module.onListenerText(res => {
          that.writeLog(JSON.stringify(res));
        })
      },
      // 发送ASCII数据
      sendText() {
        let that = this;
        module.sendText("ABCDEFG", res => {
          that.writeLog(JSON.stringify(res));
        })
      },
      // 串口是否开启
      isOpen() {
        let that = this;
        module.isOpen(res => {
          that.writeLog(JSON.stringify(res));
        })
      },
      // 当前串口属性
      getSerialProperty() {
        let that = this;
        module.getSerialProperty(res => {
          that.writeLog(JSON.stringify(res));
        })
      },
      // 固定长度粘包处理
      setStaticLenStickPackage() {
        let that = this;
        module.setStaticLenStickPackage({
          length: 16
        }, res => {
          that.writeLog(JSON.stringify(res));
        })
      },
      // 固定长度粘包处理
      setVariableLenStickPackage() {
        let that = this;
        module.setVariableLenStickPackage({
          byteOrder: 1,
          lenSize: 2,
          lenIndex: 0,
          offset: 0
        }, res => {
          that.writeLog(JSON.stringify(res));
        })
      },
      // 首尾特殊字符粘包处理
      setSpecifiedStickPackage() {
        let that = this;
        module.setSpecifiedStickPackage({
          head: "^",
          tail: "$"
        }, res => {
          that.writeLog(JSON.stringify(res));
        })
      },
      // 写日志
      writeLog(str) {
        console.log(str)
        let logStr = uni.$lv.date.format(null, "yyyy-mm-dd hh:MM:ss") + " " + str + "\n";
        this.logStr = logStr + this.logStr;
      }
    }
  }
</script>

<style>

</style>
插件方法
- 1.获取所有设备列表
- 2.获取所有设备路径
- 3.监听串口消息(已删除)
- 4.设置串口
- 5.设置波特率
- 6.设置停止位
- 7.设置数据位
- 8.设置校验位
- 9.设置流控
- 10.设置延迟
- 11.开启串口
- 12.关闭串口
- 13.监听字节串口消息
- 14.发送字节消息
- 15.监听十六进制串口消息
- 16.发送16进制消息
- 17.监听ASCII消息串口消息
- 18.发送ASCII消息
- 19.串口是否开启
- 20.当前串口属性
- 21.粘包处理
- 固定长度粘包处理
- 可变长度粘包处理
- 首尾特殊字符粘包处理
具体方法的使用请参考详细使用文档
联系作者
购买插件前请先试用,试用通过再购买。在试用中如果遇到任何问题,可与作者联系,QQ:334106817,将全力协助你使用本插件


![VM虚拟机逆向---[羊城杯 2021]Babyvm 复现【详解】](https://img-blog.csdnimg.cn/632f8a02e2d144c0ae2f1462606049fb.png)