微服务架构——笔记(4)
基于分布式的微服务架构
本次笔记为 此次项目的记录,便于整理思路,仅供参考,笔者也将会让程序更加完善
内容包括:8001集群构建,负载均衡,服务发现,Eureka自我保护

文章来源B站视频
尚硅谷SpringCloud框架开发教程(SpringCloudAlibaba微服务分布式架构丨Spring Cloud)教程
本次笔记内容为支付服务提供者8001集群环境构建
一、支付服务提供者8001集群环境构建
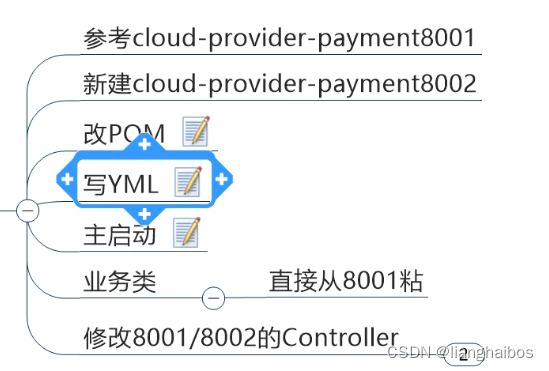
1.1 yml修改
server:
  port: 8002

spring:
  application:
    name: cloud-payment-service
  datasource:
    type: com.alibaba.druid.pool.DruidDataSource  #当前数据源操作类型
    driver-class-name: org.gjt.mm.mysql.Driver                 #mysql驱动包
    url: jdbc:mysql://localhost:3306/db2023?useUnicode=true&&characterEncoding=utf-8&useSSL=false
    username: root
    password: tiger

eureka:
  client:
    # 表示是否将自己注册进eurekaserver默认为true
    register-with-eureka: true
    # 是否从eurekaserver抓取已有的注册信息,默认为true。单节点无所谓,集群必须设置为true才能配合
    fetchRegistry: true
    service-url:
      defaultZone: http://eureka7001.com:7001/eureka,http://eureka7002.com:7002/eureka

mybatis:
  mapperLocations: classpath:mapper/*.xml
  type-aliases-package: com.liangstar.springcloud.entities   #所有Entity别名类所在包
1.2 启动修改
package com.liangstar.springcloud;

import org.springframework.boot.SpringApplication;
import org.springframework.boot.autoconfigure.SpringBootApplication;
import org.springframework.cloud.netflix.eureka.EnableEurekaClient;

@SpringBootApplication
@EnableEurekaClient
public class PaymentMain8002 {
    public static void main(String[] args) {
        SpringApplication.run(PaymentMain8002.class,args);
    }
}
注:8002与8001完全相同,除了端口等
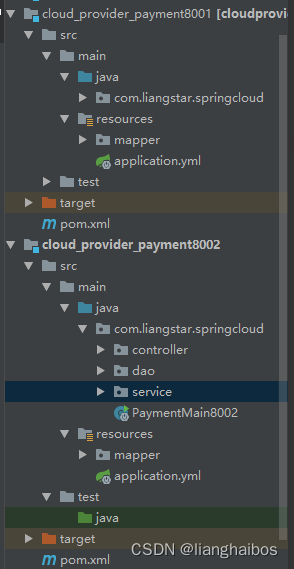
1.3 Controller修改
8001controller
@RestController
@Slf4j
public class PaymentController {
    @Resource
    private PaymentService paymentService;

    @Value("${server.port}")
    private String serverPort;

    @PostMapping(value = "/payment/create")
    public CommonResult create(@RequestBody Payment payment){
        int result = paymentService.create(payment);
        log.info("********插入结果"+result);
        if(result > 0){
            return new CommonResult(200,"插入数据库成功,serverPort:"+serverPort,result);
        }else{
            return new CommonResult(444,"插入数据库失败,serverPort:"+serverPort,null);
        }
    }

    @GetMapping(value = "/payment/get/{id}")
    public CommonResult getPaymentById(@PathVariable("id") Long id){
       Payment payment = paymentService.getPaymentId(id);
        log.info("@@@@@@@@查询结果"+payment);
        if(payment != null){
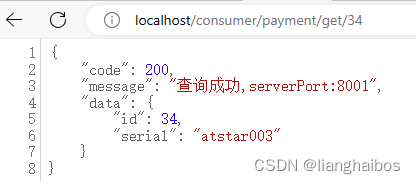
            return new CommonResult(200,"查询成功,serverPort:"+serverPort,payment);
        }else{
            return new CommonResult(444,"没有对应记录,查询Id"+id,null);
        }
    }
}
实际就添加了个来源声明,serverPort
1.4 负载均衡

coustmer中的controller初始状态为写死状态

但我们需要使用Eureka指明的服务端口。
通过Eureka识别服务名
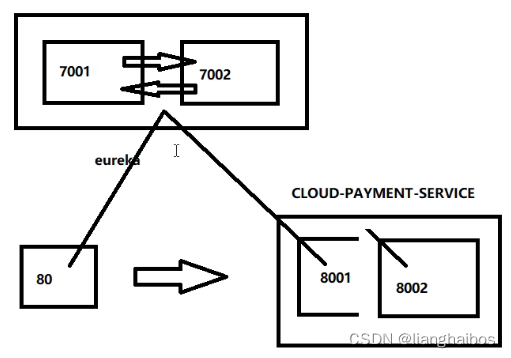
第一步:修改OrderController
//    public static final String PAYMENT_URL = "http://localhost:8001";
    public static final String PAYMENT_URL = "http://CLOUD-PAYMENT-SERVICE";
第二步:修改Orderconfig,resttemplate添加@LoadBalanced注解
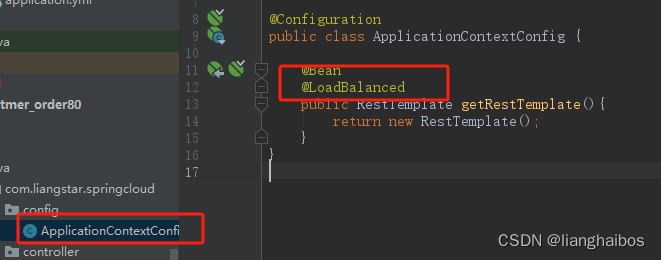
默认轮询
1.5 actuator微服务信息完善

主机名称服务名称修改:
访问信息有IP信息提示
8001、8002application.yml
添加instance与client对齐
  instance:
    instance-id: payment8001
    prefer-ip-address: true   #访问路径可以显示IP地址
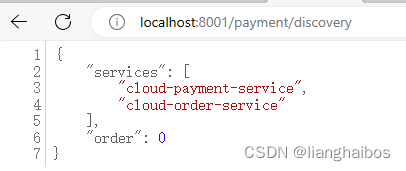
1.6 服务发现Discovery

 @Resource
    private DiscoveryClient discoveryClient;

    @GetMapping(value = "/payment/discovery")
    public Object discovery(){
        List<String> services = discoveryClient.getServices();
        for(String element :services){
            log.info("******element******"+element);
        }
        List<ServiceInstance> instances = discoveryClient.getInstances("CLOUD-PAYMENT-SERVICE");
        for (ServiceInstance instance : instances) {
            log.info(instance.getServiceId()+"\t"+instance.getHost()+"\t"+instance.getPort()+"\t"+instance.getUri());
        }
        return this.discoveryClient;
    }
启动类,添加注解
@EnableDiscoveryClient
二、Eureka自我保护

某时刻某一个微服务不可用了,Eureka不会立即清理,依旧对该微服务
2.1 关闭自我保护
自我保护版本:Eureka 相当于房东,或物业给客户端提供服务,当
用户拥堵,不能正常运行,会等待微服务重连重启等行为,一直连接不上会清理,会导致8001服务端宕机后,80无法快速切换找到新的可用微服务。
绝情版本:Eureka每天提供服务并无时无刻在收租,只要断供就立即关闭服务。
第一步7001:
禁用自我保护模式默认为true,人为改定false
自动心跳时间默认30秒,人为改定2000
eureka:
  instance:
    hostname: eureka7001.com #eureka服务端的实例名称
  client:
    #false表示不向注册中心注册自己
    register-with-eureka: false
    #false表示自己端就是注册中心,我的职责就是维护服务实例,并不需要去检查服务
    fetch-registry: false
    service-url:
      #设置与Eureka server交互的地址查询服务和注册服务都需要依赖这个地址
      defaultZone: http://eureka7002.com:7002/eureka/
  server:
    #关闭自我保护
    enable-self-preservation: false
    eviction-interval-timer-in-ms: 2000
第二步8001:
  instance:
    instance-id: payment8001
    # 访问路径可以显示IP地址
    prefer-ip-address: true
    # Eureka客户端向服务端发送心跳的时间间隔,单位为秒默认30
    lease-renewal-interval-in-seconds: 1
    # Eureka服务端在最后一个收到心跳等待时间上限,默认为90秒
    # 原来每天30天交房费,现在1天一交,2天一催缴
    lease-expiration-duration-in-seconds: 2



![[C/C++]数据结构 链表OJ题:移除链表元素](https://img-blog.csdnimg.cn/1c13469b24f341339233c570f3cfb54f.png)

