网站服务
文章目录
- 网站服务
- 一、简介
- 二、静态站点
- 三、动态站点
- 1.LAMP
- 2.部署论坛系统discuz
- 3.部署博客系统 wordpress
- 4.部署网上商城 ecshop
- 5.部署网校系统edusoho

一、简介
1.前言
UI的转变:B/S架构
2.名词
HTML( HyperText Markup Language)
超级 文本 标记 语言
网页
使用HTML,PHP,JAVA语言格式书写的文件。
主页
网页中呈现用户的第一个页面。
网站
多个网页组合而成的一台网站服务器
URL
URL( Uniform Resource Locator) 统一资源定位符
即访问网站的地址:https://www.baidu.com:80/1.html
3.网站架构
LAMP( Linux+Apache+MySQL+PHP)
系统+服务器程序+数据管理软件+中间软件
二、静态站点
1.Apache
2.Apache基础
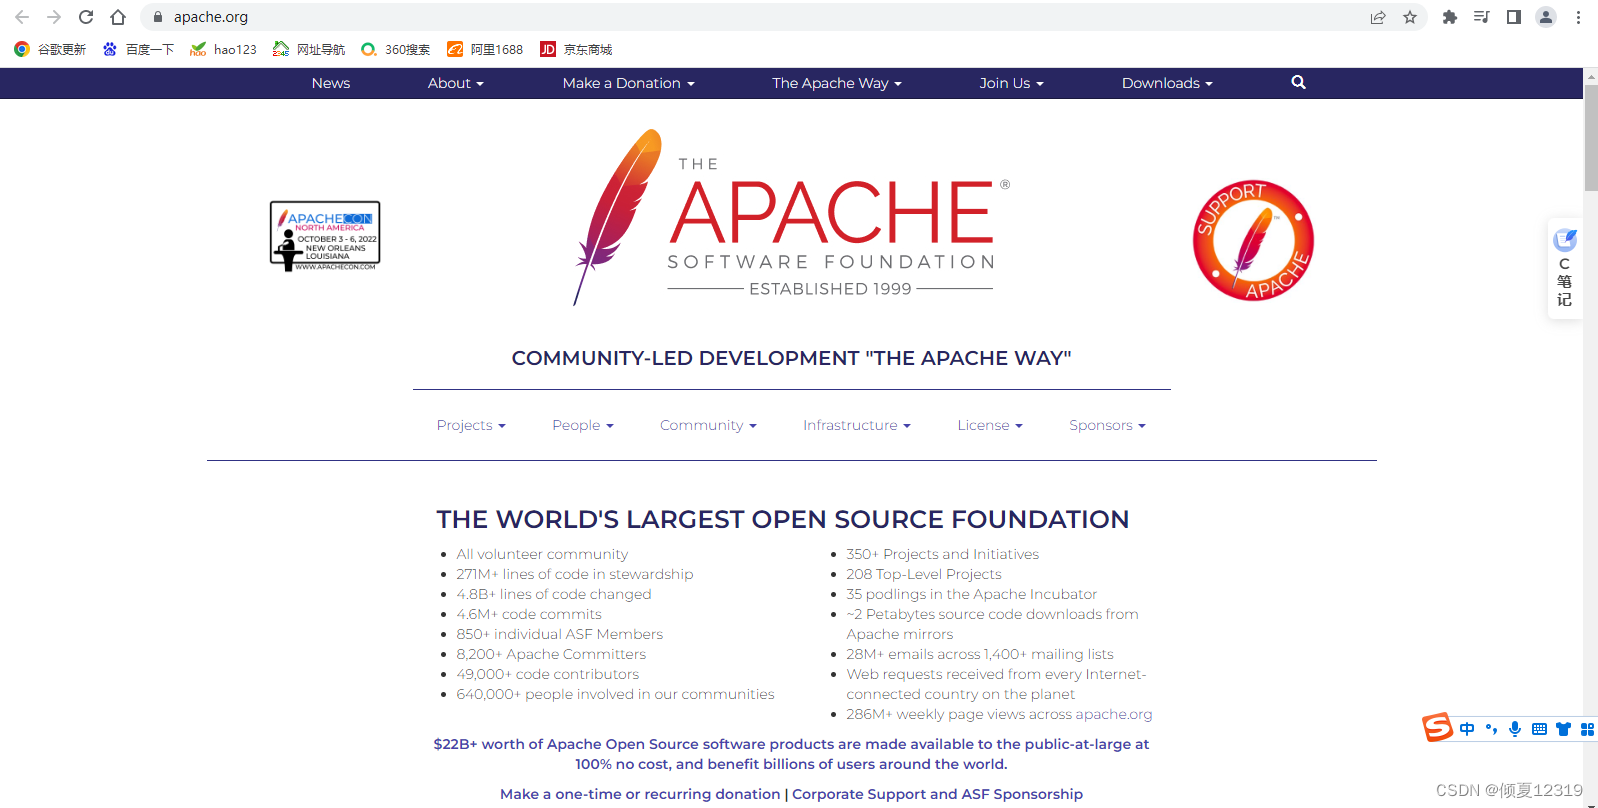
Apache官网地址:https://www.apache.org/
软件包名称:httpd
服务端口:80:/tcp(http)443/tcp(https)
[root@nfs ~]# netstat -anpt |grep 80
tcp        0      0 0.0.0.0:80              0.0.0.0:*               LISTEN      7177/nginx: master
tcp6       0      0 :::80                   :::*                    LISTEN      7177/nginx: master
主配置文件:/etc/httpd/conf/httpd.conf
子配置文件:/etc/httpd/conf.d/*.conf
主目录:/var/www/html 网站源代码默认位置
3.安装Apache
[root@nfs ~]# yum install -y  httpd  //安装httpd
已加载插件:fastestmirror, langpacks
Loading mirror speeds from cached hostfile
 * base: mirrors.aliyun.com
 * extras: mirrors.aliyun.com
 * updates: mirrors.aliyun.com
正在解决依赖关系
--> 正在检查事务
---> 软件包 httpd.x86_64.0.2.4.6-97.el7.centos.5 将被 安装
--> 解决依赖关系完成

依赖关系解决

===============================================================================================
 Package          架构              版本                              源                  大小
===============================================================================================
正在安装:
 httpd            x86_64            2.4.6-97.el7.centos.5             updates            2.7 M

事务概要
===============================================================================================
安装  1 软件包

总下载量:2.7 M
安装大小:9.4 M
Downloading packages:
httpd-2.4.6-97.el7.centos.5.x86_64.rpm                                  | 2.7 MB  00:00:06
Running transaction check
Running transaction test
Transaction test succeeded
Running transaction
  正在安装    : httpd-2.4.6-97.el7.centos.5.x86_64                                         1/1
  验证中      : httpd-2.4.6-97.el7.centos.5.x86_64                                         1/1

已安装:
  httpd.x86_64 0:2.4.6-97.el7.centos.5

完毕!
[root@nfs ~]# systemctl start httpd  //启动httpd
Job for httpd.service failed because the control process exited with error code. See "systemctl status httpd.service" and "journalctl -xe" for details.
[root@nfs ~]# systemctl status httpd   //查看服务状态
● httpd.service - The Apache HTTP Server
   Loaded: loaded (/usr/lib/systemd/system/httpd.service; disabled; vendor preset: disabled)
   Active: failed (Result: exit-code) since 一 2022-12-26 19:13:42 CST; 12s ago
     Docs: man:httpd(8)
           man:apachectl(8)
  Process: 19778 ExecStop=/bin/kill -WINCH ${MAINPID} (code=exited, status=1/FAILURE)
  Process: 19777 ExecStart=/usr/sbin/httpd $OPTIONS -DFOREGROUND (code=exited, status=1/FAILURE)
 Main PID: 19777 (code=exited, status=1/FAILURE)
//说明80端口被占用
12月 26 19:13:42 nfs httpd[19777]: (98)Address already in use: AH00072: make_sock: could...:80
12月 26 19:13:42 nfs httpd[19777]: (98)Address already in use: AH00072: make_sock: could...:80
12月 26 19:13:42 nfs httpd[19777]: no listening sockets available, shutting down
12月 26 19:13:42 nfs httpd[19777]: AH00015: Unable to open logs
12月 26 19:13:42 nfs systemd[1]: httpd.service: main process exited, code=exited, statu...LURE
12月 26 19:13:42 nfs kill[19778]: kill: cannot find process ""
12月 26 19:13:42 nfs systemd[1]: httpd.service: control process exited, code=exited status=1
12月 26 19:13:42 nfs systemd[1]: Failed to start The Apache HTTP Server.
12月 26 19:13:42 nfs systemd[1]: Unit httpd.service entered failed state.
12月 26 19:13:42 nfs systemd[1]: httpd.service failed.
Hint: Some lines were ellipsized, use -l to show in full.
[root@nfs ~]# netstat -lnp|grep 80
tcp        0      0 0.0.0.0:80              0.0.0.0:*               LISTEN      7206/nginx: master
tcp6       0      0 :::80                   :::*                    LISTEN      7206/nginx: master
unix  2      [ ACC ]     STREAM     LISTENING     39804    6526/lsmd            /var/run/lsm/ipc/simc
[root@nfs ~]# kill -9 7206
[root@nfs ~]# systemctl start httpd
Job for httpd.service failed because the control process exited with error code. See "systemctl status httpd.service" and "journalctl -xe" for details.

//解决方法:终端使用 ps -ef|grep httpd察看占用的进程或者用netstat -lnp|grep 80

找到后kill掉
[root@nfs ~]# netstat -lnp|grep 80
tcp        0      0 0.0.0.0:80              0.0.0.0:*               LISTEN      7210/nginx: worker
tcp6       0      0 :::80                   :::*                    LISTEN      7210/nginx: worker
unix  2      [ ACC ]     STREAM     LISTENING     39804    6526/lsmd            /var/run/lsm/ipc/simc
[root@nfs ~]# kill -9 7210
[root@nfs ~]# systemctl start httpd
[root@nfs ~]# systemctl status httpd
● httpd.service - The Apache HTTP Server
   Loaded: loaded (/usr/lib/systemd/system/httpd.service; disabled; vendor preset: disabled)
   Active: active (running) since 一 2022-12-26 19:16:57 CST; 5s ago
     Docs: man:httpd(8)
           man:apachectl(8)
  Process: 19838 ExecStop=/bin/kill -WINCH ${MAINPID} (code=exited, status=1/FAILURE)
 Main PID: 19878 (httpd)
   Status: "Processing requests..."
    Tasks: 6
   CGroup: /system.slice/httpd.service
           ├─19878 /usr/sbin/httpd -DFOREGROUND
           ├─19880 /usr/sbin/httpd -DFOREGROUND
           ├─19881 /usr/sbin/httpd -DFOREGROUND
           ├─19882 /usr/sbin/httpd -DFOREGROUND
           ├─19883 /usr/sbin/httpd -DFOREGROUND
           └─19884 /usr/sbin/httpd -DFOREGROUND

12月 26 19:16:57 nfs systemd[1]: Starting The Apache HTTP Server...
12月 26 19:16:57 nfs httpd[19878]: AH00558: httpd: Could not reliably determine the serv...age
12月 26 19:16:57 nfs systemd[1]: Started The Apache HTTP Server.
Hint: Some lines were ellipsized, use -l to show in full.
[root@nfs ~]# systemctl enable httpd    //开机自启
Created symlink from /etc/systemd/system/multi-user.target.wants/httpd.service to /usr/lib/systemd/system/httpd.service.
[root@nfs ~]# systemctl stop firewalld  //关闭防火墙
[root@nfs ~]# setenforce 0 //关闭selinux
setenforce: SELinux is disabled
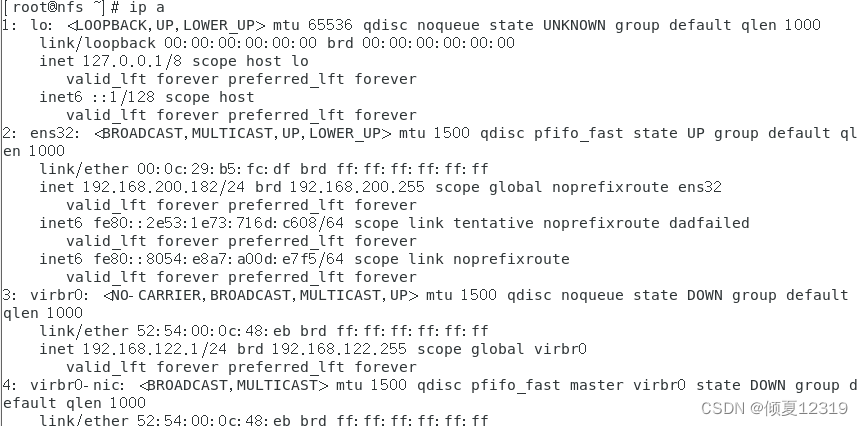
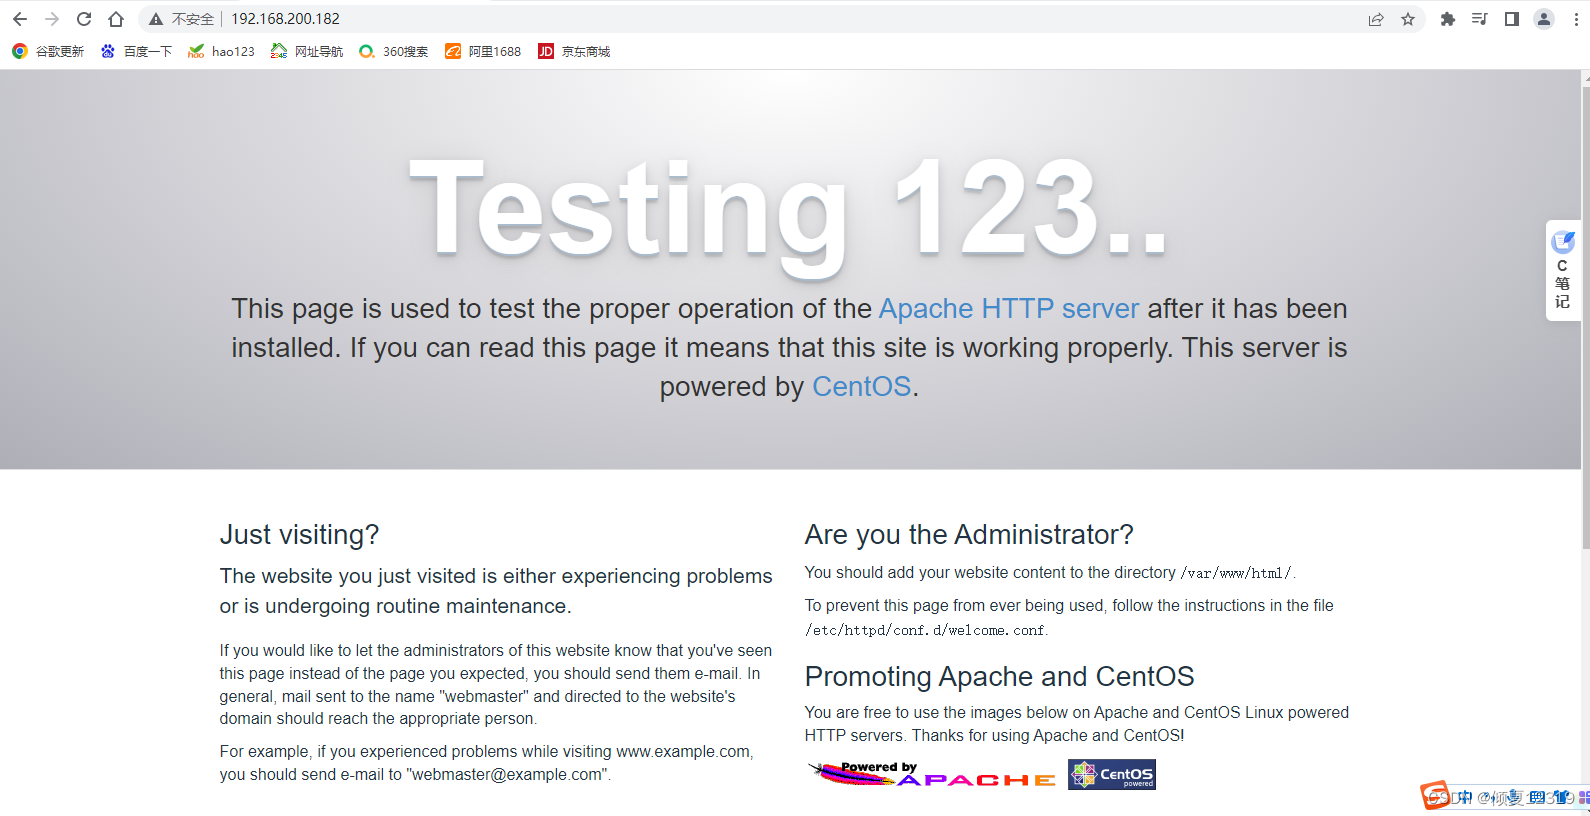
[root@nfs ~]# httpd -v  //查看httpd的版本
Server version: Apache/2.4.6 (CentOS)
Server built:   Mar 24 2022 14:57:57
4.虚拟主机
目的:虚拟主机( VirtualHost )
作用:在一台物理服务器上运行多个网站
类型:基于主机名
www.a.org
www.b.org
配置虚拟主机的目标
在一台服务器上,实现两个网站的架设
网站域名 网站资源存放目录
www.a.org /var/www/html/a.org
www.b.org /b.org
环境
服务器
| 服务器 | IP |
|---|---|
| 192.168.200.182 |
www.a.org站点设置
1.准备网站源码( 网页 )目录
[root@nfs ~]# mkdir /var/www/html/a.org
[root@nfs ~]# vim /var/www/html/a.org/index.html
hello,A!( 网页内容 )
2.创建a.org 的网站配置文件
[root@nfs ~]# vim /etc/httpd/conf.d/a.org.conf
<VirtualHost *:80>   //某个虚拟主机
ServerName www.a.org   //服务器起个名字
DocumentRoot /var/www/html/a.org  //网站根目录
</VirtualHost>
3.检测配置文件语法,重启服务
[root@nfs ~]# systemctl restart httpd
www.b.org站点设置
1.准备网站源码( 网页 )目录
[root@nfs ~]# mkdir /b.org
[root@nfs ~]# vim /b.org/index.html
hello,B!( 网站内容 )
2.创建b.org 的网站配置文件
[root@nfs ~]# vim /etc/httpd/conf.d/b.org.conf
<VirtualHost *:80>
ServerName www.b.org
DocumentRoot /b.org
</VirtualHost>
<Directory "/b.org">
Require all granted
</Directory>
3.检测配置文件语法,重启服务
[root@nfs ~]# httpd -t //检查配置文件的语法是否出现错误
AH00558: httpd: Could not reliably determine the server's fully qualified domain name, using 192.168.200.182. Set the 'ServerName' directive globally to suppress this message
Syntax OK
[root@nfs ~]# systemctl restart httpd
客户端
服务器ip:192.168.200.1
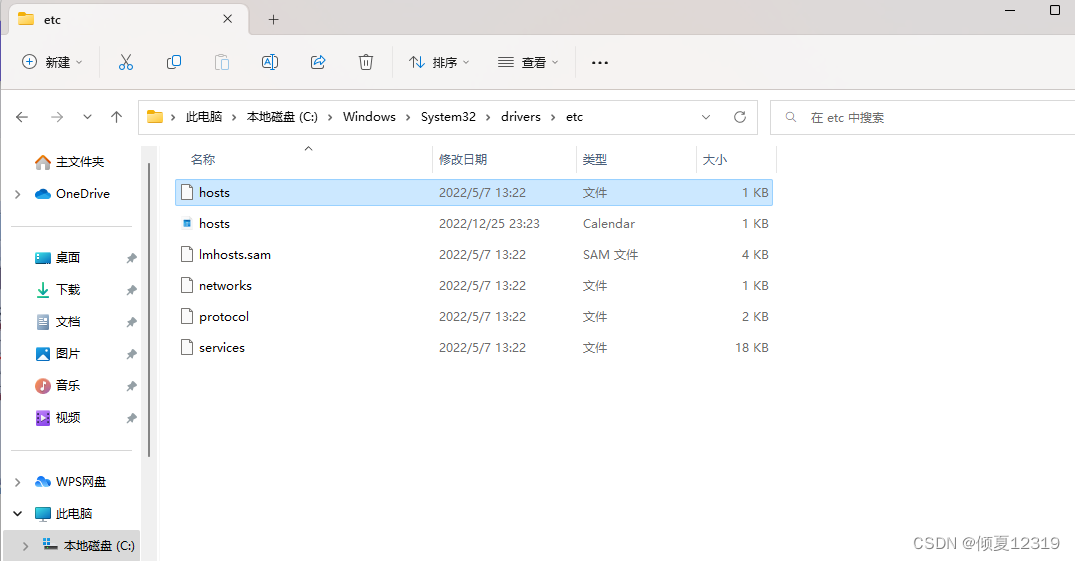
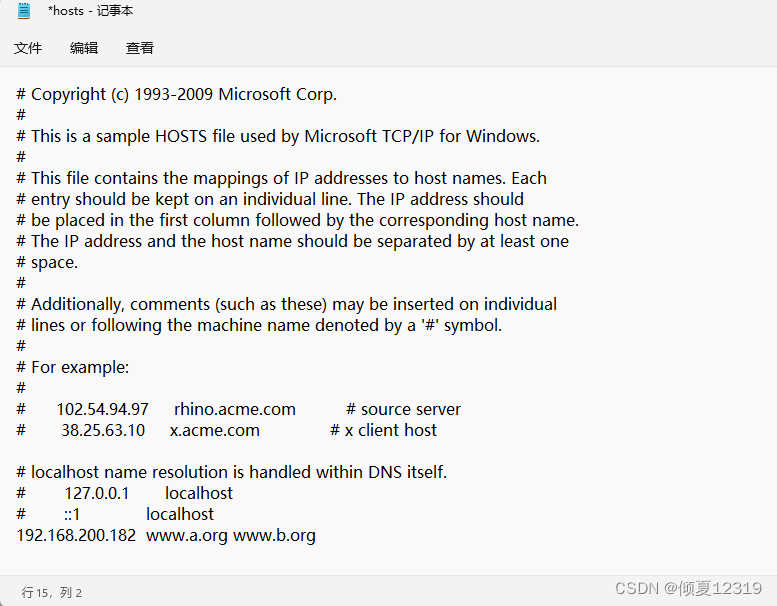
Windows客户端域名解析
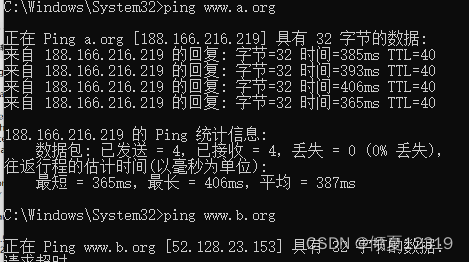

Linux客户端测试网站可用性
服务器ip:192.168.200.184
Linux客户端域名解析
[root@web1 ~]# vim /etc/hosts
127.0.0.1   localhost localhost.localdomain localhost4 localhost4.localdomain4
::1         localhost localhost.localdomain localhost6 localhost6.localdomain6
192.168.200.182 nfs
192.168.200.183 wbe3
192.168.200.184 web1
192.168.200.185 wbe2
192.168.200.186 mycat
192.168.200.182 www.a.org  //web服务器的ip 地址
192.168.200.182 www.b.org  //web服务器的ip 地址
字符测试
[root@web1 ~]# yum install -y elinks
已加载插件:fastestmirror
Loading mirror speeds from cached hostfile
正在解决依赖关系
--> 正在检查事务
---> 软件包 elinks.x86_64.0.0.12-0.37.pre6.el7.0.1 将被 安装
--> 正在处理依赖关系 libnss_compat_ossl.so.0()(64bit),它被软件包 elinks-0.12-0.37.pre6.el7.0.1.x86_64 需要
--> 正在处理依赖关系 libmozjs185.so.1.0()(64bit),它被软件包 elinks-0.12-0.37.pre6.el7.0.1.x86_64 需要
--> 正在检查事务
---> 软件包 js.x86_64.1.1.8.5-20.el7 将被 安装
---> 软件包 nss_compat_ossl.x86_64.0.0.9.6-8.el7 将被 安装
--> 解决依赖关系完成

依赖关系解决

=======================================================================================
 Package               架构         版本                           源             大小
=======================================================================================
正在安装:
 elinks                x86_64       0.12-0.37.pre6.el7.0.1         updates       882 k
为依赖而安装:
 js                    x86_64       1:1.8.5-20.el7                 base          2.3 M
 nss_compat_ossl       x86_64       0.9.6-8.el7                    base           37 k

事务概要
=======================================================================================
安装  1 软件包 (+2 依赖软件包)

总下载量:3.2 M
安装大小:9.6 M
Downloading packages:
(1/3): nss_compat_ossl-0.9.6-8.el7.x86_64.rpm                   |  37 kB  00:00:06
(2/3): js-1.8.5-20.el7.x86_64.rpm                               | 2.3 MB  00:00:06
(3/3): elinks-0.12-0.37.pre6.el7.0.1.x86_64.rpm                 | 882 kB  00:00:06
---------------------------------------------------------------------------------------
总计                                                      467 kB/s | 3.2 MB  00:07
Running transaction check
Running transaction test
Transaction test succeeded
Running transaction
  正在安装    : nss_compat_ossl-0.9.6-8.el7.x86_64                                 1/3
  正在安装    : 1:js-1.8.5-20.el7.x86_64                                           2/3
  正在安装    : elinks-0.12-0.37.pre6.el7.0.1.x86_64                               3/3
  验证中      : elinks-0.12-0.37.pre6.el7.0.1.x86_64                               1/3
  验证中      : 1:js-1.8.5-20.el7.x86_64                                           2/3
  验证中      : nss_compat_ossl-0.9.6-8.el7.x86_64                                 3/3

已安装:
  elinks.x86_64 0:0.12-0.37.pre6.el7.0.1

作为依赖被安装:
  js.x86_64 1:1.8.5-20.el7             nss_compat_ossl.x86_64 0:0.9.6-8.el7

完毕!
[root@web1 ~]# elinks http://www.a.org
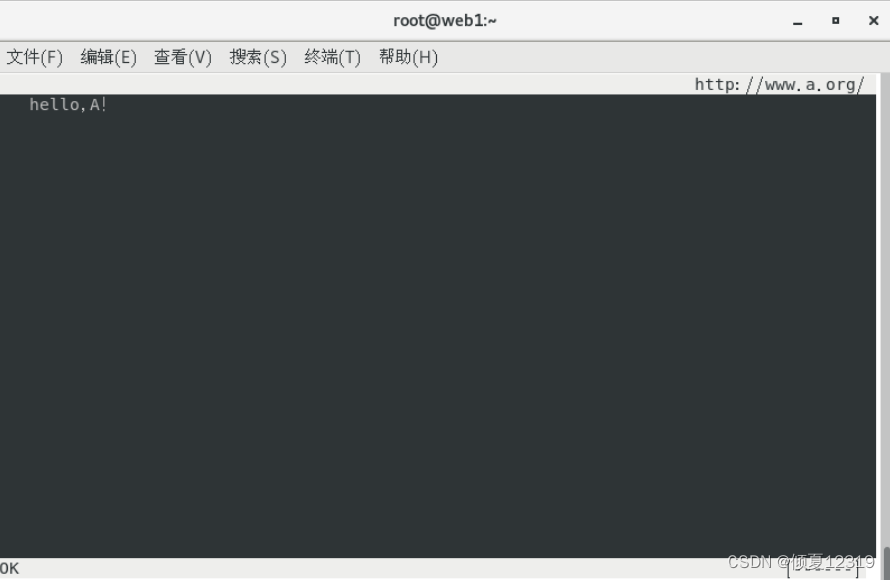
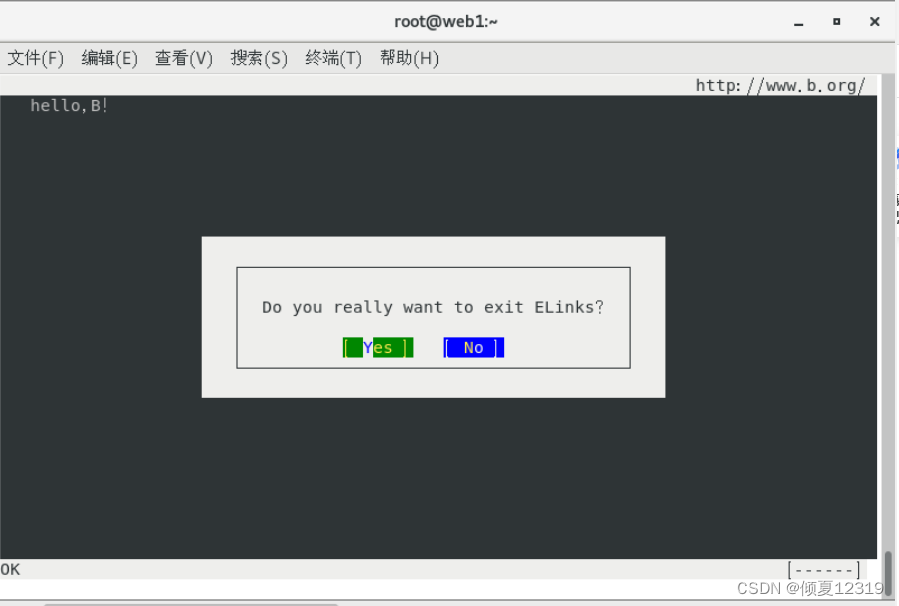
按q,选择yes退出
[root@web1 ~]# elinks http://www.b.org
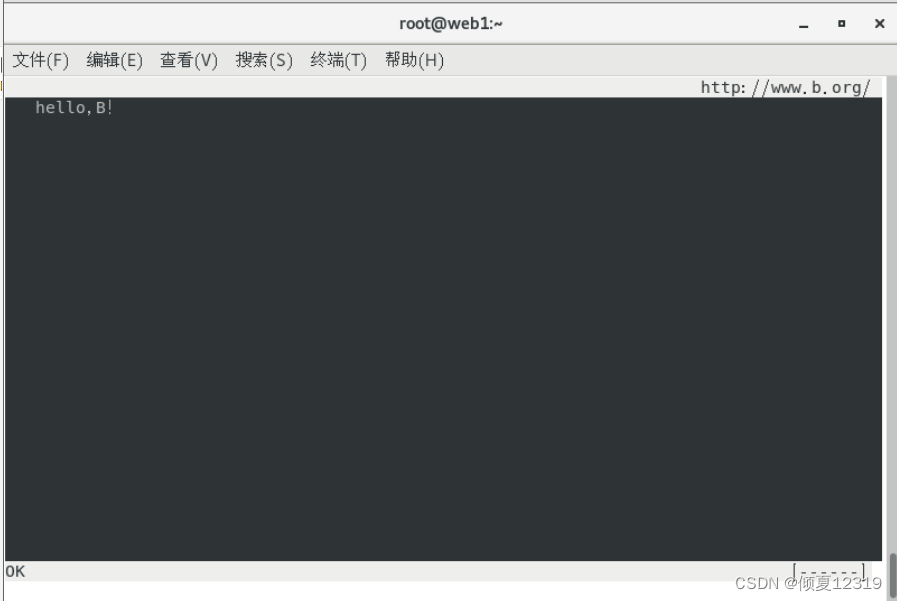
图形测试( 通过火狐浏览器,分别访问两个网站地址)
三、动态站点
1.LAMP
LAMP( Linux+Apache+MySQL+PHP) 即Linux系统+网站程序+数据管理软件(数据库MySQL)+PHP中间软件
2.部署论坛系统discuz
2.1 简介
discuz网址:https://discuz.dismall.com/


2.2 基础环境
[root@apache ~]# systemctl stop firewalld  //关闭防火墙
[root@apache ~]# systemctl disable firewalld
[root@apache ~]# setenforce 0 //关闭selinux
setenforce: SELinux is disabled
2.3 安装LAMP
//安装网站 - 数据库服务 - 数据库客户端 - 中间件 - 中间件插件 - 图形库 - php图形库

//开机启动网站和数据库
[root@apache ~]# yum -y install httpd mariadb-server mariadb php php-mysql gd php-gd
已加载插件:fastestmirror, langpacks
Loading mirror speeds from cached hostfile
 * base: mirrors.aliyun.com
 * extras: mirrors.aliyun.com
 * updates: mirrors.aliyun.com
软件包 httpd-2.4.6-97.el7.centos.5.x86_64 已安装并且是最新版本
软件包 php-gd-5.4.16-48.el7.x86_64 已安装并且是最新版本
正在解决依赖关系
--> 正在检查事务
---> 软件包 gd.x86_64.0.2.0.35-26.el7 将被 升级
---> 软件包 gd.x86_64.0.2.0.35-27.el7_9 将被 更新
---> 软件包 mariadb.x86_64.1.5.5.68-1.el7 将被 安装
--> 正在处理依赖关系 mariadb-libs(x86-64) = 1:5.5.68-1.el7,它被软件包 1:mariadb-5.5.68-1.el7.x86_64 需要
软件包 mariadb-libs 已经被 Percona-XtraDB-Cluster-shared-57 取代,但是取代的软件包并未满足需求
---> 软件包 mariadb-server.x86_64.1.5.5.68-1.el7 将被 安装
--> 正在处理依赖关系 mariadb-libs(x86-64) = 1:5.5.68-1.el7,它被软件包 1:mariadb-server-5.5.68-1.el7.x86_64 需要
软件包 mariadb-libs 已经被 Percona-XtraDB-Cluster-shared-57 取代,但是取代的软件包并未满足需求
---> 软件包 php.x86_64.0.5.4.16-48.el7 将被 安装
---> 软件包 php-mysql.x86_64.0.5.4.16-48.el7 将被 安装
Removing mariadb.x86_64 1:5.5.68-1.el7 - u due to obsoletes from installed mysql-community-client-5.7.40-1.el7.x86_64
base/7/x86_64/filelists_db                                              | 7.2 MB  00:00:23
Removing mariadb-server.x86_64 1:5.5.68-1.el7 - u due to obsoletes from installed mysql-community-server-5.7.40-1.el7.x86_64
--> 正在使用新的信息重新解决依赖关系
--> 正在检查事务
---> 软件包 mariadb.x86_64.1.5.5.68-1.el7 将被 安装
---> 软件包 mariadb-server.x86_64.1.5.5.68-1.el7 将被 安装
--> 解决依赖关系完成
错误:软件包:1:mariadb-5.5.68-1.el7.x86_64 (base)
          需要:mariadb-libs(x86-64) = 1:5.5.68-1.el7
          可用: 1:mariadb-libs-5.5.68-1.el7.x86_64 (base)
              mariadb-libs(x86-64) = 1:5.5.68-1.el7
错误:软件包:1:mariadb-server-5.5.68-1.el7.x86_64 (base)
          需要:mariadb-libs(x86-64) = 1:5.5.68-1.el7
          可用: 1:mariadb-libs-5.5.68-1.el7.x86_64 (base)
              mariadb-libs(x86-64) = 1:5.5.68-1.el7
 您可以尝试添加 --skip-broken 选项来解决该问题
 您可以尝试执行:rpm -Va --nofiles --nodigest
[root@apache ~]# systemctl status mysqld
● mysqld.service - MySQL Server
   Loaded: loaded (/usr/lib/systemd/system/mysqld.service; enabled; vendor preset: disabled)
   Active: active (running) since 一 2022-12-26 19:05:42 CST; 3h 3min ago
     Docs: man:mysqld(8)
           http://dev.mysql.com/doc/refman/en/using-systemd.html
 Main PID: 7795 (mysqld)
    Tasks: 28
   CGroup: /system.slice/mysqld.service
           └─7795 /usr/sbin/mysqld --daemonize --pid-file=/var/run/mysqld/mysqld.pid

12月 26 19:05:30 nfs systemd[1]: Starting MySQL Server...
12月 26 19:05:42 nfs systemd[1]: Started MySQL Server.
[root@apache ~]# mysqld -version
2022-12-26T14:10:56.080118Z 0 [ERROR] --verbose is for use with --help; did you mean --log-error-verbosity?
2022-12-26T14:10:56.080937Z 0 [Warning] TIMESTAMP with implicit DEFAULT value is deprecated. Please use --explicit_defaults_for_timestamp server option (see documentation for more details).
2022-12-26T14:10:56.090268Z 0 [Note] mysqld (mysqld 5.7.40-log) starting as process 22053 ...
2022-12-26T14:10:56.097992Z 0 [ERROR] Fatal error: Please read "Security" section of the manual to find out how to run mysqld as root!

2022-12-26T14:10:56.098065Z 0 [ERROR] Aborting

2022-12-26T14:10:56.098147Z 0 [Note] Binlog end
2022-12-26T14:10:56.098477Z 0 [Note] mysqld: Shutdown complete

[root@apache ~]# yum -y install httpd mariadb-server mariadb php php-mysql gd php-gd  --skip-broken
已加载插件:fastestmirror, langpacks
Loading mirror speeds from cached hostfile
 * base: mirrors.aliyun.com
 * extras: mirrors.aliyun.com
 * updates: mirrors.aliyun.com
软件包 httpd-2.4.6-97.el7.centos.5.x86_64 已安装并且是最新版本
软件包 php-gd-5.4.16-48.el7.x86_64 已安装并且是最新版本
正在解决依赖关系
--> 正在检查事务
---> 软件包 gd.x86_64.0.2.0.35-26.el7 将被 升级
---> 软件包 gd.x86_64.0.2.0.35-27.el7_9 将被 更新
---> 软件包 mariadb.x86_64.1.5.5.68-1.el7 将被 安装
--> 正在处理依赖关系 mariadb-libs(x86-64) = 1:5.5.68-1.el7,它被软件包 1:mariadb-5.5.68-1.el7.x86_64 需要
软件包 mariadb-libs 已经被 Percona-XtraDB-Cluster-shared-57 取代,但是取代的软件包并未满足需求
---> 软件包 mariadb-server.x86_64.1.5.5.68-1.el7 将被 安装
--> 正在处理依赖关系 mariadb-libs(x86-64) = 1:5.5.68-1.el7,它被软件包 1:mariadb-server-5.5.68-1.el7.x86_64 需要
软件包 mariadb-libs 已经被 Percona-XtraDB-Cluster-shared-57 取代,但是取代的软件包并未满足需求
---> 软件包 php.x86_64.0.5.4.16-48.el7 将被 安装
---> 软件包 php-mysql.x86_64.0.5.4.16-48.el7 将被 安装
Removing mariadb.x86_64 1:5.5.68-1.el7 - u due to obsoletes from installed mysql-community-client-5.7.40-1.el7.x86_64
Removing mariadb-server.x86_64 1:5.5.68-1.el7 - u due to obsoletes from installed mysql-community-server-5.7.40-1.el7.x86_64
--> 正在使用新的信息重新解决依赖关系
--> 正在检查事务
---> 软件包 mariadb.x86_64.1.5.5.68-1.el7 将被 安装
---> 软件包 mariadb-server.x86_64.1.5.5.68-1.el7 将被 安装
--> 正在检查事务
--> 正在检查事务
---> 软件包 gd.x86_64.0.2.0.35-26.el7 将被 升级
---> 软件包 gd.x86_64.0.2.0.35-27.el7_9 将被 更新
---> 软件包 php.x86_64.0.5.4.16-48.el7 将被 安装
---> 软件包 php-mysql.x86_64.0.5.4.16-48.el7 将被 安装
--> 解决依赖关系完成

因为依赖关系问题而跳过的软件包:

依赖关系解决

===============================================================================================
 Package              架构              版本                          源                  大小
===============================================================================================
正在安装:
 php                  x86_64            5.4.16-48.el7                 base               1.4 M
 php-mysql            x86_64            5.4.16-48.el7                 base               102 k
正在更新:
 gd                   x86_64            2.0.35-27.el7_9               updates            146 k

事务概要
===============================================================================================
安装  2 软件包
升级  1 软件包

总下载量:1.6 M
Downloading packages:
No Presto metadata available for updates
(1/3): gd-2.0.35-27.el7_9.x86_64.rpm                                    | 146 kB  00:00:05
(2/3): php-mysql-5.4.16-48.el7.x86_64.rpm                               | 102 kB  00:00:05
(3/3): php-5.4.16-48.el7.x86_64.rpm                                     | 1.4 MB  00:00:07
-----------------------------------------------------------------------------------------------
总计                                                           226 kB/s | 1.6 MB  00:00:07
Running transaction check
Running transaction test
Transaction test succeeded
Running transaction
  正在更新    : gd-2.0.35-27.el7_9.x86_64                                                  1/4
  正在安装    : php-5.4.16-48.el7.x86_64                                                   2/4
  正在安装    : php-mysql-5.4.16-48.el7.x86_64                                             3/4
  清理        : gd-2.0.35-26.el7.x86_64                                                    4/4
  验证中      : php-mysql-5.4.16-48.el7.x86_64                                             1/4
  验证中      : php-5.4.16-48.el7.x86_64                                                   2/4
  验证中      : gd-2.0.35-27.el7_9.x86_64                                                  3/4
  验证中      : gd-2.0.35-26.el7.x86_64                                                    4/4

已安装:
  php.x86_64 0:5.4.16-48.el7                  php-mysql.x86_64 0:5.4.16-48.el7

更新完毕:
  gd.x86_64 0:2.0.35-27.el7_9

完毕!
启动网站和数据库
[root@apache ~]# systemctl start httpd mariadb
[root@apache ~]# systemctl enable httpd mariadb
2.4 安装Discuz !
2.4.1.导入 discuz 网站源码
1.下载 Discuz! X3.4 到本地或者服务器上

2.解压并上传 Discuz! X3.4 程序到服务器且修改相应目录权限
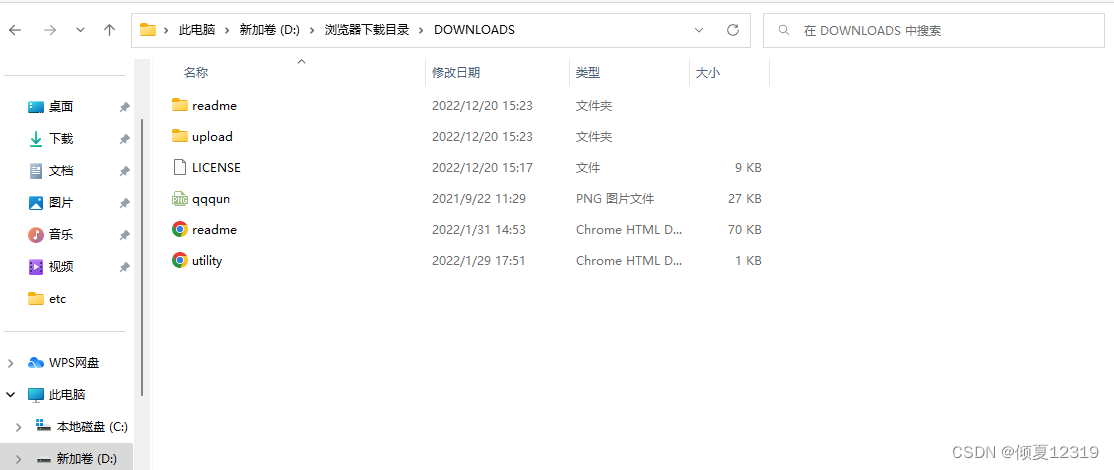
解压缩得到如下图所示的几个文件:
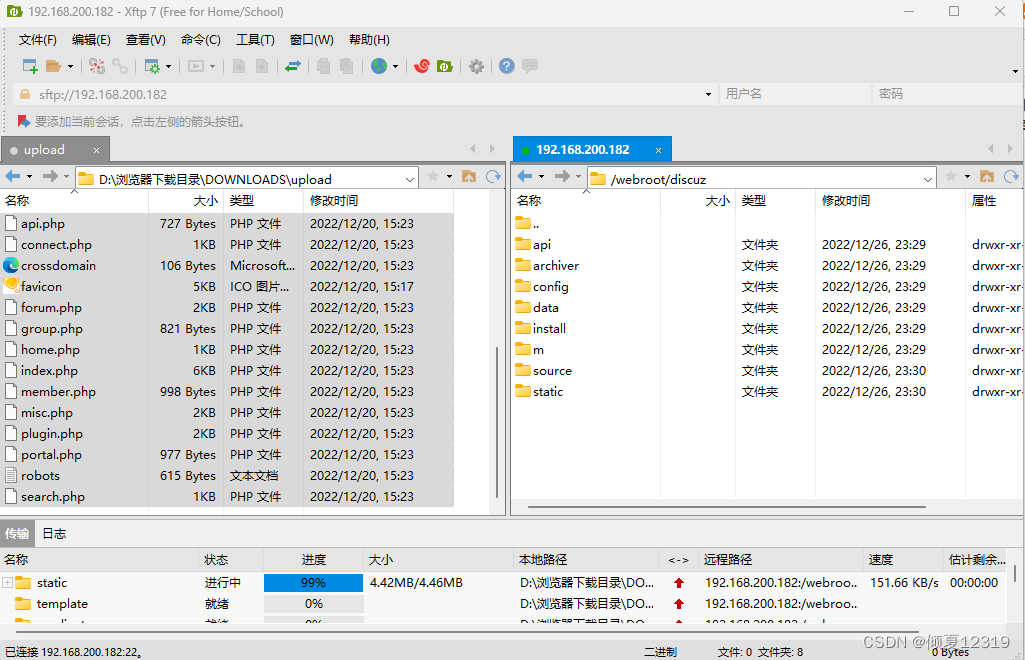
upload 这个目录下面的所有文件是我们需要上传到服务器上的可用程序文件(仅上传目录里边的文件);
将其中 upload 目录里边 的所有文件使用 FTP 软件以二进制方式上传到空间(upload文件夹本身不用上传,只传里边的文件)。如下图所示:

[root@apache /]# cd /webroot/discuz
[root@apache discuz]# ls
admin.php  config           favicon.ico  index.php   misc.php    search.php  uc_client
api        connect.php      forum.php    install     plugin.php  source      uc_server
api.php    crossdomain.xml  group.php    m           portal.php  static
archiver   data             home.php     member.php  robots.txt  template
[root@apache discuz]# ls -l /webroot/discuz
总用量 68
-rw-r--r--  1 root root 2848 12月 26 23:31 admin.php
drwxr-xr-x  9 root root  135 12月 26 23:29 api
-rw-r--r--  1 root root  727 12月 26 23:31 api.php
drwxr-xr-x  2 root root   23 12月 26 23:29 archiver
drwxr-xr-x  2 root root   90 12月 26 23:29 config
-rw-r--r--  1 root root 1040 12月 26 23:31 connect.php
-rw-r--r--  1 root root  106 12月 26 23:31 crossdomain.xml
drwxr-xr-x 12 root root  178 12月 26 23:29 data
-rw-r--r--  1 root root 5558 12月 26 23:31 favicon.ico
-rw-r--r--  1 root root 2245 12月 26 23:31 forum.php
-rw-r--r--  1 root root  821 12月 26 23:31 group.php
-rw-r--r--  1 root root 1280 12月 26 23:31 home.php
-rw-r--r--  1 root root 6655 12月 26 23:31 index.php
drwxr-xr-x  5 root root   64 12月 26 23:29 install
drwxr-xr-x  2 root root   23 12月 26 23:29 m
-rw-r--r--  1 root root  998 12月 26 23:31 member.php
-rw-r--r--  1 root root 2371 12月 26 23:31 misc.php
-rw-r--r--  1 root root 1788 12月 26 23:31 plugin.php
-rw-r--r--  1 root root  977 12月 26 23:31 portal.php
-rw-r--r--  1 root root  615 12月 26 23:31 robots.txt
-rw-r--r--  1 root root 1274 12月 26 23:31 search.php
drwxr-xr-x 10 root root  168 12月 26 23:30 source
drwxr-xr-x  7 root root   86 12月 26 23:31 static
drwxr-xr-x  3 root root   38 12月 26 23:31 template
drwxr-xr-x  7 root root  106 12月 26 23:31 uc_client
drwxr-xr-x 13 root root  241 12月 26 23:31 uc_server
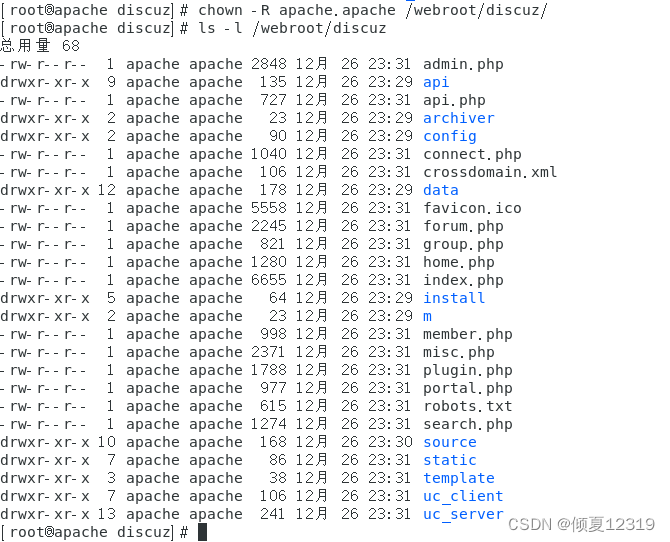
//授权给apache
[root@apache discuz]# chown -R apache.apache /webroot/discuz/
[root@apache discuz]# ls -l /webroot/discuz
总用量 68
-rw-r--r--  1 apache apache 2848 12月 26 23:31 admin.php
drwxr-xr-x  9 apache apache  135 12月 26 23:29 api
-rw-r--r--  1 apache apache  727 12月 26 23:31 api.php
drwxr-xr-x  2 apache apache   23 12月 26 23:29 archiver
drwxr-xr-x  2 apache apache   90 12月 26 23:29 config
-rw-r--r--  1 apache apache 1040 12月 26 23:31 connect.php
-rw-r--r--  1 apache apache  106 12月 26 23:31 crossdomain.xml
drwxr-xr-x 12 apache apache  178 12月 26 23:29 data
-rw-r--r--  1 apache apache 5558 12月 26 23:31 favicon.ico
-rw-r--r--  1 apache apache 2245 12月 26 23:31 forum.php
-rw-r--r--  1 apache apache  821 12月 26 23:31 group.php
-rw-r--r--  1 apache apache 1280 12月 26 23:31 home.php
-rw-r--r--  1 apache apache 6655 12月 26 23:31 index.php
drwxr-xr-x  5 apache apache   64 12月 26 23:29 install
drwxr-xr-x  2 apache apache   23 12月 26 23:29 m
-rw-r--r--  1 apache apache  998 12月 26 23:31 member.php
-rw-r--r--  1 apache apache 2371 12月 26 23:31 misc.php
-rw-r--r--  1 apache apache 1788 12月 26 23:31 plugin.php
-rw-r--r--  1 apache apache  977 12月 26 23:31 portal.php
-rw-r--r--  1 apache apache  615 12月 26 23:31 robots.txt
-rw-r--r--  1 apache apache 1274 12月 26 23:31 search.php
drwxr-xr-x 10 apache apache  168 12月 26 23:30 source
drwxr-xr-x  7 apache apache   86 12月 26 23:31 static
drwxr-xr-x  3 apache apache   38 12月 26 23:31 template
drwxr-xr-x  7 apache apache  106 12月 26 23:31 uc_client
drwxr-xr-x 13 apache apache  241 12月 26 23:31 uc_server
2.4.2.Apache 配置虚拟主机
[root@apache discuz]# vim /etc/httpd/conf.d/discuz.conf
<VirtualHost *:80>
ServerName www.discuz.com
DocumentRoot /webroot/discuz
</VirtualHost>

<Directory "/webroot/discuz">
Require all granted
</Directory>
重启服务
[root@apache discuz]# systemctl restart httpd
2.4.3.准备数据库
[root@apache discuz]# mysql -u root -p123456
mysql: [Warning] Using a password on the command line interface can be insecure.
Welcome to the MySQL monitor.  Commands end with ; or \g.
Your MySQL connection id is 1694
Server version: 5.7.40-log MySQL Community Server (GPL)

Copyright (c) 2000, 2022, Oracle and/or its affiliates.

Oracle is a registered trademark of Oracle Corporation and/or its
affiliates. Other names may be trademarks of their respective
owners.

Type 'help;' or '\h' for help. Type '\c' to clear the current input statement.

mysql> create database discuz;
Query OK, 1 row affected (0.01 sec)

mysql> exit
Bye
2.4.4 客户端测试
客户端测试时,添加域名解析
[root@web1 ~]# vim /etc/hosts
[root@web1 ~]# ping www.discuz.com
PING www.discuz.com (192.168.200.182) 56(84) bytes of data.
64 bytes from nfs (192.168.200.182): icmp_seq=1 ttl=64 time=0.339 ms
64 bytes from nfs (192.168.200.182): icmp_seq=2 ttl=64 time=1.24 ms
^C
--- www.discuz.com ping statistics ---
2 packets transmitted, 2 received, 0% packet loss, time 1001ms
rtt min/avg/max/mdev = 0.339/0.792/1.245/0.453 ms
[root@web1 ~]# cat /etc/hosts
127.0.0.1   localhost localhost.localdomain localhost4 localhost4.localdomain4
::1         localhost localhost.localdomain localhost6 localhost6.localdomain6
192.168.200.182 nfs
192.168.200.183 wbe3
192.168.200.184 web1
192.168.200.185 wbe2
192.168.200.186 mycat
192.168.200.182 www.a.org
192.168.200.182 www.b.org
192.168.200.182 www.discuz.com
[root@web1 ~]# ping www.discuz.com
PING www.discuz.com (192.168.200.182) 56(84) bytes of data.
64 bytes from nfs (192.168.200.182): icmp_seq=1 ttl=64 time=0.418 ms
64 bytes from nfs (192.168.200.182): icmp_seq=2 ttl=64 time=0.448 ms
64 bytes from nfs (192.168.200.182): icmp_seq=3 ttl=64 time=1.37 ms
64 bytes from nfs (192.168.200.182): icmp_seq=4 ttl=64 time=0.564 ms
^C
--- www.discuz.com ping statistics ---
4 packets transmitted, 4 received, 0% packet loss, time 3006ms
rtt min/avg/max/mdev = 0.418/0.701/1.376/0.394 ms
2.4.5.安装 discuz [ 任何client ]
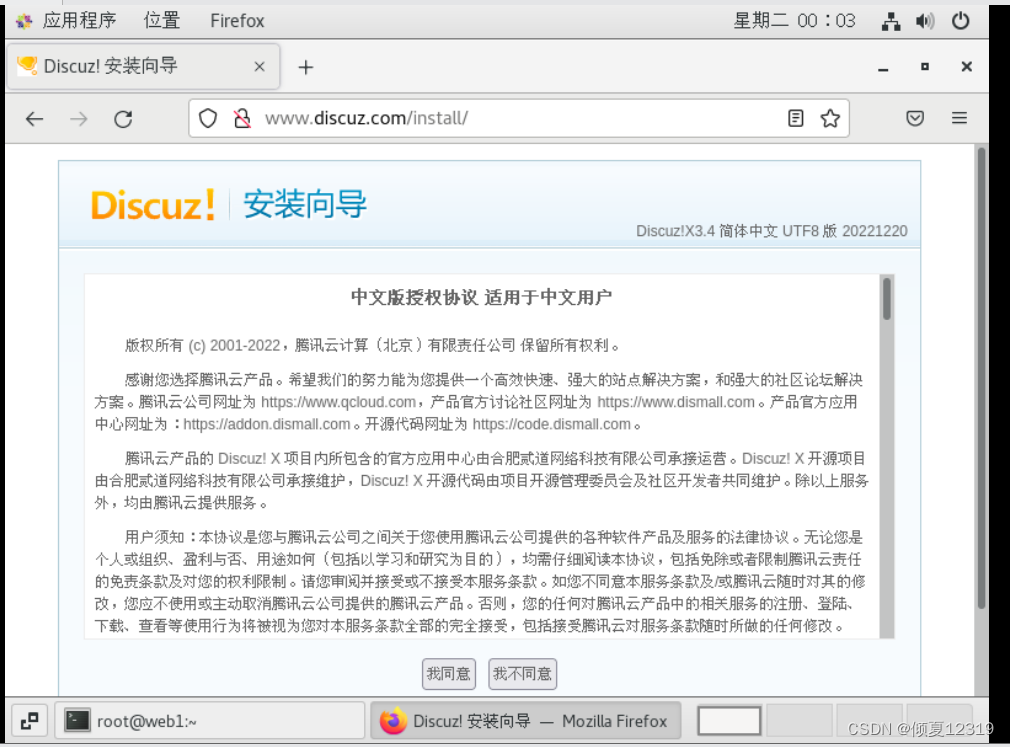
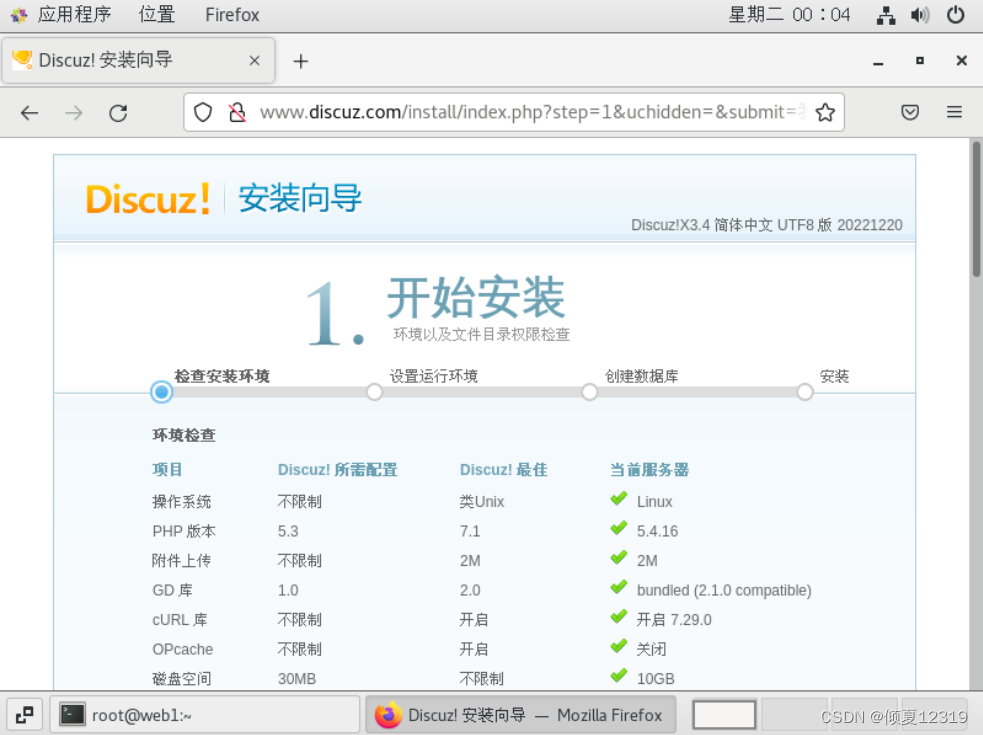
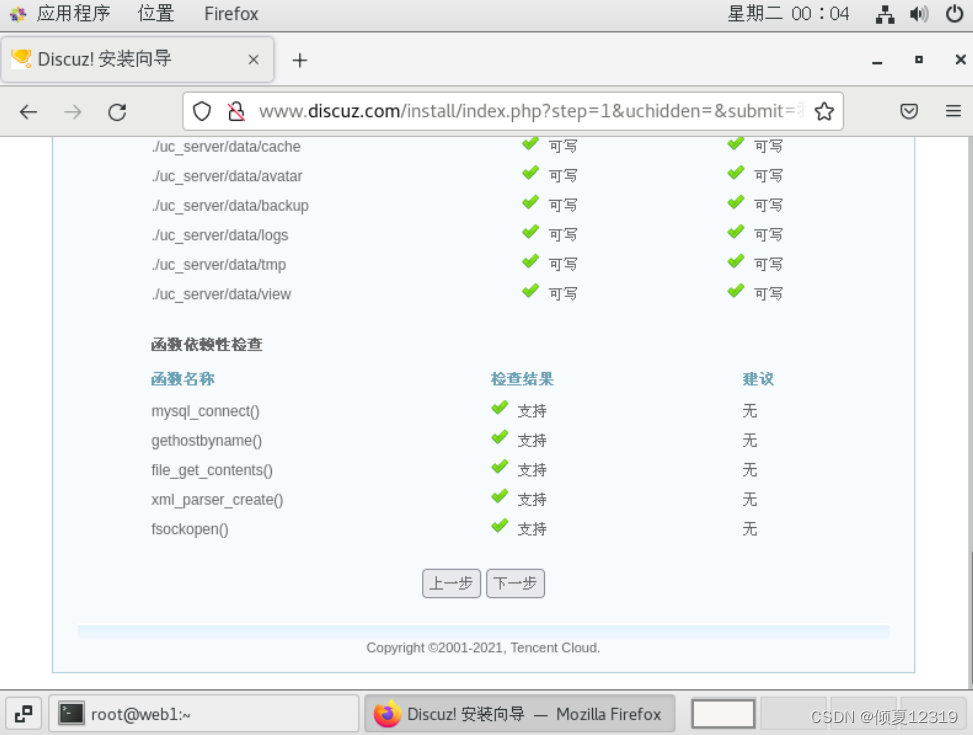
点击下一步
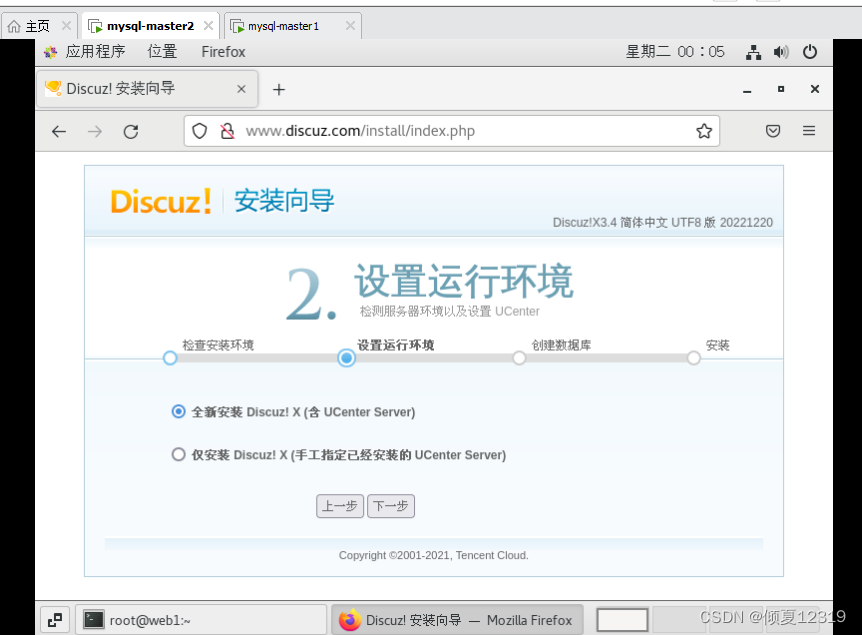
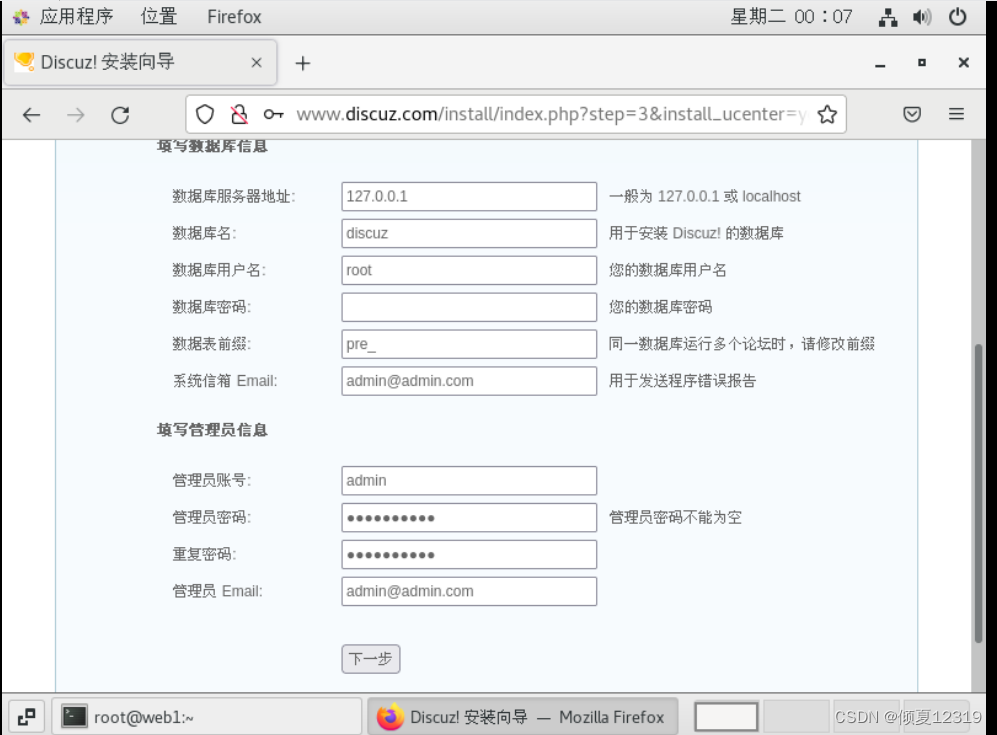
点击下一步
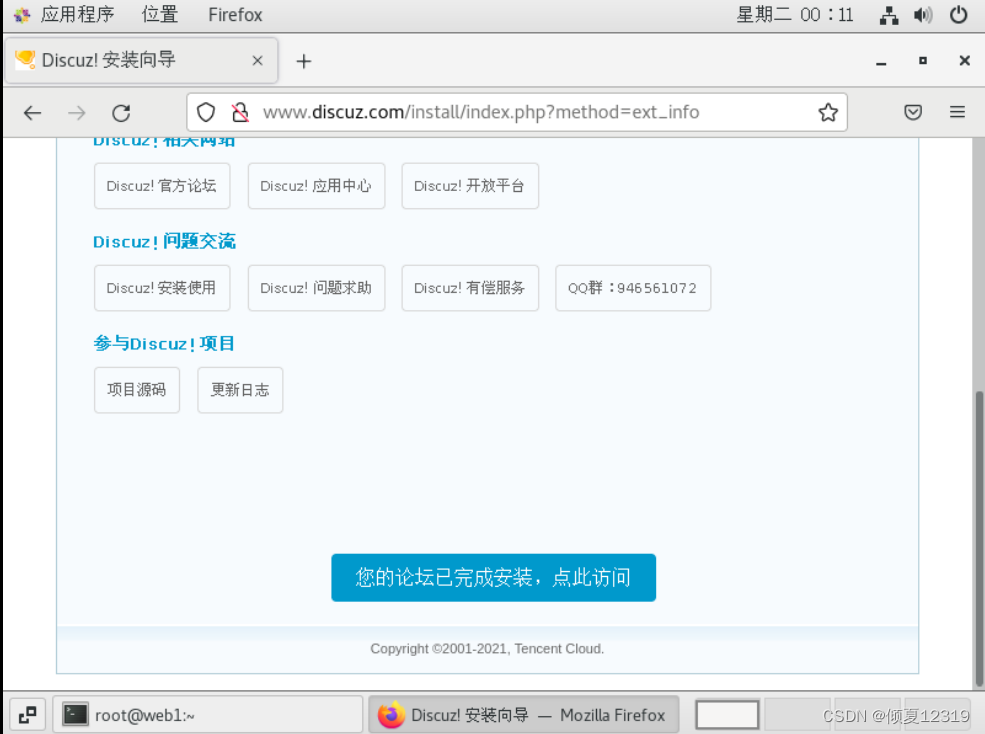
安装完成


