通过修改容器,然后commit提交为镜像
定制特定的镜像:在实际工作,公网的镜像往往不符合我们预期,因此我们需要自己定制镜像以满足业务需求。
例如:我们期望定制一个符号我们自己的Nginx镜像,并期望镜像交付就包含项目代码与我们期望的配置, 后期只需要轻松run 容器即可
首先在docker中准备nginx的基础镜像,没有的话可以docker pull nginx 拉取一个最新的
因为我没有配镜像加速地址下载太慢,直接用以前的,版本没有太大关系
[root@server159 ~]# docker images
REPOSITORY   TAG       IMAGE ID       CREATED        SIZE
php-fpm      v1        0474bd7488fa   21 hours ago   698MB
debian       latest    676aedd4776f   2 weeks ago    117MB
centos       7         eeb6ee3f44bd   2 years ago    204MB
nginx        1.18.0    c2c45d506085   2 years ago    133MB
然后直接创建镜像,根据经验都知道nginx的配置文件在/etc/nginx/conf.d目录下
[root@server159 ~]# docker run -dt --name nginxtest  nginx:1.18.0
9c8c514fff1e6e8bebaca3d0d8deaffe39cc243f31e0dcfa0e73b9cf8e924fff
[root@server159 ~]# docker exec nginxtest ls /etc/nginx/conf.d
default.conf
复制docker容器里的文件到当前宿主机的目录下
[root@server159 ~]# docker cp nginxtest:/etc/nginx/conf.d/default.conf ./
Successfully copied 3.07kB to /root/./
[root@server159 ~]# ls
anaconda-ks.cfg  default.conf  original-ks.cfg  www.conf
复制的文件内容是这样的
[root@server159 ~]# cat default.conf
server {
    listen       80;
    listen  [::]:80;
    server_name  localhost;

    #charset koi8-r;
    #access_log  /var/log/nginx/host.access.log  main;

    location / {
        root   /usr/share/nginx/html;
        index  index.html index.htm;
    }

    #error_page  404              /404.html;

    # redirect server error pages to the static page /50x.html
    #
    error_page   500 502 503 504  /50x.html;
    location = /50x.html {
        root   /usr/share/nginx/html;
    }

    # proxy the PHP scripts to Apache listening on 127.0.0.1:80
    #
    #location ~ \.php$ {
    #    proxy_pass   http://127.0.0.1;
    #}

    # pass the PHP scripts to FastCGI server listening on 127.0.0.1:9000
    #
    #location ~ \.php$ {
    #    root           html;
    #    fastcgi_pass   127.0.0.1:9000;
    #    fastcgi_index  index.php;
    #    fastcgi_param  SCRIPT_FILENAME  /scripts$fastcgi_script_name;
    #    include        fastcgi_params;
    #}

    # deny access to .htaccess files, if Apache's document root
    # concurs with nginx's one
    #
    #location ~ /\.ht {
    #    deny  all;
    #}
}
然后修改我们复制出来的文件,就是定制我们自己需要的配置文件了
这里我修改了端口为8080,根目录变成/usr/share/nginx
server {
    listen       8080;
    listen  [::]:8080;
    server_name  www.game.com;
    location / {
        root   /usr/share/nginx;
        index  index.html index.htm;
    }
}
然后将修改的配置文件复制到容器里,覆盖原来的文件
并且复制一个我准备好的贪吃蛇游戏index.html文件到根目录下
[root@server159 ~]# docker cp ./default.conf nginxtest:/etc/nginx/conf.d/default.conf
Successfully copied 2.05kB to nginxtest:/etc/nginx/conf.d/default.conf
[root@server159 ~]# ls
anaconda-ks.cfg  default.conf  index.html  original-ks.cfg  www.conf
[root@server159 ~]# docker cp ./index.html nginxtest:/usr/share/nginx
Successfully copied 33.3kB to nginxtest:/usr/share/nginx
然后将容器生成为一个新镜像
[root@server159 ~]# docker commit -a "alice" -m "my new nginx image " nginxtest newnginx:v1
sha256:765591e6feee43047b660bea909bbc46fe9eec7a8c498438b55579244793c02f
[root@server159 ~]# docker images
REPOSITORY   TAG       IMAGE ID       CREATED          SIZE
newnginx     v1        765591e6feee   10 seconds ago   133MB
php-fpm      v1        0474bd7488fa   21 hours ago     698MB
debian       latest    676aedd4776f   2 weeks ago      117MB
centos       7         eeb6ee3f44bd   2 years ago      204MB
nginx        1.18.0    c2c45d506085   2 years ago      133MB
然后我们新的nginx镜像就定制好了
-a是作者,-m是这个镜像的描述,newnginx:v1是镜像名和版本
定制好我们的新镜像以后可以创建一个新容器运行我们定制的镜像看看效果
把容器的8080端口映射到主机的80端口,因为我们定制的nginx镜像是改了端口的,不是80了
[root@server159 ~]# docker run -dt --name webgame -p 80:8080 newnginx:v1
d92bc0b92bf72401756d6c59bf3dcc2d3fc3e660b9a63efb759dae85de70ebc3
[root@server159 ~]# docker exec webgame ls /usr/share/nginx
html
index.html
[root@server159 ~]#
使用交互式命令可以看到我们的nginx目录下确实有我们上传的index.html文件
容器创建好后去浏览器访问
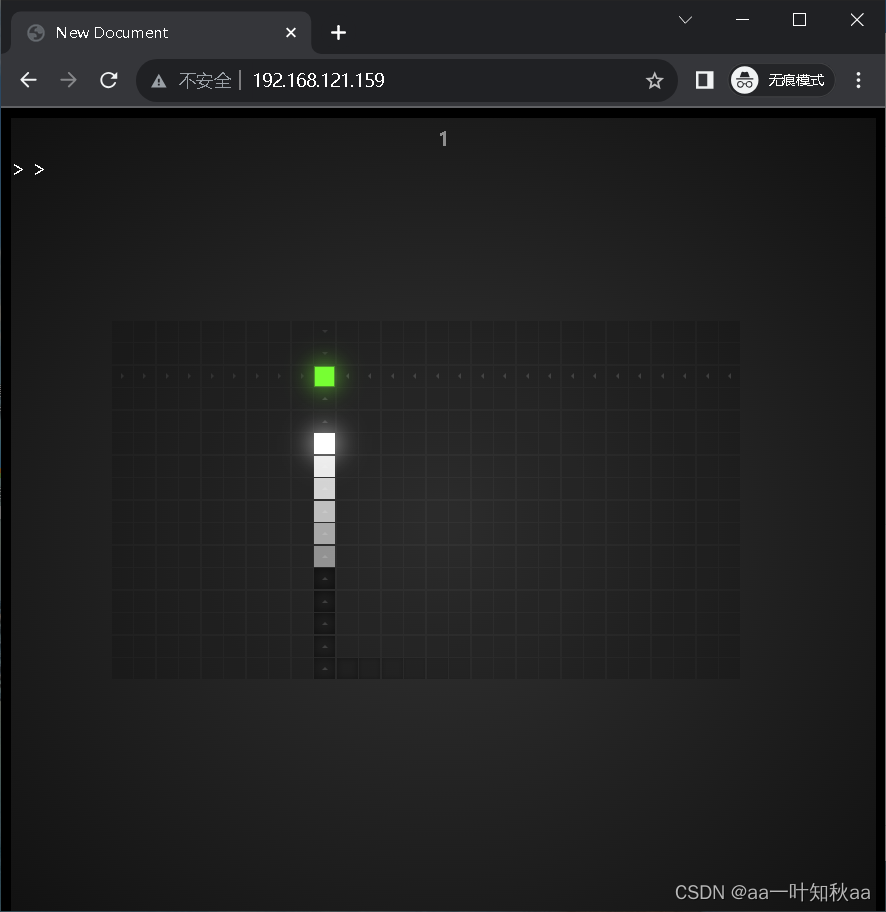
可以看到我们的贪吃蛇游戏就可以运行了
一个容器的定制这样就可以了
下次讲Dockerfile的容器定制方法


![[每日一氵] cudaDevAttrMaxBlocksPerMultiprocessor is not a member of cudaDeviceAttr](https://img-blog.csdnimg.cn/7f8d19da4187409eb4a5eb6e3950a223.png)