一:转换环境准备
python版本为Python 3.8.0,需要安装对应的版本包,torch==1.10.0 torchvision==0.11.0 torchaudio==0.10.0
pip3 install torch==1.10.0 torchvision==0.11.0 torchaudio==0.10.0 -f https://download.pytorch.org/whl/torch_stable.html
二:下载编译nccn_yolov5需要用到的库
sudo apt install build-essential git cmake libprotobuf-dev protobuf-compiler libvulkan-dev vulkan-utils libopencv-dev
1、下载源码nccn:
git clone https://github.com/Tencent/ncnn.git
cd ncnn
git submodule update --init
2、编译ncnn_yolov5源码: https://github.com/Tencent/ncnn/wiki/how-to-build#build-for-linux
cd ncnn;mkdir build;cd build;cmake ..
1. 下载yolov5仓库,git clone https://github.com/ultralytics/yolov5
2. pt转onnx
python3 export.py --weights ../ywjc_V2023101201.pt --include torchscript onnx
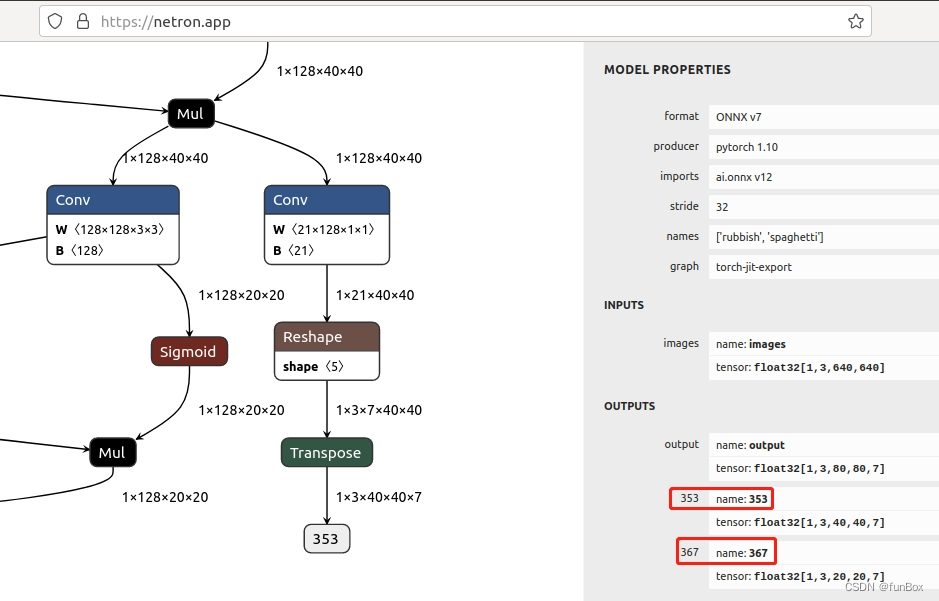
3.在线查看onnx:Netron
输出name有353和367
4、进入到ncnn目录下执行以下命令
./build/tools/onnx/onnx2ncnn ../ywjc_V2023101201.onnx ./yolov5n-fp32-ywjc.param ./yolov5n-fp32-ywjc.bin
./build/tools/ncnnoptimize ./yolov5n-fp32-ywjc.param ./yolov5n-fp32-ywjc.bin ./yolov5n-fp16-ywjc.param ./yolov5n-fp16-ywjc.bin 65536
./build/tools/quantize/ncnn2table ./yolov5n-fp16-ywjc.param ./yolov5n-fp16-ywjc.bin imagelist.txt yolov5n-best.table mean=[104,117,123] norm=[0.017,0.017,0.017] shape=[320,320,3] pixel=BGR thread=8 method=kl


![[激光原理与应用-72]:PLC架构与工作原理](https://img-blog.csdnimg.cn/bd5280e05ee2496aa889ec922f65eece.png)
![二叉搜索树的最小绝对差[简单]](https://img-blog.csdnimg.cn/14b249fd6ed94cd1b8ab4ef9268280b9.png)

