1、枚举
1.1 枚举的概念
枚举是 C/C++ 语言中的一种基本数据类型, 它可以用于声明一组常数 。当一个变量有几个固定的可能取值时,可以将这个变量定义为枚举类型。 比如,你可以用一个枚举类型的变量来表示季节,因为季节只有 4 种可能的取值:春天、夏天、秋天、冬天。
1.2 枚举类型的定义
一般形式为: enum 枚举名 { 枚举元素 1, 枚举元素 2, …… };enum Season {spring,summer,autumn,winter};
注意,枚举类型的定义最后一个成员是没有逗号哦!
1.3 枚举变量的定义
前面只是定义了枚举类型,接下来就可以利用定义好的枚举类型定义变量,跟结构体一样,
有
3
种方式定义枚举变量
1. 先定义枚举类型,再定义枚举变量enum Season {spring,summer,autumn,winter};enum Season s;
2. 定义枚举类型的同时定义枚举变量enum Season {spring,summer,autumn,winter} s;
3. 省略枚举名称,直接定义枚举变量enum {spring,summer,autumn,winter} s;
上面三种方式定义的都是枚举变量
s
1.4 枚举使用的注意
1、 C 语言编译器会将枚举元素 (spring 、 summer 等 ) 作为整型常量处理,称为枚 举常量。2、 枚举元素的值取决于定义时各枚举元素排列的先后顺序。默认情况下,第一 个枚举元素的值为 0 ,第二个为 1 ,依次顺序加 1 。
#include <stdio.h>
int main()
{
	// 1.定义枚举类型
	enum Season
	{
		spring, summer, autumn, winter
	};
	// 2.定义枚举变量
	enum Season s = winter;
	printf("%d\n", s);
	return 0;
}
运行结果:
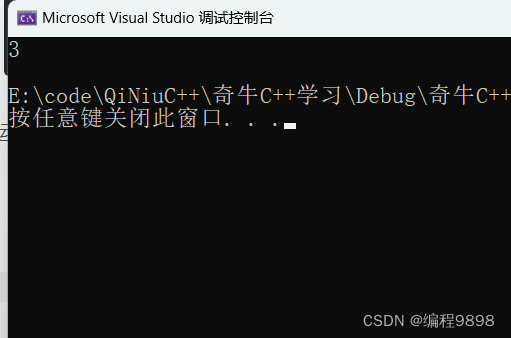
打印结果为:
3
也就是说
spring
的值为
0
,
summer
的值为
1
,
autumn
的值为
2
,
winter
的值为
3。
枚举元素的值取决于定义时各枚举元素排列的先后顺序。默认情况下,第一个枚举元素的值为 0,第二个为 1,依次顺序加 1。 所以winter=3。
注意:枚举变量只能用枚举常量来赋值,用其他数值赋值会报错。 如:
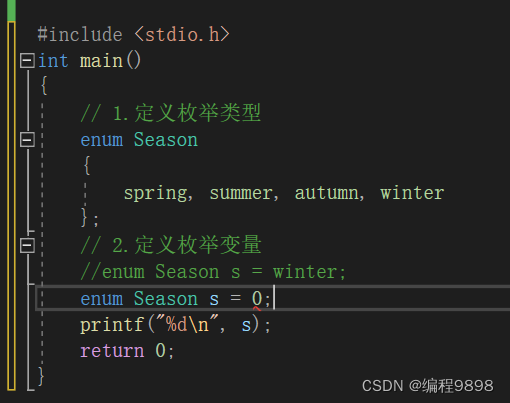
枚举变量只能取定义的时候里面的成员值
也可以在定义枚举类型时改变枚举元素的值:
#include <stdio.h>
int main() {
	// 1.定义枚举类型
	enum Season {
		spring = 1, summer, autumn, winter
	};
	//2.定义枚举变量
	enum Season s = winter;
	printf("%d\n", s);
	return 0;
}
运行结果:
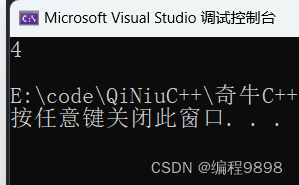
打印结果为:
4
没有指定值的枚举元素,其值为前一元素加
1。
1.5 枚举变量的基本操作
1.赋值
可以给枚举变量赋枚举常量或者整型值
#include <stdio.h>
int main() {
	// 1.定义枚举类型
	enum Season { spring, summer, autumn, winter } s;
	// 2.定义枚举变量
	s = spring; // 等价于 s = 0;
	printf("%d\n", s);
	s = winter;//等价于 s = 3;
	printf("%d\n", s);
	return 0;
}
运行结果:
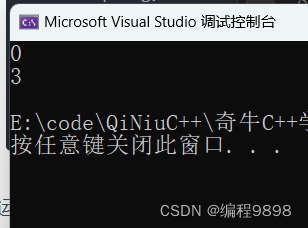
枚举类型的大小就是固定 4 个字节,不管是在位2 位平台还是在64 位平台,都是固定的 4个字节。这个和指针还不一样哦!
2.遍历枚举元素
#include <stdio.h>
int main() {
	enum Season { spring, summer, autumn, winter } s;
	// 遍历枚举元素
	for (int i = spring; i <= winter; i++) {
		printf("枚举元素:%d \n", i);
	}
}
运行结果:
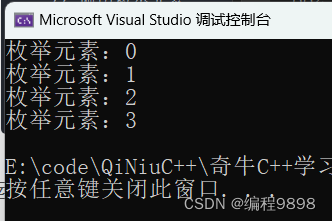
注意下面这种遍历在VS里会报错:

枚举作为常量,不能自增运算,只有变量才能自增运算。
2、类型的定义
2.1 什么是类型定义
typedef
是一个高级数据特性,它可以为某一
类型
自定义名称
,
即类型的别名。
2.2 为什么要使用类型定义
从一辆豪车说起:
奇瑞捷豹路虎揽胜极光

使用类型定义可以:
1. 简化写法2. 提高程序的可移植性
#include <stdio.h>
#include <stdlib.h>
typedef long long int64;
int main(void) {
	int64 dream = 10000000000; //梦想一百亿
	printf("dream: %lld\n", dream);
	printf("sizeof(int64): %d\n", sizeof(int64));
	return 0;
}
运行结果:

int64 比 long long要可通俗的多。
2.2 类型定义的使用
#include <stdio.h>
#include <stdlib.h>
typedef char* STRING;
#define STR char *
int main(void) {
	STRING s1, s2; //等同于 char *s1; char *s2;
	char name[] = "Martin";
	s1 = name;
	s2 = name;
	STR s3, s4; // char * s3, s4;
	s3 = name;
	s4 = name[0];
	system("pause");
	return 0;
}虽然类型定义和宏定义有相似之处,但不能混为一谈!它俩不是一个东西。
宏定义是机械的替换,而类型定义
typedef
替换的类型,后面定义的变量都是这种类型。如:
#define int* int_point1typedef int* int_point2int_point1 p1,p2;int_point2 p3,p4;这里p1是指针,p2是int型变量而 p3,p4 都是 int 型指针!!但是这种宏定义在新的版本VS中已经不允许了,发现越新的VS版本之前的代码基本都容易出现问题。
3、头文件
3.1 什么是 #include
预处理指令
-
编译前包含指定文件内容到当前文件中,即使用包含文件替换源文件中的#include
指令。
#include
指令有两种形式:
#include <stdio.h>← 文件名在尖括号中 < 标准系统目录 >
#include "box_man.h"← 文件名在双引号中 < 当前目录 >
3.2 头文件的作用
1、代码重用2、封装 - 把某些具有共性的函数定义放在同一个源文件里3、 提高代码的可维护性
3.3 头文件的使用
test.h
#pragma once //第一种 文件只包含一次

#ifndef TEST_H //第二种 #ifndef 和 #endif 包围的代码只包含一次
#define TEST_H
#include <stdio.h>
struct _pos {
	int x;
	int y;
	int z;
	int w;
};
void test_A();
void test_B();

extern int kkk;
#endif
testA.cpp
#include <stdio.h>
#include <stdlib.h>
#include "test.h"
//程序员 A 的代码
int main(void) {
	struct _pos pos;
	pos.x = 0;
	pos.y = 0;
	pos.z = 0;
	pos.w = 0;
	printf("kkk: %d\n", kkk);
	test_A();
	test_B();
	system("pause");
}
void test_A() {
	printf("我是 test_A.cpp => test_A() \n");
	{
		static int time = 0;
		if (++time > 5)return;
	}
	test_B();
}
testB.cpp
#include <stdio.h>
#include "test.h"
int kkk = 100;
extern void test_B() {
	struct _pos pos;
	pos.x = 0;
	pos.y = 0;
	pos.w = 0;
	printf("我是 test_B.cpp => test_B() \n");
	test_A();
}
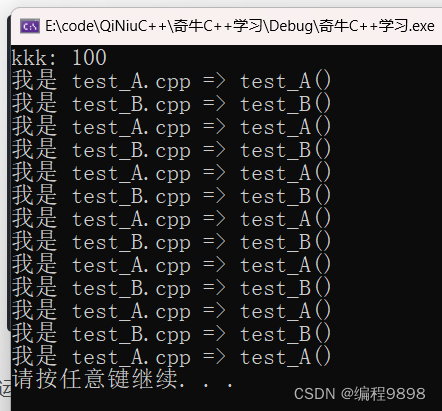
运行结果:
3.4头文件保护措施
#pragma once// 防止整个头文件被包含多次
#ifndef … #define… #endif// 防止 #ifndef 和 #endif 包围的代码包含多次


