Linux-5 基础命令
查看类命令
-
此类命令仅能查看文件中的内容
- ls是用来查看目录中的内容
- cat是用来查看文件中的内容
-
查看文件
-
cat
- 选项
- -n:显示文件内容的行数
- -A:显示文件中的特殊字符(如果从Windows拷贝配置文件到Linux,很容易出现多了一些特殊字符,造成服务启动失败)

# 使用命令将Windows格式转换为linux [root@destiny ~]# yum install dos2unix -y [root@destiny ~]# dos2unix xxx.txt dos2unix: converting file xxx.txt to unix format ... - 选项
-
less/more:查看文件内容比较多的,比如/etc/services,小说等
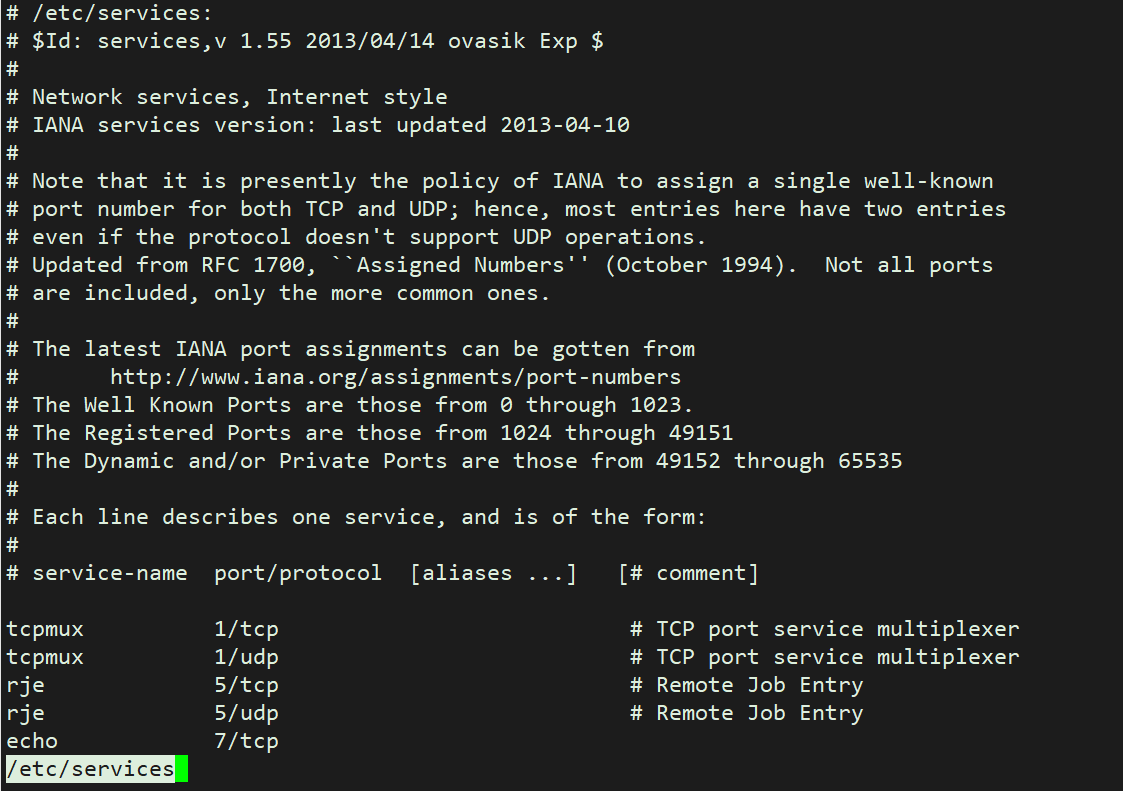
# less 分页查看文件内容:
	# CTRL+F 下翻页
	# CTRL+B 上翻页
	# Q 退出
	#空格也可以下翻页
# more与less相似,不过会有百分比进度条显示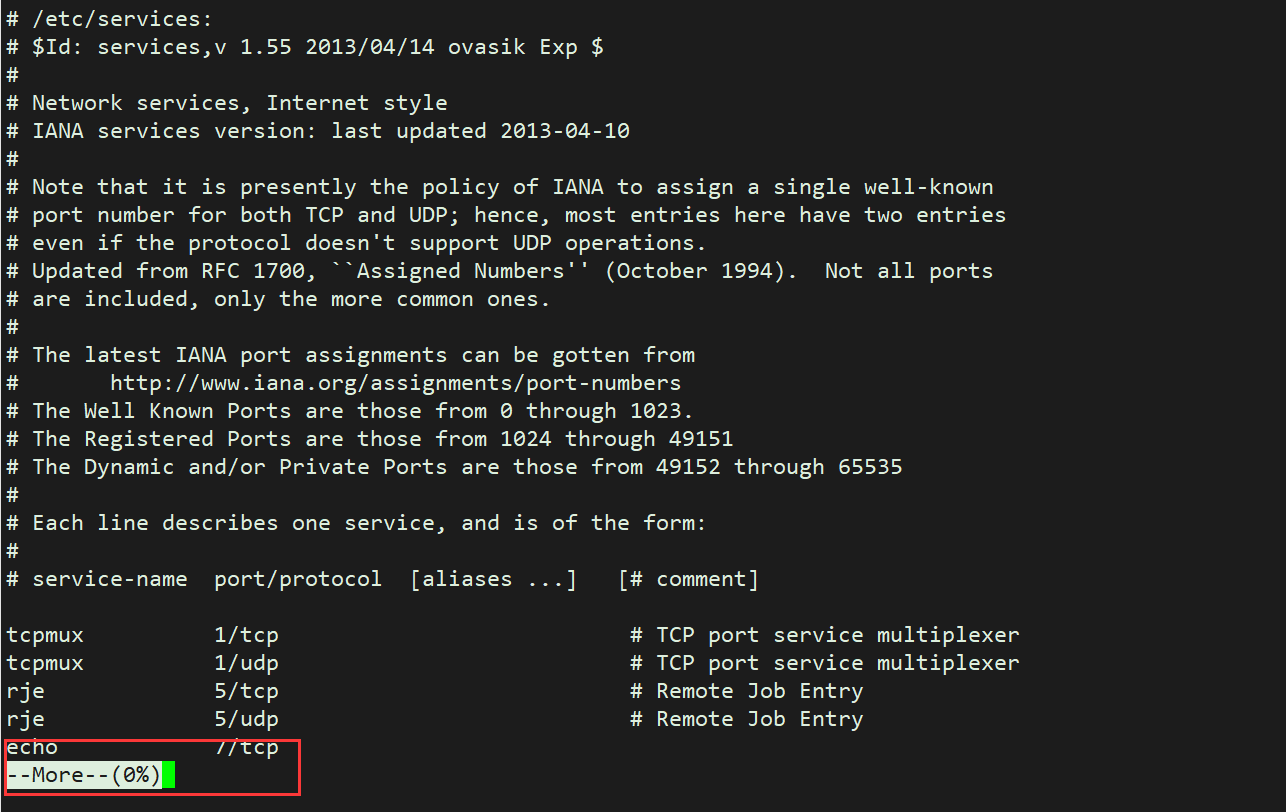
-
head/tail/tailf
# head 首部;默认首部10行;
	# -n 显示查看第几行
	# -5 查看前5行;默认打印文字首部10行

[root@destiny ~]# head /etc/services
# /etc/services:
# $Id: services,v 1.55 2013/04/14 ovasik Exp $
#
# Network services, Internet style
# IANA services version: last updated 2013-04-10
#
# Note that it is presently the policy of IANA to assign a single well-known
# port number for both TCP and UDP; hence, most entries here have two entries
# even if the protocol doesn't support UDP operations.
# Updated from RFC 1700, ``Assigned Numbers'' (October 1994).  Not all ports

[root@destiny ~]# head -5 /etc/passwd
root:x:0:0:root:/root:/bin/bash
bin:x:1:1:bin:/bin:/sbin/nologin
daemon:x:2:2:daemon:/sbin:/sbin/nologin
adm:x:3:4:adm:/var/adm:/sbin/nologin
lp:x:4:7:lp:/var/spool/lpd:/sbin/nologin

# tail 尾部;默认尾部10行
[root@destiny ~]# tail /etc/services
3gpp-cbsp       48049/tcp               # 3GPP Cell Broadcast Service Protocol
isnetserv       48128/tcp               # Image Systems Network Services
isnetserv       48128/udp               # Image Systems Network Services
blp5            48129/tcp               # Bloomberg locator
blp5            48129/udp               # Bloomberg locator
com-bardac-dw   48556/tcp               # com-bardac-dw
com-bardac-dw   48556/udp               # com-bardac-dw
iqobject        48619/tcp               # iqobject
iqobject        48619/udp               # iqobject
matahari        49000/tcp               # Matahari Broker
[root@destiny ~]# tail -5 /etc/passwd
dbus:x:81:81:System message bus:/:/sbin/nologin
polkitd:x:999:998:User for polkitd:/:/sbin/nologin
sshd:x:74:74:Privilege-separated SSH:/var/empty/sshd:/sbin/nologin
postfix:x:89:89::/var/spool/postfix:/sbin/nologin
chrony:x:998:996::/var/lib/chrony:/sbin/nologin

#[root@destiny ~]# tail -20 /etc/passwd | head
#通过这个可以取到以取出来的内容的前一部分,可用来取文件的中间部分
# tail -20 获取文件后20行,拿到输出结果,输出到屏幕;
# 使用管道技术;将左边命令输出,通过管道,传递给右边命令的输入;

#tail -f 实时追踪文件尾部的变化;
-
查找类命令
-
which
[root@destiny ~]# which ls alias ls='ls --color=auto' /usr/bin/ls [root@destiny ~]# which poweroff /usr/sbin/poweroff -
whereis
#选项: # -b:查看二进制文件; [root@destiny ~]# whereis ls ls: /usr/bin/ls /usr/share/man/man1/ls.1.gz [root@destiny ~]# whereis -b ls ls: /usr/bin/ls -
find
基于文件名称,大小,类型,用户,权限,时间等等
下载类命令
-
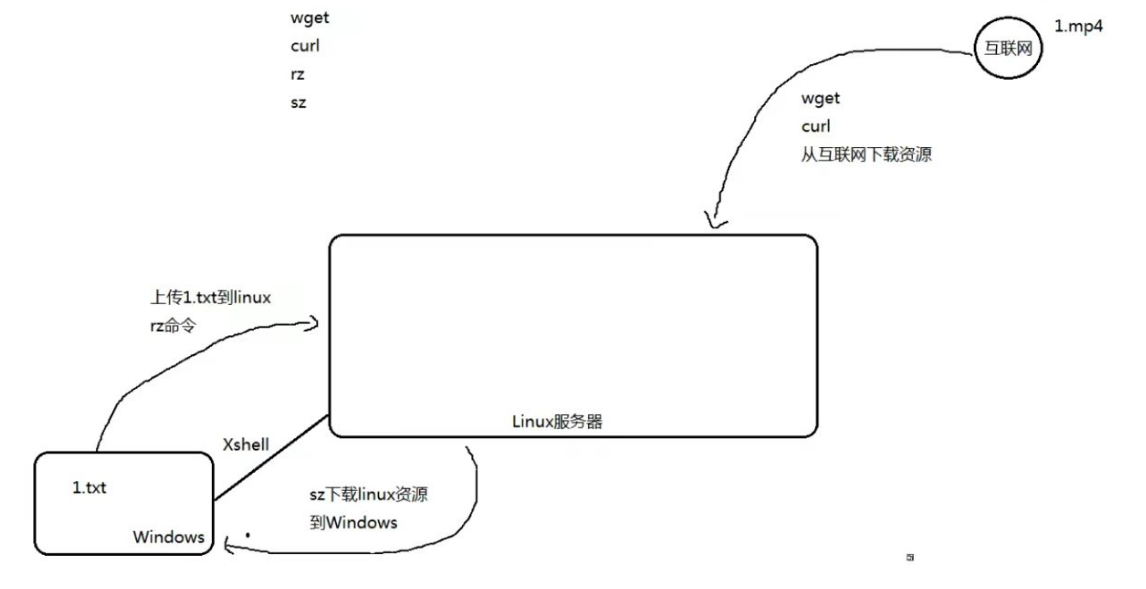
wget,curl:从互联网上下载资源至本地Linux服务器;
-
rz,sz:从Windows上传资源至Linux服务器,或者从Linux下载资源至本地
-
-
weget:
#Centos7 系统最小化安装默认没有wget命令,需要进行安装
# yum install wget -y

#下载互联网上的文件至本地
#wget http://mirrors.aliyun.com/repo/Centos-7.repo
[外链图片转存失败,源站可能有防盗链机制,建议将图片保存下来直接上传(img-kNB8nUvt-1671869729791)(https://typorazhd.oss-cn-beijing.aliyuncs.com/image-20221223113643019.png)]
#下载资源并指定路径,同时指定文件名称
	# -O 指定保存文件的路径
[root@destiny ~]# wget -O /tmp/test.repo  http://mirrors.aliyun.com/repo/Centos-7.repo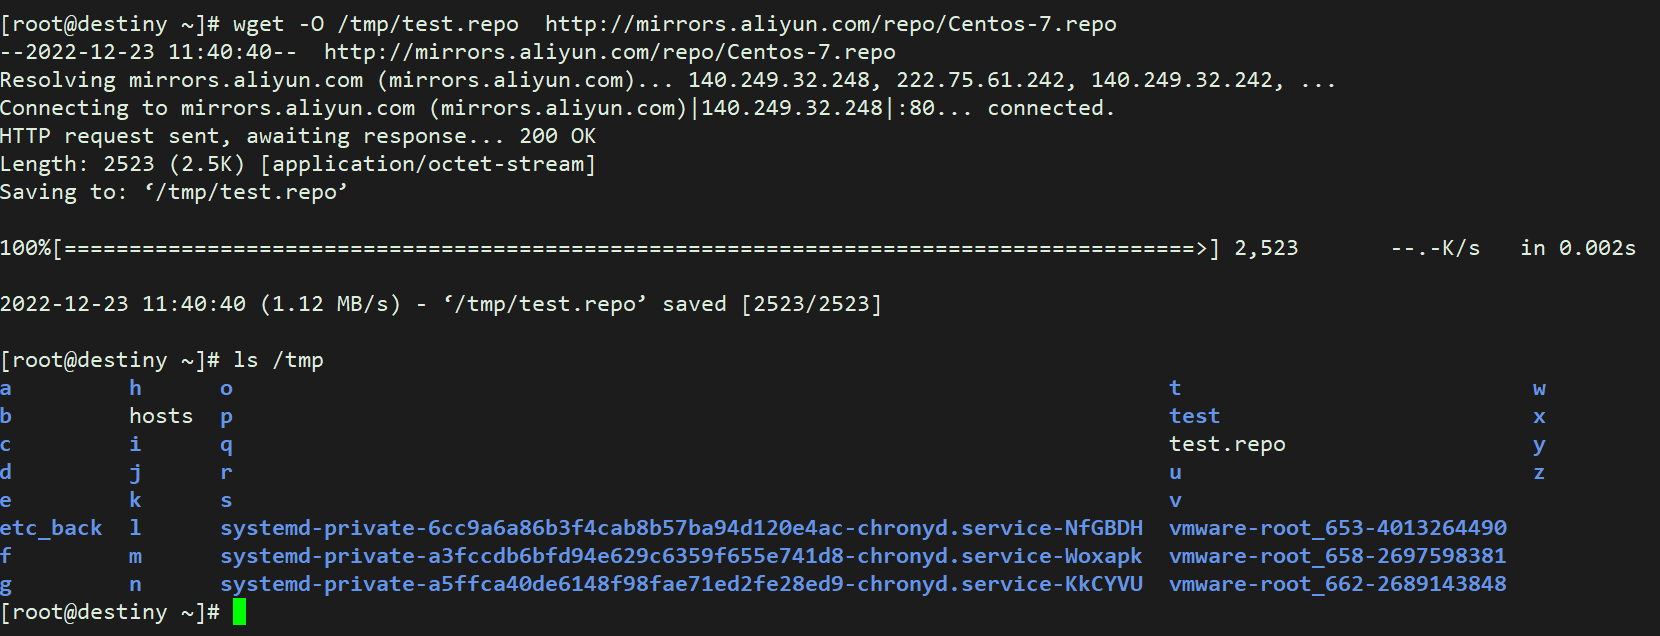
-
curl
#curl是用来获取网页的源码信息的
	# -o指定保存文件的路径
[root@destiny ~]# curl www.baidu.com
[root@destiny ~]# curl -o /tmp/curl.repo http://mirrors.aliyun.com/repo/Centos-7.repo
-
sz和rz:
sz(下载):将选定的文件发送(send)到本地机器
rz(上传):运行该命令会弹出一个文件选择窗口,从本地选择文件上传到Linux服务器
# 检查自己是否有sz和rz
[root@destiny ~]# sz
-bash: sz: command not found
[root@destiny ~]# rz
-bash: rz: command not found
#安装rz上传命令和sz下载命令
[root@destiny ~]# yum install lrzsz  -y
# sz 文件的绝对路径或者相对路径 # 只可以是文件,不可以是文件夹 # 问题: #1.不支持超过4个G的文件; #2.不支持断点续传; #3.如果必须需要文件夹下载到本地,请先压缩,然后再下载# rz是将Windows的内容上传到Linux服务器 #直接将文件拽进去,只可以是文件,不能是文件夹 #文件夹先压缩,再到Linux服务器里解压
字符处理类指令
-
sort
在有些情况下,需要对应一个无序的文本文件进行数据的排序,这时就需要使用sort进行排序了
sort [OPTION]... [FILE]... # -r:倒序 -n:按数字排序 -t:指定分隔符(默认空格) -k:指定第几列,指定几列几字符(指定1,1 3.1,3.3) # 1. 首先创建一个文件,写入一些无序的内容 [root@destiny ~]# cat >> file.txt <<EOF > b:3 > c:2 > a:4 > e:5 > d:1 > f:11 > EOF # 2. 使用sort下面对输出的内容进行排序 [root@destiny ~]# sort file.txt a:4 b:3 c:2 d:1 e:5 f:11 # 结果并不是按照数字排序,而是按字母排序 # 可以使用-t指定分隔符,使用-k指定需要排序的列 [root@destiny ~]# sort -t ":" -k2 file.txt d:1 f:11 #第二行为什么是11?不应该按照顺序排列? c:2 b:3 a:4 e:5 #按照排序的方式,只会看到第一个字符,11的第一个字符是1,按照字符来排确实比2小 #如果想要按照数字的方式进行排序,则需要使用 -n 参数 [root@destiny ~]# sort -t ":" -n -k2 file.txt d:1 c:2 b:3 a:4 e:5 f:11 [root@destiny ~]# sort -t ":" -n -k2 -r file.txt f:11 e:5 a:4 b:3 c:2 d:1 [root@destiny ~]# sort -t ":" -k 3.1,3.1 -k4.1,4.3 -n ip.txt -
uniq
去重,可能文件中会出现重复的;
[root@destiny ~]# cat >> file2.txt <<EOF > abc > 123 > abc > 123 > 456 > EOF [root@destiny ~]# uniq file2.txt abc 123 abc 123 456 #1.先排序(相同的内容才会放一块) [root@destiny ~]# sort file2.txt 123 123 456 abc abc #2.将sort之后的结果,通过管道技术,传递给uniq命令的输入; [root@destiny ~]# sort file2.txt | uniq 123 456 abc [root@destiny ~]# sort file2.txt | uniq -c 2 123 1 456 2 abc #面试题:请统计分析如下日志,打印出访问最高前10的IP #分析: #1.先从文件中将IP地址提炼出来; #2.对IP地址进行排序; #3.进行去重统计; #4.对统计后的次数再进行一次排序 #5.使用head取前10 [root@destiny ~]# sort access_log | uniq -c | sort -nr | head -
wc
统计,统计文件的行数
-
假设运行一个程序,正常情况下会启动四个进程,如果有一次只运行两个进程,说明程序异常;
#wc:通常用来统计文件的行数;当然也可以统计面板输出的行数;
	# -l (line) 行;
[root@destiny ~]# wc -l /etc/services
11176 /etc/services
[root@destiny ~]# wc -l /etc/services | awk '{print $1}'
11176

[root@destiny ~]# ps -ef | grep sshd
root       1027      1  0 16:23 ?        00:00:00 /usr/sbin/sshd -D
root       1346   1027  0 17:36 ?        00:00:00 sshd: root@pts/0
root       1372   1350  0 17:39 pts/0    00:00:00 grep --color=auto sshd
[root@destiny ~]# ps -ef | grep sshd | wc -l
3

# 练习题:过滤出/etc/passwd以nologin结尾的内容,并统计有多少行
	#分析:
		#1.过滤出根关键字相关的行;
		#2.然后通过wc统计对应的行数;
[root@destiny ~]# grep "nologin$"  /etc/passwd | wc -l
15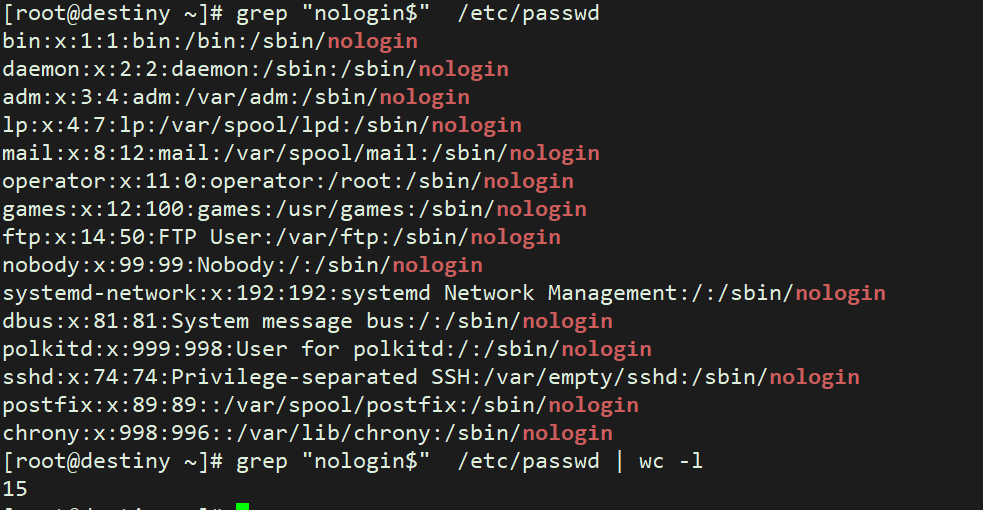
-
-
awk(取列)
将系统的IP地址打印出来
[root@destiny ~]# yum install net-tools -y
#分析:
	#1.肯定是需要拿到IP地址,仅看某一个特定的网卡;ifconfig
	#2.先想办法过滤出数据的那一行; ###行
	#3.然后掐头去尾,取中间;	###列
[root@destiny ~]# ifconfig ens32 | grep "inet"
        inet 10.0.0.100  netmask 255.255.255.0  broadcast 10.0.0.255
        inet6 fe80::b511:c46f:6799:880  prefixlen 64  scopeid 0x20<link>
[root@destiny ~]# ifconfig ens32 | grep "inet "
        inet 10.0.0.100  netmask 255.255.255.0  broadcast 10.0.0.255
[root@destiny ~]# ifconfig ens32 | grep "inet " | awk '{print $2}'
10.0.0.100

#纯awk方法:
[root@destiny ~]# ifconfig ens32 | awk 'NR==2'
        inet 10.0.0.100  netmask 255.255.255.0  broadcast 10.0.0.255
[root@destiny ~]# ifconfig ens32 | awk 'NR==2' | awk '{print $2}'
10.0.0.100
[root@destiny ~]# ifconfig ens32 | awk 'NR==2 {print $2}'
10.0.0.100

#grep 过滤行级别;
#awk 过滤列级别;

#练习:打印 /etc/passwd 中 用户名称,以及用户的UID;第一列和第三列,需要以:为分隔符;
	#默认awk是以空格作为分隔符
	#如何自行指定字段分隔符	-F ':'
[root@destiny ~]# awk -F ':' '{print $1,$3}' /etc/passwd

