这里写目录标题
- 准备工作
- 准备SQL
- 添加用户
- 添加依赖
- 准备UserInfo
- UserMapper
- UserService
- UserServiceImpl
- 配置SpringDataUserDetailsService
- 授权服务器:AuthorizationServer
- 配置客户端详细信息
- 管理令牌
- 定义TokenConfig
- 定义AuthorizationServerTokenServices
- 令牌访问端点配置
- 在AuthorizationServer配置令牌访问端点
- 令牌端点的安全约束
- web安全配置
- 授权码模式
- 获取授权码
- 简化模式(直接获取token)
- 密码模式获取token
- 客户端模式
- 搭建资源服务器
- 添加依赖
- 资源服务器配置
- ResouceServerConfig
- 添加安全访问控制
- 编写资源
- JWT令牌
- 在授权服务器中更改原来TokenConfig
- 定义JWT令牌服务
- 校验jwt令牌
- 完善环境配置
- 创建表
- 配置授权服务
- 首先使用密码模式获取token
- 使用授权码模式获取token
- 到此结束
准备工作
准备SQL
CREATE TABLE `user` (
  `id` int NOT NULL AUTO_INCREMENT,
  `username` varchar(255) CHARACTER SET utf8mb4 COLLATE utf8mb4_0900_ai_ci DEFAULT NULL,
  `password` varchar(255) DEFAULT NULL,
  `salt` varchar(255) DEFAULT NULL,
  PRIMARY KEY (`id`)
) ENGINE=InnoDB AUTO_INCREMENT=16 DEFAULT CHARSET=utf8mb4 COLLATE=utf8mb4_0900_ai_ci;
添加用户
	INSERT INTO
	`security_oauth_demo`.`user`(`id``username`,`password`, `salt`)
	VALUES
(1, 'admin''$2a$10$WuZUcd3Uc1IQ8uNTuIPrvuoToxiZ/CNtfgQL/M/vFQu63pYYQExZK', '1');
添加依赖
    <modelVersion>4.0.0</modelVersion>
    <parent>
        <groupId>org.springframework.boot</groupId>
        <artifactId>spring-boot-starter-parent</artifactId>
        <version>2.1.3.RELEASE</version>
        <relativePath/> <!-- lookup parent from repository -->
    </parent>

    <properties>
        <java.version>1.8</java.version>
        <druid.version>1.1.14</druid.version>
        <fastjson.version>1.2.68</fastjson.version>
        <security.oauth2.version>2.3.5.RELEASE</security.oauth2.version>
    </properties>

    <dependencies>
        <!-- SpringBoot 核心包 -->
        <dependency>
            <groupId>org.springframework.boot</groupId>
            <artifactId>spring-boot-starter</artifactId>
        </dependency>
        <!-- SpringBoot 测试 -->
        <dependency>
            <groupId>org.springframework.boot</groupId>
            <artifactId>spring-boot-starter-test</artifactId>
            <scope>test</scope>
        </dependency>

        <!-- SpringBoot Web容器 -->
        <dependency>
            <groupId>org.springframework.boot</groupId>
            <artifactId>spring-boot-starter-web</artifactId>
        </dependency>

        <!-- spring-boot-devtools -->
        <dependency>
            <groupId>org.springframework.boot</groupId>
            <artifactId>spring-boot-devtools</artifactId>
            <optional>true</optional> <!-- 表示依赖不会传递 -->
        </dependency>

        <!-- spring security 安全认证 -->
        <dependency>
            <groupId>org.springframework.boot</groupId>
            <artifactId>spring-boot-starter-security</artifactId>
        </dependency>

        <!--若依使用的 spring security oauth2 开放授权 -->
        <dependency>
            <groupId>org.springframework.security.oauth</groupId>
            <artifactId>spring-security-oauth2</artifactId>
            <version>${security.oauth2.version}</version>
        </dependency>


        <!-- Mysql驱动包 -->
        <dependency>
            <groupId>mysql</groupId>
            <artifactId>mysql-connector-java</artifactId>
            <scope>runtime</scope>
        </dependency>

        <!-- SpringBoot集成mybatis框架 -->
        <!--mybatis-plus-->
        <dependency>
            <groupId>com.baomidou</groupId>
            <artifactId>mybatis-plus-boot-starter</artifactId>
            <version>3.3.1</version>
        </dependency>


        <!--阿里数据库连接池 -->
        <dependency>
            <groupId>com.alibaba</groupId>
            <artifactId>druid-spring-boot-starter</artifactId>
            <version>${druid.version}</version>
        </dependency>

        <!--常用工具类 -->
        <dependency>
            <groupId>org.apache.commons</groupId>
            <artifactId>commons-lang3</artifactId>
        </dependency>

        <!-- 阿里JSON解析器 -->
        <dependency>
            <groupId>com.alibaba</groupId>
            <artifactId>fastjson</artifactId>
            <version>${fastjson.version}</version>
        </dependency>

        <!--Spring框架基本的核心工具-->
        <dependency>
            <groupId>org.springframework</groupId>
            <artifactId>spring-context-support</artifactId>
        </dependency>


        <!--  jwt-->
        <dependency>
            <groupId>org.springframework.security</groupId>
            <artifactId>spring-security-jwt</artifactId>
            <version>1.1.0.RELEASE</version>
        </dependency>

        <dependency>
            <groupId>org.projectlombok</groupId>
            <artifactId>lombok</artifactId>
            <version>1.18.26</version>
        </dependency>
    </dependencies>

    <build>
        <plugins>
            <plugin>
                <groupId>org.springframework.boot</groupId>
                <artifactId>spring-boot-maven-plugin</artifactId>
            </plugin>
        </plugins>
    </build>
准备UserInfo
import com.baomidou.mybatisplus.annotation.IdType;
import com.baomidou.mybatisplus.annotation.TableId;
import com.baomidou.mybatisplus.annotation.TableName;
import lombok.Data;

import java.io.Serializable;


@Data
@TableName("user")
public class UserInfo implements Serializable {


    private static final long serialVersionUID = 1L;

    @TableId(value = "id",type = IdType.AUTO)
    private Integer id;

    private String username;

    private String password;

    private String salt;

}
UserMapper
import com.baomidou.mybatisplus.core.mapper.BaseMapper;
import com.yc.entity.UserInfo;
import org.apache.ibatis.annotations.Mapper;

@Mapper
public interface UserMapper extends BaseMapper<UserInfo> {
}
UserService
import com.baomidou.mybatisplus.extension.service.IService;
import com.yc.entity.UserInfo;
public interface UserService extends IService<UserInfo> {

    String login(UserInfo user);

    String add(UserInfo user);

    String findOne(UserInfo user);

    String update(UserInfo user);

}
UserServiceImpl
import com.alibaba.fastjson.JSONObject;
import com.baomidou.mybatisplus.core.conditions.query.QueryWrapper;
import com.baomidou.mybatisplus.extension.service.impl.ServiceImpl;
import com.yc.entity.UserInfo;
import com.yc.mapper.UserMapper;

import org.springframework.beans.factory.annotation.Autowired;
import org.springframework.stereotype.Service;


@Service
public class UserServiceImpl   extends ServiceImpl<UserMapper, UserInfo>      implements  UserService {


    @Autowired
    UserMapper userMapper;

    /**
     * 模拟登录
     * @param user
     * @return
     */
    @Override
    public String login(UserInfo user) {
        UserInfo sysUser = userMapper.selectOne(
                new QueryWrapper<UserInfo>().lambda().eq(UserInfo::getUsername, user.getUsername()));
        JSONObject jsonObject = new JSONObject();
        jsonObject.put("code", "200");
        jsonObject.put("msg", "登录成功");

        return jsonObject.toString();

    }

    @Override
    public String add(UserInfo user) {

        int insert = userMapper.insert(user);
        return insert +"";
    }

    @Override
    public String findOne(UserInfo user) {
        UserInfo sysUser = userMapper.selectOne(
                new QueryWrapper<UserInfo>().lambda().eq(UserInfo::getUsername, user.getUsername()));
        return sysUser.getUsername();
    }

    @Override
    public String update(UserInfo user) {
        QueryWrapper<UserInfo> wrapper = new QueryWrapper<>();
       wrapper.eq("id", user.getId());
        int update = userMapper.update(user, wrapper);
        return "成功更新"+ update+ "条数据";
    }
配置SpringDataUserDetailsService
import com.baomidou.mybatisplus.core.conditions.query.QueryWrapper;
import com.yc.entity.UserInfo;
import com.yc.mapper.UserMapper;
import org.springframework.beans.factory.annotation.Autowired;
import org.springframework.security.core.authority.SimpleGrantedAuthority;
import org.springframework.security.core.userdetails.User;
import org.springframework.security.core.userdetails.UserDetails;
import org.springframework.security.core.userdetails.UserDetailsService;
import org.springframework.security.core.userdetails.UsernameNotFoundException;
import org.springframework.security.crypto.password.PasswordEncoder;
import org.springframework.stereotype.Service;

import javax.annotation.Resource;
import java.util.ArrayList;
import java.util.List;

@Service
public class SpringDataUserDetailsService  implements UserDetailsService {
    @Resource
    private UserMapper userMapper;

    @Autowired
    PasswordEncoder passwordEncoder;
    @Override
    public UserDetails loadUserByUsername(String s) throws UsernameNotFoundException {

        if (s == null || "".equals(s)) {
            throw new RuntimeException("用户不能为空");
        }
        // 调用方法查询用户
        UserInfo sysUser = userMapper.selectOne(
                new QueryWrapper<UserInfo>().lambda().eq(UserInfo::getUsername, s));

        List<SimpleGrantedAuthority> authorities = new ArrayList<>();
        authorities.add(new SimpleGrantedAuthority("ROLE_FRONT_USER"  ));


        return new User(sysUser.getUsername(),sysUser.getPassword(), authorities);
    }
授权服务器:AuthorizationServer
AuthorizationServer 需要继承AuthorizationServerConfigurerAdapter
import org.springframework.security.oauth2.config.annotation.configurers.ClientDetailsServiceConfigurer;
import org.springframework.security.oauth2.config.annotation.web.configuration.AuthorizationServerConfigurerAdapter;
import org.springframework.security.oauth2.config.annotation.web.configurers.AuthorizationServerEndpointsConfigurer;
import org.springframework.security.oauth2.config.annotation.web.configurers.AuthorizationServerSecurityConfigurer;


@Configuration
@EnableAuthorizationServer
public class AuthorizationServer extends AuthorizationServerConfigurerAdapter {

    @Override
    public void configure(ClientDetailsServiceConfigurer clients) throws Exception {
        super.configure(clients);
    }

    @Override
    public void configure(AuthorizationServerEndpointsConfigurer endpoints) throws Exception {
        super.configure(endpoints);
    }


    @Override
    public void configure(AuthorizationServerSecurityConfigurer security) throws Exception {
        super.configure(security);
    }
}
AuthorizationServerConfigurerAdapter源码

- AuthorizationServerSecurityConfigurer:配置令牌端点(Token Endpoint)的安全约束
- ClientDetailsServiceConfigurer:配置OAuth2客户端
- AuthorizationServerEndpointsConfigurer:配置授权(authorization)以及令牌(token)的访问端点和令牌服务(token services)
配置客户端详细信息
ClientDetailsServiceConfigurer 能够使用内存或者JDBC来实现客户端详情服务(ClientDetailsService),
ClientDetailsService负责查找ClientDetails,而ClientDetails有几个重要的属性如下列表
- clientId:(必须的)用来标识客户的Id。
- secret:(需要值得信任的客户端)客户端安全码,如果有的话
- scope:用来限制客户端的访问范围,如果为空(默认)的话,那么客户端拥有全部的访问范围。
- authorizedGrantTypes:此客户端可以使用的授权类型,默认为空。
- authorities:此客户端可以使用的权限(基于Spring Security authorities)。
客户端详情(Client Details)能够在应用程序运行的时候进行更新,可以通过访问底层的存储服务(例如将客户
端详情存储在一个关系数据库的表中,就可以使用 JdbcClientDetailsService)或者通过自己实现
ClientRegistrationService接口(同时你也可以实现 ClientDetailsService 接口)来进行管理。
我们暂时使用内存方式存储客户端详情信息,配置如下:
	 // clients.withClientDetails(clientDetailsService);
        clients.inMemory()// 使用in‐memory存储
                .withClient("c1")// client_id
                .secret(new BCryptPasswordEncoder().encode("secret"))
                //资源服务id
                .resourceIds("res1")
                // 该client允许的授权类型  authorization_code,password,refresh_token,implicit,client_credentials
                .authorizedGrantTypes("authorization_code", "password", "client_credentials", "implicit", "refresh_token")
                .scopes("all")// 允许的授权范围  是一个标识
                .autoApprove(false)//false代表如果是授权码模式 就跳转到授权的页面.
                  //加上验证回调地址
                .redirectUris("http://www.baidu.com");
管理令牌
AuthorizationServerTokenServices 接口定义了一些操作使得你可以对令牌进行一些必要的管理,令牌可以被用来
加载身份信息,里面包含了这个令牌的相关权限。
自己可以创建 AuthorizationServerTokenServices 这个接口的实现,则需要继承 DefaultTokenServices 这个类,
里面包含了一些有用实现,你可以使用它来修改令牌的格式和令牌的存储。默认的,当它尝试创建一个令牌的时
候,是使用随机值来进行填充的,除了持久化令牌是委托一个 TokenStore 接口来实现以外,这个类几乎帮你做了
所有的事情。并且 TokenStore 这个接口有一个默认的实现,它就是 InMemoryTokenStore ,如其命名,所有的
令牌是被保存在了内存中。除了使用这个类以外,你还可以使用一些其他的预定义实现,下面有几个版本,它们都实现了TokenStore 接口:
- InMemoryTokenStore:这个版本的实现是被默认采用的,它可以完美的工作在单服务器上(即访问并发量
压力不大的情况下,并且它在失败的时候不会进行备份),大多数的项目都可以使用这个版本的实现来进行
尝试,你可以在开发的时候使用它来进行管理,因为不会被保存到磁盘中,所以更易于调试。 - JdbcTokenStore:这是一个基于JDBC的实现版本,令牌会被保存进关系型数据库。使用这个版本的实现时,
你可以在不同的服务器之间共享令牌信息,使用这个版本的时候请注意把"spring-jdbc"这个依赖加入到你的
classpath当中。 - JwtTokenStore:这个版本的全称是 JSON Web Token(JWT),它可以把令牌相关的数据进行编码(因此对
于后端服务来说,它不需要进行存储,这将是一个重大优势),但是它有一个缺点,那就是撤销一个已经授
权令牌将会非常困难,所以它通常用来处理一个生命周期较短的令牌以及撤销刷新令牌(refresh_token)。
另外一个缺点就是这个令牌占用的空间会比较大,如果你加入了比较多用户凭证信息。JwtTokenStore 不会保存任何数据,但是它在转换令牌值以及授权信息方面与 DefaultTokenServices 所扮演的角色是一样的。
定义TokenConfig
import org.springframework.context.annotation.Bean;
import org.springframework.context.annotation.Configuration;
import org.springframework.security.oauth2.provider.token.TokenStore;
import org.springframework.security.oauth2.provider.token.store.InMemoryTokenStore;

/**
 *
 * 令牌存储策略
 */
@Configuration
public class TokenConfig  {
    @Bean
    public TokenStore tokenStore() {
        //内存模式
        return new InMemoryTokenStore();
    }
}
定义AuthorizationServerTokenServices
 //令牌服务
    @Autowired
    private TokenStore tokenStore;
    //客户端详情服务
    @Autowired
    private ClientDetailsService clientDetailsService;
  /**
     *
     * 配置令牌服务
     * 不管是什么模式都需要配置
     * 需要使用到客户端clientDetailsService和令牌服务tokenStore
     */

    @Bean
    public AuthorizationServerTokenServices tokenService() {
        DefaultTokenServices service=new DefaultTokenServices();
        //客户端详情
        service.setClientDetailsService(clientDetailsService);
        //刷新token
        service.setSupportRefreshToken(true);
        //令牌服务
        service.setTokenStore(tokenStore);
        // 令牌默认有效期2小时
        service.setAccessTokenValiditySeconds(7200);
        // 刷新令牌默认有效期3天
        service.setRefreshTokenValiditySeconds(259200);
        return service;
    }
令牌访问端点配置
AuthorizationServerEndpointsConfigurer 这个对象的实例可以完成令牌服务以及令牌endpoint配置。
配置授权类型(Grant Types)
AuthorizationServerEndpointsConfigurer 通过设定以下属性决定支持的授权类型(Grant Types):
- authenticationManager:认证管理器,当你选择了资源所有者密码(password)授权类型的时候,请设置
这个属性注入一个 AuthenticationManager 对象。 - userDetailsService:如果你设置了这个属性的话,那说明你有一个自己的 UserDetailsService 接口的实现, 或者你可以把这个东西设置到全局域上面去(例如 GlobalAuthenticationManagerConfigurer 这个配置对
象),当你设置了这个之后,那么 “refresh_token” 即刷新令牌授权类型模式的流程中就会包含一个检查,用
来确保这个账号是否仍然有效,假如说你禁用了这个账户的话。 - authorizationCodeServices:这个属性是用来设置授权码服务的(即 AuthorizationCodeServices 的实例对 象),主要用于 “authorization_code” 授权码类型模式。
- implicitGrantService:这个属性用于设置隐式授权模式,用来管理隐式授权模式的状态。不常用
- tokenGranter:当你设置了这个东西(即 TokenGranter 接口实现),那么授权将会交由你来完全掌控,并
且会忽略掉上面的这几个属性,这个属性一般是用作拓展用途的,即标准的四种授权模式已经满足不了你的
需求的时候,才会考虑使用这个
配置授权端点的URL(Endpoint URLs):
AuthorizationServerEndpointsConfigurer 这个配置对象有一个叫做 pathMapping() 的方法用来配置端点URL链
接,它有两个参数:
- 第一个参数:String 类型的,这个端点URL的默认链接。
- 第二个参数:String 类型的,你要进行替代的URL链接。
以上的参数都将以 “/” 字符为开始的字符串,框架的默认URL链接如下列表,可以作为这个 pathMapping() 方法的 第一个参数: - /oauth/authorize:授权端点。
- /oauth/token:令牌端点。
- /oauth/confirm_access:用户确认授权提交端点。
- /oauth/error:授权服务错误信息端点。
- /oauth/check_token:用于资源服务访问的令牌解析端点。
- /oauth/token_key:提供公有密匙的端点,如果你使用JWT令牌的话。
需要注意的是授权端点这个URL应该被Spring Security保护起来只供授权用户访问.
在AuthorizationServer配置令牌访问端点
@Bean
public AuthorizationCodeServices authorizationCodeServices() { //设置授权码模式的授权码如何
存取,暂时采用内存方式
return new InMemoryAuthorizationCodeServices();
}

@Autowired
private AuthorizationCodeServices authorizationCodeServices;

@Autowired
private AuthenticationManager authenticationManager;

 @Override
    public void configure(AuthorizationServerEndpointsConfigurer endpoints) {
        endpoints
                //密码模式所需要的
                .authenticationManager(authenticationManager)
                //授权码模式所需要的
                .authorizationCodeServices(authorizationCodeServices)
                //如果你设置了这个属性的话,那说明你有一个自己的 UserDetailsService 接口的实现
                //.userDetailsService(null)
                //令牌管理服务
                .tokenServices(tokenService())
                //自定义令牌端点URL
              //  .pathMapping("/oauth/token","/user/token")
                //自定义授权端点URL
             //   .pathMapping("/oauth/authorize","/user/authorize")
                //允许POST提交
                .allowedTokenEndpointRequestMethods(HttpMethod.POST);
    }
令牌端点的安全约束
AuthorizationServerSecurityConfigurer用来配置令牌端点(Token Endpoint)的安全约束,在
AuthorizationServer中配置如下
 @Override
    public void configure(AuthorizationServerSecurityConfigurer security) throws Exception {
        security
                //tokenkey这个endpoint当使用JwtToken且使用非对称加密时,资源服务用于获取公钥而开放的,这里指这个endpoint完全公开。
                .tokenKeyAccess("permitAll()")
                //checkToken这个endpoint完全公开
                .checkTokenAccess("permitAll()")
                //允许表单认证
                .allowFormAuthenticationForClients() ;
    }
- tokenkey这个endpoint当使用JwtToken且使用非对称加密时,资源服务用于获取公钥而开放的,这里指这个 endpoint完全公开。
- checkToken这个endpoint完全公开
- 允许表单认证
web安全配置
@Configuration
@EnableGlobalMethodSecurity(securedEnabled = true,prePostEnabled = true)
public class WebSecurityConfig extends WebSecurityConfigurerAdapter {


    @Bean
    public PasswordEncoder passwordEncoder() {
        return new BCryptPasswordEncoder();
    }

    //安全拦截机制(最重要)
    @Override
    protected void configure(HttpSecurity http) throws Exception {
        http.csrf().disable()
                .authorizeRequests()
                .antMatchers("/r/**").authenticated()//所有/r/**的请求必须认证通过
                .anyRequest().permitAll()//除了/r/**,其它的请求可以访问
                .and()
                .formLogin()//允许表单登录
                .loginPage("/login-view")//登录页面
                .loginProcessingUrl("/login")
                .successForwardUrl("/login-success")//自定义登录成功的页面地址
        .and()
                .sessionManagement()
                .sessionCreationPolicy(SessionCreationPolicy.IF_REQUIRED)
                .and()
                .logout()
                .logoutUrl("/logout")
                .logoutSuccessUrl("/login-view?logout");


    }

    /**
     *
     * oauth2.0 密码模式下需要认证管理器
     * 密码模式所需要的
     *
     * @return
     * @throws Exception
     */
    @Bean
    @Override
    public AuthenticationManager authenticationManagerBean() throws Exception
    {
        return super.authenticationManagerBean();
    }


}
授权码模式
获取授权码
浏览器访问
http://localhost:8081/oauth/authorize?client_id=c1&response_type=code&scope=all&redirect_uri=http://www.baidu.com
会跳转到登录页面

输入账号admin 密码123
点击授权
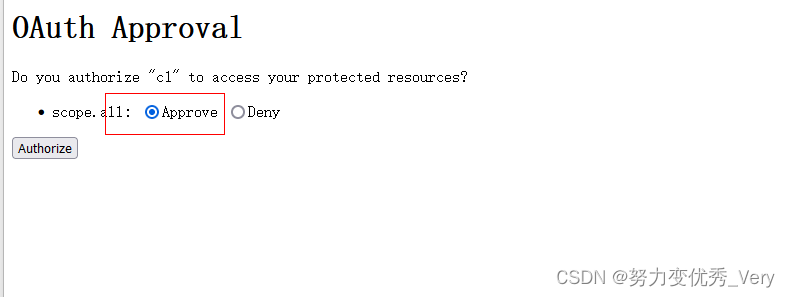
得到授权码
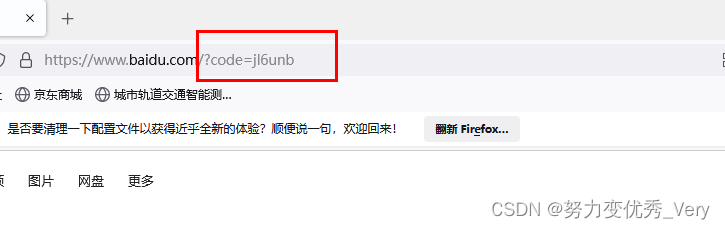
客户端拿着授权码向授权服务器索要访问access_token
http://localhost:8081/oauth/token
参数
- code : 刚刚获取的授权码
- client_id :c1
- client_secret :secret
- grant_type : authorization_code 授权码模式
- redirect_uri :http://www.baidu.com

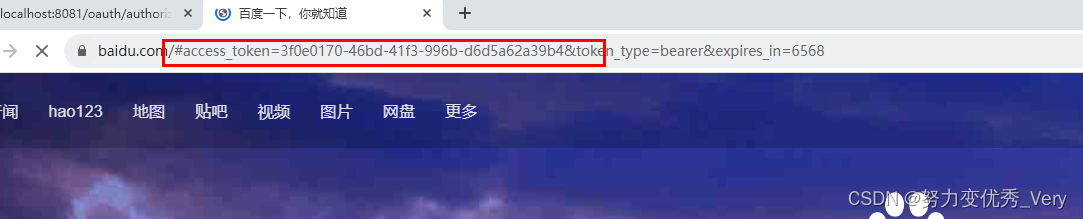
简化模式(直接获取token)
参数描述同授权码模式 ,注意response_type=token,说明是简化模式。
一般来说,简化模式用于没有服务器端的第三方单页面应用,因为没有服务器端就无法接收授权码。
http://localhost:8081/oauth/authorize?client_id=c1&response_type=token&scope=all&redirect_uri=http://www.baidu.com
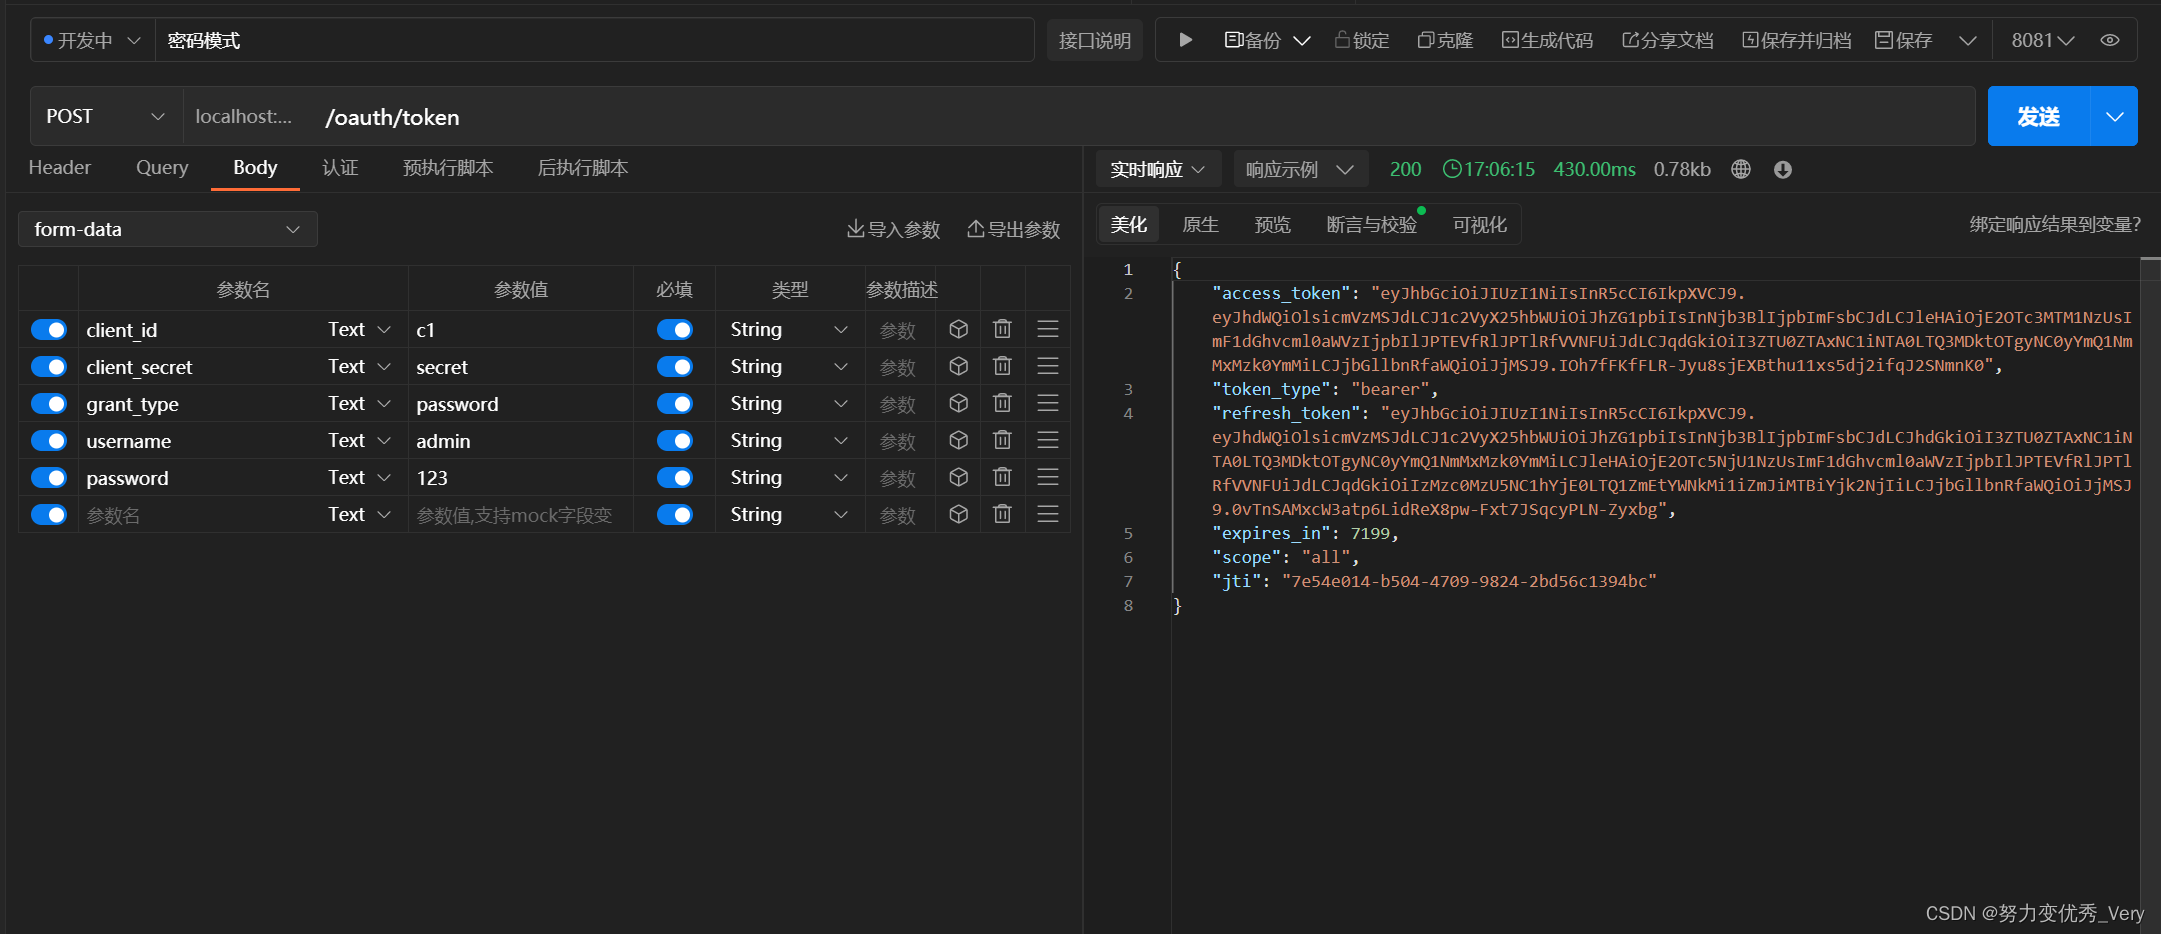
密码模式获取token
参数列表如下:
client_id:客户端准入标识。
client_secret:客户端秘钥。
grant_type:授权类型,填写password表示密码模式
username:资源拥有者用户名。
password:资源拥有者密码
这种模式十分简单,但是却意味着直接将用户敏感信息泄漏给了client,因此这就说明这种模式只能用于client是我
们自己开发的情况下。因此密码模式一般用于我们自己开发的,第一方原生App或第一方单页面应用。

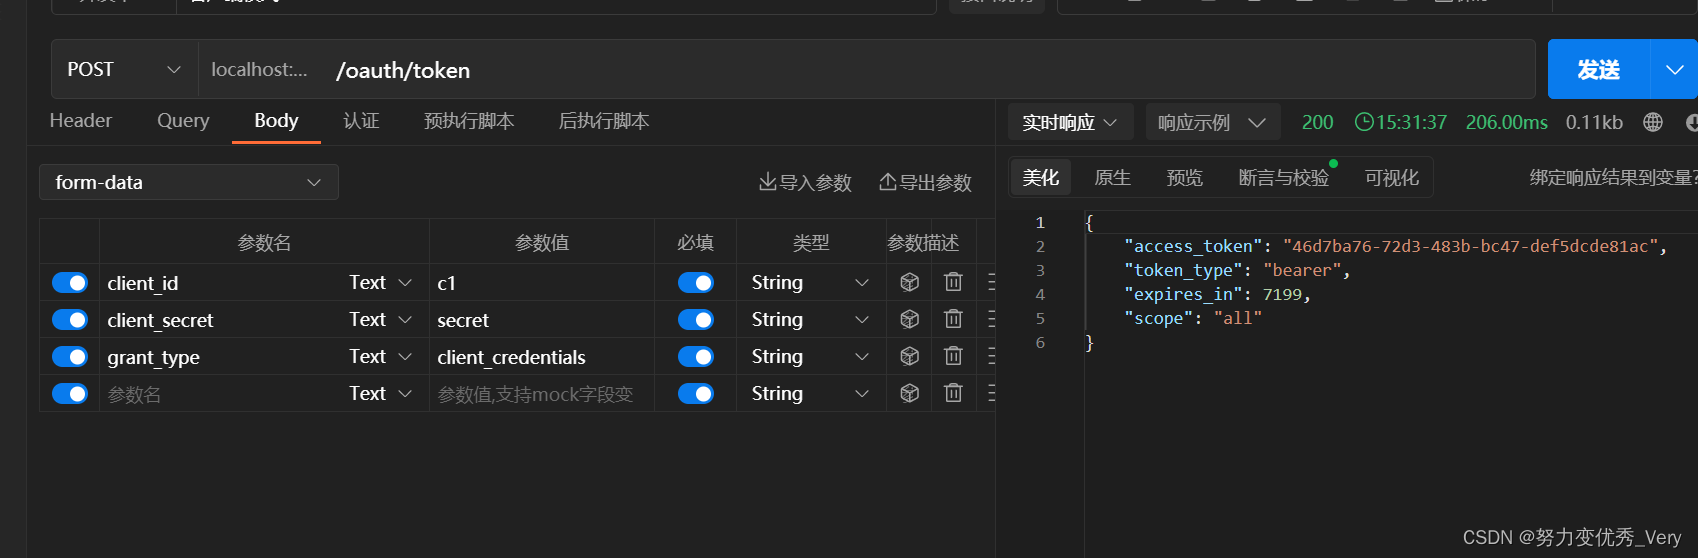
客户端模式
参数列表如下
client_id:客户端准入标识。
client_secret:客户端秘钥。
grant_type:授权类型,填写client_credentials表示客户端模式
这种模式是最方便但最不安全的模式。因此这就要求我们对client完全的信任,而client本身也是安全的。因
此这种模式一般用来提供给我们完全信任的服务器端服务。比如,合作方系统对接,拉取一组用户信息。
搭建资源服务器
添加依赖
 <parent>
        <groupId>org.springframework.boot</groupId>
        <artifactId>spring-boot-starter-parent</artifactId>
        <version>2.1.3.RELEASE</version>
        <relativePath/> <!-- lookup parent from repository -->
    </parent>

    <properties>
        <java.version>1.8</java.version>
        <druid.version>1.1.14</druid.version>
        <fastjson.version>1.2.68</fastjson.version>
        <security.oauth2.version>2.3.5.RELEASE</security.oauth2.version>
    </properties>

    <dependencies>
        <!-- SpringBoot 核心包 -->
        <dependency>
            <groupId>org.springframework.boot</groupId>
            <artifactId>spring-boot-starter</artifactId>
        </dependency>
        <!-- SpringBoot 测试 -->
        <dependency>
            <groupId>org.springframework.boot</groupId>
            <artifactId>spring-boot-starter-test</artifactId>
            <scope>test</scope>
        </dependency>

        <!-- SpringBoot Web容器 -->
        <dependency>
            <groupId>org.springframework.boot</groupId>
            <artifactId>spring-boot-starter-web</artifactId>
        </dependency>

        <!-- spring-boot-devtools -->
        <dependency>
            <groupId>org.springframework.boot</groupId>
            <artifactId>spring-boot-devtools</artifactId>
            <optional>true</optional> <!-- 表示依赖不会传递 -->
        </dependency>

        <!-- spring security 安全认证 -->
        <dependency>
            <groupId>org.springframework.boot</groupId>
            <artifactId>spring-boot-starter-security</artifactId>
        </dependency>

        <!--若依使用的 spring security oauth2 开放授权 -->
        <dependency>
            <groupId>org.springframework.security.oauth</groupId>
            <artifactId>spring-security-oauth2</artifactId>
            <version>${security.oauth2.version}</version>
        </dependency>


        <!--常用工具类 -->
        <dependency>
            <groupId>org.apache.commons</groupId>
            <artifactId>commons-lang3</artifactId>
        </dependency>

        <!-- 阿里JSON解析器 -->
        <dependency>
            <groupId>com.alibaba</groupId>
            <artifactId>fastjson</artifactId>
            <version>${fastjson.version}</version>
        </dependency>

        <!--Spring框架基本的核心工具-->
        <dependency>
            <groupId>org.springframework</groupId>
            <artifactId>spring-context-support</artifactId>
        </dependency>


        <!--  jwt-->
        <dependency>
            <groupId>org.springframework.security</groupId>
            <artifactId>spring-security-jwt</artifactId>
            <version>1.1.0.RELEASE</version>
        </dependency>

        <dependency>
            <groupId>org.projectlombok</groupId>
            <artifactId>lombok</artifactId>
            <version>1.18.26</version>
        </dependency>
    </dependencies>

    <build>
        <plugins>
            <plugin>
                <groupId>org.springframework.boot</groupId>
                <artifactId>spring-boot-maven-plugin</artifactId>
            </plugin>
        </plugins>
    </build>
资源服务器配置
@EnableResourceServer 注解到一个 @Configuration 配置类上,并且必须使用 ResourceServerConfigurer 这个
配置对象来进行配置(可以选择继承自 ResourceServerConfigurerAdapter 然后覆写其中的方法,参数就是这个
对象的实例),下面是一些可以配置的属性:
ResourceServerSecurityConfigurer中主要包括:
- tokenServices:ResourceServerTokenServices 类的实例,用来实现令牌服务。
- tokenStore:TokenStore类的实例,指定令牌如何访问,与tokenServices配置可选
- resourceId:这个资源服务的ID,这个属性是可选的,但是推荐设置并在授权服务中进行验证。
- 其他的拓展属性例如 tokenExtractor 令牌提取器用来提取请求中的令牌。
HttpSecurity配置这个与Spring Security类似: - 请求匹配器,用来设置需要进行保护的资源路径,默认的情况下是保护资源服务的全部路径。
- 通过http.authorizeRequests()来设置受保护资源的访问规则
- 其他的自定义权限保护规则通过 HttpSecurity 来进行配置。
- @EnableResourceServer 注解自动增加了一个类型为 OAuth2AuthenticationProcessingFilter 的过滤器链
编写ResouceServerConfig:
ResouceServerConfig
import org.springframework.context.annotation.Bean;
import org.springframework.context.annotation.Configuration;
import org.springframework.security.config.annotation.web.builders.HttpSecurity;
import org.springframework.security.config.http.SessionCreationPolicy;
import org.springframework.security.oauth2.config.annotation.web.configuration.EnableResourceServer;
import org.springframework.security.oauth2.config.annotation.web.configuration.ResourceServerConfigurerAdapter;
import org.springframework.security.oauth2.config.annotation.web.configurers.ResourceServerSecurityConfigurer;
import org.springframework.security.oauth2.provider.token.RemoteTokenServices;
import org.springframework.security.oauth2.provider.token.ResourceServerTokenServices;

@Configuration
@EnableResourceServer
public class ResouceServerConfig  extends
        ResourceServerConfigurerAdapter {


 	//授权服务器配置的资源id 保持一致
    public static final String RESOURCE_ID = "res1";
    @Override
    public void configure(ResourceServerSecurityConfigurer resources) {
        resources.resourceId(RESOURCE_ID)
                .tokenServices(tokenService())
                .stateless(true);
    }
    @Override
    public void configure(HttpSecurity http) throws Exception {
        http
                .authorizeRequests()
                //授权服务器配置的允许的授权范围  是一个标识 保持一致
                .antMatchers("/**").access("#oauth2.hasScope('all')")
                .and().csrf().disable()
                .sessionManagement().sessionCreationPolicy(SessionCreationPolicy.STATELESS);
    }

    //资源服务令牌解析服务
    @Bean
    public ResourceServerTokenServices tokenService() {
//使用远程服务请求授权服务器校验token,必须指定校验token 的url、client_id,client_secret
        RemoteTokenServices service=new RemoteTokenServices();
        //授权服务器地址认证token的
        /**
        * 在这里面配置的security  //tokenkey这个endpoint当使用JwtToken且使用非对称加密时,资源服务用于获取公钥而开放的,这里指这个endpoint完全公开。
                .tokenKeyAccess("permitAll()")
                //checkToken这个endpoint完全公开
                .checkTokenAccess("permitAll()")
                //允许表单认证
                .allowFormAuthenticationForClients() ;
        **/
        service.setCheckTokenEndpointUrl("http://localhost:8081/oauth/check_token");
        //客户端id
        service.setClientId("c1");
        //
        service.setClientSecret("secret");
        return service;
    }
添加安全访问控制
import org.springframework.context.annotation.Configuration;
import org.springframework.security.config.annotation.web.builders.HttpSecurity;
import org.springframework.security.config.annotation.web.configuration.WebSecurityConfigurerAdapter;

@Configuration
public class WebSecurityConfig extends WebSecurityConfigurerAdapter {
    //安全拦截机制(最重要)
    @Override
    protected void configure(HttpSecurity http) throws Exception {
        http.csrf().disable()
                .authorizeRequests()
                 .antMatchers("/user/**").authenticated()//所有/user/**的请求必须认证通过
                //拦截其它的请求可以访问
                .anyRequest().permitAll();
    }
}
编写资源
@RestController
    @RequestMapping(value = "/user")
public class UserController {
    @GetMapping(value = "/test")
    public String r1(){
        return "访问资源1";
    }
}
获取到token之后
测试访问资源

完成访问
JWT令牌
在授权服务器中更改原来TokenConfig
@Configuration
public class TokenConfig  {
//    @Bean
//    public TokenStore tokenStore() {
//        //内存模式
//        return new InMemoryTokenStore();
//    }

    /**
     *
     */
    private String SIGNING_KEY = "TOKEN_CAT";
    @Bean
    public TokenStore tokenStore() {
        return new JwtTokenStore(accessTokenConverter());
    }
    @Bean
    public JwtAccessTokenConverter accessTokenConverter() {
        JwtAccessTokenConverter converter = new JwtAccessTokenConverter();
        converter.setSigningKey(SIGNING_KEY); //对称秘钥,资源服务器使用该秘钥来验证
        return converter;
    }
}
定义JWT令牌服务
**更改AuthorizationServer中的AuthorizationServerTokenServices **
	 @Autowired
    private JwtAccessTokenConverter accessTokenConverter;
    @Bean
    public AuthorizationServerTokenServices tokenService() {
        DefaultTokenServices service=new DefaultTokenServices();
        //客户端详情
        service.setClientDetailsService(clientDetailsService);
        //刷新token
        service.setSupportRefreshToken(true);
        //令牌服务
        service.setTokenStore(tokenStore);
			新添加的代码
        TokenEnhancerChain tokenEnhancerChain = new TokenEnhancerChain();
        tokenEnhancerChain.setTokenEnhancers(Arrays.asList(accessTokenConverter));
        service.setTokenEnhancer(tokenEnhancerChain);
			新添加的代码
        // 令牌默认有效期2小时
        service.setAccessTokenValiditySeconds(7200);
        // 刷新令牌默认有效期3天
        service.setRefreshTokenValiditySeconds(259200);
        return service;
    }
使用密码模式测试生成令牌
校验jwt令牌
资源服务需要和授权服务拥有一致的签字、令牌服务等
- 将授权服务中的TokenConfig类拷贝到资源 服务中
@Configuration
public class TokenConfig {
//    @Bean
//    public TokenStore tokenStore() {
//        //内存模式
//        return new InMemoryTokenStore();
//    }

    /**
     *
     */
    private String SIGNING_KEY = "TOKEN_CAT";
    @Bean
    public TokenStore tokenStore() {
        return new JwtTokenStore(accessTokenConverter());
    }
    @Bean
    public JwtAccessTokenConverter accessTokenConverter() {
        JwtAccessTokenConverter converter = new JwtAccessTokenConverter();
        converter.setSigningKey(SIGNING_KEY); //对称秘钥,资源服务器使用该秘钥来验证
        return converter;
    }
- 屏蔽资源 服务原来的令牌服务类
更改 ResouceServerConfig配置类
注入TokenStore
  @Autowired
    TokenStore tokenStore;
@Override
    public void configure(ResourceServerSecurityConfigurer resources) {
        resources.resourceId(RESOURCE_ID)
//                .tokenServices(tokenService())
                //使用自己配置的令牌服务
                .tokenStore(  tokenStore)
                .stateless(true);
    }
测试验证token

完善环境配置
截止目前客户端信息和授权码仍然存储在内存中,生产环境中通过会存储在数据库中,下边完善环境的配置
创建表
 CREATE TABLE `oauth_client_details` (
  `client_id` varchar(255) CHARACTER SET utf8mb3 COLLATE utf8mb3_general_ci NOT NULL COMMENT '客户端标\r\n识',
  `resource_ids` varchar(255) CHARACTER SET utf8mb3 COLLATE utf8mb3_general_ci DEFAULT NULL COMMENT '接入资源列表',
  `client_secret` varchar(255) CHARACTER SET utf8mb3 COLLATE utf8mb3_general_ci DEFAULT NULL COMMENT '客户端秘钥',
  `scope` varchar(255) CHARACTER SET utf8mb3 COLLATE utf8mb3_general_ci DEFAULT NULL,
  `authorized_grant_types` varchar(255) CHARACTER SET utf8mb3 COLLATE utf8mb3_general_ci DEFAULT NULL,
  `web_server_redirect_uri` varchar(255) CHARACTER SET utf8mb3 COLLATE utf8mb3_general_ci DEFAULT NULL,
  `authorities` varchar(255) CHARACTER SET utf8mb3 COLLATE utf8mb3_general_ci DEFAULT NULL,
  `access_token_validity` int DEFAULT NULL,
  `refresh_token_validity` int DEFAULT NULL,
  `additional_information` longtext CHARACTER SET utf8mb3 COLLATE utf8mb3_general_ci,
  `create_time` timestamp NULL DEFAULT CURRENT_TIMESTAMP ON UPDATE CURRENT_TIMESTAMP,
  `archived` tinyint DEFAULT NULL,
  `trusted` tinyint DEFAULT NULL,
  `autoapprove` varchar(255) CHARACTER SET utf8mb3 COLLATE utf8mb3_general_ci DEFAULT NULL,
  PRIMARY KEY (`client_id`) USING BTREE
) ENGINE=InnoDB DEFAULT CHARSET=utf8mb3 COMMENT='接入客户端信息';


DROP TABLE IF EXISTS `oauth_code`;
CREATE TABLE `oauth_code` (
`create_time` timestamp(0) NOT NULL DEFAULT CURRENT_TIMESTAMP,
`code` varchar(255) CHARACTER SET utf8 COLLATE utf8_general_ci NULL DEFAULT NULL,
`authentication` blob NULL,
INDEX `code_index`(`code`) USING BTREE
) ENGINE = InnoDB CHARACTER SET = utf8 COLLATE = utf8_general_ci ROW_FORMAT = Compact;
插入数据
INSERT INTO `security_oauth_demo`.`oauth_client_details`(`client_id`, `resource_ids`, `client_secret`, `scope`, `authorized_grant_types`, `web_server_redirect_uri`, `authorities`, `access_token_validity`, `refresh_token_validity`, `additional_information`, `create_time`, `archived`, `trusted`, `autoapprove`) VALUES ('c1', 'res1', '$2a$10$3CCcmHbkYEz55brA3BL6J.B7VW4HxsnkYmJ/Yz95f0Gvkpnammpoi', 'ROLE_ADMIN,ROLE_USER,ROLE_API', 'client_credentials,password,authorization_code,implicit,refresh_token', 'http://www.baidu.com', NULL, 7200, 259200, NULL, '2023-10-19 09:51:20', 0, 0, 'false');
INSERT INTO `security_oauth_demo`.`oauth_client_details`(`client_id`, `resource_ids`, `client_secret`, `scope`, `authorized_grant_types`, `web_server_redirect_uri`, `authorities`, `access_token_validity`, `refresh_token_validity`, `additional_information`, `create_time`, `archived`, `trusted`, `autoapprove`) VALUES ('c2', 'res1', '$2a$10$3CCcmHbkYEz55brA3BL6J.B7VW4HxsnkYmJ/Yz95f0Gvkpnammpoi', 'ROLE_ADMIN,ROLE_USER,ROLE_API', 'client_credentials,password,authorization_code,implicit,refresh_token', 'http://www.baidu.com', NULL, 7200, 259200, NULL, '2023-10-19 09:51:20', 0, 0, 'false');
配置授权服务
修改AuthorizationServer:
ClientDetailsService和AuthorizationCodeServices从数据库读取数据。
/**
* 1.客户端详情相关配置
*/
注入ClientDetailsService
/**
     * 客户端认证服务  因为之前使用的是内存模式 直接配置信息就好了
     * 现在使用的是数据库 所以要配置数据库信息
     * @param dataSource
     * @return
     */
 @Bean
    public ClientDetailsService clientDetailsService(DataSource dataSource) {
        ClientDetailsService clientDetailsService = new JdbcClientDetailsService(dataSource);
        ((JdbcClientDetailsService)  clientDetailsService).setPasswordEncoder( new BCryptPasswordEncoder() );
        return clientDetailsService;
    }
客户端配置使用刚刚的数据库模式 clientDetailsService
@Override
    public void configure(ClientDetailsServiceConfigurer clients) throws Exception {
        clients.withClientDetails(clientDetailsService);
//        clients.inMemory()// 使用in‐memory存储
//                .withClient("c1")// client_id
//                .secret(new BCryptPasswordEncoder().encode("secret"))
//                //资源服务id
//                .resourceIds("res1")
//                // 该client允许的授权类型  authorization_code,password,refresh_token,implicit,client_credentials
//                .authorizedGrantTypes("authorization_code", "password", "client_credentials", "implicit", "refresh_token")
//                .scopes("all")// 允许的授权范围  是一个标识
//                .autoApprove(false)//false代表如果是授权码模式 就跳转到授权的页面.
//                  //加上验证回调地址
//                .redirectUris("http://www.baidu.com");
    }
配置授权码模式也使用数据库
原来的注释掉
//    @Bean
//    public AuthorizationCodeServices authorizationCodeServices() {
//        //设置授权码模式的授权码如何 存取,暂时采用内存方式
//        return new InMemoryAuthorizationCodeServices();
//    }

//使用DataSource 模式
    @Bean
    public AuthorizationCodeServices authorizationCodeServices(DataSource dataSource) {
        return new JdbcAuthorizationCodeServices(dataSource);//设置授权码模式的授权码如何存取
    }
首先使用密码模式获取token
其中oauth_client_details表中client_secret客户端密钥字段 是secret使用new BCryptPasswordEncoder() 加密模式进行加密的,如果不能使用自行进行加密

使用授权码模式获取token
http://localhost:8081/oauth/authorize?client_id=c1&response_type=code&scope=all&redirect_uri=http://www.baidu.com
获取异常,错误信息如下
Resolved [error=“invalid_scope”, error_description=“Invalid scope: all”, scope=“ROLE_ADMIN ROLE_USER ROLE_API”]
意思是scope传入的是all,而数据库是这些ROLE_ADMIN ROLE_USER ROLE_API
更改scope为其中一个再次进行测试
http://localhost:8081/oauth/authorize?client_id=c1&response_type=code&scope=ROLE_API&redirect_uri=http://www.baidu.com
获取到授权码

到此结束
有问题可以私信,互相学习。
道虽远不行不至,事虽小不为不成


![2023年中国酒类新零售行业发展概况分析:线上线下渠道趋向深度融合[图]](https://img-blog.csdnimg.cn/img_convert/16922a27d13d1f0e3cc27ca7a022dacf.png)