目录
jq自定义动画【animate,stop】
案例1:大小图标
案例2:动态增加删除数据
案例3:动态留言与删除
案例4:动态进度条
案例5:点击三个相同的图片进行消除
jq自定义动画【animate,stop】
animate({样式},时间);
样式还是css的样式,样式名变为驼峰命名法【将 - 后的第一个字母变为大写】
样式不分开写则一起进行变化,若分开则一步一步进行
stop([clearQueue],[gotoEnd])
<!DOCTYPE html>
<html lang="en">
<head>
    <meta charset="UTF-8">
    <meta name="viewport" content="width=device-width, initial-scale=1.0">
    <script src="jquery-3.6.0.min.js"></script>
    <title>Document</title>
    <style>
        div{
            width: 50px;
            height: 20px;
            border: 1px solid blue;
            background-color: brown;
            /* border-radius: 10px; */
            /* text-align: center; */
        }
    </style>
</head>
<body>
    <script>
        $(function(){
            $('#btn1').click(function(){
                $('div').animate({
                    width: 1000,
                    height:600,
                    borderWidth:10,
                    fontSize:100,
                    borderRadius:100,

                },2000);
            });
            $('#btn2').click(function(){
                $('div').animate({
                    width:100,
                    height:20,
                    borderWidth:2,
                    borderRadius:1,
                    fontSize:20,
                },2000);
            })
            $('#btn4').click(function(){
                $('div').animate({width:500},1000)
                    .animate({height:500},1000)
                    .animate({borderWidth:5},1000)
                    .animate({fontSize:100},1000);
            })
            $('#btn3').click(function(){
                // $('div').stop();
                $('div').stop(true,false); // 立即清空队列,立即完成当前动画
            })
        })
    </script>
    <button id="btn1">run</button>
    <button id="btn2">back</button>
    <button id="btn3">stop</button>
    <button id="btn4">Run</button>
    <hr>
    <div>
        Hello!
    </div>
</body>
</html>
案例1:大小图标
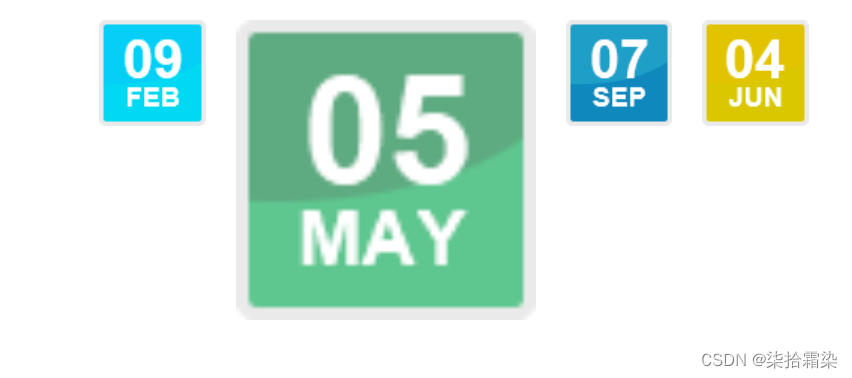
当鼠标经过时图标变大
<!DOCTYPE html>
<html lang="en">
<head>
    <meta charset="UTF-8">
    <meta name="viewport" content="width=device-width, initial-scale=1.0">
    <script src="jquery-3.6.0.min.js"></script>
    <title>Document</title>
    <style>
        div{
            width: max-content;
            margin: 0 auto;
        }
        .li1{
            list-style: none;
            margin: 5px 10px;
            float: left;
        }
        .big{
            width: 200px;
            display: none;
        }
    </style>
</head>
<body>
    <script>
        $(function(){
            // 当鼠标经过时,小图标变为大图标,当鼠标离开时,大图标变为小图标
            $('.li1 .small').mousemove(function(){
                $(this).parent().children().toggle();
            })
            $('.li1 .big').mouseleave(function(){
                $(this).parent().children().toggle();
            })
        })
    </script>
    <div>
        <li class="li1">
            <img class="small" src="02_09.png" alt="">
            <img class="big" src="02_09.png" alt="">
        </li>
        <li class="li1">
            <img class="small" src="05_05.png" alt="">
            <img class="big" src="05_05.png" alt="">
        </li>
        <li class="li1">
            <img class="small" src="09_07.png" alt="">
            <img class="big" src="09_07.png" alt="">
        </li>
        <li class="li1">
            <img class="small" src="06_04.png" alt="">
            <img class="big" src="06_04.png" alt="">
        </li>
        <div style="clear: both;"></div>
    </div>
</body>
</html>
案例2:动态增加删除数据
<!DOCTYPE html>
<html lang="en">
<head>
    <meta charset="UTF-8">
    <meta name="viewport" content="width=device-width, initial-scale=1.0">
    <script src="jquery-3.6.0.min.js"></script>
    <title>Document</title>
    <style>
        table{
            border: 1px solid green;
            border-collapse: collapse;
        }
        td{
            border: 1px solid green;
            height: 30px;
            line-height: 30px;
            text-align: center;
        }
        tr>td:nth-child(1){
            width: 100px;
        }
        tr>td:nth-child(2){
            width: 200px;
        }
        tr>td:nth-child(3){
            width: 50px;
        }
    </style>
</head>
<body>
    <script>
        $(function(){
            $('input[type=button]').click(function(){
                var cls=$('input[type=text]').val();
                var opt=$('select').val()
                var trs='<tr>'+
                            '<td>'+cls+'</td>'+
                            '<td>'+opt+'</td>'+
                            '<td><button>del</button></td>'+
                        '</tr>'
                $('table').append(trs); // 将tr追加到 table 的末尾
                $('input[type=text]').val('');
            });
            $('table').on('click','button',function(){
                var trs=$(this).parent().parent();
                trs.remove();
                console.log('yes')
            })
        })
    </script>
    课程名称:<input type="text">
    所属学院 <select name="" id="">
                <option value="计算机工程学院">计算机工程学院</option>
                <option value="软件学院">软件学院</option>
                <option value="大数据与云计算学院">大数据与云计算学院</option>
                <option value="轨道交通学院">轨道交通学院</option>
            </select>
    <input type="button" value="添加数据">
    <hr>
    <table>
        <tr style="font-weight: bold;">
            <td>课程名称</td>
            <td>所属学院</td>
            <td>已完成</td>
        </tr>
        <tr>
            <td>javascript</td>
            <td>计算机工程学院</td>
            <td><button>del</button></td>
        </tr>
        <tr>
            <td>Python Web</td>
            <td>计算机工程学院</td>
            <td><button>del</button></td>
        </tr>
        <tr>
            <td>地铁运行原理</td>
            <td>轨道交通学院</td>
            <td><button>del</button></td>
        </tr>
        <!-- jq添加区域 -->
    </table>
</body>
</html>
没有做到当输入数据为空时的校验
案例3:动态留言与删除

当鼠标经过删除时,删除变蓝【与js那里的思路相同】
<!DOCTYPE html>
<html lang="en">
<head>
    <meta charset="UTF-8">
    <meta name="viewport" content="width=device-width, initial-scale=1.0">
    <script src="jquery-3.6.0.min.js"></script>
    <title>Document</title>
    <style>
        textarea{
            width: 200px;
            height: 50px;
            resize: none;
        }
        li{
            width: 100%;

        }
        li>span{
            /* border: 1px solid ; */
            font-size: 8px;
            text-align: right;
            display: block;
            float: right;
        }
        li>i{
            font-size: 8px;
            color: grey;
            text-decoration: underline;
            display: block;
            /* border: 1px solid ; */
            float: right;
        }

    </style>
</head>
<body>
    <script>
        $(function(){
            $('button').click(function(){

                var time=new Date();
                year=time.getFullYear();
                month=time.getMonth()+1;
                day=time.getDate();
                hour=time.getHours();
                minute=time.getMinutes();
                var tm=year+'-'+month+'-'+day+' '+hour+':'+minute;

                console.log(tm);
                var txt=$('textarea').val();
                var li=$('<li></li>');
                li.prepend(txt+'<i>删除</i><span>'+tm+'</span>');
                $('ul').prepend(li);

                $('textarea').val('');
            });
            $('ul').on('mouseover','i',function(){
                $(this).css('color','blue');
            })
            $('ul').on('mouseout','i',function(){
                $(this).css('color','grey');
            })
            $('ul').on('click','i',function(){
                $(this).parent().remove();
            })
        })
    </script>
    <textarea placeholder="请输入"></textarea>
    <button>发布</button>
    <ul>
        <!-- jq生成区域 -->
    </ul>
</body>
</html>
案例4:动态进度条

向div中放入一个span,通过不断放大width达到进度条
<!DOCTYPE html>
<html lang="en">
<head>
    <meta charset="UTF-8">
    <meta name="viewport" content="width=device-width, initial-scale=1.0">
    <script src="jquery-3.6.0.min.js"></script>
    <title>Document</title>
    <style>
        #jdt{
            color:rgb(73, 246, 205);
            border: 1px solid blueviolet;
            border-radius: 10px;
            width: 100%;
            height: 22px;
            text-align: left;
        }
        span{
            display: block;
            width: 0px;
            height: 100%;
            /* background-color: blueviolet; */
            border-radius: 10px;
        }
    </style>
</head>
<body>
    <script>
        i=0;
        $(function(){
            $('button').click(function(){
                $(this).attr('disabled','disabled');
                // 添加间隔器,当达到100%时退出
                var tms=setInterval(function(){
                    px=++i +'%';

                    if(i > 100){
                        clearInterval(tms);
                        alert('下载完成');
                        return;
                    }

                    // console.log(px);
                    // 改变span的宽度以达到加载的效果
                    var span=$('#jdt>span')
                    span.css('width',px);
                    span.html(px);
                    // 对进度条的进度颜色进行区分
                    if(i < 25){
                        span.css('background-color','rgb(135, 205, 232)');
                    }else if(i < 50){
                        span.css('background-color','rgb(55, 176, 223)');
                    }else if(i < 75){
                        span.css('background-color','rgb(77, 113, 232)');
                    }else{
                        span.css('background-color','rgb(103, 66, 237)');
                    }


                },50);

            })
        })
    </script>
    <button>点击下载</button>
    <hr>
    <div id="jdt">
        <span></span>
    </div>
</body>
</html>
案例5:点击三个相同的图片进行消除
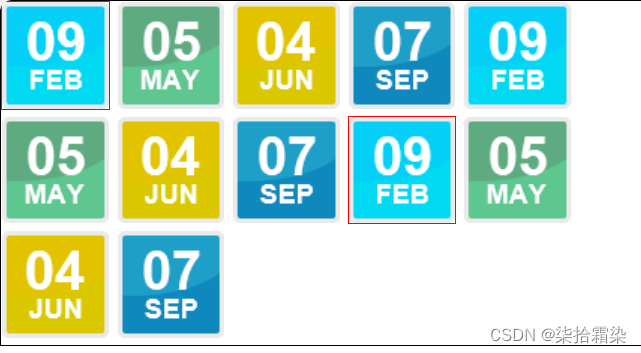
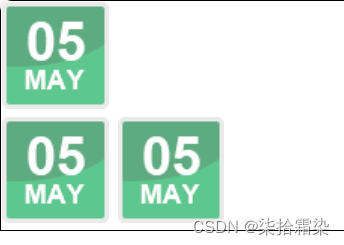
获取点击到图片的src,为点击到的图片设置一个样式用作标记,若无该标记则加入数组,有则不加入,数组每满三个进行消除,随后清空数组与样式
<!DOCTYPE html>
<html lang="en">

<head>
    <meta charset="UTF-8">
    <meta name="viewport" content="width=device-width, initial-scale=1.0">
    <script src="jquery-3.6.0.min.js"></script>
    <title>Document</title>
    <style>
        * {
            margin: 0;
            padding: 0;
            list-style: none;
        }

        div {
            border: 1px solid;
        }
        img{
            border: 1px solid white;
        }
    </style>
</head>

<body>
    <script>
        // 获取点击到的src,若相同,则
        $(function (){
            var cks = [];  // 存储被点击图片的 src 属性

            $("div").on('click','img',function (){
                var src = $(this).attr("src");
                var col=$(this).css('color');
                console.log(col);

                // 设置 条件 ,若没有该样式,添加该样式,并加入数组,否则不加入数组
                if(col != 'rgb(150, 251, 255)'){
                    $(this).css('color','rgb(150, 251, 255)');
                    $(this).css('border','1px solid red');
                    cks.push($(this));
                }
                // 将图片的 src 属性添加到 数组 中
                console.log(cks);
                if(cks.length >= 3){
                    // 当满足三个时,获取它们的路径
                    src1=cks[0].attr('src');
                    src2=cks[1].attr('src');
                    src3=cks[2].attr('src');
                    // 若路径相同,则对其进行隐藏
                    if(src1 == src2 && src2 == src3){
                        cks[0].slideUp();
                        cks[1].slideUp();
                        cks[2].slideUp();
                    }
                    // 无论是否隐藏,去除所有样式,并清空数组为下次的选择做准备
                    $('img').css('color','');//清除颜色
                    $('img').css('border','');//清除边框
                    cks=[];
                }
                console.log(cks.length);
            });

        })
    </script>
    <div>
        <img src="02_09.png" alt="">
        <img src="05_05.png" alt="">
        <img src="06_04.png" alt="">
        <img src="09_07.png" alt="">
        <img src="02_09.png" alt=""><br>
        <img src="05_05.png" alt="">
        <img src="06_04.png" alt="">
        <img src="09_07.png" alt="">
        <img src="02_09.png" alt="">
        <img src="05_05.png" alt=""><br>
        <img src="06_04.png" alt="">
        <img src="09_07.png" alt="">
    </div>
</body>

</html>
