什么是electron
电子是一个开源框架,用于使用web技术构建跨平台桌面应用程序;即: HTML、CSS和JavaScript;被集成为节点模块,我们可以为我们的应用程序使用节点的所有功能;组件,如数据库、Api休息、CSS框架,如引导或尾风等,我们可以将它集成到电子应用程序中。它是由GitHub开发和维护的,并且是许多开源项目背后的图形化框架,如Atom、Visual Studio代码、和Whats app。
关于Electron
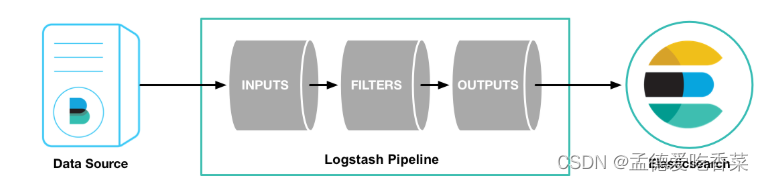
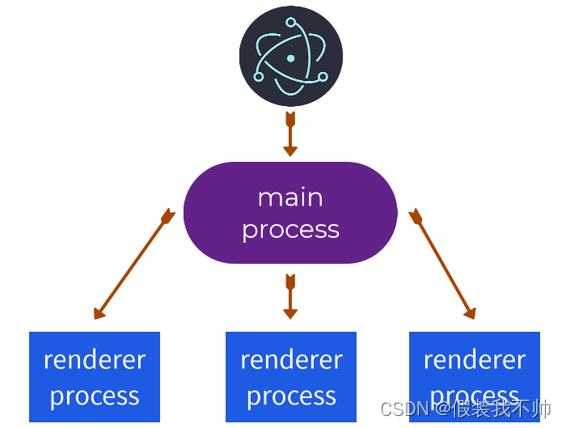
electron的实现是两个过程的组合;主要过程和渲染器过程。
- 第一个进程是主要进程,是Node.js进程;这个进程可以访问各种Elecmon.jsapi,我们可以与操作系统通信。
- 第二个进程是使用Chromium的渲染器;这个进程包含了Node.js,并且它可以访问它的所有模块。
Chromium,谷歌Chrome浏览器和Node.js背后的一个开源项目,一个基于Chromium的V8 JavaScript引擎的JavaScript运行时
Electron使用Chromium作为前端,Node.js作为后端。它提供了一套广泛的接口或api,可以用来访问操作系统,并允许我们这些开发人员创建共享相同HTML、CSS和JavaScript代码的多平台应用程序。
简而言之,您可以把主进程看作是服务器,其中我们可以连接到数据库和访问操作系统,以及渲染器进程,客户端,在其中,我们将屏幕放在一起,以便最终用户可以交互;重要的是要指出,我们可以直接与这两个进程进行通信。
技能要求
要开始开发Electron应用程序,您需要一台PC运行MacOS、Windows或Linux
至于软件,我们只需要Node和一个可选的推荐的代码编辑器,在本书中Visual Studio代码,尽管您可以使用自己选择的代码编辑器
要安装Node,我们可以从官方网站进行安装,网址为:https://nodejs.org/选择任何版本(传统版本或全功能版本),然后单击下载按钮。
在任何情况下,您都可以保留默认显示的所有设置,通过“next,next,next…”安装的典型软件安装上述软件后,在中运行以下命令验证您是否安装了Node.js和NPM的终端:
$ node --version
$ npm --version
国内需要安装cnpm 通过命令
npm install -g cnpm --registry=https://registry.npm.taobao.org装即可
在Electron中创建应用程序
现在,我们将创建一个典型的helloworld应用程序。Electron并运行它以在应用程序窗口中显示它。在您的工作区中,我们将为项目创建一个文件夹:
$ mkdir chat-app
$ cd chat-app
此时,您可以将上面的文件夹拖到您的VSCode或编辑器中,以开始处理这个项目,一个目前完全空的项目;现在,我们需要使用以下命令使用npm工具初始化我们的新项目:
npm init
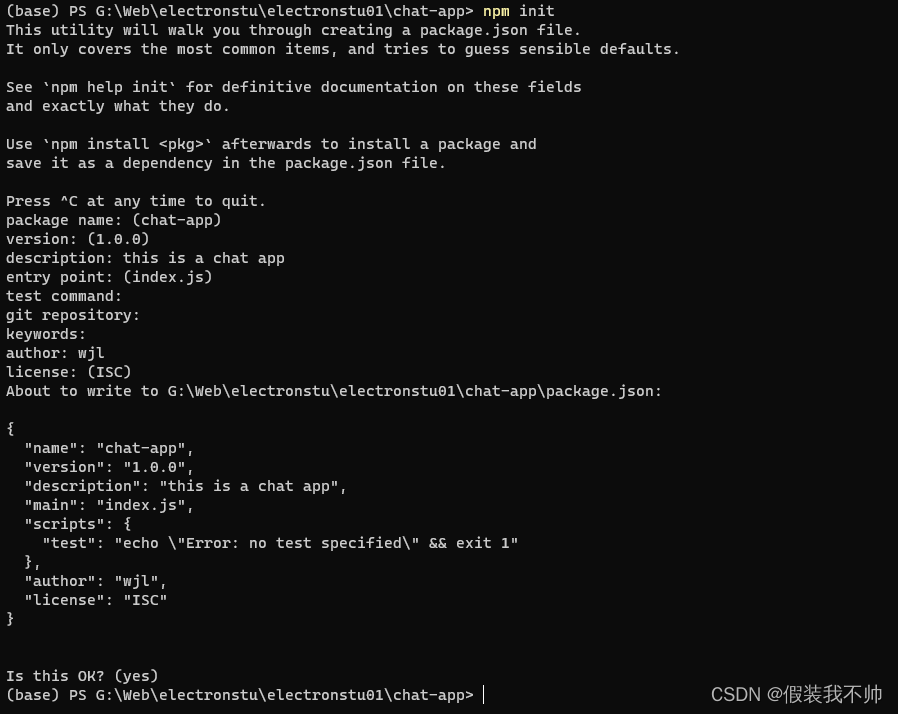
生成了package.json文件;其中包含项目元数据,以及命令、版本号、依赖项等:
{
  "name": "chat-app",
  "version": "1.0.0",
  "description": "this is a chat app",
  "main": "index.js",
  "scripts": {
    "test": "echo \"Error: no test specified\" && exit 1"
  },
  "author": "wjl",
  "license": "ISC"
}
我们就可以用以下命令来安装我们的Electron
cnpm install --save-dev electron
这将把我们的electron安装在上一个项目的水平上;这命令反映在官方网站上:https://www.electronjs.org/有了这个,我们就可以开始工作,并在实践中详细了解“主过程”和“渲染过程(网页)”的概念。
{
  "name": "chat-app",
  "version": "1.0.0",
  "description": "this is a chat app",
  "main": "index.js",
  "scripts": {
    "test": "echo \"Error: no test specified\" && exit 1"
  },
  "author": "wjl",
  "license": "ISC",
  "devDependencies": {
    "electron": "^26.2.2"
  }
}
案例程序
在项目的根目录中,我们将创建一个包含以下内容的JS文件: index.js
const { app, BrowserWindow } = require("electron");
function createWindow() {
  let win = new BrowserWindow({
    width: 800,
    height: 600,
  });
  win.loadFile("index.html");
}
app.whenReady().then(createWindow);
首先,您必须导入我们要用来工作的必要对象和类;electron在使用node时,它是相当模块化的,因此,我们导入必要的元素来使用它,在这种情况下:
- 对浏览窗口类型的对象的引用,以实例化并显示给用户。
- 使用应用程序对象,您可以控制应用程序的生命周期。
在此之后,我们需要等待应用程序准备好,这样我们就可以创建一个800 x 600大小的小窗口。
最后,加载并显示包含电子应用程序的主要内容的index.html文件的内容;
虽然我们还没有定义index.html文件,正如您可能猜到的那样,这对应于渲染过程或网页,请记住,网页的扩展名为HTML。当electron初始化时,app.whenReady()函数返回一个Promise(因此,在这种情况下,它可以准备好调用操作系统来创建一个窗口)。
这个文件,正如你可能猜到的,是我们与操作系统与electron提供的广泛功能API保持通信的主要过程,在这种情况下,这个功能允许我们创建一个窗口。
现在,我们需要向用户显示一些图形界面,按钮,文本,图像等,为此,我们必须工作在渲染过程或网页,正如它的名字所示,这是一个HTML页面,可以有任何HTML内容:index.html
<!DOCTYPE html>
<html lang="en">
<head>
    <meta charset="UTF-8">
    <meta name="viewport" content="width=device-width, initial-scale=1.0">
    <title>Document</title>
</head>
<body>
    <h1>Hello Electron</h1>
</body>
</html>
正如您所看到的,在上面的网页中,我们可以放置任何类型的HTML内容,在这种情况下,是一个欢迎消息。现在我们需要一个机制来运行应用程序,并能够显示“Hello Electron”窗口;我们创建命令来运行我们的应用程序:package.json
{
  "name": "chat-app",
  "version": "1.0.0",
  "description": "this is a chat app",
  "main": "index.js",
  "scripts": {
    "start":"electron ."
  },
  "author": "wjl",
  "license": "ISC",
  "devDependencies": {
    "electron": "^26.2.2"
  }
}
在终端执行时的命令:
npm start
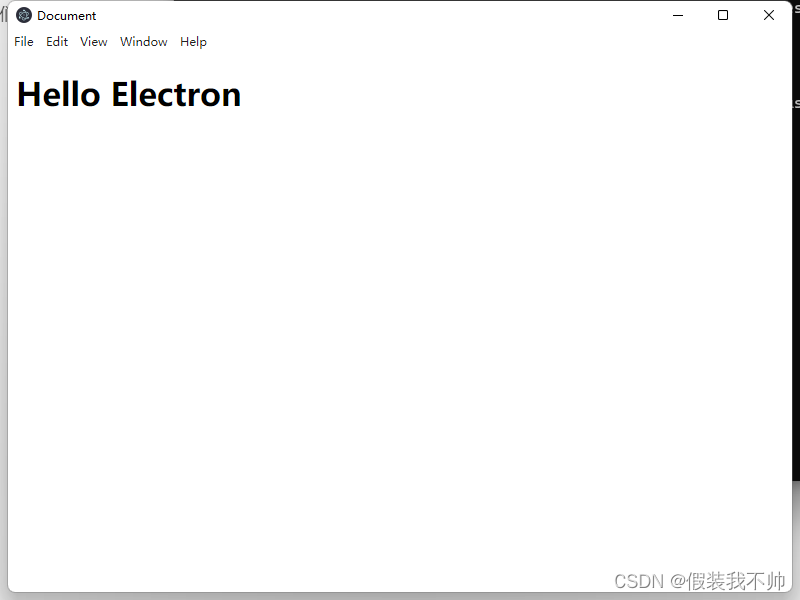
最终结果是显示指定index.html内容的尺寸(800x600)的窗口。
创建详细信息页面
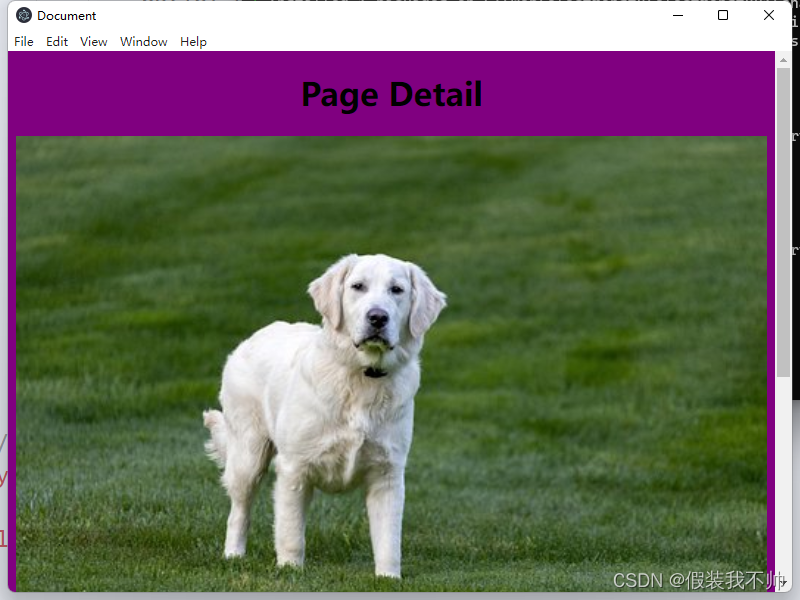
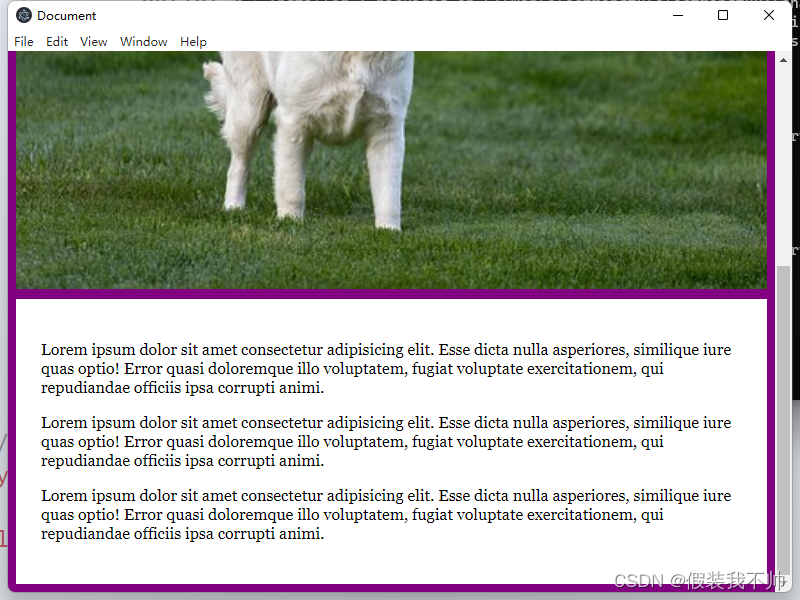
为了继续试验这个网页,我们将创建一个细节视图,它将由一个标题、一个图像、文本和一些非常基本的CSS组成:index.html
<!DOCTYPE html>
<html lang="en">

<head>
    <meta charset="UTF-8">
    <meta name="viewport" content="width=device-width, initial-scale=1.0">
    <title>Document</title>
</head>
<style>
    body {
        background-color: purple;
    }

    h1 {
        text-align: center;
    }

    #customId {
        display: block;
        width: 100%;
    }

    section {
        background-color: #FFF;
        font-family: Georgia;
        padding: 25px;
        margin-top: 10px;
    }
</style>

<body>
    <main>
        <h1>Page Detail</h1>
        <img id="customId" src="https://cdn.pixabay.com/photo/2022/08/16/20/02/wallpaper-7391054__340.jpg" alt="">
        <section>
            <p>Lorem ipsum dolor sit amet consectetur adipisicing elit. Esse
                dicta nulla asperiores, similique iure quas
                optio! Error quasi doloremque illo voluptatem, fugiat voluptate
                exercitationem, qui repudiandae officiis
                ipsa corrupti animi.</p>
        </section>
    </main>
</body>

</html>
当然,我们可以使用更现代的CSS属性,以获得更好的设计,如下所述(index.html)
<!DOCTYPE html>
<html lang="en">

<head>
    <meta charset="UTF-8">
    <meta name="viewport" content="width=device-width, initial-scale=1.0">
    <title>Document</title>
</head>
<style>
    h1 {
        text-align: center;
    }

    img {
        border-radius: 10px;
        margin-top: 5px;
        box-shadow: 7px -1px 23px -6px rgba(0, 0, 0, 0.75);
        width: 100%;
    }

    .btn-primary {
        border-radius: 5px;
        color: #FFF;
        font-size: 20px;
        padding: 15px 20px;
        margin: 0 auto;
        text-transform: uppercase;
        background: #7733FF;
        display: block;
        cursor: pointer;
        border: none;
        transition: 150ms all;
    }

    .btn-primary:hover {
        transform: translateY(-7px);
    }
</style>

<body>
    <main>
        <h1>Page Detail</h1>
        <img src="https://cdn.pixabay.com/photo/2022/08/16/20/02/wallpaper-7391054__340.jpg">
        <p>Lorem ipsum, dolor sit amet consectetur adipisicing elit.
            Voluptatem et consectetur cupiditate. Aperiam quasi
            quibusdam minima, deleniti error sunt, sed laborum debitis vero
            corrupti ipsa recusandae inventore at est
            nam.</p>
        <button class="btn-primary">Show Post</button>
    </main>
</body>

</html>
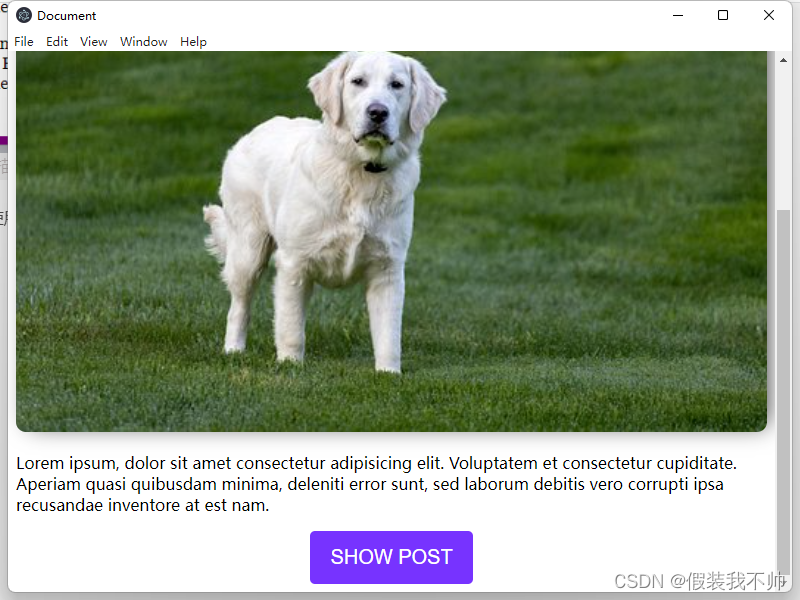
正如你所看到的,我们使用更现代的属性,如转换、翻译(在按钮悬停事件时)、圆角边和阴影,它工作得很完美,就好像之前定义的内容将在谷歌Chrome浏览器中呈现;这是因为,electron使用Chromium,因为应用程序本质上是HTML 5内容,它工作就像任何其他浏览器。
Chromium和Electron提供了与底层操作系统无关的操作,无论是macOS、Windows还是Linux。
安装 Bootstrap 5
让我们在项目中安装和使用引导程序: https://getbootstrap.com/
为此,我们有以下命令,我们必须在上一个项目上执行该命令:
cnpm install bootstrap
cnpm install  @popperjs/core@^2.11.8
通过前面的命令,我们已经在项目中准备好了引导,为了配置它,我们有几种方法,这次,我们将基于导入CSS文件来加载引导:
css/index.css
@import "../node_modules/bootstrap/dist/css/bootstrap.min.css";
我们将使用它,从我们的html页面上index.html
<!DOCTYPE html>
<html lang="en">

<head>
    <meta charset="UTF-8">
    <meta name="viewport" content="width=device-width, initial-scale=1.0">
    <title>Document</title>
    <link rel="stylesheet" href="css/index.css">
</head>

<body>
    <button class="btn btn-primary">Button</button>
</body>

</html>
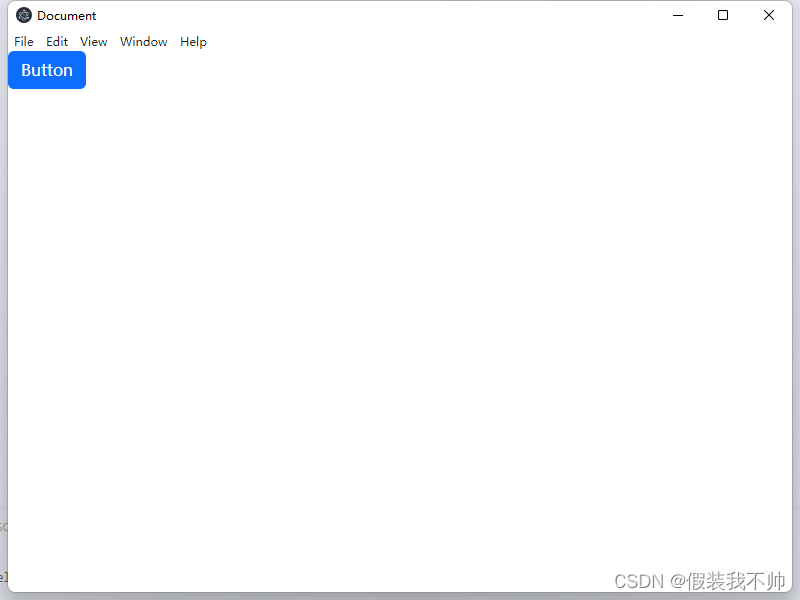
如果您没有看到上面的按钮,您的引导安装有一个问题,需要修复。在前面的示例中,我们使用Bootstrap 5创建了一个主类型的按钮,为此,我们可以使用HTML元素,并定义btn的类,然后,我们定义在本例中是主要的类型(官方文档中的更多细节)
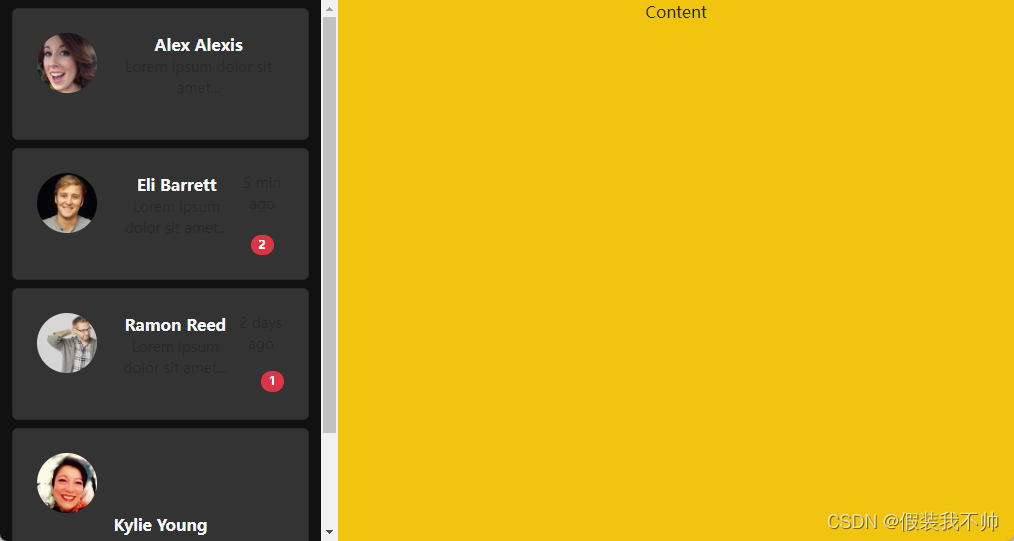
定义列
在本节中,我们将创建几个列来分离内容,第一列是联系人,第二列是聊天的详细信息:
index.html
<!DOCTYPE html>
<html lang="en">

<head>
    <meta charset="UTF-8">
    <meta name="viewport" content="width=device-width, initial-scale=1.0">
    <title>Document</title>
    <link rel="stylesheet" href="css/index.css">
</head>

<body>
    <div class="row justify-content-start">
        <div class="col-4">
            <p class="my-5">lorem</p>
            <p class="my-5">lorem</p>
            <p class="my-5">lorem</p>
            <p class="my-5">lorem</p>
            <p class="my-5">lorem</p>
            <p class="my-5">lorem</p>
            <p class="my-5">lorem</p>
            <p class="my-5">lorem</p>
            <p class="my-5">lorem</p>
            <p class="my-5">lorem</p>
            <p class="my-5">lorem</p>
            <p class="my-5">lorem</p>
        </div>
        <div class="col-8">

            <div>
                <div class="container">
                    Content
                </div>
            </div>
        </div>
    </div>
</body>

</html>
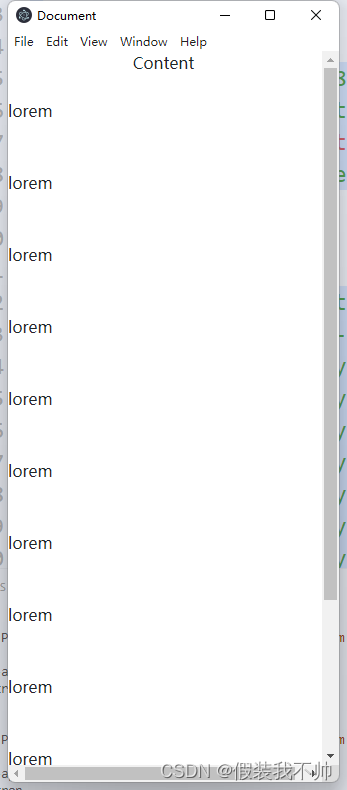
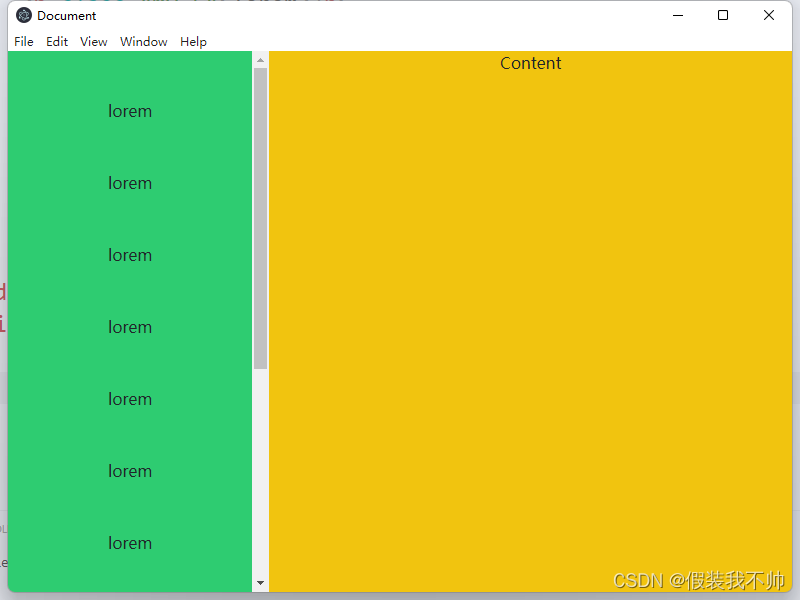
您如何从上面的HTML中看出,通过使内容在一列中溢出,它在两者中都溢出,这不是我们想要的效果,为了避免这种情况,我们定义了以下规则: css/index.css
@import "../node_modules/bootstrap/dist/css/bootstrap.min.css";
#left {
  background-color: #2ecc71;
  text-align: center;
  height: 100%;
  position: absolute;
  top: 0px;
  bottom: 0;
  left: 0;
  overflow-y: auto;
}

#right {
  height: 100%;
  background-color: #f1c40f;
  text-align: center;
  position: absolute;
  top: 0;
  bottom: 0;
  right: 0;
  overflow-y: auto;
}
我们使用它们,添加id=left和right
<!DOCTYPE html>
<html lang="en">

<head>
    <meta charset="UTF-8">
    <meta name="viewport" content="width=device-width, initial-scale=1.0">
    <title>Document</title>
    <link rel="stylesheet" href="css/index.css">
</head>

<body>
    <div class="row justify-content-start">
        <div class="col-4" id="left">
            <p class="my-5">lorem</p>
            <p class="my-5">lorem</p>
            <p class="my-5">lorem</p>
            <p class="my-5">lorem</p>
            <p class="my-5">lorem</p>
            <p class="my-5">lorem</p>
            <p class="my-5">lorem</p>
            <p class="my-5">lorem</p>
            <p class="my-5">lorem</p>
            <p class="my-5">lorem</p>
            <p class="my-5">lorem</p>
            <p class="my-5">lorem</p>
        </div>
        <div class="col-8" id="right">

            <div>
                <div class="container">
                    Content
                </div>
            </div>
        </div>
    </div>
</body>

</html>
Chrome中的应用程序调试
当开发我们的web应用程序时,我们一直有的一个工具是使用浏览器的开发控制台来调试它,在Electron中,我们也可以很容易地使用它,为此,我们必须在BrowserWindow()对象中激活它:index.js
const { app, BrowserWindow } = require("electron");

function createWindow() {
  let win = new BrowserWindow({
    width: 800,
    height: 600,
  });
  win.loadFile("index.html");
  win.webContents.openDevTools();
}
app.whenReady().then(createWindow);
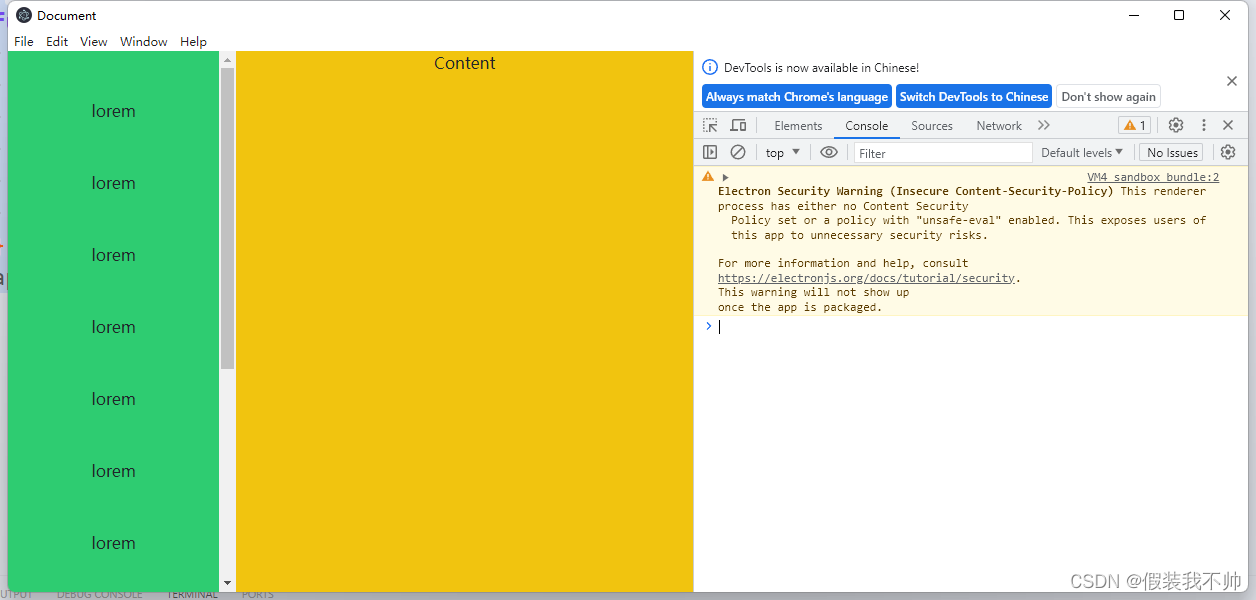
有了这个功能,我们就可以在JavaScript控制台中更改样式、HTML和测试,就像我们在谷歌Chrome等任何其他网络浏览器中所做的一样。这个工具在开发时特别有用,建议读者在Electron中开发时始终使它活跃。
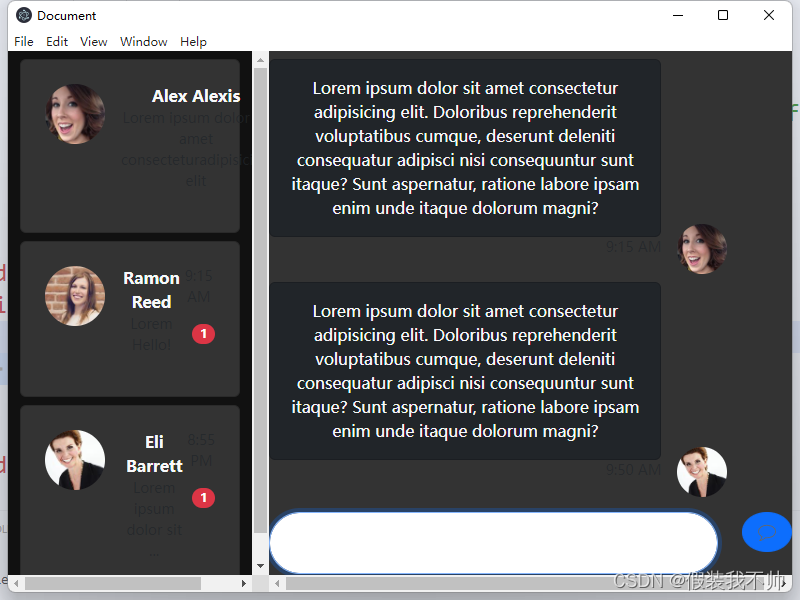
网页设计
对于我们正在执行的聊天应用程序,它由两个部分组成,每一列对应一个,一个用于联系人列表,另一个用于聊天细节。
联系人界面
对于联系人列,我们将定义一个带有LI的UL列表,其中,在LI中,我们将放置一个字母,简而言之,对于每个联系人,它对应于一个Bootstrap字母;除此之外,我们还将放置联系人的典型数据,如图像、姓名、上次联系人和我们使用flex及其相关属性对齐的聊天次数。最后,我们将使用HTML flexes来对齐最后一个联系人图像和内容的行中内容:
<div class="col-4" id="left">
    <ul class="contact list-unstyled mb-0 mt-2">
        <li class="p-2 card ">
            <div class="card-body">
                <div class="d-flex">
                    <div>
                        <img class="rounded-pill me-3" width="60"
                            src="https://randomuser.me/api/portraits/women/56.jpg">
                    </div>
                    <div>
                        <p class="fw-bold mb-0 text-light">Alex Alexis</p>
                        <p class="small text-muted">Lorem ipsum dolor sit amet...
                        </p>
                    </div>
                </div>
            </div>
        </li>
        <li class="p-2 card mt-2">
            <div class="card-body">
                <div class="d-flex">
                    <div>
                        <img class="rounded-pill me-3" width="60"
                            src="https://randomuser.me/api/portraits/men/96.jpg">
                    </div>
                    <div>
                        <p class="fw-bold mb-0 text-light">Eli Barrett</p>
                        <p class="small text-muted">Lorem ipsum dolor sit amet...
                        </p>
                    </div>
                    <div>
                        <p class="small text-muted">5 min ago</p>
                        <span class="badge bg-danger rounded-pill floatend">2</span>
                    </div>
                </div>
            </div>
        </li>
        <li class="p-2 card mt-2">
            <div class="card-body">
                <div class="d-flex">
                    <div>
                        <img class="rounded-pill me-3" width="60"
                            src="https://randomuser.me/api/portraits/men/17.jpg">
                    </div>
                    <div>
                        <p class="fw-bold mb-0 text-light">Ramon Reed</p>
                        <p class="small text-muted">Lorem ipsum dolor sit amet...
                        </p>
                    </div>
                    <div>
                        <p class="small text-muted">2 days ago</p>
                        <span class="badge bg-danger rounded-pill float-end">1</span>
                    </div>
                </div>
            </div>
        </li>
        <li class="p-2 card mt-2">
            <div class="card-body">
                <div class="d-flex">
                    <img class="rounded-pill me-3" width="60"
                        src="https://randomuser.me/api/portraits/women/83.jpg">
                </div>
                <div>
                    <p class="fw-bold mb-0 text-light">Kylie Young</p>
                    <p class="small text-muted">Lorem ipsum dolor sit amet...
                    </p>
                </div>
                <div>
                    <p class="small text-muted">1 week ago</p>
                    <span class="badge bg-danger rounded-pill floatend">4</span>
                </div>
            </div>
        </li>
    </ul>
</div>
修改后的css代码css/index.css
@import "../node_modules/bootstrap/dist/css/bootstrap.min.css";
#left {
  background-color: #111;
  text-align: center;
  height: 100%;
  position: absolute;
  top: 0px;
  bottom: 0;
  left: 0;
  overflow-y: auto;
}
.contact .card {
  background-color: #333;
}
#right {
  height: 100%;
  background-color: #f1c40f;
  text-align: center;
  position: absolute;
  top: 0;
  bottom: 0;
  right: 0;
  overflow-y: auto;
}
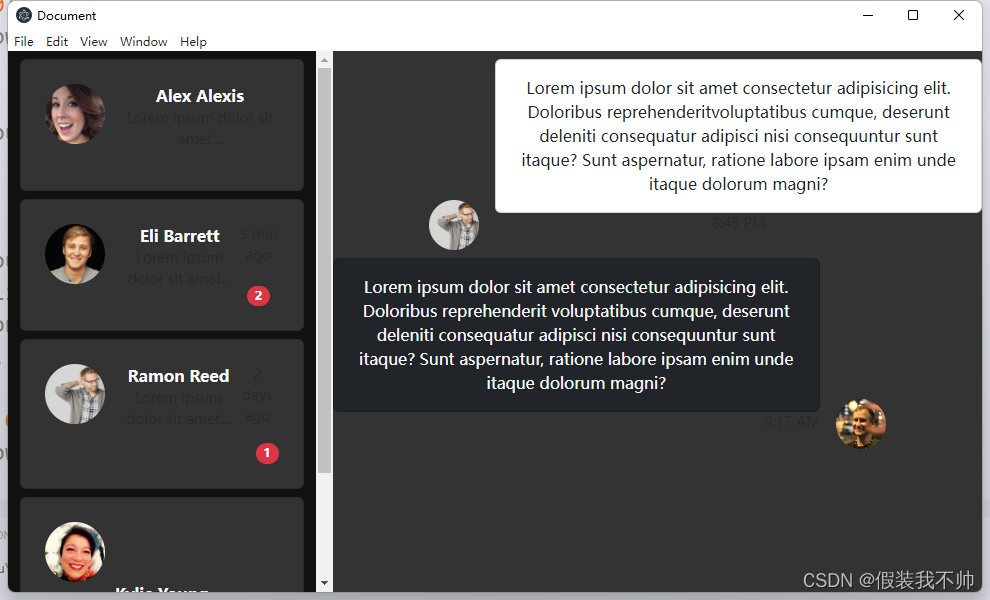
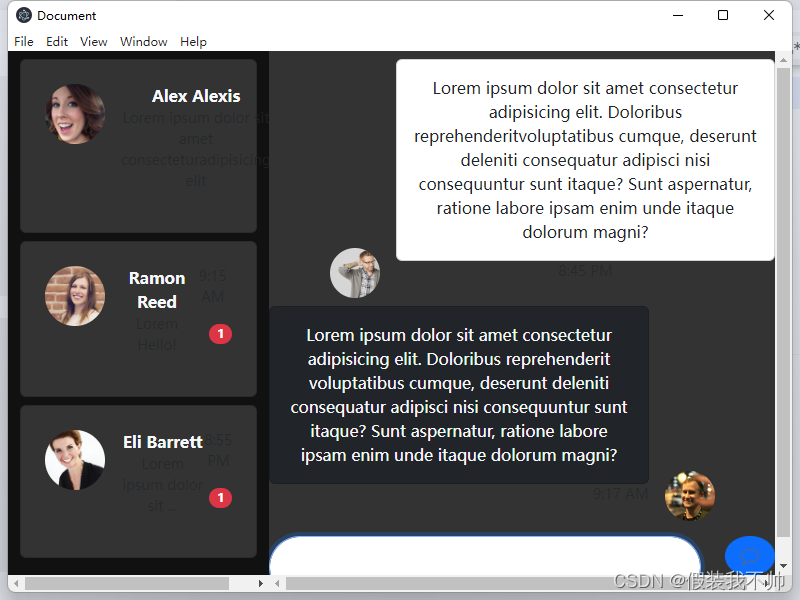
聊天界面
对于聊天信息,我们将再次使用flex,在那里我们将占据全部行的宽度,以定义消息:
以及主用户的消息,我们将它们向左对齐;要做到这一点,我们所做的就是反转两个容器(一个包含消息,另一个包含化身)。
当然,我们会放更多关于联系人的数据,以及联系的日期和时间。
设计如下:
代码如下
index.html
<div class="col-8" id="right">
    <div class="d-flex chat">
        <div class="w-25 d-flex align-items-end justify-content-end">
            <img class="rounded-pill me-3 avatar" width="60"
                src="https://randomuser.me/api/portraits/men/17.jpg">
        </div>
        <div class="w-75">
            <div class="card">
                <div class="card-body">
                    Lorem ipsum dolor sit amet consectetur adipisicing elit.
                    Doloribus reprehenderitvoluptatibus cumque, deserunt deleniti consequatur adipisci
                    nisi consequuntur sunt itaque?
                    Sunt aspernatur, ratione labore ipsam enim unde itaque
                    dolorum magni?
                </div>
            </div>
            <p class="small text-muted">8:45 PM</p>
        </div>
    </div>
    <div class="d-flex chat">
        <div class="w-75 ">
            <div class="card bg-dark">
                <div class="card-body text-light">
                    Lorem ipsum dolor sit amet consectetur adipisicing elit.
                    Doloribus reprehenderit
                    voluptatibus cumque, deserunt deleniti consequatur adipisci
                    nisi consequuntur sunt itaque?
                    Sunt aspernatur, ratione labore ipsam enim unde itaque
                    dolorum magni?
                </div>
            </div>
            <p class="small text-muted float-end">9:17 AM</p>
        </div>
        <div class="w-25 d-flex align-items-end">
            <img class="rounded-pill ms-3 avatar" src="https://randomuser.me/api/portraits/men/19.jpg">
        </div>
    </div>
</div>
css/index.css
@import "../node_modules/bootstrap/dist/css/bootstrap.min.css";
#left {
  background-color: #111;
  text-align: center;
  height: 100%;
  position: absolute;
  top: 0px;
  bottom: 0;
  left: 0;
  overflow-y: auto;
}
.contact .card {
  background-color: #333;
}
#right {
  height: 100%;
  background-color: #333;
  text-align: center;
  position: absolute;
  top: 0;
  bottom: 0;
  right: 0;
  overflow-y: auto;
}

.chat {
  margin-top: 8px;
}
.chat img.avatar {
  width: 50px;
  height: 50px;
}
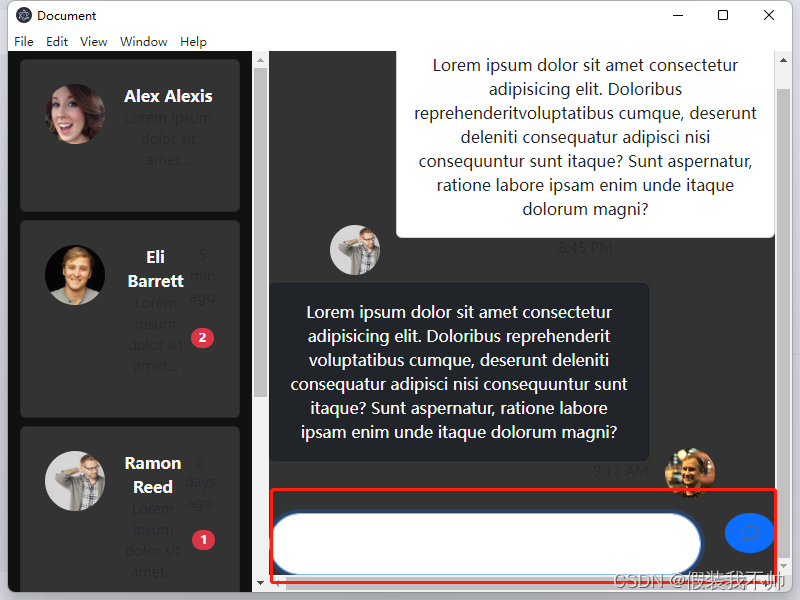
文本框
对于文本框,也就是说,我们将放置消息的位置,它将由两列组成,其中一列具有自动大小,使它只占用必要的大小;在固定大小的一个中,我们将带有圆角放在角落的文本区域:
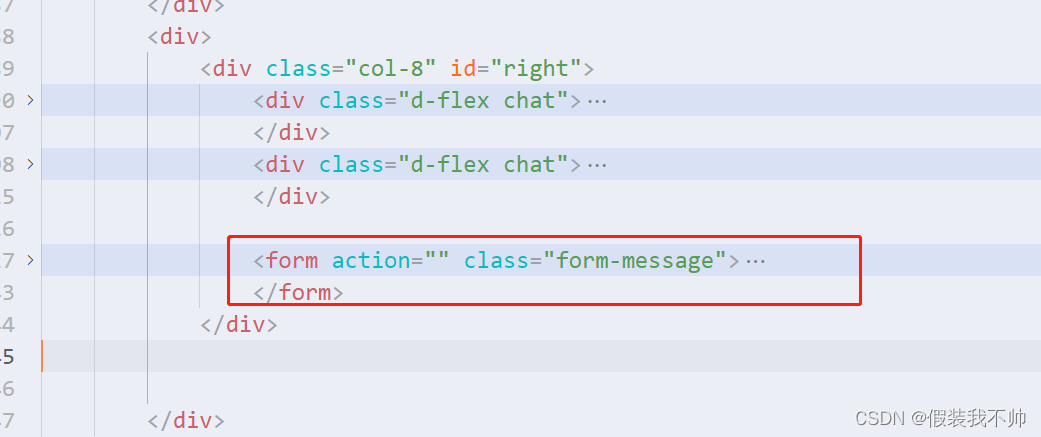
<form action="" class="form-message">
    <div class="row">
        <div class="col">
            <textarea class="form-control rounded-pill"></textarea>
        </div>
        <div class="col-auto">
            <button class="btn btn-primary rounded-circle sendbutton">
                <svg t="1695877122692" class="icon" viewBox="0 0 1024 1024" version="1.1"
                    xmlns="http://www.w3.org/2000/svg" p-id="1482" width="24" height="24" color="#fff">
                    <path
                        d="M512.48607 198.014866c64.466244 0 124.555807 11.94096 178.602747 35.493375 26.735921 11.648294 50.913577 25.524327 71.861678 41.24231 20.599154 15.456017 38.695301 33.163307 53.780881 52.627614 29.489638 38.055734 43.825135 78.102822 43.825135 122.4304 0 21.817911-3.620457 43.061748-10.759041 63.140039-7.239891 20.36277-18.3663 40.303938-33.07121 59.269895-15.089673 19.465331-33.18275 37.170574-53.778834 52.622498-20.949124 15.717983-45.125757 29.589922-71.873957 41.238216-54.033637 23.560602-114.121154 35.506678-178.590468 35.506678-18.576077 0-38.153972-1.136893-58.189284-3.37998l-16.781198-1.87879-12.376888 11.486612c-26.021653 24.150026-54.512544 44.843324-84.682681 61.505819-29.54285 16.316617-61.588707 29.260417-95.281063 38.488593 2.193968-2.538823 3.969405-4.588505 5.330402-6.151094 3.965312-4.553713 8.973372-11.212366 15.746636-20.935822 6.973832-9.997702 12.447497-19.047822 16.741289-27.681456 3.9121-7.874341 8.113795-17.492396 12.845563-29.407774 4.819772-12.138458 9.048073-25.100678 12.56927-38.525432l7.034207-26.823925-23.830755-14.179954c-39.916105-23.750937-71.674413-53.29481-94.390787-87.810928-22.077831-33.546024-32.810267-68.37732-32.810267-106.485243 0-32.881898 8.393157-63.566758 25.659403-93.810572 17.750269-31.092136 42.043558-58.362222 72.208579-81.053014 30.895661-23.243377 68.552306-42.052768 111.921046-55.906288C417.872203 205.088982 464.399889 198.014866 512.48607 198.014866M512.48607 161.175843c-52.126194 0-101.95916 7.586792-149.498896 22.77061-47.539736 15.184841-88.491427 35.704177-122.860189 61.560054-34.371832 25.855878-61.717643 56.604182-82.053808 92.227518-20.338211 35.625382-30.505781 72.984245-30.505781 112.074541 0 45.095058 12.95608 87.352487 38.877449 126.737496 25.921369 39.386032 61.35744 72.460312 106.326631 99.216699-3.15383 12.027941-6.876618 23.452131-11.17348 34.275641-4.296863 10.819416-8.16189 19.693528-11.599176 26.612101-3.439332 6.91448-8.089235 14.572904-13.964036 22.995737-5.867638 8.423857-10.305717 14.365172-13.314237 17.818831-3.004427 3.450589-7.943926 9.175987-14.820544 17.141402-6.870478 7.960299-11.310603 13.154601-13.314237 15.557324-0.290619 0.146333-1.433652 1.503237-3.437286 4.058432-2.003634 2.557242-3.006474 3.822049-3.006474 3.822049l-2.578732 4.049223c-1.431605 2.263553-2.076288 3.693112-1.934049 4.276397 0.14224 0.604774-0.14224 2.111081-0.858554 4.51892-0.717338 2.399653-0.642636 4.202719 0.213871 5.412266l0 0.446162c1.151219 5.415336 3.656273 9.776667 7.519254 13.08297 3.269463 2.784416 6.900154 4.191462 10.886955 4.191462 0.727571 0 1.466398-0.047072 2.217505-0.141216 18.618033-2.408863 34.941813-5.705955 48.973388-9.912767 75.036997-20.159132 140.910287-56.527434 197.61373-109.153002 21.474081 2.403746 42.23901 3.608178 62.287625 3.608178 69.879534 0 134.320195-12.853749 193.314821-38.57762 58.996672-25.692149 105.677854-60.72606 140.043546-105.059777 34.369785-44.331671 51.554166-92.669586 51.554166-144.979976 0-52.318576-17.184381-100.654444-51.544957-144.995325-34.369785-44.342927-81.057107-79.374792-140.04764-105.077174C646.814452 174.029592 582.365604 161.175843 512.48607 161.175843L512.48607 161.175843z"
                        fill="#666666" p-id="1483"></path>
                </svg>
            </button>
        </div>
    </div>
</form>
新建css/style.css
index.html别忘了引入<link rel=“stylesheet” href=“css/style.css”>
.form-message {
  margin-top: 15px;
}
.form-message button.send-button svg {
  width: 40px;
  height: 40px;
}
.form-message textarea {
  overflow: hidden;
  resize: none;
}
基于对象数组创建联系人
在本节中,我们将使用JavaScript以编程方式构建联系人列表;为此,我们将从以下格式的对象数组开始:
index.html
<script>
    function createContacts() {
        var contacts = [
            {
                'name': 'Alex Alexis',
                'image': 'https://randomuser.me/api/portraits/women/56.jpg',
                'last_chat': [
                    {
                        'date': '9:15 AM',
                        'message': 'Lorem ipsum dolor sit amet consecteturadipisicing elit',
                    }
                ]
            },
            {
                'name': 'Ramon Reed',
                'image': 'https://randomuser.me/api/portraits/women/59.jpg',
                'last_chat': [
                    {
                        'date': '9:15 AM',
                        'message': 'Lorem Hello!',
                    }
                ]
            },
            {
                'name': 'Eli Barrett',
                'image': 'https://randomuser.me/api/portraits/women/58.jpg',
                'last_chat': [
                    {
                        'date': '8:55 PM',
                        'message': 'Lorem ipsum dolor sit ...',
                    }
                ]
            },
        ]
    }
</script>
现在,使用前面的格式,我们将迭代联系人数组,并使用前面的结构构建一个HTML:
<script>
    function createContacts() {
        var contacts = [
            {
                'name': 'Alex Alexis',
                'image': 'https://randomuser.me/api/portraits/women/56.jpg',
                'last_chat': [
                    {
                        'date': '9:15 AM',
                        'message': 'Lorem ipsum dolor sit amet consecteturadipisicing elit',
                    }
                ]
            },
            {
                'name': 'Ramon Reed',
                'image': 'https://randomuser.me/api/portraits/women/59.jpg',
                'last_chat': [
                    {
                        'date': '9:15 AM',
                        'message': 'Lorem Hello!',
                    }
                ]
            },
            {
                'name': 'Eli Barrett',
                'image': 'https://randomuser.me/api/portraits/women/58.jpg',
                'last_chat': [
                    {
                        'date': '8:55 PM',
                        'message': 'Lorem ipsum dolor sit ...',
                    }
                ]
            },
        ]
        var lis = ''
        contacts.forEach((c) => {
            lis += `<li class="p-2 card mt-2">
 <div class="card-body">
 <div class="d-flex">
 <div>
 <img class="rounded-pill me-3" width="60"
 src="${c.image}">
 </div>
 <div>
 <p class="fw-bold mb-0 text-light">${c.name}</p>
 <p class="small text-muted">${c.last_chat[0]['message']}
</p>
 </div>
 <div>
 <p class="small text-muted">${c.last_chat[0]['date']}</p>
 <span class="badge bg-danger rounded-pill float-end">1</span>
 </div>
 </div>
 </div>
 </li>`
        })
        document.querySelector('.contact').innerHTML = lis;
    }
    createContacts();
</script>
基于对象数组创建聊天
有了联系人的格式,我们将复制以前的方案,但现在,对于聊天;为此,我们将遵循具有对象数组的相同逻辑:
index.html
<div class="col-8" id="right">
                <div class="chats">
                    <div class="d-flex chat">
                        <div class="w-25 d-flex align-items-end justify-content-end">
                            <img class="rounded-pill me-3 avatar" width="60"
                                src="https://randomuser.me/api/portraits/men/17.jpg">
                        </div>
                        <div class="w-75">
                            <div class="card">
                                <div class="card-body">
                                    Lorem ipsum dolor sit amet consectetur adipisicing elit.
                                    Doloribus reprehenderitvoluptatibus cumque, deserunt deleniti consequatur adipisci
                                    nisi consequuntur sunt itaque?
                                    Sunt aspernatur, ratione labore ipsam enim unde itaque
                                    dolorum magni?
                                </div>
                            </div>
                            <p class="small text-muted">8:45 PM</p>
                        </div>
                    </div>
                    <div class="d-flex chat">
                        <div class="w-75 ">
                            <div class="card bg-dark">
                                <div class="card-body text-light">
                                    Lorem ipsum dolor sit amet consectetur adipisicing elit.
                                    Doloribus reprehenderit
                                    voluptatibus cumque, deserunt deleniti consequatur adipisci
                                    nisi consequuntur sunt itaque?
                                    Sunt aspernatur, ratione labore ipsam enim unde itaque
                                    dolorum magni?
                                </div>
                            </div>
                            <p class="small text-muted float-end">9:17 AM</p>
                        </div>
                        <div class="w-25 d-flex align-items-end">
                            <img class="rounded-pill ms-3 avatar" src="https://randomuser.me/api/portraits/men/19.jpg">
                        </div>
                    </div>
                </div>


                <form action="" class="form-message">
                    <div class="row">
                        <div class="col">
                            <textarea class="form-control rounded-pill"></textarea>
                        </div>
                        <div class="col-auto">
                            <button class="btn btn-primary rounded-circle sendbutton">
                                <svg t="1695877122692" class="icon" viewBox="0 0 1024 1024" version="1.1"
                                    xmlns="http://www.w3.org/2000/svg" p-id="1482" width="24" height="24" color="#fff">
                                    <path
                                        d="M512.48607 198.014866c64.466244 0 124.555807 11.94096 178.602747 35.493375 26.735921 11.648294 50.913577 25.524327 71.861678 41.24231 20.599154 15.456017 38.695301 33.163307 53.780881 52.627614 29.489638 38.055734 43.825135 78.102822 43.825135 122.4304 0 21.817911-3.620457 43.061748-10.759041 63.140039-7.239891 20.36277-18.3663 40.303938-33.07121 59.269895-15.089673 19.465331-33.18275 37.170574-53.778834 52.622498-20.949124 15.717983-45.125757 29.589922-71.873957 41.238216-54.033637 23.560602-114.121154 35.506678-178.590468 35.506678-18.576077 0-38.153972-1.136893-58.189284-3.37998l-16.781198-1.87879-12.376888 11.486612c-26.021653 24.150026-54.512544 44.843324-84.682681 61.505819-29.54285 16.316617-61.588707 29.260417-95.281063 38.488593 2.193968-2.538823 3.969405-4.588505 5.330402-6.151094 3.965312-4.553713 8.973372-11.212366 15.746636-20.935822 6.973832-9.997702 12.447497-19.047822 16.741289-27.681456 3.9121-7.874341 8.113795-17.492396 12.845563-29.407774 4.819772-12.138458 9.048073-25.100678 12.56927-38.525432l7.034207-26.823925-23.830755-14.179954c-39.916105-23.750937-71.674413-53.29481-94.390787-87.810928-22.077831-33.546024-32.810267-68.37732-32.810267-106.485243 0-32.881898 8.393157-63.566758 25.659403-93.810572 17.750269-31.092136 42.043558-58.362222 72.208579-81.053014 30.895661-23.243377 68.552306-42.052768 111.921046-55.906288C417.872203 205.088982 464.399889 198.014866 512.48607 198.014866M512.48607 161.175843c-52.126194 0-101.95916 7.586792-149.498896 22.77061-47.539736 15.184841-88.491427 35.704177-122.860189 61.560054-34.371832 25.855878-61.717643 56.604182-82.053808 92.227518-20.338211 35.625382-30.505781 72.984245-30.505781 112.074541 0 45.095058 12.95608 87.352487 38.877449 126.737496 25.921369 39.386032 61.35744 72.460312 106.326631 99.216699-3.15383 12.027941-6.876618 23.452131-11.17348 34.275641-4.296863 10.819416-8.16189 19.693528-11.599176 26.612101-3.439332 6.91448-8.089235 14.572904-13.964036 22.995737-5.867638 8.423857-10.305717 14.365172-13.314237 17.818831-3.004427 3.450589-7.943926 9.175987-14.820544 17.141402-6.870478 7.960299-11.310603 13.154601-13.314237 15.557324-0.290619 0.146333-1.433652 1.503237-3.437286 4.058432-2.003634 2.557242-3.006474 3.822049-3.006474 3.822049l-2.578732 4.049223c-1.431605 2.263553-2.076288 3.693112-1.934049 4.276397 0.14224 0.604774-0.14224 2.111081-0.858554 4.51892-0.717338 2.399653-0.642636 4.202719 0.213871 5.412266l0 0.446162c1.151219 5.415336 3.656273 9.776667 7.519254 13.08297 3.269463 2.784416 6.900154 4.191462 10.886955 4.191462 0.727571 0 1.466398-0.047072 2.217505-0.141216 18.618033-2.408863 34.941813-5.705955 48.973388-9.912767 75.036997-20.159132 140.910287-56.527434 197.61373-109.153002 21.474081 2.403746 42.23901 3.608178 62.287625 3.608178 69.879534 0 134.320195-12.853749 193.314821-38.57762 58.996672-25.692149 105.677854-60.72606 140.043546-105.059777 34.369785-44.331671 51.554166-92.669586 51.554166-144.979976 0-52.318576-17.184381-100.654444-51.544957-144.995325-34.369785-44.342927-81.057107-79.374792-140.04764-105.077174C646.814452 174.029592 582.365604 161.175843 512.48607 161.175843L512.48607 161.175843z"
                                        fill="#666666" p-id="1483"></path>
                                </svg>
                            </button>
                        </div>
                    </div>
                </form>
            </div>
js代码
function createChats() {
      var chats = [
          {
              'user': {
                  'name': 'Alex Alexis',
                  'image': 'https://randomuser.me/api/portraits/women/56.jpg',
              },
              'chat':
              {
                  'date': '9:15 AM',
                  'message': 'Lorem ipsum dolor sit amet consectetur adipisicing elit. Doloribus reprehenderit voluptatibus cumque, deserunt deleniti consequatur adipisci nisi consequuntur sunt itaque? Sunt aspernatur, ratione labore ipsam enim unde itaque dolorum magni?',
              }
          },

          {
              'user': {
                  'name': 'Eli Barrett',
                  'image': 'https://randomuser.me/api/portraits/women/58.jpg',
              },
              'chat':
              {
                  'date': '9:50 AM',
                  'message': 'Lorem ipsum dolor sit amet consectetur adipisicing elit. Doloribus reprehenderit voluptatibus cumque, deserunt deleniti consequatur adipisci nisi consequuntur sunt itaque? Sunt aspernatur, ratione labore ipsam enim unde itaque dolorum magni?',
              }
          },

      ]
      var lis = ''
      chats.forEach((c) => {
          lis += ` <div class="d-flex chat">
<div class="w-75 ">
<div class="card bg-dark">
<div class="card-body text-light">
${c.chat.message}
</div>
</div>
<p class="small text-muted float-end">${c.chat.date}</p>
</div>
<div class="w-25 d-flex align-items-end">
<img class="rounded-pill ms-3 avatar" src="${c.user.image}"/>
</div>
</div>`
      })
      document.querySelector('.chats').innerHTML = lis;
}
createChats();