一、 Spring Security 概述
Spring Security是Spring组织提供的一个开源安全框架,基于Spring开发,所以非常适合在Spring Boot中使用。
官方文档地址:https://docs.spring.io/spring-security/reference/index.html
GitHub地址:https://github.com/spring-projects/spring-security
目前最新的版本是
6.1.4,提供了许多新功能,需使用JDK 17及以上版本。
Spring Security作为一个功能完善的安全框架,具有以下特性:
- 认证(Authentication):解决 “你是谁” 的问题,验证系统中是否有这个“用户”(用户/设备/系统),也就是我们常说的“登录”。
- 授权(Authorization):权限控制/鉴别,解决的是系统中某个用户能够访问哪些资源,即“你能干什么”的问题。
Spring Security支持基于URL的请求授权、方法访问授权、对象访问授权。 - 加密:对重要信息进行加密处理,如对密码进行加密、匹配等。
- 会话管理:对用户认证、会话信息进行存储管理。
- RememberMe: 实现“记住我”功能,并可以实现
token令牌持久化。 - 抵御攻击:对常见的网络攻击进行防御。
二、入门示例搭建
2.1 层级结构
.
├── springboot3-cloud-example
│   ├── spring-security
│   │   ├── hello-security
│   │   │   ├── src
│   │   │   └── pom.xml
│   │   └── pom.xml
|   └── pom.xml
- springboot3-cloud-example:顶级项目
- spring-security:父级项目起到目录划分作用
- hello-security:
Spring Security入门示例
2.2 顶级项目完整pom依赖
<?xml version="1.0" encoding="UTF-8"?>
<project xmlns="http://maven.apache.org/POM/4.0.0" xmlns:xsi="http://www.w3.org/2001/XMLSchema-instance"
         xsi:schemaLocation="http://maven.apache.org/POM/4.0.0 https://maven.apache.org/xsd/maven-4.0.0.xsd">
    <modelVersion>4.0.0</modelVersion>

    <groupId>com.gm</groupId>
    <artifactId>springboot3-cloud-example</artifactId>
    <name>springboot3-cloud-example</name>
    <version>0.0.1-SNAPSHOT</version>
    <packaging>pom</packaging>
    <description>SpringBoot3-Cloud进阶实战示例</description>

    <!--各版本对应关系 https://github.com/alibaba/spring-cloud-alibaba/wiki/%E7%89%88%E6%9C%AC%E8%AF%B4%E6%98%8E -->
    <properties>
        <spring-boot.version>3.1.4</spring-boot.version>
        <spring-cloud.version>2022.0.0</spring-cloud.version>
        <spring-cloud-alibaba.version>2022.0.0.0</spring-cloud-alibaba.version>
        <project.build.sourceEncoding>UTF-8</project.build.sourceEncoding>
        <maven.compiler.source>17</maven.compiler.source>
        <maven.compiler.target>17</maven.compiler.target>
    </properties>

    <modules>
        <module>spring-security</module>
    </modules>

    <dependencies>
        <!--Lombok-->
        <dependency>
            <groupId>org.projectlombok</groupId>
            <artifactId>lombok</artifactId>
            <scope>provided</scope>
        </dependency>
        <dependency>
            <groupId>org.springframework.boot</groupId>
            <artifactId>spring-boot-starter-test</artifactId>
            <scope>test</scope>
        </dependency>
    </dependencies>

    <dependencyManagement>
        <dependencies>
            <!-- spring boot 依赖 -->
            <dependency>
                <groupId>org.springframework.boot</groupId>
                <artifactId>spring-boot-dependencies</artifactId>
                <version>${spring-boot.version}</version>
                <type>pom</type>
                <scope>import</scope>
            </dependency>

            <!-- spring cloud 依赖 -->
            <dependency>
                <groupId>org.springframework.cloud</groupId>
                <artifactId>spring-cloud-dependencies</artifactId>
                <version>${spring-cloud.version}</version>
                <type>pom</type>
                <scope>import</scope>
            </dependency>
            <!-- spring cloud alibaba 依赖 -->
            <dependency>
                <groupId>com.alibaba.cloud</groupId>
                <artifactId>spring-cloud-alibaba-dependencies</artifactId>
                <version>${spring-cloud-alibaba.version}</version>
                <type>pom</type>
                <scope>import</scope>
            </dependency>

        </dependencies>
    </dependencyManagement>

    <build>
        <finalName>${project.name}</finalName>
        <resources>
            <resource>
                <directory>src/main/resources</directory>
                <filtering>true</filtering>
            </resource>
        </resources>
        <pluginManagement>
            <plugins>
                <plugin>
                    <groupId>org.springframework.boot</groupId>
                    <artifactId>spring-boot-maven-plugin</artifactId>
                    <version>${spring-boot.version}</version>
                    <configuration>
                        <finalName>${project.build.finalName}</finalName>
                        <layers>
                            <enabled>true</enabled>
                        </layers>
                    </configuration>
                    <executions>
                        <execution>
                            <goals>
                                <goal>repackage</goal>
                            </goals>
                        </execution>
                    </executions>
                </plugin>
            </plugins>
        </pluginManagement>
    </build>

    <profiles>
        <profile>
            <id>dev</id>
            <properties>
                <!-- 环境标识,需要与配置文件的名称相对应 -->
                <profile.active>dev</profile.active>
                <nacos.username>nacos</nacos.username>
                <nacos.password>nacos</nacos.password>
            </properties>
            <activation>
                <!-- 默认环境 -->
                <activeByDefault>true</activeByDefault>
            </activation>
        </profile>
        <profile>
            <id>test</id>
            <properties>
                <!-- 环境标识,需要与配置文件的名称相对应 -->
                <profile.active>test</profile.active>
                <nacos.username>nacos</nacos.username>
                <nacos.password>nacos</nacos.password>
            </properties>
        </profile>
    </profiles>
</project>
2.3 父级项目完整pom依赖
<?xml version="1.0" encoding="UTF-8"?>
<project xmlns="http://maven.apache.org/POM/4.0.0" xmlns:xsi="http://www.w3.org/2001/XMLSchema-instance" xsi:schemaLocation="http://maven.apache.org/POM/4.0.0 http://maven.apache.org/xsd/maven-4.0.0.xsd">
	<parent>
		<artifactId>springboot3-cloud-example</artifactId>
		<groupId>com.gm</groupId>
		<version>0.0.1-SNAPSHOT</version>
	</parent>
	<modelVersion>4.0.0</modelVersion>
	<packaging>pom</packaging>

	<artifactId>spring-security</artifactId>
	<modules>
		<module>hello-security</module>
    </modules>
</project>
2.4 入门示例
2.4.1 完整pom依赖
<?xml version="1.0" encoding="UTF-8"?>
<project xmlns="http://maven.apache.org/POM/4.0.0" xmlns:xsi="http://www.w3.org/2001/XMLSchema-instance"
         xsi:schemaLocation="http://maven.apache.org/POM/4.0.0 https://maven.apache.org/xsd/maven-4.0.0.xsd">
    <modelVersion>4.0.0</modelVersion>

    <parent>
        <artifactId>spring-security</artifactId>
        <groupId>com.gm</groupId>
        <version>0.0.1-SNAPSHOT</version>
    </parent>

    <artifactId>hello-security</artifactId>
    <packaging>jar</packaging>
    <description>入门示例</description>

    <dependencies>
        <dependency>
            <groupId>org.springframework.boot</groupId>
            <artifactId>spring-boot-starter-web</artifactId>
        </dependency>
        <dependency>
            <groupId>org.springframework.boot</groupId>
            <artifactId>spring-boot-starter-security</artifactId>
        </dependency>
        <dependency>
            <groupId>org.springframework.security</groupId>
            <artifactId>spring-security-test</artifactId>
            <scope>test</scope>
        </dependency>
    </dependencies>
</project>
spring-boot-starter-security是Spring Boot官方提供的启动器,提供了自动配置和依赖包管理功能,主要包含以下几个子模块:
spring-security-core: 核心包,包含核心认证和访问权限功能类和接口、远程支持和基本配置spring-security-web:Web框架集成包,包含过滤器和相关的安全基础设施代码spring-security-config:包含security命名空间解析代码和Java配置代码
2.4.2 创建访问接口
接下来我们随便编写一个web访问接口,方便后面进行测试。
package com.gm.security.controller;

import org.springframework.web.bind.annotation.GetMapping;
import org.springframework.web.bind.annotation.RestController;

@RestController
public class HelloController {

    @GetMapping("/hello")
    public String hello() {
        return "hello spring security";
    }
}
2.4.3 创建项目入口
package com.gm.security;

import org.springframework.boot.SpringApplication;
import org.springframework.boot.autoconfigure.SpringBootApplication;

@SpringBootApplication
public class HelloSecurityApplication {

    public static void main(String[] args) {
        SpringApplication.run(HelloSecurityApplication.class, args);
    }
}
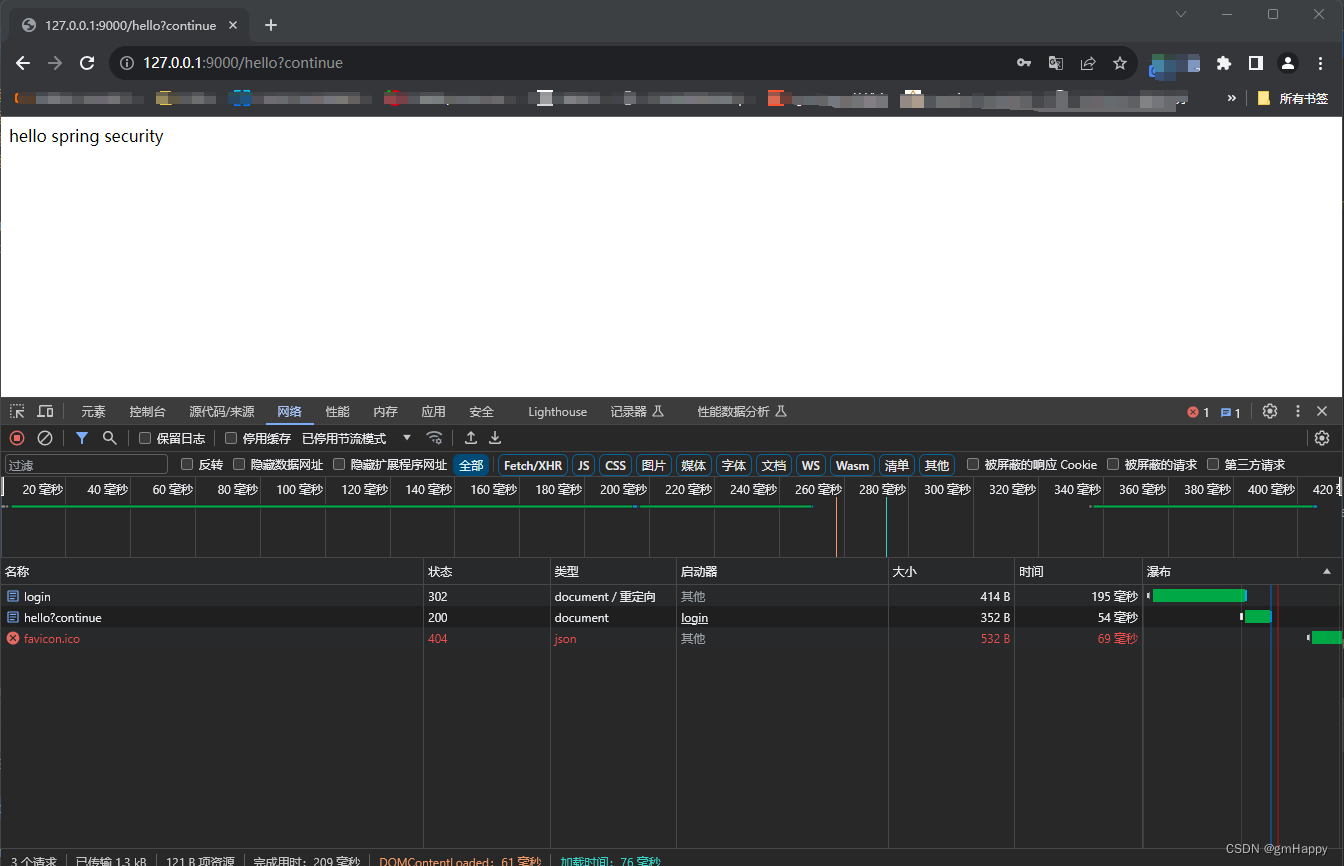
2.4.4 运行项目
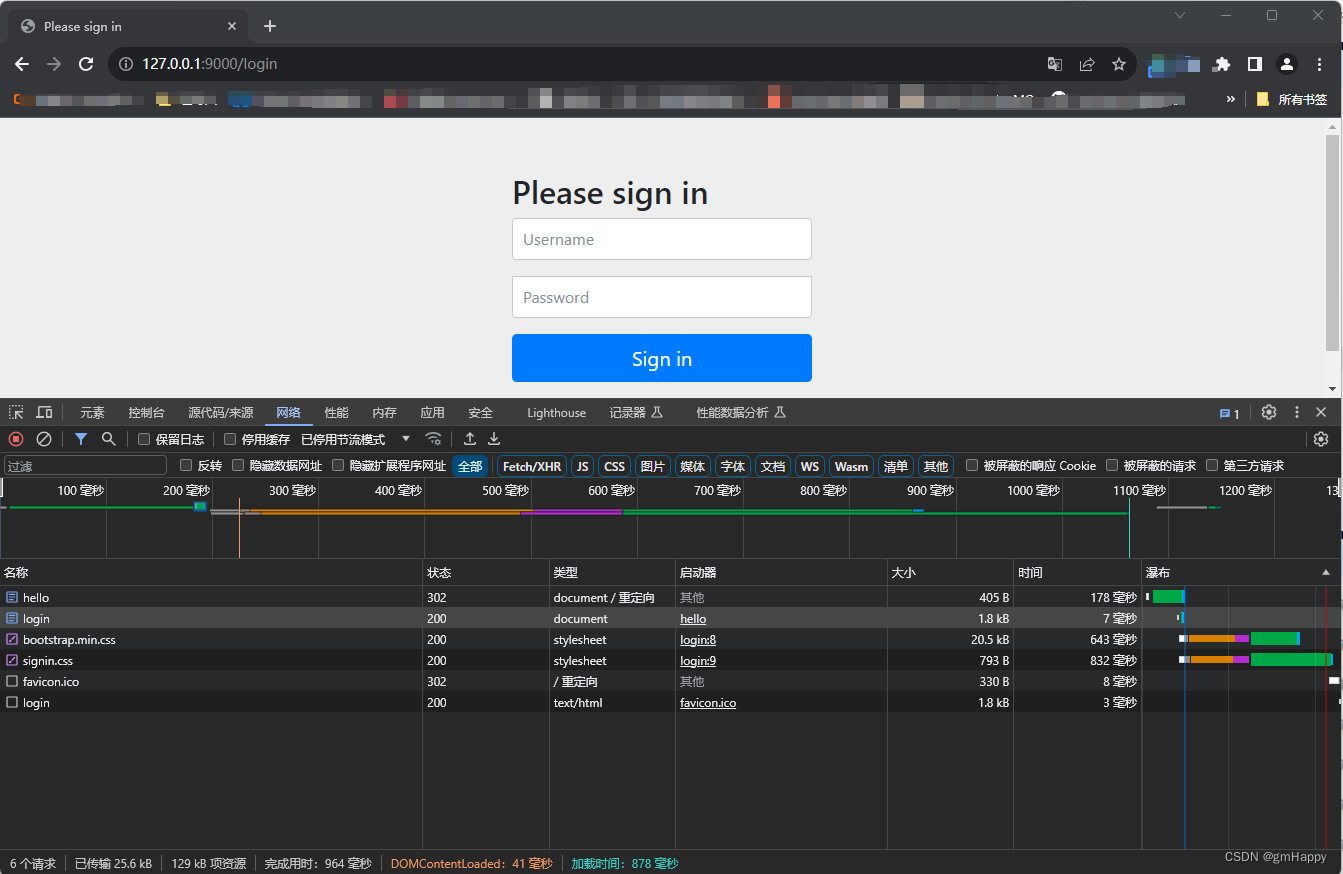
我们把项目启动起来后,在浏览器中对/hello进行访问,会发现/hello是无法直接访问的。在访问/hello之前会自动跳转到/login地址,进入到一个登录界面。这是因为Spring Boot中"约定大约配置"的规则,只要我们添加了Spring Security的依赖包,就会自动开启安全限制,在访问Web接口之前会进行安全拦截。只有输入了用户名和密码,才能访问项目中的Web接口,上述过程如下图所示:
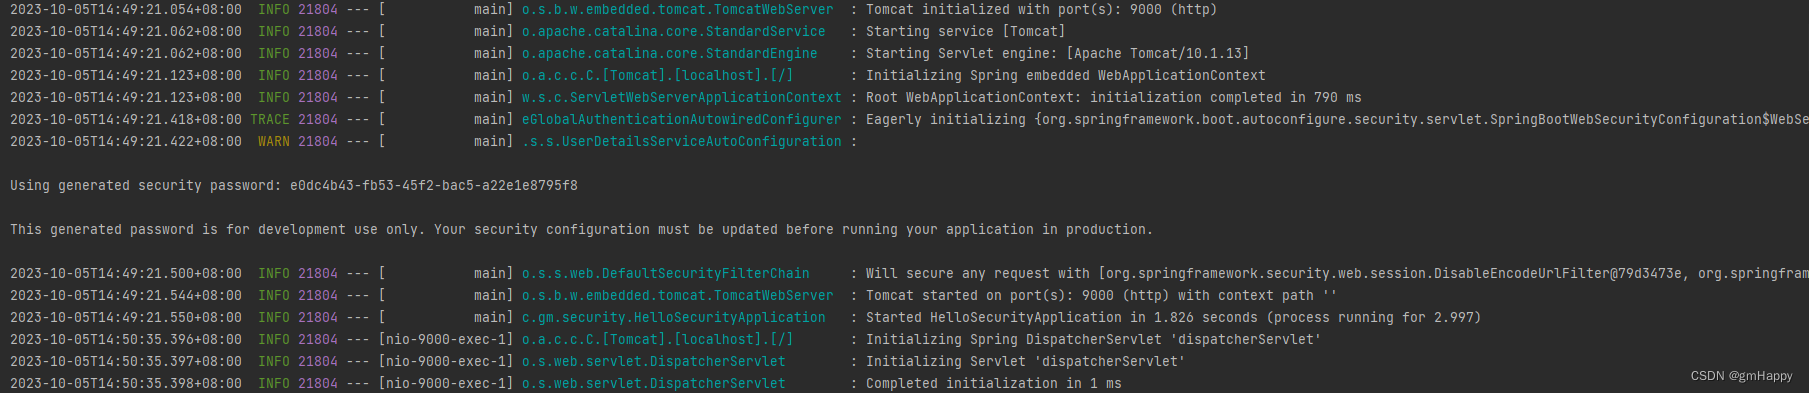
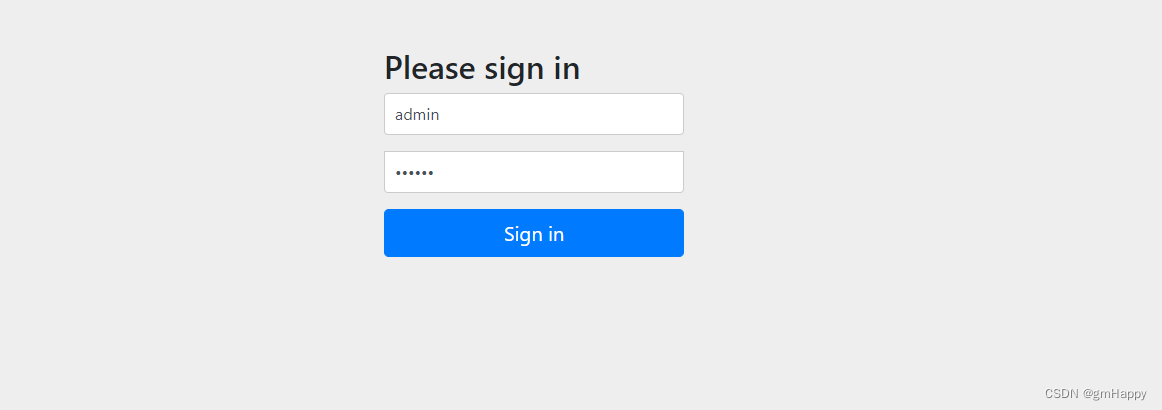
此时登录界面中,要求我们输入用户名和密码。这个默认的用户名是user,密码是一个用UUID生成的随机字符串。在每次启动项目时,都可以在控制台中看到生成的随机密码,如下图所示:
2.4.5 随机密码生成机制
能有小伙伴会很好奇,这个随机的密码到底是在哪里生成的呢?
让我们分析一下Spring Security的源码,来看看这个密码的生成策略。这个默认的用户名和密码其实是在SecurityProperties类中定义的,源码如下图:
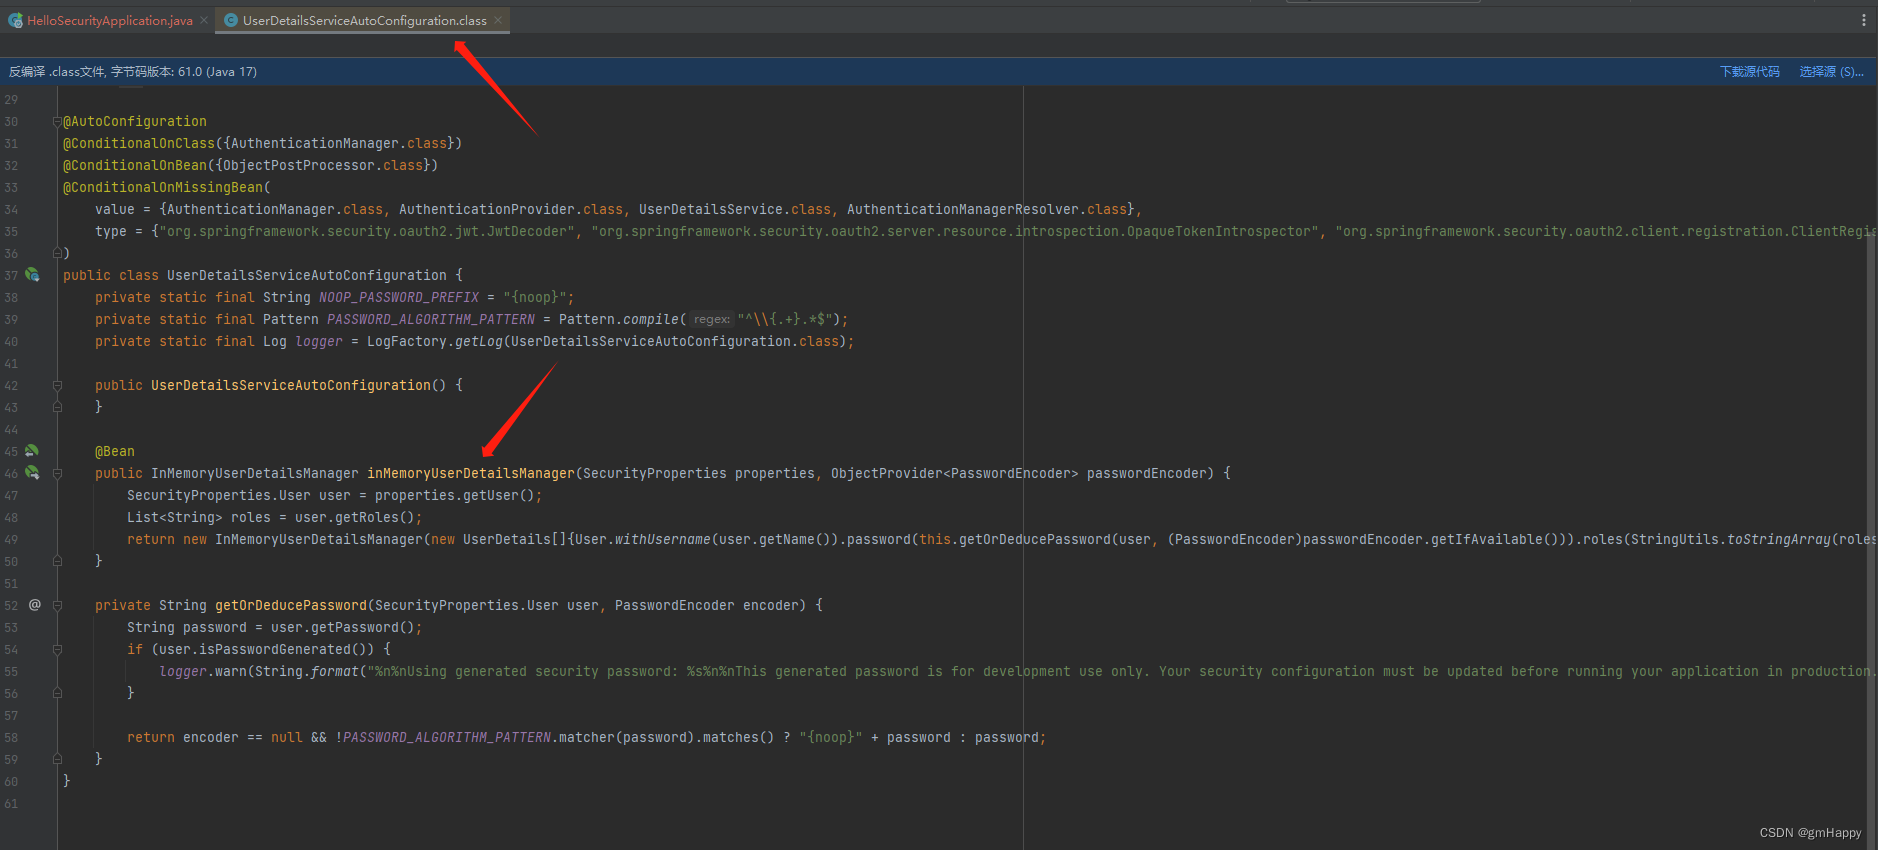
而控制台上打印的密码日志,是在UserDetailsServiceAutoConfiguration类的getOrDeducePassword方法中输出的。
我们只要把这个随机密码,复制粘贴到登录页面的密码框中,就可以访问/hello接口了。
2.5 配置Spring Security账户密码
从上面的源码分析可知,默认的登录密码是利用UUID生成的随机字符串,很明显如果我们使用这个字符串作为登录密码,就太麻烦了。那么有没有更方便的登录账户呢?
Spring Security框架允许我们自己配置用户名和密码,并且提供了2种方式来进行自定义用户名和密码:
- 在配置文件中定义
- 在配置类中定义
2.5.1 在配置文件中定义
在application.yml配置文件新增以下内容:
spring:
  security:
    user:
      name: admin
      password: 123456
2.5.2 在配置类中定义
新建配置类SecurityConfig,新增以下内容:
package com.gm.security.config;

import org.springframework.context.annotation.Bean;
import org.springframework.context.annotation.Configuration;
import org.springframework.security.config.annotation.web.configuration.EnableWebSecurity;
import org.springframework.security.core.userdetails.User;
import org.springframework.security.core.userdetails.UserDetails;
import org.springframework.security.core.userdetails.UserDetailsService;
import org.springframework.security.provisioning.InMemoryUserDetailsManager;

@Configuration
@EnableWebSecurity(debug = true)
public class SecurityConfig {

    @Bean
    public UserDetailsService userDetailsService() {
        UserDetails user = User.withDefaultPasswordEncoder()
                .username("admin").password("123456").roles("USER").build();
        return new InMemoryUserDetailsManager(new UserDetails[]{user});
    }
}
2.5.3 重启项目
实现以上2种方式的任何一种,我们重启项目,这时候利用我们自己配置的用户名和密码,就可以访问/hello接口了。
在后续章节中会对以上
2种实现方式进行具体源码分析。
至此我们入门案例搭建完毕。我们只需要添加一个Spring Security依赖包,就可以实现Web安全控制。


![[Spring] Spring5——JdbcTemplate 简介](https://img-blog.csdnimg.cn/7a6540b582014a0caeb1019694b3451f.png)