一、Anaconda
1、安装Anaconda
Anaconda的安装:https://www.anaconda.com/
Anaconda-国内镜像站
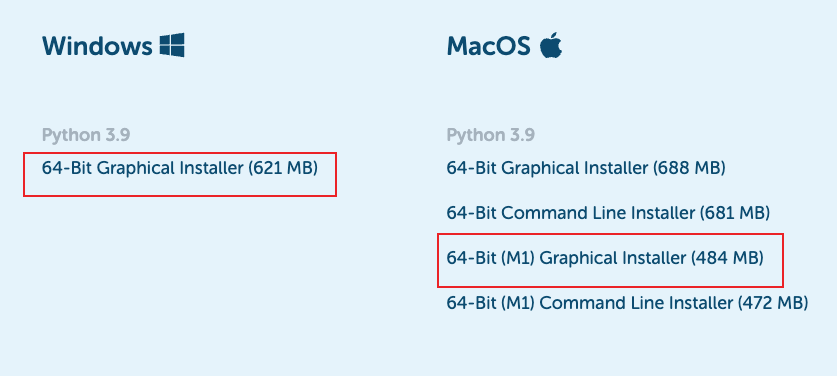
在terminal上看到(base)说明安装已完成


2、conda换源
添加中科大源
conda config --add channels https://mirrors.ustc.edu.cn/anaconda/pkgs/main/
conda config --add channels https://mirrors.ustc.edu.cn/anaconda/pkgs/free/
conda config --add channels https://mirrors.ustc.edu.cn/anaconda/cloud/conda-forge/
conda config --add channels https://mirrors.ustc.edu.cn/anaconda/cloud/msys2/
conda config --add channels https://mirrors.ustc.edu.cn/anaconda/cloud/bioconda/
conda config --add channels https://mirrors.ustc.edu.cn/anaconda/cloud/menpo/
conda config --set show_channel_urls yes
查看源
cat ~/.condarc
3、conda基本命令
创建虚拟环境
conda create -n py38 python=3.8
激活当前环境
conda activate py38
查看当前虚拟环境中已安装内容
conda list
查看当前已有的虚拟环境
conda env list
二、pip
pip更换国内镜像
检查是否已存在pip.conf文件,若无需手动创建
cd ~/.pip/pip.conf
# cd: no such file or directory: ~/.pip/pip.conf

# 若出现以上信息则说明无配置文件,需手动创建
mkdir ~/.pip
touch ~/.pip/pip.conf
编辑pip.conf文件内容
[global]
index-url = https://pypi.tuna.tsinghua.edu.cn/simple
三、PyTorch
1、安装PyTorch
conda create -n py3.8 python=3.8
conda activate py3.8
conda install pytorch torchvision -c pytorch
2、验证pytorch安装成功
>>> import torch
>>> torch.__version__
'1.13.1'
3、使用GPU
此处和之前的cuda调用方式略有不同,需要在tensor里加入参数 device='mps'
等价与之前的device='cuda'
x = torch.ones((1024 * 12, 1024 * 12), dtype=torch.float32,device='mps')
但要注意的是
mps目前还并不是tensor的方法,也就是说不能像以下代码一样使用gpux = torch.ones((1024 * 12, 1024 * 12), dtype=torch.float32).cuda()
四、jupyter
代码的自动提示和补全功能
1、下载jupyter提示功能的包
pip install jupyter_contrib_nbextensions
jupyter contrib nbextension install --user
pip install --user jupyter_nbextensions_configurator
jupyter nbextensions_configurator enable --user
2、打开jupyter
conda activate py38

jupyter notebook
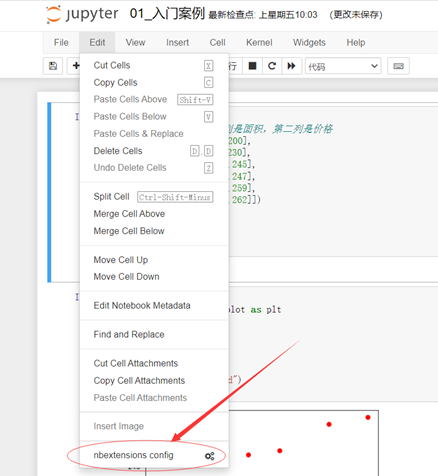
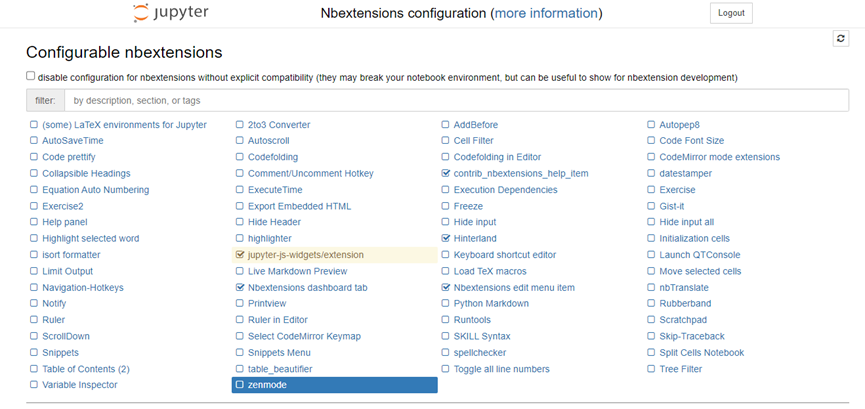
3、点击Edit菜单,然后选择 “nbextenstions config”
五、常用软件包
1、open-cv
pip install opencv-python==4.5.3.56
2、matplotlib
pip install matplotlib
