01.Spring Boot简介
1.Spring的本质和作用
spring的本质就是一个"容器",它负责创建并管理容器中的对象(组件,也称为Bean),并管理组件之间的依赖关系(何为依赖关系:A组件需要调用B组件方法,称为A依赖于B)
因此学习Spring最常用的两个注解:
@Component:将被修饰的类变成容器中的组件
@Controller @Service @Repository本质都是@Component只不过更形象的表示哪个层级
控制层,业务层,持久层.表示清楚而已
@AutoWired:完成依赖注入
2.javaEE和Spring
3.java后端开发涉及的技术
MVC层:Spring WebFlux,Spring MVC,Struts2等
安全领域:Spring Security,Shiro等
消息组件:ActiveMQ,RabbitMQ,Kafka等
缓存:JCache,EhCache,Hazelcast,Redis等
持久层框架:JPA,Mybatis,JOOQ,R2DBC等
分布式:Zookeeper,Dubbo等.
NOSQL存储:Redsi,MongoDB,Neo4J,Cassandra,Geodo,CouchBase等
全文检索引擎:Lucene,Solr,Elastichsearch等
数据库存储:Mysql,PostgreSQL,Oracle等
Web服务器:Tomcat,Jetty,Undertow等
4.Spring与SpringBoot
SpringBoot依然以Spring为核心,Spring的缺点是配置过多
SpringBoot为绝大部分第三方框架的快速整合提供了自动配置
针对各种框架提供了对应的Starter,只要添加该Starter即可完成第三方框架的自动整合
SpringBoot整合了绝大对数常用的第三方框架
5.SrpingBoot能做什么和不能做什么
内嵌Tomcat,Jetty等服务器,因此SpringBoot 应用无需部署到其他服务器
SpringBoot应用可做成独立的java应用程序--不需要是web应用
意味着可以通过"java 主类"命令来运行应用.
提供产品级监控功能(Spring Actuator),如运行状况检查和外部化配置等
不要夸大SpringBoot的功能,SpringBoot直译就是Spring启动
它主要功能就是为Spring及第三方框架的快速启动提供了自动配置
-----------------------------------------------------------------------------------------------------------------
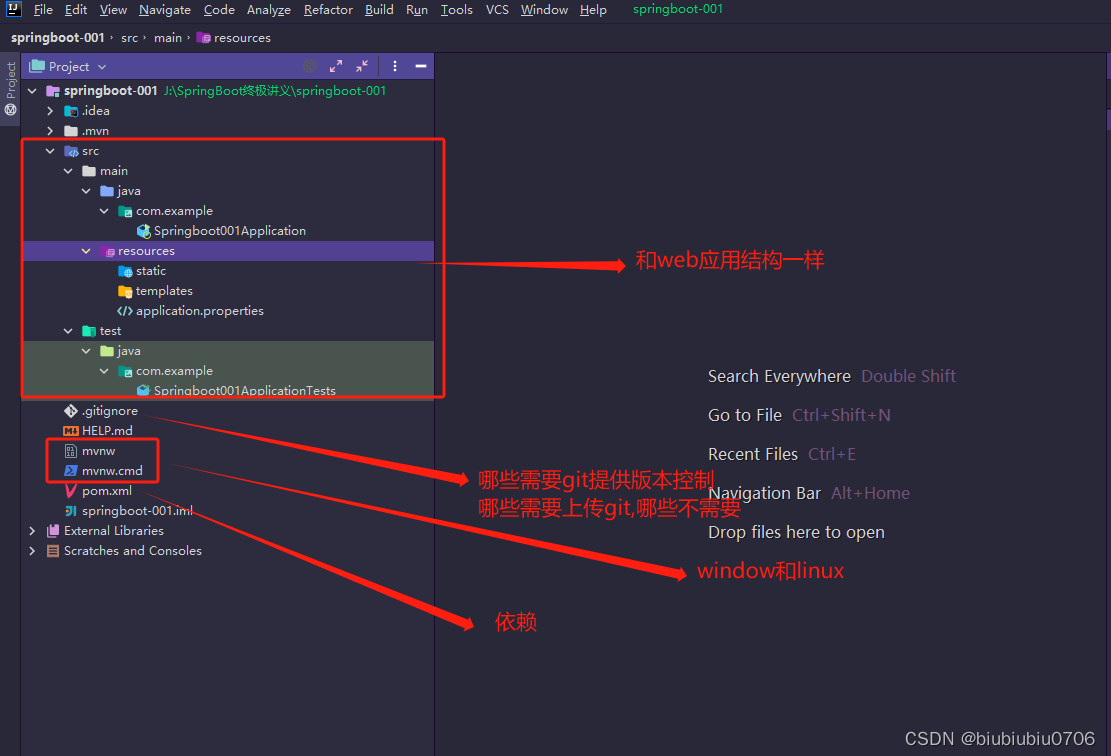
02.SpringBoot的项目结构
创建时引入的依赖
<dependencies>
    <dependency>
        <groupId>org.springframework.boot</groupId>
        <artifactId>spring-boot-starter-web</artifactId>
    </dependency>

    <dependency>
        <groupId>org.springframework.boot</groupId>
        <artifactId>spring-boot-devtools</artifactId>
        <scope>runtime</scope>
        <optional>true</optional>
    </dependency>
    <dependency>
        <groupId>org.projectlombok</groupId>
        <artifactId>lombok</artifactId>
        <optional>true</optional>
    </dependency>
    <dependency>
        <groupId>org.springframework.boot</groupId>
        <artifactId>spring-boot-starter-test</artifactId>
        <scope>test</scope>
    </dependency>
</dependencies>

<build>
    <plugins>
        <plugin>
            <groupId>org.springframework.boot</groupId>
            <artifactId>spring-boot-maven-plugin</artifactId>
            <configuration>
                <excludes>
                    <exclude>
                        <groupId>org.projectlombok</groupId>
                        <artifactId>lombok</artifactId>
                    </exclude>
                </excludes>
            </configuration>
        </plugin>
    </plugins>
</build>
03.控制器访问

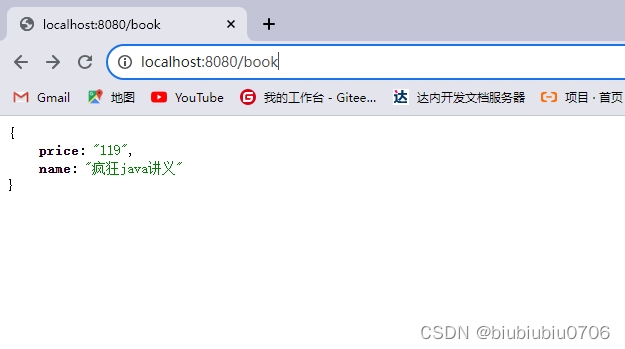
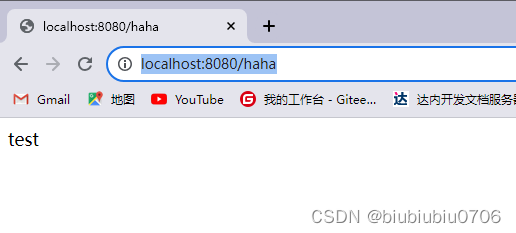
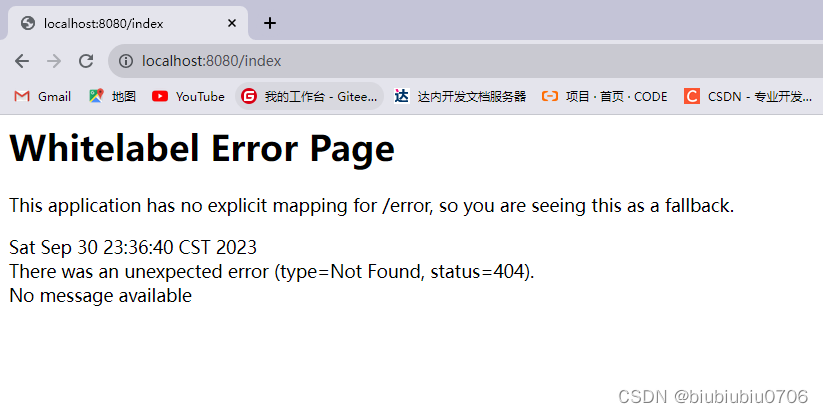
当访问localhost:8080/index时候无法访问,原因是这里是返回视图
04.SpringBoot整合Thymeleaf作为视图模板技术
引入Thymeleaf依赖
<!--Thymeleaf依赖-->
<dependency>
    <groupId>org.springframework.boot</groupId>
    <artifactId>spring-boot-starter-thymeleaf</artifactId>
</dependency>
SpringBoot支持Webjar技术
webjars:用于将各种前端资源(JS/CSS等打成jar包)
引入bootstarp依赖:
<!--bootstarp依赖-->
<dependency>
    <groupId>org.webjars</groupId>
    <artifactId>bootstrap</artifactId>
    <version>4.6.0</version>
</dependency>
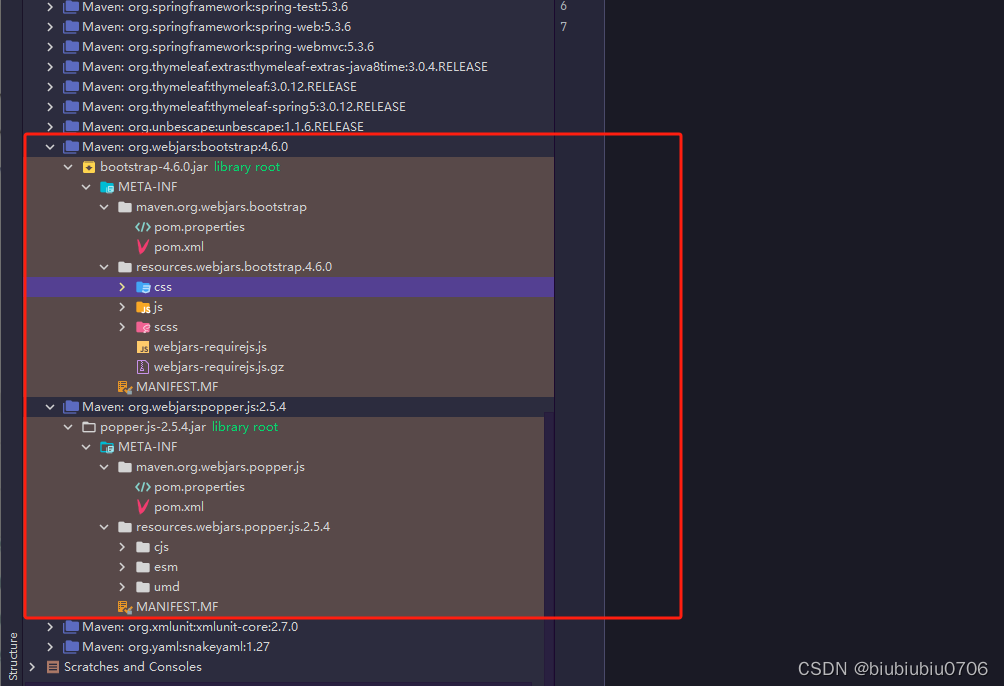
Thymeleaf模板页面要放在resources/templates下
在resources/templates/hello.html
<!DOCTYPE html>
<!--导入thymeleaf-->
<html lang="en" xmlns:th="http://www.thymeleaf.org">
<head>
    <meta charset="UTF-8">
    <title>欢迎页面</title>
    <!--引入webjar中bootstrap样式-->
    <link rel="stylesheet" th:href="@{/webjars/bootstrap/4.6.0/css/bootstrap.css}">
</head>
<body>
<div class="container">
    <div th:text="${tip}" class="alert alert-primary">提示信息</div>
</div>
</body>
</html>
访问localhost:8080/index 视图转发到hello.html

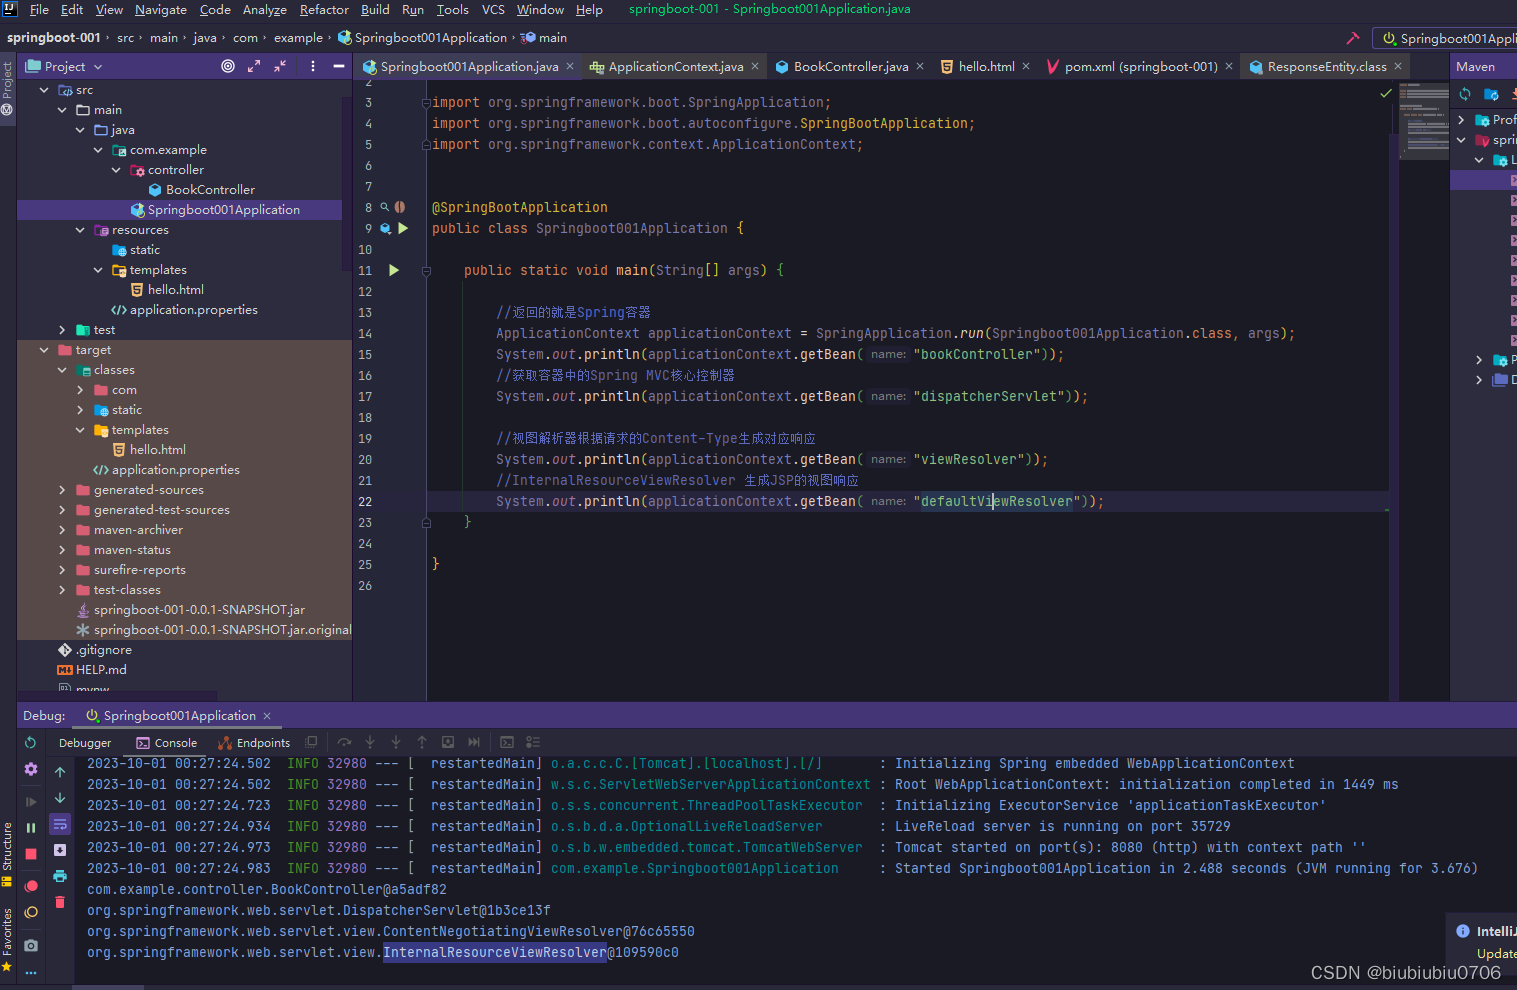
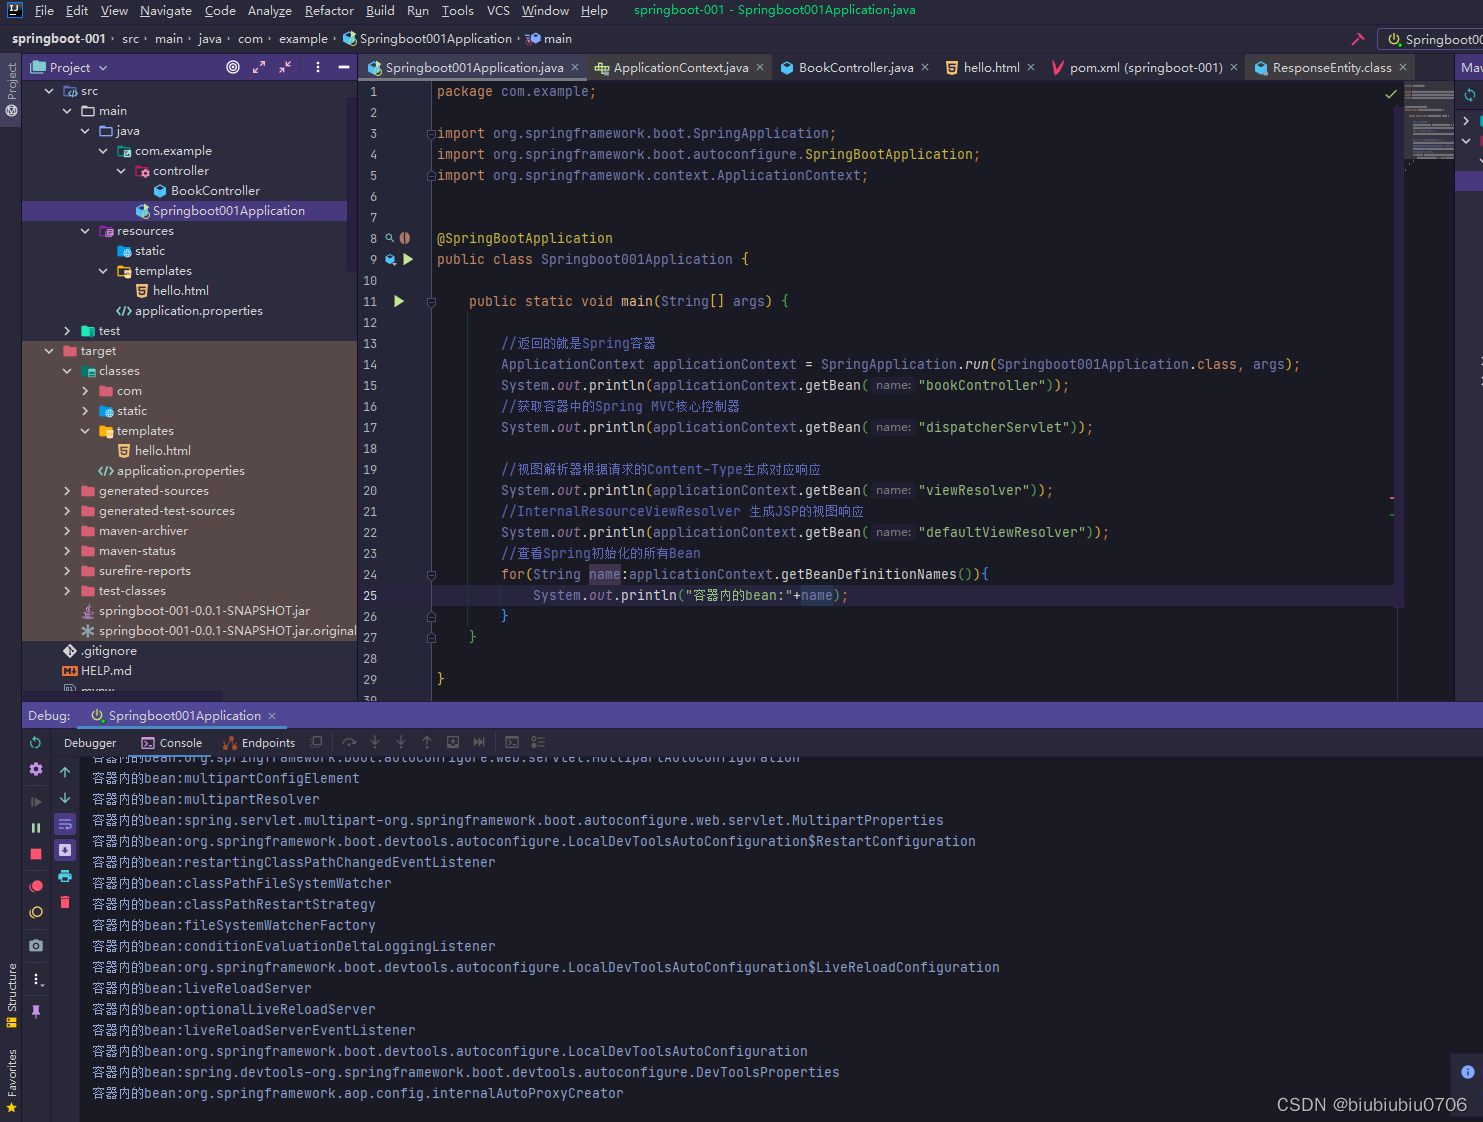
05.SpringBoot启动类作用
06.运行及打包SpringBoot应用
启动该项目
第一种方式:进入项目的pom.xml所在路径 执行 mvn spring-boot:run
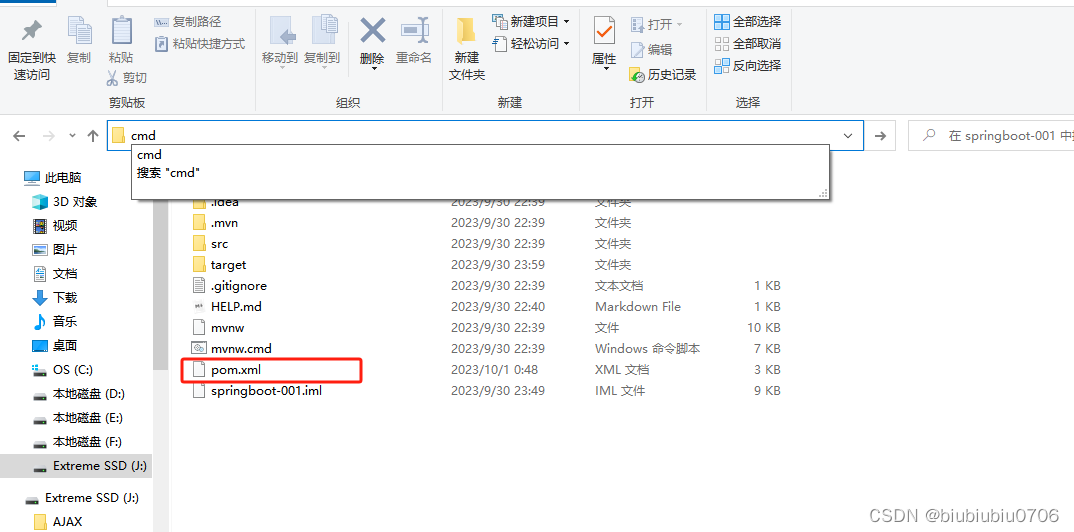

CTRL+C 退出
第二种方式:将SpringBoot应用打包
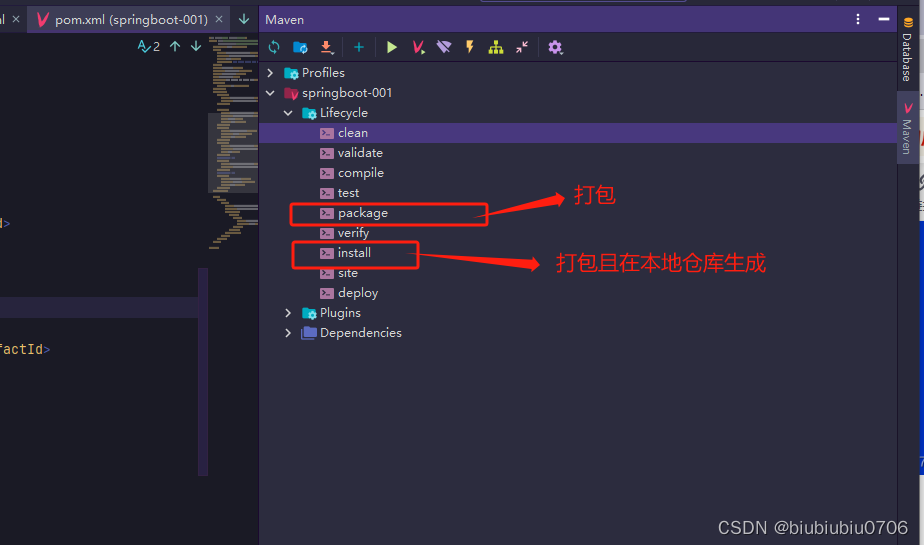
打包有可能出错,如果是test问题
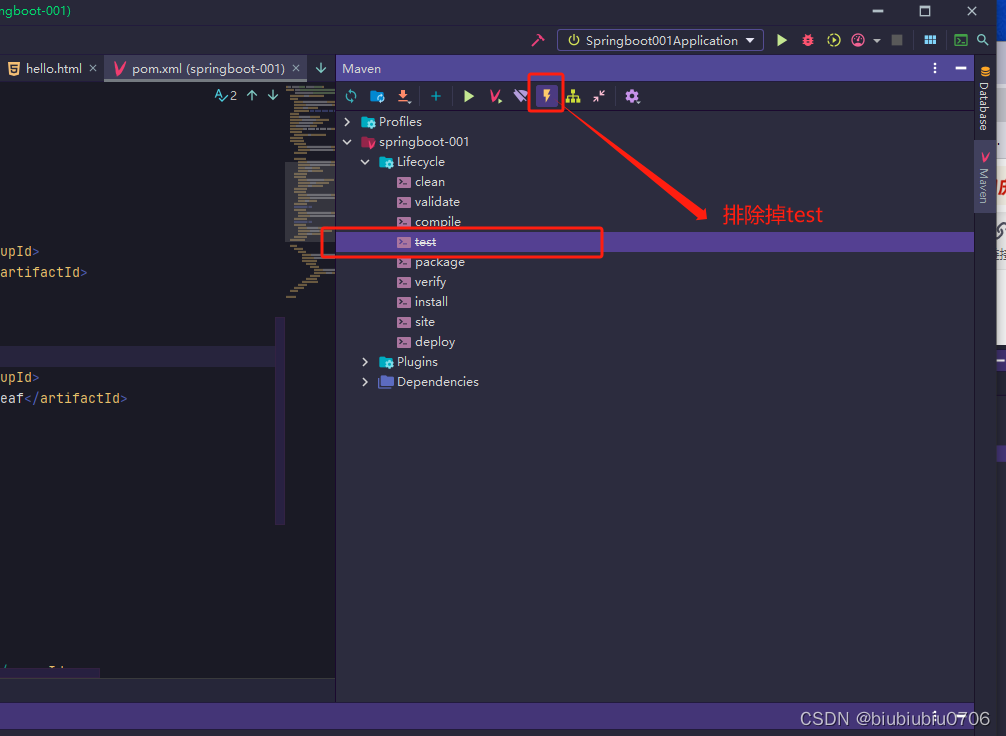
进入target目录 java -jar xxx.jar 或者 java -jar xxx.jar &
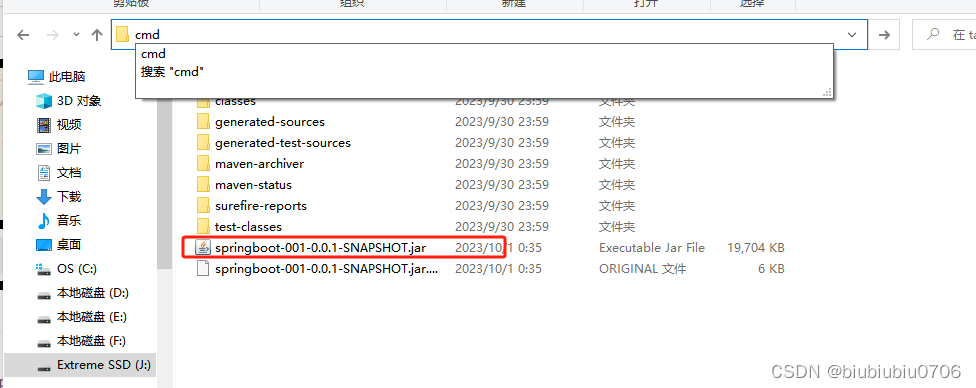
java -jar xxx.jar 是在当前窗口运行 java -jar xxx.jar & 是在后台运行
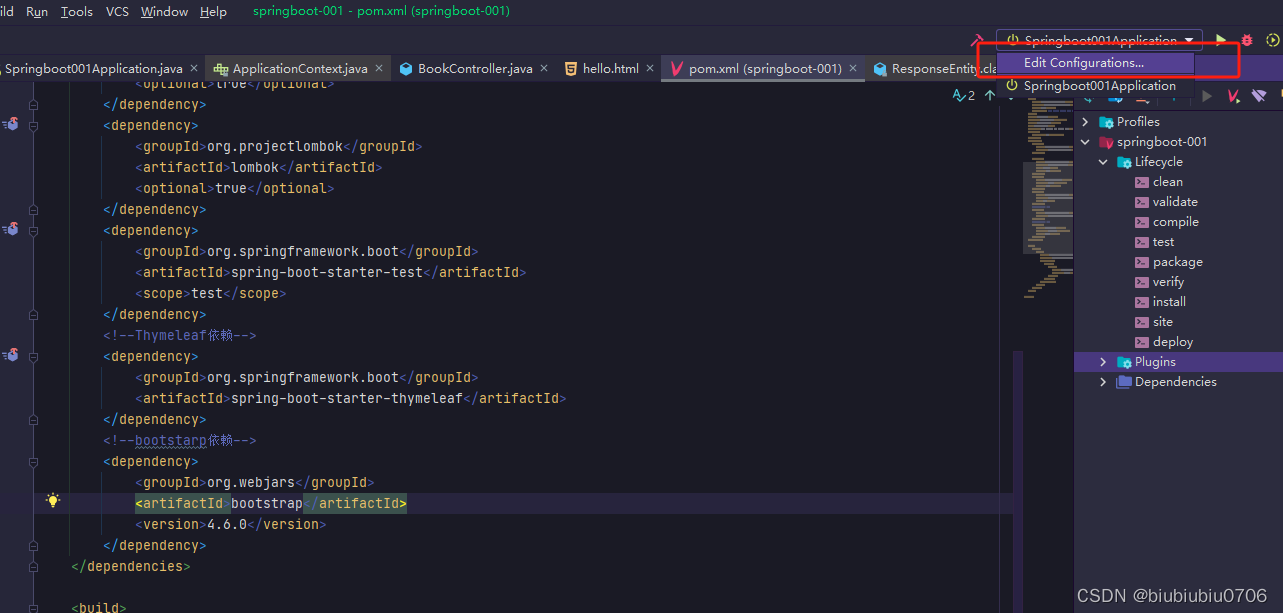
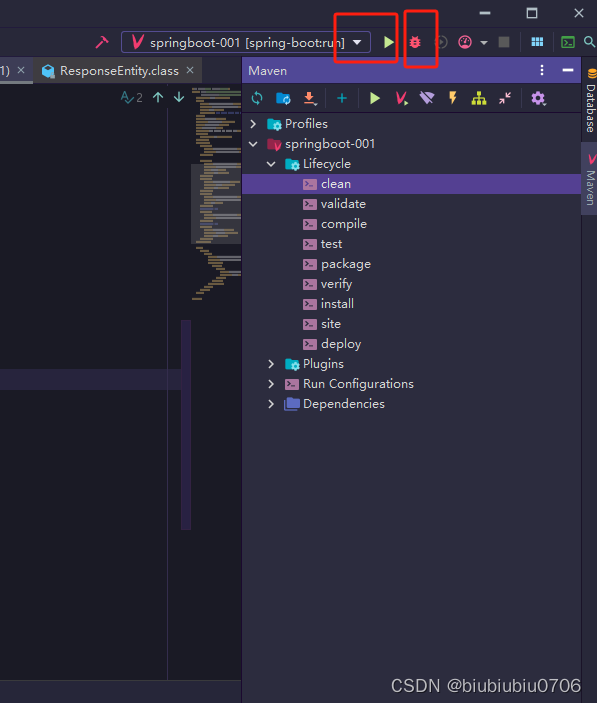
IDEA的Terminal窗口:运行mvn spring-boot:run

CTRL+C Y结束
双击CTRL键盘 回车
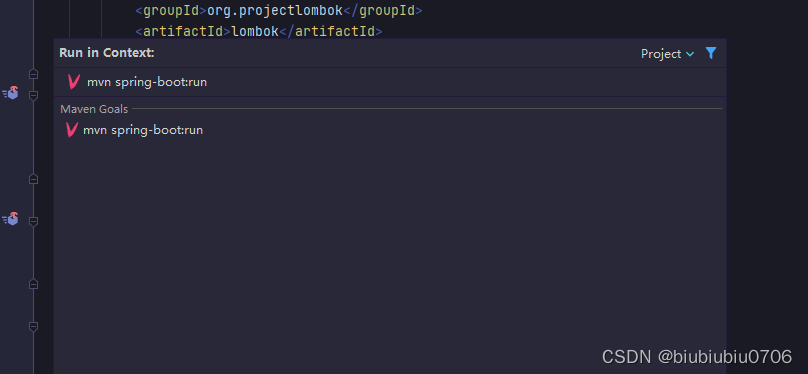
这些真无聊 还可以
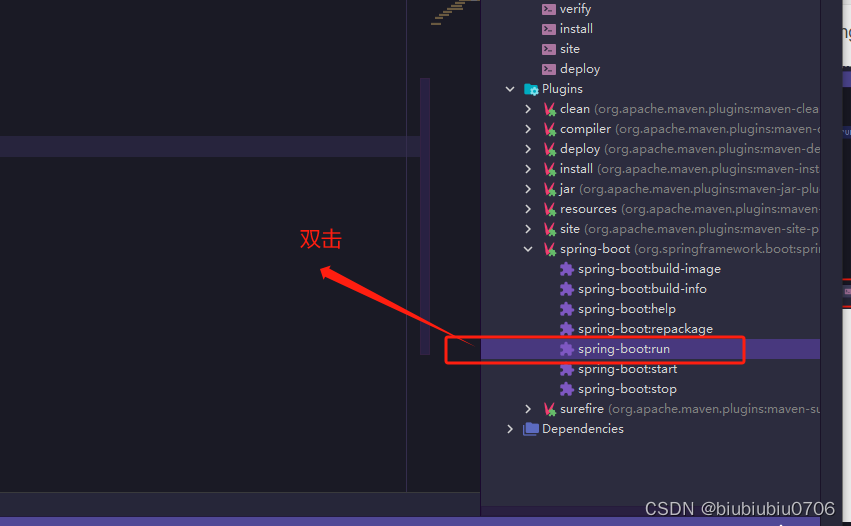
还可以这样 这是闲的


07.整合Thymeleaf添加service及dao
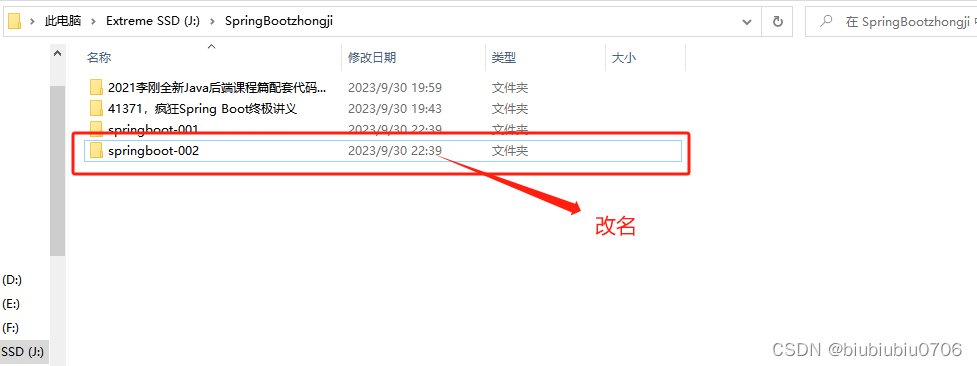
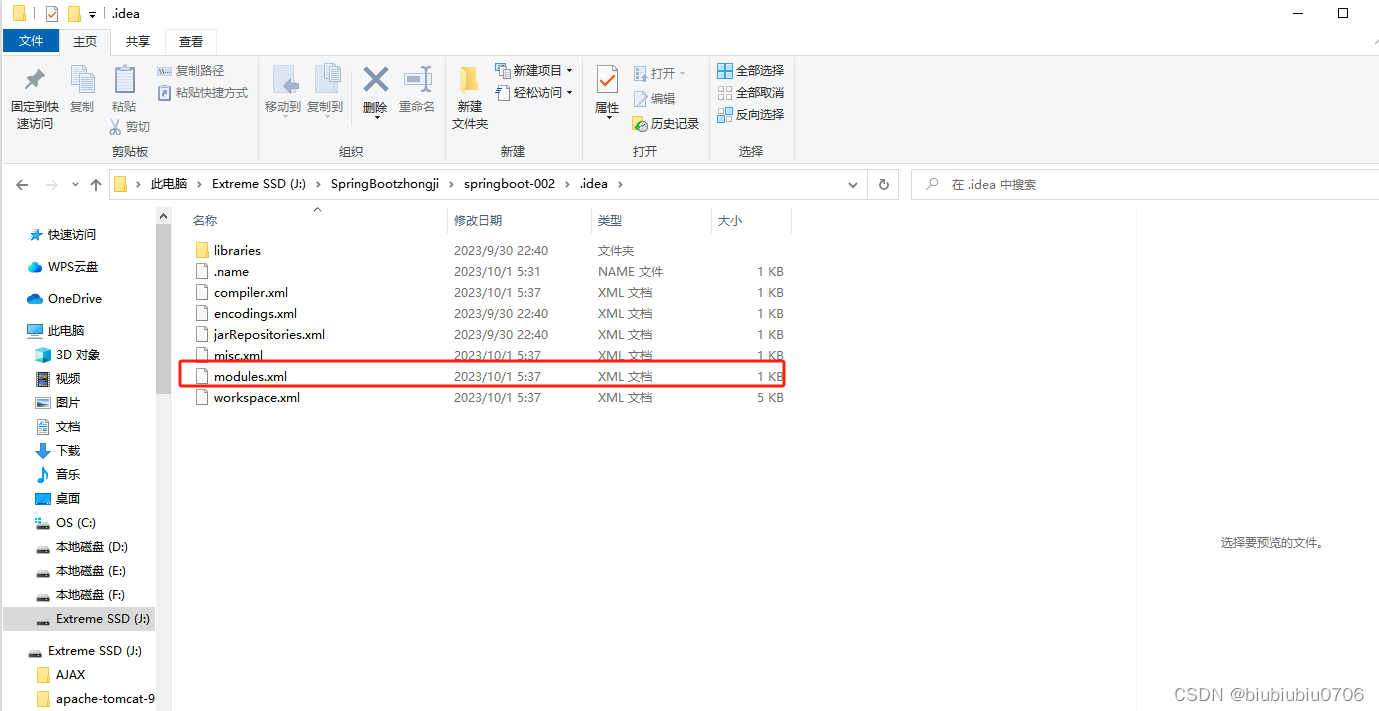
为了项目看起来不那么乱,有迭代效果,复制一份




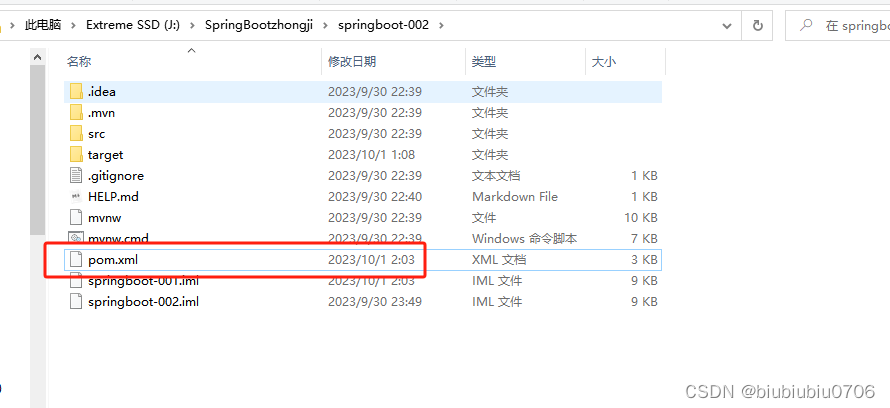

templates下的文件不能直接访问,用控制器转发
添加持久层依赖,这里用Spring Data JPA
<!--mysql驱动-->
<dependency>
    <groupId>mysql</groupId>
    <artifactId>mysql-connector-java</artifactId>
    <scope>runtime</scope>
</dependency>

<!--Spring data jpa-->
<dependency>
    <groupId>org.springframework.boot</groupId>
    <artifactId>spring-boot-starter-data-jpa</artifactId>
</dependency>
建库
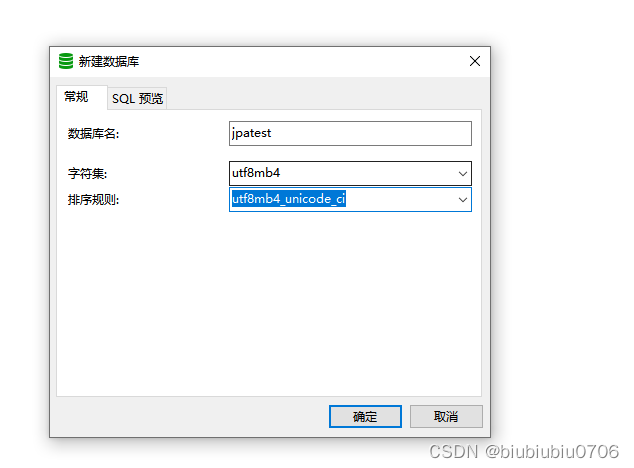
Spring data jpa会自动帮你根据实体类创建表
在application.properties配置
spring.datasource.driver-class-name=com.mysql.cj.jdbc.Driver
spring.datasource.url=jdbc:mysql://xxxx:3306/jpatest?serverTimezone=Asia/Shanghai
spring.datasource.username=xxxx
spring.datasource.password=xxxx

#指定显示SQL语句
spring.jpa.show-sql=true
#指定根据尸体自动建表
spring.jpa.generate-ddl=true
实体类
package com.example.pojo;

import lombok.AllArgsConstructor;
import lombok.Data;
import lombok.NoArgsConstructor;
import lombok.experimental.Accessors;

import javax.persistence.*;

/**
 * @author hrui
 * @date 2023/10/1 2:12
 */
@Data
@NoArgsConstructor
@AllArgsConstructor
@Accessors(chain = true)
@Entity
@Table(name="book_inf")
public class Book {

    @Id
    @Column(name="book_id")
    @GeneratedValue(strategy = GenerationType.IDENTITY)//主键自增
    private Integer id;

    private String name;

    private Double price;

    private String author;

    //如果需要排除掉@Transient

}
持久层接口
package com.example.dao;

import com.example.pojo.Book;
import org.springframework.data.repository.CrudRepository;

/**
 * @author hrui
 * @date 2023/10/1 4:46
 */
//继承CrudRepository 泛型写实体类  主键类型
public interface BookDao extends CrudRepository<Book,Integer> {
}
业务层接口
package com.example.service;

import com.example.pojo.Book;

import java.util.List;

/**
 * @author hrui
 * @date 2023/10/1 2:06
 */
public interface BookService {

    int addBook(Book book);

    List<Book> getAllBooks();

    void deleteBook(Integer id);

}
业务实现类
package com.example.service.impl;

import com.example.dao.BookDao;
import com.example.pojo.Book;
import com.example.service.BookService;
import org.springframework.stereotype.Service;
import org.springframework.transaction.annotation.Transactional;

import java.util.List;

/**
 * @author hrui
 * @date 2023/10/1 2:06
 */
@Service
@Transactional
public class BookServiceImpl implements BookService {

    private BookDao bookDao;

    public BookServiceImpl(BookDao bookDao) {
        this.bookDao = bookDao;
    }

    @Override
    public int addBook(Book book) {
        bookDao.save(book);//执行后会将主键id传回封装到book
        return book.getId();
    }

    @Override
    public List<Book> getAllBooks() {
        return (List<Book>) bookDao.findAll();
    }

    @Override
    public void deleteBook(Integer id) {
        bookDao.deleteById(id);
    }
}
控制器
package com.example.controller;

import com.example.pojo.Book;
import com.example.service.BookService;
import org.springframework.http.HttpStatus;
import org.springframework.http.ResponseEntity;
import org.springframework.stereotype.Controller;
import org.springframework.ui.Model;
import org.springframework.web.bind.annotation.*;


import java.util.HashMap;
import java.util.Map;

/**
 * @author hrui
 * @date 2023/9/30 22:44
 */
@Controller
public class BookController {

    private BookService bookService;

    public BookController(BookService bookService) {
        this.bookService = bookService;
    }


    @PostMapping("/addBook")
    public String addBook(Book book,Model model){
        if(bookService.addBook(book)>0){
            return "redirect:listBooks";//重定向
        }

        model.addAttribute("tip", "添加图书失败");
        return "bookForm";
    }

    @GetMapping("/bookForm")
    public String bookForm(){
        return "bookForm";
    }

    @RequestMapping("/listBooks")
    public String list(Model model){
        //查询系统中所有的图书 存入books属性
        model.addAttribute("books", bookService.getAllBooks());
        return "listBooks";//转发
    }

    @RequestMapping("/deleteBook/{id}")
    public String delete(@PathVariable Integer id,Model model){
        bookService.deleteBook(id);
        return "redirect:/listBooks";
    }
resources/templates/下的3个文件
hello.html
<!DOCTYPE html>
<!--导入thymeleaf-->
<html lang="en" xmlns:th="http://www.thymeleaf.org">
<head>
    <meta charset="UTF-8">
    <title>欢迎页面</title>
    <!--引入webjar中bootstrap样式-->
    <link rel="stylesheet" th:href="@{/webjars/bootstrap/4.6.0/css/bootstrap.css}">
</head>
<body>
<div class="container">
    <div th:text="${tip}" class="alert alert-primary">提示信息</div>
</div>
</body>
</html>
bookForm.html
<!DOCTYPE html>
<html lang="en" xmlns:th="http://www.thymeleaf.org">
<head>
	<meta charset="UTF-8">
	<title>添加图书</title>
	<!-- 导入Webjar中的Boostrap资源 -->
	<link rel="stylesheet" th:href="@{/webjars/bootstrap/4.6.0/css/bootstrap.css}">
</head>
<body>
<div class="container">
	<!-- 使用th:text将表达式的值绑定到标准HTML元素 -->
	<div class="alert alert-primary" th:text="${tip}">提示信息</div>
	<h2>添加图书</h2>
	<form method="post" th:action="@{/addBook}">
		<div class="form-group row">
			<label for="name" class="col-sm-3 col-form-label">图书名:</label>
			<div class="col-sm-9">
				<input type="text" id="name" name="name"
					   class="form-control" placeholder="输入图书名">
			</div>
		</div>
		<div class="form-group row">
			<label for="author" class="col-sm-3 col-form-label">作者:</label>
			<div class="col-sm-9">
				<input type="text" id="author" name="author"
					   class="form-control" placeholder="输入作者">
			</div>
		</div>
		<div class="form-group row">
			<label for="price" class="col-sm-3 col-form-label">价格:</label>
			<div class="col-sm-9">
				<input type="number" step="0.1" id="price" name="price"
					   class="form-control" placeholder="输入价格">
			</div>
		</div>
		<div class="form-group row">
			<div class="col-sm-6 text-right">
				<button type="submit" class="btn btn-primary">添加</button>
			</div>
			<div class="col-sm-6">
				<button type="reset" class="btn btn-danger">重设</button>
			</div>
		</div>
	</form>
</div>
</body>
</html>
listBooks.html
<!DOCTYPE html>
<html lang="en" xmlns:th="http://www.thymeleaf.org">
<head>
	<meta charset="UTF-8">
	<title>欢迎页面</title>
	<!-- 导入Webjar中的Boostrap资源 -->
	<link rel="stylesheet" th:href="@{/webjars/bootstrap/4.6.0/css/bootstrap.css}">
</head>
<body>
<div class="container">
	<table class="table table-hover">
		<tr>
			<th>书名</th>
			<th>价格</th>
			<th>作者</th>
			<th>删除</th>
		</tr>
		<tr th:each="book: ${books}">
			<td th:text="${book.name}">书名</td>
			<td th:text="${book.price}">价格</td>
			<td th:text="${book.author}">作者</td>
			<td><a th:href="@{/deleteBook/} + ${book.id}">删除</a></td>
		</tr>
	</table>
	<div class="text-right"><a class="btn btn-primary" th:href="@{/bookForm}">添加图书</a></div>
</div>
</body>
</html>
效果
访问localhost:8080/bookForm

点击添加

08.SpringBoot对单元测试的支持
复制个新的springboot-003
添加SpringBoot的测试依赖,这个依赖原先就放进去了
<dependency>
    <groupId>org.springframework.boot</groupId>
    <artifactId>spring-boot-starter-test</artifactId>
    <scope>test</scope>
</dependency>
在控制器新增几个方法
@PostMapping("/books")
@ResponseBody
public ResponseEntity<Book> restAddBook(@RequestBody Book book){
    if(bookService.addBook(book)>0){
        return new ResponseEntity<>(book,HttpStatus.OK);
    }
    return new ResponseEntity<>(null, HttpStatus.BAD_REQUEST);
}

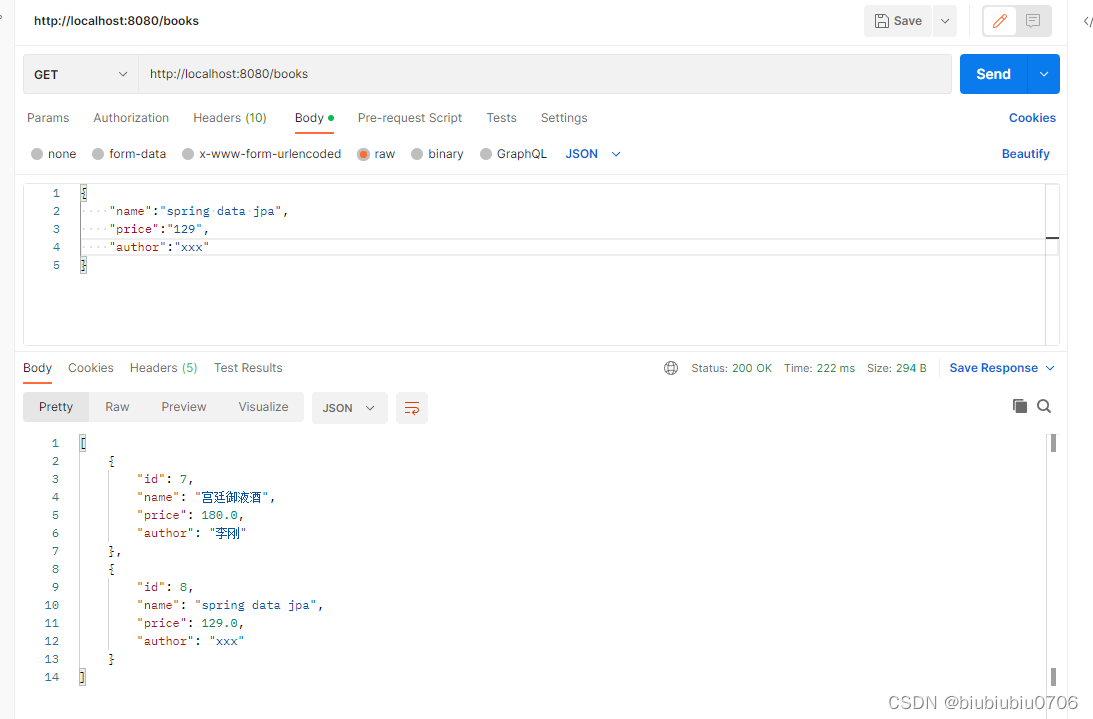
@GetMapping("/books")
@ResponseBody
public ResponseEntity<List<Book>> restList(){
    return new ResponseEntity<>(bookService.getAllBooks(), HttpStatus.OK);
}

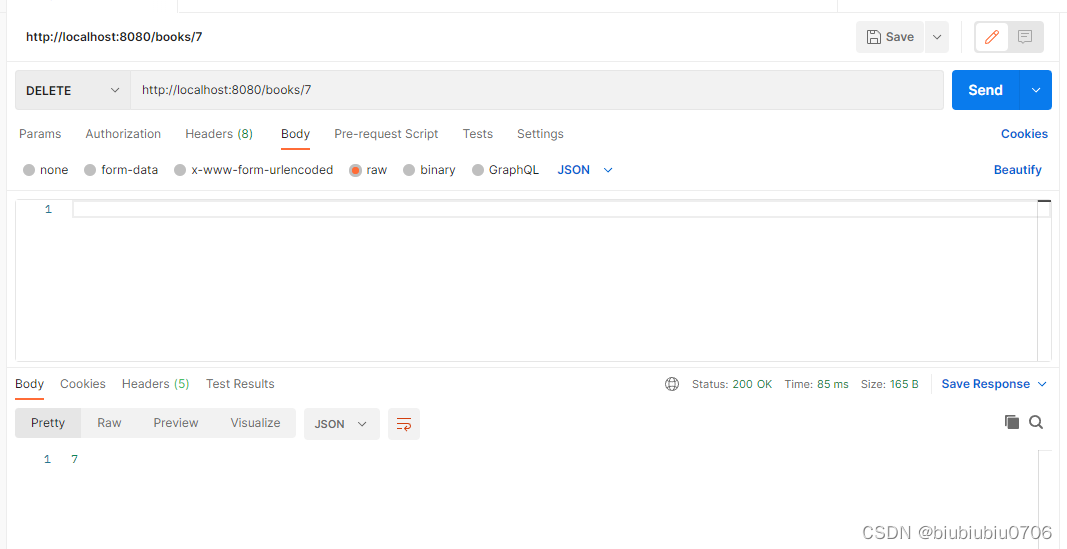
@DeleteMapping("/books/{id}")
public ResponseEntity<Integer> restDelete(@PathVariable Integer id){
    bookService.deleteBook(id);
    return new ResponseEntity<>(id, HttpStatus.OK);
}
1.用postman测试
Post http://localhost:8080/books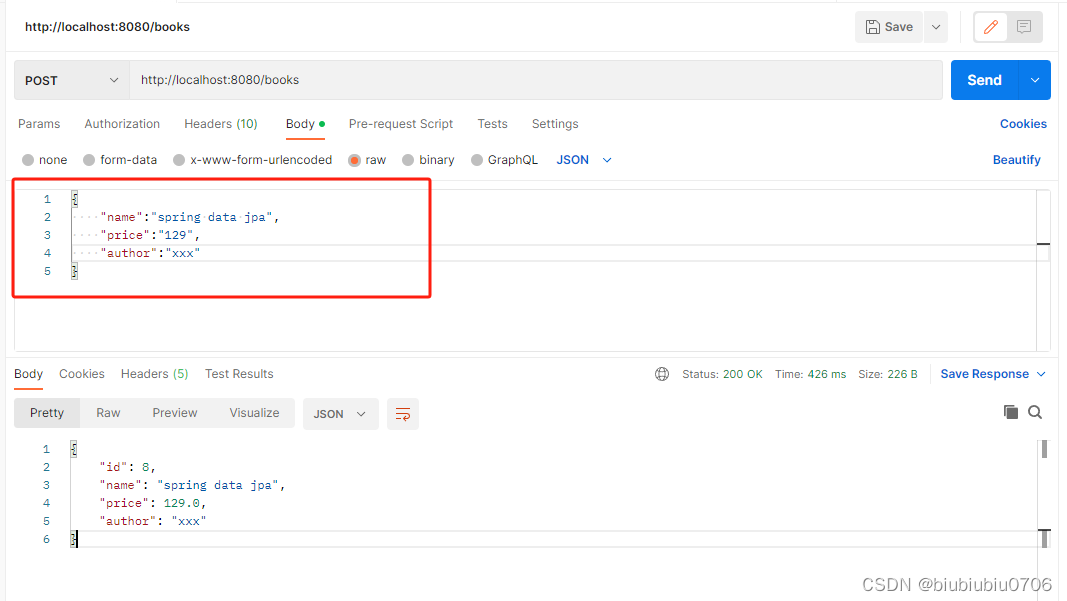
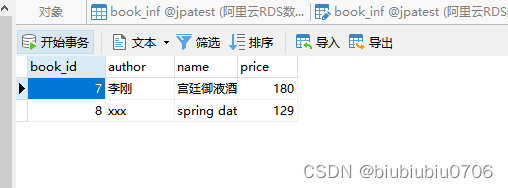
Get http://localhost:8080/books body体里不管,反正后端没接收
Delete http://localhost:8080/books/7
2.使用TestRestTemplate测试RESTFUL接口
测试类使用@SpringBootTest(webEnvironment=WebEnvironment.RANDOM_PORT)修饰
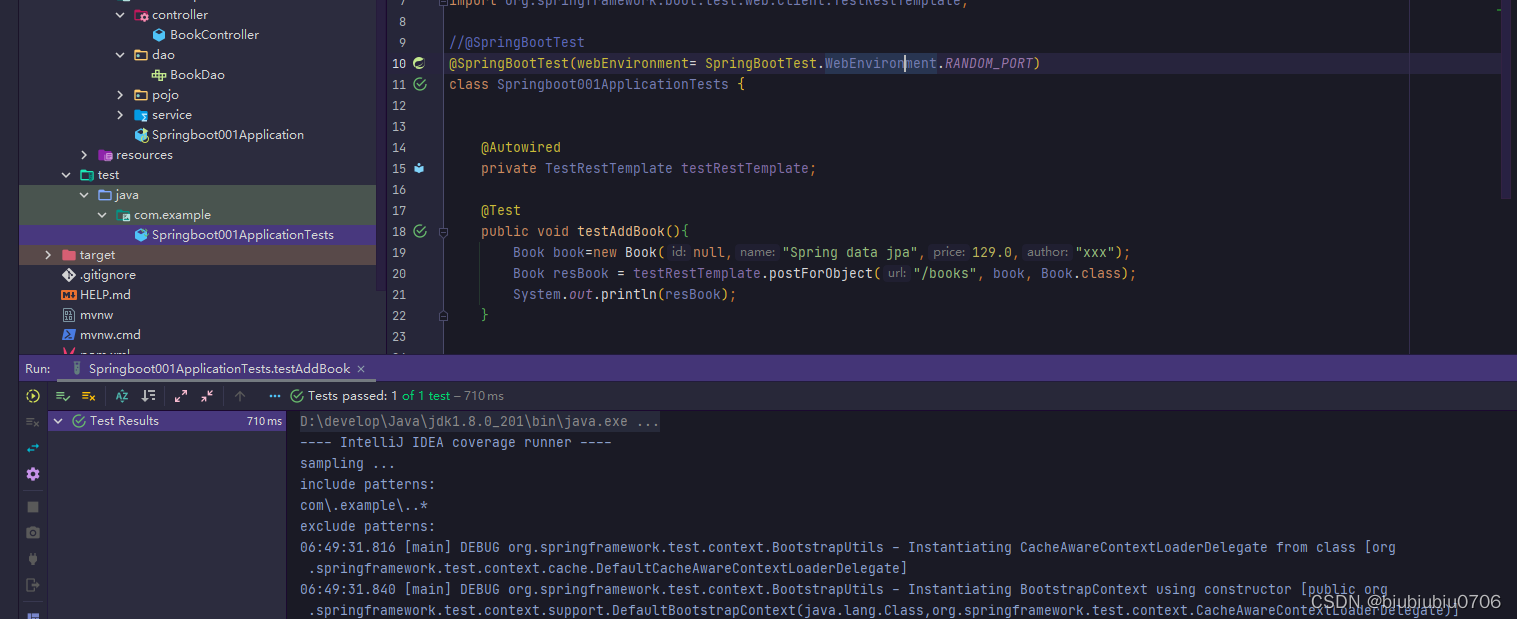

Spring整合Junit5 出了方法上加@Test之外 还可以使用
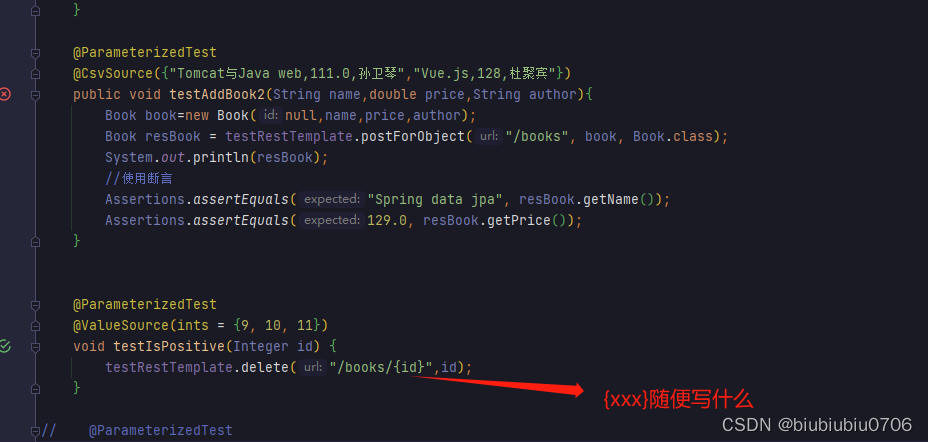
@ParameterizedTest
@CsvSource({"Tomcat与Java web,111.0,孙卫琴","Vue.js,128,杜聚宾"})
public void testAddBook2(String name,double price,String author){
    Book book=new Book(null,name,price,author);
    Book resBook = testRestTemplate.postForObject("/books", book, Book.class);
    System.out.println(resBook);
    //使用断言
    Assertions.assertEquals("Spring data jpa", resBook.getName());
    Assertions.assertEquals(129.0, resBook.getPrice());
}


@ParameterizedTest
@ValueSource(ints = {9, 10, 11})
void testIsPositive(Integer id) {
    testRestTemplate.delete("/books/{id}",id);
}

@Test
public void testList(){
    var forObject = testRestTemplate.getForObject("/books", List.class);
    forObject.forEach(System.out::println);

}
测试类
package com.example;

import com.example.pojo.Book;


import lombok.var;
import org.junit.jupiter.api.Assertions;
import org.junit.jupiter.api.Test;
import org.junit.jupiter.params.ParameterizedTest;
import org.junit.jupiter.params.provider.CsvSource;
import org.junit.jupiter.params.provider.MethodSource;
import org.junit.jupiter.params.provider.ValueSource;
import org.springframework.beans.factory.annotation.Autowired;
import org.springframework.boot.test.context.SpringBootTest;
import org.springframework.boot.test.web.client.TestRestTemplate;
import org.springframework.util.Assert;

import java.util.List;

//@SpringBootTest
@SpringBootTest(webEnvironment= SpringBootTest.WebEnvironment.RANDOM_PORT)
class Springboot001ApplicationTests {


    @Autowired
    private TestRestTemplate testRestTemplate;

    @Test
    public void testAddBook(){
        Book book=new Book(null,"Spring data jpa",129.0,"xxx");
        Book resBook = testRestTemplate.postForObject("/books", book, Book.class);
        System.out.println(resBook);
        //使用断言
        Assertions.assertEquals("Spring data jpa", resBook.getName());
        Assertions.assertEquals(129.0, resBook.getPrice());
    }

    @ParameterizedTest
    @CsvSource({"Tomcat与Java web,111.0,孙卫琴","Vue.js,128,杜聚宾"})
    public void testAddBook2(String name,double price,String author){
        Book book=new Book(null,name,price,author);
        Book resBook = testRestTemplate.postForObject("/books", book, Book.class);
        System.out.println(resBook);
        //使用断言
        Assertions.assertEquals("Spring data jpa", resBook.getName());
        Assertions.assertEquals(129.0, resBook.getPrice());
    }


    @ParameterizedTest
    @ValueSource(ints = {9, 10, 11})
    void testIsPositive(Integer id) {
        testRestTemplate.delete("/books/{id}",id);
    }

    @Test
    public void testList(){
        var forObject = testRestTemplate.getForObject("/books", List.class);
        forObject.forEach(System.out::println);

    }

//    @ParameterizedTest
//    @MethodSource("xxx某个方法") 有兴趣自己查下


    @Test
    void contextLoads() {
    }

}
3.模拟Web环境测试控制器(暂时理解成测试转发或重定向的一些接口)
不需要真正启动Web服务器,只是对Web环境进行简单的模拟.
使用@SpringBootTest(webEnvironment=WebEnvironment.RANDOM_PORT)
和@AutoConfigureMockMvc修饰测试用例
测试用例类定义接收依赖注入的MockMvc类型的实例变量,通过该实例变量可模拟浏览器来发送请求,获取返回值ModelAndView
新建测试类
package com.example;

import com.example.pojo.Book;
import lombok.var;
import org.junit.jupiter.api.Assertions;
import org.junit.jupiter.api.Test;
import org.junit.jupiter.params.ParameterizedTest;
import org.junit.jupiter.params.provider.CsvSource;
import org.junit.jupiter.params.provider.ValueSource;
import org.springframework.beans.factory.annotation.Autowired;
import org.springframework.boot.test.autoconfigure.web.servlet.AutoConfigureMockMvc;
import org.springframework.boot.test.context.SpringBootTest;
import org.springframework.boot.test.web.client.TestRestTemplate;
import org.springframework.test.web.servlet.MockMvc;

import java.util.List;


@SpringBootTest(webEnvironment= SpringBootTest.WebEnvironment.RANDOM_PORT)
@AutoConfigureMockMvc
class Springboot001ApplicationTests2 {


    @Autowired
    private MockMvc mockMvc;


}
4.测试Service
package com.example;

import com.example.pojo.Book;
import lombok.var;
import org.junit.jupiter.api.Assertions;
import org.junit.jupiter.api.Test;
import org.junit.jupiter.params.ParameterizedTest;
import org.junit.jupiter.params.provider.CsvSource;
import org.junit.jupiter.params.provider.ValueSource;
import org.springframework.beans.factory.annotation.Autowired;
import org.springframework.boot.test.autoconfigure.web.servlet.AutoConfigureMockMvc;
import org.springframework.boot.test.context.SpringBootTest;
import org.springframework.boot.test.web.client.TestRestTemplate;
import org.springframework.test.web.servlet.MockMvc;
import org.springframework.test.web.servlet.ResultActions;
import org.springframework.test.web.servlet.request.MockMvcRequestBuilders;
import org.springframework.web.servlet.ModelAndView;

import java.util.List;


@SpringBootTest(webEnvironment= SpringBootTest.WebEnvironment.RANDOM_PORT)
@AutoConfigureMockMvc
class Springboot001ApplicationTests2 {


    @Autowired
    private MockMvc mockMvc;

    @Test
    public void testIndex() throws Exception {
        //发送请求,获取控制器方法返回的ModelAndView
        ModelAndView mv = mockMvc.perform(MockMvcRequestBuilders.get("/index")).andReturn().getModelAndView();
        Object tip = mv.getModel().get("tip");//放在model的里东西
        Assertions.assertEquals("第一个SpringBoot应用", tip);
        String viewName = mv.getViewName();//返回的视图组件
        Assertions.assertEquals("hello", viewName);
    }

}





![P1311 [NOIP2011 提高组] 选择客栈(小小的也很可爱【指小动规】)](https://img-blog.csdnimg.cn/1a5544bb91dc4cdb9926907841939b40.png)
