npm install egg-jwt
'use strict';

module.exports = {
    //mysql
    mysql: {
        enable: true,
        package: 'egg-mysql'
    },
    //jwt
    jwt: {
        enable: true,
        package: 'egg-jwt'
    }
};
在app文件下创建 middleware 文件夹 在middleware 文件下创建 checktoken.js module.exports = (option, app) => {
return async function(ctx, next) {
//获取token
const token = ctx.request.header.token || ''
try{
//解密token
const userInfo = await ctx.app.jwt.verify(token, ctx.app.config.security.jwt.key)
//将信息存储到ctx上
ctx.userInfo = userInfo
await next()
}catch(err){
ctx.body={
code:401,
data:err,
msg:'token失效'
}
}
}
}
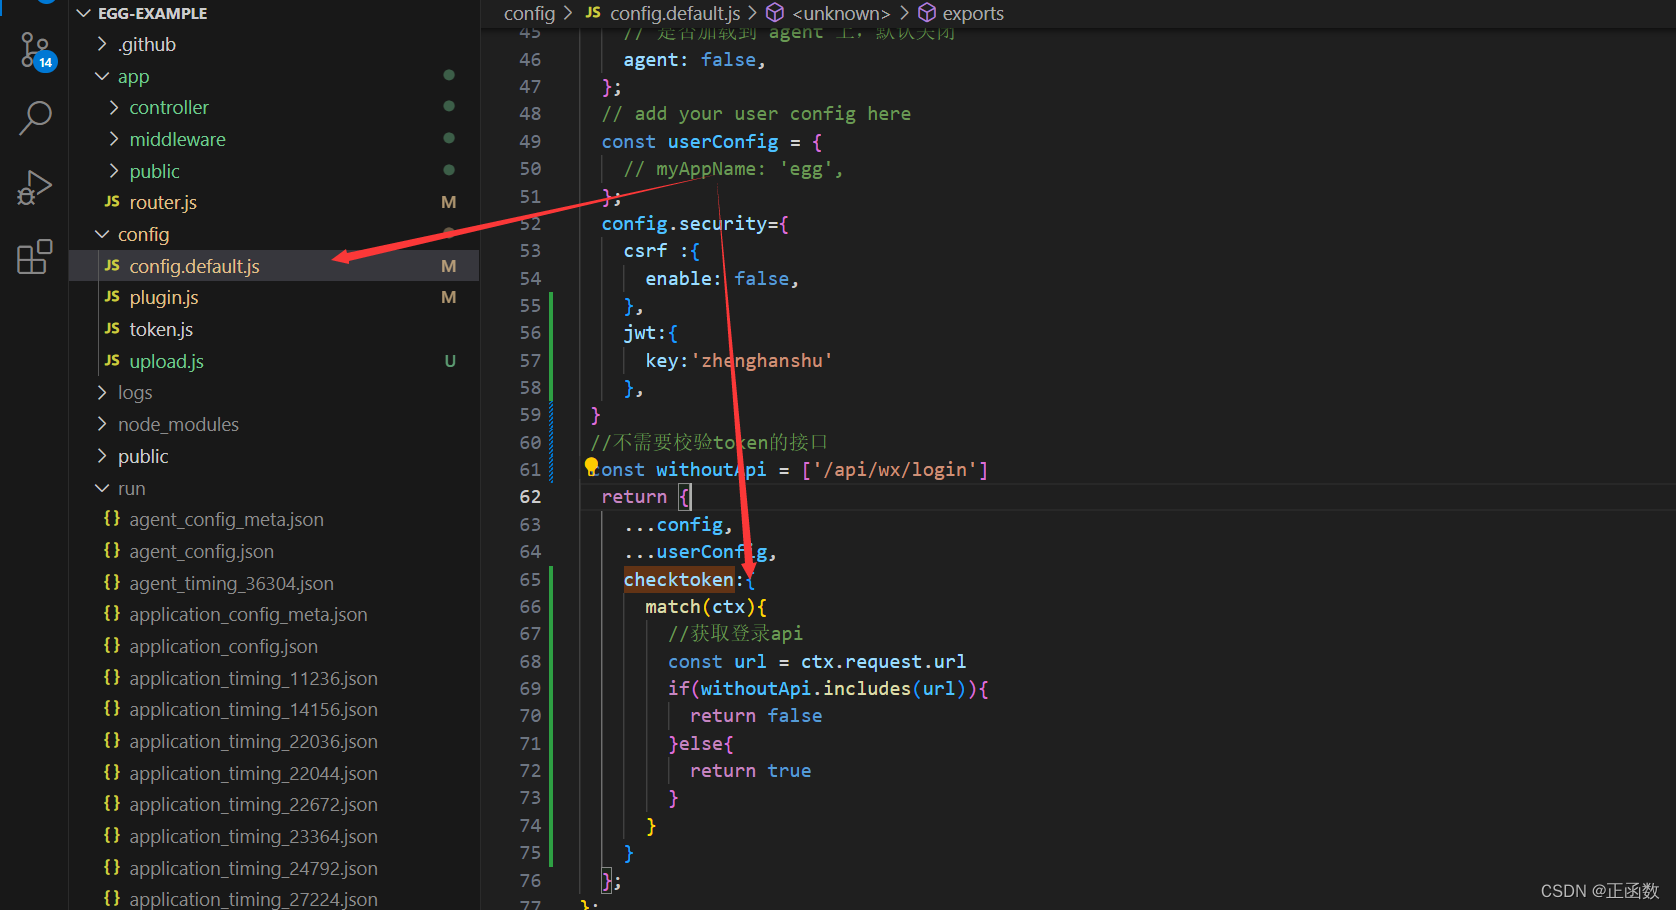
在 config.default.js 文件中进行注册 名称对应middleware 文件夹下的js名称 登录接口拿到 账号密码 后 创建token 并返回token /// 将openid 存入token中 app.config.security.jwt.key, 是一个字符串key 可以根据自己喜好随意设置
const token = app.jwt.sign({ openid }, app.config.security.jwt.key,)
    const { ctx, app } = this;
    const data = ctx.request.body
    const openid = data.openid
    const result = await app.mysql.get('wxuser', { openid: data.openid })
    //创建token
    const token = app.jwt.sign({ openid }, app.config.security.jwt.key,)
    console.log('key',  app.config.security.jwt.key)
    if (result) {
      ctx.body = {
        code: 200,
        data: token,
        msg: '登录成功'
      }
//直接返回 ctx.userInfo  因为在checktoken.js 中已经将userInfo定义在了ctx上了
        const {ctx,app} = this
		    ctx.body={
		      code:200,
		      data:{
		        data:ctx.userInfo
		      },
		      msg:'成功'
		    }
一般除了登录接口不需要token 其他接口都需要token校验 代码 checktoken:{
match(ctx){
//获取登录api
const url = ctx.request.url
if(withoutApi.includes(url)){
return false
}else{
return true
}
}
}
withoutApi 数组里面的接口都不需要经过中间件了

