4、SpringBoot_Mybatis、Druid、Juint整合

news2025/1/10 16:15:07

五、SSM整合

1.整合Mybatis

1.1springmvc 整合回顾

  • 导入坐标

    <dependency>
          <groupId>org.springframework</groupId>
          <artifactId>spring-jdbc</artifactId>
          <version>5.2.17.RELEASE</version>
        </dependency>
        <dependency>
          <groupId>org.mybatis</groupId>
          <artifactId>mybatis</artifactId>
          <version>3.5.6</version>
        </dependency>
    
        <dependency>
          <groupId>org.mybatis</groupId>
          <artifactId>mybatis-spring</artifactId>
          <version>1.3.0</version>
        </dependency>
    
        <dependency>
          <groupId>mysql</groupId>
          <artifactId>mysql-connector-java</artifactId>
          <version>8.0.29</version>
        </dependency>
    
        <dependency>
          <groupId>com.alibaba</groupId>
          <artifactId>druid</artifactId>
          <version>1.1.16</version>
        </dependency>
    
  • 创建数据库配置文件

    jdbc.url=jdbc:mysql://localhost:3306/ssm
    jdbc.driver=com.mysql.cj.jdbc.Driver
    jdbc.username=root
    jdbc.password=123456
    
  • 提供jdbcconfig

    public class DbConfig {
    
        @Value("${jdbc.url}")
        private String url;
        @Value("${jdbc.driver}")
        private String driver;
        @Value("${jdbc.username}")
        private String username;
        @Value("${jdbc.password}")
        private String password;
    
        /**
         * 配置德鲁伊连接池
         * @return
         */
        @Bean
        public DataSource dataSource(){
            DruidDataSource source = new DruidDataSource();
            source.setUrl(url);
            source.setDriverClassName(driver);
            source.setPassword(password);
            source.setUsername(username);
            return source;
        }
    
        @Bean
        public PlatformTransactionManager transactionManager(DataSource dataSource){
            DataSourceTransactionManager manager = new DataSourceTransactionManager();
            manager.setDataSource(dataSource);
            return manager;
        }
    
    }
    
  • springconfig

    @Configuration
    @ComponentScan(value = {"cn.sycoder.service","cn.sycoder.dao"})
    @EnableTransactionManagement
    @PropertySource("classpath:db.properties")
    @Import({DbConfig.class,MybatisConfig.class})
    public class SpringConfig {
    }
    
  • mybatis 交给spring管理

    public class MybatisConfig {
    
        @Bean
        public SqlSessionFactoryBean sessionFactoryBean(DataSource dataSource){
            SqlSessionFactoryBean bean = new SqlSessionFactoryBean();
            bean.setDataSource(dataSource);
            bean.setTypeAliasesPackage("cn.sycoder.domain");
            return bean;
        }
    
        @Bean
        public MapperScannerConfigurer mapperScannerConfigurer(){
            MapperScannerConfigurer configurer = new MapperScannerConfigurer();
            configurer.setBasePackage("cn.sycoder.dao");
            return configurer;
        }
    }
    

1.2SpringBoot整合Mybatis

1.2.1创建模块
  • 创建模块并填入基础信息

    在这里插入图片描述

    在这里插入图片描述

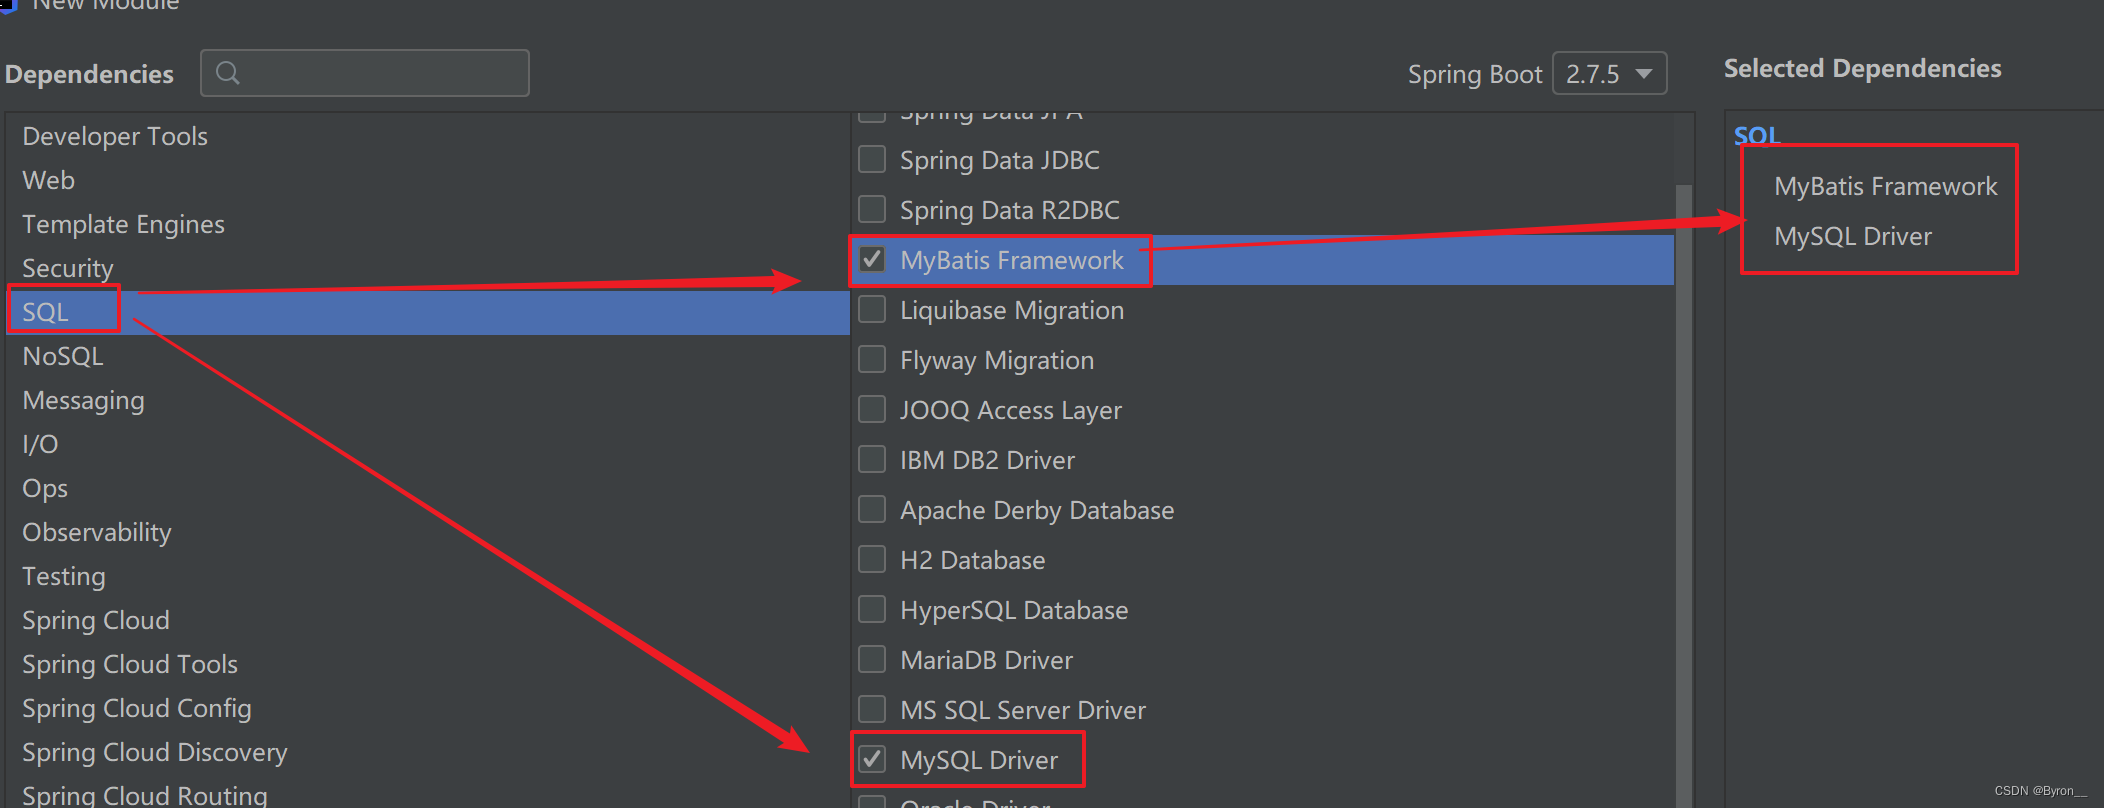
  • 添加依赖

    在这里插入图片描述

    • 等价于手动添加配置依赖

      <dependency>
          <groupId>org.mybatis.spring.boot</groupId>
          <artifactId>mybatis-spring-boot-starter</artifactId>
          <version>2.2.2</version>
      </dependency>
      
      <dependency>
          <groupId>com.mysql</groupId>
          <artifactId>mysql-connector-j</artifactId>
          <scope>runtime</scope>
      </dependency>
      
1.2.2添加配置
  • 添加mysql配置

    spring:
      datasource:
        driver-class-name: com.mysql.cj.jdbc.Driver
        url: jdbc:mysql://localhost:3306/springboot_ssm
        username: root
        password: 123456
    
1.2.3创建mapper并且测试
  • 创建 domain

    @Data
    public class Item {
        private Long id;
        private String name;
        private String remark;
    }
    
  • 创建 mapper

    @Mapper
    public interface ItemMapper {
        @Insert("insert into item(name,remark) value(#{name},#{remark})")
        void insert(Item item);
    
        @Select("select * from item where id = #{id}")
        public Item getById(Long id);
    }
    
  • 测试验证

    @SpringBootTest
    class SpringbootSsmApplicationTests {
    
        @Autowired
        ItemMapper mapper;
    
        @Test
        void contextLoads() {
            Item item = new Item();
            item.setName("上云 javase 精讲");
            item.setRemark("课程免费,知识全面");
            mapper.insert(item);
    
            System.out.println(mapper.getById(1L));
        }
    
    }
    
1.2.4总结
  • 使用SpringBoot 整合真的太方便了
    • 需要添加 mybatis 的依赖也即mybatis-spring-boot-starter
    • @Mapper 将Mapper 映射交给容器管理
    • 如果有下划线你觉得难受,添加 @Repository就可以解决(不解决也行)

2.整合Druid

2.1目前使用的数据连接池

  • 默认springboot会给我们使用 Hikari 连接池

    在这里插入图片描述

  • 整合德鲁伊

    • 导入对应starter
    • 修改配置即可

2.2导入依赖

  • 导入依赖

    <dependency>
        <groupId>com.alibaba</groupId>
        <artifactId>druid-spring-boot-starter</artifactId>
        <version>1.2.15</version>
    </dependency>
    

2.3修改配置

  • 配置如下

    spring:
      datasource:
        druid:
          url: jdbc:mysql://localhost:3306/springboot_ssm
          username: root
          password: 123456
          driver-class-name: com.mysql.cj.jdbc.Driver
    
  • 日志查看

    在这里插入图片描述

  • 配置总结

    • 导入Druid starter
    • 提供配置文件

3.整合JUnit

  • 导入依赖

    <dependency>
        <groupId>org.springframework.boot</groupId>
        <artifactId>spring-boot-starter-test</artifactId>
        <scope>test</scope>
    </dependency>
    
  • 传统方式

    @RunWith(SpringJUnit4ClassRunner.class)
    @ContextConfiguration(classes = SpringConfig.class)
    public class ItemTest {
    
        @Autowired
        IItemService service;
        @Test
        public void save(){
            Item item = new Item();
            item.setName("单元测试");
            item.setRemark("单元测试");
            item.setType("单元测试");
            boolean save = service.save(item);
            System.out.println(save);
        }
    }
    

3.1@SpringBootTest

  • 现在的使用

    @SpringBootTest
    class SpringbootSsmApplicationTests {
    
        @Autowired
        ItemMapper mapper;
    
        @Test
        void contextLoads() {
            Item item = new Item();
            item.setName("上云 javase 精讲");
            item.setRemark("课程免费,知识全面");
            mapper.insert(item);
    
            System.out.println(mapper.getById(1L));
        }
    
    }
    

4.整合其它总结

  • 导入对应的 starter
  • 需要写配置的提供配置

本文来自互联网用户投稿,该文观点仅代表作者本人,不代表本站立场。本站仅提供信息存储空间服务,不拥有所有权,不承担相关法律责任。如若转载,请注明出处:http://www.coloradmin.cn/o/1037707.html

如若内容造成侵权/违法违规/事实不符,请联系多彩编程网进行投诉反馈,一经查实,立即删除!

相关文章

力扣刷题-链表-两两交换链表中的节点

24.两两交换链表中的节点 给定一个链表&#xff0c;两两交换其中相邻的节点&#xff0c;并返回交换后的链表。你不能只是单纯的改变节点内部的值&#xff0c;而是需要实际的进行节点交换。 解题思路 采用正常模拟的方法。 建议使用虚拟头结点&#xff0c;这样会方便很多&am…

大数据从入门到精通(超详细版)之BI工具的安装

前言 嗨&#xff0c;各位小伙伴&#xff0c;恭喜大家学习到这里&#xff0c;不知道关于大数据前面的知识遗忘程度怎么样了&#xff0c;又或者是对大数据后面的知识是否感兴趣&#xff0c;本文是《大数据从入门到精通&#xff08;超详细版&#xff09;》的一部分&#xff0c;小…

iMAP——论文解析

iMAP: Implicit Mapping and Positioning in Real-Time iMAP 是第一个提出用 MLP 作为场景表征的实时 RGB-D SLAM。iMAP 采用关键帧结构和多进程&#xff0c;通过动态信息引导的像素采样来提高速度&#xff0c;跟踪频率为 10 Hz&#xff0c;全局地图更新频率为 2 Hz。隐式 MLP…

Vite打包时使用plugin解决浏览器兼容问题

一、安装Vite插件 在终端输入如下命令&#xff1a; npm add -D vitejs/plugin-legacy 二、配置config文件 在项目目录下创建vite.config.js文件夹&#xff0c;配置如下代码&#xff1a; import { defineConfig } from "vite"; import legacy from "vitejs/pl…

VM虚拟机克隆

VMware 克隆虚拟机具有以下优点&#xff1a; 快速部署&#xff1a;通过克隆虚拟机&#xff0c;可以快速创建新的虚拟机副本&#xff0c;而无需从头开始进行操作系统和应用程序的安装。这节省了大量的时间和工作量。一致性和稳定性&#xff1a;克隆虚拟机是通过复制现有虚拟机来…

DeepMind: 用ReLU取代Softmax可以让Transformer更快

注意力是人类认知功能的重要组成部分&#xff0c;当面对海量的信息时&#xff0c;人类可以在关注一些信息的同时&#xff0c;忽略另一些信息。当计算机使用神经网络来处理大量的输入信息时&#xff0c;也可以借鉴人脑的注意力机制&#xff0c;只选择一些关键的信息输入进行处理…

常见限流算法学习

文章目录 常见限流算法学习前言限流算法基本介绍固定窗口计数器限流算法计数器限流算法相关介绍计数器限流算法的实现&#xff08;基于共享变量&#xff09;计数器限流算法的实现&#xff08;基于Redis&#xff09; 滑动窗口计数器算法滑动时间窗口算法相关介绍介绍滑动时间窗口…

【软件设计师-从小白到大牛】上午题基础篇:第五章 结构化开发方法

文章目录 前言结构化设计1、基本原则真题链接2、内聚与耦合真题链接3、系统结构/模块结构真题链接用户界面设计的黄金原则&#xff08;补充&#xff09;真题链接数据流图&#xff08;补充&#xff09;真题链接系统文档&#xff08;补充&#xff09;真题链接 前言 ​ 本系列文章…

如何使用 Git 进行多人协作开发(全流程图解)

文章目录 分支管理策略1.什么是Feature Branching&#xff1f;2.Feature Branching如何工作&#xff1f; 多人协作一&#xff1a;单分支1.准备工作2.创建分支3.在分支上开发4.分支合并5.清理 多人协作二&#xff1a;多分支1.创建分支2.在分支上开发3. pull request4.清理 在软件…

/usr/bin/ld: cannot find -lmysqlcllient

文章目录 1. question: /usr/bin/ld: cannot find -lmysqlcllient2. solution 1. question: /usr/bin/ld: cannot find -lmysqlcllient 2. solution 在 使用编译命令 -lmysqlclient时&#xff0c;如果提示这个信息。 先确认一下 有没有安装mysql-devel 执行如下命令 yum inst…

js对象属性

在面向对象的语言中有一个标志&#xff0c;那就是都有类&#xff0c;通过类可以创建任意多个相同属性、方法的对象。在js中没有类的存在&#xff0c;所以js中的对象&#xff0c;相对于类语言中对象有所不同。 js中定义对象为&#xff1a;“无序属性的集合&#xff0c;其属性可…

新版绿豆视频APP视频免授权源码 V6.6插件版

新版绿豆视频APP视频免授权源码 V6.6插件版 简介&#xff1a; 新版绿豆视频APP视频免授权源码 插件版 后端插件开源&#xff0c;可直接反编译修改方便 对接苹果cms,自定义DIY页面布局&#xff01; 绿豆影视APP对接苹果cms 所有页面皆可通过后端自由定制 此版本后端源码 前…

二叉树创建、前序遍历、中序遍历、后序遍历、层序遍历

#define _CRT_SECURE_NO_WARNINGS #include<stdio.h> #include<malloc.h> #define N 100 typedef char data_t;typedef struct tree {data_t data;//存放本节点数据struct tree* l_child;//存放左孩子节点地址struct tree* r_child;//存放右孩子节点地址 }Tree;Tre…

Zig实现Hello World

1. 什么是zig 先列出一段官方的介绍: Zig is a general-purpose programming language and toolchain for maintaining robust, optimal, and reusable software. 大概意思就是说&#xff1a; Zig是一种通用编程语言和工具链&#xff0c;用于维护健壮、最佳和可重用的软件。 官…

电脑计算机xinput1_3.dll丢失的解决方法分享,四种修复手段解决问题

日常生活中可能会遇到的问题——xinput1_3.dll丢失的解决方法。我相信&#xff0c;在座的很多朋友都曾遇到过这个问题&#xff0c;那么接下来&#xff0c;我将分享如何解决这个问题的解决方法。 首先&#xff0c;让我们来了解一下xinput1_3.dll文件。xinput1_3.dll是一个动态链…

服务注册发现_高可用Eureka注册中心搭建

在微服务架构这样的分布式环境中&#xff0c;我们需要充分考虑发生故障的情况&#xff0c;所以在生产环境中必须对各个组件进行高可用部署&#xff0c;对于微服务如此&#xff0c;对于服务注册中心也一样。 问题&#xff1a; Spring-Cloud为基础的微服务架构&#xff0c;所有的…

vulhub venom

文章目录 靶场环境信息收集ftp服务二、信息利用三、任意文件上传三 sudo提权靶场环境 `vmware 靶场信息:https://www.vulnhub.com/entry/venom-1,701/ 下载地址:https://download.vulnhub.com/venom/venom.zip 新建虚拟机打开下载后的ovf文件 遇见导入失败合规性检查时,重试…

找不到d3dcompiler_43.dll,无法继续执行代码如何解决

d3dcompiler_47.dll 是一个与 DirectX 相关的动态链接库&#xff08;DLL&#xff09;&#xff0c;它包含了 DirectX 图形编译器的一些功能。当您的电脑出现 d3dcompiler_47.dll 丢失的情况时&#xff0c;可能会导致一些基于 DirectX 的游戏或应用程序无法正常运行。下面我们将介…

【刷题笔记9.24】LeetCode:只出现一次的数字

LeetCode&#xff1a;只出现一次的数字 一、题目描述 给你一个 非空 整数数组 nums &#xff0c;除了某个元素只出现一次以外&#xff0c;其余每个元素均出现两次。找出那个只出现了一次的元素。 你必须设计并实现线性时间复杂度的算法来解决此问题&#xff0c;且该算法只使…

ImportError: Java package ‘edu‘ not found, requested by alias ‘edu‘

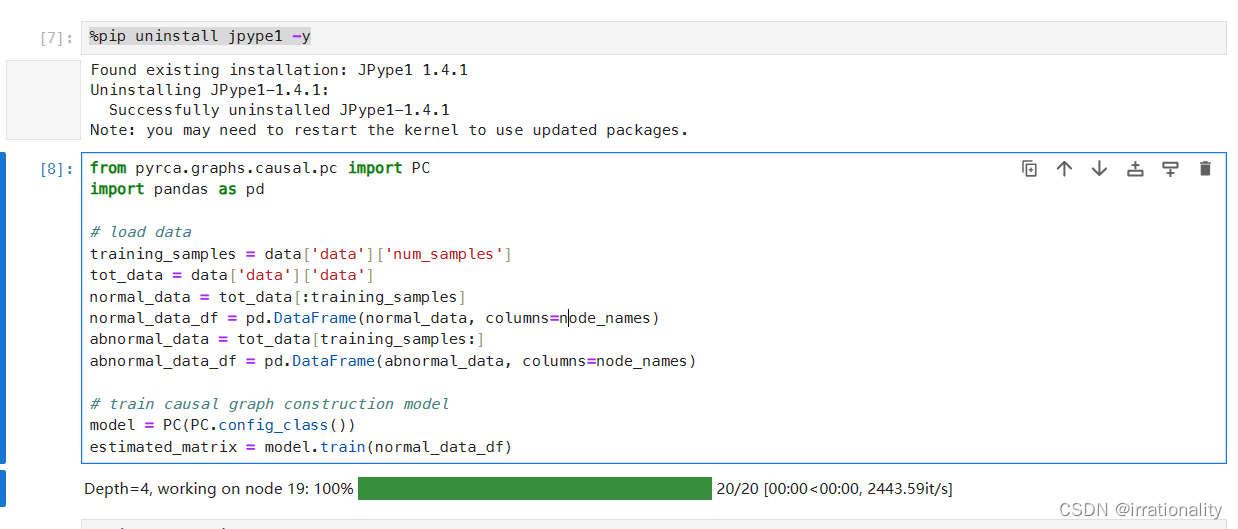
参考issue&#xff1a; https://github.com/ncbi-nlp/NegBio/issues/44 我目前的解决办法 pip uninstall jpype1 -y可以成功运行。