Zookeeper安装
Kafka是基于Zookeeper来实现分布式协调的,所以在搭建Kafka节点之前需要先搭建好Zookeeper节点。而Zookeeper和Kafka都依赖于JDK,我这里先安装好了JDK:
安装jdk
yum install java-1.8.0-openjdk* -y
1
[root@192.168.99.4 ~]# java --version
java 11.0.5 2019-10-15 LTS
Java(TM) SE Runtime Environment 18.9 (build 11.0.5+10-LTS)
Java HotSpot(TM) 64-Bit Server VM 18.9 (build 11.0.5+10-LTS, mixed mode)
[root@txy-server2 ~]#
准备好JDK环境后,然后到Linux中使用wget命令进行下载,如下:
下载zookeeper
#下载压缩包
wget https://archive.apache.org/dist/zookeeper/zookeeper-3.5.8/apache-zookeeper-3.5.8-bin.tar.gz
#解压
tar -zxvf apache-zookeeper-3.5.8-bin.tar.gz
#进入目录
cd  apache-zookeeper-3.5.8-bin
#创建id
mkdir tmp
echo 1 > tmp/myid
#复制文件
cp conf/zoo_sample.cfg conf/zoo.cfg
#修改配置文件
vi zoo.cfg (进入文件进行编辑)
修改zoo.cfg
修改如下
#将dataDir后边的路径修改为自己tmp 的路径,此处为
dataDir=./tmp

#继续添加如下内容:
server.1=192.168.100.85:2888:3888
server.2=192.168.100.86:2888:3888
server.3=192.168.100.36:2888:3888

#这里的192.168.100.36,192.168.100.85,192.168.100.86换成自己对应的主机名
注:dataDir=./tmp是缓存数据路径
2888为组成zookeeper服务器之间的通信端口3888为用来选举leader的端口 三台虚拟机都需操作
同上操作另外2台服务器、进入tmp目录,将myid里边的1改为2, 在kafka03主机下,进入tmp目录,将myid里边的1改为3。
配置zookpeeper 环境变量(可选)
export ZOOKEEPER_HOME=/root/apache-zookeeper-3.5.8-bin
export PATH=$ZOOKEEPER_HOME/bin:$PATH
#/root/apache-zookeeper-3.5.8-bin 要换为自己对应存放zookeeper-3.4.5路径
集群测试
bin/zkServer.sh stop 停止运行
bin/zkServer.sh status 查询状态
bin/zkServer.sh start 启动
启动zookeeper集群,在zookeeper-3.4.5 目录下执行 bin/zkServer.sh start ,出现如下图内容就算完成啦。
注:三台主机都要分别启动

Kafka安装
安装完Zookeeper后,接下来就可以安装Kafka了,同样的套路首先去Kafka的官网下载地址,复制下载链接:
Kafka下载
https:// zookeeper.apache.org/re leases.html#download
然后到Linux中使用wget命令进行下载,如下:
wget https://archive.apache.org/dist/kafka/2.4.1/kafka_2.11-2.4.1.tgz
 # 2.11是scala的版本,2.4.1是kafka的版本
 tar -xzf kafka_2.11-2.4.1.tgz

 cd kafka_2.11-2.4.1
 vim config/server.properties
修改配置文件:
# 指定该节点的brokerId,同一集群中的brokerId需要唯一
broker.id=0
# 指定监听的地址及端口号,该配置项是指定内网ip
listeners=PLAINTEXT://192.168.100.86:9092
# 如果需要开放外网访问,则在该配置项指定外网ip
advertised.listeners=PLAINTEXT://192.168.100.86:9092
# 指定kafka日志文件的存储目录
log.dirs=/usr/local/kafka/kafka-logs
# 指定zookeeper的连接地址,若有多个地址则用逗号分隔
zookeeper.connect=192.168.100.86:2181,192.168.100.85:2181,192.168.100.36:2181
其他2台的kafka brokerId为1和2
对应的listeners advertised.listeners ip对应本机的ip如 192.168.100.85,192.168.100.36
在完成配置文件的修改后,为了方便使用Kafka的命令脚本,我们可以将Kafka的bin目录配置到环境变量中
[root@192.168.99.1 ~]# vim /etc/profile
export KAFKA_HOME=/root/kafka_2.11-2.4.1
export PATH=$PATH:$KAFKA_HOME/bin
[root@192.168.99.1 ~]# source /etc/profile  # 让配置生效
这样就可以使用如下命令启动Kafka了:
启动Kafka
kafka-server-start.sh /root/kafka_2.11-2.4.1/config/server.properties &
执行以上命令后,启动日志会输出到控制台,可以通过日志判断是否启动成功,也可以通过查看是否监听了9092端口来判断是否启动成功:
netstat -lntp |grep 9092
配置修改完成后,按之前所介绍的步骤启动这两个节点。启动成功后进入Zookeeper中,在/brokers/ids下有相应的brokerId数据代表集群搭建成功:
[root@192.168.99.4 ~]# /usr/local/zookeeper/bin/zkCli.sh
[zk: localhost:2181(CONNECTED) 4] ls /brokers/ids
[0, 1, 2]
[zk: localhost:2181(CONNECTED) 5]
es安装
下载ElasticSearch
官方下载地址:https://www.elastic.co/cn/downloads/elasticsearch
创建ES需要的用户
root权限是直接启动不了ES的,所以需要创建启动的用户
# 1、创建新的用户
adduser es
# 2、设置用户密码
passwd es

# 4、切换用户
su es
cd
到创建用户目录底下
切换用户 root 下载es
wget https://artifacts.elastic.co/downloads/elasticsearch/elasticsearch-7.2.1-linux-x86_64.tar.gz
授权包
chown -R es /home/es
切换es
解压包
tar -zxvf elasticsearch-7.2.1-linux-x86_64.tar.gz
配置ElastaicSearch配置文件
本例为单节点
cd  elasticsearch-7.2.1/config
vi elasticsearch.yml

#1.集群名称,需确保不同的环境中集群的名称不重复,否则节点可能会连接到错误的集群上
cluster.name: luwei-es-app

#2.节点名称,默认情况下当节点启动时Elasticsearch将随机在一份3000个名字的列表中随机指定一个。如果机器上只允许运行一个集群Elasticsearch节点,可以用${HOSTNAME}设置节点的名称为主机节点。节点默认名称为机器的主机名
node.name: node-1

#3.网络设置,绑定服务到指定IP(提供服务的网口)
network.host: 0.0.0.0
http.port: 9200

#4.集群主节点信息
cluster.initial_master_nodes: [“node-1”]
系统设置
设置内核参数
#Elasticsearch mmapfs默认使用目录来存储其索引。默认的操作系统对mmap计数的限制可能太低,这可能会导致内存不足异常。
vi /etc/sysctl.conf
vm.max_map_count=262144

sysctl -p #执行命令sysctl -p生效
当前用户每个进程最大同时打开文件数
#查看硬限制
ulimit -Hn
ulimit -Sn
#通常情况下如果值是4096启动ES时会报如下错误
#max file descriptors [4096] for elasticsearch process is too low, increase to at least [65536]
修改配置文件
vi /etc/security/limits.conf
* hard nofile 65537
* soft nofile 65536

sysctl -p
用户的软限制为65536,硬限制为65536,即用户不管它开启多少个shell能打开的最大文件数量为65536
启动ElasticSearch
启动需要使用专门用户,本例启动es的用户为 “es”,如果使用root启动会报错,会生成一些只有root用户才能操作的文件,这会导致即使正确启动仍然会报错
#使用elasticsearch用户
su es
#进入ES启动脚本目录
cd /home/es/elasticsearch-7.2.1/bin
#启动ES, -d参数是为了让ES服务在后台运行
./elasticsearch -d
查看es信息
通过如下命令或通过浏览器打开http://11.34.4.4:9200
给es设置用户名和密码
设置elasticsearch账户密码,并且允许外部访问
生成CA证书 bin目录下执行
到es的bin目录下
 ./elasticsearch-certutil ca
 # 提示设置密码直接回车就行
cd ..
ls #这里在elasticsearch根目录已经可以看到 elastic-stack-ca.p12这个文件了
然后使用刚刚生成的证书,生成p12秘钥 ,进入bin目录执行
./elasticsearch-certutil cert --ca /home/es/elasticsearch-7.2.1/elastic-stack-ca.p12
 # 提示设置密码直接回车就行
# 进入/elasticsearch
cd /config
mkdir certs
cp /home/es/elasticsearch-7.2.1//elastic-certificates.p12 certs #拷贝
修改 elasticsearch.yml
# ------------------------------------ Node ------------------------------------
#
# Use a descriptive name for the node:
#
node.name: node-1
#
# Add custom attributes to the node:
#
#node.attr.rack: r1
#

# ---------------------------------- Network -----------------------------------
#
# Set the bind address to a specific IP (IPv4 or IPv6):
#
network.host: 0.0.0.0
#
# Set a custom port for HTTP:
#
http.port: 9200
#transport.host: localhost
#transport.tcp.port: 9300
#
# For more information, consult the network module documentation.
#
# ---------------------------------- Discovery -----------------------------------
cluster.initial_master_nodes: ["node-1"]

xpack.security.enabled: true
#xpack.licence.self_generated.type: basic
xpack.security.transport.ssl.enabled: true
xpack.security.transport.ssl.verification_mode: certificate
xpack.security.transport.ssl.keystore.path: certs/elastic-certificates.p12
xpack.security.transport.ssl.truststore.path: certs/elastic-certificates.p12
修改完配置文件之后重新启动elasticsearch
./elasticsearch-setup-passwords interactive # 在elasticsearch/bin目录下执行该命令,设置密码
./elasticsearch-setup-passwords interactive # 在elasticsearch/bin目录下执行该命令,设置密码
下图所示,这里我外部已经可以访问9200了,并且访问需要账号密码

安装 Kibana
下载kibana
官网下载linux版本:https://www.elastic.co/cn/downloads/kibana
wget https://artifacts.elastic.co/downloads/kibana/kibana-7.2.1-linux-x86_64.tar.gz

tar -zxvf kibana-7.2.1-linux-x86_64.tar.gz
配置kibana
#进入kibana配置文件目录
cd  kibana-7.2.1/config
#编辑配置文件kibana.yml
vi kibana.yml


#服务端口
server.port: 5601

#服务IP地址
server.host: “0.0.0.0”

#服务名称
server.name: “luwei_kibana”

#ElasticSearch实例地址
elasticsearch.hosts: [“http://127.0.0.1:9200”]
启动kibana
#切换到elasticsearch用户
su es
#启动Kibana
nohup kibana-7.2.1/bin/kibana &
设置kibana的开机启动
cd /etc/init.d 创建文件
vim kibana
#!/bin/bash
#chkconfig: 345 63 37
#description: kibana
#processname:kibana-7.13.2

export ES_HOME=/home/es/kibana-7.2.1

case $1 in
        start)
                su es<<!
                cd $ES_HOME
                ./bin/kibana -p pid &
                exit
!
                echo "kibana is started"
                ;;
        stop)
                pid=`cat $ES_HOME/pid`
                kill -9 $pid
                echo "kibana is stopped"
                ;;
        restart)
                pid=`cat $ES_HOME/pid`
                kill -9 $pid
                echo "kibana is stopped"
                sleep 1
                su es<<!
                cd $ES_HOME
                ./bin/kibana -p pid &
                exit
!
                echo "kibana is started"
        ;;
    *)
        echo "start|stop|restart"
        ;;
esac
exit 0
#修改文件权限;
chmod 777kibana

#添加和删除服务并设置启动方式;
#添加系统服务
chkconfig --add kibana
#删除系统服务
chkconfig --del kibana


#关闭和启动服务;
#启动
service kibana  start
#停止
service kibana  stop
#重启
service kibana  restart

#设置服务是否开机启动;
#开启
chkconfig kibana  on
#关闭
chkconfig kibana  off
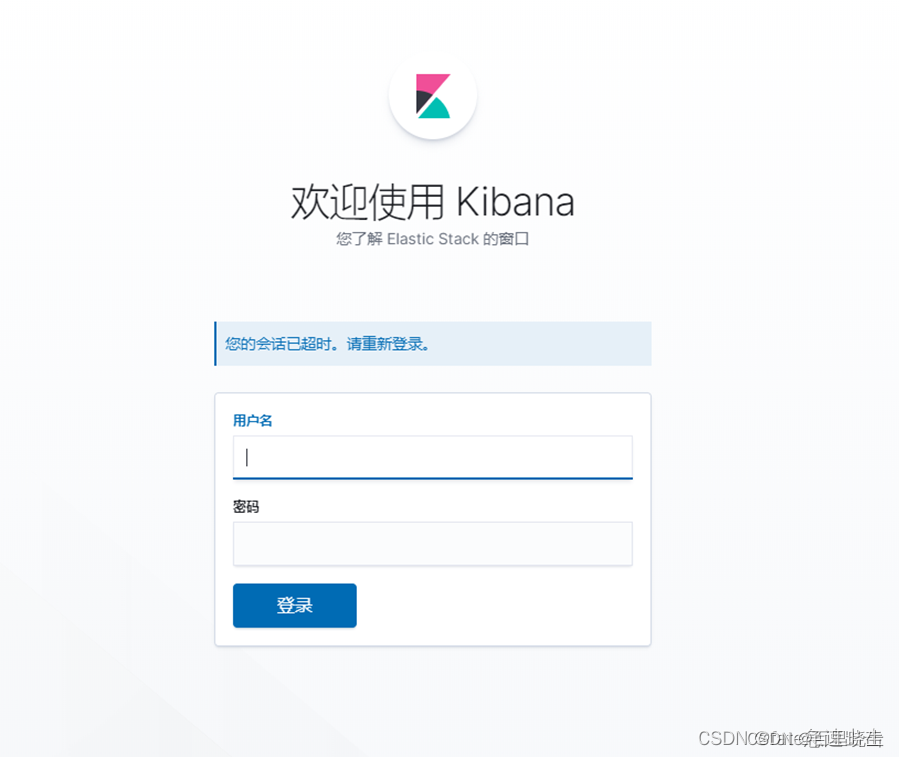
设置kibana账户密码
编辑 kibana.yml
# The URLs of the Elasticsearch instances to use for all your queries.
elasticsearch.hosts: ["http://localhost:9200"]

# When this setting's value is true Kibana uses the hostname specified in the server.host
# setting. When the value of this setting is false, Kibana uses the hostname of the host
# that connects to this Kibana instance.
#elasticsearch.preserveHost: true

# Kibana uses an index in Elasticsearch to store saved searches, visualizations and
# dashboards. Kibana creates a new index if the index doesn't already exist.
#kibana.index: ".kibana"

# The default application to load.
#kibana.defaultAppId: "home"

# If your Elasticsearch is protected with basic authentication, these settings provide
# the username and password that the Kibana server uses to perform maintenance on the Kibana
# index at startup. Your Kibana users still need to authenticate with Elasticsearch, which
# is proxied through the Kibana server.
elasticsearch.username: "elastic"
elasticsearch.password: "elastic"
ik分词器
下载对应版本的分词器
https://github.com/medcl/elasticsearch-analysis-ik/releases
根据上面的版本下载7.2.1
进入elasticsearch-7.2.1的plugins目录依次执行命令:
$ cd plugins/
# 创建ik目录
[sirxy@localhost plugins]$ mkdir ik
# 进入ik目录
[sirxy@localhost plugins]$ cd ik
# 下载es对应版本的ik分词器
[sirxy@localhost plugins]$ wget https://github.com/medcl/elasticsearch-analysis-ik/releases/download/v7.2.1/elasticsearch-analysis-ik-7.2.1.zip
# 解压zip包
[sirxy@localhost plugins]$ unzip elasticsearch-analysis-ik-7.2.1.zip
# 解压完成后,删掉zip包
[sirxy@localhost plugins]$ rm -rf elasticsearch-analysis-ik-7.2.1.zip
然后重启elasticsearch,使其生效。
logstash的安装
下载logstash版本 7.2.1
下载推荐到elastic中文社区,里面有elastic系列里所有的开源产品下载链接,地址如下:
https://elasticsearch.cn/download/
解压 安装包:
tar zxvf logstash-7.2.1.tar.gz
配置kafka es
新建 myconf.conf配置文件 编辑如下:
input {
        kafka {
                bootstrap_servers => "x.x.x.x:9092,x.x.x.x:9092,x.x.x.x:9092"
                group_id => "kafka_logstash"
                topics => "eoplog"
                consumer_threads => 5
                auto_commit_interval_ms => "1500"
        auto_offset_reset => "earliest"
                codec => "json"
                type => "eoplog"
                client_id => "kafka_logstash"

        }
}
output {
        elasticsearch{
		#es的地址
                hosts => ["x.x.113.15:9200"]
                index => "eoplog-%{+YYYY.MM.dd}"
                 user => "elastic"
password => "elastic"
        }
#       stdout { codec => rubydebug }
}
置文件启动命令如下:
nohup bin/logstash -f myconf.conf &
Logstash是以管道方式运行的,一个Logstash实例可以启动多个管道
每个管道包含输入(input),输出(output),过滤器(filter)三个部分,这种结构同时也体现在.conf配置文件上,如下:
#this is a comment. You should use comments to describe
# parts of your configuration.
# 输入插件配置处
input {
  ...
}

# 过滤器插件配置处
filter {
  ...
}
# 输出插件配置处
output {
  ...
}

在实际使用中,需要根据实际场景去选择不同的插件配置到配置文件中。
自动装载配置文件
在使用之前,先把Logstash自动加载配置文件功能打开,以便每次修改完conf配置文件,自动读取配置
 cd ./logstash-7.2.1/conf
 vi logstash.yml
# Periodically check if the configuration has changed and reload the pipeline
# This can also be triggered manually through the SIGHUP signal
#
 config.reload.automatic: true
#
# How often to check if the pipeline configuration has changed (in seconds)
#
# config.reload.interval: 3s
安装Redis
安装gcc依赖
由于 redis 是用 C 语言开发,安装之前必先确认是否安装 gcc 环境(gcc -v),如果没有安装,执行以下命令进行安装
[root@localhost local]# yum install -y gcc
下载并解压安装包
[root@localhost local]# wget http://download.redis.io/releases/redis-6.2.5.tar.gz

[root@localhost local]# tar -zxvf redis-6.2.5.tar.gz
cd切换到redis解压目录下,执行编译
[root@localhost local]# cd redis-6.2.5

[root@localhost redis-6.2.5]# make
安装并指定安装目录
[root@localhost redis-6.2.5]# make install PREFIX=/usr/local/redis
启动服务
从 redis 的源码目录中复制 redis.conf 到 redis 的安装目录
[root@localhost bin]# cp /usr/local/redis-6.2.5/redis.conf /usr/local/redis/bin/
修改 redis.conf 文件,把 daemonize no 改为 daemonize yes
[root@localhost bin]# vi redis.conf
去掉前面的注释,并修改为所需要的密码:

requirepass myPassword (其中myPassword就是要设置的密码)
#bind 127.0.0.1 -::1
## 允许任何IP访问
bind 0.0.0.0
,把 daemonize no 改为 daemonize yes
设置开机启动
添加开机启动服务
[root@localhost bin]# vi /etc/systemd/system/redis.service
[Unit]
Description=redis-server
After=network.target

[Service]
Type=forking
ExecStart=/usr/local/redis/bin/redis-server /usr/local/redis/bin/redis.conf
PrivateTmp=true

[Install]
WantedBy=multi-user.target
注意:ExecStart配置成自己的路径
设置开机启动
[root@localhost bin]# systemctl daemon-reload

[root@localhost bin]# systemctl start redis.service

[root@localhost bin]# systemctl enable redis.service







![计算机视觉与深度学习-卷积神经网络-卷积图像去噪边缘提取-图像去噪 [北邮鲁鹏]](https://img-blog.csdnimg.cn/364f66a79e0546ddafbdcdc104d4fea0.png)