文章目录
- dockerfile备忘
- ENTRYPOINT ["bash", "/app/startProject.sh"]
- 常用docker指令
- web服务脚本
- 访问接口
- 文件
给一张图片,输出图片描述。
dockerfile备忘
只有从dockerfile制作的镜像才有分层结构,加速传输,故第一步需要编写dockerfile,过程是不断调试的,下面是一些制作过程中写的dockerfile片段,可以参考一下语句和写法:
FROM nvidia/cuda:11.6.2-cudnn8-devel-ubuntu18.04
RUN apt-get update && apt-get install -y wget git
RUN wget http://mirrors.tuna.tsinghua.edu.cn/anaconda/miniconda/Miniconda3-latest-Linux-x86_64.sh -O /tmp/conda.sh && \
    bash /tmp/conda.sh -b && rm /tmp/conda.sh
COPY ./deps/ /deps
RUN cp /deps/.condarc /root/
ENV DEBIAN_FRONTEND=noninteractive
# 安装 tzdata 包并设置时区为上海(无交互)
RUN apt-get update && \
    apt-get install -y tzdata && \
    ln -sf /usr/share/zoneinfo/Asia/Shanghai /etc/localtime && \
    echo "Asia/Shanghai" > /etc/timezone
RUN apt-get install -y curl
RUN ~/miniconda3/bin/conda init bash && . ~/.bashrc
RUN . ~/.bashrc && curl -s https://packagecloud.io/install/repositories/github/git-lfs/script.deb.sh |  bash && \
    apt-get install -y git-lfs && git-lfs install
RUN apt-get install -y python3-pip
# 打印~/.bashrc
RUN . ~/.bashrc && pip config set global.index-url https://pypi.tuna.tsinghua.edu.cn/simple
RUN . ~/.bashrc && git clone --recurse-submodules https://github.com/lkwq007/stablediffusion-infinity && \
    cd stablediffusion-infinity &&  ~/miniconda3/bin/conda env create -f environment.yml
#RUN . ~/.bashrc && ~/miniconda3/bin/conda activate sd-inf && \
#    ~/miniconda3/bin/conda install -c conda-forge -y diffusers transformers ftfy accelerate && \
#    ~/miniconda3/bin/conda update -c conda-forge -y diffusers transformers ftfy accelerate && \
#    pip install -U gradio


FROM kevinchina/deeplearning:sd_base_cuda116
RUN . ~/.bashrc && conda activate sd-inf && pip install  clip-interrogator==0.6.0  && pip install fastapi uvicorn python-multipart requests opencv-python numpy
RUN . ~/.bashrc && conda activate sd-inf && cd /deps/ && python t.py

FROM kevinchina/deeplearning:sd_base_cuda116clip
RUN . ~/.bashrc && mkdir /app/ && apt-get install -y libopencv-dev
COPY ./deps/main_clip.py /app/


FROM kevinchina/deeplearning:sd_base_cuda116clip1
RUN . ~/.bashrc && echo "conda activate sd-inf" >>~/.bashrc
RUN . ~/.bashrc && pip uninstall clip-interrogator -y
RUN . ~/.bashrc && git clone https://github.com/xddun/clip-interrogator.git


FROM kevinchina/deeplearning:sd_base_cuda116clip4
WORKDIR /app
RUN rm /app/main_clip.py
COPY ./deps/main_clip.py /app/
COPY ./deps/startProject.sh /app/
EXPOSE 8001
ENTRYPOINT ["bash", "/app/startProject.sh"]
比较重要的是最后一个dockerfile,可以通过kevinchina/deeplearning:sd_base_cuda116clip4作为基础镜像。
FROM kevinchina/deeplearning:sd_base_cuda116clip4
WORKDIR /app
RUN rm /app/main_clip.py
COPY ./deps/main_clip.py /app/
COPY ./deps/startProject.sh /app/
EXPOSE 8001
ENTRYPOINT ["bash", "/app/startProject.sh"]
ENTRYPOINT [“bash”, “/app/startProject.sh”]
启动web服务的脚本:
#!/bin/bash
set -u
cd /app/ && nohup /root/miniconda3/envs/sd-inf/bin/python main_clip.py >/log.alg  2>&1 &
echo "----------------------------------------"
echo "running..."
while [ 1 ]
do
    echo "sleep"
    sleep 3600
done
常用docker指令
安装docker nvidia支持(确认有docker后):
# 1、添加源
distribution=$(. /etc/os-release;echo $ID$VERSION_ID)
sudo curl -s -L https://nvidia.github.io/nvidia-docker/gpgkey | sudo apt-key add -
sudo curl -s -L https://nvidia.github.io/nvidia-docker/$distribution/nvidia-docker.list | sudo tee /etc/apt/sources.list.d/nvidia-docker.list
# 2、安装并重启
sudo apt-get update && sudo apt-get install -y nvidia-container-toolkit
sudo systemctl restart docker
给docker image命名:
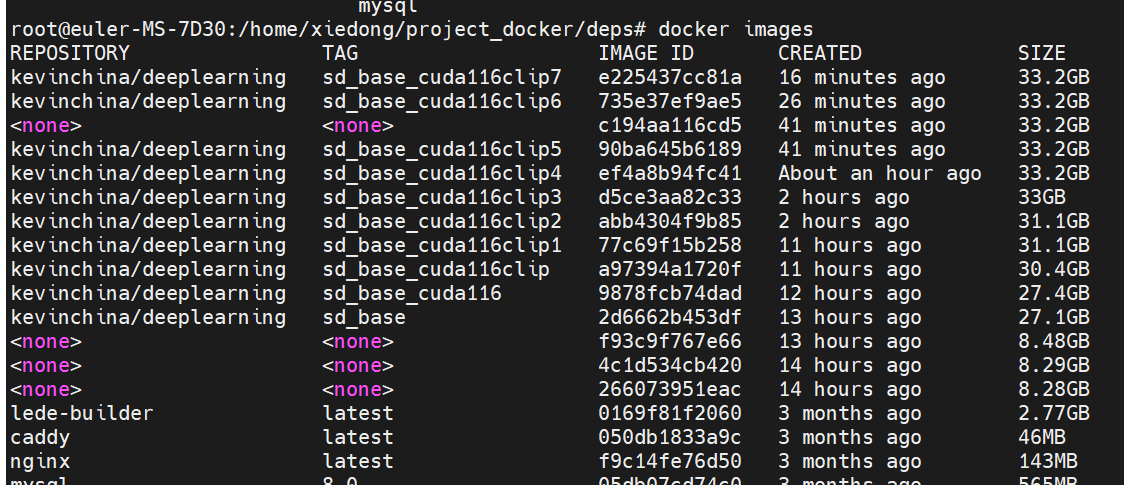
docker tag e225437cc81a kevinchina/deeplearning:sd_base_cuda116clip7
在docker build的时候直接给名字(那个点是宿主机当前目录):
docker build -f Dockerfile -t kevinchina/deeplearning:sd_base_cuda116clip7 .
在后台直接执行docker web服务(因为dockerfile里有ENTRYPOINT [“bash”, “/app/startProject.sh”]):
docker run -d --gpus all -p 8001:8001 kevinchina/deeplearning:sd_base_cuda116clip7
以交互形态进入刚才启动的容器:
docker ps # 查看容器hash id,不是镜像hash id
docker exec -it 4209c872c48b bash # 进入后可以去查看日志/log.alg
向docker center推送镜像:
docker push kevinchina/deeplearning:sd_base_cuda116clip7
web服务脚本
# -*- coding:utf-8 -*-
import traceback
from typing import List, Optional, Union
import uvicorn
from fastapi.middleware.cors import CORSMiddleware
from fastapi import FastAPI, File, Form, UploadFile
import cv2
import numpy as np
from PIL import Image
from clip_interrogator import Config, Interrogator

ci = Interrogator(Config(clip_model_name="ViT-L-14/openai"))

app = FastAPI(
    title='FastAPI Tutorial',
    description='FastAPI教程',
    version='1.0.0',
    docs_url='/docs',
    redoc_url='/redocs',
)
app.add_middleware(
    CORSMiddleware,
    allow_origins=["*"],
    allow_credentials=True,
    allow_methods=["*"],
    allow_headers=["*"],
)


@app.post("/files/")
async def alg_file(
        fileb: UploadFile = File(...)
):
    try:
        img = cv2.imdecode(np.fromstring(fileb.file.read(), np.uint8), cv2.IMREAD_COLOR)
        pil_image = Image.fromarray(cv2.cvtColor(img, cv2.COLOR_BGR2RGB))
        return ci.interrogate(pil_image)
    except:
        traceback.print_exc()
        return "-1"


if __name__ == '__main__':
    uvicorn.run('main_clip:app', host='0.0.0.0', port=8001, reload=False, workers=1)
访问接口
容器启动是需要加载模型的,故需要访问要等1分钟后,比较稳定。
import requests
url = "http://0.0.0.0:8001/files/"
with open("1.png", "rb") as f:
    res = requests.post(url=url, files={"fileb": f}, timeout=None)
    print(res.json())
访问成功:
root@euler-MS-7D30:/home/xiedong/project_docker/deps# python3 req.py
arafed kingfisher with open beak and long bill, featured on unsplash, screaming face, colorised, sauron, with a very large mouth, that has the form of a dragonfly, perfect face template, kenku, visibly angry, closeup of the face, sneer, devouring
文件
可以这里下载docker的一些文件:
https://download.csdn.net/download/x1131230123/88359051


