一. 使用UICollectionView制作书架
我想的书架是那种每一排都可以滑动的。暂时的想法是使用两个collectionView,第一个collectionView布置书架的每一排,第二个布置每一排内部的书。
- 布置外部的colletionView,这部分很简单,item的大小就是屏幕的宽和书的高。
- (void) initCollectionView {
    UICollectionViewFlowLayout* layout = [[UICollectionViewFlowLayout alloc] init];
    layout.scrollDirection = UICollectionViewScrollDirectionVertical;
    layout.itemSize = CGSizeMake(KSreenWidth, 120);
    layout.minimumLineSpacing = 35;
    layout.sectionInset = UIEdgeInsetsMake(0, 0, 0, 0);

    self.collectionView = [[UICollectionView alloc] initWithFrame:self.view.bounds collectionViewLayout:layout];
    self.collectionView.delegate = self;
    self.collectionView.dataSource = self;

    [self.collectionView registerClass:[BookcaseFaceCell class] forCellWithReuseIdentifier:@"bookcaseFace"];

    [self.view addSubview:self.collectionView];
}

- (NSInteger) collectionView:(UICollectionView *)collectionView numberOfItemsInSection:(NSInteger)section {
    return 6;
}

- (__kindof UICollectionViewCell*) collectionView:(UICollectionView *)collectionView cellForItemAtIndexPath:(NSIndexPath *)indexPath {
    BookcaseFaceCell* cell = [self.collectionView dequeueReusableCellWithReuseIdentifier:@"bookcaseFace" forIndexPath:indexPath];
    return cell;
}
- 自定义cell,这个cell需要使用collectionView布局书架中的每一本书。注意这个collectionView是横向排列的。
cell.h
#import <UIKit/UIKit.h>

NS_ASSUME_NONNULL_BEGIN

@interface BookcaseFaceCell : UICollectionViewCell
<
UICollectionViewDelegate,
UICollectionViewDataSource
>

@property (nonatomic, strong) UICollectionView* collectionView;

@end

NS_ASSUME_NONNULL_END
cell.m
#import "BookcaseFaceCell.h"
#import "BookcaseCell.h"

#define KSreenWidth [UIScreen mainScreen].bounds.size.width

@implementation BookcaseFaceCell

- (instancetype) initWithFrame:(CGRect)frame {
    if (self = [super initWithFrame:frame]) {
        [self initCollectionView];
    }
    return self;
}

- (void) initCollectionView {
    UICollectionViewFlowLayout* layout = [[UICollectionViewFlowLayout alloc] init];
    layout.itemSize = CGSizeMake((KSreenWidth - 60) / 4, 120);
    layout.scrollDirection = UICollectionViewScrollDirectionHorizontal;
    layout.sectionInset = UIEdgeInsetsMake(0, 20, 0, 20);

    self.collectionView = [[UICollectionView alloc] initWithFrame:self.bounds collectionViewLayout:layout];
    self.collectionView.delegate = self;
    self.collectionView.dataSource = self;
    self.collectionView.showsHorizontalScrollIndicator = NO;

    [self.collectionView registerClass:[BookcaseCell class] forCellWithReuseIdentifier:@"bookcase"];

    [self.contentView addSubview:self.collectionView];
}

- (NSInteger) collectionView:(UICollectionView *)collectionView numberOfItemsInSection:(NSInteger)section {
    return 9;
}

- (__kindof UICollectionViewCell*) collectionView:(UICollectionView *)collectionView cellForItemAtIndexPath:(NSIndexPath *)indexPath {
    BookcaseCell* cell = [self.collectionView dequeueReusableCellWithReuseIdentifier:@"bookcase" forIndexPath:indexPath];

    if (indexPath.row % 2 == 0) {
        [cell.imageView setImage:[UIImage imageNamed:@"book.jpeg"]];
    } else {
        [cell.imageView setImage:[UIImage imageNamed:@"book2.jpeg"]];
    }

    return cell;
}

@end
- 展示书面的cell,就是一个普通的展示图片的cell。
cell.h
#import <UIKit/UIKit.h>

NS_ASSUME_NONNULL_BEGIN

@interface BookcaseCell : UICollectionViewCell

@property (nonatomic, strong) UIImageView* imageView;

@end

NS_ASSUME_NONNULL_END
cell.m
#import "BookcaseCell.h"

@implementation BookcaseCell

- (instancetype) initWithFrame:(CGRect)frame {
    if (self = [super initWithFrame:frame]) {
        self.imageView = [[UIImageView alloc] initWithFrame:self.contentView.bounds];
        [self.contentView addSubview:self.imageView];
    }
    return self;
}

@end
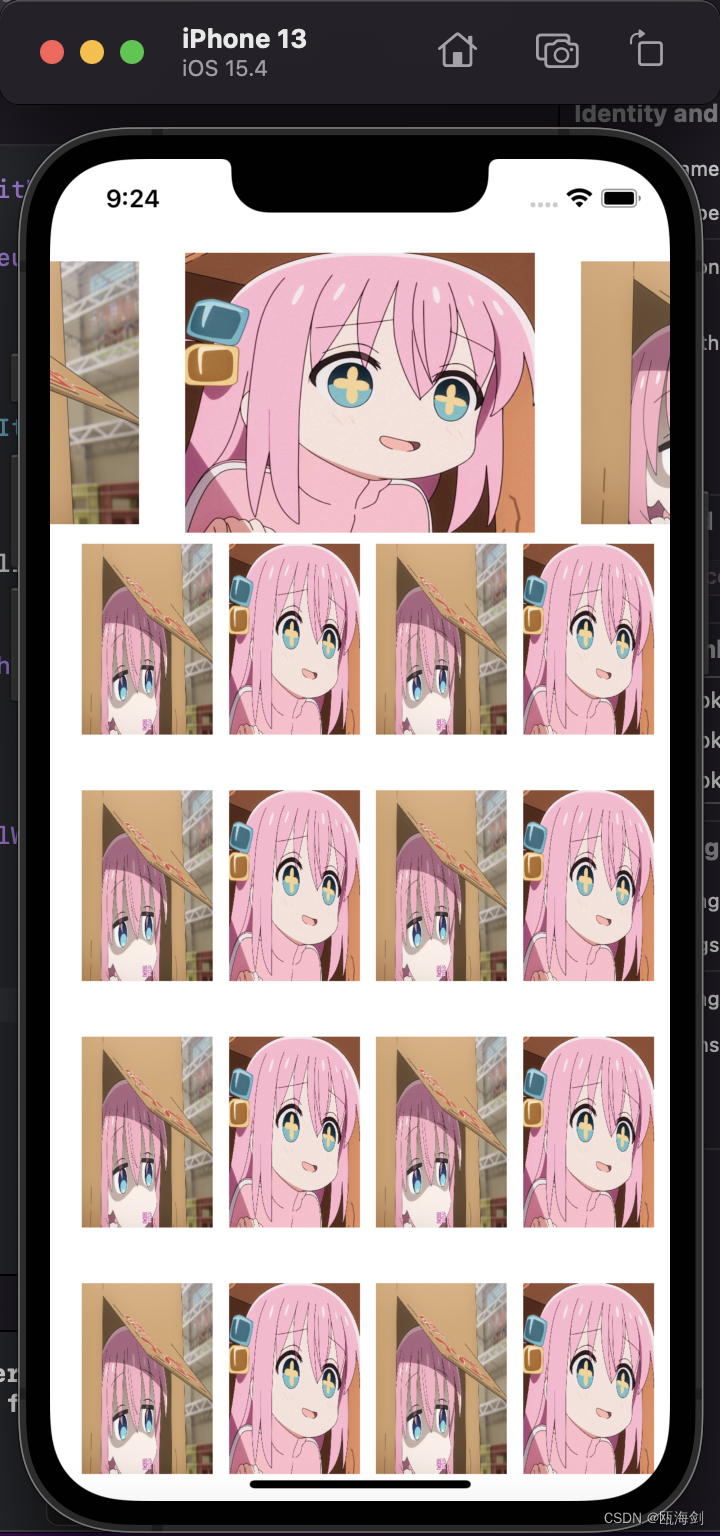
结果展示:

二. 使用CollectionView制作轮播推荐图
我想要的轮播推荐图需要那种图片距离屏幕中心越近,就会越来越大的那种效果。
在这里我们需要自定义我们的layout。
基本思想是将远离中心的图片缩小,以屏幕中心图片的大小做为标准计算布局。
- 新建MyLayout类继承自UICollectionViewFlowLayout。
#import <UIKit/UIKit.h>

NS_ASSUME_NONNULL_BEGIN

@interface MyLayout : UICollectionViewFlowLayout

@end

NS_ASSUME_NONNULL_END
- 重写
prepareLayout方法,开启collectionView的刷新。注意计算第一个图片的位置,通过设置collectionView的contenyInset来确保第一张图片位于屏幕中心。
- (void) prepareLayout {
    [super prepareLayout];

    self.scrollDirection = UICollectionViewScrollDirectionHorizontal;

    // 计算第一个图片所在的位置
    CGFloat margin = (self.collectionView.frame.size.width - self.itemSize.width) / 2;
    self.collectionView.contentInset = UIEdgeInsetsMake(0, margin, 0, margin);

}

// 开启刷新
- (BOOL) shouldInvalidateLayoutForBoundsChange:(CGRect)newBounds {
    return YES;
}
- 重写
- (nullable NSArray<__kindof UICollectionViewLayoutAttributes*> *) layoutAttributesForElementsInRect:(CGRect)rect方法。
通过计算每一个item的中心x值(这个值需要减去collectionView的滚动偏移量)与collectionView的中心x值的距离来判断图片距离中心的距离。根据这个距离计算图片的缩小系数。
- (nullable NSArray<__kindof UICollectionViewLayoutAttributes*> *) layoutAttributesForElementsInRect:(CGRect)rect {

    // 扩大刷新范围防止闪屏
    rect.size.width += KSreenWidth;
    rect.origin.x -= KSreenWidth / 2;

    // 调用父类获取布局
    NSArray* array = [[NSArray alloc] initWithArray:[super layoutAttributesForElementsInRect:rect] copyItems:YES];

    for (UICollectionViewLayoutAttributes* attributes in array) {
        // 保存图片变化系数
        CGFloat scale = 1.0;
        // collectionView的center.x
        CGFloat centerX = self.collectionView.center.x;
        // 图片距离中心的位置
        CGFloat step = ABS(centerX - (attributes.center.x - self.collectionView.contentOffset.x));
        // 使用cos函数计算一个明显顺滑的变化系数
        scale = fabsf(cosf(step / centerX * M_PI / 5));

        attributes.transform = CGAffineTransformMakeScale(scale, scale);
    }

    return array;
}
- 重写
- (CGPoint) targetContentOffsetForProposedContentOffset:(CGPoint)proposedContentOffset withScrollingVelocity:(CGPoint)velocity方法,保证每一次滑动后都有一个图片位于屏幕中心。
- (CGPoint) targetContentOffsetForProposedContentOffset:(CGPoint)proposedContentOffset withScrollingVelocity:(CGPoint)velocity {

    // 计算出最终显示的矩形框
    CGRect rect;
    rect.size = self.collectionView.frame.size;
    rect.origin.x = proposedContentOffset.x;
    rect.origin.y = 0;

    // 获取布局
    NSArray* array = [super layoutAttributesForElementsInRect:rect];

    // 获取collectionView最中心点的x值
    CGFloat centerX = proposedContentOffset.x + self.collectionView.frame.size.width / 2;

    CGFloat minDatle = MAXFLOAT;
    for (UICollectionViewLayoutAttributes* attributes in array) {
        if (ABS(minDatle) > ABS(attributes.center.x - centerX)) {
            minDatle = attributes.center.x - centerX;
        }
    }

    // 修正偏移量,保证有一个图片位于屏幕中心
    proposedContentOffset.x += minDatle;

    return proposedContentOffset;
}
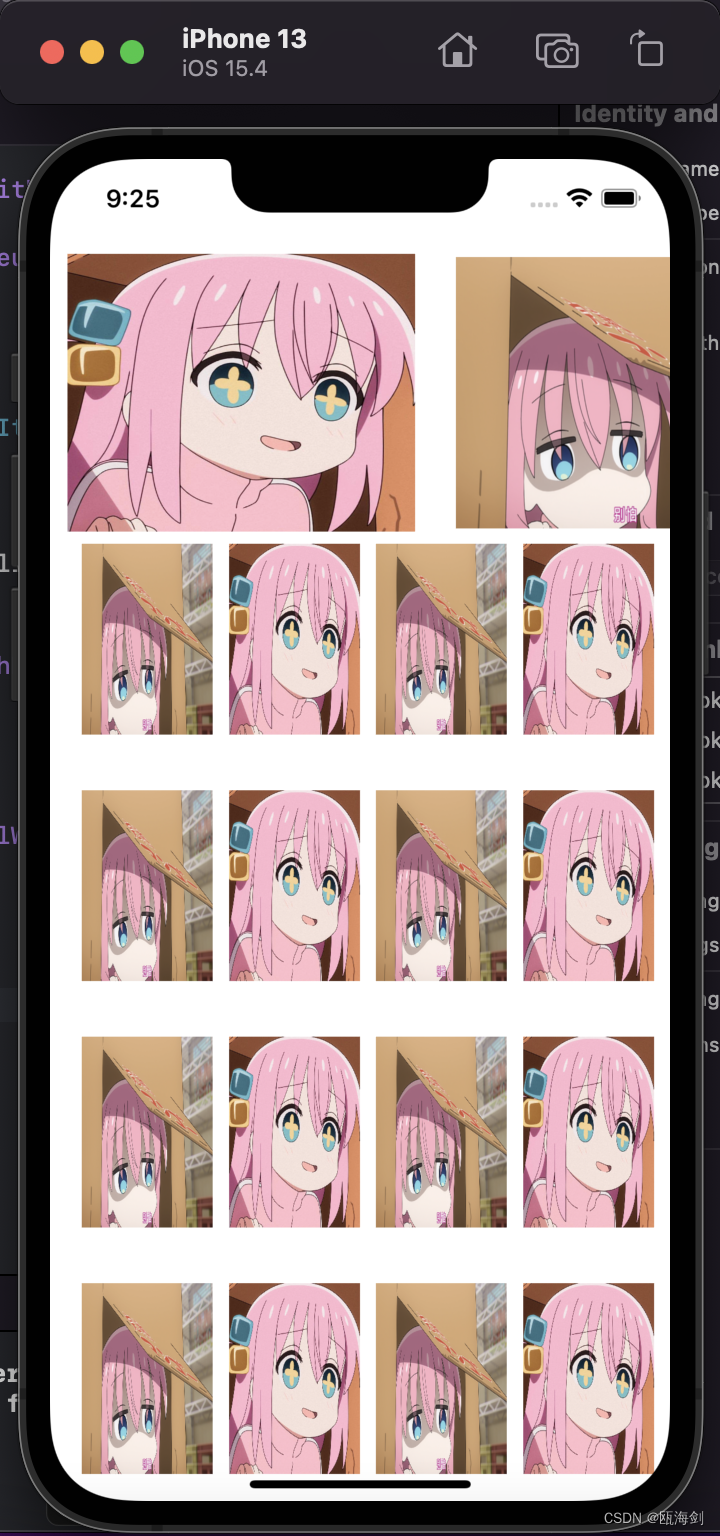
结果展示:
三. 将两个合起来,将轮播图加入总的collectionView中。
- 为轮播图定义一个cell。
cell.h
#import <UIKit/UIKit.h>

NS_ASSUME_NONNULL_BEGIN

@interface BookShowCell : UICollectionViewCell
<
UICollectionViewDelegate,
UICollectionViewDataSource
>

@property (nonatomic, strong) UICollectionView* collectionView;

@end

NS_ASSUME_NONNULL_END
cell.h
#import "BookShowCell.h"
#import "MyLayout.h"
#import "BookcaseCell.h"

@implementation BookShowCell

- (instancetype) initWithFrame:(CGRect)frame {
    if (self = [super initWithFrame:frame]) {
        [self initCollectionView];
    }
    return self;
}

- (void) initCollectionView {
    MyLayout* layout = [[MyLayout alloc] init];

    self.collectionView = [[UICollectionView alloc] initWithFrame:self.bounds collectionViewLayout:layout];
    self.collectionView.delegate = self;
    self.collectionView.dataSource = self;
    self.collectionView.showsHorizontalScrollIndicator = NO;

    [self.collectionView registerClass:[BookcaseCell class] forCellWithReuseIdentifier:@"bookcase"];

    [self.contentView addSubview:self.collectionView];
}

- (NSInteger) collectionView:(UICollectionView *)collectionView numberOfItemsInSection:(NSInteger)section {
    return 6;
}

- (__kindof UICollectionViewCell*) collectionView:(UICollectionView *)collectionView cellForItemAtIndexPath:(NSIndexPath *)indexPath {
    BookcaseCell* cell = [self.collectionView dequeueReusableCellWithReuseIdentifier:@"bookcase" forIndexPath:indexPath];

    if (indexPath.row % 2 == 0) {
        [cell.imageView setImage:[UIImage imageNamed:@"book.jpeg"]];
    } else {
        [cell.imageView setImage:[UIImage imageNamed:@"book2.jpeg"]];
    }

    return cell;
}

@end
- 为总的collectionView自定义一个layout,因为item的大小不一样了。需要把轮播图的item放大。
layout.m
#import "FaceLayout.h"

@implementation FaceLayout

- (void) prepareLayout {
    [super prepareLayout];
}

- (nullable NSArray<__kindof UICollectionViewLayoutAttributes*> *) layoutAttributesForElementsInRect:(CGRect)rect {
    NSArray* arr = [[NSArray alloc] initWithArray:[super layoutAttributesForElementsInRect:rect] copyItems:YES];

    for (UICollectionViewLayoutAttributes* attributes in arr) {
        if (attributes.indexPath.row == 0) {
            attributes.transform = CGAffineTransformMakeScale(2.2, 2.2);
        }
    }

    return arr;
}

@end
- 将使用新定一的layout建立总的collectionView,并注册轮播图的cell。
UICollectionViewFlowLayout* layout = [[FaceLayout alloc] init];

self.collectionView = [[UICollectionView alloc] initWithFrame:self.view.bounds collectionViewLayout:layout];

[self.collectionView registerClass:[BookShowCell class] forCellWithReuseIdentifier:@"bookShow"];
- 加入轮播图的cell。
- (__kindof UICollectionViewCell*) collectionView:(UICollectionView *)collectionView cellForItemAtIndexPath:(NSIndexPath *)indexPath {
    if (indexPath.row == 0) {
        BookShowCell* cell = [self.collectionView dequeueReusableCellWithReuseIdentifier:@"bookShow" forIndexPath:indexPath];

        return cell;
    } else {
        BookcaseFaceCell* cell = [self.collectionView dequeueReusableCellWithReuseIdentifier:@"bookcaseFace" forIndexPath:indexPath];
        return cell;
    }
}
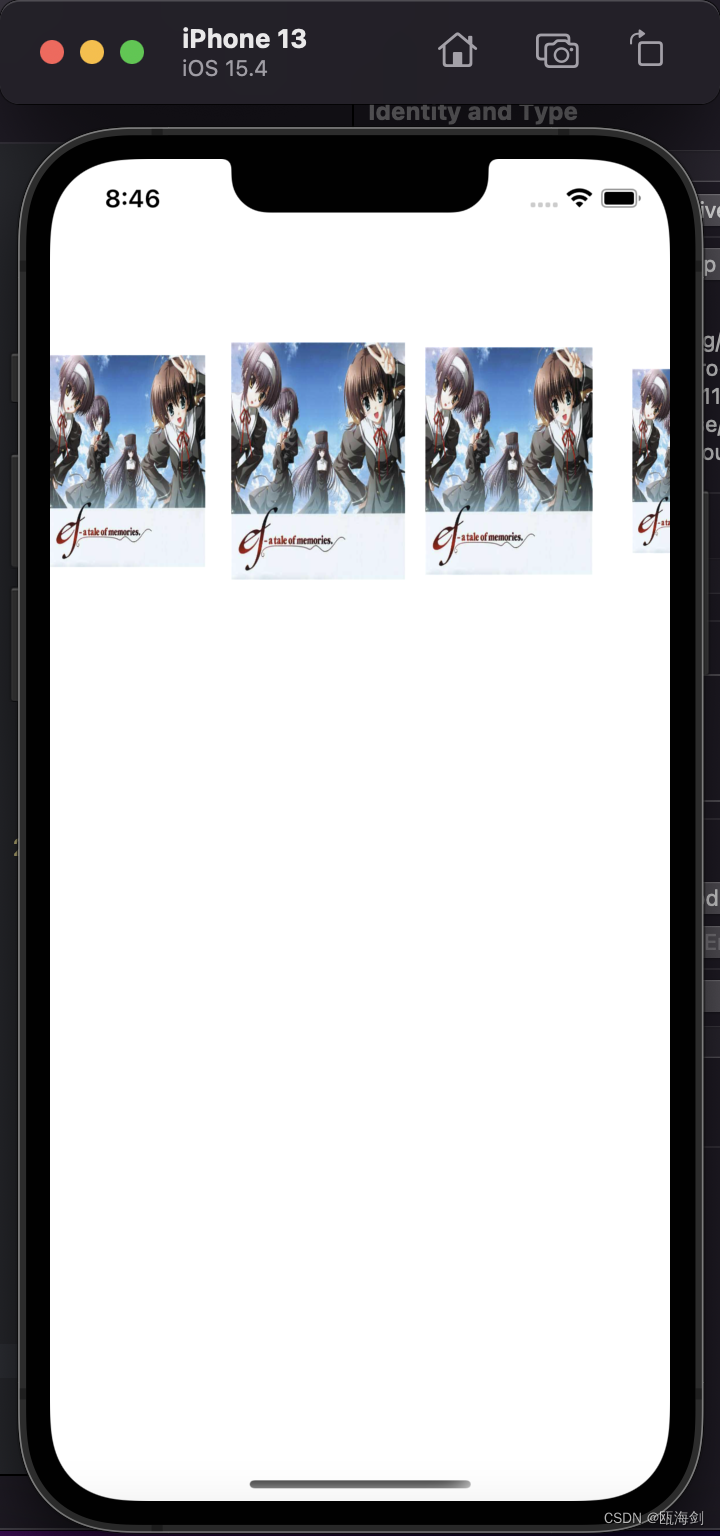
效果图
图片根据距离中心点的距离不同调整大小
![[ 数据结构 -- 手撕排序算法第五篇 ] 堆排序](https://img-blog.csdnimg.cn/26c014bc653f4cfbab79d63d307cfe51.png)

![[ISITDTU 2019]EasyPHP rce替换字母](https://img-blog.csdnimg.cn/b9b6e28818cf4a9abcf2a87279c5b5d5.png)
![[ vulhub漏洞复现篇 ] Apache Airflow Celery 消息中间件命令执行漏洞复现 CVE-2020-11981](https://img-blog.csdnimg.cn/cb6691a021114911bcc1708f11464fa4.png)