1.zabbix简介
Zabbix 软件能够监控众多网络参数和服务器的健康度、完整性。Zabbix 使用灵活的告警机制,允许用
户为几乎任何事件配置基于邮件的告警。这样用户可以快速响应服务器问题。Zabbix 基于存储的数据
提供出色的报表和数据可视化功能。这些功能使得 Zabbix 成为容量规划的理想选择。
Zabbix 支持主动轮询(polling)和被动捕获(trapping)。Zabbix所有的报表、统计数据和配置参数
都可以通过基于 Web 的前端页面进行访问。基于 Web 的前端页面确保您可以在任何地方访问您监控的
网络状态和服务器健康状况。适当的配置后,Zabbix 可以在监控 IT 基础设施方面发挥重要作用。无论
是对于有少量服务器的小型组织,还是拥有大量服务器的大企业而言,同样适用。
zabbix部署
ubuntu22.04部署zabbix
二进制安装
阿里源
5.0
https://mirrors.aliyun.com/zabbix/zabbix/5.0/ubuntu/pool/main/z/zabbix-release/
6.4
wget https://mirrors.aliyun.com/zabbix/zabbix/6.4/ubuntu/pool/main/z/zabbix-release/zabbix-release_6.4-1+ubuntu22.04_all.deb
下载上传对应版本
安装
dpkg -i zabbix-release_5.0-2+ubuntu22.04_all.deb
apt list|grep zabbix
dpkg -L zabbix-release #查看包的配置文件
安装后默认是zabbix的源,要替换为阿里的源,但旧版的阿里的源缺少包
sed -i.bak ‘s#repo.zabbix.com#mirrors.aliyun.com/zabbix#’ /etc/apt/sources.list.d/zabbix.list
sed -i.bak ‘s#repo.zabbix.com#mirrors.aliyun.com/zabbix#’ zabbix-agent2-plugins.list
安装
apt install zabbix-server-mysql zabbix-frontend-php zabbix-apache-conf zabbix-sql-scripts zabbix-agent
官方安装步骤链接
https://www.zabbix.com/cn/download?zabbix=6.4&os_distribution=ubuntu&os_version=22.04&components=server_frontend_agent&db=mysql&ws=apache
root@server02:~/nginx/nginx-1.24.0# cat /etc/apt/sources.list.d/zabbix.list
# Zabbix main repository
deb https://mirrors.tuna.tsinghua.edu.cn/zabbix/zabbix/6.0/ubuntu jammy main
deb-src https://mirrors.tuna.tsinghua.edu.cn/zabbix/zabbix/6.0/ubuntu jammy main

apt update
重新安装源先卸载: dpkg --purge zabbix-release
安装Zabbix server,Web前端,agent
apt install zabbix-server-mysql zabbix-frontend-php zabbix-apache-conf zabbix-sql-scripts zabbix-agent
c. 创建初始数据库
# mysql -uroot -p
password
mysql> create database zabbix character set utf8mb4 collate utf8mb4_bin;
mysql> create user zabbix@localhost identified by '123456';
mysql> grant all privileges on zabbix.* to zabbix@localhost;
mysql> set global log_bin_trust_function_creators = 1;
mysql> quit;
导入初始架构和数据,系统将提示您输入新创建的密码。
zcat /usr/share/zabbix-sql-scripts/mysql/server.sql.gz | mysql --default-character-set=utf8mb4 -uzabbix -p zabbix


mysql -uroot -p
password
mysql> set global log_bin_trust_function_creators = 1;
mysql> quit
set global log_bin_trust_function_creators = 0; 是一个MySQL服务器的配置选项。当设置为0时,它禁用了对于具有DEFINER权限的存储过程和函数的二进制日志记录。这意味着在进行主从复制时,这些存储过程和函数将不会被复制到从服务器上。这个选项通常用于解决在主从复制中出现的一些权限相关的问题。
不配置在导入会提示:
ERROR 1419 (HY000) at line 2091: You do not have the SUPER privilege and binary logging is enabled (you *might* want to use the less safe log_bin_trust_function_creators variable)


为Zabbix server配置数据库
编辑配置文件 /etc/zabbix/zabbix_server.conf
DBPassword=password
 启动Zabbix server和agent进程
systemctl restart zabbix-server zabbix-agent apache2
systemctl enable zabbix-server zabbix-agent apache2
安装中文语言包
apt -y install language-pack-zh-hans
systemctl restart apache2
查看端口
root@server02:/etc/zabbix# netstat -antp|grep 10051
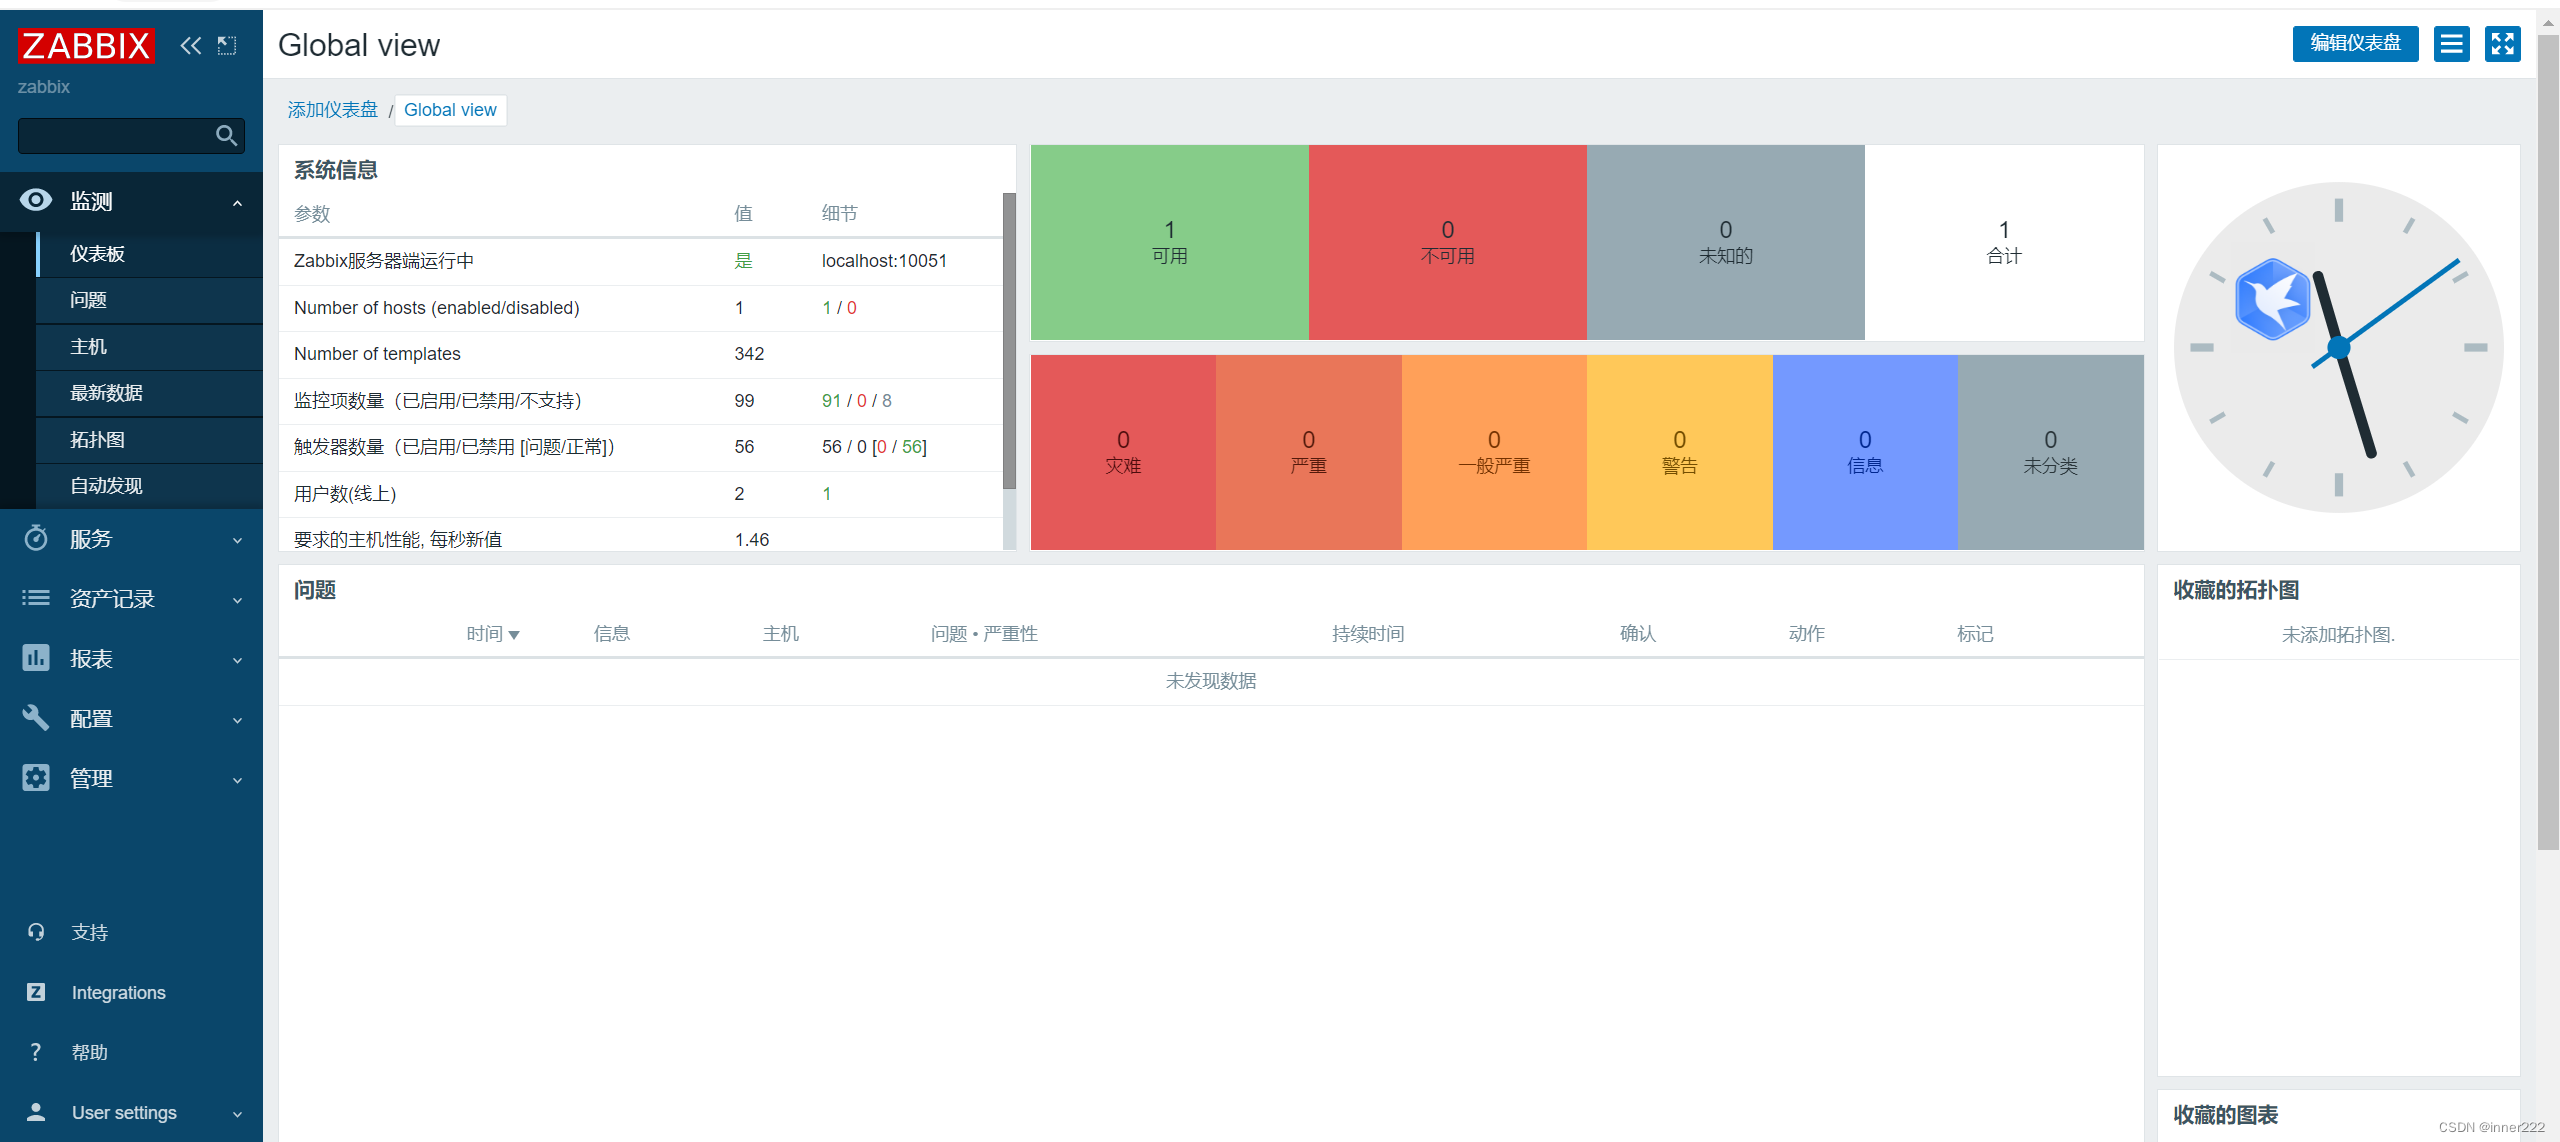
访问IP/zabbix
配置后登录
Admin/zabbix
源码编译安装
官方文档https://www.zabbix.com/documentation/6.0/zh/manual/installation/install
apt -y install apache2 apache2-bin apache2-data apache2-utils fontconfig-config fonts-dejavu-core fping libapache2-mod-php libapache2-mod-php8.1 libapr1 libaprutil1 libaprutil1-dbd-sqlite3 libaprutil1-ldap libfontconfig1 libgd3 libiksemel3 libjbig0 libjpeg-turbo8 libjpeg8 liblua5.2-0 libodbc1 libopenipmi0 libsensors5  libsnmp-base libsnmp40 libsodium23 libssh2-1 libtiff5 libwebp7 libxpm4 php-bcmath php-common php-gd php8.1-common php8.1-gd php8.1-ldap php8.1-mbstring php8.1-mysql php8.1-opcache php8.1-readline            libxml2-dev libxml2 snmp libsnmp-dev libevent-dev openjdk-8-jdk libcurl4-openssl-dev php8.1-xml snmpd ssl-cert  fonts-dejavu  libmysqlclient-dev


./configure --enable-server --enable-agent --with-mysql --enable-ipv6 --with-net-snmp --with-libcurl --with-libxml2 --with-openipmi
make  -j6 &&sudo make install

root@server01:/usr/local/zabbix/sbin# ln -s /usr/local/zabbix/sbin/* /usr/sbin/
root@server01:/usr/local/zabbix/sbin# ln -s /usr/local/zabbix/bin/* /usr/sbin/
编译找不到,参考https://support.zabbix.com/browse/ZBX-12324
checking for pkg-config... no
configure: error: LIBXML2 library not found
安装pkg-config即可解决:
 apt install pkg-config -y
创建数据库
mysql -uroot -p
password
mysql> create database zabbix character set utf8mb4 collate utf8mb4_bin;
mysql> create user zabbix@localhost identified by '123456';
mysql> grant all privileges on zabbix.* to zabbix@localhost;
mysql> set global log_bin_trust_function_creators = 1;
mysql> quit;
导入数据
cd database/mysql
sudo mysql -u zabbix -p zabbix < schema.sql
sudo mysql -u zabbix -p zabbix < images.sql
sudo mysql -u zabbix -p zabbix < data.sql
修改配置
root@server01:/usr/local/zabbix/etc# grep '^[^#]' zabbix_server.conf
LogFile=/tmp/zabbix_server.log
DBHost=120.77.146.92
DBName=zabbix
DBUser=zabbix
DBPassword= 123456
DBPort=3306
Timeout=4
LogSlowQueries=3000
StatsAllowedIP=127.0.0.1

StatsAllowedIP=127.0.0.1是MySQL服务器配置文件中的一个选项,它指定了允许访问MySQL统计信息的IP地址。在这种情况下,只有IP地址为127.0.0.1的客户端可以访问MySQL统计信息。
查看日志
tail -f /tmp/zabbix_server.log
580816:20230830:235251.515 [Z3001] connection to database ‘zabbix’ failed: [2002] Can’t connect to local MySQL server through socket ‘/var/run/mysqld/mysqld.sock’ (2)
580816:20230830:235251.515 database is down: reconnecting in 10 seconds
580816:20230830:235301.516 [Z3001] connection to database ‘zabbix’ failed: [2002] Can’t connect to local MySQL server through socket ‘/var/run/mysqld/mysqld.sock’ (2)
修改zabbix文件指定mysql的socket位置
root@server01:/apps/zabbix/zabbix-6.0.21# find / -name mysql.sock*
/data/mysql/mysql.sock
DBSocket=/data/mysql/mysql.sock #添加此行
还是报错
使用socket文件不能用localhost连接,修改zabbix配置文件为本机地址
DBHost=172.29.21.67
root@server01:/usr/local/zabbix/etc# vi zabbix_server.conf
root@server01:/usr/local/zabbix/etc# ps -ef|grep zab
zabbix    580931       1  0 Aug30 ?        00:00:00 zabbix_server -c /usr/local/zabbix/etc/zabbix_server.conf
root      580986  564313  0 Aug30 pts/3    00:00:00 tail -f /tmp/zabbix_server.log
root      581184  575792  0 00:06 pts/4    00:00:00 grep --color=auto zab
root@server01:/usr/local/zabbix/etc# kill -9 580931
root@server01:/usr/local/zabbix/etc# !zabbix
root@server01:/usr/local/zabbix/etc# netstat -antp  |grep 10051
tcp        0      0 0.0.0.0:10051           0.0.0.0:*               LISTEN      581188/zabbix_serve
root@server01:/usr/local/zabbix/etc# vi zabbix_server.conf
修改后启动成功
root@server01:/usr/local/zabbix/etc#  grep '^[^#]' zabbix_server.conf
LogFile=/tmp/zabbix_server.log
DBHost=172.29.21.67
DBName=zabbix
DBUser=zabbix
DBPassword=123456
DBSocket=/data/mysql/mysql.sock
DBPort=3306
Timeout=4
LogSlowQueries=3000
StatsAllowedIP=127.0.0.1
命令行启动
zabbix_server /usr/local/zabbix/etc/zabbix_server.conf
查看端口
ss -tnlp |grep 10051
配置php和初始化登录WEB页面
root@server01:/apps/zabbix/zabbix-6.0.21/ui# cp -a /apps/zabbix/zabbix-6.0.21/ui/* /var/www/html/zabbix/
启动apahe2
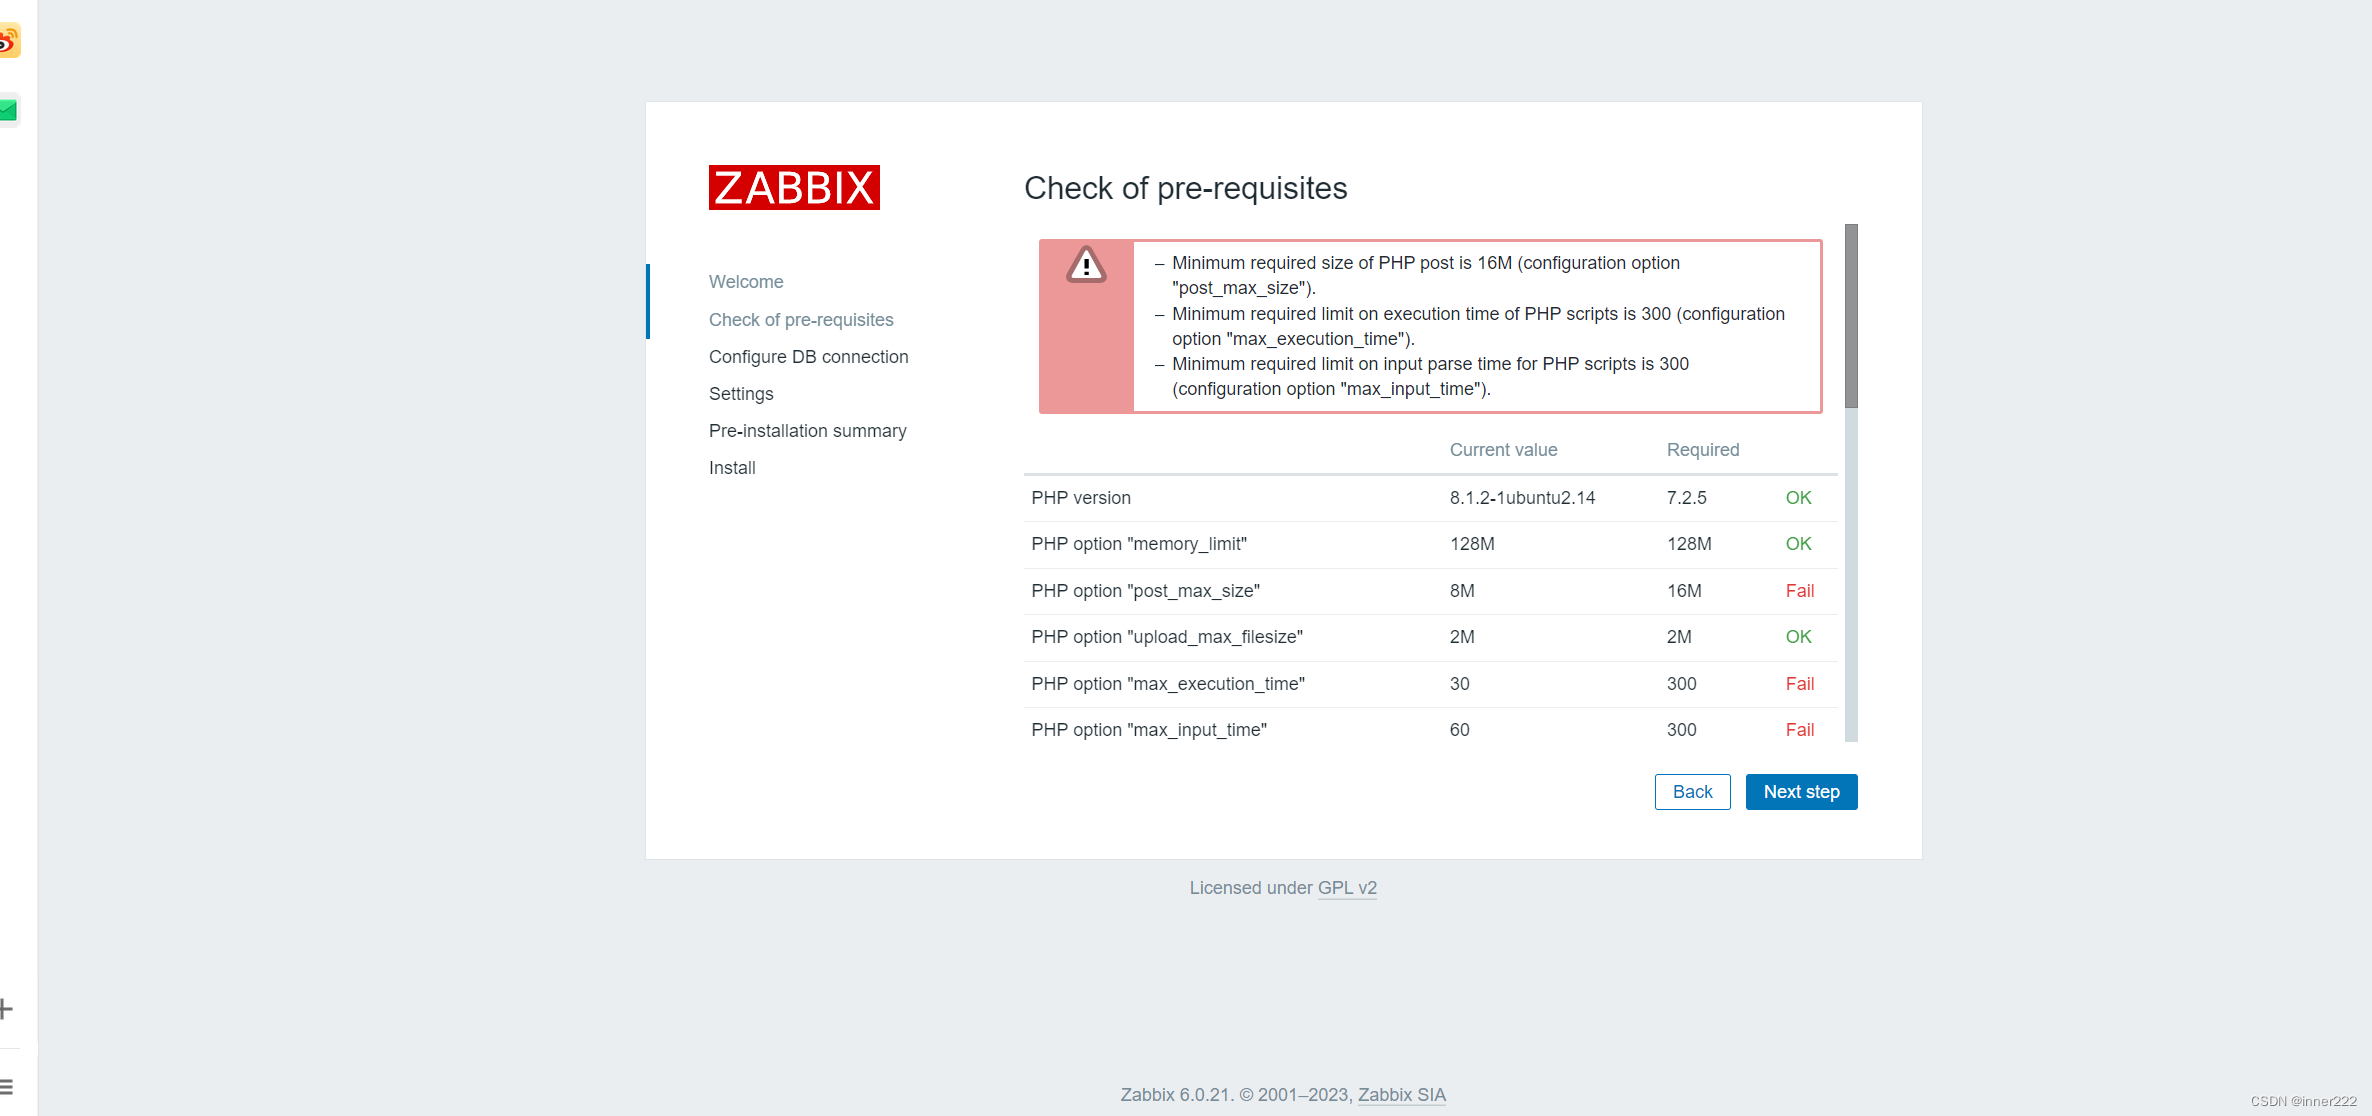
修改php配置后重启
systemctl restart apache2
vim /etc/php/8.1/apache2/php.ini

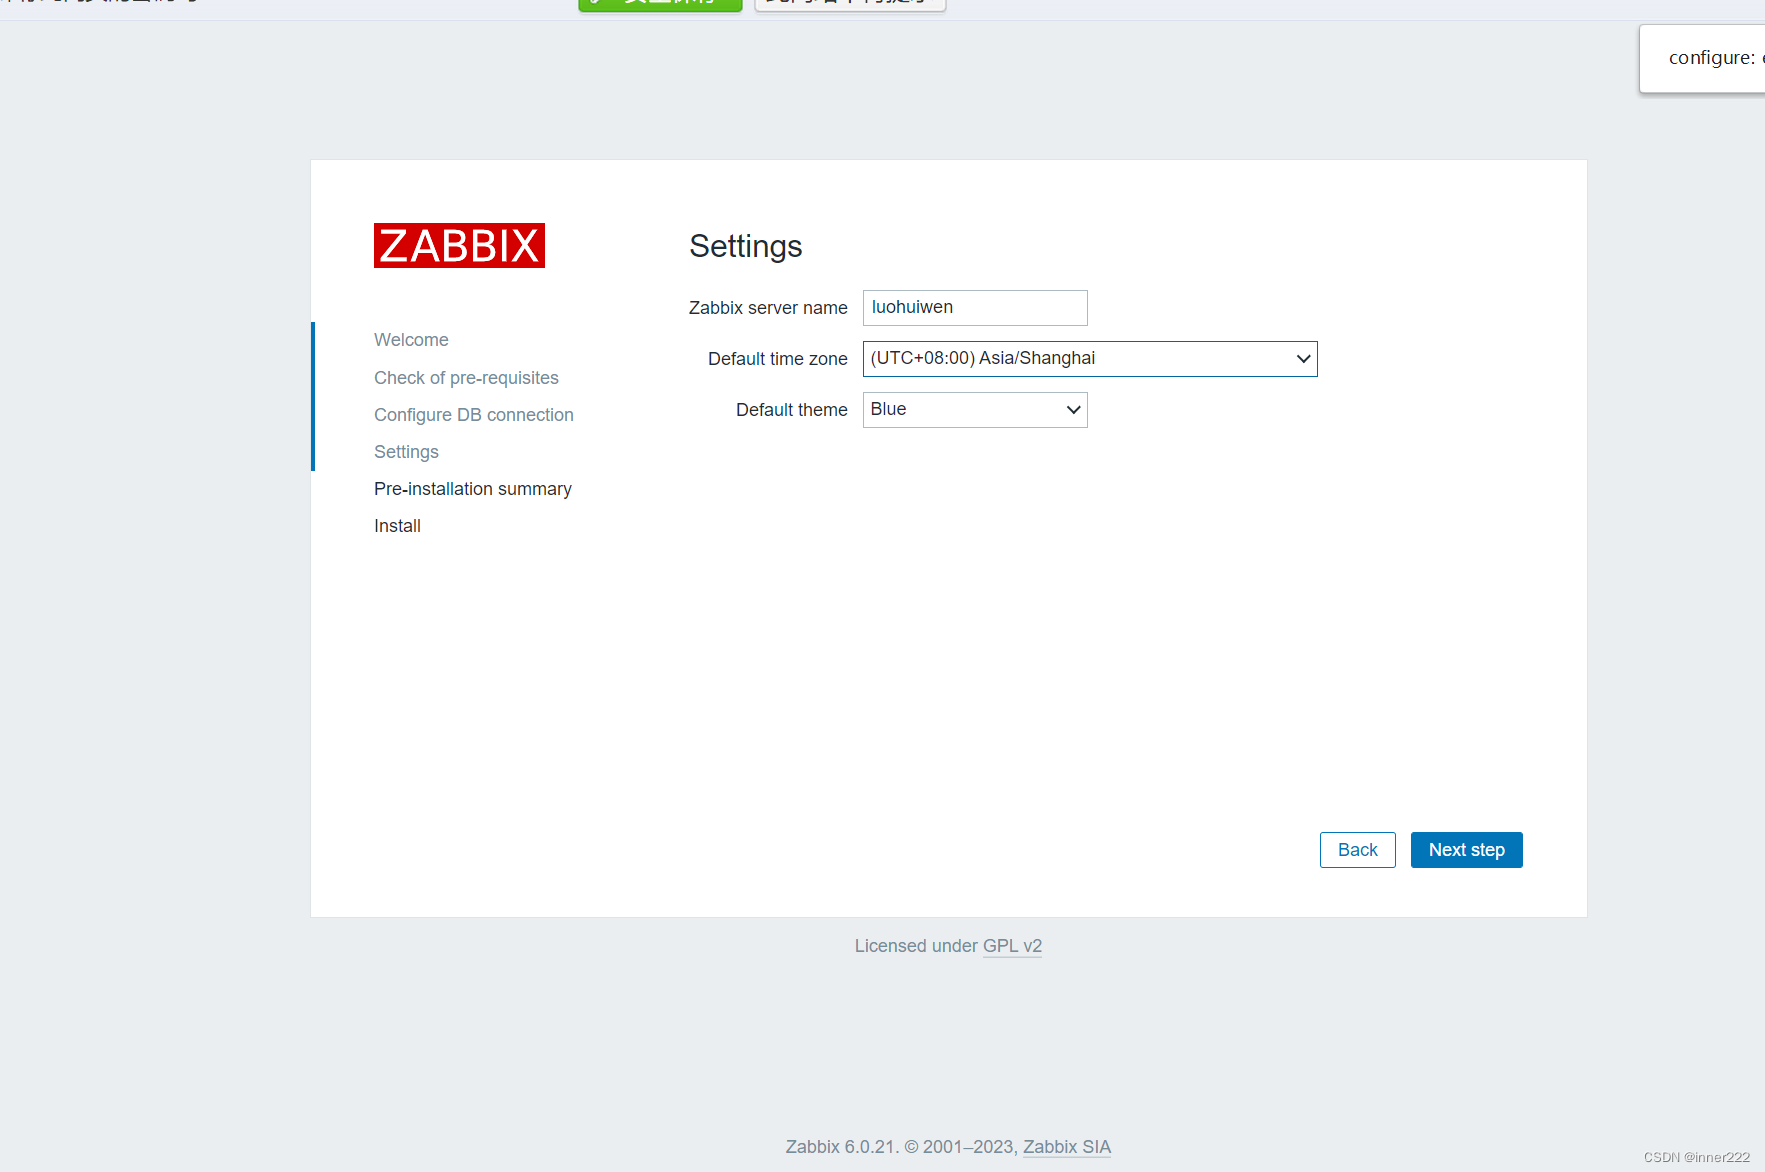
下载配置文件并上传至目录/var/www/html/zabbix/conf/
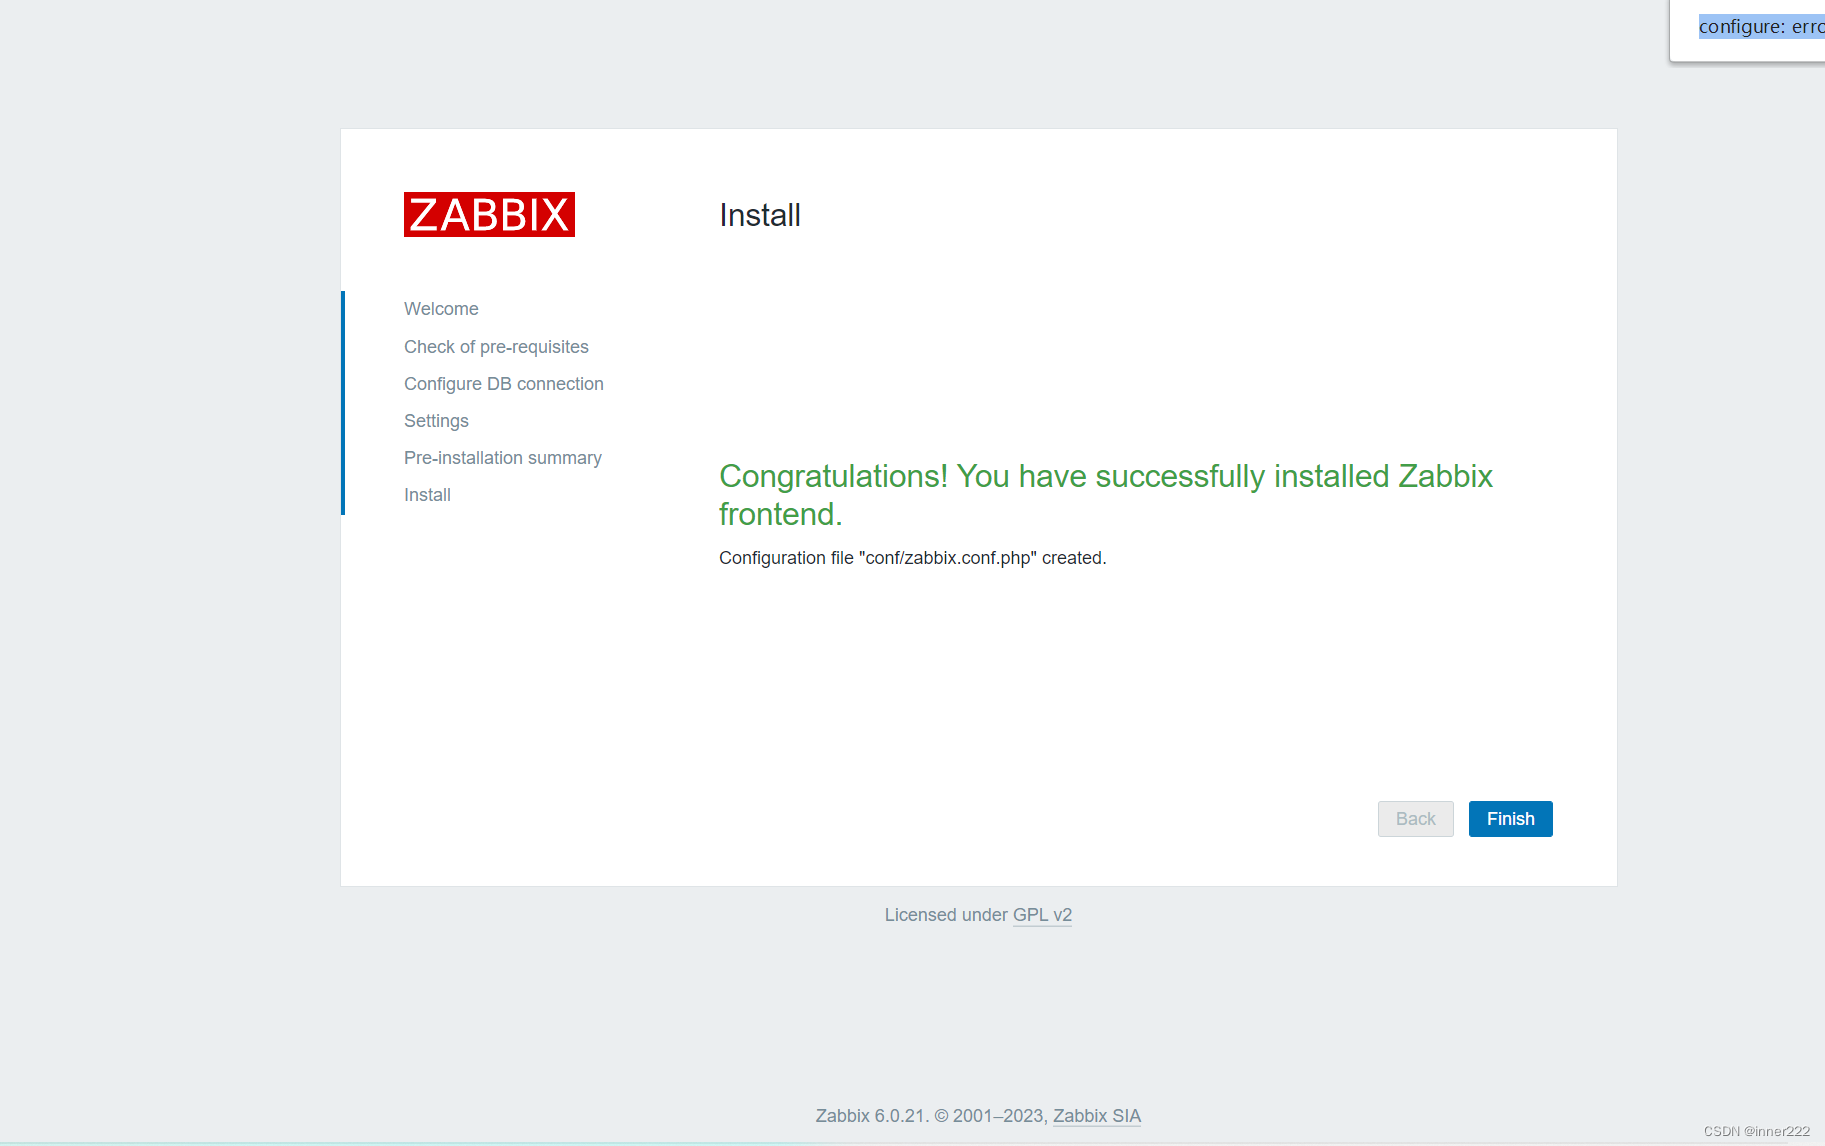
Zabbix 前端已经就绪!第一次登录, 默认的用户名是 Admin,密码是zabbix
配置server文件
root@server01:/etc/apt/sources.list.d# cat /lib/systemd/system/zabbix-server.service
[Unit]
Description=Zabbix Server
After=syslog.target
After=network.target
[Service]
Environment="CONFFILE=/usr/local/zabbix/etc/zabbix_server.conf"
EnvironmentFile=-/etc/sysconfig/zabbix-server
Type=forking
Restart=on-failure
PIDFile=/tmp/zabbix_server.pid
KillMode=control-group
ExecStart=/usr/local/zabbix/sbin/zabbix_server -c $CONFFILE
ExecStop=/bin/kill -SIGTERM $MAINPID
RestartSec=10s
TimeoutSec=0
[Install]
WantedBy=multi-user.target


killall zabbix
systemctl daemon-reload

systemctl  restart  zabbix-service
这是一个 Systemd 单元文件(Unit)的示例,用于描述一个名为 “Zabbix Server” 的服务。它定义了服务的依赖关系和行为。
在 [Unit] 部分,描述了服务的基本信息,包括名称和描述。After 指定了该服务依赖的其他单元,在这个例子中依赖于 syslog.target 和 network.target。
在 [Service] 部分,定义了服务的执行参数和行为。Environment 设置了环境变量,Type 指定了进程的类型(这里是 forking)。Restart 设置了当服务发生故障时自动重启,PIDFile 指定了保存进程 ID 的文件位置,KillMode 指定了进程结束时的行为。ExecStart 和 ExecStop 是启动和停止服务时执行的命令,RestartSec 设置了重启延迟时间,TimeoutSec 设置了服务的超时时间。
在 [Install] 部分,定义了如何安装这个服务。WantedBy 指定了该服务在 multi-user.target 部分启动。
这个文件的作用是为 Zabbix Server 设置 Systemd 服务,使其可以在系统启动时自动运行,并在服务发生故障时进行自动重启。
部署zabbix5.0
安装zabbix,使用nginx基于LNMP安装
官方文档
https://www.zabbix.com/cn/download?zabbix=5.0&os_distribution=ubuntu&os_version=20.04&components=server_frontend_agent&db=mysql&ws=nginx
配置zabbix源
wget https://mirrors.aliyun.com/zabbix/zabbix/5.0/ubuntu/pool/main/z/zabbix-release/zabbix-release_5.0-1+focal_all.deb
dpkg -i zabbix-release_5.0-1+focal_all.deb
改为阿里源
cd /etc/apt/source.list.d/
sed -i s#repo.zabbix.com#mirrors.aliyun.com/zabbix#g zabbix*
安装zabbix-server
apt install zabbix-server-mysql zabbix-frontend-php zabbix-nginx-conf zabbix-agent2
安装数据库
root@ubuntu20:~# apt install mysql-server
c. 创建初始数据库
产品手册
Make sure you have database server up and running.
在数据库主机上运行以下代码。
#mysql -uroot -p
password
mysql> create database zabbix character set utf8 collate utf8_bin;
mysql> create user zabbix@localhost identified by ‘123456’;
mysql> grant all privileges on zabbix.* to zabbix@localhost;
mysql> set global log_bin_trust_function_creators = 1;
mysql> quit;
cat << EOF |mysql
EOF
导入初始架构和数据,系统将提示您输入新创建的密码。
zcat /usr/share/doc/zabbix-server-mysql*/create.sql.gz | mysql -uzabbix -p123456 zabbix
Disable log_bin_trust_function_creators option after importing database schema.
导入数据库后禁用
mysql -uroot -p
password
mysql> set global log_bin_trust_function_creators = 0;
mysql> quit;
修改zabbix配置文件
sed -i ‘/# DBPassword/a DBPassword 123456/’ /etc/zabbix/zabbix_server.conf
修改PHP文件编辑配置文件 /etc/zabbix/php-fpm.conf
php_value[date.timezone] = Asina/Shanghai
sed命令修改
sed -ir -e ‘/^.date.time./ s@^.*$@php_value[date.timezone] = Asia/Shanghai@g’ /etc/zabbix/php-fpm.co
修改apache
server {
listen 80;
server_name zabbix.luo.com;
其中server_name不配置,访问默认页面
默认会启动apache2 ,停止apache2,启动
systemctl stop apache2
systemctl restart zabbix-server.service zabbix-agent2.service nginx.service php7.4-fpm.service
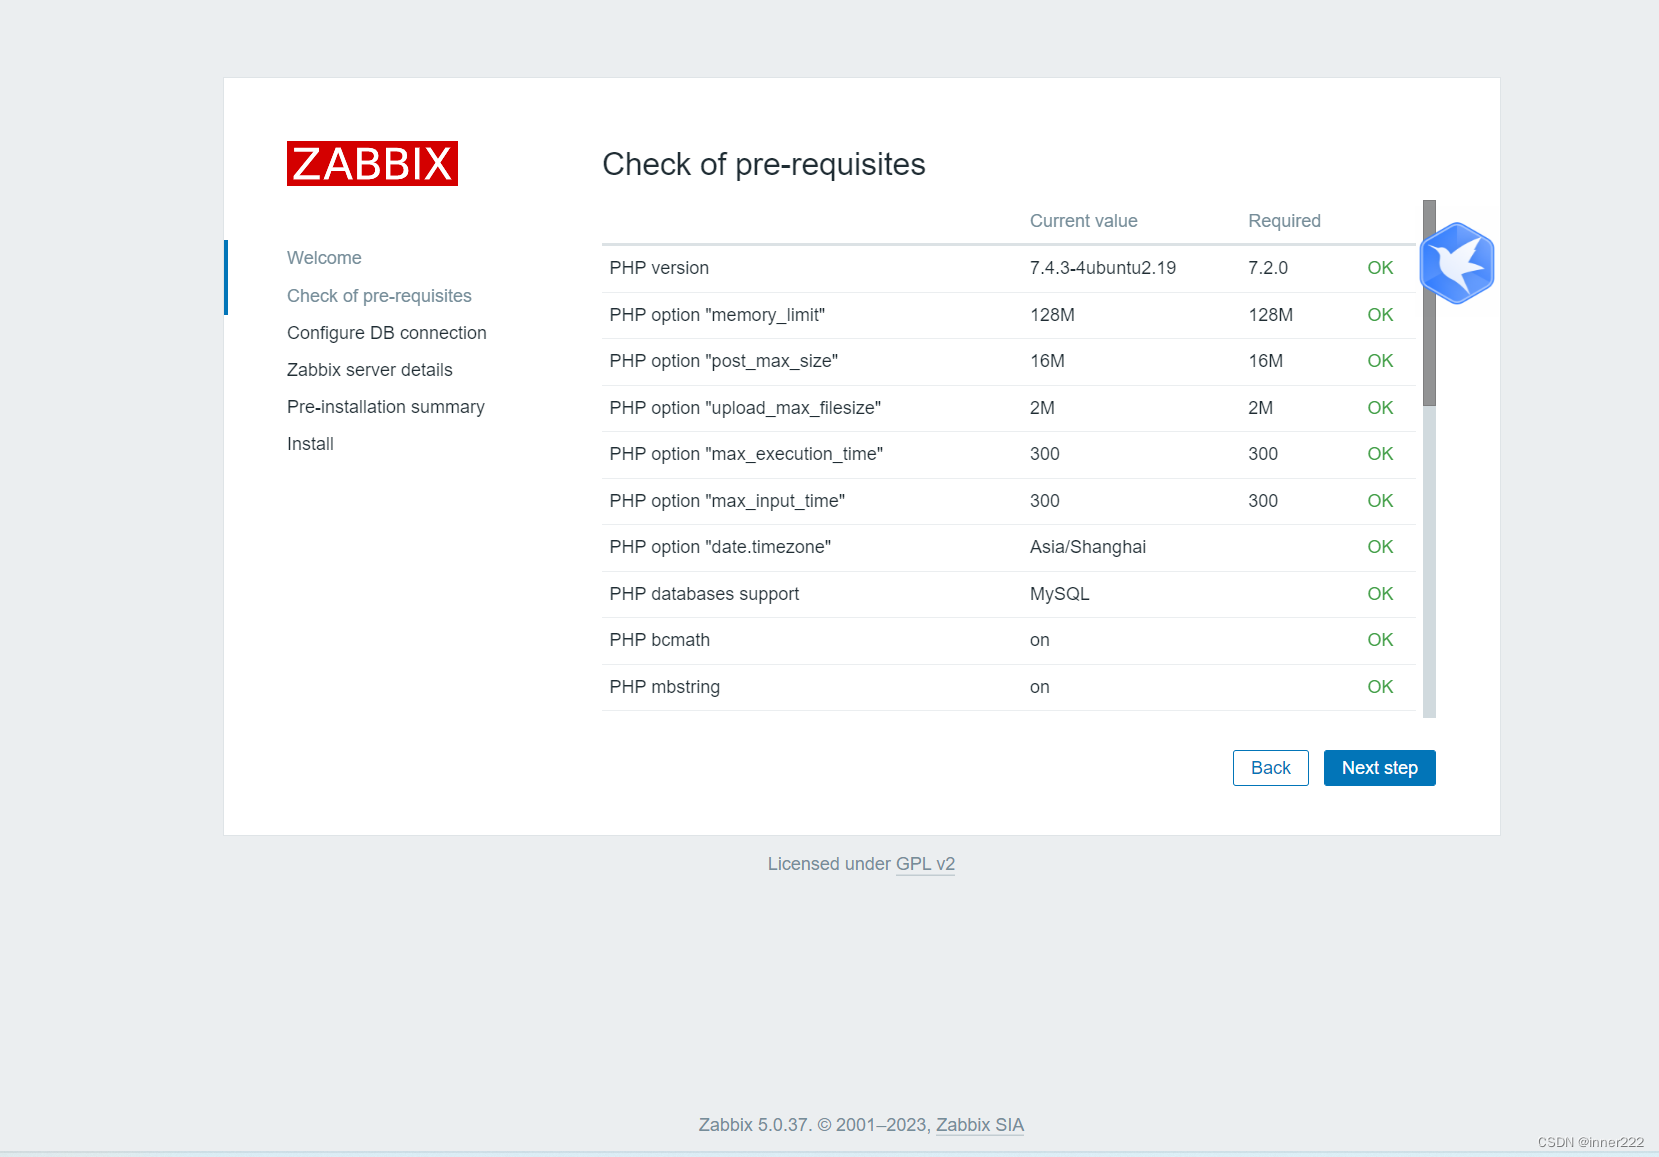
修改字体
登录,安装中文包
root@ubuntu20:~# apt -y install language-pack-zh-hans && systemctl restart php7.4-fpm.service
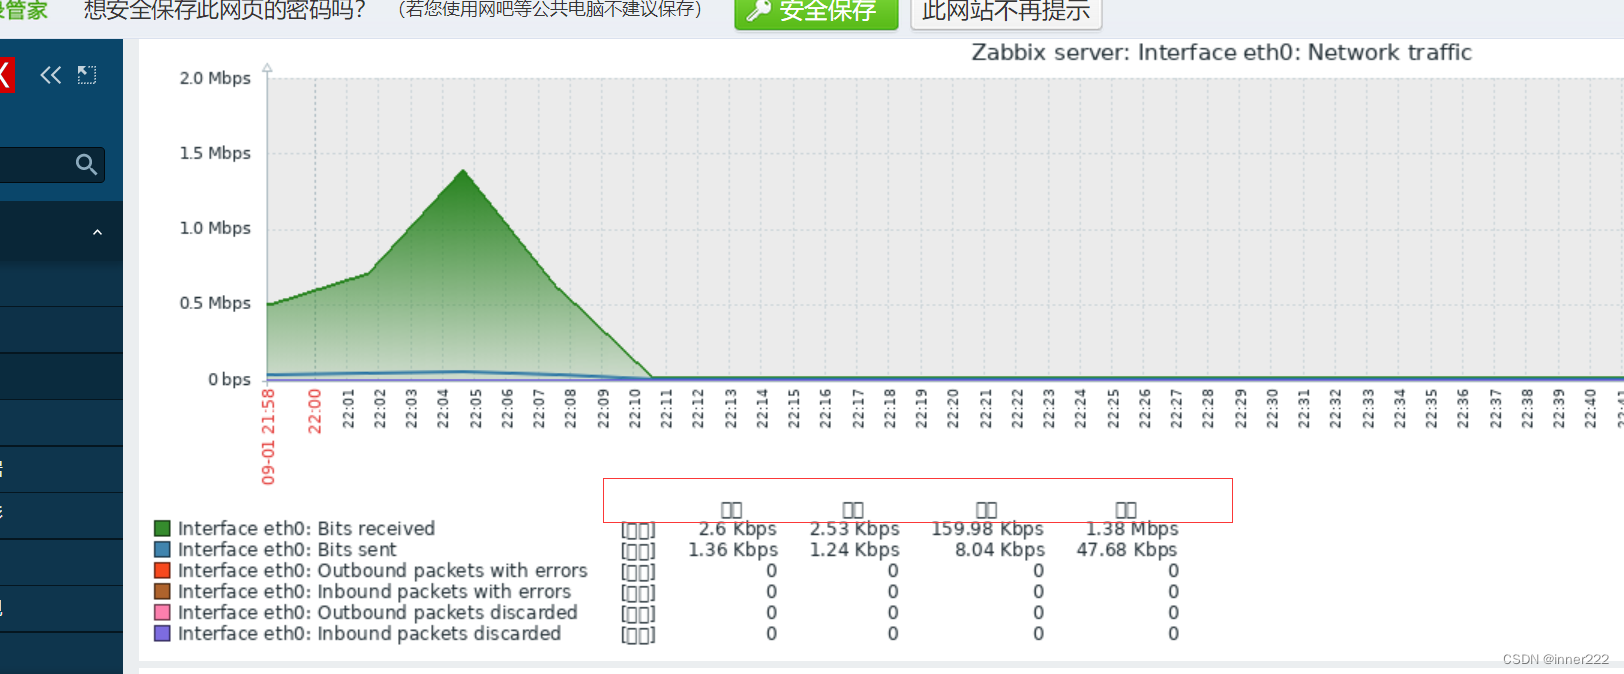
字体乱码,找windows字体替代zabbix
win+R 输入fonts
选择字体传输到zabbix字体目录
备份原来的文件
root@ubuntu20:/usr/share/zabbix/assets/fonts# mv graphfont.ttf graphfont.ttf.bak
上传的文件改名字
root@ubuntu20:/usr/share/zabbix/assets/fonts# mv MSYHBD.TTC graphfont.ttf
agnet安装
root@ubuntu20:~# apt install zabbix-agent -y
修改server为zabbix server地址
vi /etc/zabbix/zabbix_agent2.conf
Server=192.168.1.150
ServerActive=192.168.1.150
systemctl restart zabbix-agent2.service
ss -tnl |grep 10050
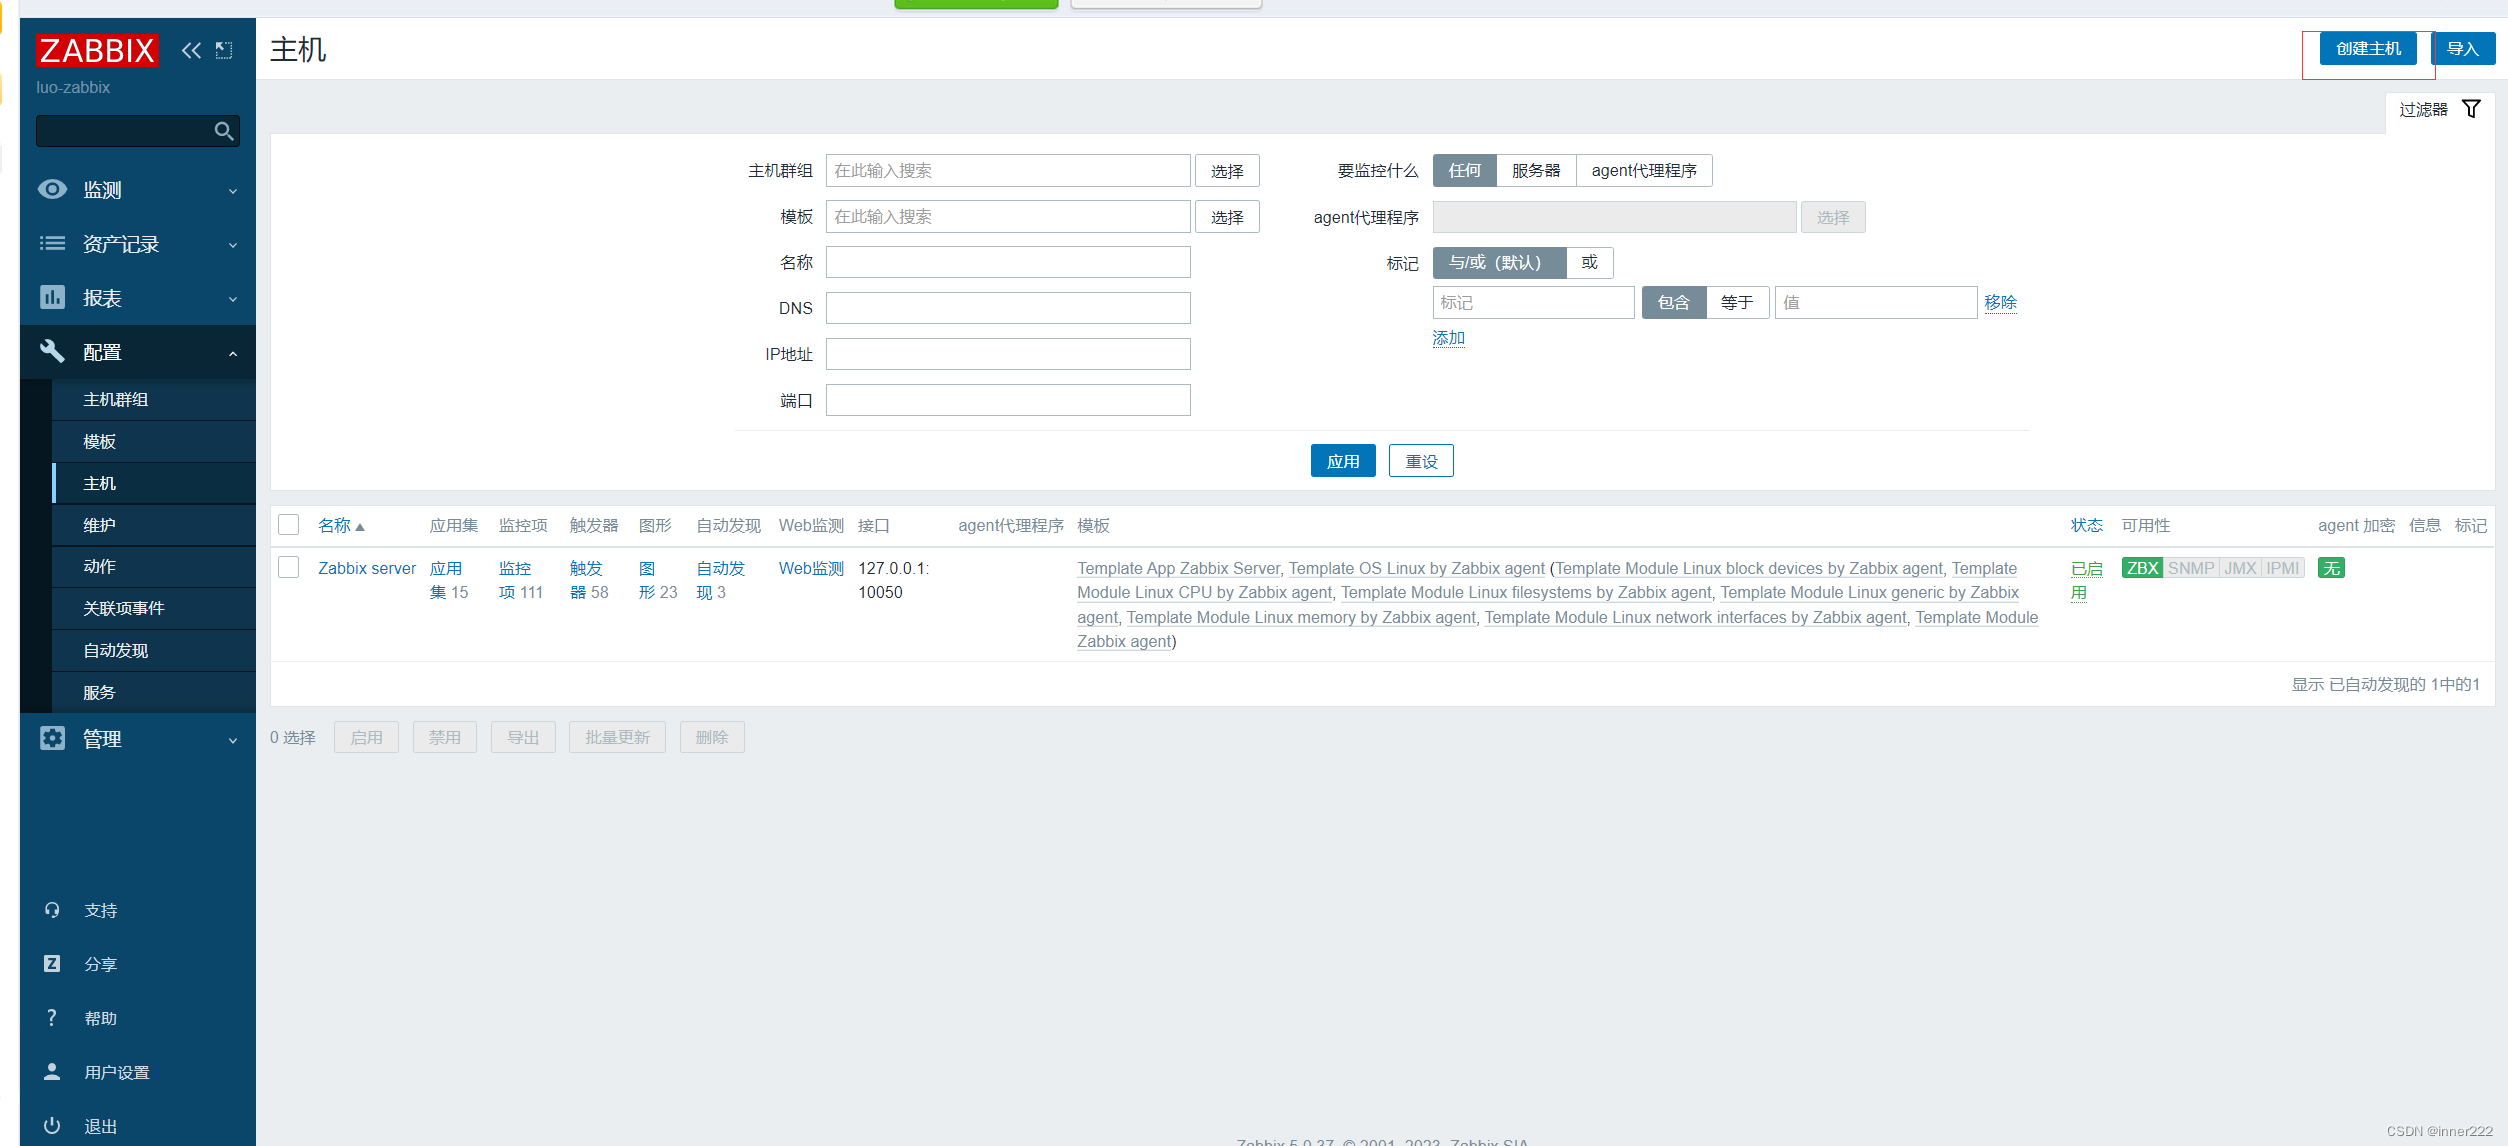
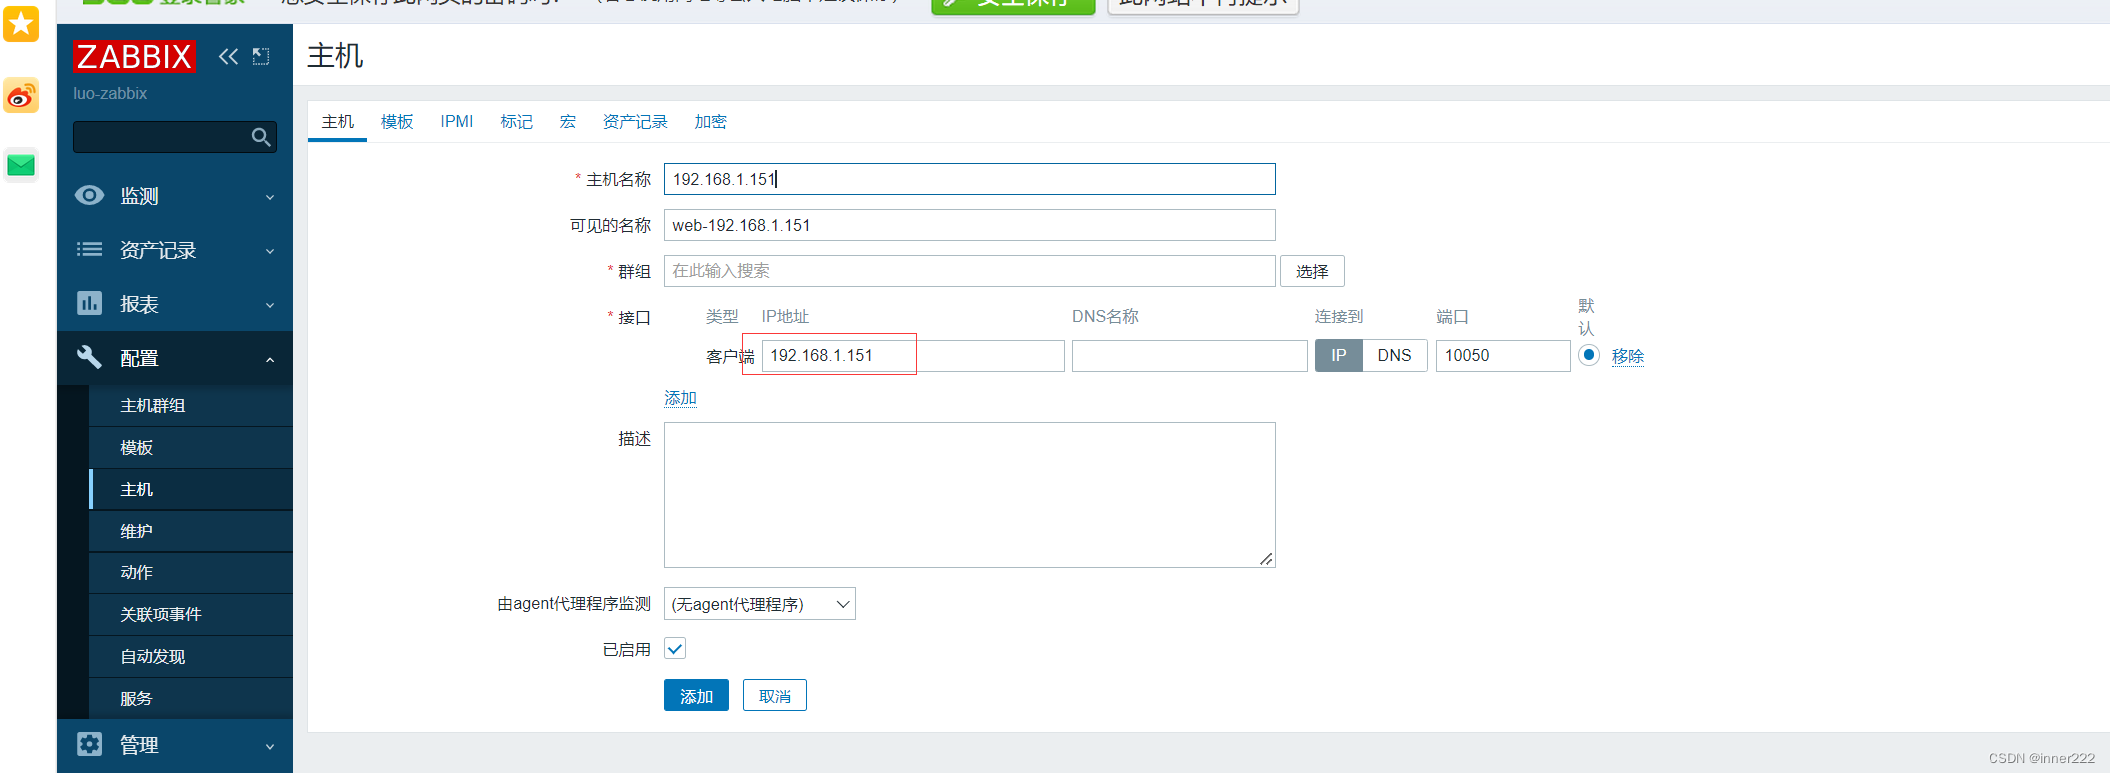
添加主机
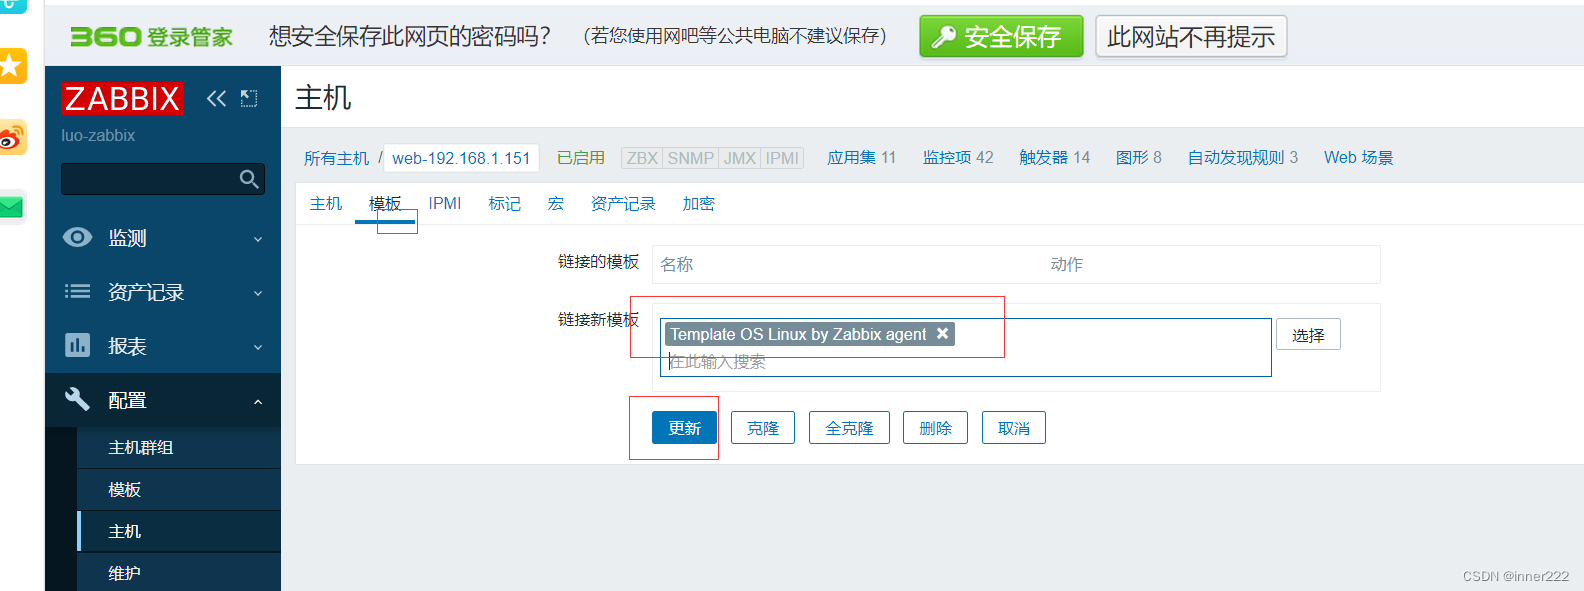
添加模板
使用现有模板和监控项监控主机流程
在被监控的主机上安装Zabbix Agent ,建议和 Zabbix Server 同一个版本
配置 Zabbix agent的配置文件关键两项,并重启服务生效
在Zabbix Server 上使用 zabbix_get 工具测试是否正常连接被监控主机
在Zabbix Server 添加被监控主机
在Zabbix WEB 添加已有的模板至被监控的主机
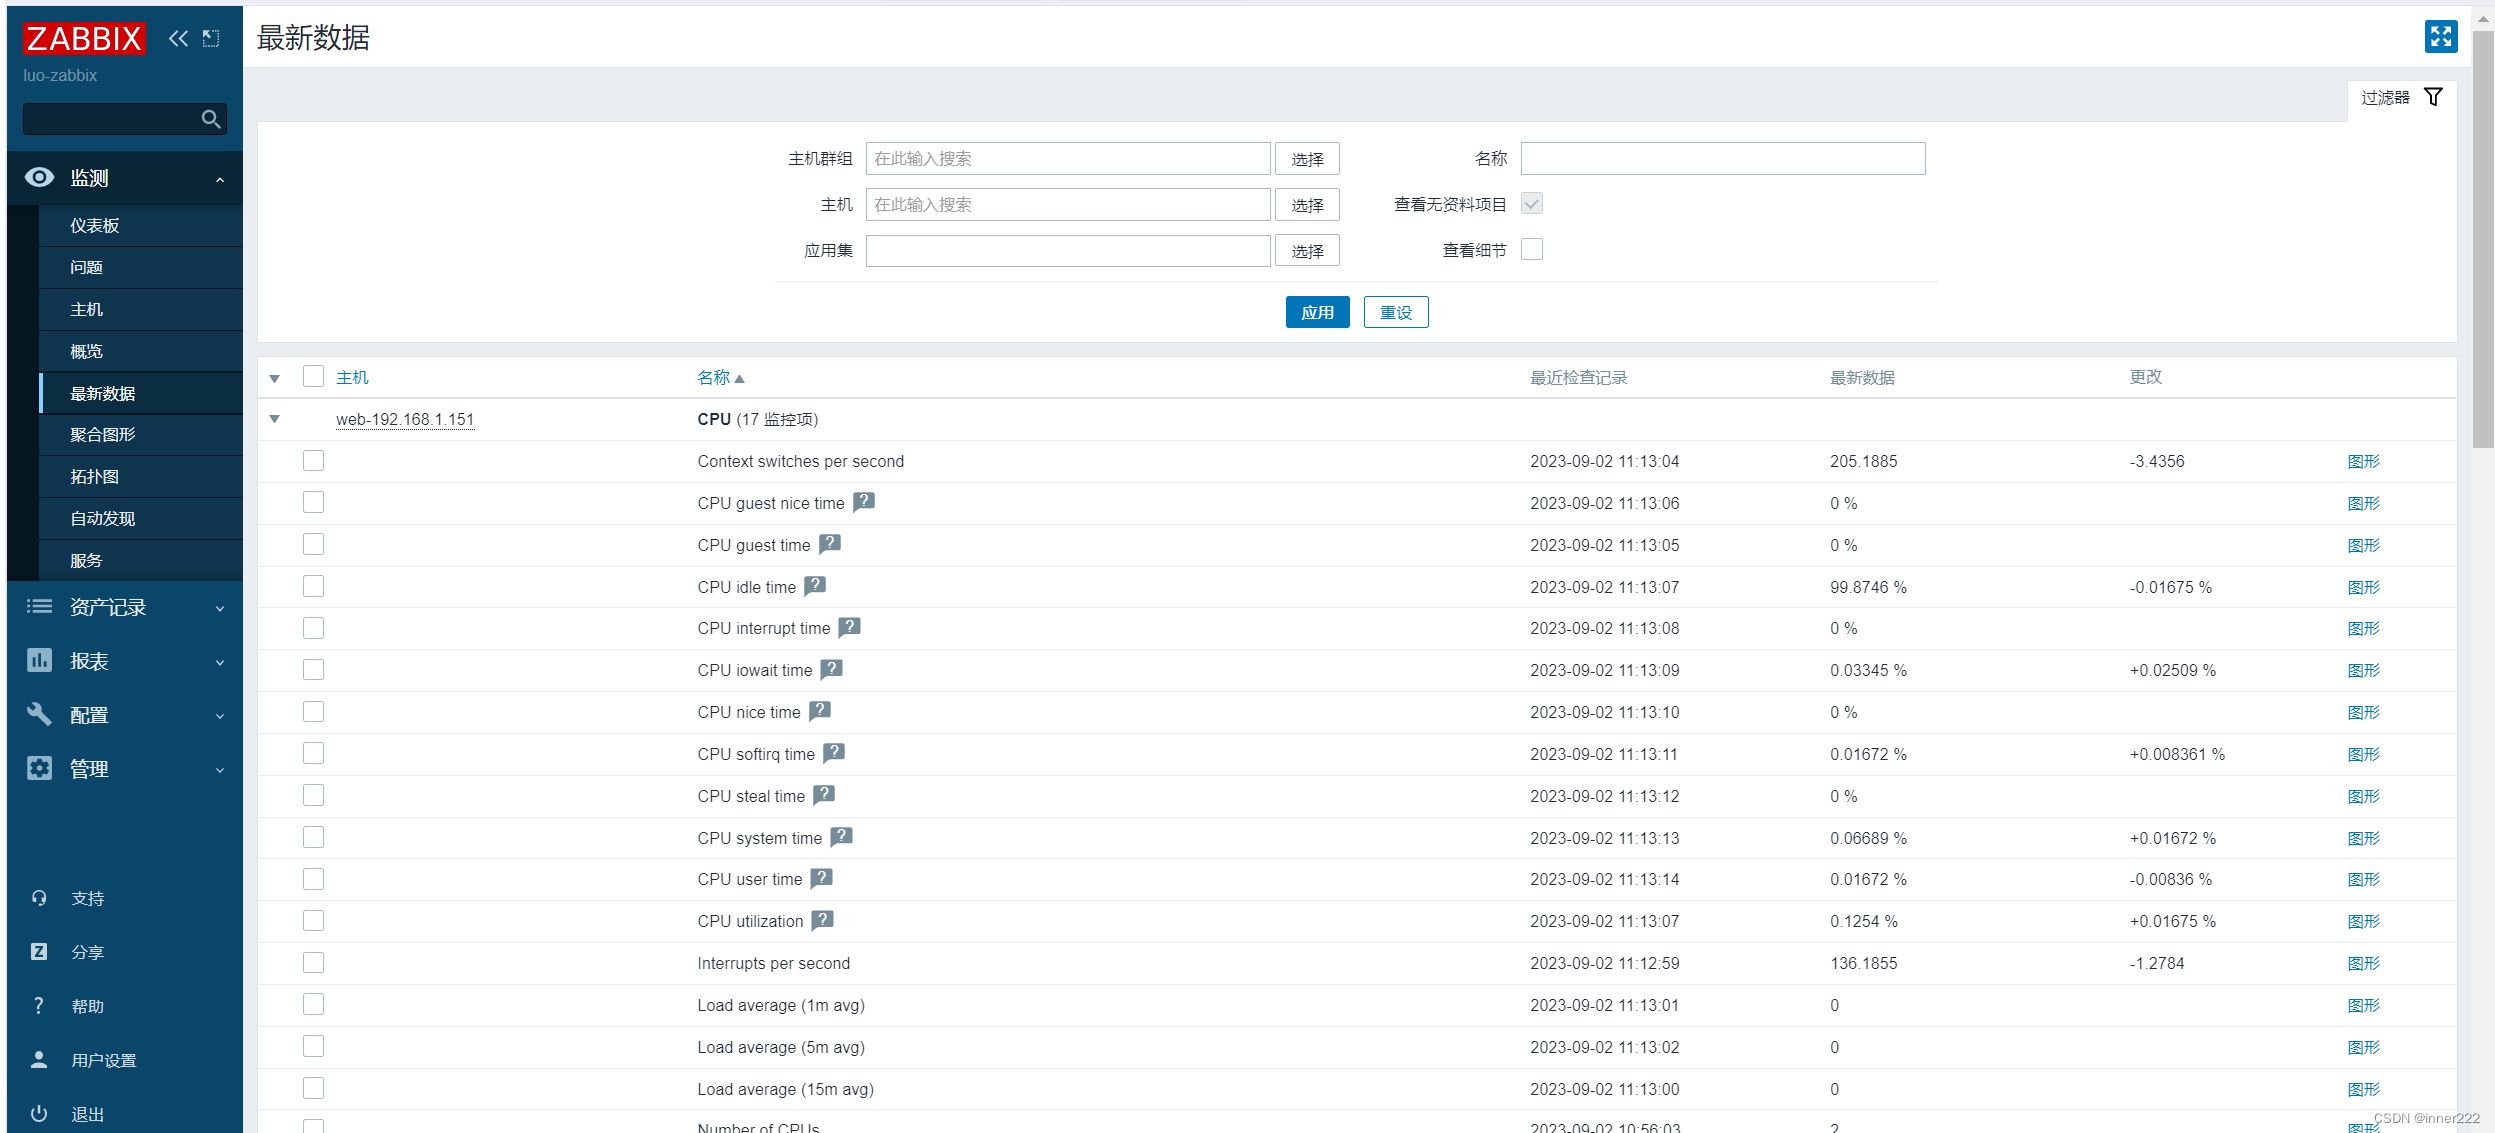
在Zabbix WEB 观察是否有新数据生成
监控windows机器
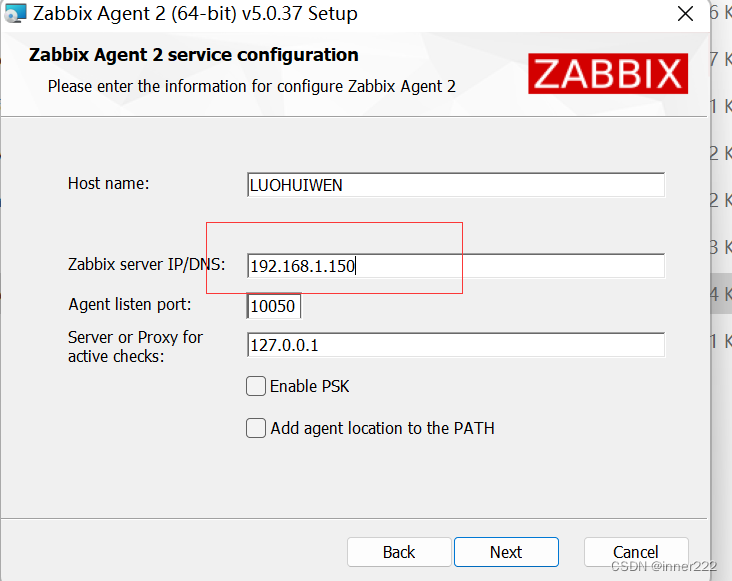
下载包
安装
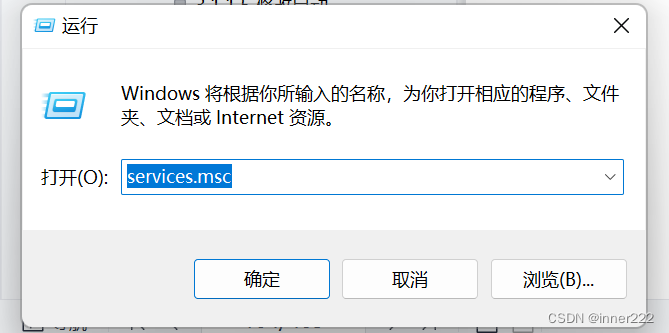
查看进程是否启动

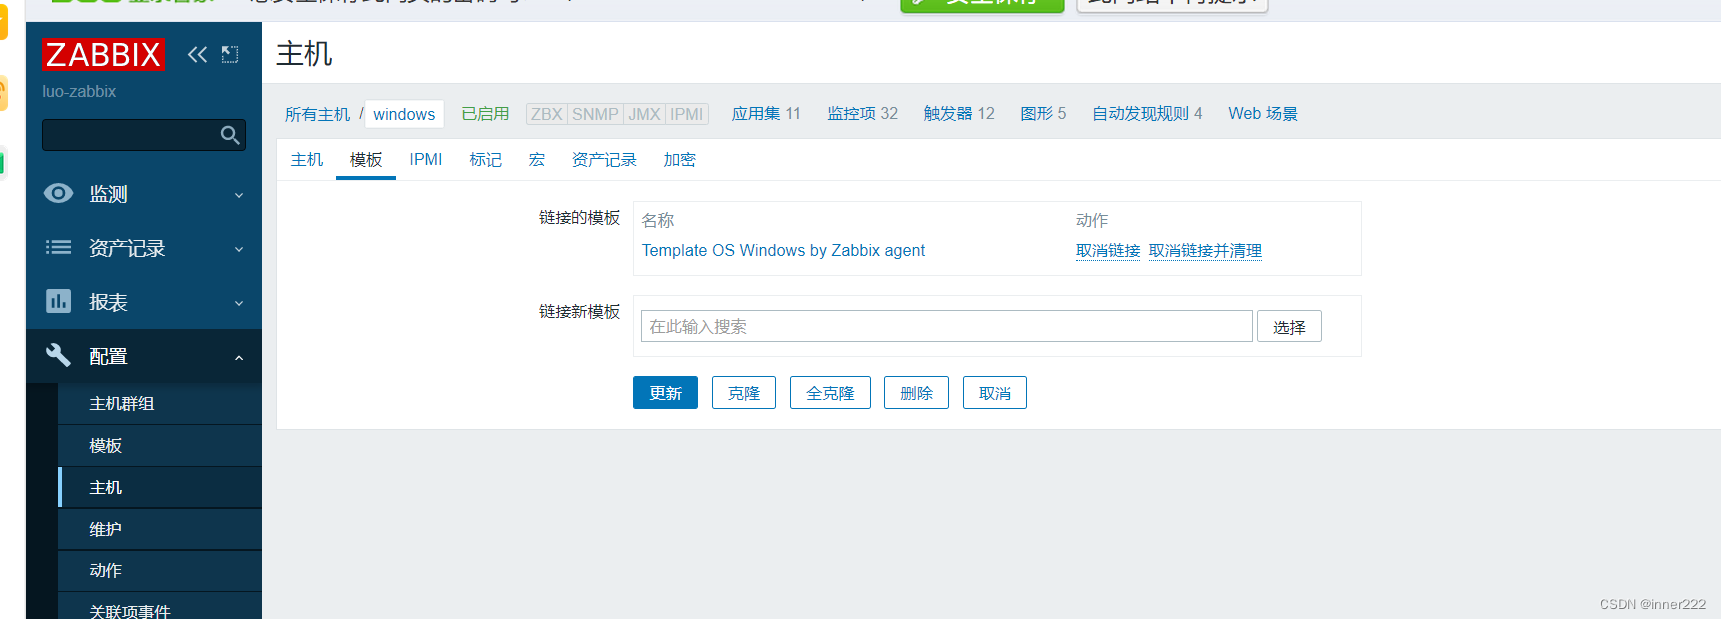
添加主机
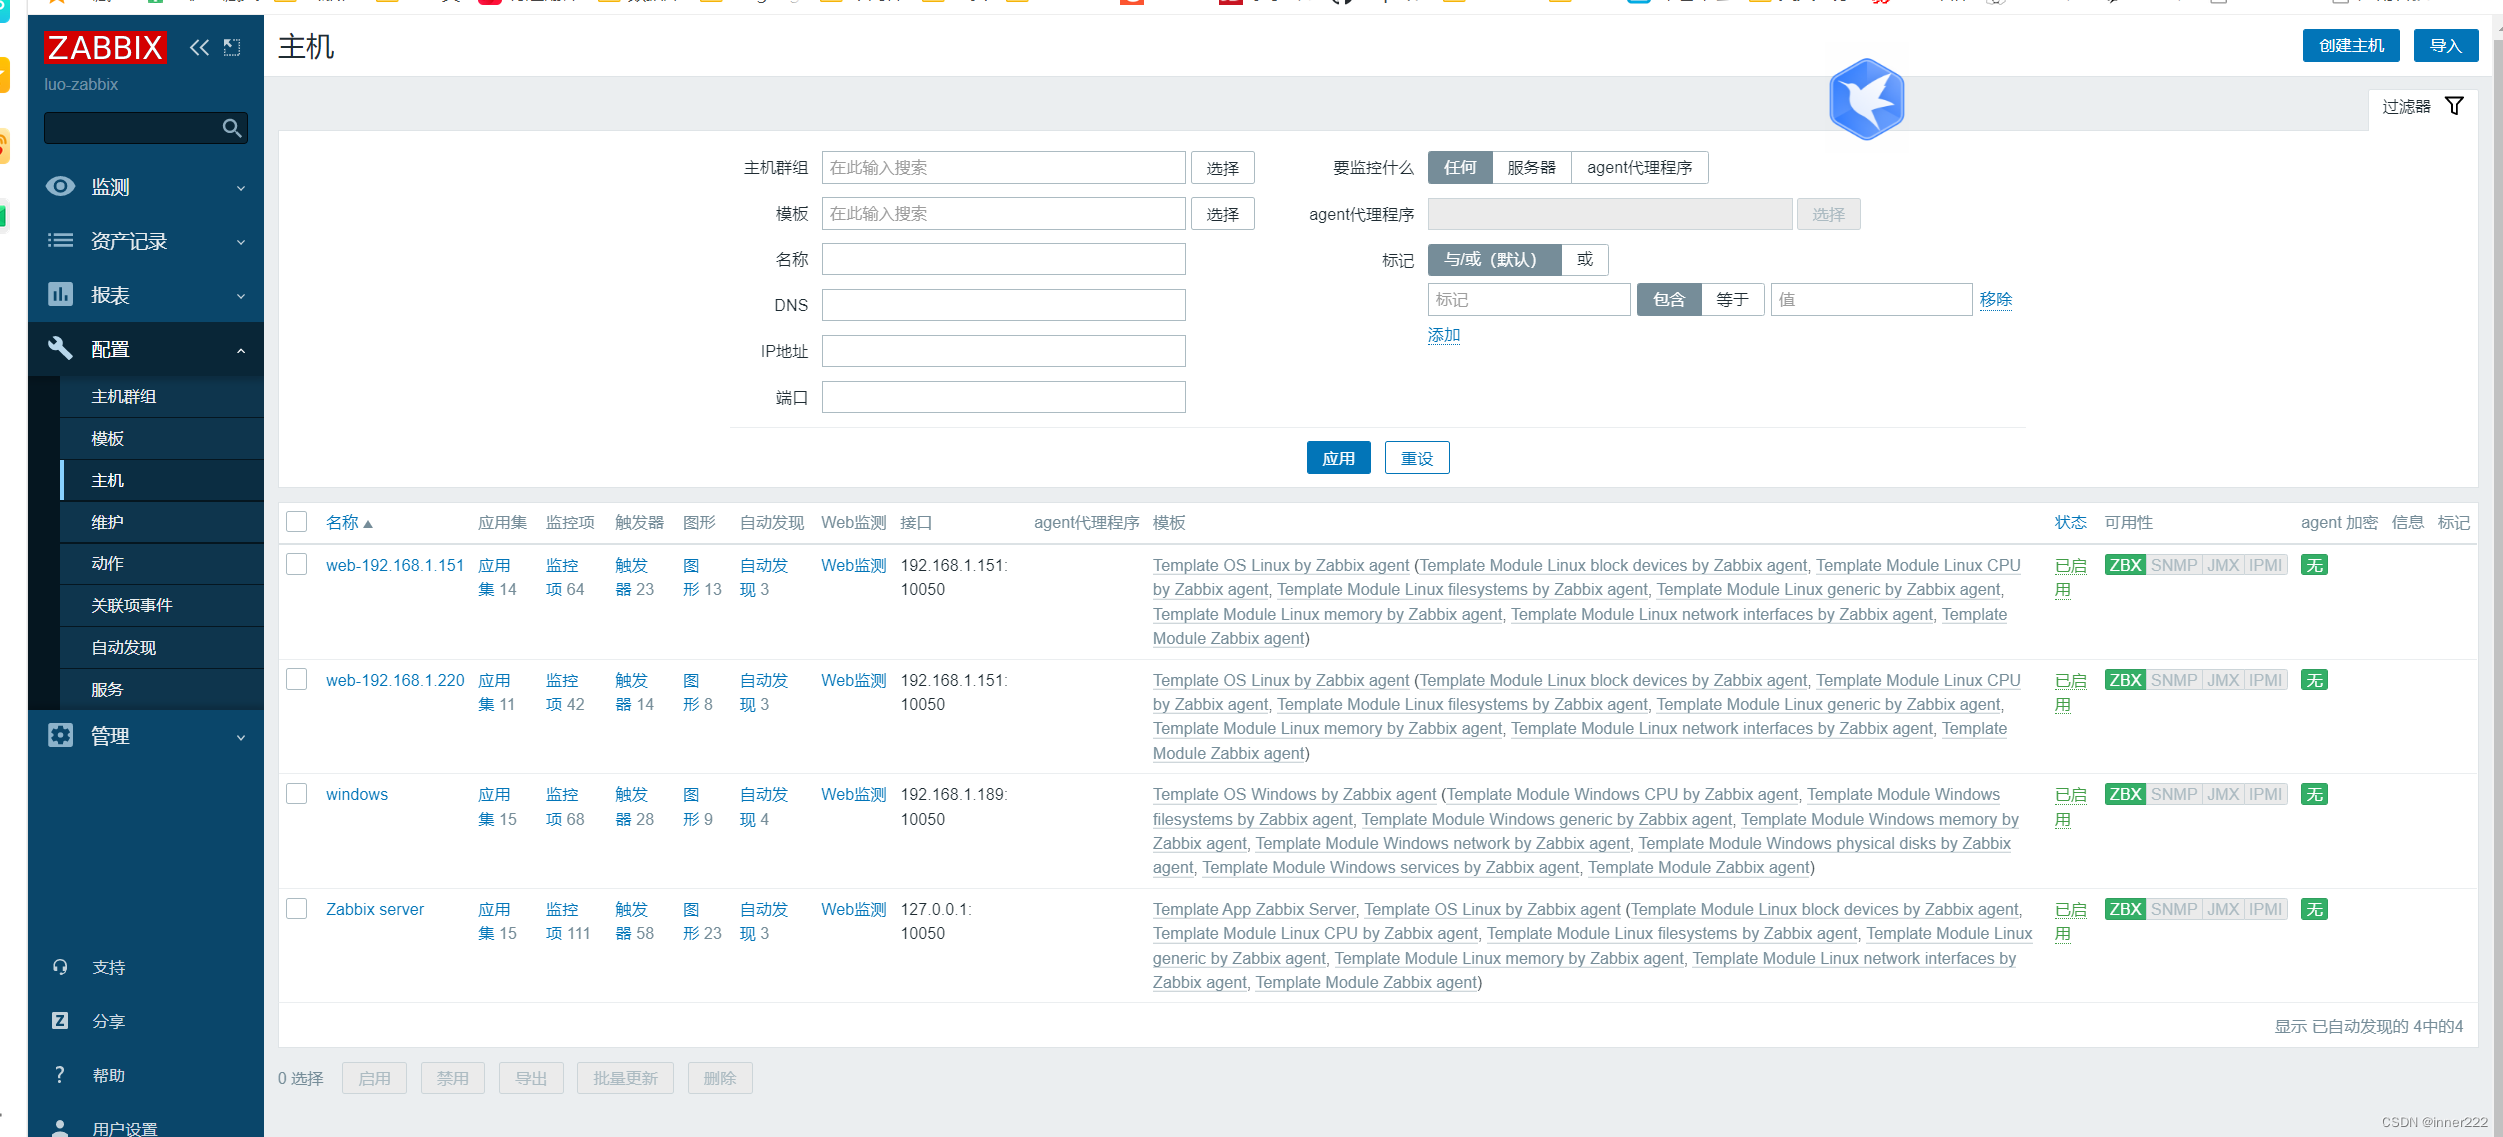
检测agent是否通
root@ubuntu20:~# apt install zabbix-get
root@ubuntu20:~# zabbix_get -s 192.168.1.189 -p 10050 -k “agent.ping”
1
迁移MySQL到独立的服务器
0 停止Zabbix Server服务 (建议)
1 将MySQL上的所有数据备份出来,Zabbix Server 还在不断采集数据
mysqldump -A --single-transaction --default-character-set=utf8 > all.sql
2 恢复到独立同一个版本同一配置的MySQL服务器
mysql -uroot -p123456 < all.sql
3 修改Zabbix Server指向新的MySQL服务器 /etc/zabbix/zabbix_server.conf
4 修改php连接信息指向新的MySQL服务器 /etc/zabbix/web/zabbix.conf.php
新mysql服务器 192.168.1.250 rocky8
mysqldump -uroot -p -A -F --single-transaction > zabbix.sql
scp zabbix.sql 192.168.1.150:/
在独立数据库服务器上安装并恢复数据库
[root@rocky8 ~]# yum install mysql-server
mysql -uroot -p < /zabbix.sql
#重新授权用户允许远程连接zabbix数据库
create user zabbix@‘192.168.1.%’ identified by ‘123456’;
grant all privileges on zabbix.* to zabbix@‘192.168.1.%’;
flush privileges;
#重新授权用户允许远程连接zabbix数据库
#将php的配置指向新的数据库服务器IP
#vim /usr/share/zabbix/conf/zabbix.conf.php #rocky配置文件路径
$DB[‘SERVER’] = ‘192.168.1.250’;
#将Zabbix Server的配置指向新的数据库服务器IP
#vim /etc/zabbix/zabbix_server.conf
DBHost=192.168.1.250
DBPort=3306
启动zabbix,访问验证正常
@ubuntu20:/etc/nginx# systemctl restart zabbix-server.service
配置监控nginx
配置文件修改
location = /basic_status {
            stub_status;
            allow 127.0.0.1;
            allow 192.168.1.150;
            deny all;
            }
添加模版

监控PHP
采样:
通过agent采样 php-》 agent 》 server
通过http
安装php
apt -y install php-fpm
查看文件 dpkg -L php7.4-fpm
修改php配置文件
vim /etc/php/7.4/fpm/pool.d/www.conf
listen=127.0.0.1:9000 #默认是通过socket文件通信
pm.status_path = /php_status #zabbix中是status,要改为status
ping.path = /ping
nginx 添加配置
location ~ ^/(ping|php_status)$ { # zabbix中是status,要改为status
include fastcgi_params;
fastcgi_pass 127.0.0.1:9000;
fastcgi_param SCRIPT_FILENAME
d
o
c
u
m
e
n
t
r
o
o
t
document_root
documentrootfastcgi_script_name;
}
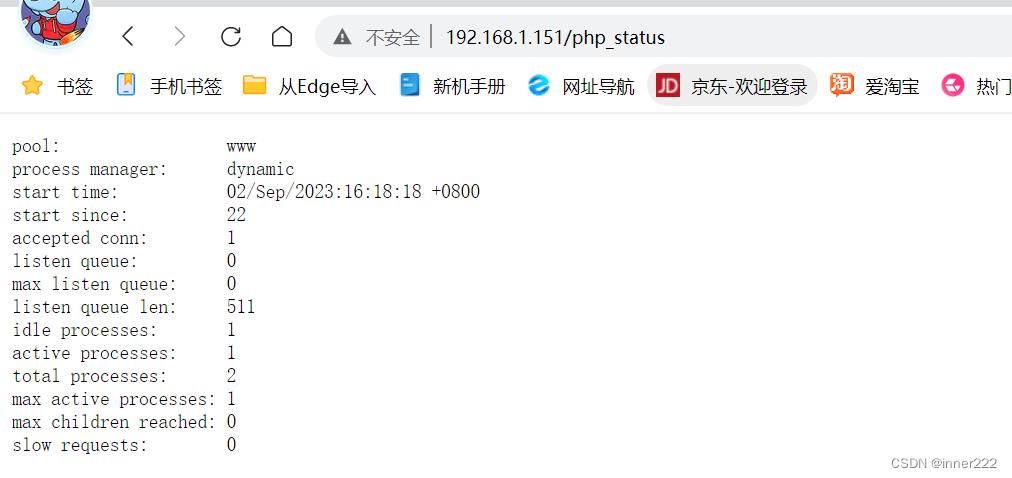
添加模版


状态也错误,php和nginx要和监控项中的对应,将php和nginx中的php_status改为satus,重启服务正常
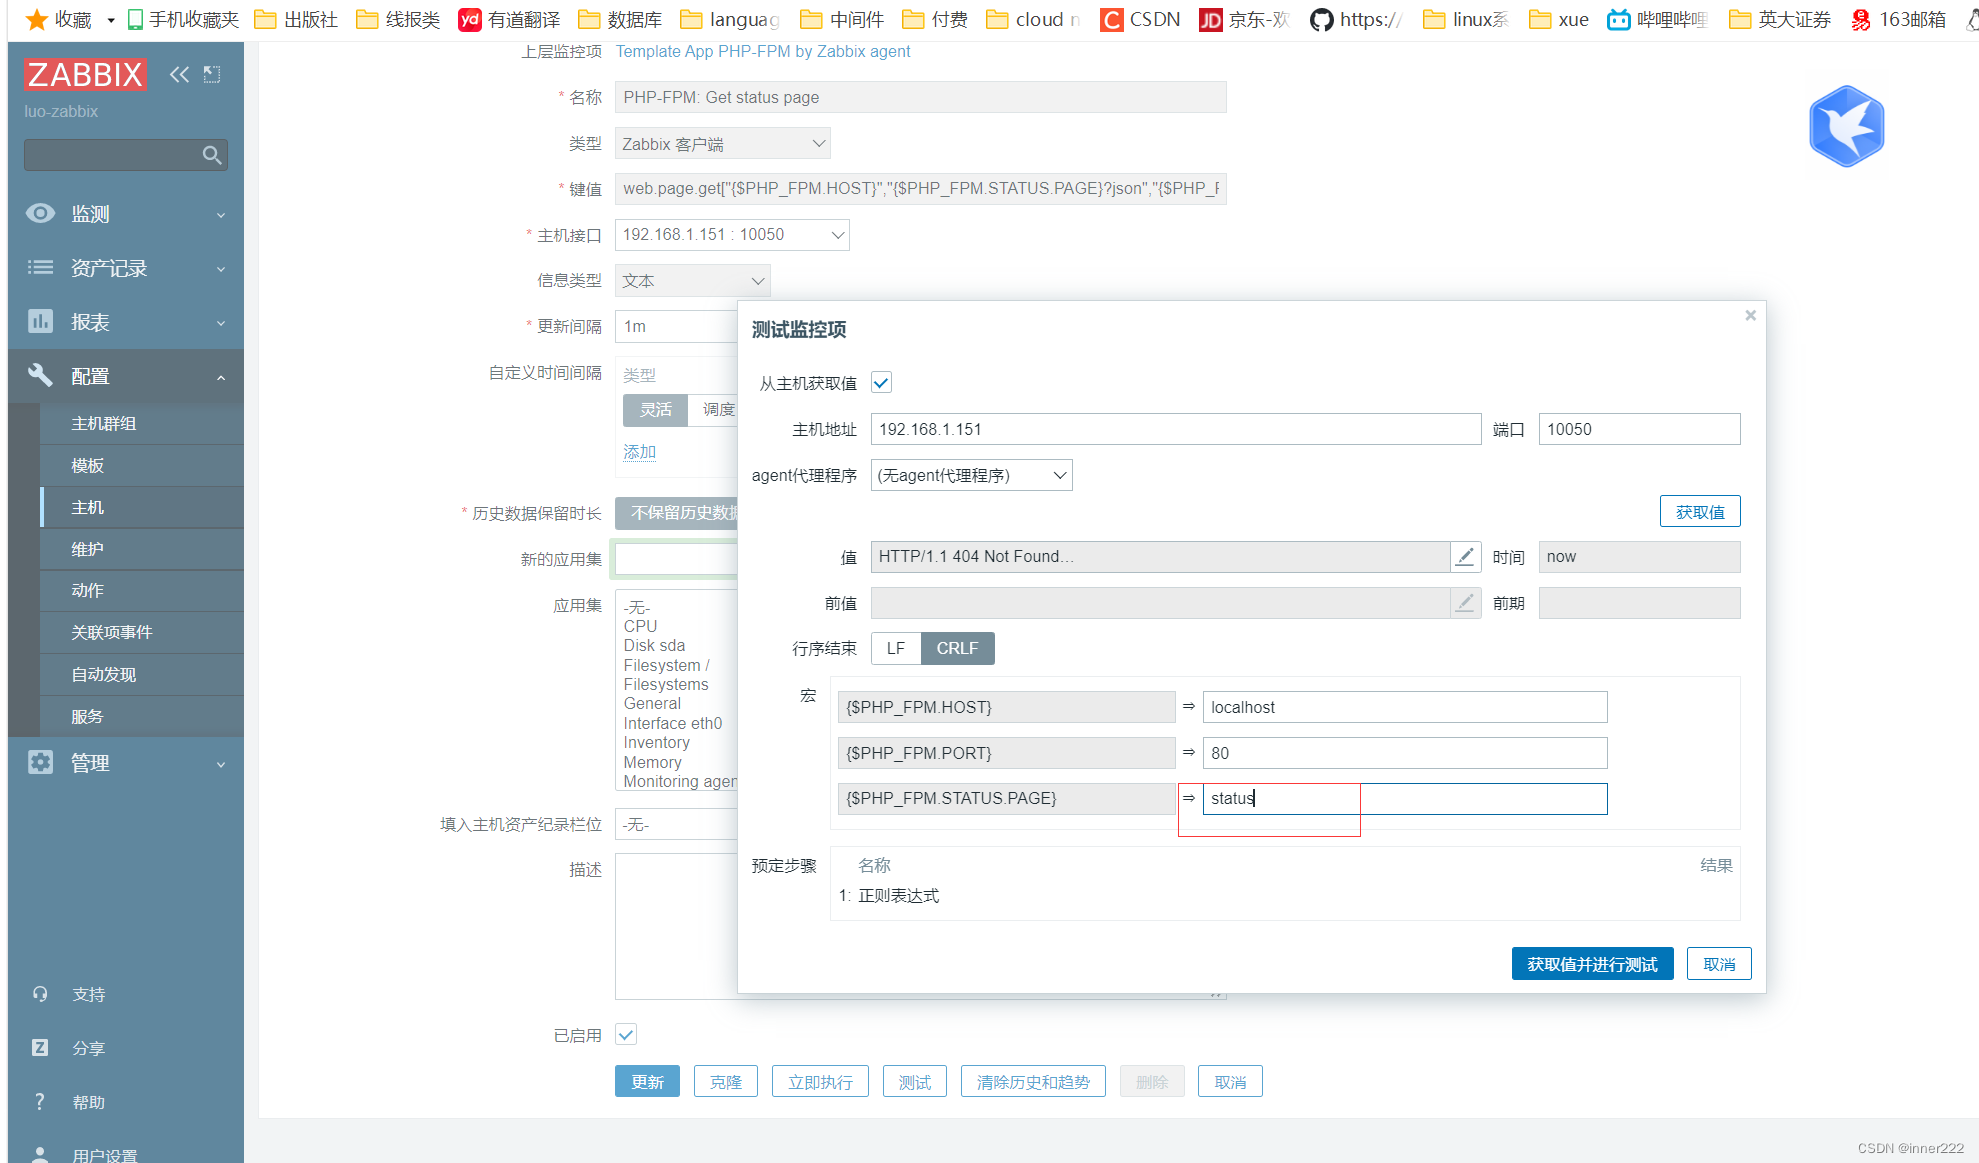
ubuntu20.04配置nginx连接php
        location ~ \.php$ {
                include  snippets/fastcgi-php.conf;
                fastcgi_pass 127.0.0.1:9000;
}
查看数据
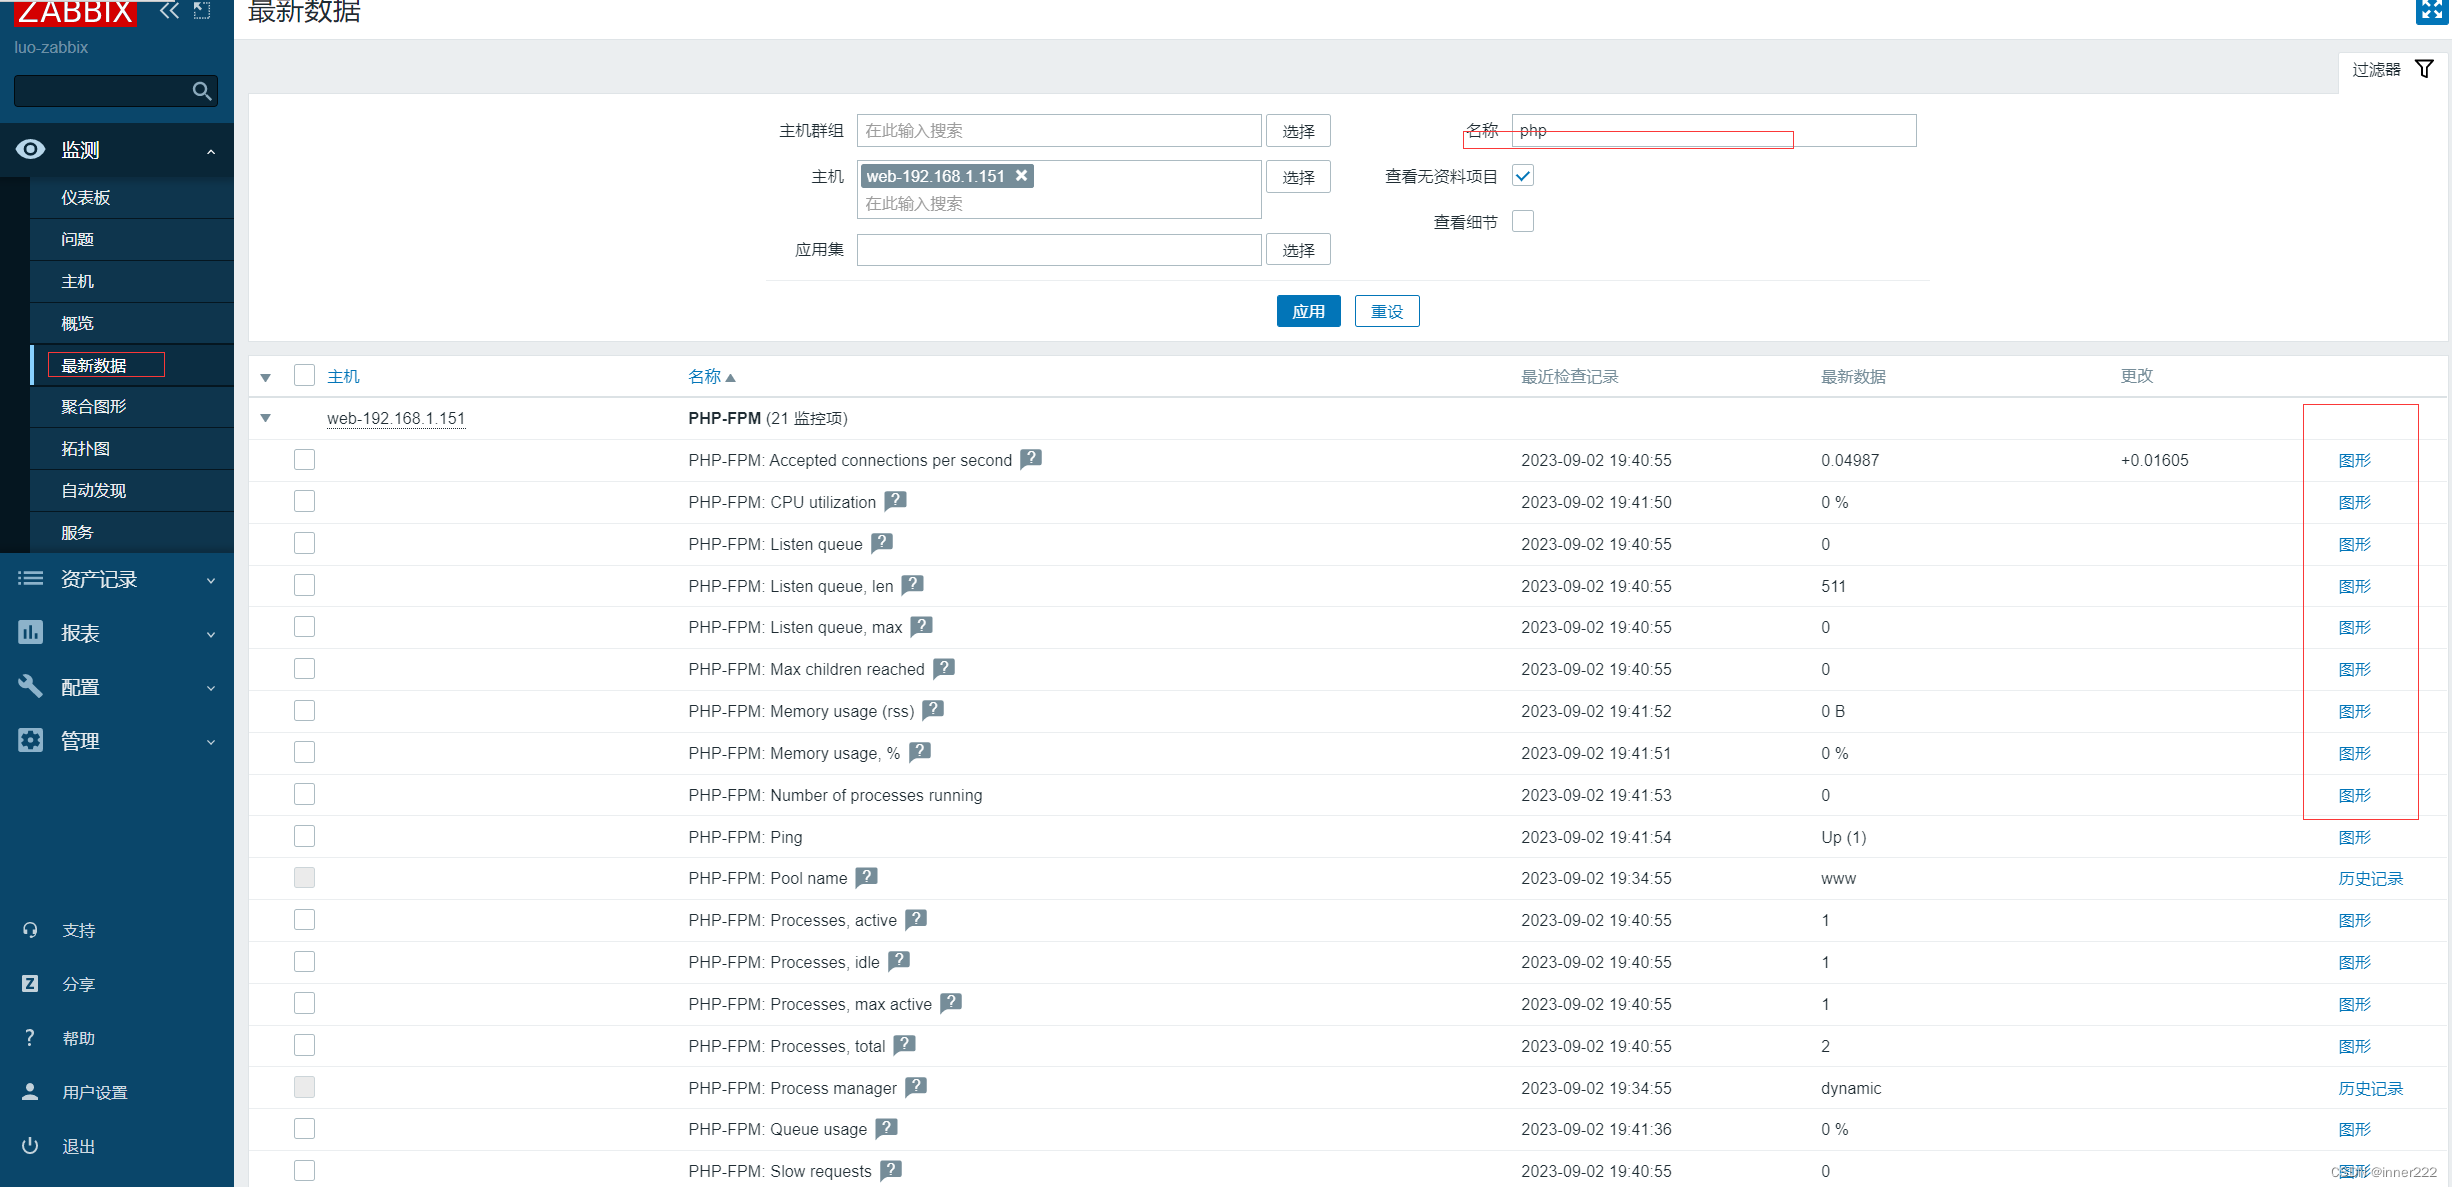
怎么监控一个机器的流程?
1.安装agent,配置agent
2.在web管理界面添加被监控主机
3.关联模版,模版包含很多的监控项
4. 观察脚本
监控100台主机
ansible实现agent和配置


