众所周知,微信扫码登陆的功能,个人网站是无法申请的,我们想在本地想测一下微信登录也是无法实现。
要实现微信登录,首先你得是一个企业单位,有公章才能申请,申请还要花费300块大洋。
如果我们只是想学习和体验一下微信登录,可以自己本地搭建个微型服务模拟一下,过一把瘾也是可以的。
如果你是企业用户,并顺利完成了微信开发者认证,就会得到一个 AppID 和 AppSecret。AppID 是公开的,谁都可以知道。 而 AppSecret 是私密的,只有开发者自己知道。
假设我们得到的 AppID 是 wx123456,AppSecret 是 87wjef4453deg432。
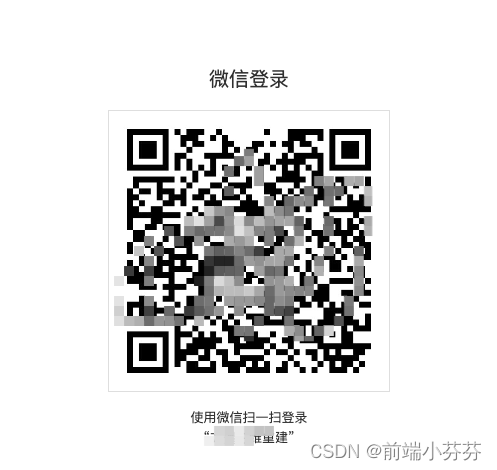
网站使用微信扫码登录,得有个码对不对?
这个码是微信平台提供的,浏览器就是跳转到微信的网址上面有一个二维码。
比如 https://open.weixin.qq.com/connect/qrconnect?appid=wx123456&redirect_uri=http://localhost:8080/wx.html&response_type=code&scope=snsapi_login&state=STATE#wechat_redirect
在这个地址我们传了appid,就是常规渠道我们去微信开发平台申请的应用ID。
http://localhost:8080/wx.html 这个是回调地址,就是说如果用户扫了码,点击确认,就会回调到这个地址。事实上我们不会写localhost,而是单位网址的域名,这个也是要提交材料审核的(还要加盖公章)。
需要明确一点,回调地址不一定是一个页面的地址,也可以是我们接口的地址,比如回调到我们controller中的某一个方法,也是没问题的。
接下来,我们就开始模拟。
二维码页面
要扫码,我们得有一个二维码的页面。
WxController:
/**
 * 二维码页面
 * @return
 */
@RequestMapping("wx/connect/qrconnect")
public String qrCode(){
    return "qrconnect";
}
qrconnect.html
<!DOCTYPE html>
<html lang="en">
<head>
    <meta charset="UTF-8">
    <title>微信扫码登录</title>
    <script src="/js/jquery.min.js" ></script>
    <script src="/js/jquery.qrcode.min.js" ></script>
</head>
<body>
    <h1>请扫码登录</h1>
    <a href="/wx/confirm">
        <div id="qrcode"></div>
    </a>

    <script>
        $(function(){
            $('#qrcode').qrcode({render:'canvas',text:"http://localhost:8080",width:160,height:160});
        });
    </script>

</body>
</html>
因为我们没有在线的网址,所以就给二维码加了一个点击事件,模拟扫码跳转。

点一下就跳转到:http://localhost:8080/wx/confirm
/**
 * 用户授权页面
 * @return
 */
@RequestMapping("/wx/confirm")
public String confirm(){
    return "confirm";
}
模拟扫码登录的授权页面
<!DOCTYPE html>
<html lang="en">
<head>
    <meta charset="UTF-8">
    <title>授权页面</title>
</head>
<body>
  <a href="/wx/pass?appid=wx123456&redirect_uri=wx&response_type=code&scope=snsapi_login&state=STATE#wechat_redirect">同意</a>
</body>
</html>
点同意后跳转到 /wx/pass ,正常的逻辑是跳转到微信的服务端,微信端会根据你传过来的 appid (因为你已经认证过了,所以会直接跳转到你的回调地址,并且带上临时票据 code )
临时票据的作用是你用来获取微信用户的 openid 和 access_token ,这个操作需要你在回调接口中处理。
openid 是微信账号的唯一标识,可以用来对应你系统里面的用户,一般第一次登录的时候,你需要在用户表里面创建这个用户的。后面如果openid在你本地存在,就不用重复创建了。
而access_token是用来获取微信用户的基本信息的,比如昵称,头像之类的,可以用来填充你的本地用户数据。
回调接口
以下代码就模拟了回调获取openid 和 access_token的过程。
/**
 * 用户确认授权
 * @return
 */
@GetMapping("/wx/pass")
public String pass(String appid, String redirect_uri, Model model){
    String appSecret = "87wjef4453deg432";
    String code = "abc"; //模拟临时票据
    //通过 app_id, app_secret 和 code 获取接口调用凭证 access_token 和  授权用户唯一标识 openid
    String getAccessTokenURLFormat = "http://localhost:8080/wx/sns/oauth2/access_token?appid={}&secret={}&code={}&grant_type=authorization_code";
    String getAccessTokenURL = StrUtil.format(getAccessTokenURLFormat, appid,appSecret,code);

    //通过 hutool 工具类 访问url
    String tokenResponse = HttpUtil.get(getAccessTokenURL);
    //通过 hutool 工具类 转换为 json 对象
    JSONObject tokenJson= JSONUtil.parseObj(tokenResponse);

    //获取json 对象相关字段
    Integer errcode = (Integer)tokenJson.get("errcode");
    String errmsg = (String)tokenJson.get("errmsg");
    String openid = (String)tokenJson.get("openid");            //微信用户的唯一标识,可以跟自己数据库的用户进行关联
    String access_token = (String)tokenJson.get("access_token"); //作用是获取该微信用户的具体信息

    model.addAttribute("openid",openid);
    model.addAttribute("access_token",access_token);

    return redirect_uri;
}
http://localhost:8080/wx/sns/oauth2/access_token?appid={}&secret={}&code={}&grant_type=authorization_code
这个地址按理说是微信服务端的,不过我们就模拟一下,在本地写个接口,直接返回即可:
/**
 * 模拟获取AccessToken
 * @return
 */
@GetMapping("/wx/sns/oauth2/access_token")
@ResponseBody
public String getAccessToken(String appid,String secret,String code){
    JSONObject json = new JSONObject();
    json.set("errcode",null);
    json.set("errmsg",null);
    json.set("openid","666");
    json.set("access_token","&HG^FUI");

    return json.toString();
}
用到了hutool的方法,hutool依赖别忘了导入:
<dependency>
    <groupId>cn.hutool</groupId>
    <artifactId>hutool-all</artifactId>
    <version>5.7.20</version>
</dependency>
最终返回的页面是wx.html
<!DOCTYPE html>
<html>
<head>
    <title>Thymeleaf Example</title>
</head>
<body>
<span th:text="'恭喜,微信登录成功。 openid:' + ${openid} + ', access_token:' + ${access_token}"></span>
</body>
</html>
这样一来,当我点同意,就进入回调,回调再模拟远程调用获取openId,得到:

源码下载
https://gitee.com/skyblue0678/shiro-demo
