如果你看过之前的Minecraft 1.19.2建筑生成的话,想必会更好理解这篇教程。
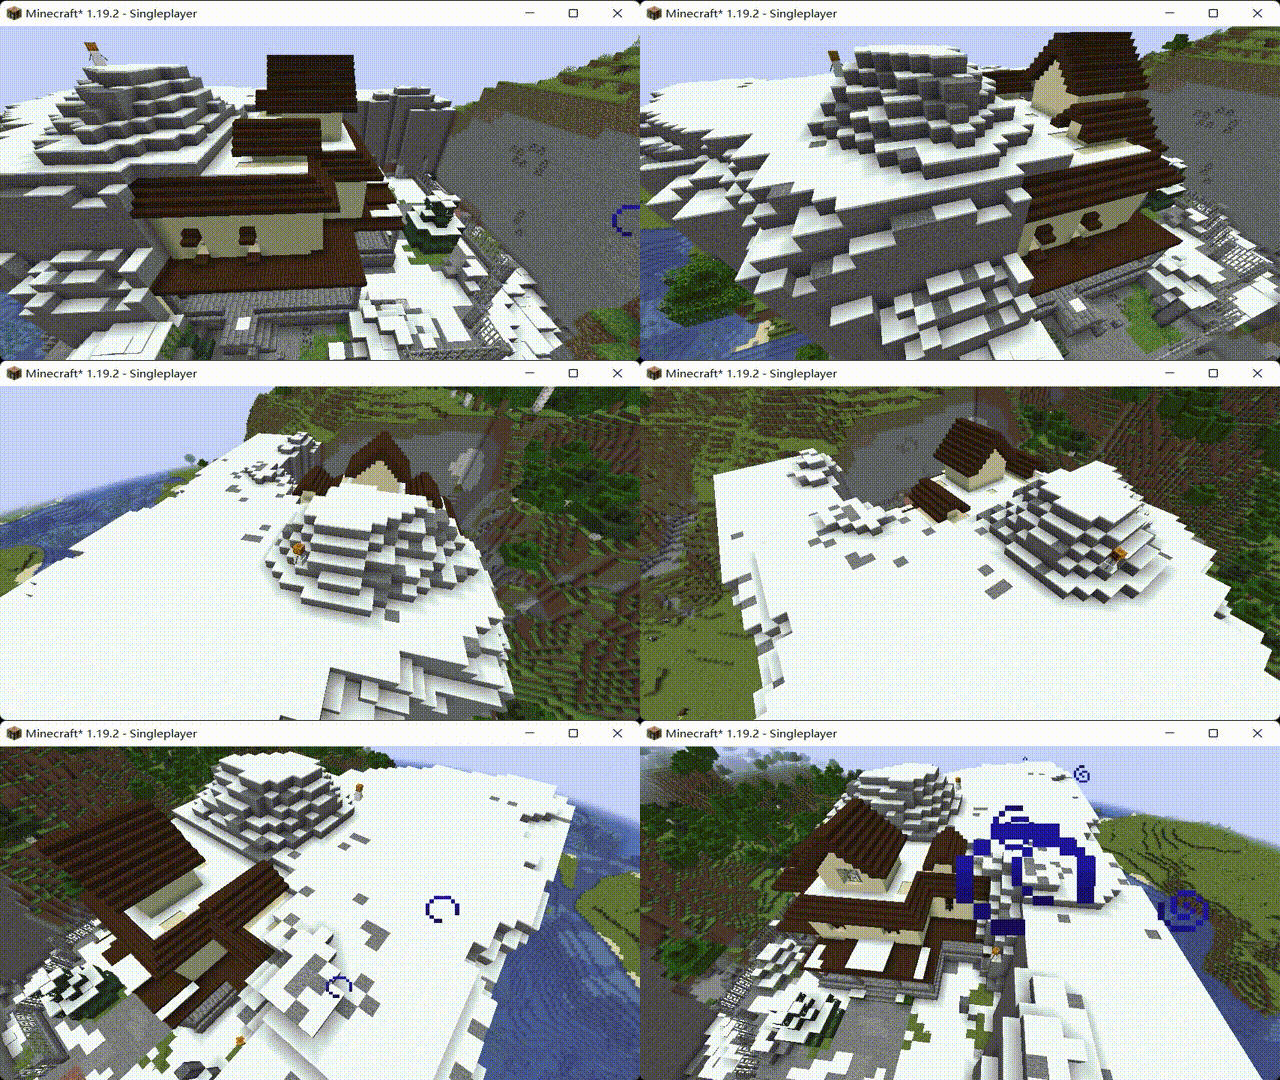
效果演示
效果演示
效果演示
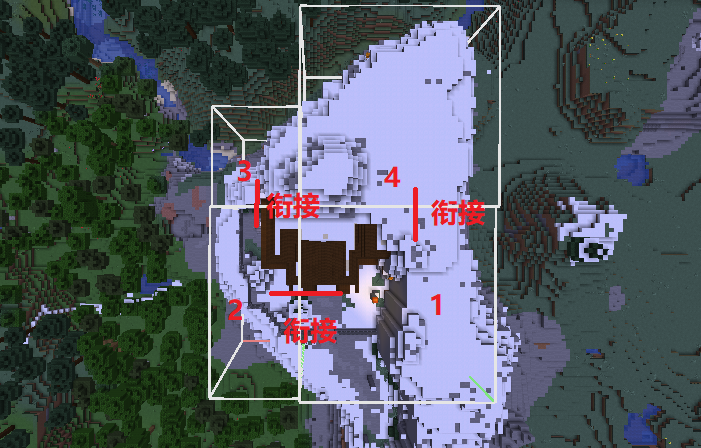
1.我们本期准备生成的建筑分为4块,所以首先需要用4个结构方块将整个建筑包括起来:
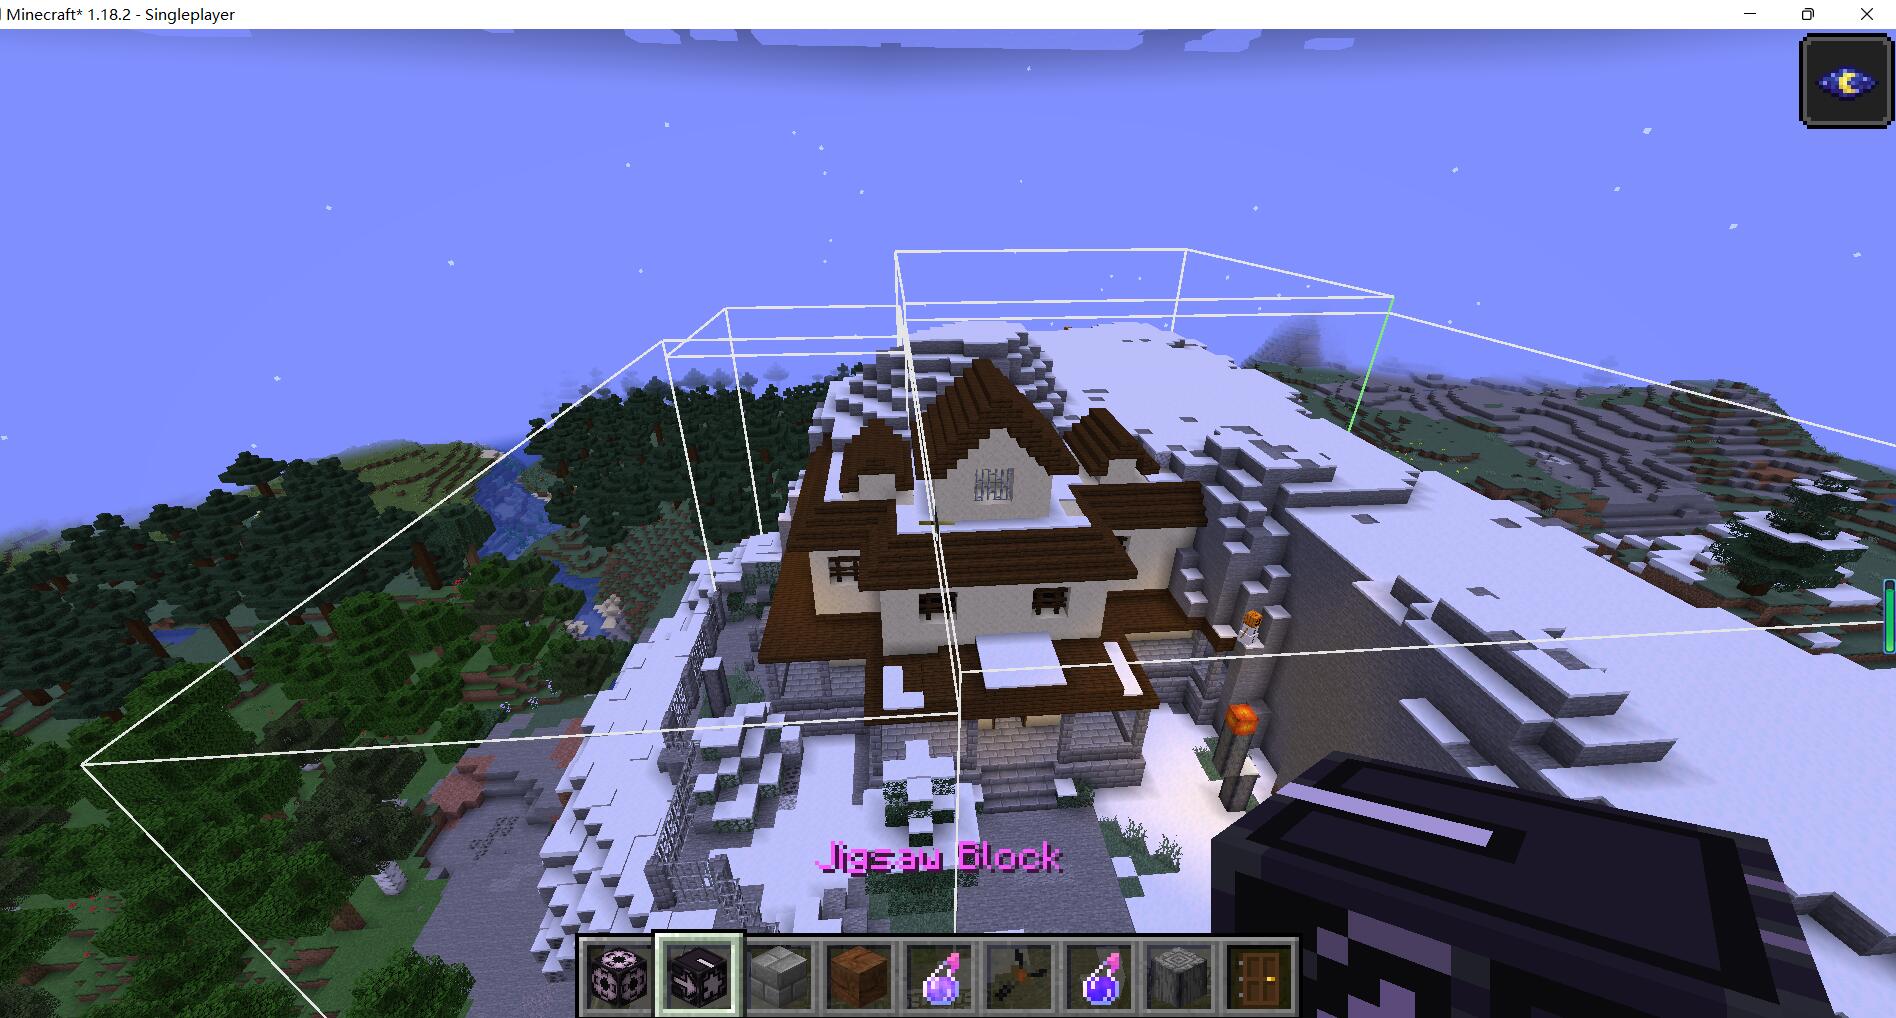
2.之后我们需要用指令拿出拼图方块:
give @p minecraft:jigsaw
我们需要对拼图顺序做一个大致的设计:
来到1、2的衔接点,将我们的结构方块摆放如下:
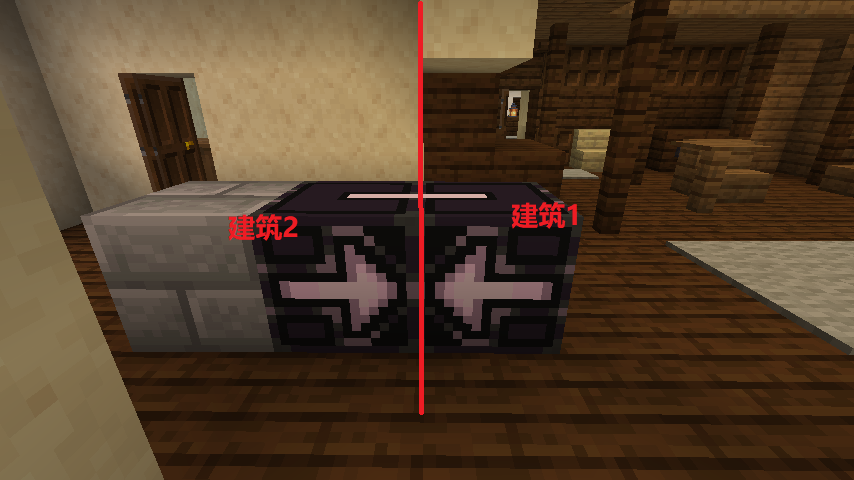
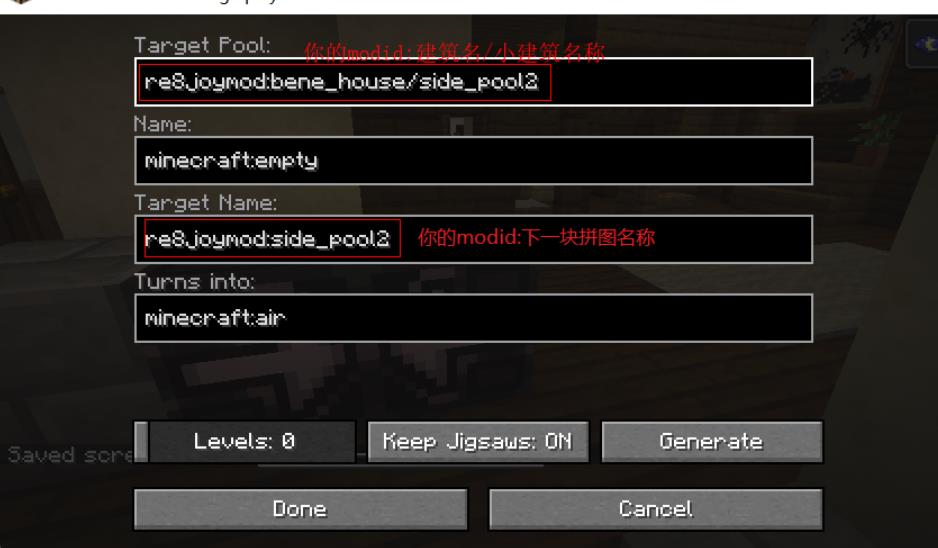
右键建筑1的结构方块,在该方块中输入如下信息:
建筑1要找到建筑2拼图,所以它的Target Pool和Target Name中要是建筑2的名称。
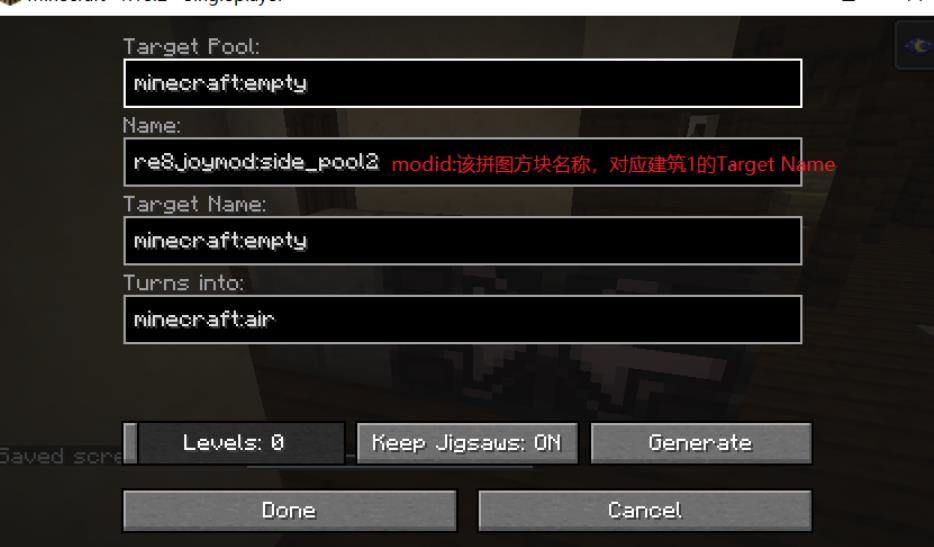
右键建筑2的结构方块,在该方块中输入如下信息:
建筑2只需要被建筑1找到,不需要找别的建筑。所以它没有Target,只有自己的名字,和建筑1的Target Name一样。
同理,我们把另外两个衔接点都给完成。
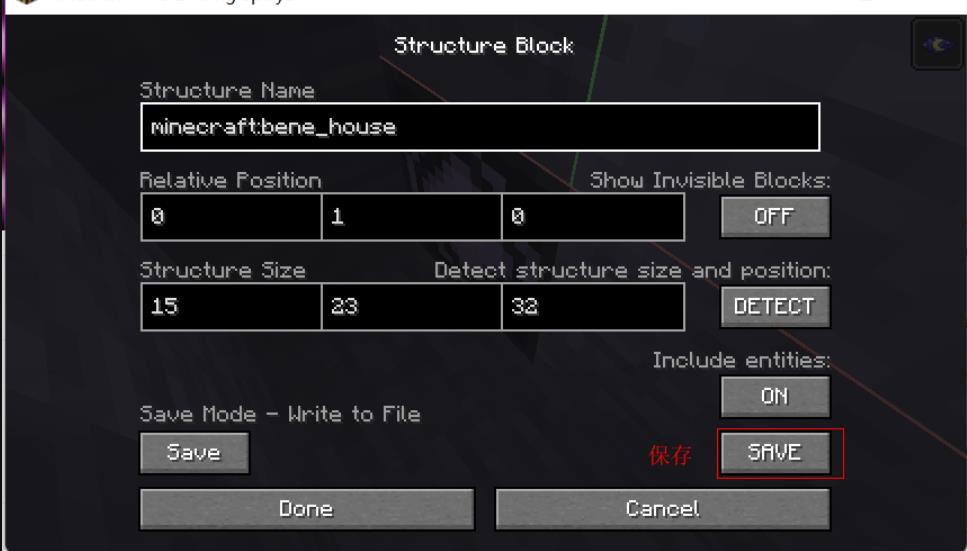
我们将所有的衔接工作搞完后,将所有的建筑保存为.nbt文件:
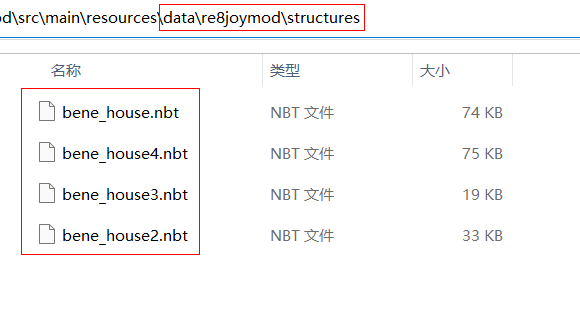
3.在你的地图存档中的generated\minecraft\structures下找到所有的.nbt文件,存放到resources\data\re8joymod\structures路径下:
4.之后来到数据包制作:
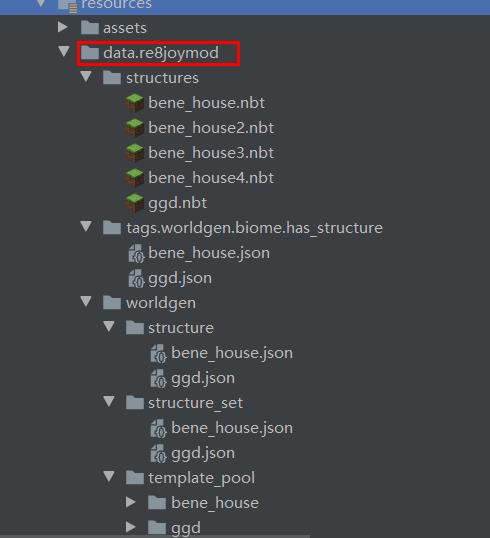
项目结构
项目结构
项目结构
和之前一样,在data\你的modid\tags\worldgen\biome\has_structure中新建文件说明我们的建筑在哪些生态群系生成:
bene_house.json
{
  "replace": false,

  "_comment": " This biome tag can specify the biome directly. Or specify another biome tag by starting with # ",
  "values": [
    "minecraft:plains",
    "re8joymod:re8_ehills_biome"
  ]
}
在data\你的modid\worldgen\structure中新建文件,说明你的建筑内生成什么生物
bene_house.json
{
  "type": "minecraft:jigsaw",
  //起始生成建筑
  "start_pool": "re8joymod:bene_house/start_pool",
  //这个是指从我们中心处可以往外延伸几个建筑
  "size": 2,
  "max_distance_from_center": 100,
  //建筑在什么群系生成,对应上面的has_structure中的文件名称
  "biomes": "#re8joymod:has_structure/bene_house",
  "step": "surface_structures",

  "start_height": {
    "absolute": 0
  },

  "project_start_to_heightmap": "WORLD_SURFACE_WG",
  "use_expansion_hack": false,
  //建筑物内生成的生物
  "spawn_overrides": {
    "creature": {
      "bounding_box": "piece",
      "spawns": [
        {
          "type": "minecraft:bat",
          "weight": 1,
          "minCount": 1,
          "maxCount": 4
        }
      ]
    }
  }
}
注:上面的size可以用3维宽度优先搜索来解释:
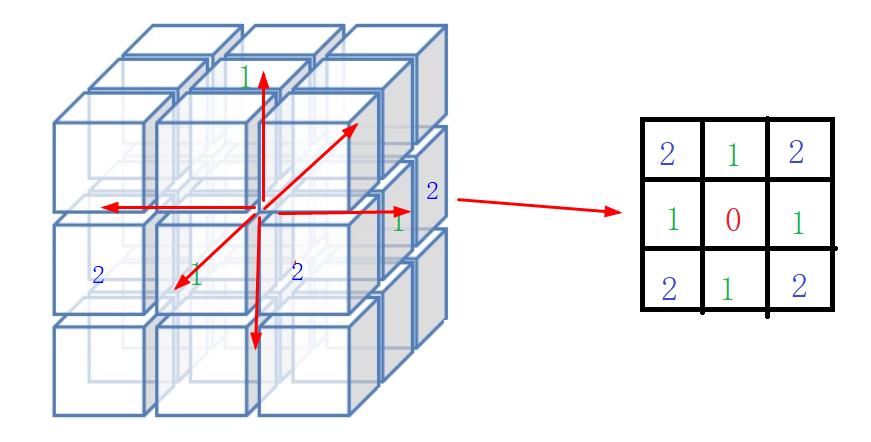
你的建筑会从中心结构朝着上下左右前后共6个方向延伸,延伸的次数就是这个size。
在data\你的modid\worldgen\structure_set中新建文件,说明你的建筑生成间距、建筑生成id等内容:
bene_house.json
{
  // What structures to pick to try and spawn if a spot passes the placement check.
  // If two or more structures in this list can spawn in a biome at a spot, a random one based on weight is chosen to spawn
  "structures": [
    {
      "structure": "re8joymod:bene_house",
      "weight": 1
    }
  ],
  "placement": {
    // Make sure this is unique and does not match any other structure set's salt
    //找一个介于int间的数,不要和其他的建筑一样
    "salt": 36694,

    // The average distance apart in chunks for spawn attempts
    //平均几个区块的距离生成一个这种建筑
    "spacing": 24,

    // Minimum distance apart in chunks for spawn attempts
    // MUST ALWAYS BE SMALLER THAN spacing ABOVE
    "separation": 20,

    // The kind of placement to use. The other kind is ring based like strongholds use.
    "type": "minecraft:random_spread"
  }
}
在resources\data\re8joymod\worldgen\template_pool中新建我们的建筑文件夹bene_house,将我们第2步中定义的建筑新建出来:
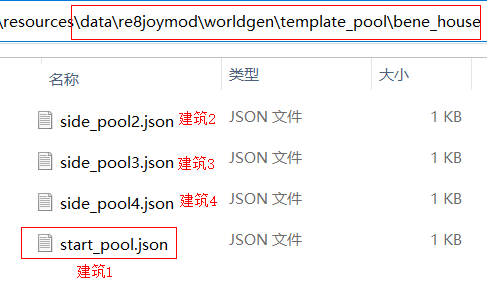
我们的建筑1作为整个大型建筑的开头,需要命名为start_pool
start_pool.json
{
  //作为建筑的start_pool
  "name": "re8joymod:bene_house/start_pool",

  "fallback": "minecraft:empty",

  "elements": [
    {

      "weight": 1,
      "element": {

        //第3步中我们第一个建筑保存的名称
        "location": "re8joymod:bene_house",

        "processors": "minecraft:empty",


        "projection": "rigid",


        "element_type": "minecraft:single_pool_element"
      }
    }
  ]
}
第二个建筑作为拼图,命名为side_pool2
side_pool2.json
{
  //建筑2作为拼图,命名为side_pool2
  "name": "re8joymod:bene_house/side_pool2",
  "fallback": "minecraft:empty",
  "elements": [
    {
      "weight": 1,
      "element": {

        //第3步中我们第2个建筑的名称
        "location": "re8joymod:bene_house2",
        "processors": "minecraft:empty",
        "projection": "rigid",
        "element_type": "minecraft:single_pool_element"
      }
    }
  ]
}
第三个、第四个同理:
side_pool3.json
{
  "name": "re8joymod:bene_house/side_pool3",
  "fallback": "minecraft:empty",
  "elements": [
    {
      "weight": 1,
      "element": {


        "location": "re8joymod:bene_house3",
        "processors": "minecraft:empty",
        "projection": "rigid",
        "element_type": "minecraft:single_pool_element"
      }
    }
  ]
}
side_pool4.json
{
  "name": "re8joymod:bene_house/side_pool4",
  "fallback": "minecraft:empty",
  "elements": [
    {
      "weight": 1,
      "element": {


        "location": "re8joymod:bene_house4",
        "processors": "minecraft:empty",
        "projection": "rigid",
        "element_type": "minecraft:single_pool_element"
      }
    }
  ]
}
5.保存所有文件 -> 运行游戏
如果你能在你第4步中定义的生态群系里找到你的建筑,就说明你成功了!!!




![[附源码]Node.js计算机毕业设计高校学科竞赛管理系统Express](https://img-blog.csdnimg.cn/3e1497c5467e4b9d9bc096dcf2991741.png)


