大家敢相信吗,原来VBA竟然可以实现电缆结构自动出图,换句话说,只要输入数据,VBA会自动将电缆的结构画出来,同时还可以渲染,结果竟然不输画图软件,真真让我刮目相看。这里我就不过多介绍VBA了,相信用过office软件的小伙伴都或多或少的接触过VBA,好的,话不多说,上干货。
本章开始我们来看一下如何做单芯线,并能实现立体图。实现的结果如下:
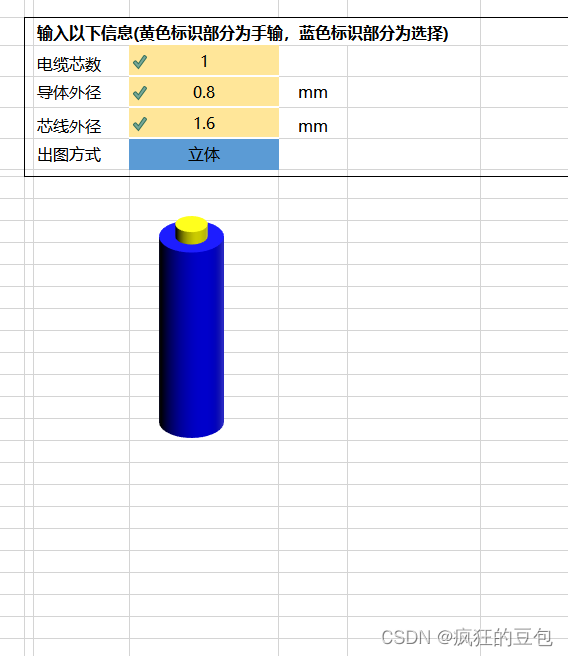
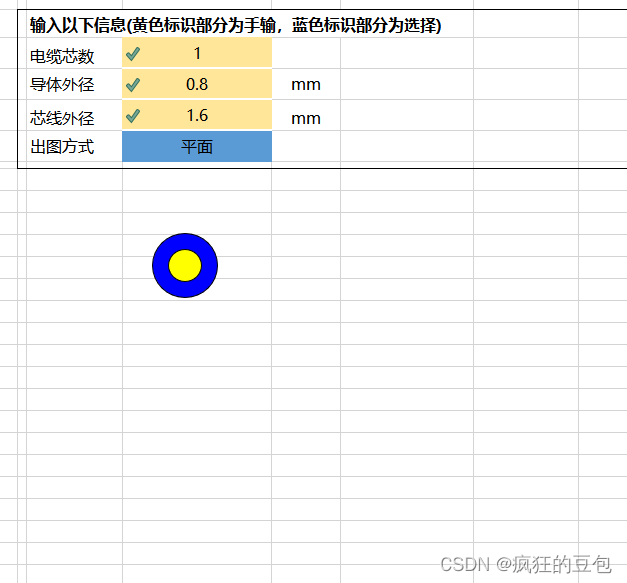
电缆芯数、导体外径和芯线外径均可以调整。
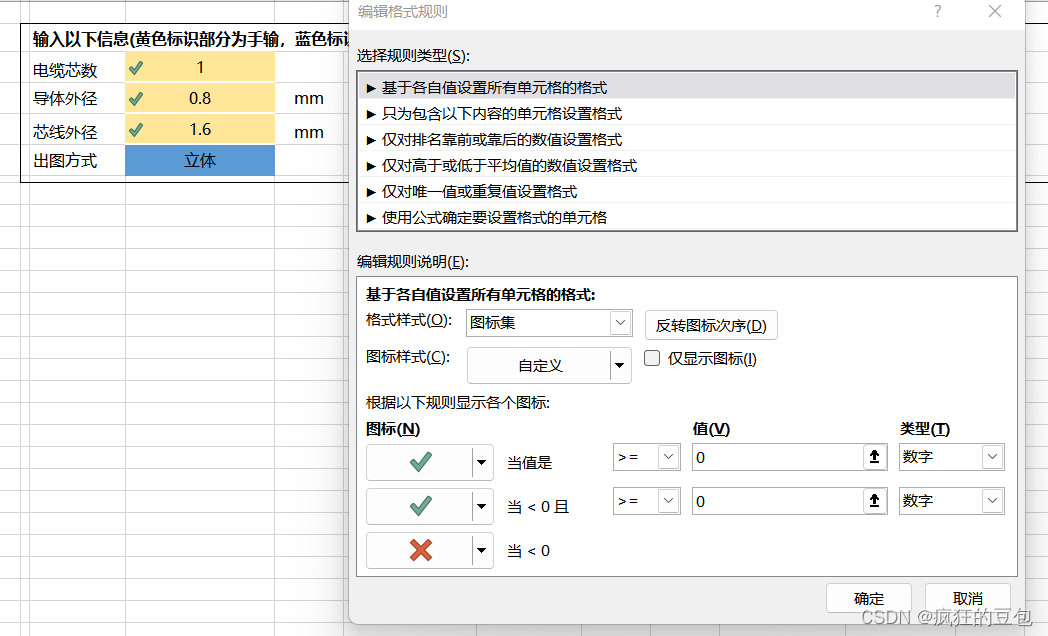
备注:1.电缆芯数圆的个数的输入框建立“数据验证”,双重保护避免出现低于0的数字,更好的防错机制。

2. 界面中每个输入框建立了条件格式,其目的避免出现低于0的数字。
实现的代码如下:
Sub Drawcable()
If ActiveSheet.Shapes.Count > 0 Then

ActiveSheet.Shapes.SelectAll
     Selection.Delete
End If

Dim i, Cn, X, Y, Cc As Integer
Dim cable(), TB() As Shape
Dim od, cd, id, coe As Variant
Dim cable_index(), TB_index() As String
Cn = Sheet1.Range("D3").Value
C1 = Sheet1.Range("D3").Value
Pi = Application.Pi()
coe = 28.35
td = Sheet1.Range("D4").Value * coe
id = Sheet1.Range("D5").Value * coe
X = 250
Y = 300

ReDim cable(Cn), TB(Cn)
ReDim cable_index(Cn), TB_index(Cn)
Dim cable_c, arr_c As Variant
   arr_c = Sheet2.Range("B1:B12")
   cable_c = Application.Transpose(arr_c)
For i = 1 To C1
      Set TB(i) = Sheet1.Shapes.AddShape(msoShapeOval, X, Y, id, id)
      TB_index(i) = TB(i).Name
        TB(i).Select
      With Selection.ShapeRange
         tc = cable_c(i)
         With .Fill
        .Visible = msoTrue
        .ForeColor.SchemeColor = tc
         End With
         With .Line
        .Weight = 0.5
        .ForeColor.SchemeColor = 64
         End With
      End With


      Set cable(i) = Sheet1.Shapes.AddShape(msoShapeOval, X, Y, td, td)
       cable_index(i) = cable(i).Name
       cable(i).Select
       With Selection.ShapeRange
         With .Fill
        .Visible = msoTrue
        .ForeColor.SchemeColor = 13
         End With
         With .Line
        .Weight = 0.25
        .ForeColor.SchemeColor = 64
         End With
        .IncrementLeft 0.5 * (id - td)
        .IncrementTop 0.5 * (id - td)

       End With


       ActiveSheet.Shapes.Range(Array(i + 1, i)).Select
         Selection.ShapeRange.Group.Select

         With Selection.ShapeRange
         If C1 > 1 Then
         .IncrementLeft 0.5 * (id + Gap) * (1 / Sin(3.1416 / C1)) * Sin(2 * i * 3.1416 / C1)
         .IncrementTop -0.5 * (id + Gap) * (1 / Sin(3.1416 / C1)) * Cos(2 * i * 3.1416 / C1)
         End If
         End With

    Next


    ActiveSheet.Shapes.SelectAll
         Selection.ShapeRange.Select
         'Selection.Copy
         'Sheet1.Paste
         'Selection.Left = X - 0.5 * (od - id) - 0.5 * (id - td)
         'Selection.Top = Y - 0.5 * (od - id) - 0.5 * (id - td)

      If Sheet1.Range("D10") = "立体" Then
         Selection.ShapeRange.Line.Visible = msoFalse
         Selection.ShapeRange.ThreeD.Depth = 150
         Selection.ShapeRange.ThreeD.RotationX = 180
         Selection.ShapeRange.ThreeD.RotationY = 120
      ActiveSheet.Shapes.Range(cable_index).Select
         Selection.ShapeRange.ThreeD.Z = 80
      ActiveSheet.Shapes.Range(TB_index).Select
         Selection.ShapeRange.ThreeD.Z = 70

      End If


End Sub
代码段:
1. Shapes.AddShape(msoShapeOval, x, y, w, h)'画出一个圆形
解释:worksheet对象msoShapeOval:圆形标识符,这个是微软定死的,就这么用就对了x:圆形左位置,y:圆形上位置,w:圆形宽,h:圆形高
2. 常量coe可以更改,以便调整大小
3. ForeColor.ShemeColor为颜色,等于号后面的数字为颜色索引号,大家可在搜索中输入"颜色索引",一看就懂。
4. 立体图的命令相对简单,三维坐标设定值即可。
小结
第二篇文章可以实现立体图,这也是VBA可以实现渲染的高级用法。
关注我,带你体验不一样的编程乐趣。









![[附源码]Python计算机毕业设计高铁乘坐舒适性在线调查及评价系统Django(程序+LW)](https://img-blog.csdnimg.cn/97c6222bbc104f9683a9a9b2e3d7f79d.png)
