由于app经常需要用到支付功能,然而ios用户,是无法用支付宝、微信进行支付,这时候只能用到苹果支付。苹果支付是苹果公司推出的一种在线支付方式,用户可以通过苹果支付购买应用、内购道具等等。
原理
苹果支付的实现原理是通过在应用内调用苹果提供的API来实现的。开发者需要将自己的应用注册到苹果的开发者中心,并在应用内部调用苹果提供的支付API,将支付请求发送到苹果服务器。苹果服务器会验证支付信息,并将支付结果返回给应用。如果支付成功,应用会收到苹果服务器发送的支付成功通知。
注册开发者账号
首先,开发者需要在苹果官网注册一个开发者账号。注册成功后,开发者需要创建一个App ID,并开启支付功能。
apple store 地址:https://appstoreconnect.apple.com/login
苹果官方帮助:https://help.apple.com/app-store-connect/?lang=zh-cn#/devb57be10e7
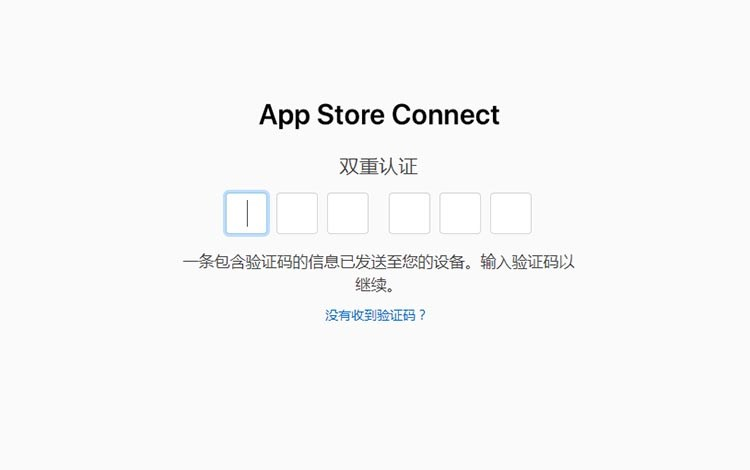
登录appstoreconnect中心
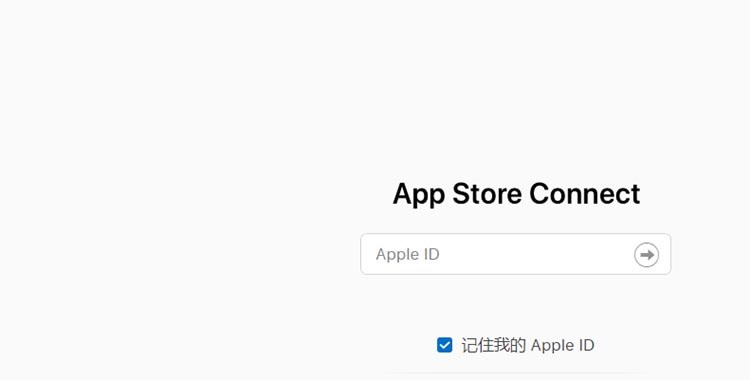
现在登录需要双重验证,请确保账户已经开通!
在appstoreconnect中心找到协议、税务和银行业务
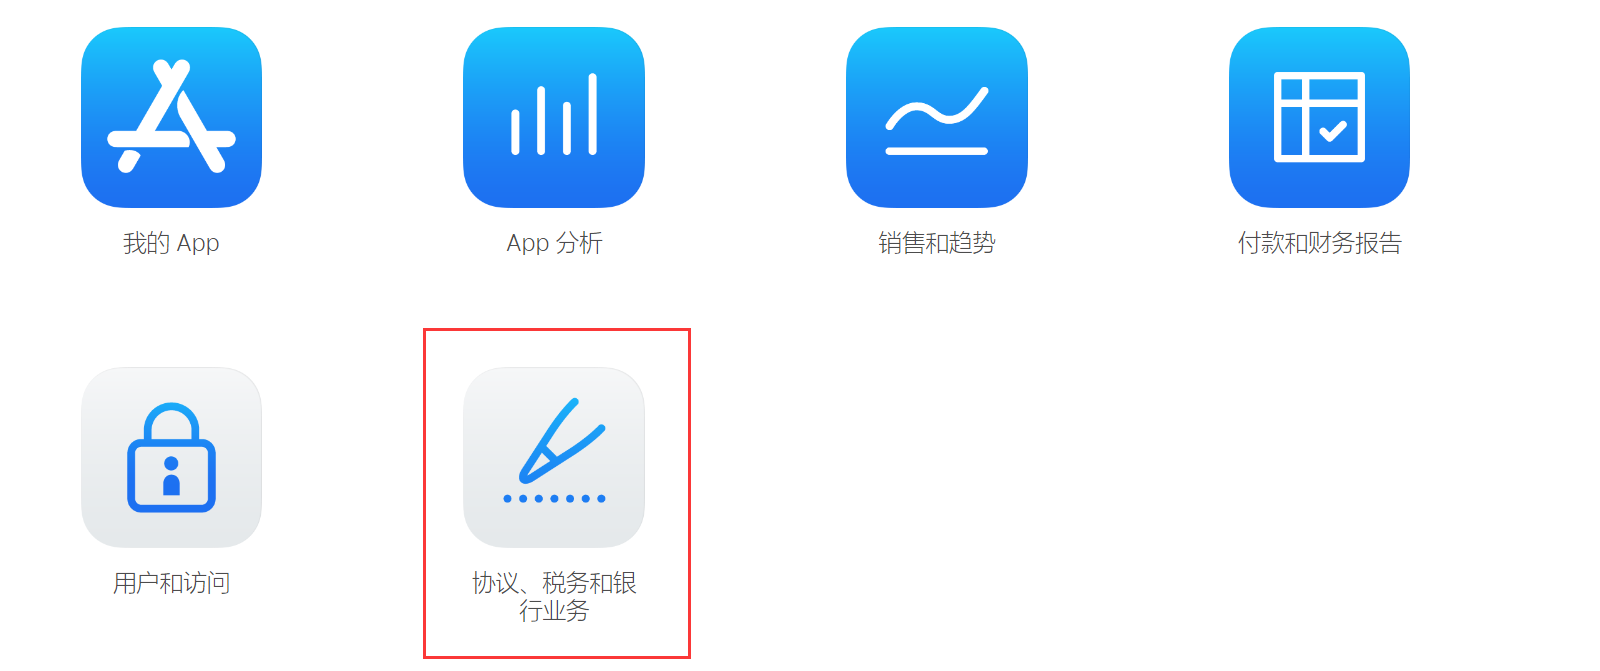
点击进入协议、税务和银行业务 版块,进行下一步的申请
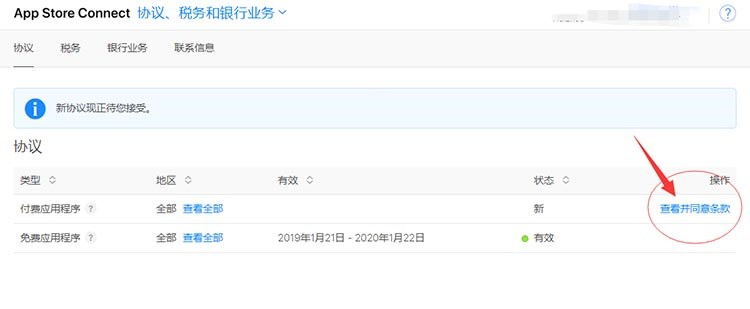
可以看到,默认的【免费应用程序】是和账号的到期时间是一致的!
而【付费应用程序】则需要“同意条款”
点击右侧“查看并同意条款
在弹出界面输入您的真实联系地址

该地址信息请您认真并真实填写!
提示:地址必须是全英文,可以是拼音,如果地址太长可以分2行填写
(注意:这里名称和地址总是报错,说什么参数太长,要注意修改下,之前减少了很多,都不行,后来又突然可以了)
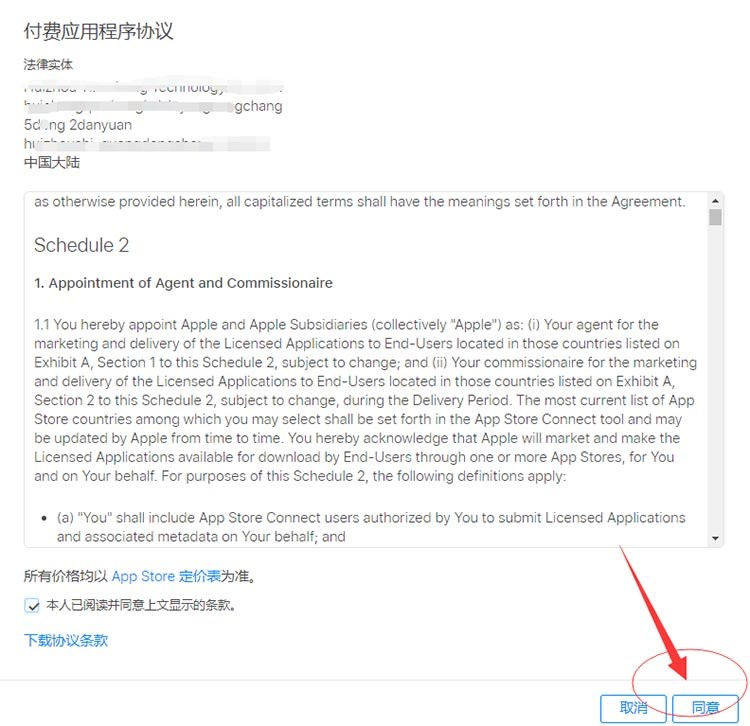
点击【同意】完整地址信息提交!
地址信息更新之后,跟着设置“税务、银行业务和联系信息”
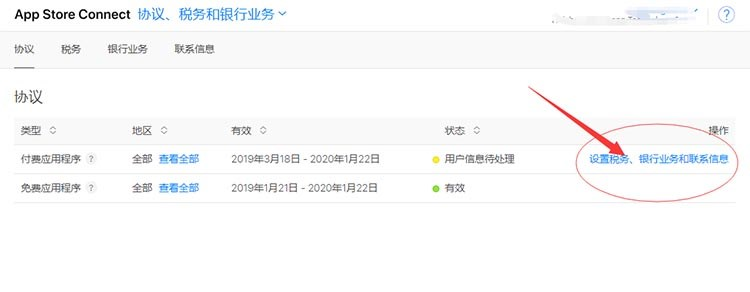
点击右侧【税务、银行业务和联系信息】进入设置页面
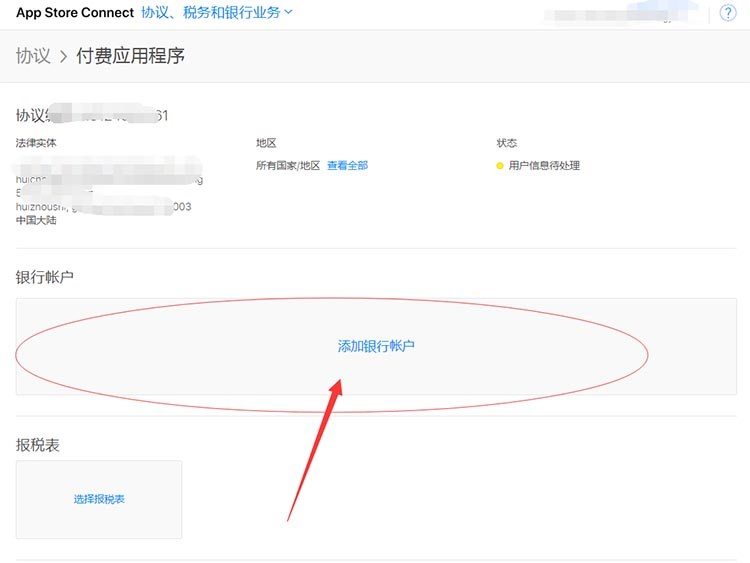
在设置页面,点击添加【银行账号】

温馨提示:个人用户在账户持有人姓名哪里输入拼音;公司用户输入邓白氏编码一致的公司英文名!
按照自己的真实信息填写,公司就写公司,个人就写个人!
这里需要一个CNAPS,是大陆地区每个银行的银联收款号,请电话至您账号的开户行询问!
当然也可以在线查询!前提是你知道自己的开户行详细信息!
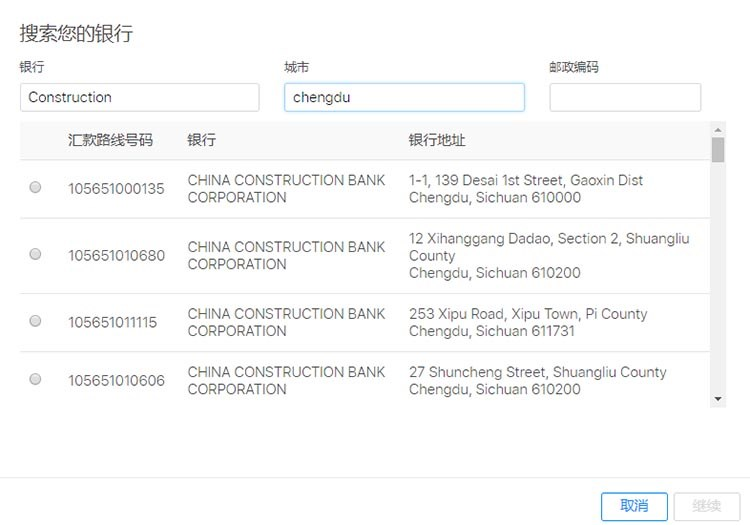
温馨提示:还是建议电话至开户行询问银联12位编码(支付系统行号)!
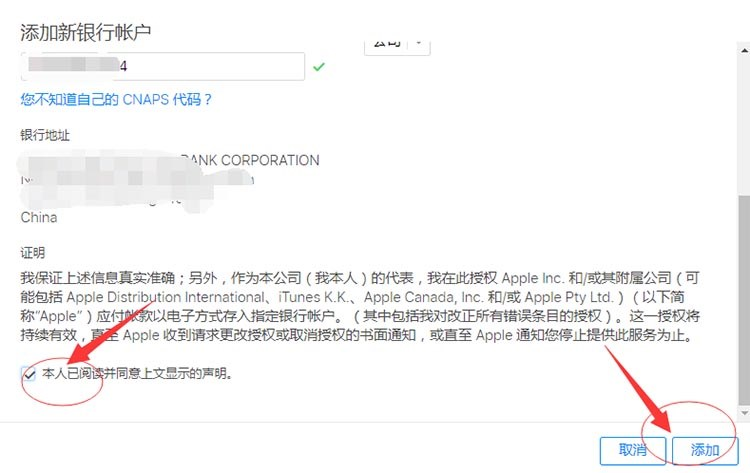
输入信息齐全之后,下拉,勾选协议,点击右侧【添加】即可完成
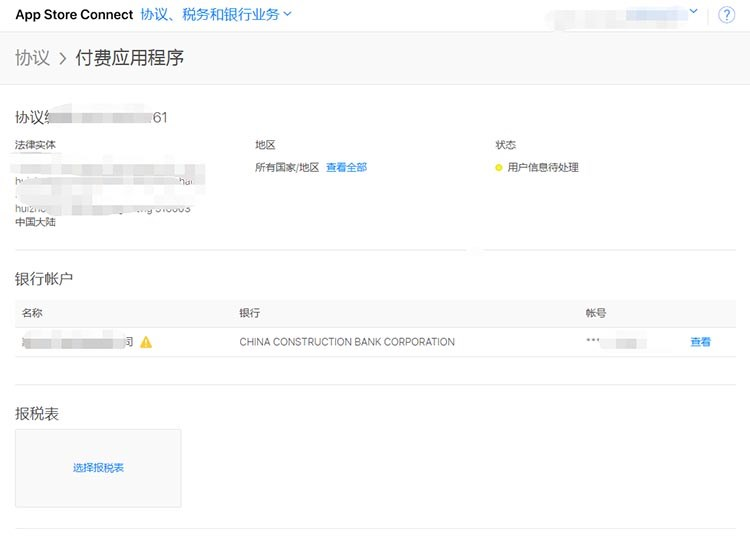
如图,银行信息就设置好了。
设置税务协议,美国税务协议!
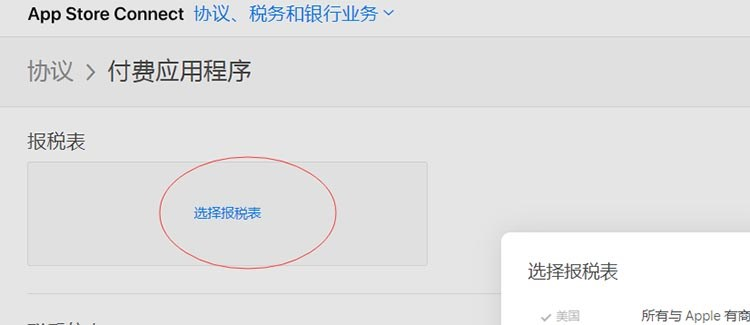
直接点击【完成】选择美国协议!
当然如果你账号是以下三个国家或中国台湾省的,可以单独勾选,独立填写!
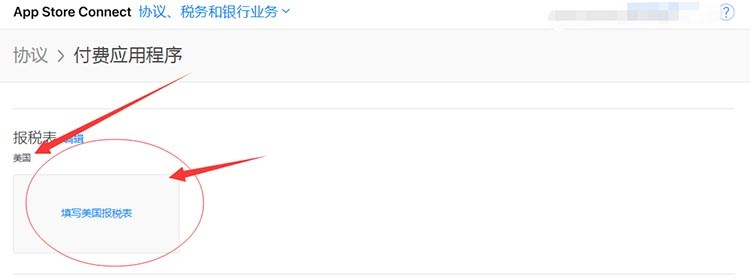
您是否被视为美国税务居民 (U.S. Tax Resident) ?
一般来说,如果您符合以下条件,则您可被视为美国居民:(1) 在本日历年的任何时间,根据美国移民法,您是美国合法永久居民,该身份未撤销,且未从行政或司法角度认定为已放弃该身份;或者 (2) 您在本年度内至少在美国实际居留 31 天,在包含本年度及前两年在内的总计 3 年期内在美国实际居留至少 183 天。点按此处进一步了解“美国居民”的定义。

您在美国是否有任何商业活动?
一般来说,如果您在美国有雇员,或在美国拥有、租用或控制设备或其他资产,并且使用这些资产通过 Apple 赚得收入,则表示您在美国有商业活动。
直接选择【否】即可点击【提交】
填写详细税务协议单
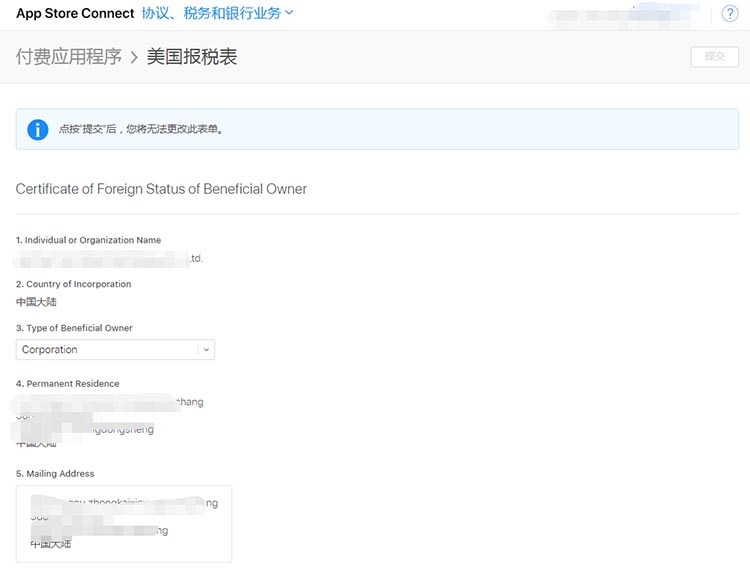
Certificate of Foreign Status of Beneficial Owner
受益所有人的外国身份证明
-
Individual or Organization Name
个人或公司组织名 系统默认 -
Country of Incorporation
地区或国家 系统默认 中国大陆 -
Type of Beneficial Owner
受益人类型 自行选择,公司就选公司,个人选个人
- Permanent Residence
常住地 系统默认(如不正确,请在第一项地址里面修改)
- Mailing Address
邮寄地址 系统默认 (如不正确,请在第一项地址里面修改)
Certification
I declare that the individual or organization named above is the beneficial owner of any payments made under the agreement. I declare that the beneficial owner does not have any employees in the United States and does not own, lease, or control any equipment or other assets in the United States that are used to derive revenue from Apple. I declare that I am either the beneficial owner or that I am authorized to make this declaration on behalf of the beneficial owner.
Name of Person making this Declaration

以上信息正确,请注意勾选此处协议!
Title :输入框
—— 职位签名,英文名 +CEO 总经理 …
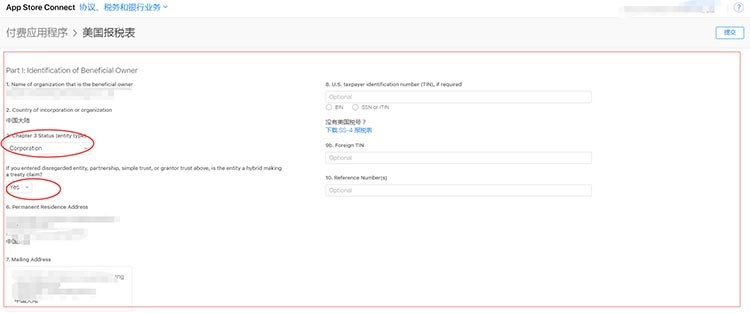
W-8BEN-E 代用表
Certificate of Status of Beneficial Owner for United States Tax Withholding and Reporting (Entities) (Rev. July 2017)
我们建议您在填写 W-8BEN-E 代用表之前先查看 W-8BEN-E 代用表提示页和 W-8BEN-E 报税表说明。
如果您之前提交过 W-8BEN-E 代用表,则您现在填写的 W-8BEN-E 代用表将替换并取代您之前提交的 W-8BEN-E 代用表。
如果您是合伙公司,并且希望通过 Apple Developer Program 申请与您的收入相关的协定利益,请参阅有关提交更新的税务信息的常见问题解答。
该部分可以全部留空!
Part III: Claim of Tax Treaty Benefits (If Applicable). (For chapter 3 purposes only)
14. I certify that (check all that apply)
The beneficial owner is a resident of China mainland within the meaning of the income tax treaty between United States and that country.
The beneficial owner derives the item (or items) of income for which the treaty benefits are claimed, and, if applicable, meets the requirements of the treaty provision dealing with limitation on benefits. The following are types of limitation on benefits provisions that may be included in an applicable tax treaty (check only one; see instructions):
Type of limitation on benefits provisions
The beneficial owner is claiming treaty benefits for dividends received from a foreign corporation or interest from a U.S. trade or business of a foreign corporation and meets qualified resident status (see instructions).
15. Special rate and Conditions
The beneficial owner is claiming the provisions of Article and paragraph
Optional
of the treaty identified on line 14a above to claim a
Optional
% rate of withholding on (specify type of income):
Income from the sale of applications
Other (please specify)
Optional
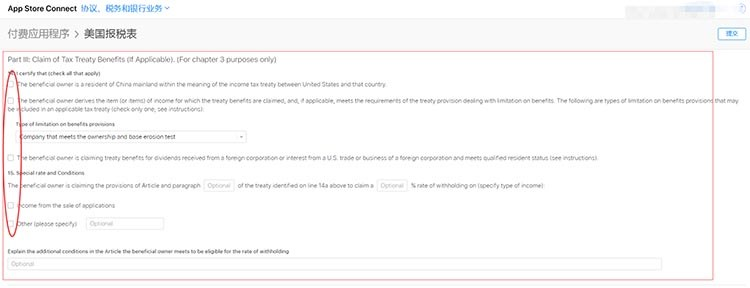
该部分可以全部留空!
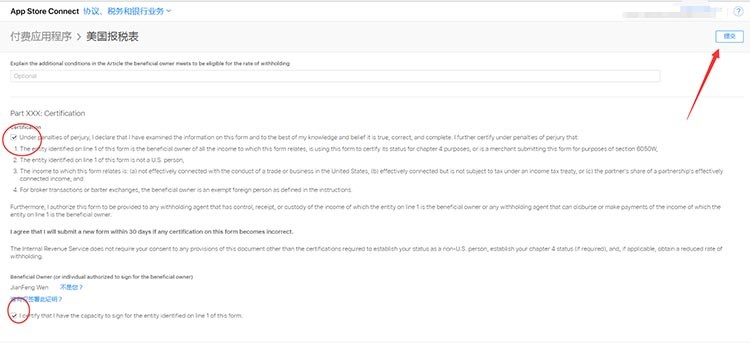
最后勾选协议,底部两处勾选,之后在顶部右边上角【提交】按钮,点击提交!
提交之后耐心等待1-3工作日,如果有特殊需求,苹果会邮件通知,根据邮件修改一下即可!
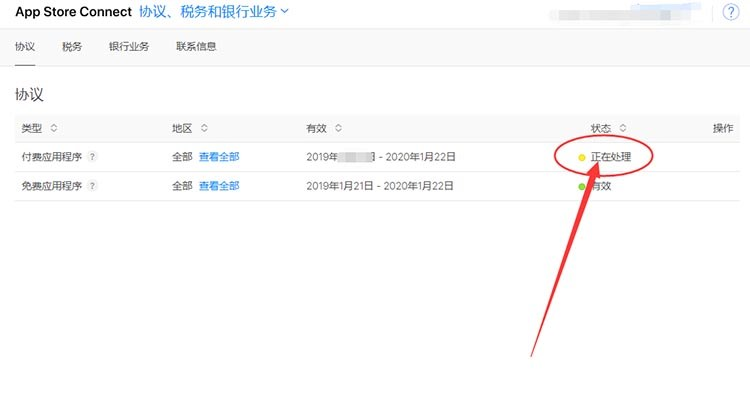
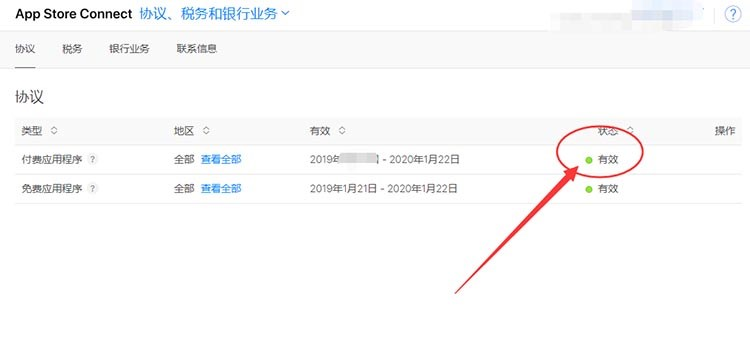
审核通过之后,就可以设置内购项目了!
App 内购买项目配置流程
官方文档:https://help.apple.com/app-store-connect/?lang=zh-cn#/devb57be10e7
登录app store connect:https://appstoreconnect.apple.com/
从“我的 App”中,选择您的 App。
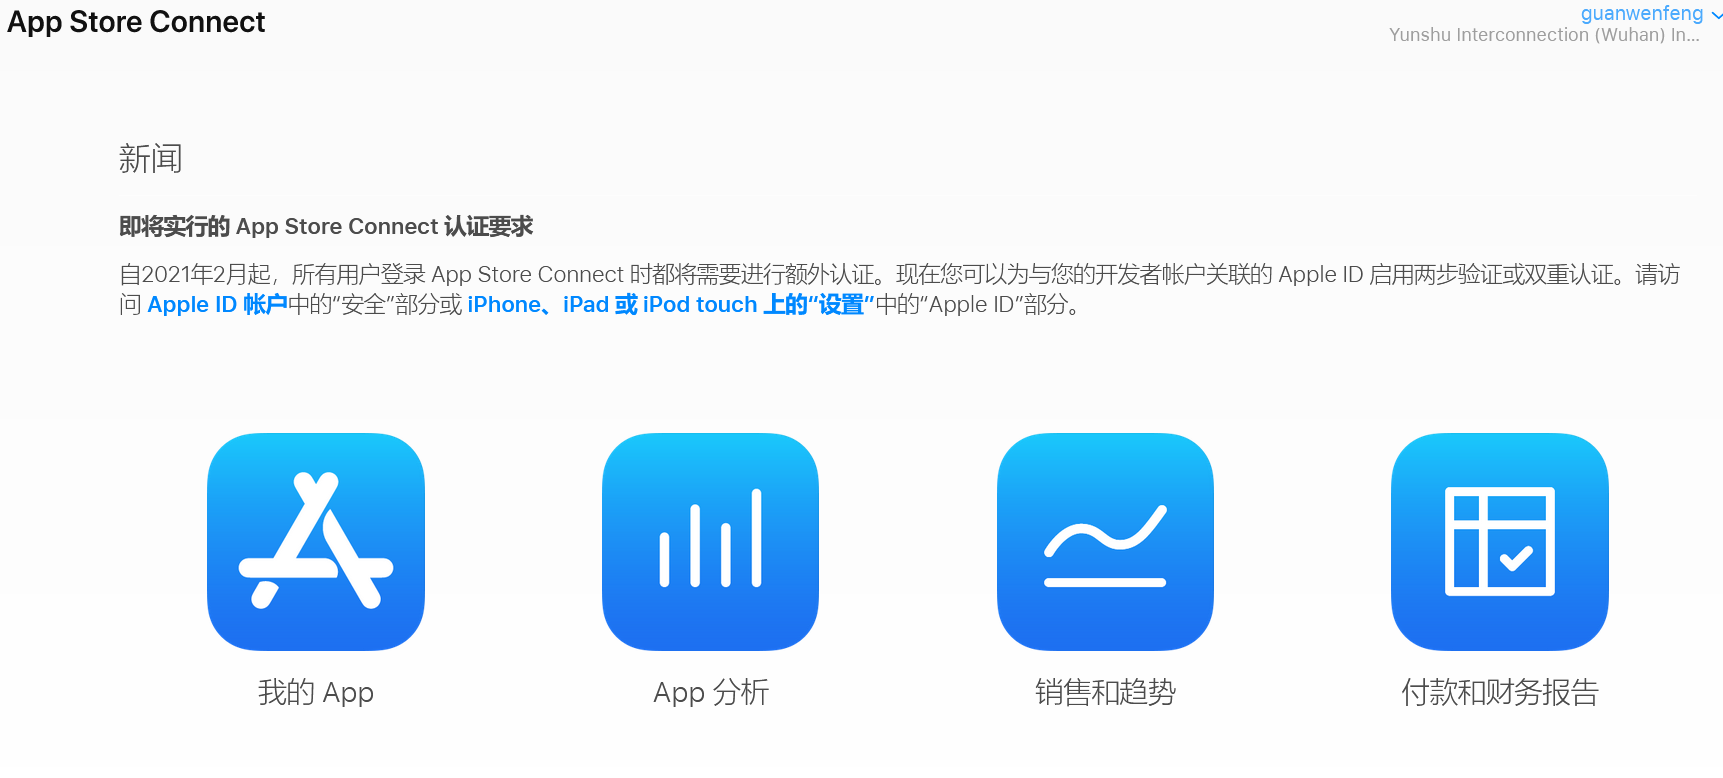
点击侧边栏的“App 内购买项目”
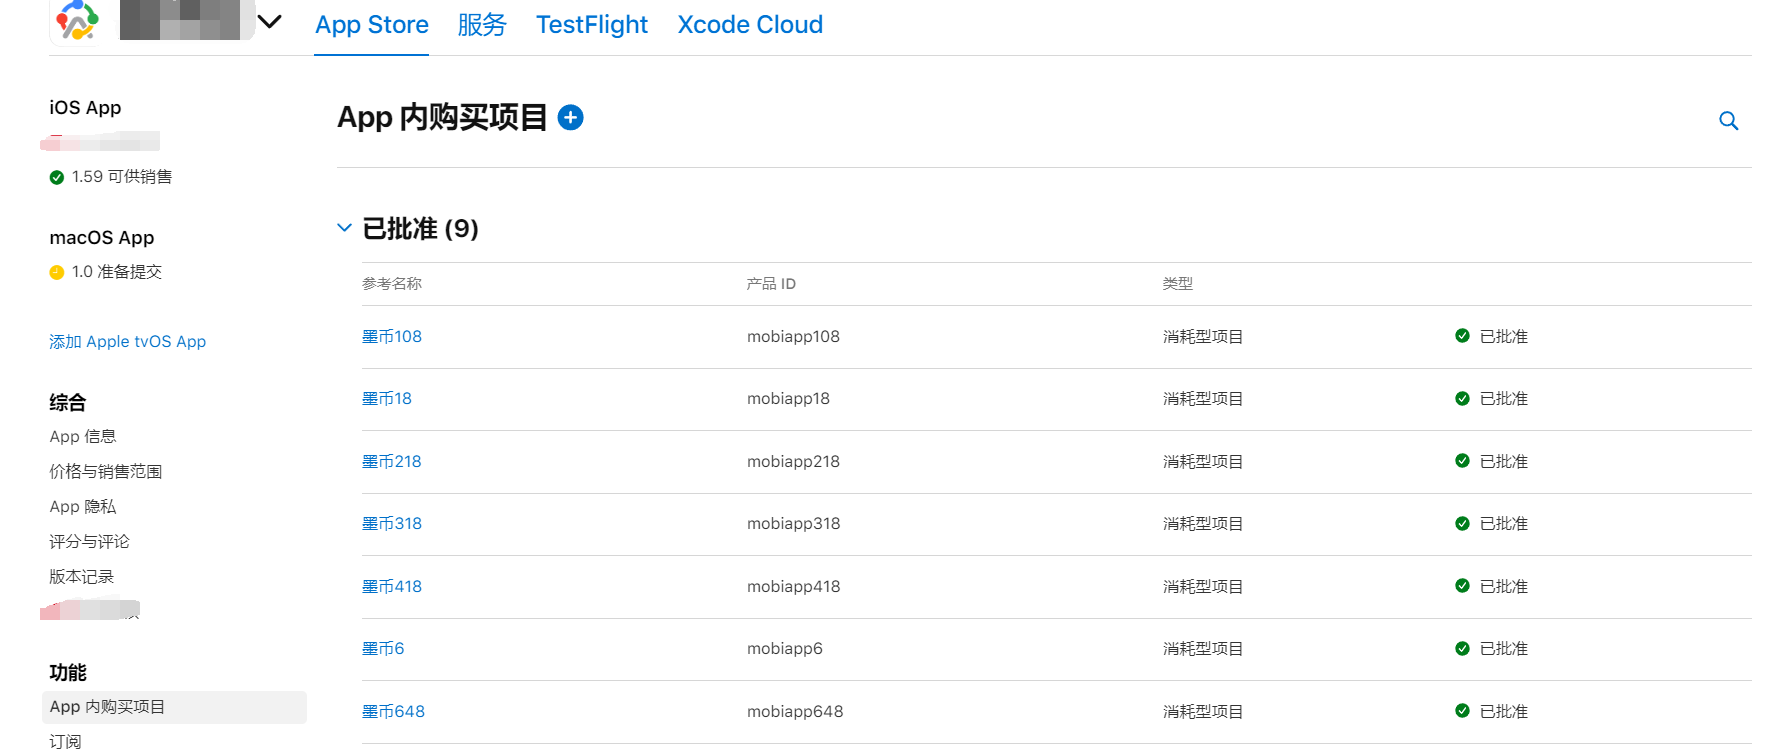
若要添加 App 内购买项目,请前往“App 内购买项目”,并点按添加按钮(+)。
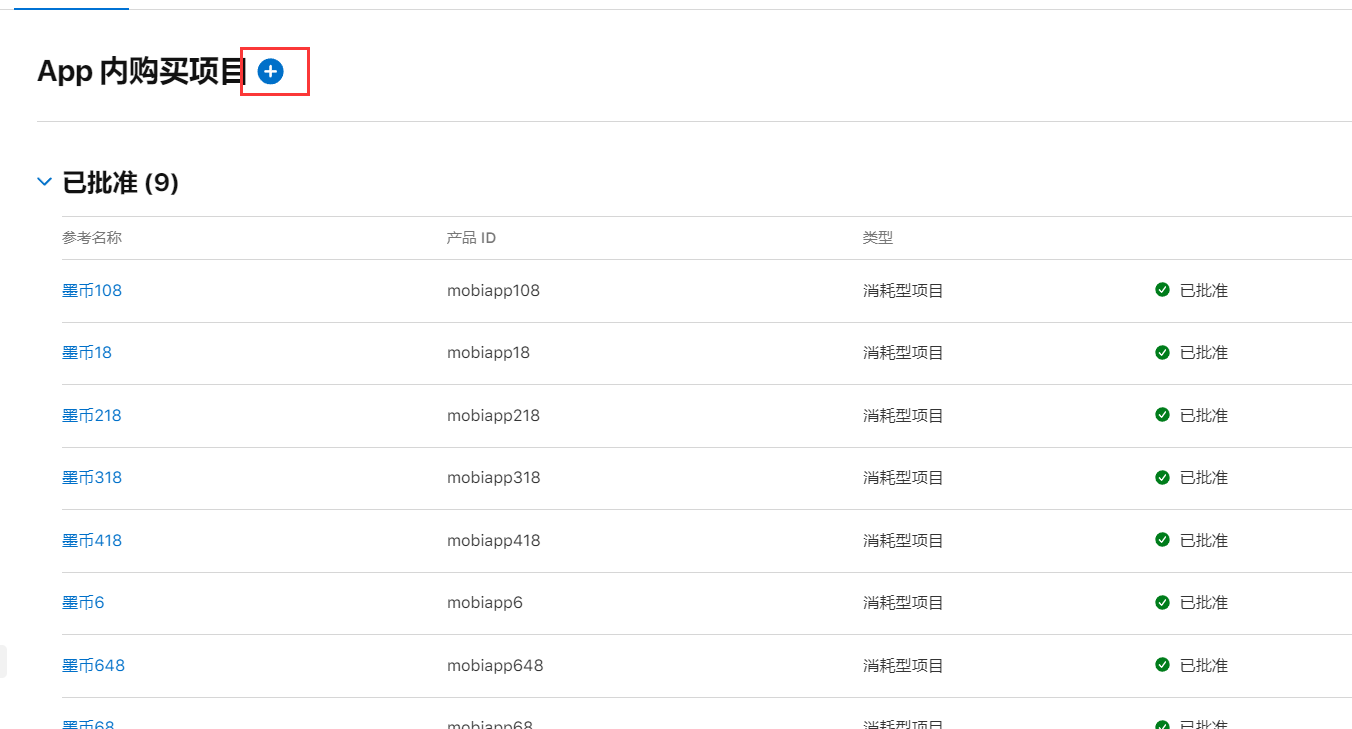
选择“消耗型项目”、“非消耗型项目”或“非续期订阅”,并点按“创建”。有关自动续期订阅的信息,请参见创建自动续费订阅。
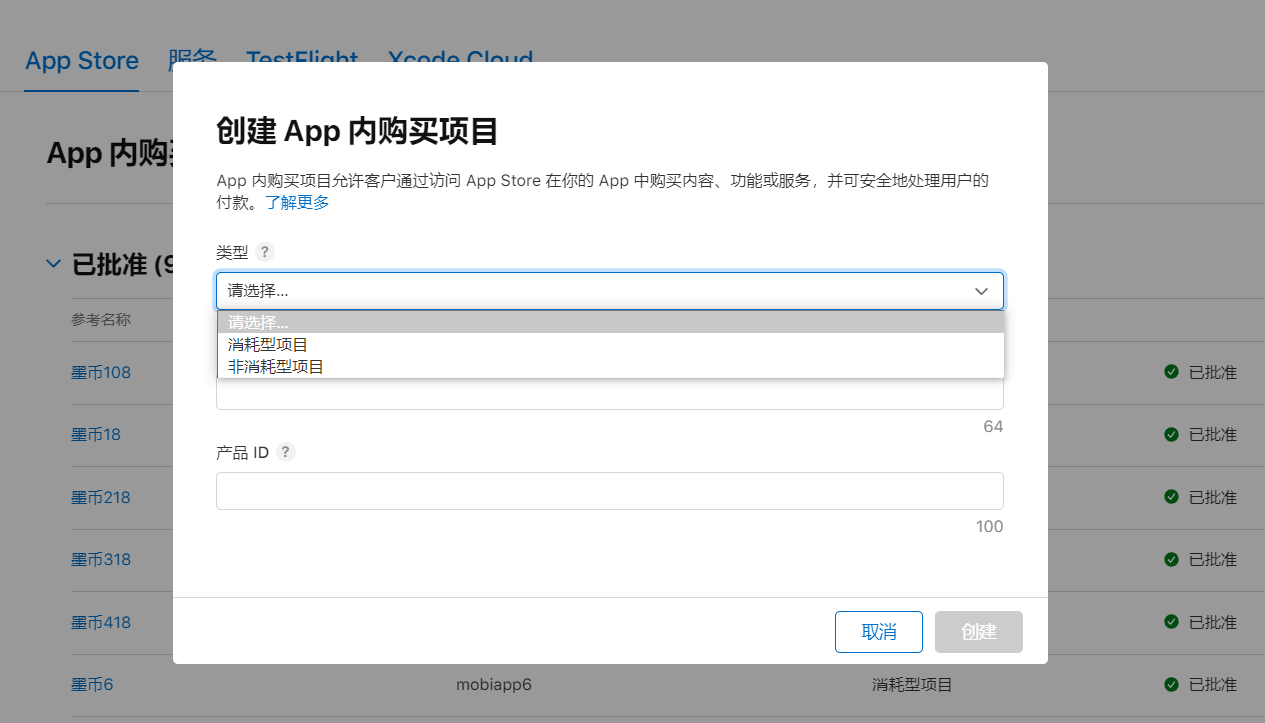
注意类型选择即可
添加参考名称、产品 ID 和本地化显示名称。
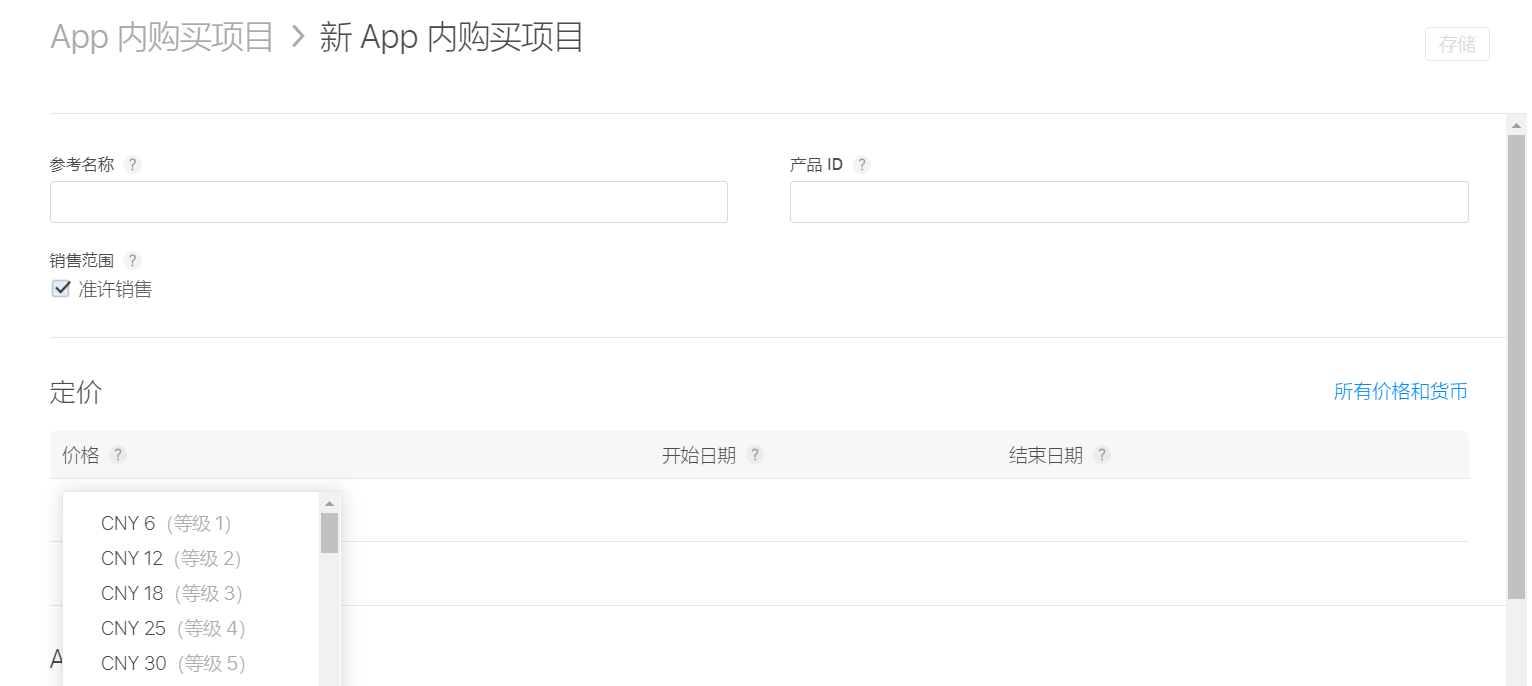


点按“存储”或“提交以供审核”。
您可以在创建您的 App 内购买项目时输入所有的元数据,或稍后输入您的 App 内购买项目信息。
注意:创建app内购买项目时有时候会报元数据缺失的问题,这时候点进去看下,缺什么数据:一般是价格和审核图片忘记传,填上即可。
创建完之后,一个价格就对应一个产品ID,这个产品ID就是后面你写代码需要用到的。
配置完app内购买项目之后,还有提交 App 内购买项目:https://developer.apple.com/help/app-store-connect/manage-submissions-to-app-review/submit-for-review
从“我的 App”中,选择您的 App。
在侧边栏的“App 内购买项目”下方,点按“管理”。
在右侧,向下滚动至“App 内购买项目”部分,点按“App 内购买项目”旁的添加按钮(+)。
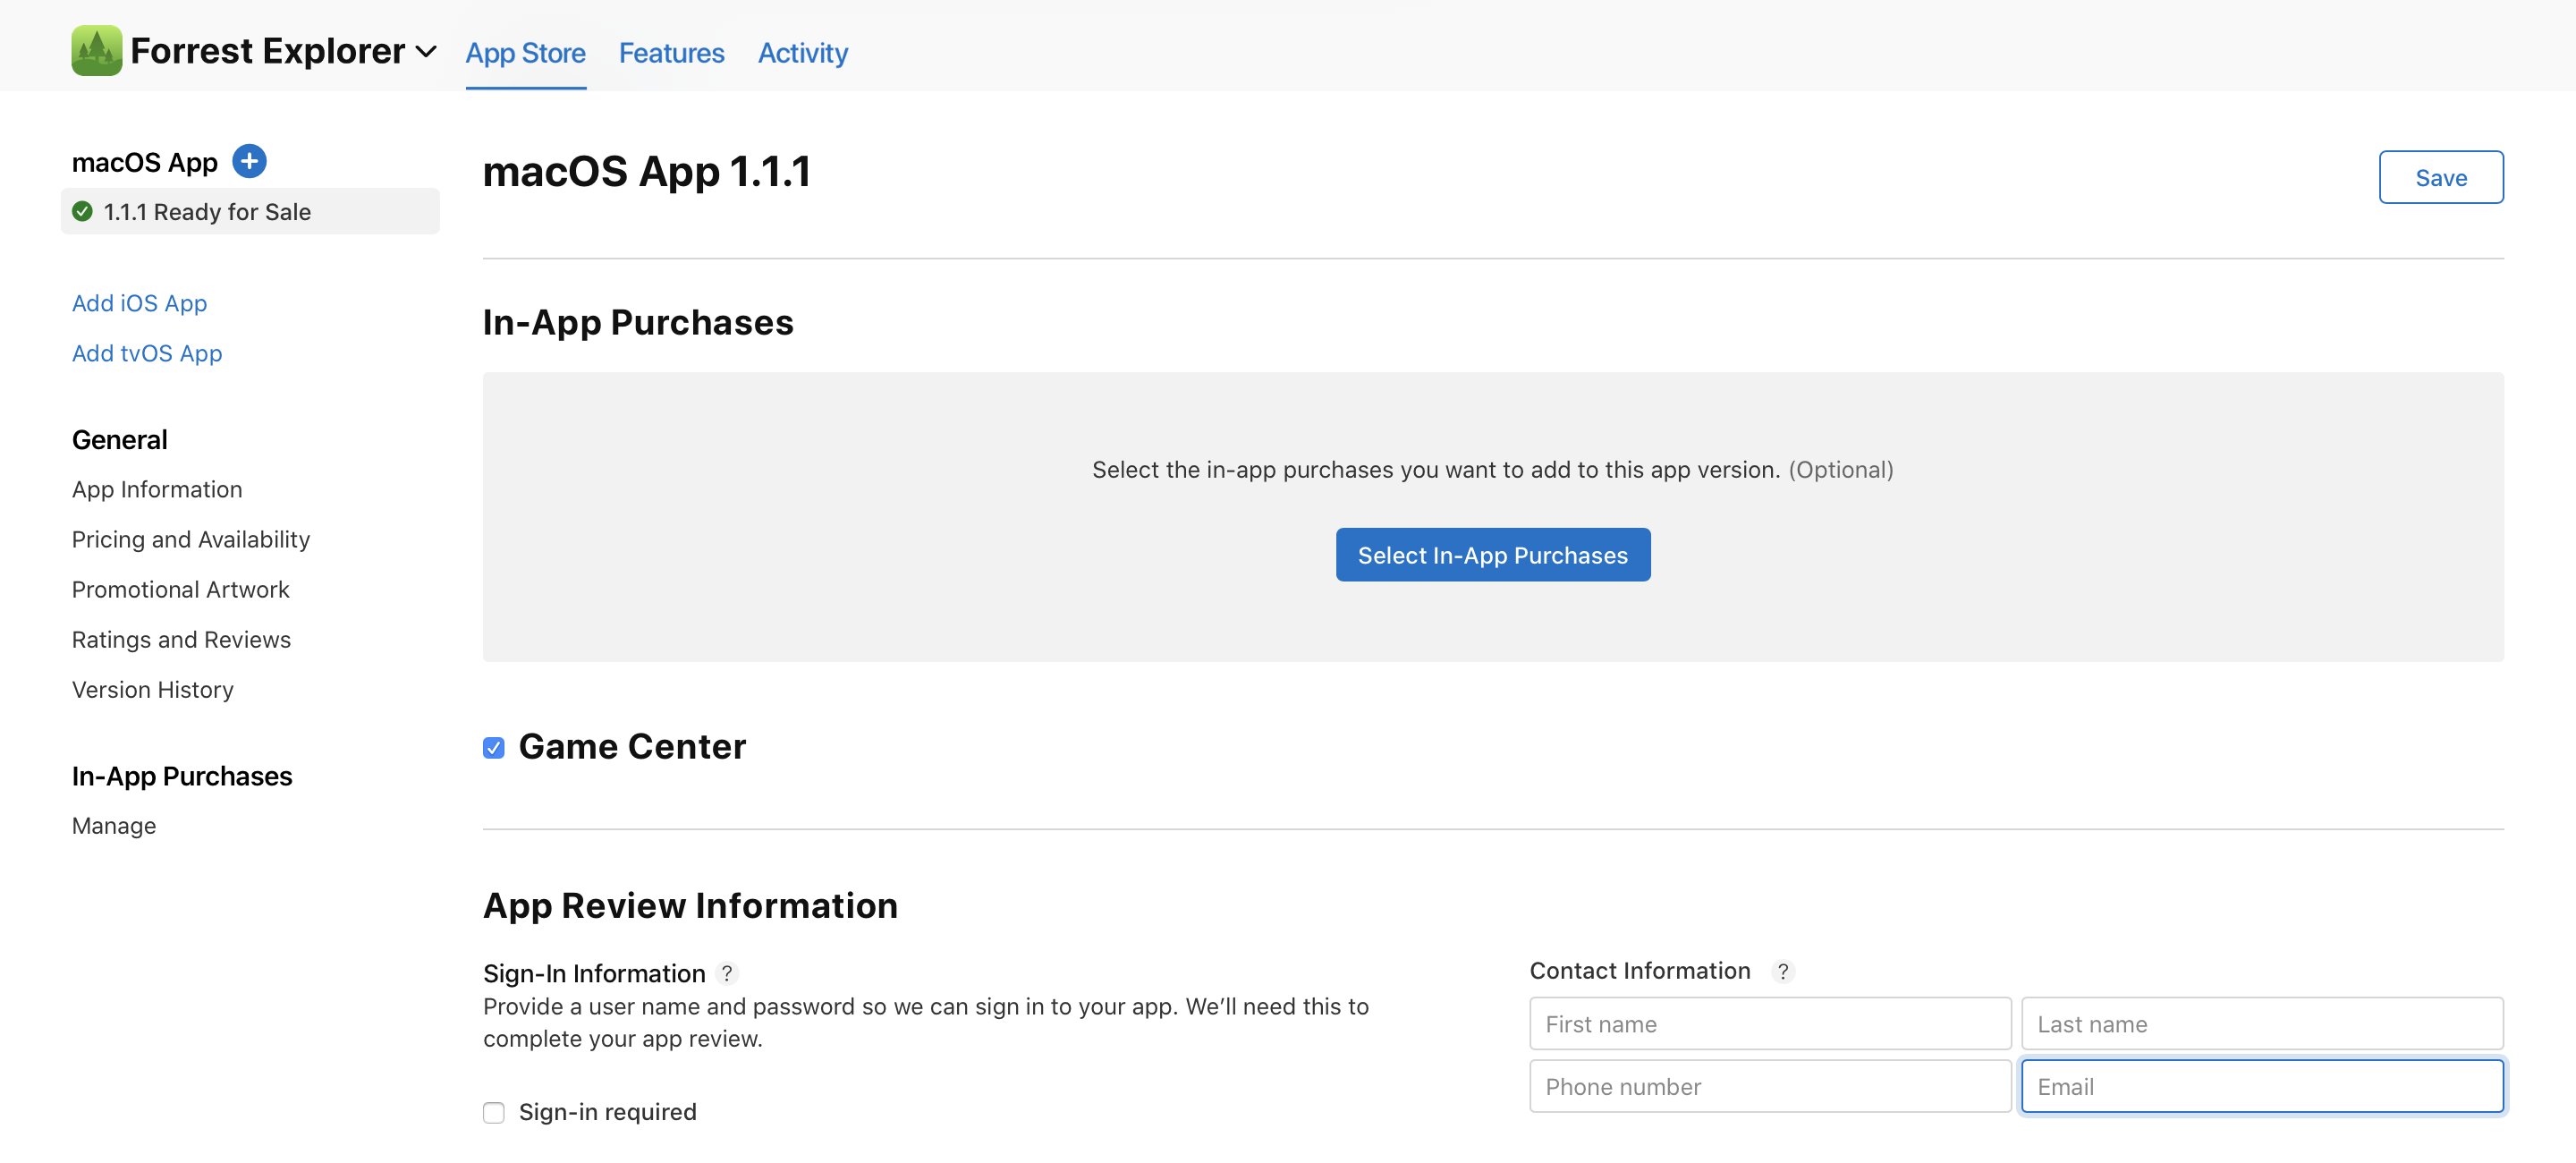
在“App 内购买项目”对话框中,选择您想要提交的 App 内购买项目。
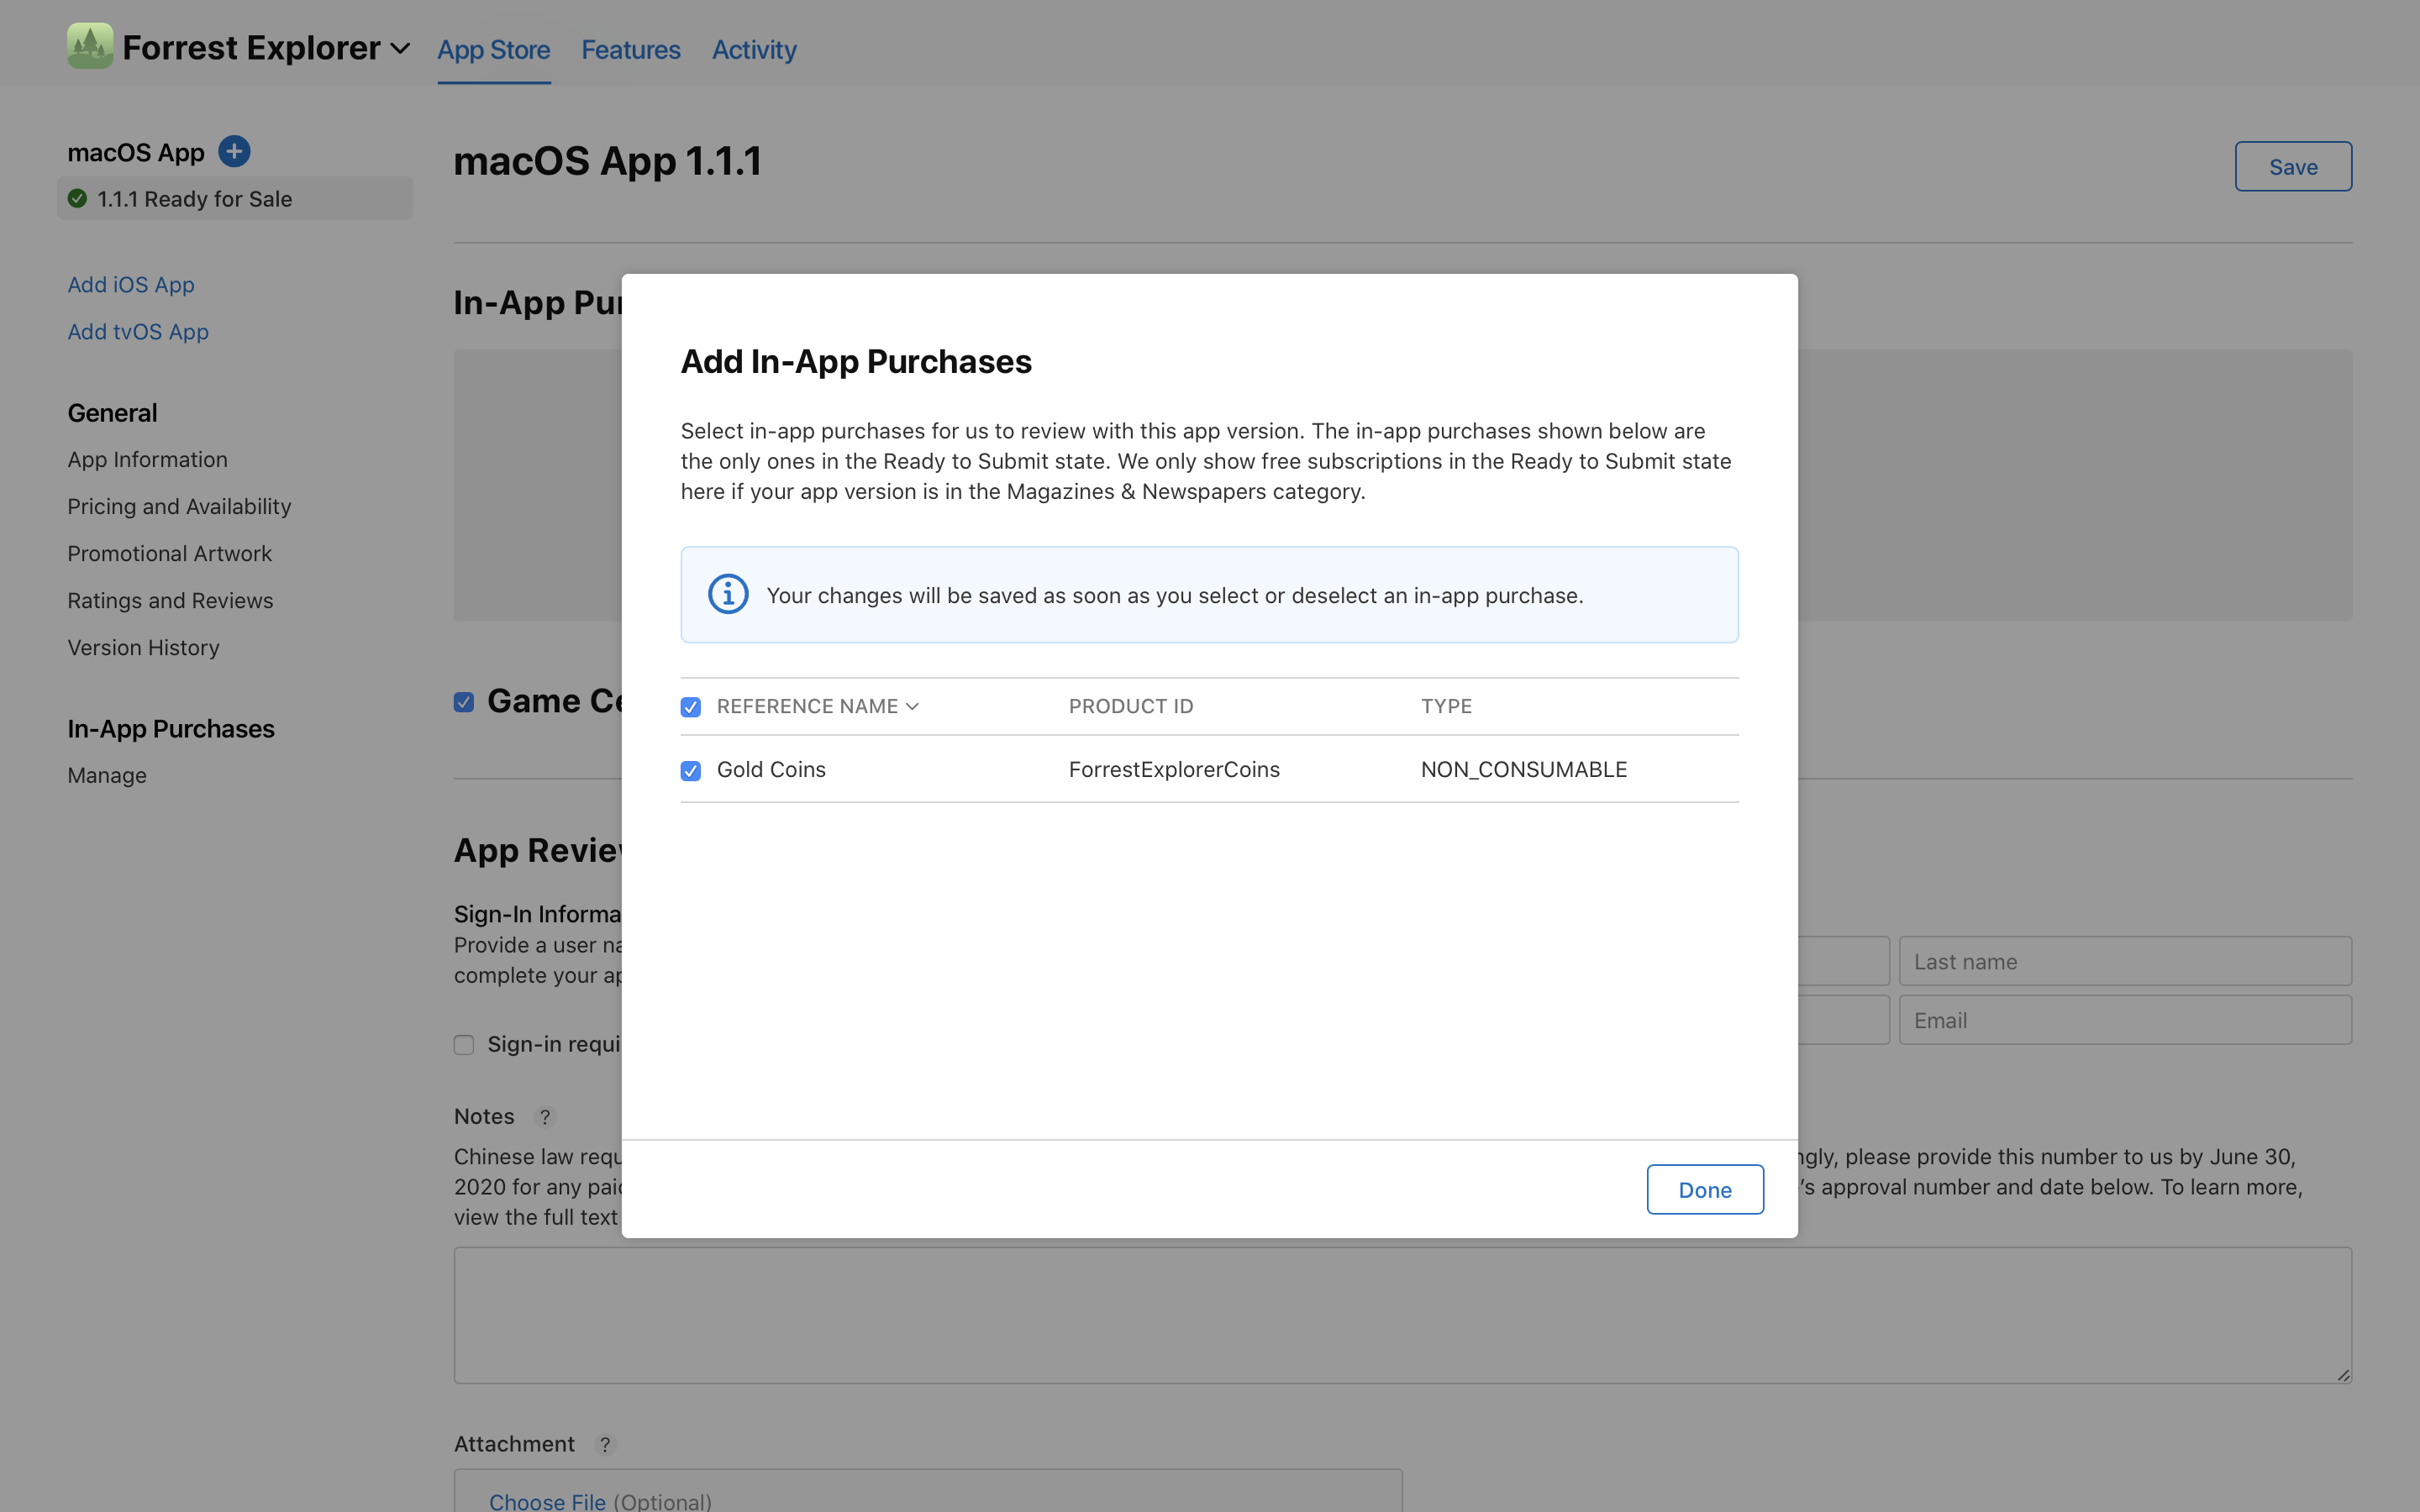
点按“完成”,然后“存储”。
当您准备就绪后,提交您的 App 以供审核。
代码实现苹果支付
<script>
    import { validApplyPayApi } from '@/apis/api.js'
    import { mapActions, mapGetters } from 'vuex'
    import { cbSuccess } from '@/utils'
    const IAPOrders = [
        '**6','**18','**68', '**108','**218',
        '**318','**418','**648','**998'
    ] // 根据这些ids获取到苹果app内商品信息,这些ids就是你上面设置的产品id

    export default {
        data () {
            return {
                mbs: [6,18,68,108,218,318,418,648,998],
                mb: 68,
                iapChannel: null
            }
        },
        computed: {
            ...mapGetters(['userInfo'])
        },
        onLoad () {
            this.plusReady()
        },
        onShow () {
            this.getUser()
        },
        methods: {
            ...mapActions(['getUser']),
            plusReady() {
                let _this = this
                plus.payment.getChannels(function(channels) {
                    for (let i in channels) {
                        if (channels[i].id == 'appleiap') {
                            _this.iapChannel = channels[i]
                            _this.iapChannel.requestOrder(IAPOrders, function(event) {
                                for (let index in event) {
                                    let OrderItem = event[index]
                                    console.log("Title:" + OrderItem.title + "Price:" + OrderItem.price + "Description:" + OrderItem.description + "ProductID:" + OrderItem.productid)
                                }
                            }, function(e) {
                                console.log("获取支付通道失败:" + e.message)
                            })
                        }
                    }
                }, function(e) {
                    console.log("获取支付通道失败:" + e.message)
                })
            },
            pay() {
                let _this = this
                let _productId = '**' + this.mb // 当前选择的产品id,根据这个id去对应app内购买项目详情
                uni.showLoading({
                    title: '支付中,请稍后'
                })
                plus.payment.request(_this.iapChannel, {
                    "productid": _productId
                }, function(result) {
                    console.log(result)
                    _this.validPay(result)
                }, function(e) {
                    console.log('支付失败:' + e.code)
                })
            },
            async validPay(result) {// 苹果支付成功之后会返回数据,根据返回数据请求后台接口校验,然后做添加钱等相应业务逻辑
                let _data = {
                    transactionId: result.payment && result.payment.productid,
                    receiptData: result.transactionReceipt
                }
                console.log('valid', _data)
                let { data } = await validApplyPayApi(_data)
                cbSuccess(data, _ => {
                    this.getUser()
                })
                uni.hideLoading()
            }
        }
    }
</script>
我们可以看一下一些相应的打印信息
19:01:59.857  Title:墨币68元Price:68Description:墨币68元ProductID:**68 at pages/course/card.vue:77
19:02:04.708  Title:墨币418元Price:418Description:墨币418元ProductID:**418 at pages/course/card.vue:77
19:02:04.728  Title:墨币998元Price:998Description:墨币998元ProductID:**998 at pages/course/card.vue:77
19:02:04.748  Title:墨币318元Price:318Description:墨币318元ProductID:**318 at pages/course/card.vue:77
19:02:04.769  Title:墨币18元Price:18Description:墨币18元ProductID:**18 at pages/course/card.vue:77
19:02:04.789  Title:墨币6元Price:6Description:墨币6元ProductID:**6 at pages/course/card.vue:77
19:02:04.810  Title:墨币108元Price:108Description:墨币108元ProductID:**108 at pages/course/card.vue:77
19:02:04.830  Title:墨币218元Price:218Description:墨币218元ProductID:**218 at pages/course/card.vue:77
19:02:04.851  Title:墨币648元Price:648Description:墨币648元ProductID:**648 at pages/course/card.vue:77
applePay付款成功之后返回的数据如下这样:
{
    "payment": {
        "productid": "**18",
        "quantity": "1"
    },
    "transactionDate": "2021-01-26 19:02:37",
    "transactionIdentifier": "1000000769854176",
    "transactionReceipt": "ewoJInNpZ25hdHVyZSIgP**Zamp1TGd6mFNaEVha2**wWVkvSlJBballnTURNN7Cn0=",
    "transactionState": "1"
}
我们主要需要拿到productid和transactionReceipt(base64形式的字符串)来进行校验来继续后续业务工作。
沙箱测试ApplePay
新app需要将app内购买项目提交审核之后才能测试,并且需要扣钱,好在apple提供了沙箱测试,并不需要审核通过及扣钱就可以测试是否走通。
官方文档:测试 App 内购买项目:https://help.apple.com/app-store-connect/?lang=zh-cn#/dev7e89e149d
您可以使用沙盒测试您的 App 和 App 内购买项目,而无需创建财务交易。沙盒是一个使用 App Store 基础架构但不处理实际付款的测试环境。它会返回交易,付款被视为已成功处理。如创建沙盒测试员帐户中所述,您可以在 App Store Connect 中添加沙盒测试员。
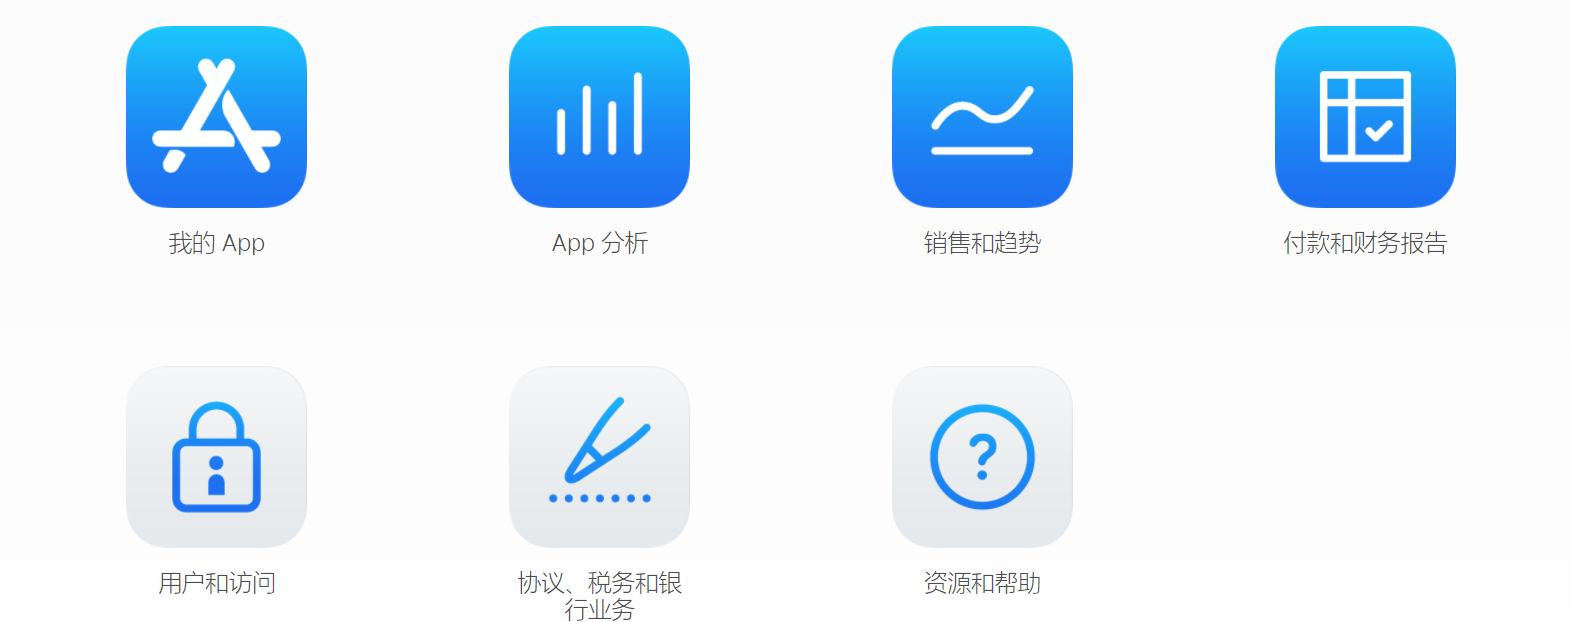
进入app store connect,点击“用户和访问”
点击沙盒测试员
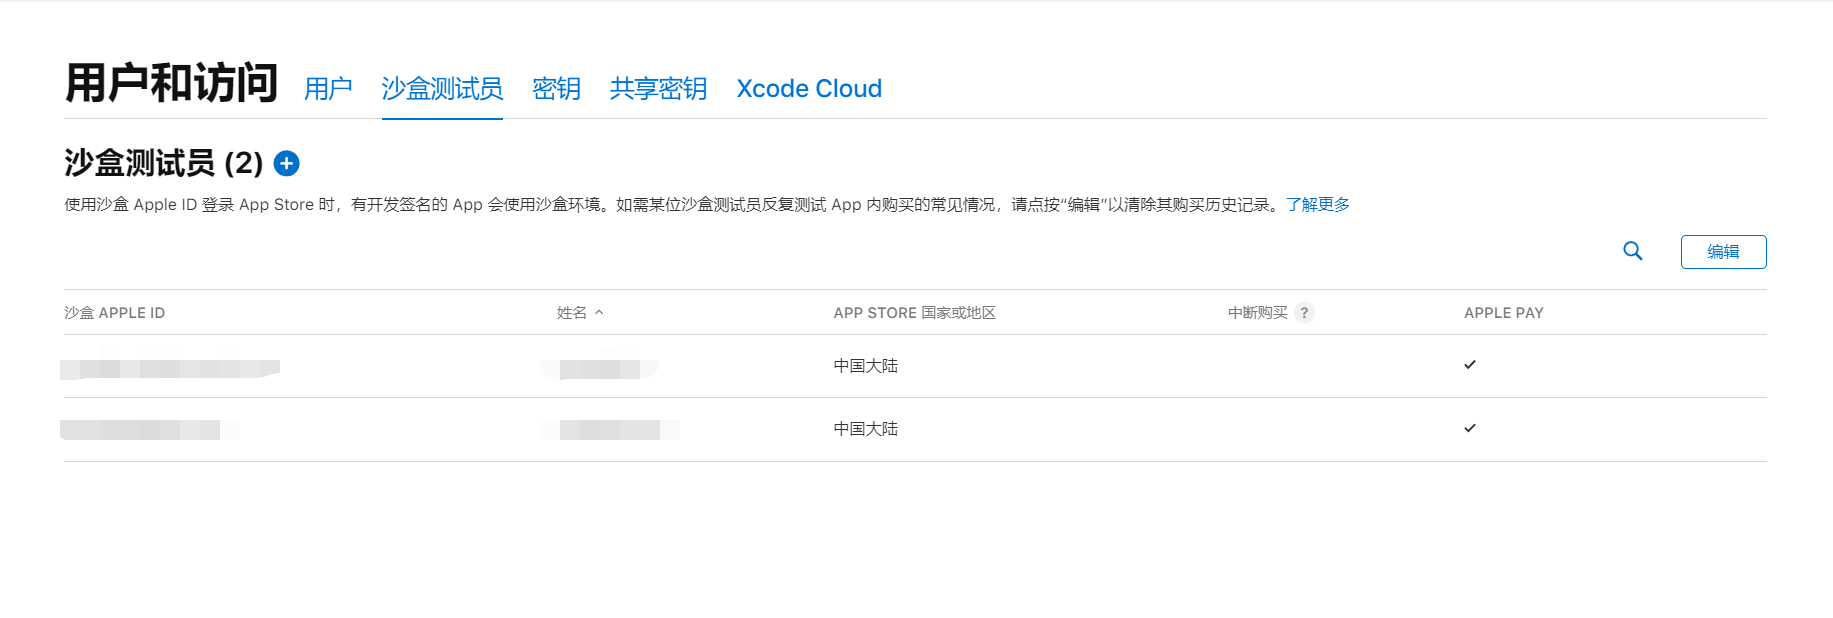
请点按添加按钮(+)

输入测试员信息,然后点按“创建”。
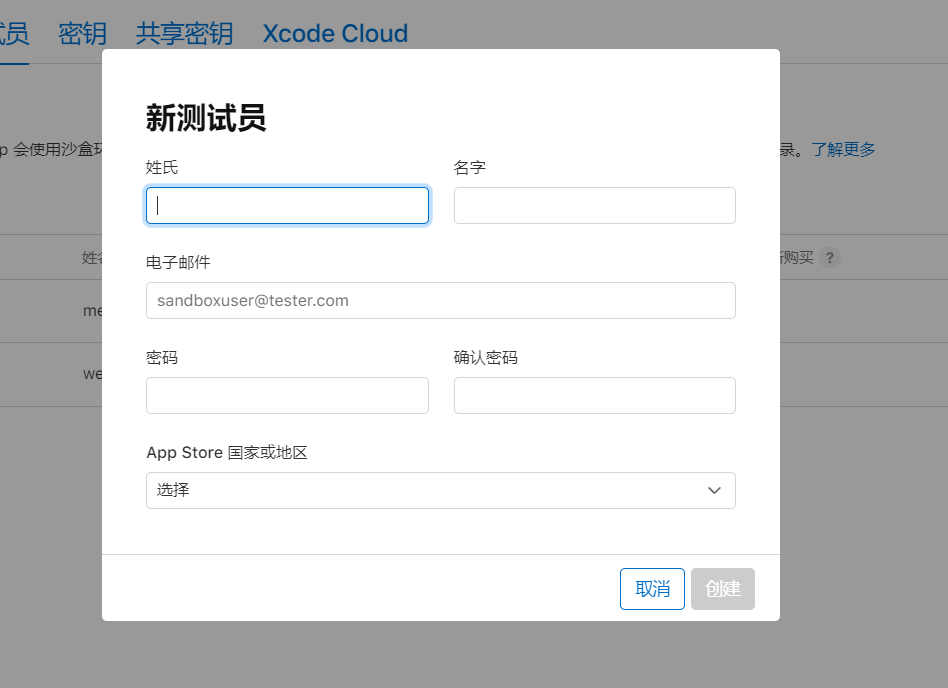
测试员的邮箱就会收到一个邀请链接,验证一下appid(即邮箱)和密码即可
然后就可以使用该测试员appid进行ApplePay的支付测试了。
使用方法就是,用ios手机,登录建立的测试员账号,在app中点击付费的项目,购买,就可以支付啦。


