接下来编写一个简单的springboot与Cat整合的案例
1 新建springboot项目
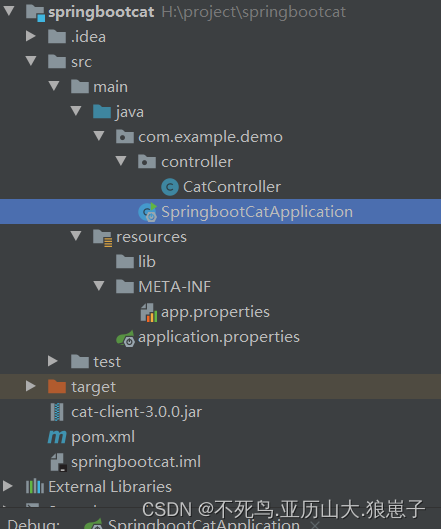
首先创建一个Spring Boot的初始化工程。只需要勾选web依赖即可。
2 添加 Maven 添加依赖
        <dependency>
            <groupId>com.dianping.cat</groupId>
            <artifactId>cat-client</artifactId>
            <version>3.0.0</version>
        </dependency>
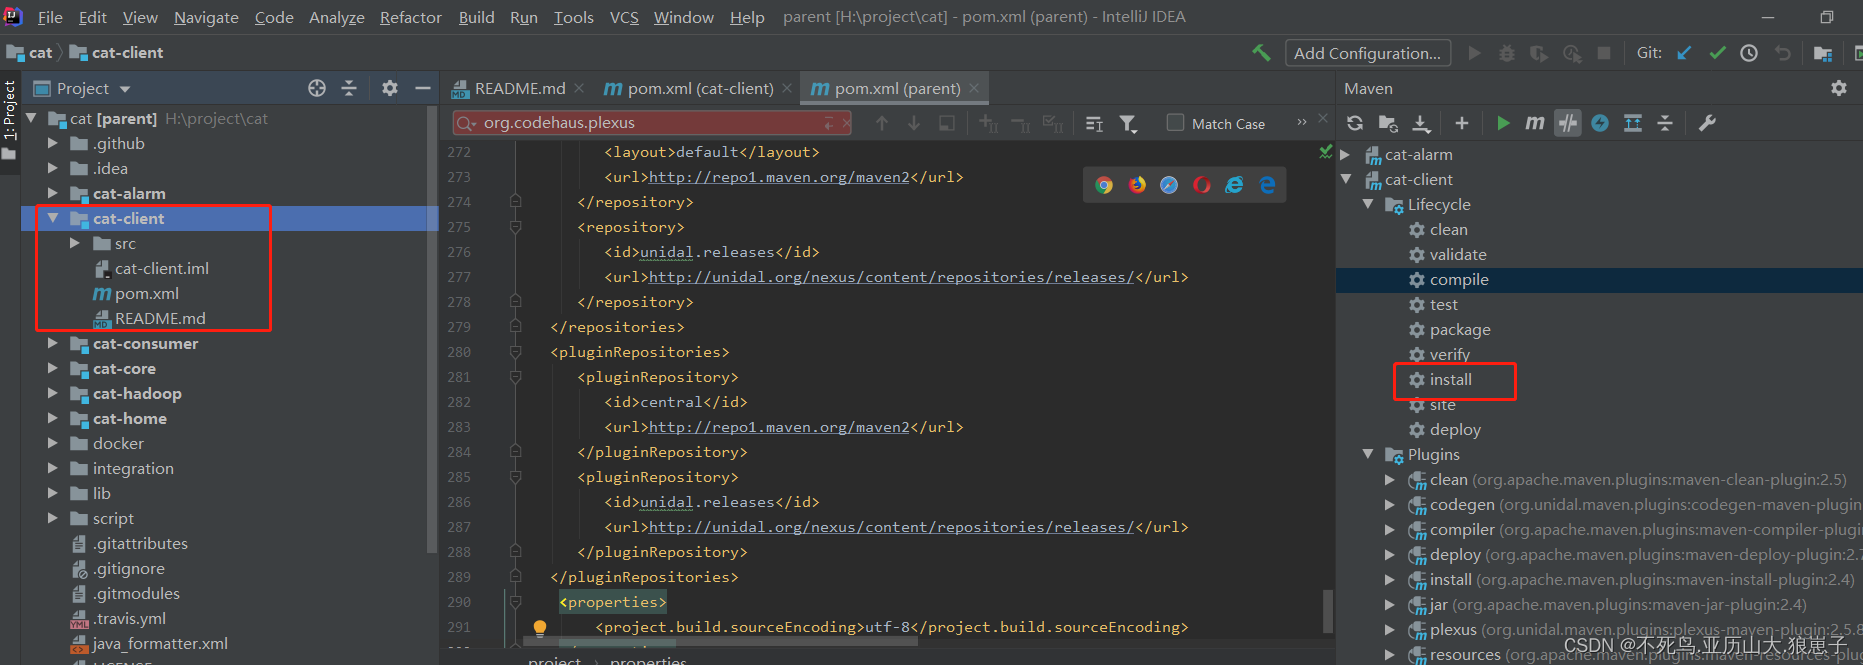
这个maven上没有,需要通过源码install到本地maven,或者去官网下载后手动安装的本地maven
源码安装如下:
3 启动 cat 客户端前的准备工作
以下所有文件,如果在windows下,需要创建在启动项目的盘符下。
(1)创建 /data/appdatas/cat 目录
确保你具有这个目录的读写权限。
(2)创建 /data/applogs/cat 目录 (可选)
这个目录是用于存放运行时日志的,这将会对调试提供很大帮助,同样需要读写权限。
(3)创建 /data/appdatas/cat/client.xml ,内容如下
<?xml version="1.0" encoding="utf-8"?>
<config xmlns:xsi="http://www.w3.org/2001/XMLSchema" xsi:noNamespaceSchemaLocation="config.xsd">
    <servers>
        <server ip="192.168.222.153" port="2280" http-port="8080" />
    </servers>
</config>
4 初始化
在你项目中创建 src/main/resources/META-INF/app.properties 文件, 并添加如下内容:
app.name={appkey}appkey 只能包含英文字母 (a-z, A-Z)、数字 (0-9)、下划线 (_) 和中划线 (-)

5 编写代码
在com.example.demo.controller包下创建CatController
package com.example.demo.controller;

import com.dianping.cat.Cat;
import com.dianping.cat.message.Event;
import com.dianping.cat.message.Transaction;
import org.springframework.web.bind.annotation.RequestMapping;
import org.springframework.web.bind.annotation.RestController;

@RestController
public class CatController {
    @RequestMapping("test")
    public String test(){
        Transaction t = Cat.newTransaction("URL", "pageName");
        try {
            Cat.logEvent("URL.Server", "serverIp", Event.SUCCESS, "ip=192.168.222.153");
            Cat.logMetricForCount("metric.key");
            Cat.logMetricForDuration("metric.key", 5);
            //让代码抛出异常
            int i = 1/0;
            t.setStatus(Transaction.SUCCESS);
        } catch (Exception e) {
            t.setStatus(e);
            Cat.logError(e);
        } finally {
            t.complete();
        }
        return "hello cat";
    }
}
6 运行SpringBoot
启动SpringBoot项目,访问接口 http://[ip:端口]/test。然后在Cat中查看结果。

如上图所示,已经出现了一笔调用,我们来看下调用的细节。

查看具体的错误信息:
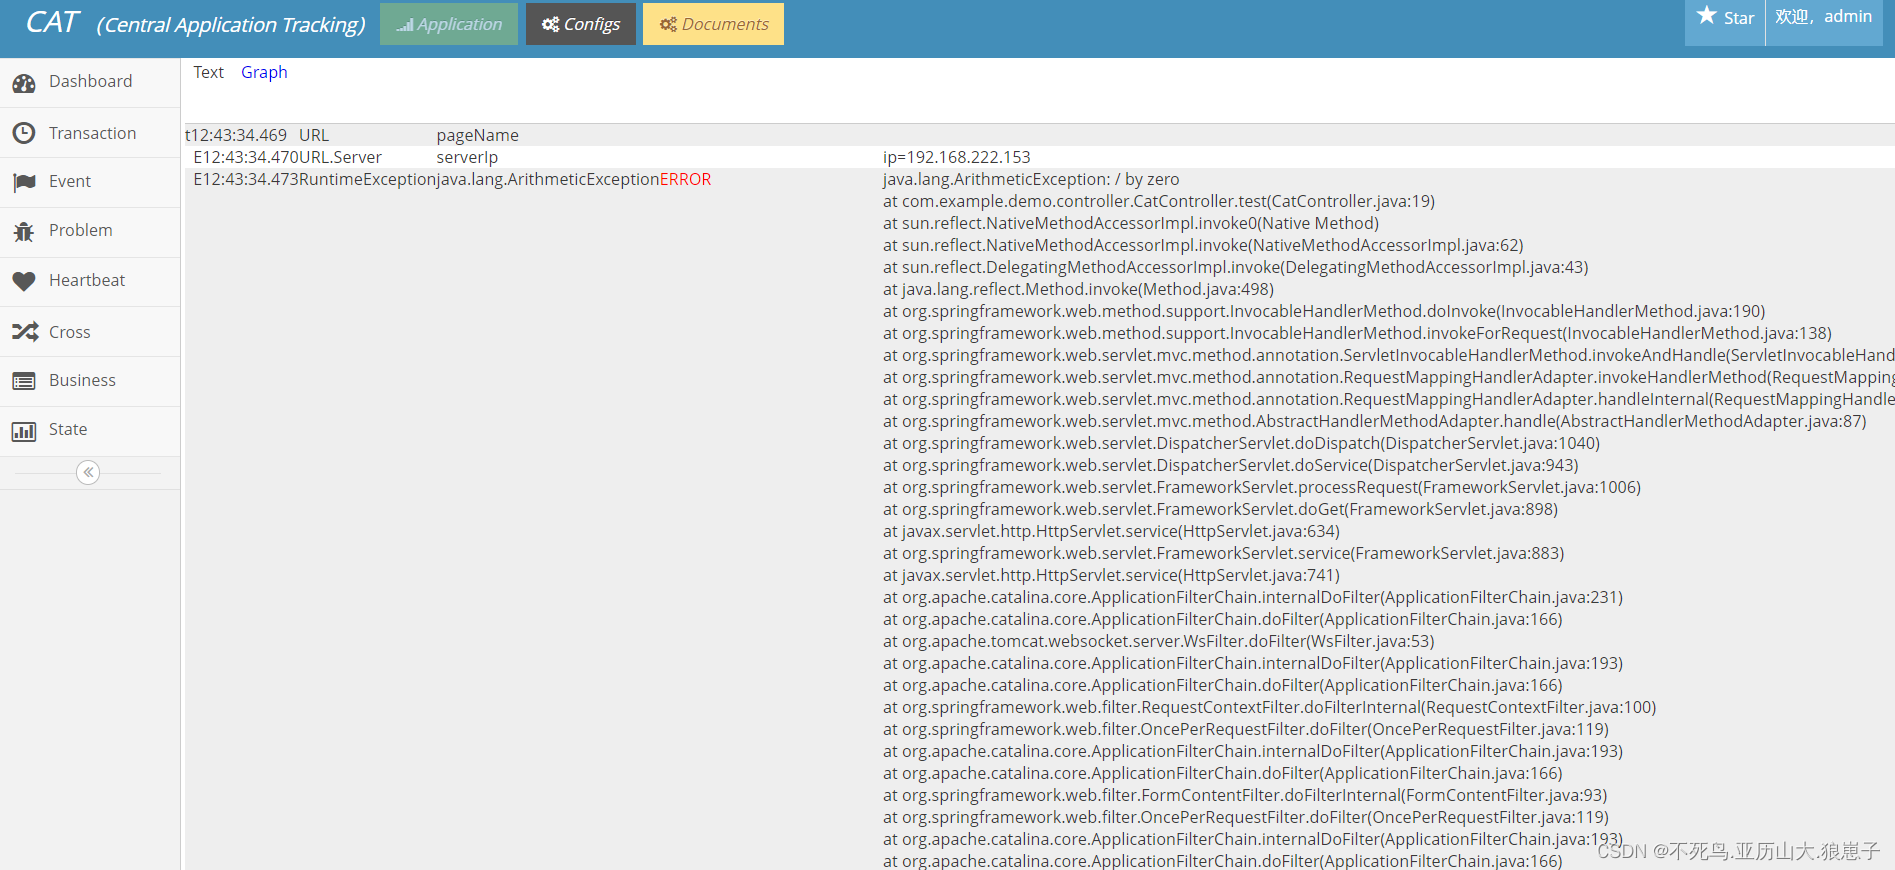
很显然看出上图所示其实是一个除0异常,到此为止SpringBoot客户端集成Cat就完成了。
