文章目录
- 0.前言
- 1.参考文档
- 2.基础介绍
- 默认支持的端点
- 3.步骤
- 3.1. 引入依赖
- 3.2. 配置文件
- 3.3. 核心源码
- 4.示例项目
- 5.总结
0.前言
背景: 一直零散的使用着Spring Boot 的各种组件和特性,从未系统性的学习和总结,本次借着这个机会搞一波。共同学习,一起进步。哈哈
Spring Boot Actuator 是一个强大的监控和管理框架,它提供了一系列的监控端点,可以用于获取应用程序的状态、度量指标、健康检查、配置信息等。Actuator 的监控端点可以通过 HTTP 请求访问,并返回有关应用程序运行时信息的响应。
使用 Actuator 可以方便地了解应用程序的运行状况,监控关键指标,并根据需要采取相应的措施。它为开发人员和运维人员提供了一种简单而有效的方式来监控和管理 Spring Boot 应用程序。
本系列文章将深入探讨 Spring Boot Actuator 监控端点的各个方面。我们将逐个介绍默认的监控端点,包括健康检查、信息、度量指标等,并说明如何自定义和扩展这些端点以满足特定需求。
在本系列文章中,你将学到以下内容:
- Actuator 的介绍和基本概念。
- 默认监控端点的详细解释,包括健康检查、信息、度量指标等。
- 如何自定义监控端点,以便获取特定的应用程序状态和信息。
- 监控端点的安全性配置,以保护敏感信息的访问。
- 如何使用 Actuator 的事件和监听器功能。
- Actuator 的扩展性机制,包括自定义指标、自定义端点和自定义 EndpointGroup 等。
通过阅读本系列文章,你将全面了解 Spring Boot Actuator 监控端点的功能和用法,能够灵活应用 Actuator 来监控和管理你的 Spring Boot 应用程序。让我们开始这个有趣而实用的学习之旅吧!
1.参考文档
-
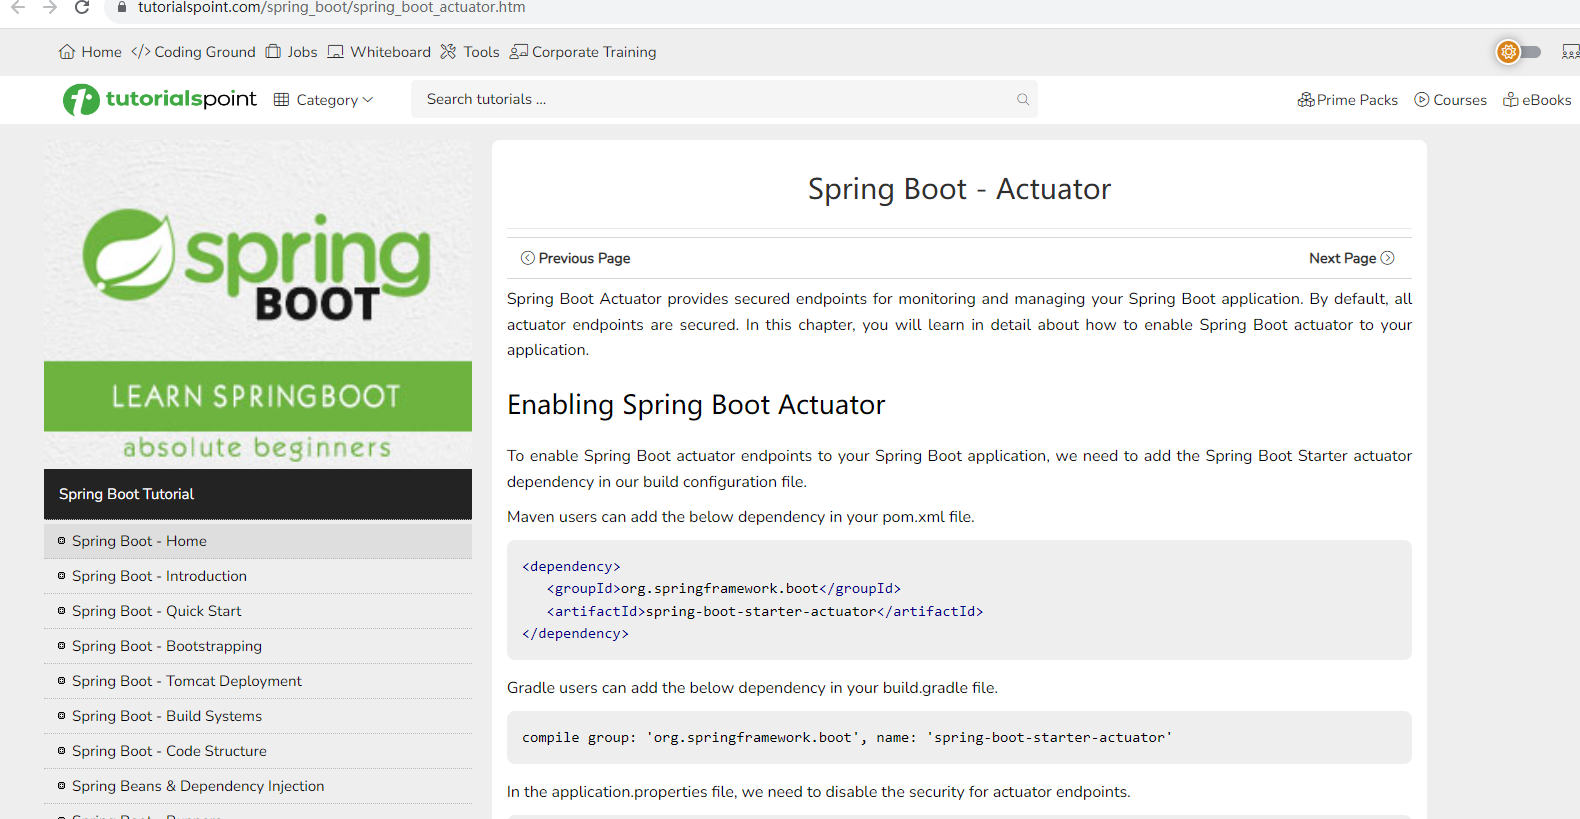
Spring Boot Actuator Tutorial
Tutorialspoint还是比较好的比较权威的一个网站上。他上面罗列的一些示例具有很好的借鉴意义,至少比CSDN 的一些代码示例强的多,不会抄来抄去,连bug都一模一样,哈哈。建议大家可以随便翻翻,东西还是挺全的。上面的链接介绍了 Spring Boot Actuator 的基本概念和用法,包括默认端点、自定义端点、健康检查等方面的内容,并提供了一些示例代码。
-
官方文档 - Spring Boot Actuator
官方文档提供了详细的关于 Actuator 的说明,包括监控端点的概述、默认端点的介绍、自定义端点的创建和配置等内容。
-
官方文档 - Health Indicator
官方文档中关于 Health Indicator 的部分介绍了如何创建自定义的健康检查指标,并提供了一些示例和配置选项的说明。
-
Baeldung - A Guide to Spring Boot Actuator
Baeldung 网站的文章提供了一个全面的 Spring Boot Actuator 指南,涵盖了 Actuator 的核心概念、监控端点的详细解释,以及如何自定义和配置端点等内容。
2.基础介绍
spring-boot-starter-actuator 是 Spring Boot 提供的一个模块,用于监控和管理 Spring Boot 应用程序的运行时信息。它提供了一组监控端点(endpoints),用于获取应用程序的健康状态、性能指标、配置信息等,并支持通过 HTTP 或 JMX 进行访问。
以下是 spring-boot-starter-actuator 的一些主要特性和功能:
-
健康监测(Health Indicators):
spring-boot-starter-actuator提供了一个健康端点,可用于检查应用程序的健康状态。它通过 Health Indicator 提供了一组预定义的健康检查规则,如数据库连接、磁盘空间、内存使用等。也可以自定义 Health Indicator 来添加自定义的健康检查规则。 -
信息端点(Info Endpoint):该端点用于获取应用程序的自定义信息。可以配置应用程序的元数据,如版本号、构建信息等,并通过 Info Endpoint 暴露这些信息。
-
度量指标(Metrics):
spring-boot-starter-actuator支持收集和暴露应用程序的度量指标,如 CPU 使用率、内存使用量、请求处理时间等。可以使用 Micrometer 库来收集和管理度量指标,并通过 Metrics Endpoint 暴露这些指标。 -
配置属性(Configuration Properties):该功能允许检索和调整应用程序的配置属性。可以通过 Configuration Properties Endpoint 查看和修改应用程序的配置属性,并支持属性的动态刷新。
-
日志记录(Logging):
spring-boot-starter-actuator提供了一个端点用于管理应用程序的日志级别。可以通过 Logging Endpoint 查看和修改日志记录器的级别,以及重新加载日志配置。 -
远程 Shell(Remote Shell):该功能允许通过 SSH 或 Telnet 连接到应用程序,并执行一些管理操作。可以在应用程序中启用远程 Shell,以便通过命令行界面远程管理和监控应用程序。
通过引入 spring-boot-starter-actuator 依赖,可以轻松地将上述功能集成到 Spring Boot 应用程序中。同时,spring-boot-starter-actuator 还提供了一些安全性配置选项,以确保监控端点的安全访问。
默认支持的端点
Spring Boot 默认提供了以下一些常用的端点(endpoints):
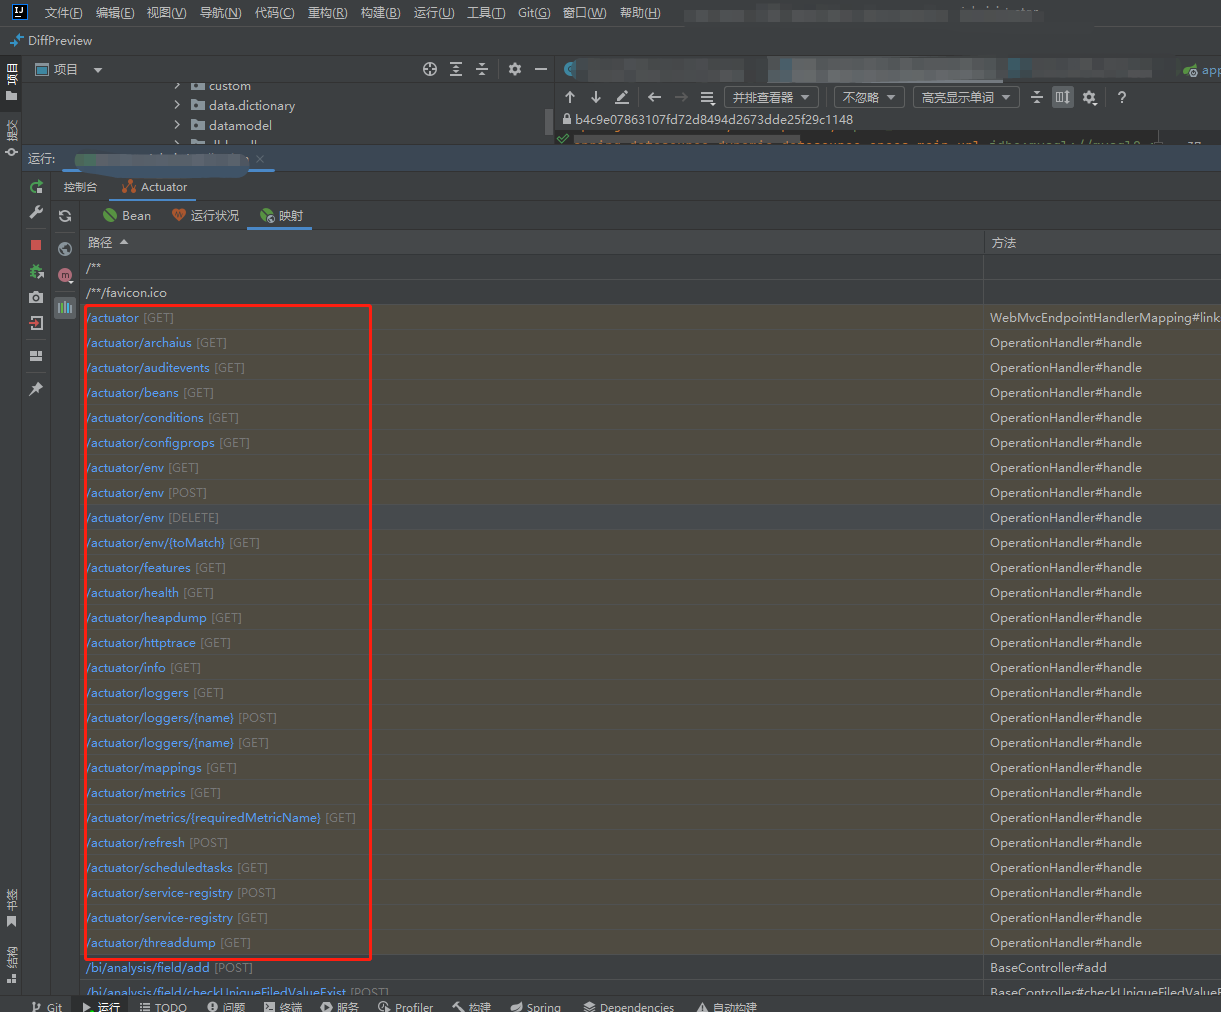
- /actuator/health:显示应用程序的健康状态。返回一个表示健康状态的 JSON 响应。
假设我们的应用程序是一个电子商务平台, 展示了/actuator/health端点的健康状态和其他自定义健康检查项:
{
  "status": "UP",
  "components": {
    "database": {
      "status": "UP",
      "details": {
        "connection": "OK",
        "activeConnections": 10
      }
    },
    "storage": {
      "status": "UP",
      "details": {
        "availableSpace": "10 GB",
        "usedSpace": "2 GB"
      }
    },
    "paymentGateway": {
      "status": "DOWN",
      "details": {
        "error": "Connection timeout"
      }
    }
  }
}
-
/actuator/info:显示应用程序的信息。
-
/actuator/metrics:显示应用程序的度量指标。返回 如内存使用量、HTTP 请求计数等。
-
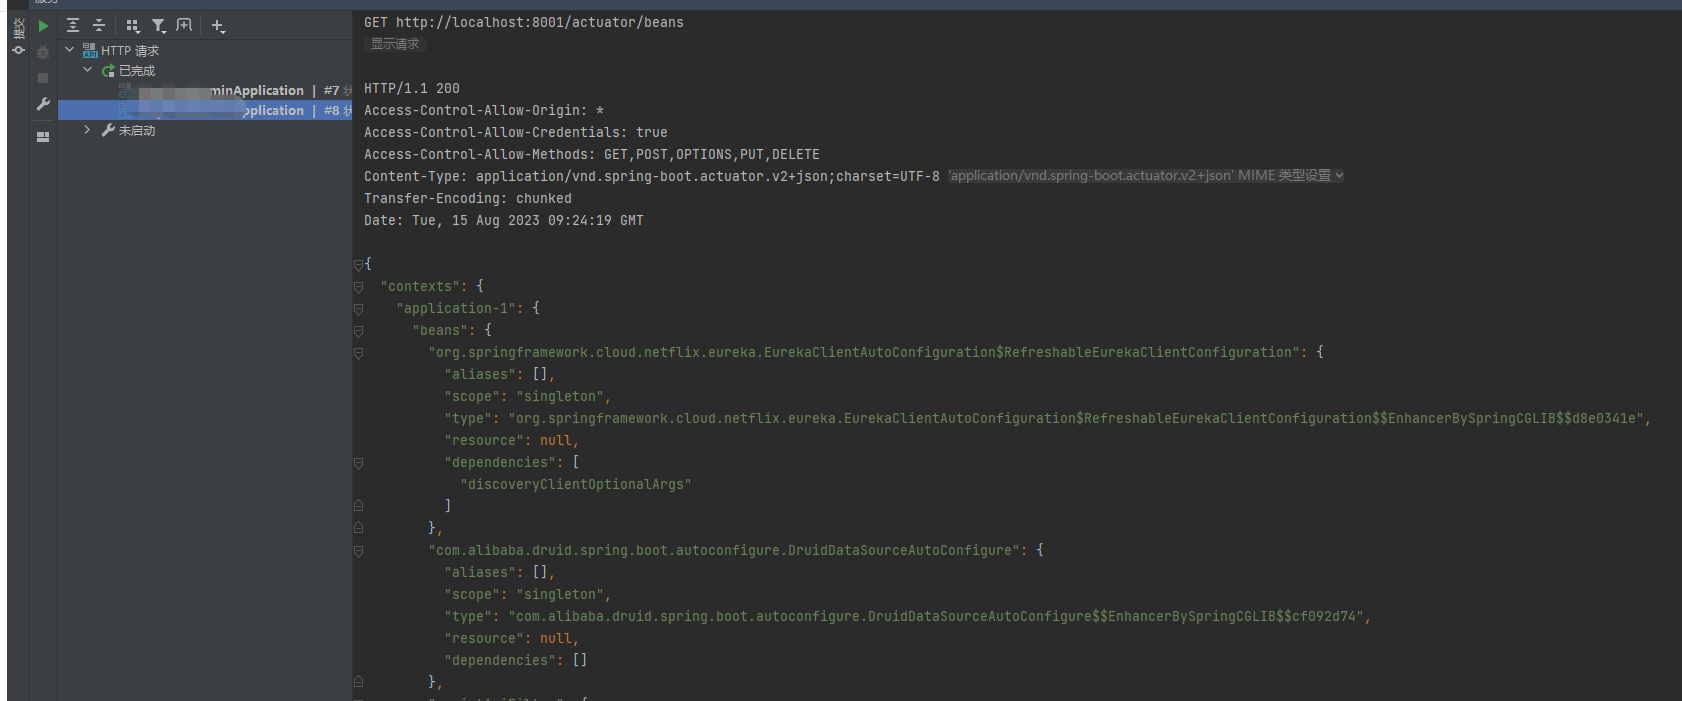
/actuator/beans:显示应用程序中所有的 Spring Bean。返回一个包含所有 Bean 的 JSON 响应。
-
/actuator/env:显示应用程序的环境属性。返回一个包含应用程序环境属性的 JSON 响应,如配置文件属性、系统属性等。
-
/actuator/mappings:显示应用程序的 URL 映射。返回一个包含应用程序中所有 URL 映射信息的 JSON 响应,包括控制器、请求方法等。
-
/actuator/trace:显示最近的 HTTP 请求跟踪信息。返回一个包含最近 HTTP 请求的 JSON 响应,包括请求方法、URL、状态码等。
{
  "traces": [
    {
      "timestamp": "2023-08-15T09:26:18.062Z",
      "principal": null,
      "session": null,
      "request": {
        "method": "GET",
        "uri": "http://localhost:8001/actuator/loggers",
        "headers": {
          "accept": [
            "application/vnd.spring-boot.actuator.v2+json"
          ],
          "host": [
            "localhost:8001"
          ],
          "connection": [
            "Keep-Alive"
          ],
          "user-agent": [
            "Apache-HttpClient/4.5.14 (Java/17.0.7)"
          ],
          "accept-encoding": [
            "br,deflate,gzip,x-gzip"
          ]
        },
        "remoteAddress": null
      },
      "response": {
        "status": 200,
        "headers": {
          "Access-Control-Allow-Origin": [
            "*"
          ],
          "Access-Control-Allow-Credentials": [
            "true"
          ],
          "Access-Control-Allow-Methods": [
            "GET,POST,OPTIONS,PUT,DELETE"
          ],
          "Content-Type": [
            "application/vnd.spring-boot.actuator.v2+json;charset=UTF-8"
          ],
          "Transfer-Encoding": [
            "chunked"
          ],
          "Date": [
            "Tue, 15 Aug 2023 09:26:18 GMT"
          ]
        }
      },
      "timeTaken": 49
    },
    {
      "timestamp": "2023-08-15T09:24:19.108Z",
      "principal": null,
      "session": null,
      "request": {
        "method": "GET",
        "uri": "http://localhost:8001/actuator/beans",
        "headers": {
          "accept": [
            "application/vnd.spring-boot.actuator.v2+json"
          ],
          "host": [
            "localhost:8001"
          ],
          "connection": [
            "Keep-Alive"
          ],
          "user-agent": [
            "Apache-HttpClient/4.5.14 (Java/17.0.7)"
          ],
          "accept-encoding": [
            "br,deflate,gzip,x-gzip"
          ]
        },
        "remoteAddress": null
      },
      "response": {
        "status": 200,
        "headers": {
          "Access-Control-Allow-Origin": [
            "*"
          ],
          "Access-Control-Allow-Credentials": [
            "true"
          ],
          "Access-Control-Allow-Methods": [
            "GET,POST,OPTIONS,PUT,DELETE"
          ],
          "Content-Type": [
            "application/vnd.spring-boot.actuator.v2+json;charset=UTF-8"
          ],
          "Transfer-Encoding": [
            "chunked"
          ],
          "Date": [
            "Tue, 15 Aug 2023 09:24:19 GMT"
          ]
        }
      },
      "timeTaken": 70
    },
    {
      "timestamp": "2023-08-15T09:23:50.737Z",
      "principal": null,
      "session": null,
      "request": {
        "method": "GET",
        "uri": "http://localhost:8001/actuator/health",
        "headers": {
          "accept": [
            "application/vnd.spring-boot.actuator.v2+json"
          ],
          "host": [
            "localhost:8001"
          ],
          "connection": [
            "Keep-Alive"
          ],
          "user-agent": [
            "Apache-HttpClient/4.5.14 (Java/17.0.7)"
          ],
          "accept-encoding": [
            "br,deflate,gzip,x-gzip"
          ]
        },
        "remoteAddress": null
      },
      "response": {
        "status": 200,
        "headers": {
          "Access-Control-Allow-Origin": [
            "*"
          ],
          "Access-Control-Allow-Credentials": [
            "true"
          ],
          "Access-Control-Allow-Methods": [
            "GET,POST,OPTIONS,PUT,DELETE"
          ],
          "Content-Type": [
            "application/vnd.spring-boot.actuator.v2+json;charset=UTF-8"
          ],
          "Transfer-Encoding": [
            "chunked"
          ],
          "Date": [
            "Tue, 15 Aug 2023 09:23:51 GMT"
          ]
        }
      },
      "timeTaken": 488
    }
  ]
}
响应文件已保存。
> 2023-08-15T172634.200.json

Response code: 200; Time: 38ms (38 ms); Content length: 2230 bytes (2.23 kB)
-
/actuator/auditevents:显示应用程序的审计事件。返回一个包含应用程序审计事件的 JSON 响应,如登录成功、失败等。
-
/actuator/loggers:显示和修改应用程序的日志记录器配置。返回一个包含日志记录器配置信息的 JSON 响应,可以修改日志记录器的级别。
-
/actuator/httptrace:显示最近的 HTTP 跟踪信息。返回一个包含最近的 HTTP 请求和响应跟踪信息的 JSON 响应,包括请求和响应头、状态码等。
-
/actuator/threaddump:显示应用程序的线程转储信息。返回一个包含应用程序线程转储信息的 JSON 响应,用于分析线程状态和问题。
大家可以在自己的项目中去尝试获取一下这些信息,此处不再演示。,我们继续搞。
3.步骤
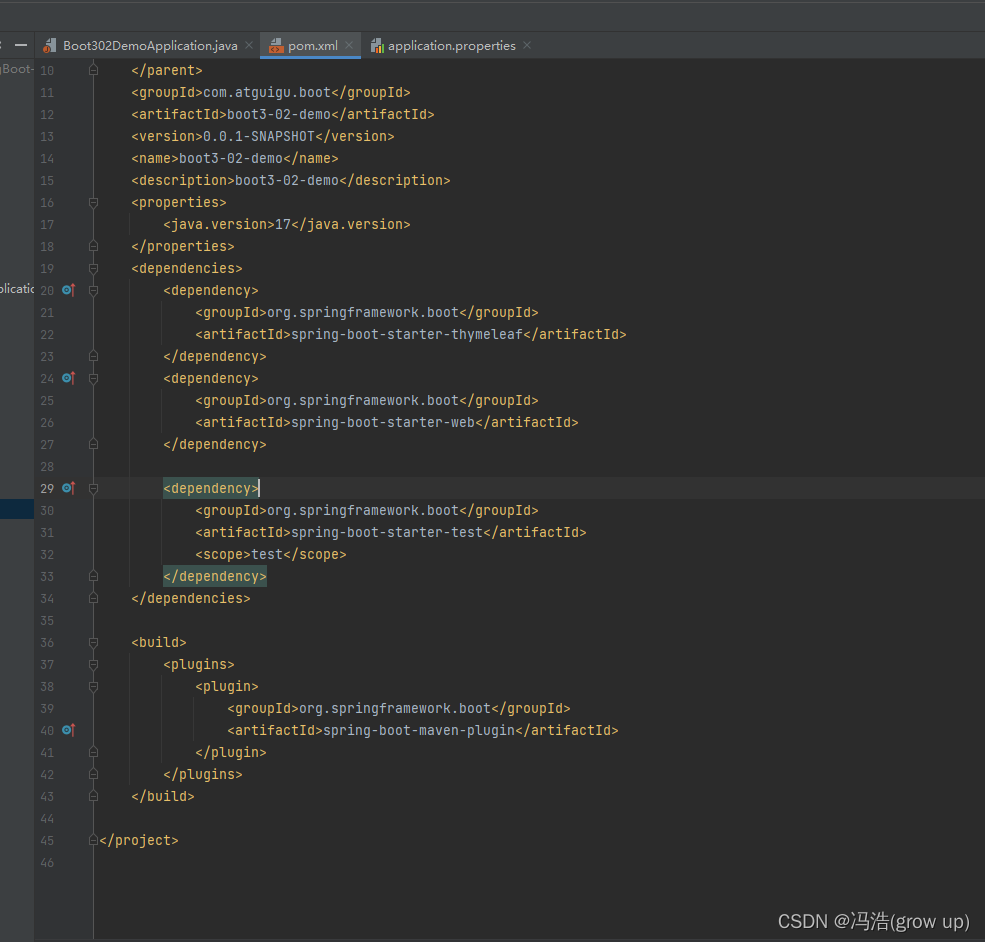
3.1. 引入依赖
        <dependency>
            <groupId>org.springframework.boot</groupId>
            <artifactId>spring-boot-starter-actuator</artifactId>
        </dependency>
3.2. 配置文件
这些配置大家按需配置,还有一点,开启端点是具有一定安全风险的,大家可以通过上面我演示的结果来看,其实会输出一些核心信息,给攻击者提供了价值。切记生产环境非必要不要开启
 # Actuator Endpoints
# 启用所有端点,默认为true
management.endpoints.enabled-by-default=true
# 管理端点的基本路径,默认为/actuator
management.endpoints.web.base-path=/actuator
# 配置需要暴露的端点,*表示全部暴露
management.endpoints.web.exposure.include=*
# 配置需要排除的端点,如果需要排除特定端点,可以在此处指定
management.endpoints.web.exposure.exclude=
# 允许跨域访问的来源,*表示允许全部来源
management.endpoints.web.cors.allowed-origins=*
# 允许跨域访问的HTTP方法
management.endpoints.web.cors.allowed-methods=GET

# Health Endpoint
# 显示详细的健康状态信息,always表示始终显示
management.endpoint.health.show-details=always

# Info Endpoint
# 应用程序名称
info.app.name=我的应用程序
# 应用程序版本
info.app.version=1.0.0

# Metrics Endpoint
# 启用度量指标端点
management.endpoint.metrics.enabled=true
# 启用缓存的度量指标
management.endpoint.metrics.cache.enabled=true
# 启用默认的度量指标
management.metrics.export.defaults.enabled=true

# Beans Endpoint
# 启用显示所有 Spring Bean 的端点
management.endpoint.beans.enabled=true

# Environment Endpoint
# 启用显示应用程序环境属性的端点
management.endpoint.env.enabled=true

# Mappings Endpoint
# 启用显示应用程序 URL 映射信息的端点
management.endpoint.mappings.enabled=true

# Trace Endpoint
# 启用显示最近的 HTTP 请求跟踪信息的端点
management.endpoint.trace.enabled=true

# Auditevents Endpoint
# 启用显示应用程序审计事件的端点
management.endpoint.auditevents.enabled=true

# Loggers Endpoint
# 启用显示和修改应用程序日志记录器配置的端点
management.endpoint.loggers.enabled=true

# Httptrace Endpoint
# 启用显示最近的 HTTP 请求和响应跟踪信息的端点
management.endpoint.httptrace.enabled=true

# Threaddump Endpoint
# 启用显示应用程序线程转储信息的端点
management.endpoint.threaddump.enabled=true
3.3. 核心源码
其核心代码包括以下关键组件和功能:版本不一样类和接口也是有差异的,包括上面的配置项。本文是基于2.0.3
-
Endpoint 接口:
Endpoint接口定义了监控和管理功能的核心方法。所有的监控端点都必须实现该接口,并提供自己的逻辑实现。 -
MetricsEndpoint 类:
MetricsEndpoint是用于提供应用程序度量指标信息的监控端点。它继承自AbstractEndpoint,并实现了Endpoint接口的方法,通过收集应用程序的度量指标数据并返回给调用方。 -
InfoEndpoint 类:
InfoEndpoint是一个监控端点,用于提供应用程序的自定义信息。它继承自AbstractEndpoint,并实现了Endpoint接口的方法,通过收集应用程序的自定义信息并返回给调用方。 -
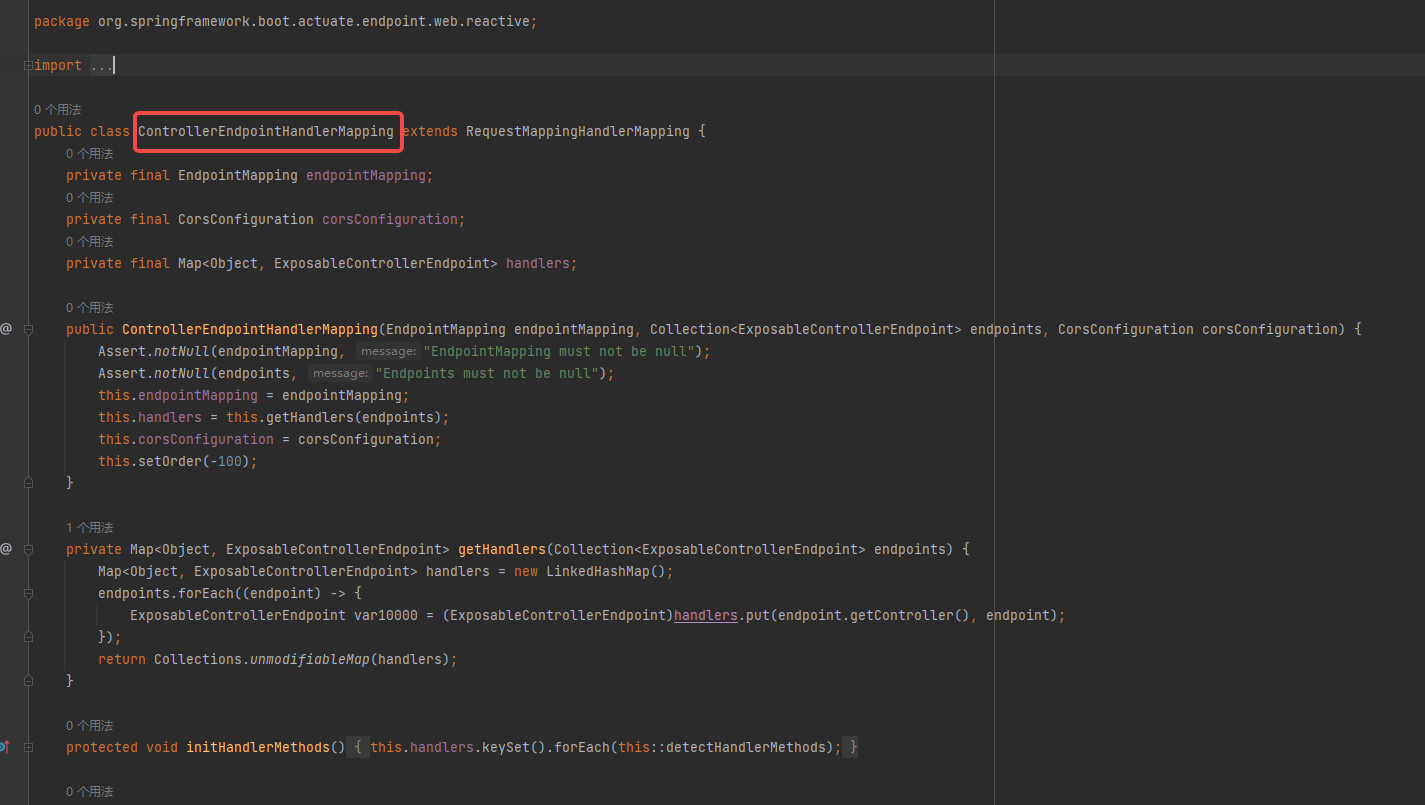
ControllerEndpointHandlerMapping类:
EndpointHandlerMapping类是一个 Spring MVC 的处理器映射器,负责将 HTTP 请求映射到相应的监控端点的处理器。
-
EndpointWebMvcManagementContextConfiguration 类:
EndpointWebMvcManagementContextConfiguration类是 Spring Boot Actuator 的自动配置类,用于注册和配置 Actuator 的核心组件,包括EndpointHandlerMapping、EndpointMvcAdapter等。 -
AbstractEndpoint 类:
AbstractEndpoint类是Endpoint接口的抽象实现,提供了一些通用的功能和方法,例如端点的 ID、是否启用、安全性配置等。自定义的监控端点可以继承该类来简化实现。 -
HealthIndicator:是 Spring Boot Actuator 提供的一个核心接口,用于定义应用程序的健康检查逻辑。它允许开发人员自定义健康检查的实现,并将其注册为 Spring Bean,使其成为 Actuator 的一部分。。
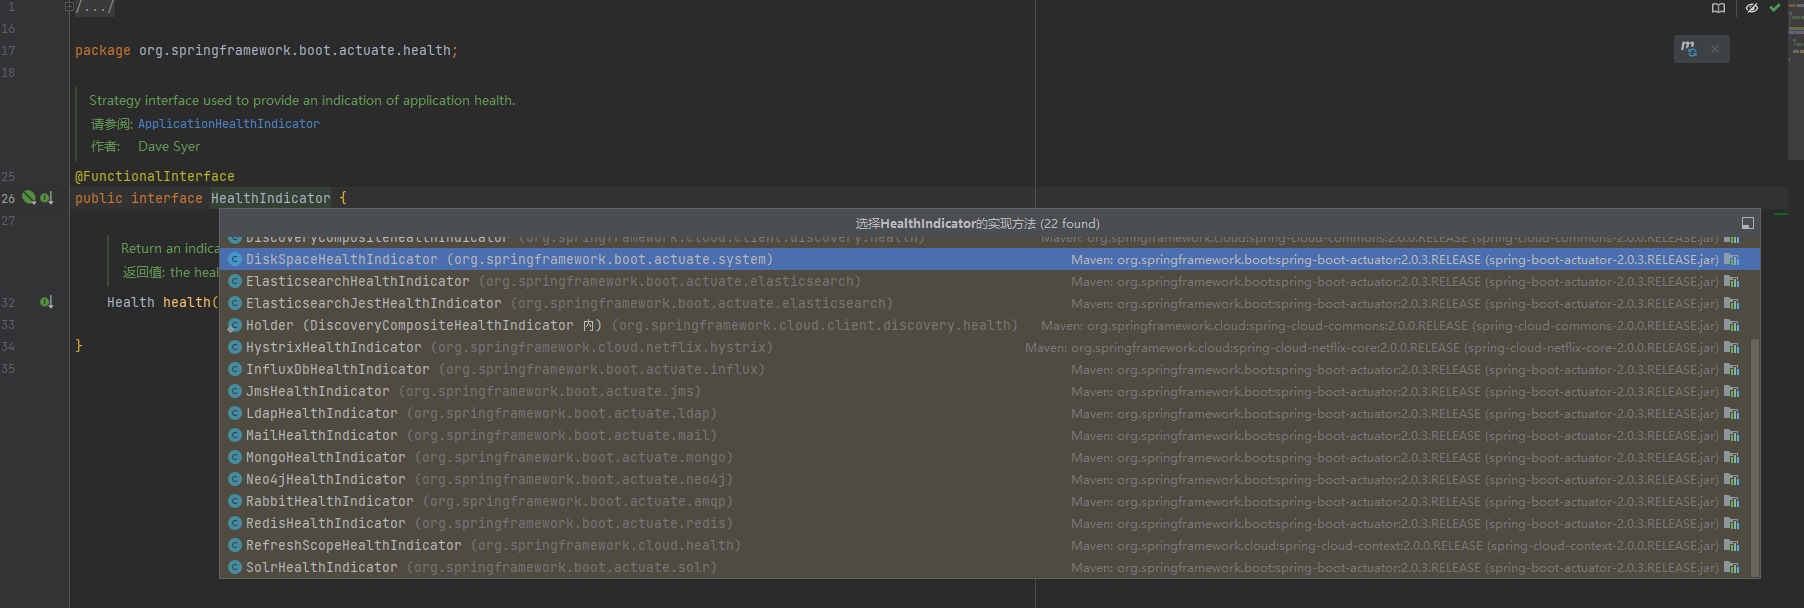
我们可以看到有这么多约定的配置已经加入的将康检查。
HealthIndicator接口是 Spring Boot Actuator 提供的一个核心接口,用于定义应用程序的健康检查逻辑。它允许开发人员自定义健康检查的实现,并将其注册为 Spring Bean,使其成为 Actuator 的一部分。
HealthIndicator接口只有一个方法health(),该方法返回一个Health对象,表示应用程序的健康状态。
自定义的健康指标实现需要实现HealthIndicator接口,并实现其中的health()方法。在该方法中,开发人员可以编写自己的健康检查逻辑,并返回一个Health对象,该对象描述了应用程序的健康状态。
Health对象可以使用Health.up()、Health.down()、Health.unknown()等静态方法进行创建。它可以包含一些状态信息、错误消息、异常信息等,以提供更详细的健康状态描述。
简单的实现方式如下:
@Component
public class MyHealthIndicator implements HealthIndicator {

    @Override
    public Health health() {
        // 自定义健康检查逻辑
        boolean isHealthy = checkHealth(); // 健康检查的具体实现

        if (isHealthy) {
            return Health.up().build(); // 返回健康状态
        } else {
            return Health.down().withDetail("Error", "Something went wrong").build(); // 返回不健康状态,并提供错误信息
        }
    }

    private boolean checkHealth() {
        // 实现自定义的健康检查逻辑
        // 返回 true 表示健康,返回 false 表示不健康
        // 可以根据具体需求进行判断
    }
}
4.示例项目
假设我们有一个 Spring Boot 应用程序,它使用 MongoDB 作为数据库,并且我们希望添加一个自定义健康检查规则来检查与 MongoDB 数据库的连接状态。如果连接正常,应用程序将被标记为健康状态,否则将被标记为非健康状态。
首先,我们需要创建一个自定义的健康指示器类 MongoDBHealthIndicator,实现 HealthIndicator 接口,并重写 health() 方法来执行 MongoDB 连接的健康检查。
我们使用 MongoClient 对象来执行 MongoDB 的 ping 命令,如果命令执行成功,则认为与数据库的连接正常。如果出现异常,我们将错误信息添加到健康状态的详细信息中。
import com.mongodb.MongoClient;
import org.springframework.boot.actuate.health.Health;
import org.springframework.boot.actuate.health.HealthIndicator;
import org.springframework.stereotype.Component;

@Component
public class MongoDBHealthIndicator implements HealthIndicator {

    private final MongoClient mongoClient;

    public MongoDBHealthIndicator(MongoClient mongoClient) {
        this.mongoClient = mongoClient;
    }

    @Override
    public Health health() {
        try {
            mongoClient.getDatabase("admin").runCommand("ping"); // 执行 MongoDB 的 ping 命令,检查连接状态
            return Health.up().build(); // 健康状态
        } catch (Exception e) {
            return Health.down().withDetail("Error", e.getMessage()).build(); // 非健康状态,添加错误信息
        }
    }
}
然后,确保应用程序能够自动扫描到 MongoDBHealthIndicator 类。可以使用 @ComponentScan 或 @SpringBootApplication 注解进行自动扫描。
import org.springframework.boot.SpringApplication;
import org.springframework.boot.autoconfigure.SpringBootApplication;

@SpringBootApplication
public class MyApplication {

    public static void main(String[] args) {
        SpringApplication.run(MyApplication.class, args);
    }
}
最后,启动应用程序,并访问 /actuator/health 端点,查看自定义健康检查规则的结果。
GET /actuator/health
应该能够看到返回的 JSON 中包含自定义健康检查结果,类似于以下输出:
mongoDB 表示自定义健康检查的结果,status 字段为 "UP" 表示健康状态,details 字段为附加的详细信息。如果连接出现问题,status 字段将变为 "DOWN",并在 details 字段中提供错误信息。
{
  "status": "UP",
  "components": {
    "mongoDB": {
      "status": "UP",
      "details": {
        "error": null
      }
    },
    "ping": {
      "status": "UP",
      "details": {
        "error": null
      }
    }
  }
}
5.总结
Spring Boot Actuator 的设计思想是为了提供一种简单、可扩展和可配置的方式来监控和管理 Spring Boot 应用程序。
-
约定优于配置:Spring Boot Actuator 遵循 Spring Boot 的约定优于配置原则,通过默认配置和自动装配的方式,使得监控和管理端点能够在应用程序启动时自动可用,而无需进行繁琐的手动配置。
-
端点的模块化和可扩展性:Actuator 提供了一组核心端点(如健康检查、信息、度量指标等),同时也支持自定义端点的添加和扩展。开发人员可以根据自己的需求,编写自定义的端点,并通过简单的配置将其集成到 Actuator 中。
-
基于 HTTP 协议的远程访问:Actuator 的端点通过 HTTP 协议进行访问,这使得监控和管理操作可以通过远程方式进行,无需直接访问应用程序的代码或运行时环境。这样可以方便地在分布式环境中监控和管理多个应用程序。
-
提供丰富的监控和管理功能:Actuator 提供了一系列功能强大的端点,可以监控和管理应用程序的各个方面,包括健康状态、性能指标、环境属性、日志记录器配置等。这些功能可以帮助开发人员快速了解应用程序的运行状况,并进行问题排查和性能优化。
-
安全性和权限控制:Actuator 提供了安全性配置选项,可以限制对端点的访问权限,确保只有授权的用户或角色才能访问敏感的监控和管理端点。这样可以保护应用程序的安全性和敏感信息的机密性。
