Opencv 之ORB特征提取与匹配API简介及使用例程
- ORB因其速度较快常被用于视觉SLAM中的位姿估计、视觉里程、图像处理中的特征提取与匹配及图像拼接等领域
- 本文将详细给出使用例程及实现效果展示
1. API 简介
- 创建
static Ptr<ORB> cv::ORB::create	(
	int nfeatures = 500,                                   //nfeatures 最终输出最大特征点数目
	float scaleFactor = 1.2f,                            // scaleFactor 金字塔上采样比率
	int nlevels = 8,                                            // nlevels 金字塔层数
	int edgeThreshold = 31,                                // edgeThreshold 边缘阈值
	int firstLevel = 0,
	int WTA_K = 2,                                                // WTA_K这个是跟BRIEF描述子用的
	ORB::ScoreType 	scoreType = ORB::HARRIS_SCORE,        //  scoreType 对所有的特征点进行排名用的方法
	int patchSize = 31,
	int fastThreshold = 20
)
- 检测
void cv::Feature2D::detect	(	InputArray 	image,   //输入图像
                                std::vector< KeyPoint > & 	keypoints,    //待搜索特征点
                                InputArray 	mask = noArray()    //操作掩码
                             )
- 计算
void cv::Feature2D::compute	(	InputArrayOfArrays 	images,    //输入图像
                                std::vector< std::vector< KeyPoint > > & 	keypoints,
                                OutputArrayOfArrays 	descriptors   //描述子
                            )
- 检测与计算
 void cv::Feature2D::detectAndCompute	(	InputArray 	image,
                                            InputArray 	mask,
                                            std::vector< KeyPoint > & 	keypoints,
                                            OutputArray 	descriptors,
                                            bool 	useProvidedKeypoints = false
                                        )
- 绘制特征点
void cv::drawMatches	(	InputArray 	img1,
                            const std::vector< KeyPoint > & 	keypoints1,
                            InputArray 	img2,
                            const std::vector< KeyPoint > & 	keypoints2,
                            const std::vector< DMatch > & 	matches1to2,
                            InputOutputArray 	outImg,
                            const Scalar & 	matchColor = Scalar::all(-1),
                            const Scalar & 	singlePointColor = Scalar::all(-1),
                            const std::vector< char > & 	matchesMask = std::vector< char >(),
                            DrawMatchesFlags 	flags = DrawMatchesFlags::DEFAULT
                         )
- 绘制匹配点对
void cv::drawMatches	(	InputArray 	img1,
                            const std::vector< KeyPoint > & 	keypoints1,
                            InputArray 	img2,
                            const std::vector< KeyPoint > & 	keypoints2,
                            const std::vector< DMatch > & 	matches1to2,
                            InputOutputArray 	outImg,
                            const Scalar & 	matchColor = Scalar::all(-1),
                            const Scalar & 	singlePointColor = Scalar::all(-1),
                            const std::vector< char > & 	matchesMask = std::vector< char >(),
                            DrawMatchesFlags 	flags = DrawMatchesFlags::DEFAULT
                       )
2. 特征提取
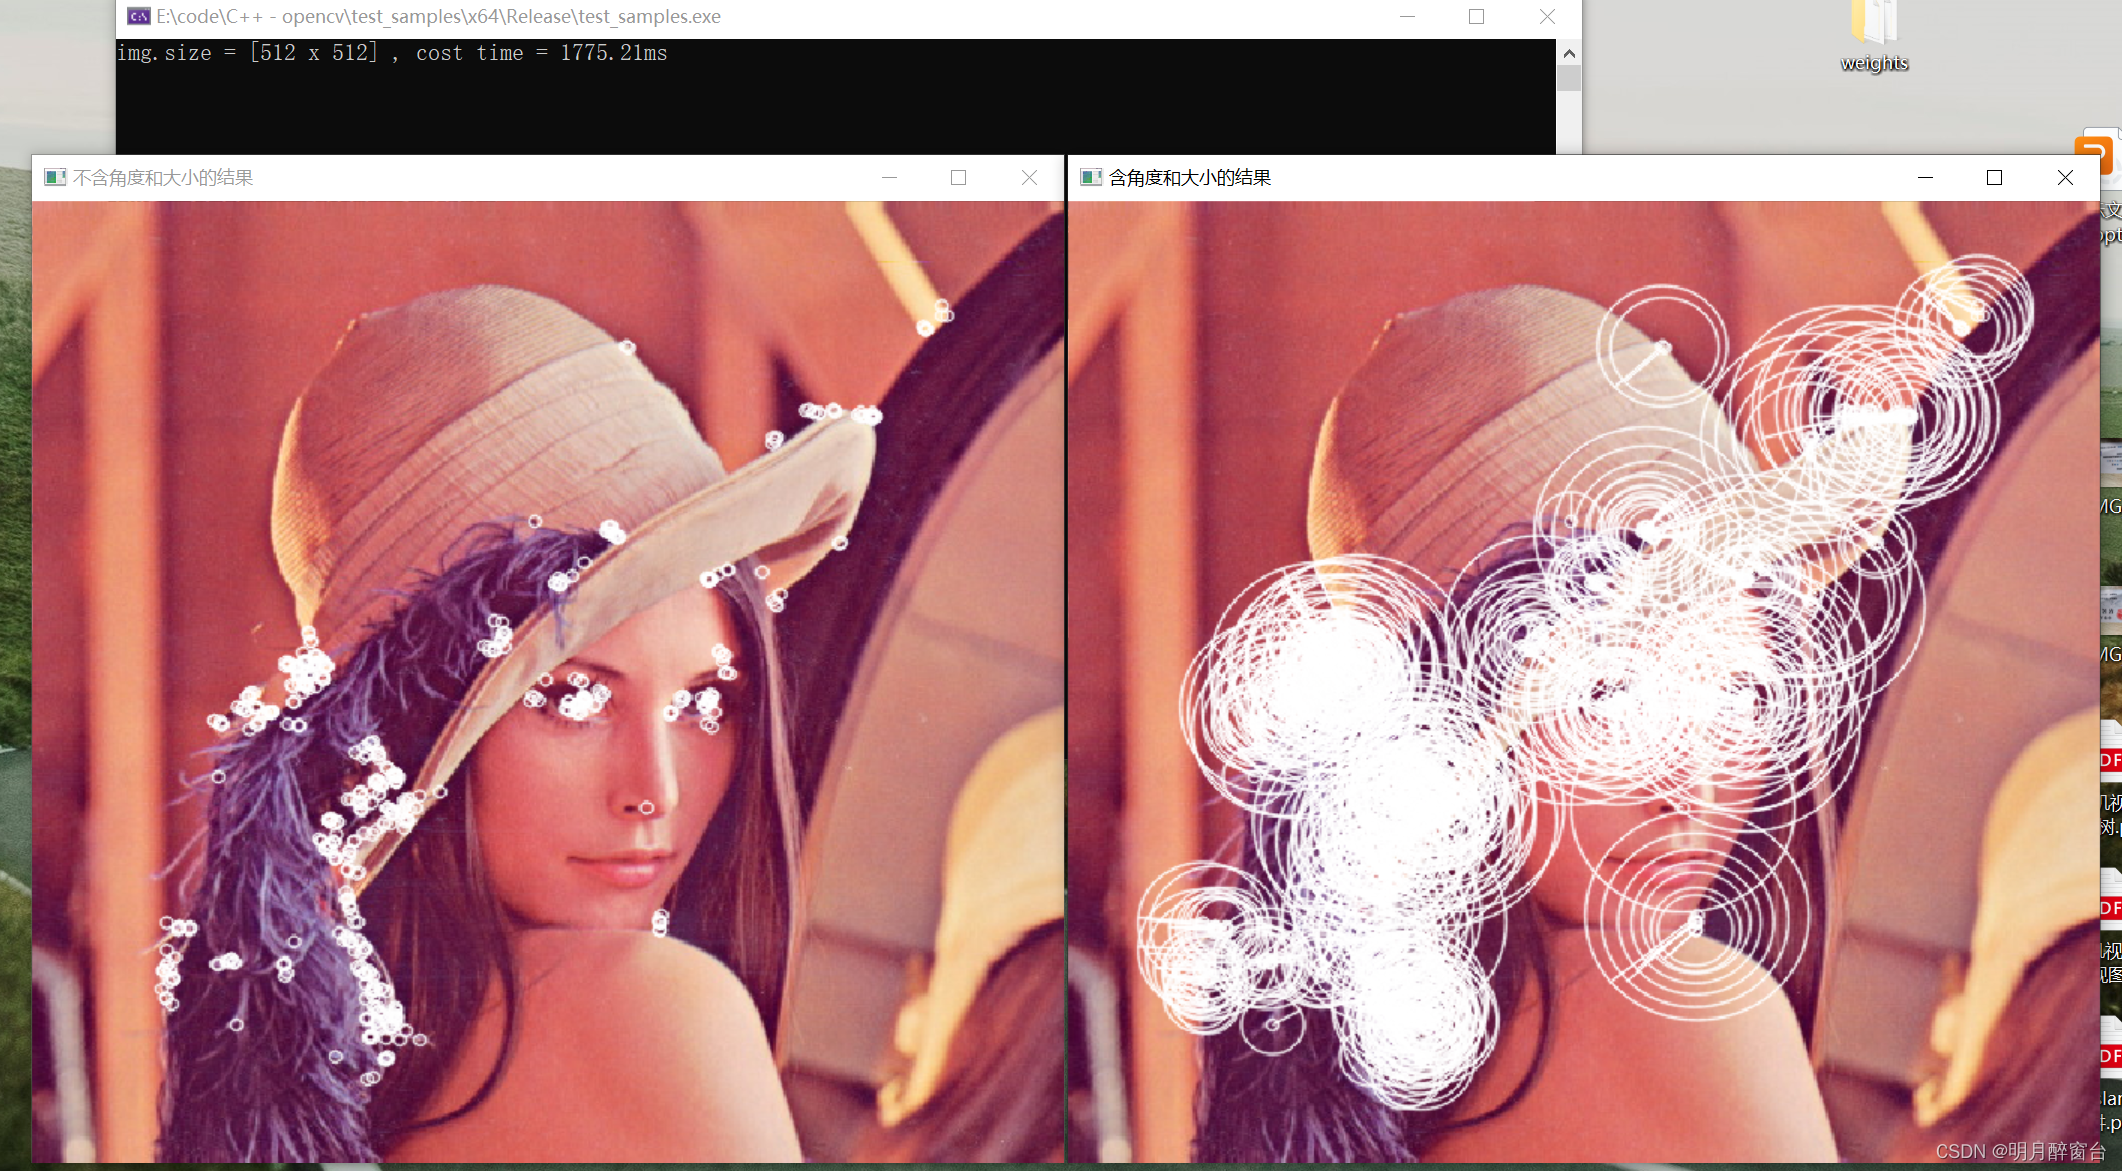
- 讲述特征点提取与描述子计算,实现如下:
int main()
{
	Mat img = imread("./data/test3/lena.png");
	if (!img.data || img.empty())
	{
		cout << "图像读取错误!" << endl;
		return -1;
	}

	//创建ORB关键点

	Ptr<ORB> orb = ORB::create(500, 1.2f);
	double t1 = getTickCount();
	vector<KeyPoint>Keypoints;
	Mat descriptions;
#if 0
	//计算ORB关键点
	orb->detect(img, Keypoints);

	//计算ORB描述子
	orb->compute(img, Keypoints, descriptions);
#else
	orb->detectAndCompute(img, cv::Mat(), Keypoints, descriptions);
#endif // 0

	double t2 = (getTickCount() - t1) / getTickFrequency() * 1000;
	cout << "img.size = " << img.size() << " , cost time = " << t2 << "ms\n";

	//绘制特征点
	Mat imgAngle;
	img.copyTo(imgAngle);
	//绘制不含角度和大小的结果
	drawKeypoints(img, Keypoints, img, Scalar(255, 255, 255));
	//绘制含有角度和大小的结果
	drawKeypoints(img, Keypoints, imgAngle, Scalar(255, 255, 255), DrawMatchesFlags::DRAW_RICH_KEYPOINTS);

	//显示结果
	string wname1 = "不含角度和大小的结果", wname2 = "含角度和大小的结果";
	namedWindow(wname1, WINDOW_NORMAL);
	namedWindow(wname2, 0);
	imshow(wname1, img);
	imshow(wname2, imgAngle);
	waitKey(0);

	return 1;
}
3. 特征匹配
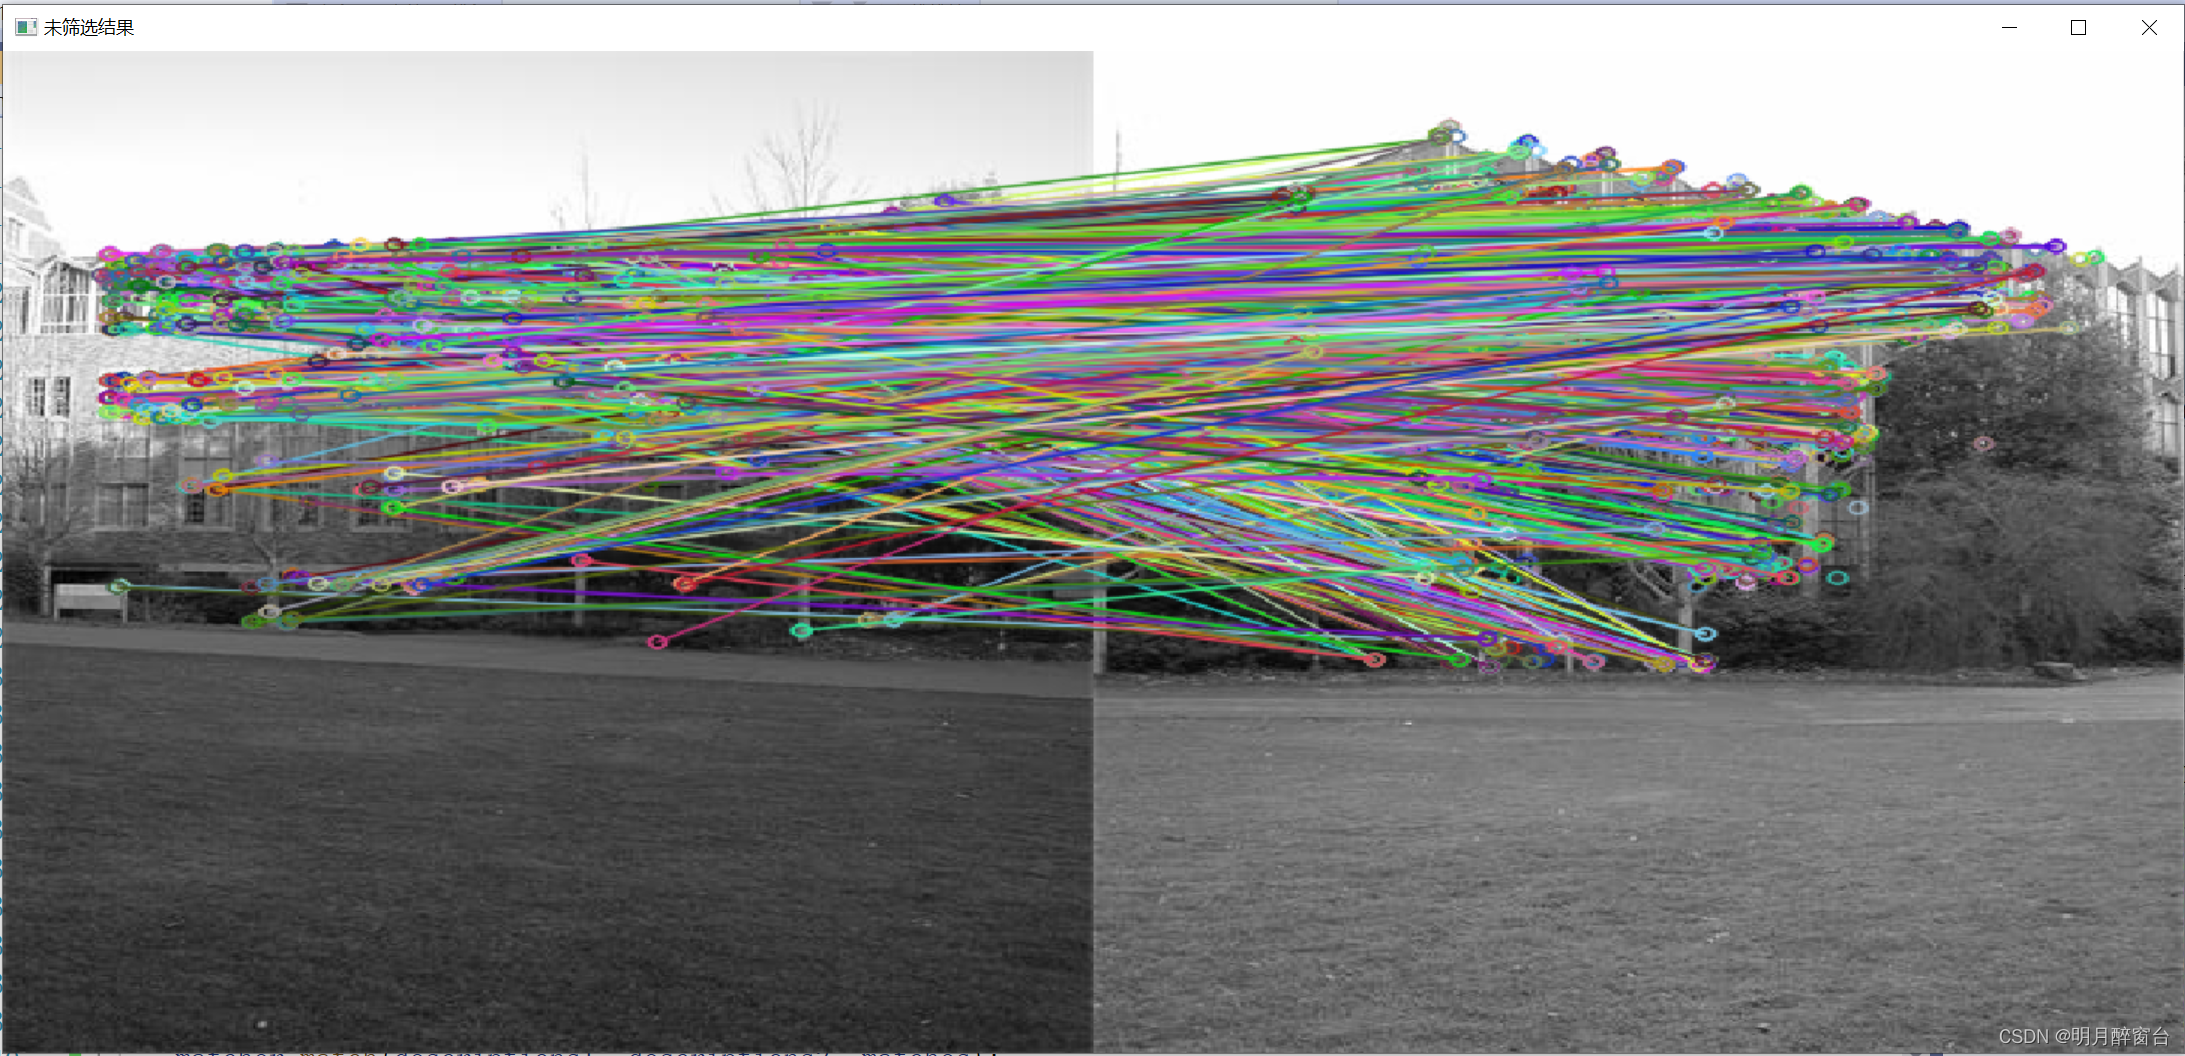
- 暴力匹配实现:
#include<iostream>
#include<opencv2/opencv.hpp>
#include<vector>

using namespace std;
using namespace cv;

int main()
{
	//灰度格式读取
	Mat img1, img2;
	img1 = imread("./data/test3/1.jpg",IMREAD_GRAYSCALE);
	img2 = imread("./data/test3/2.jpg",0);
	if (img1.empty() || img2.empty())
	{
		cout << "img.empty!!!\n";
		return -1;
	}
	//提取orb特征点
	vector<KeyPoint>Keypoints1, Keypoints2;
	Mat descriptions1, descriptions2;

	//计算特征点
	orb_features(img1, Keypoints1, descriptions1);
	orb_features(img2, Keypoints2, descriptions2);

	//特征点匹配
	vector<DMatch>matches;
	BFMatcher matcher(NORM_HAMMING); //定义特征点匹配的类,使用汉明距离
	matcher.match(descriptions1, descriptions2, matches);
	cout << "matches = " << matches.size() << endl;

	//通过汉明距离筛选匹配结果
	double min_dist = 10000, max_dist = 0;
	for (int i = 0; i < matches.size(); ++i)
	{
		double dist = matches[i].distance;
		min_dist = min_dist < dist ? min_dist : dist;
		max_dist = max_dist > dist ? max_dist : dist;
	}
	//输出计算的最大、最小距离
	cout << "min_dist = " << min_dist << endl;
	cout << "max_dist = " << max_dist << endl;

	//通过距离提出误差大的点
	vector<DMatch>goodmatches;
	for (int i = 0; i < matches.size(); ++i)
	{
		if (matches[i].distance <= MAX(1.8 * min_dist, 30)) //需调参
		{
			goodmatches.push_back(matches[i]);
		}
	}
	cout << "good_min = " << goodmatches.size() << endl;

	//绘制结果
	Mat outimg, outimg1;
	drawMatches(img1, Keypoints1, img2, Keypoints2, matches, outimg);
	drawMatches(img1, Keypoints1, img2, Keypoints2, goodmatches, outimg1);
	string wname1 = "未筛选结果", wname2 = "最小汉明距离筛选";
	namedWindow(wname1, WINDOW_NORMAL);
	namedWindow(wname2, 0);
	imshow(wname1, outimg);
	imshow(wname2, outimg1);
	waitKey(0);

	return 1;
}
其效果如下:

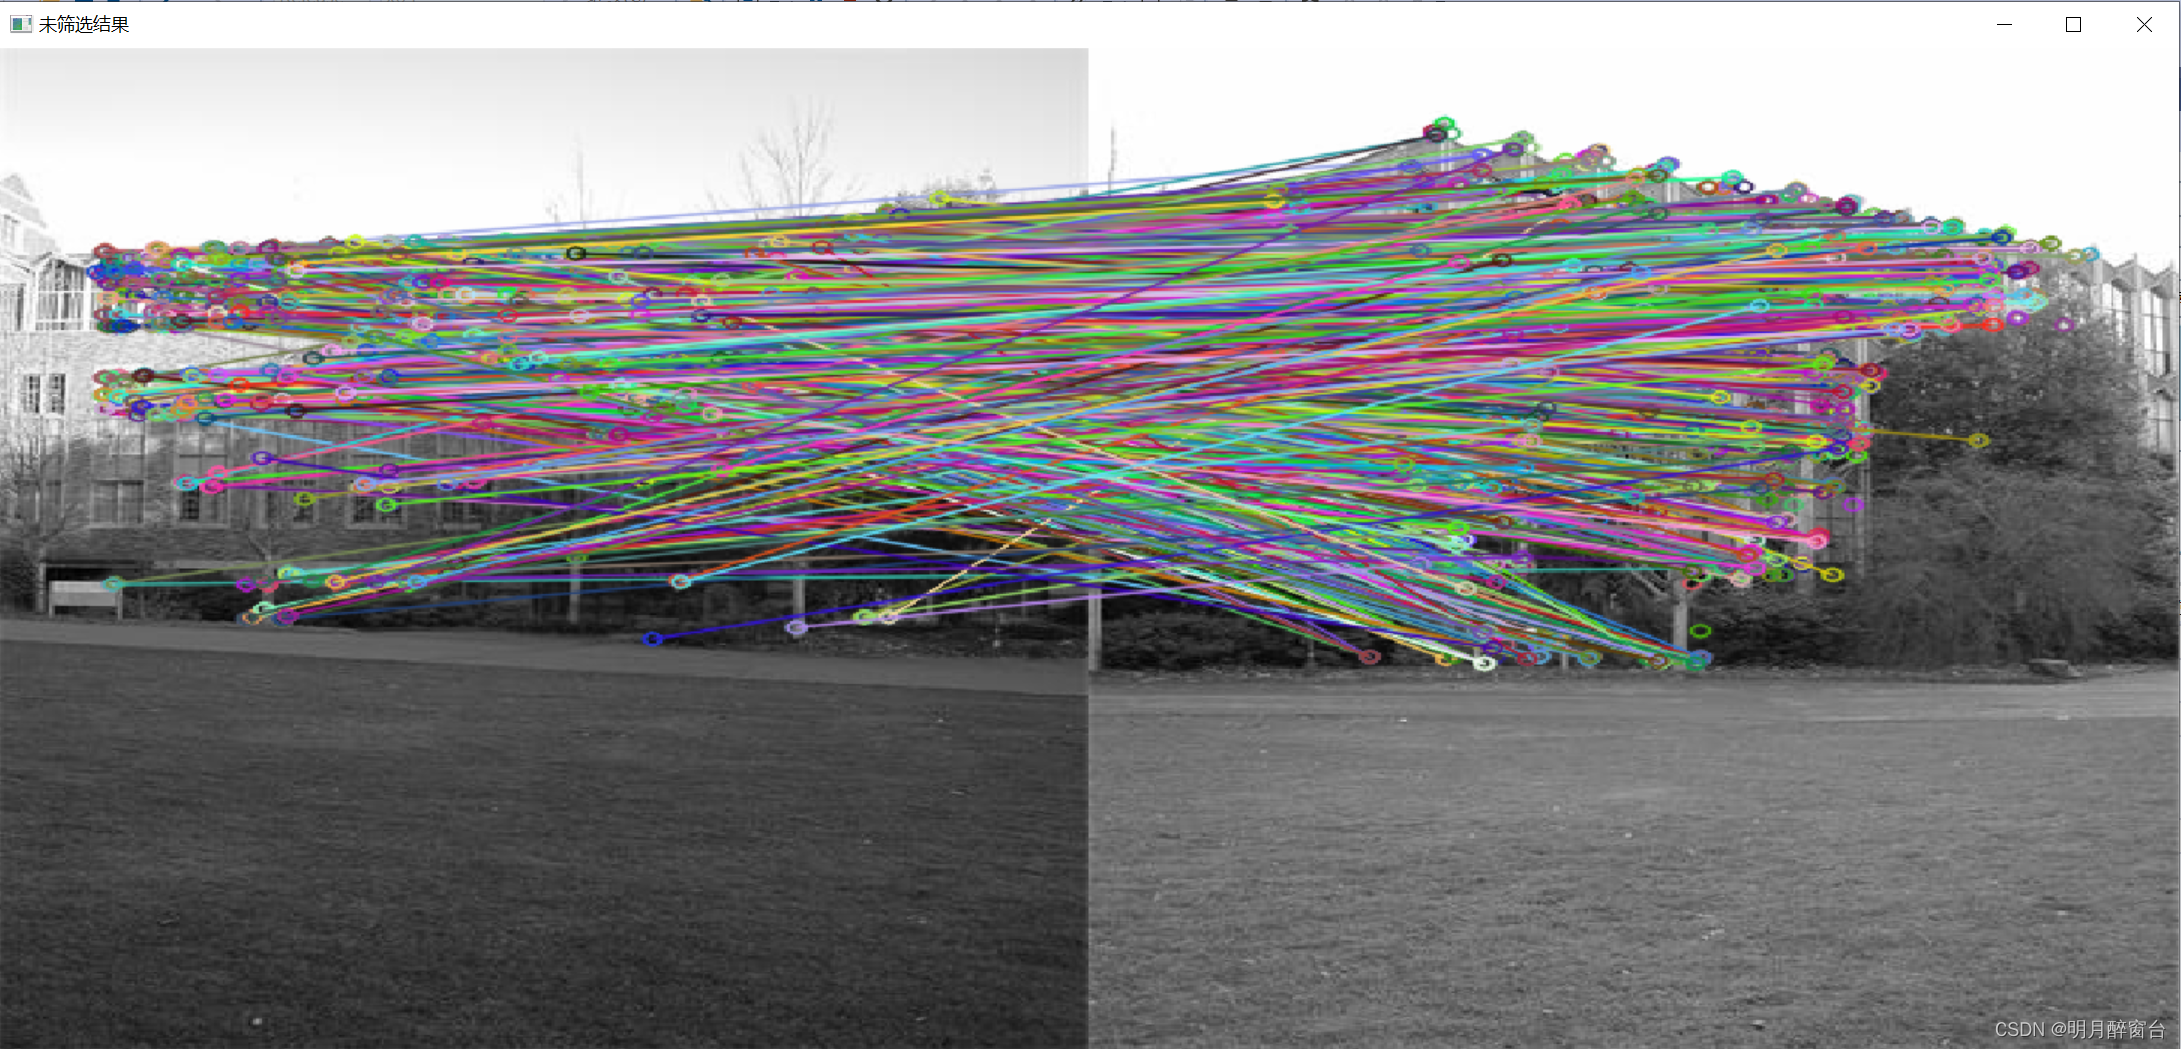
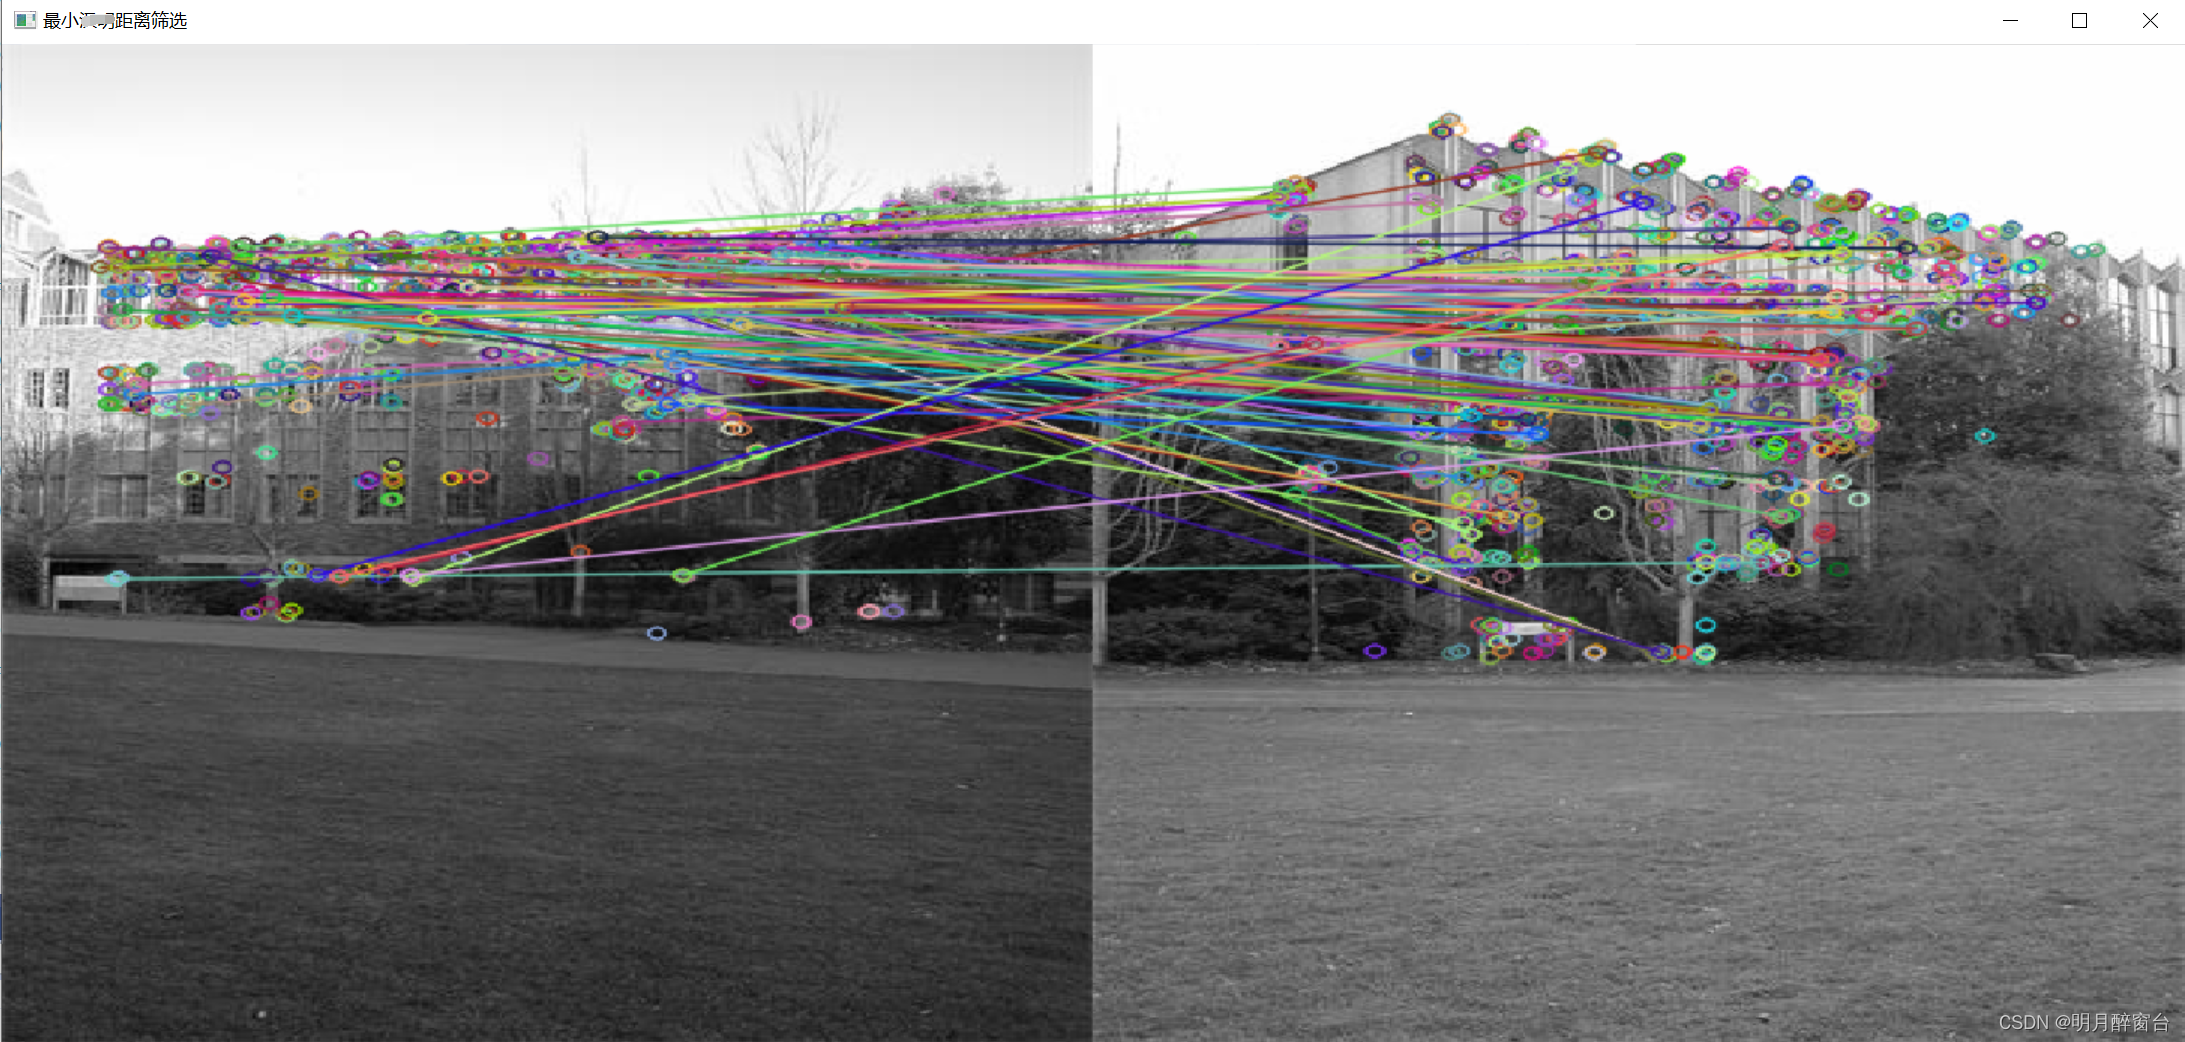
- 最近邻匹配实现如下:
if (descriptions1.type() != CV_32F)
	{
		descriptions1.convertTo(descriptions1, CV_32F);
		descriptions2.convertTo(descriptions2, CV_32F);
	}
	//特征点匹配
	vector<DMatch>matches;
	FlannBasedMatcher matcher; //定义特征点匹配的类,使用汉明距离
	matcher.match(descriptions1, descriptions2, matches);
	cout << "matches = " << matches.size() << endl;

	//通过汉明距离筛选匹配结果
	double min_dist = 10000, max_dist = 0;
	for (int i = 0; i < matches.size(); ++i)
	{
		double dist = matches[i].distance;
		min_dist = min_dist < dist ? min_dist : dist;
		max_dist = max_dist > dist ? max_dist : dist;
	}
	//输出计算的最大、最小距离
	cout << "min_dist = " << min_dist << endl;
	cout << "max_dist = " << max_dist << endl;

	//通过距离提出误差大的点
	vector<DMatch>goodmatches;
	for (int i = 0; i < matches.size(); ++i)
	{
		if (matches[i].distance <= 0.6 * max_dist) //需调参
		{
			goodmatches.push_back(matches[i]);
		}
	}
	cout << "good_min = " << goodmatches.size() << endl;
其效果如下:
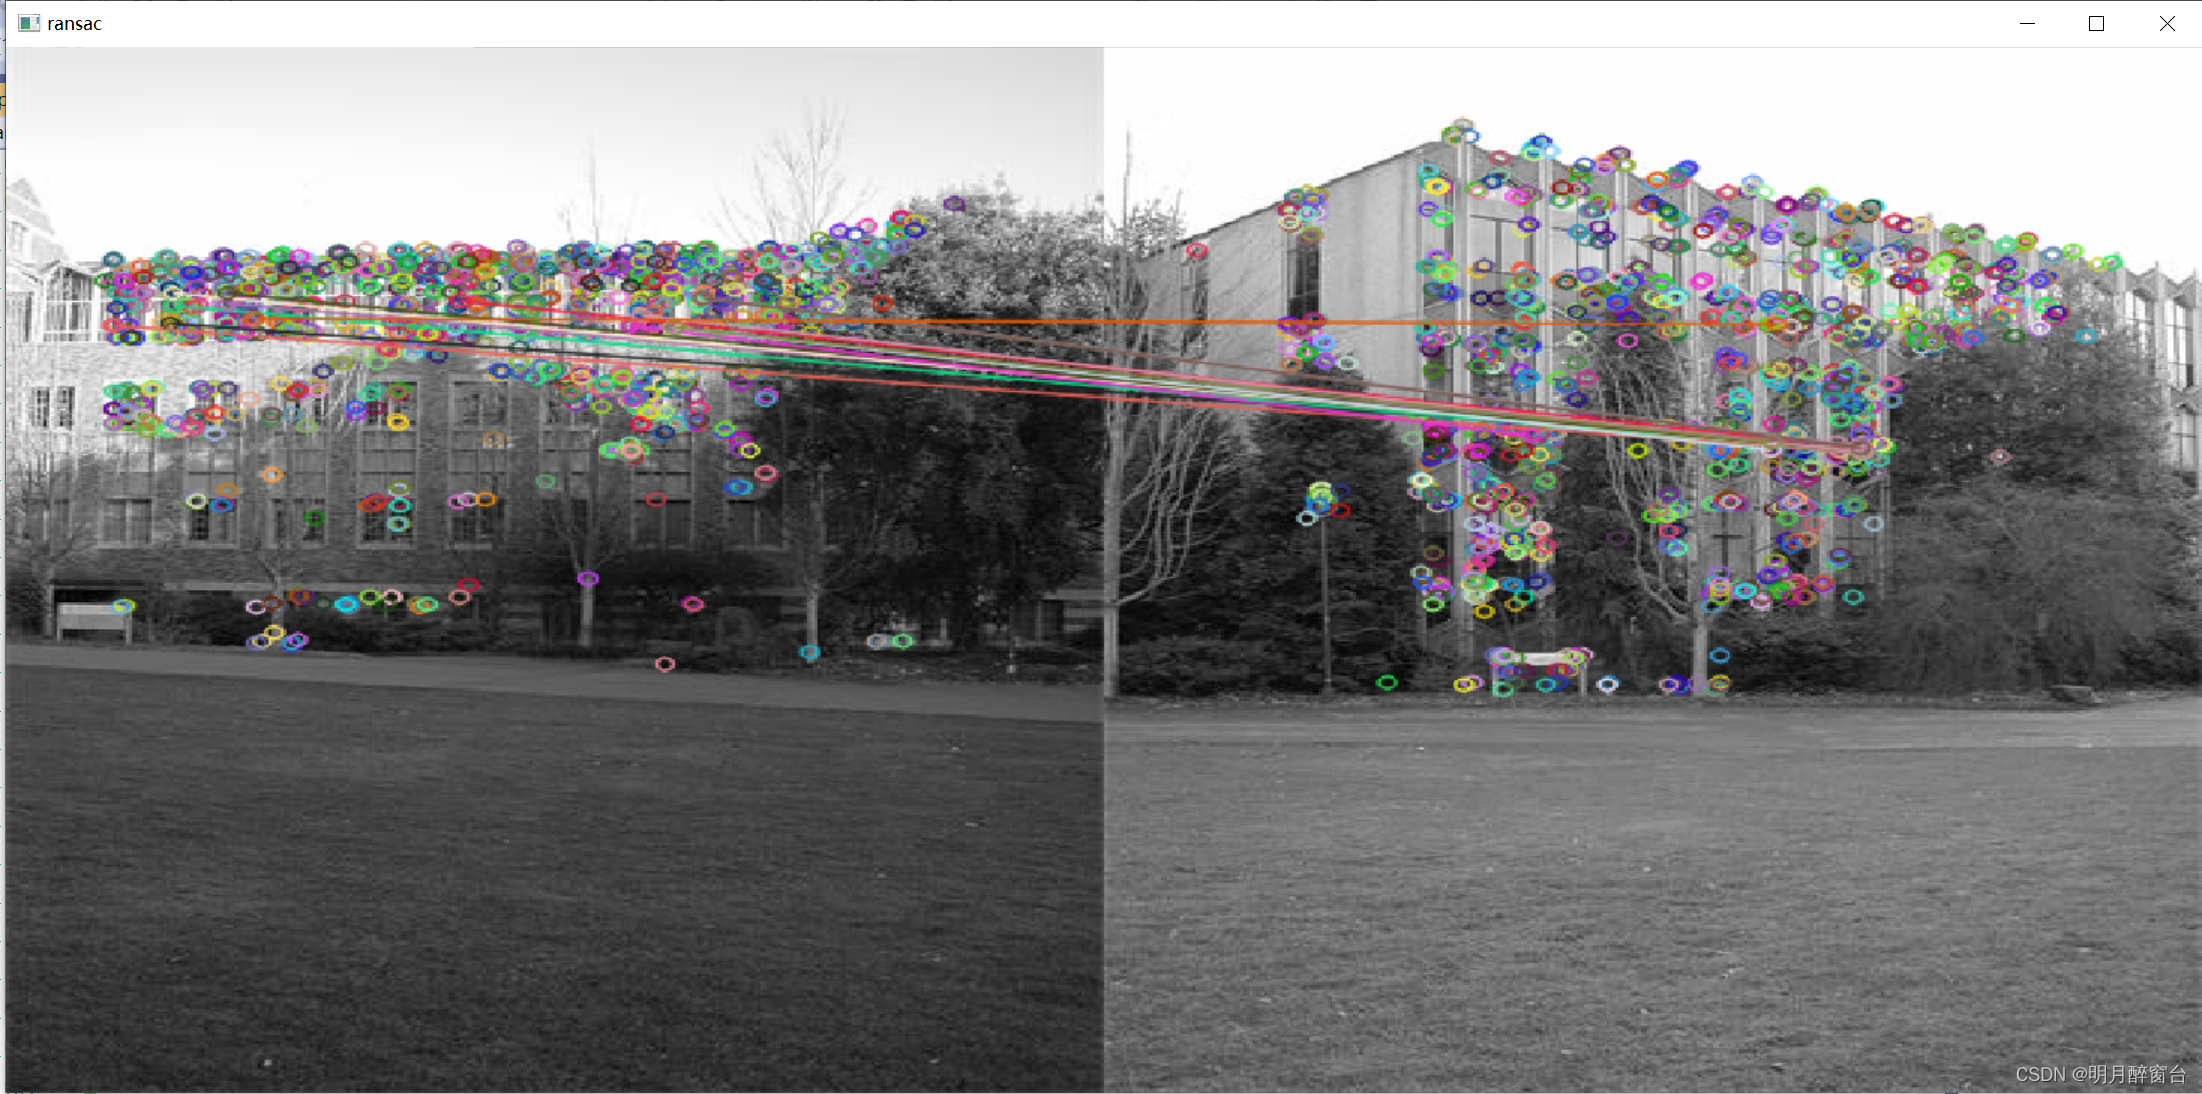
- RANSAC优化匹配
void ransac(vector<DMatch>matches, vector<KeyPoint>queryKeyPoint,
	vector<KeyPoint>trainKeyPoint, vector<DMatch>& matches_ransac)
{
	//定义保存匹配点对坐标
	vector<Point2f>srcPoints(matches.size()), dstPoints(matches.size());
	//保存从关键点中提取到的匹配点对坐标
	for (int i = 0; i < matches.size(); ++i)
	{
		srcPoints[i] = queryKeyPoint[matches[i].queryIdx].pt;
		dstPoints[i] = trainKeyPoint[matches[i].trainIdx].pt;
	}
	//匹配点对RANSAC过滤
	vector<int>inlierMask(srcPoints.size());
	findHomography(srcPoints, dstPoints, RANSAC, 5, inlierMask);

	//手动保留RANSAC过滤后的匹配点对
	for (int i = 0; i < inlierMask.size(); ++i)
	{
		if (inlierMask[i])
			matches_ransac.push_back(matches[i]);
	}
}

//*************************RANSAC*******************************************
//main函数中放在暴力匹配代码后:
    //特征点匹配
	vector<DMatch>matches;
	BFMatcher matcher(NORM_HAMMING); //定义特征点匹配的类,使用汉明距离
	matcher.match(descriptions1, descriptions2, matches);
	cout << "matches = " << matches.size() << endl;

	//通过汉明距离筛选匹配结果
	double min_dist = 10000, max_dist = 0;
	for (int i = 0; i < matches.size(); ++i)
	{
		double dist = matches[i].distance;
		min_dist = min_dist < dist ? min_dist : dist;
		max_dist = max_dist > dist ? max_dist : dist;
	}
	//输出计算的最大、最小距离
	cout << "min_dist = " << min_dist << endl;
	cout << "max_dist = " << max_dist << endl;

	//通过距离提出误差大的点
	vector<DMatch>goodmatches;
	for (int i = 0; i < matches.size(); ++i)
	{
		if (matches[i].distance <= MAX(1.8 * min_dist, 30)) //需调参
		{
			goodmatches.push_back(matches[i]);
		}
	}
	cout << "good_min = " << goodmatches.size() << endl;

	//RANSAC优化:
	vector<DMatch>good_ransac;
	ransac(goodmatches, Keypoints1, Keypoints2, good_ransac);
	cout << "good_ransac = " << good_ransac.size() << endl;
	Mat output_;
	drawMatches(img1, Keypoints1, img2, Keypoints2, good_ransac, output_);
	namedWindow("ransac", 0);
	imshow("ransac", output_);
