Vue.js2+Cesium1.103.0 十、加载 Three.js
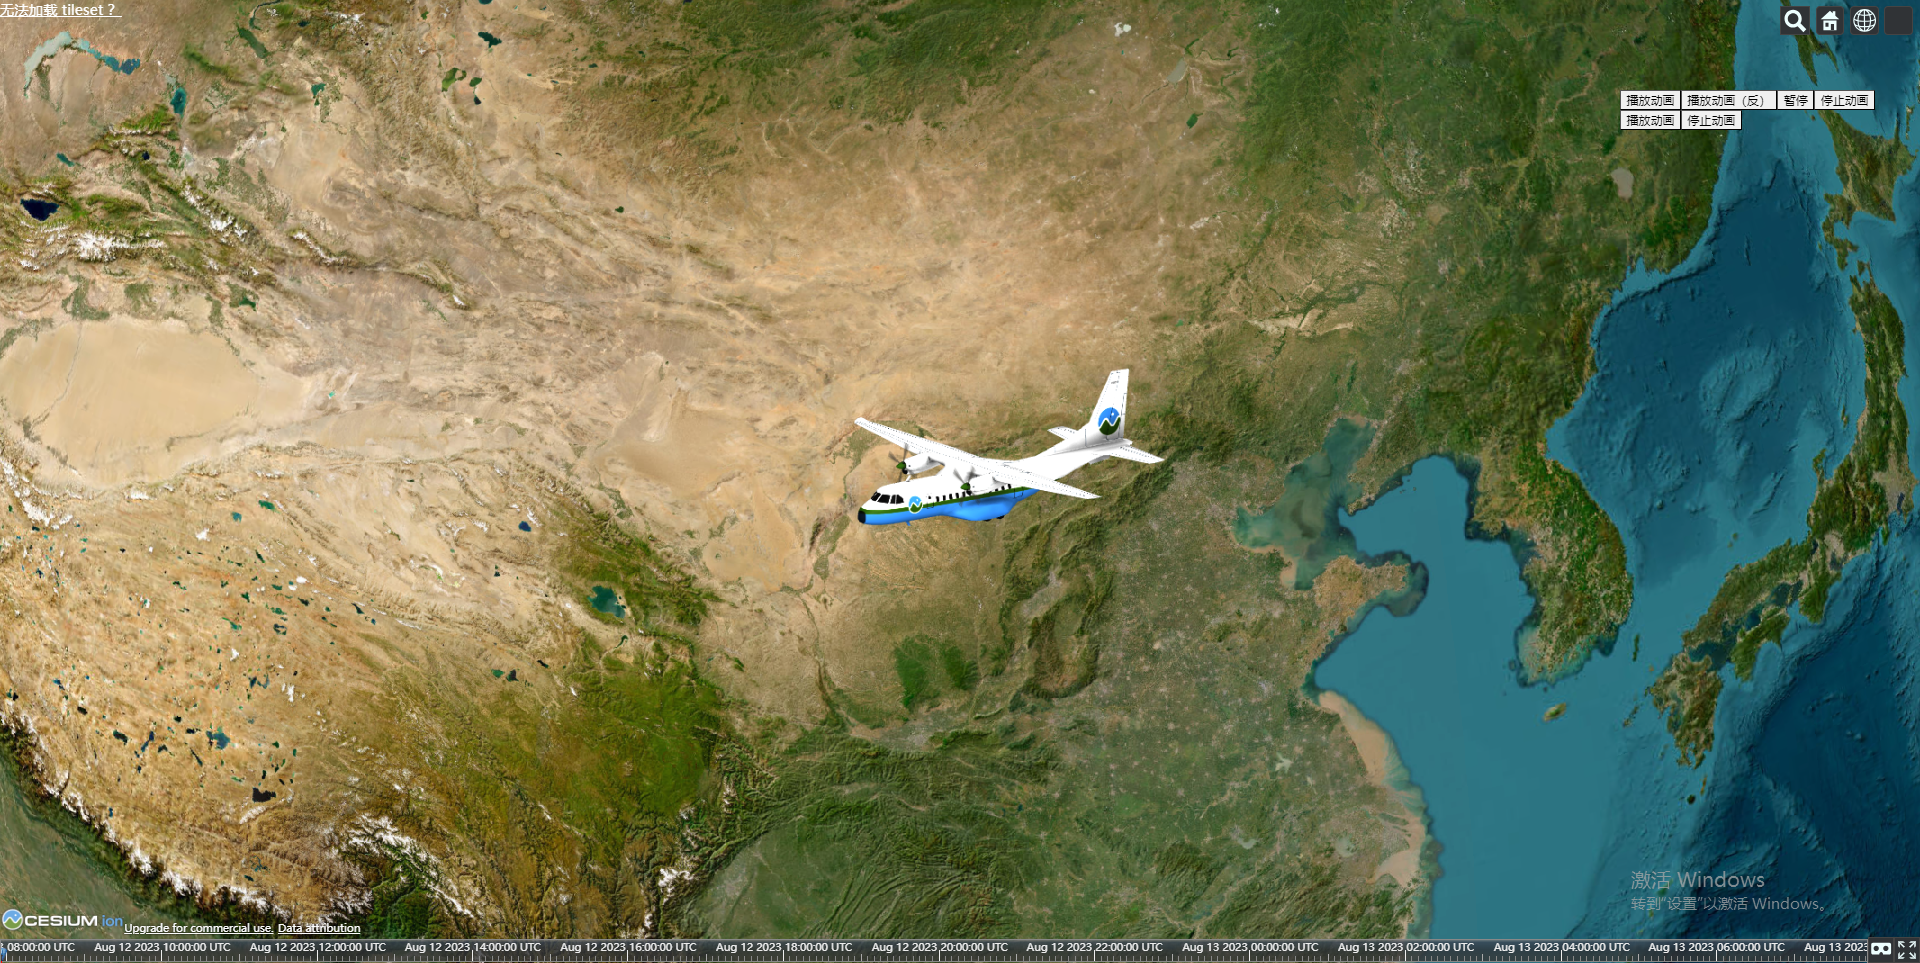
Demo
ThreeModel.vue
<template>
  <div
    id="three_container"
    class="three_container"
  />
</template>

<script>
/* eslint-disable eqeqeq */
/* eslint-disable no-unused-vars */
/* eslint-disable no-undef */
/* eslint-disable no-caller */
import * as THREE from 'three'
import { OrbitControls } from 'three/examples/jsm/controls/OrbitControls.js'
import { GLTFLoader } from 'three/examples/jsm/loaders/GLTFLoader'
// import { DRACOLoader } from 'three/examples/jsm/loaders/DRACOLoader.js'
// import { FBXLoader } from 'three/examples/jsm/loaders/FBXLoader.js'
export default {
  name: 'ThreeModel',
  props: {},
  data() {
    return {
      modelMixer: null,
      modelClock: null,
      modelAnimationAction: null,
      modelAnimationAction2: null,
      model: null,
      scene: null,
      camera: null,
      renderer: null,
      textureLoader: null,
      groupBox: null,
      control: null,
      enableRotate: null
    }
  },
  computed: {},
  watch: {},
  mounted() {
    window.cancelAnimationFrame(this.clearAnim)
    this.init()
  },
  beforeDestroy() {
    window.cancelAnimationFrame(this.clearAnim)
  },
  methods: {
    async init() {
      const _this = this
      const element = document.getElementById('three_container')
      const width = element.clientWidth // 窗口宽度
      const height = element.clientHeight // 窗口高度
      // 场景
      this.scene = new THREE.Scene()
      // this.scene.background = new THREE.Color(0x000000, 0)
      this.scene.background = null

      // 相机
      const k = width / height // 窗口宽高比
      const s = 400 // 三维场景显示范围控制系数,系数越大,显示的范围越大
      // this.camera = new THREE.PerspectiveCamera(50, window.innerWidth / window.innerHeight, 0.1, 1000) // 透视摄像机
      this.camera = new THREE.OrthographicCamera(-s * k, s * k, s, -s, 1, 1000) // 正交摄像机
      // 设置摄像机位置,相机方向逆X轴方向,倾斜向下看
      this.camera.position.set(0, 180, 360)
      // this.camera.rotation.order = 'YXZ'
      // 指向场景中心
      this.camera.lookAt(this.scene.position)

      // 渲染器
      this.renderer = new THREE.WebGLRenderer({ antialias: true, alpha: true })
      // 设置环境
      this.renderer.setClearColor(0x000000, 0)
      // 设置场景大小
      this.renderer.setSize(600, 600)
      // 渲染器开启阴影效果
      this.renderer.shadowMap.enabled = true

      // 纹理加载器
      this.textureLoader = new THREE.TextureLoader()

      // 组合对象
      this.groupBox = new THREE.Group()

      // 坐标轴
      // const axes = new THREE.AxesHelper(1000)
      // this.scene.add(axes)

      // 点光源
      const point = new THREE.PointLight(0xffffff)
      point.position.set(500, 300, 400) // 点光源位置
      this.scene.add(point) // 点光源添加到场景中

      // 环境光
      const ambient = new THREE.AmbientLight(0xffffff, 0.8)
      this.scene.add(ambient)

      element.appendChild(this.renderer.domElement)

      // 相机控件
      this.control = new OrbitControls(this.camera, this.renderer.domElement)
      this.control.enableDamping = true
      // 动态阻尼系数 就是鼠标拖拽旋转灵敏度,阻尼越小越灵敏
      this.control.dampingFactor = 0.5
      // 是否可以缩放
      this.control.enableZoom = true
      // 是否自动旋转
      this.control.autoRotate = false
      // 设置相机距离原点的最近距离
      this.control.minDistance = 20
      // 设置相机距离原点的最远距离
      this.control.maxDistance = 1000
      // 是否开启右键拖拽
      this.control.enablePan = true
      // 上下翻转的最大角度
      this.control.maxPolarAngle = 1.5
      // 上下翻转的最小角度
      this.control.minPolarAngle = 0.0
      // 是否可以旋转
      this.enableRotate = true

      // 加载模型
      const loader = new GLTFLoader()
      await loader.load(
        'model/Cesium_Air.glb',
        gltf => {
          gltf.scene.name = 'Cesium_Air'
          gltf.scene.scale.set(20, 20, 20) //  设置模型大小缩放
          gltf.scene.position.set(0, 0, 0)
          gltf.scene.translateY(0)
          _this.modelMixer = new THREE.AnimationMixer(gltf.scene)
          _this.modelClock = new THREE.Clock()
          // http://www.yanhuangxueyuan.com/threejs/docs/index.html#api/zh/animation/AnimationAction
          _this.modelAnimationAction = _this.modelMixer.clipAction(
            gltf.animations[0]
          )
          _this.modelAnimationAction.timeScale = 1
          // _this.modelAnimationAction.loop = THREE.LoopOnce // 播放一次
          _this.modelAnimationAction.clampWhenFinished = true
          _this.modelAnimationAction2 = _this.modelMixer.clipAction(
            gltf.animations[1]
          )
          _this.modelAnimationAction2.timeScale = 1
          // _this.modelAnimationAction2.loop = THREE.LoopOnce // 播放一次
          _this.modelAnimationAction2.clampWhenFinished = true
          _this.scene.add(gltf.scene)
          _this.model = gltf.scene
        },
        _xhr => {
          // console.log((_xhr.loaded / _xhr.total) * 100 + '% loaded')
        },
        _error => {
          // console.error(_error)
        }
      )

      const animate = () => {
        // 循环调用函数
        this.clearAnim = requestAnimationFrame(animate)
        // 更新相机控件
        this.control.update()
        // 渲染界面
        this.renderer.render(this.scene, this.camera)
        if (this.modelMixer) {
          // modelClock.getDelta() 方法获得两帧的时间间隔
          // 更新混合器相关的时间
          this.modelMixer.update(this.modelClock.getDelta())
        }
      }
      animate()
    }
  }
}
</script>

<style lang="scss" scoped>
.three_container {
  position: absolute;
  z-index: 999;
  top: 50%;
  left: 50%;
  width: 600px;
  height: 600px;
  transform: translateX(-50%) translateY(-50%);
  overflow: hidden;
}
</style>
index.vue
<template>
  <div
    id="cesium-container"
    style="width: 100%; height: 100%;"
  >
    <div style="position: absolute;right: 50px;top: 100px;z-index: 9;">
      <div>
        <button @click="handlePlay('play')">播放动画</button>
        <button @click="handlePlay('reverse')">播放动画(反)</button>
        <button @click="handlePlay('paused')">暂停</button>
        <button @click="handlePlay('stop')">停止动画</button>
      </div>
      <div>
        <button @click="handlePlay2('play')">播放动画</button>
        <button @click="handlePlay2('stop')">停止动画</button>
      </div>
    </div>
    <ThreeModel ref="ThreeModel" />
  </div>
</template>

<script>
/* eslint-disable no-undef */
/* eslint-disable no-caller */
/* eslint-disable eqeqeq */
import ThreeModel from './components/ThreeModel.vue'

export default {
  components: {
    ThreeModel
  },
  data() {
    return {
      paused: false
    }
  },
  computed: {},
  watch: {},
  mounted() {
    window.$InitMap()
  },
  methods: {
    handlePlay2(val) {
      if (val === 'play') {
        this.$refs.ThreeModel.modelAnimationAction2.play()
      } else if (val === 'stop') {
        this.$refs.ThreeModel.modelAnimationAction2.stop()
      }
    },
    handlePlay(val) {
      if (val === 'play') {
        this.$refs.ThreeModel.modelAnimationAction.paused = true
        this.$refs.ThreeModel.modelAnimationAction.timeScale = 1
        this.$refs.ThreeModel.modelAnimationAction.paused = false
        this.$refs.ThreeModel.modelAnimationAction.play()
      } else if (val === 'reverse') {
        this.$refs.ThreeModel.modelAnimationAction.paused = true
        this.$refs.ThreeModel.modelAnimationAction.timeScale = -1
        this.$refs.ThreeModel.modelAnimationAction.paused = false
        this.$refs.ThreeModel.modelAnimationAction.play()
      } else if (val === 'paused') {
        this.paused = !this.paused
        this.$refs.ThreeModel.modelAnimationAction.paused = this.paused
      } else if (val === 'stop') {
        this.$refs.ThreeModel.modelAnimationAction.stop()
      }
    }
  }
}
</script>

<style lang="scss">
.btns_container {
  position: absolute;
  z-index: 9;
  color: #fff;
  padding: 20px;
  width: 100%;
  box-sizing: border-box;
  bottom: 100px;
  left: 0;
}
</style>

