安装
建议内存大于2G
开放防火墙端口80和配置映射文件夹
firewall-cmd --zone=public --add-port=80/tcp --permanent
firewall-cmd --reload
mkdir -p /docker_data/gitlab/{data,logs,config}
启动Gitlab容器(启动容器之前确保22,80,443端口没用被占用,被占用就改成其它的。这个启动比较费时,我差点认为它没跑起来!)
docker run -d -p 80:80 -p 222:22 -p 443:443 --privileged=true --restart=always -v /docker_data/gitlab/config:/etc/gitlab -v /docker_data/gitlab/data:/var/opt/gitlab -v /docker_data/gitlab/logs:/var/log/gitlab --shm-size 256m --name gitlab-ce-15.6.2 gitlab/gitlab-ce:15.6.2-ce.0
修改hostname拉取代码
docker exec -it gitlab-ce-15.6.2 /bin/bash
cd opt/gitlab/embedded/service/gitlab-rails/config
vi gitlab.yml
修改host为ip地址即可
# This file is managed by gitlab-ctl. Manual changes will be
# erased! To change the contents below, edit /etc/gitlab/gitlab.rb
# and run `sudo gitlab-ctl reconfigure`.

production: &base
  #
  # 1. GitLab app settings
  # ==========================

  ## GitLab settings
  gitlab:
    ## Web server settings (note: host is the FQDN, do not include http://)
    host: d4d89faff031
    port: 80
    https: false
容器内部重启gitlab
gitlab-ctl restart
获取Gitlab密码(gitlab-ce-15.6.2是容器名称,我个人习惯用容器名称 - 版本号命名)
docker exec -it gitlab-ce-15.6.2 grep 'Password:' /etc/gitlab/initial_root_password
ip:80访问,账号:root,密码就是上面那行命令输出的。
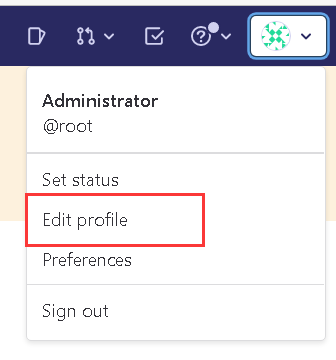
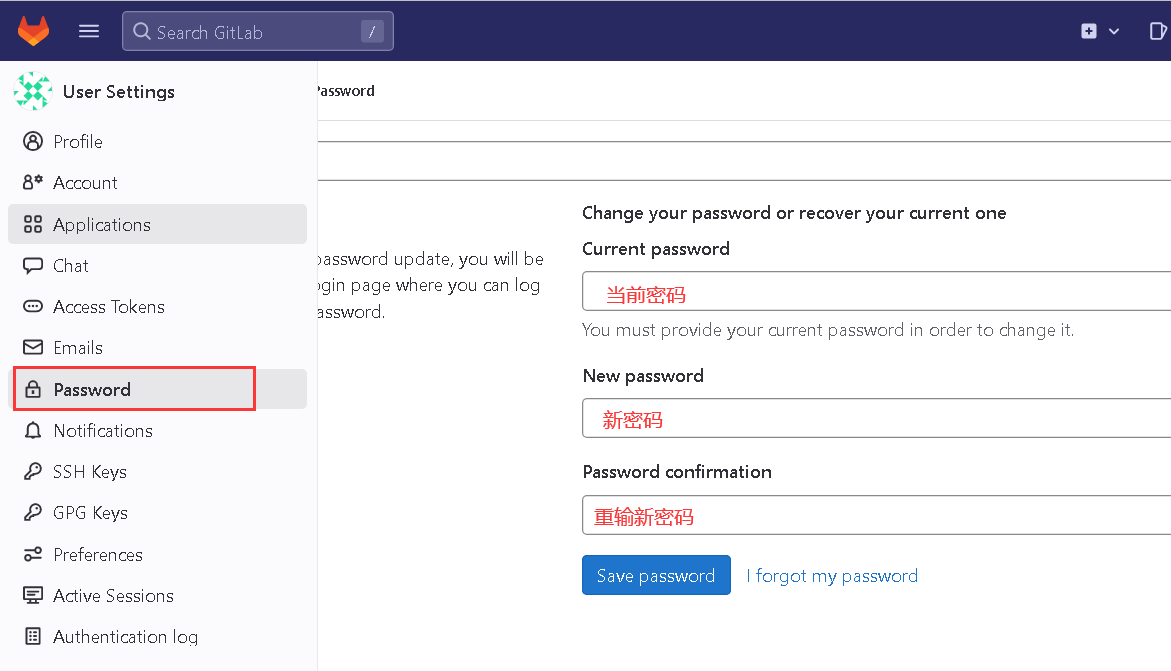
修改root密码
因为官方说明:密码文件将在 24 小时后的第一次重新配置运行中自动删除。修改的密码长度 ≥ 8位
其它
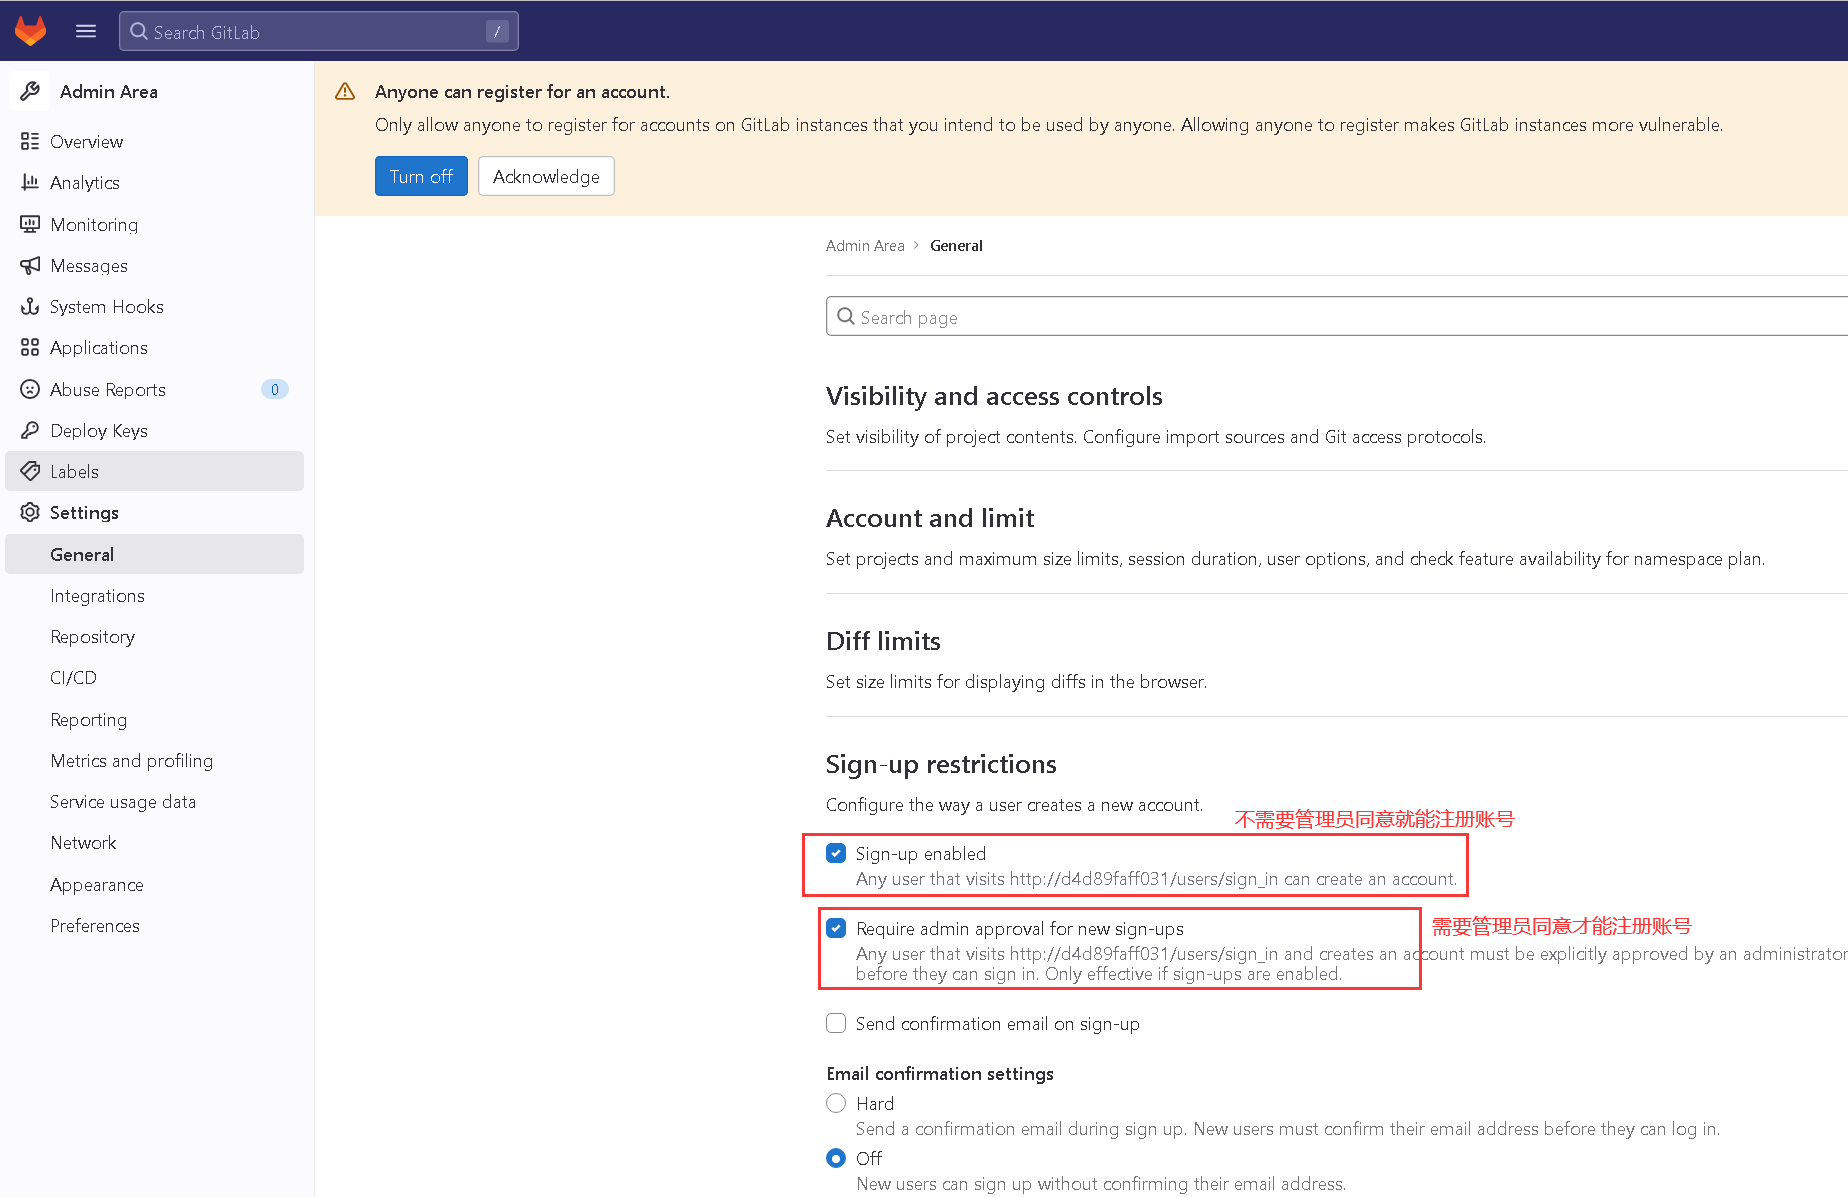
关闭不需要管理员就能注册账号的功能(可选)
创建组
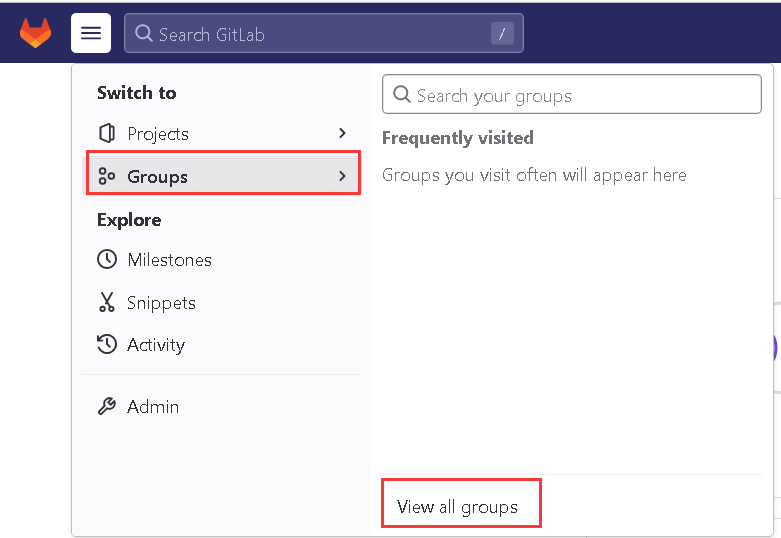
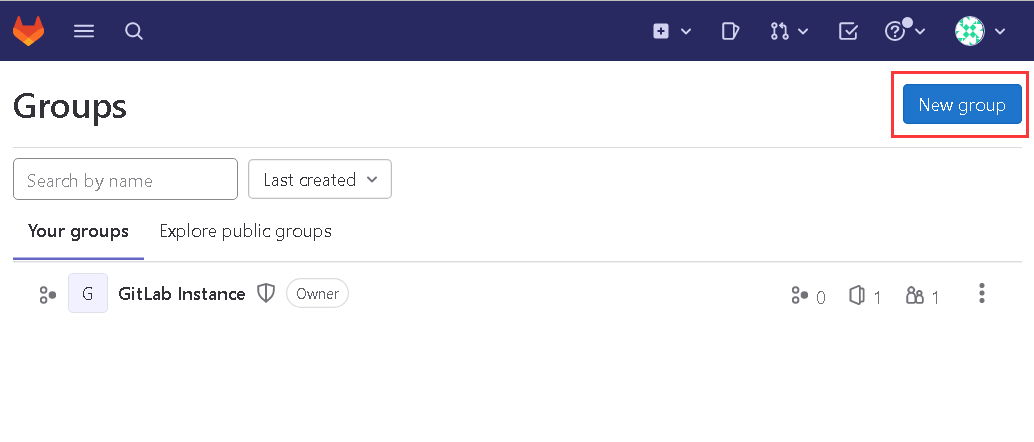

创建组的目的是为了和其它公司合作时,如果部分项目是公共的就可以创建一个组
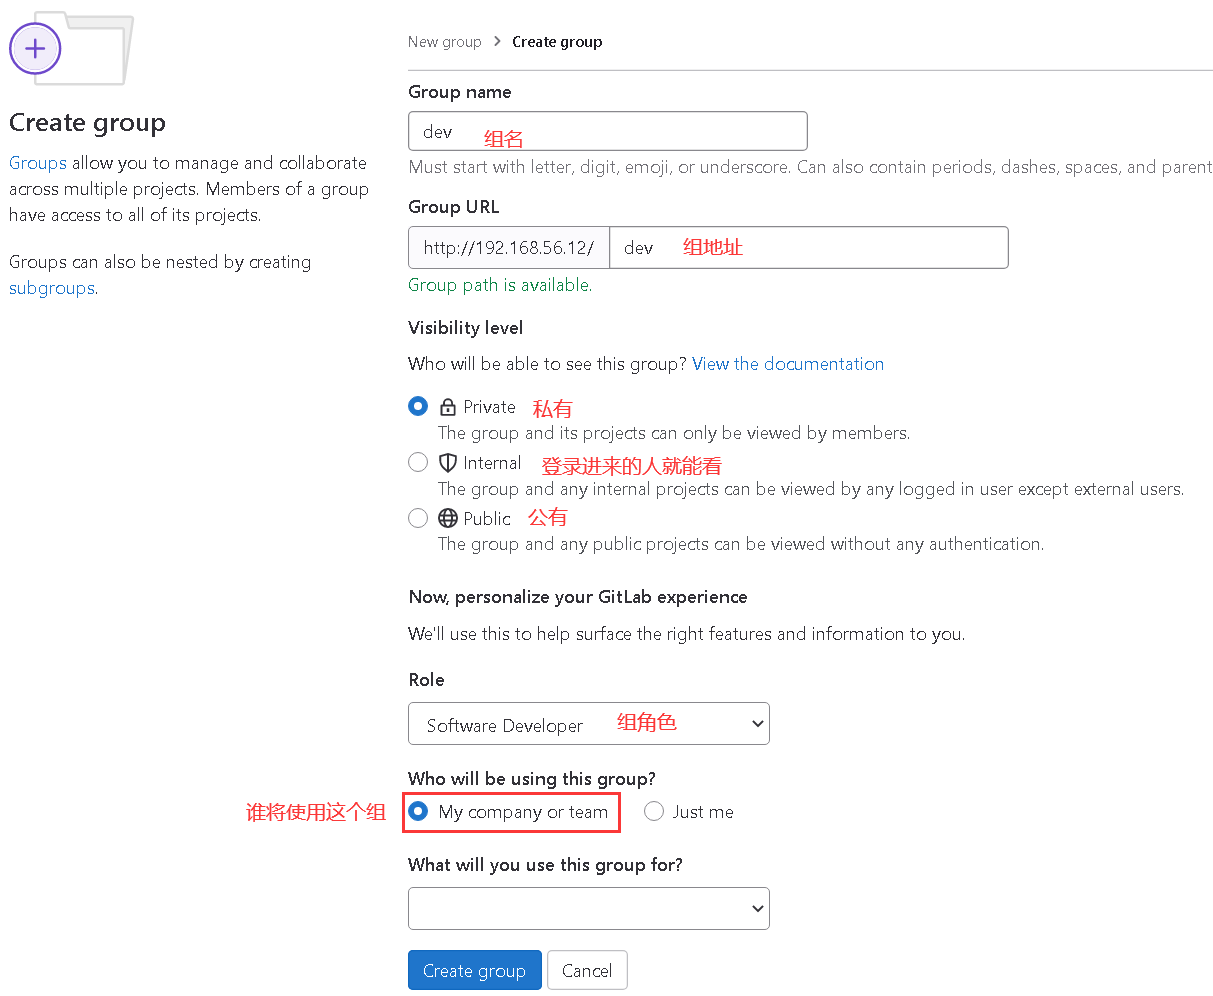
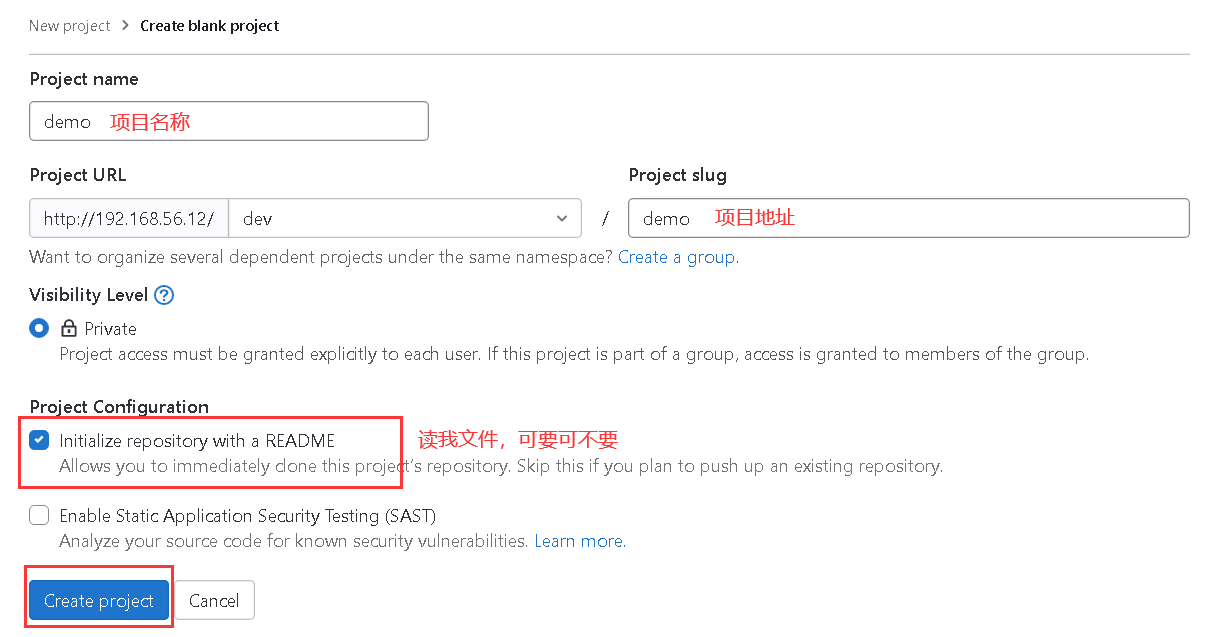
创建新项目
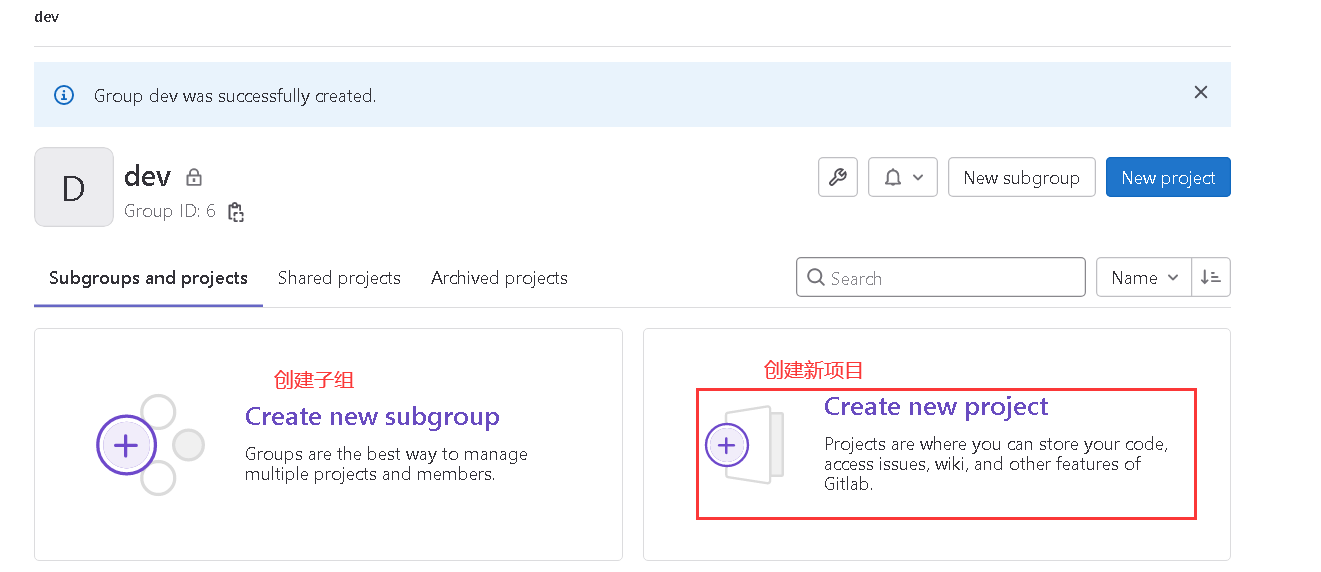
创建一个空的项目

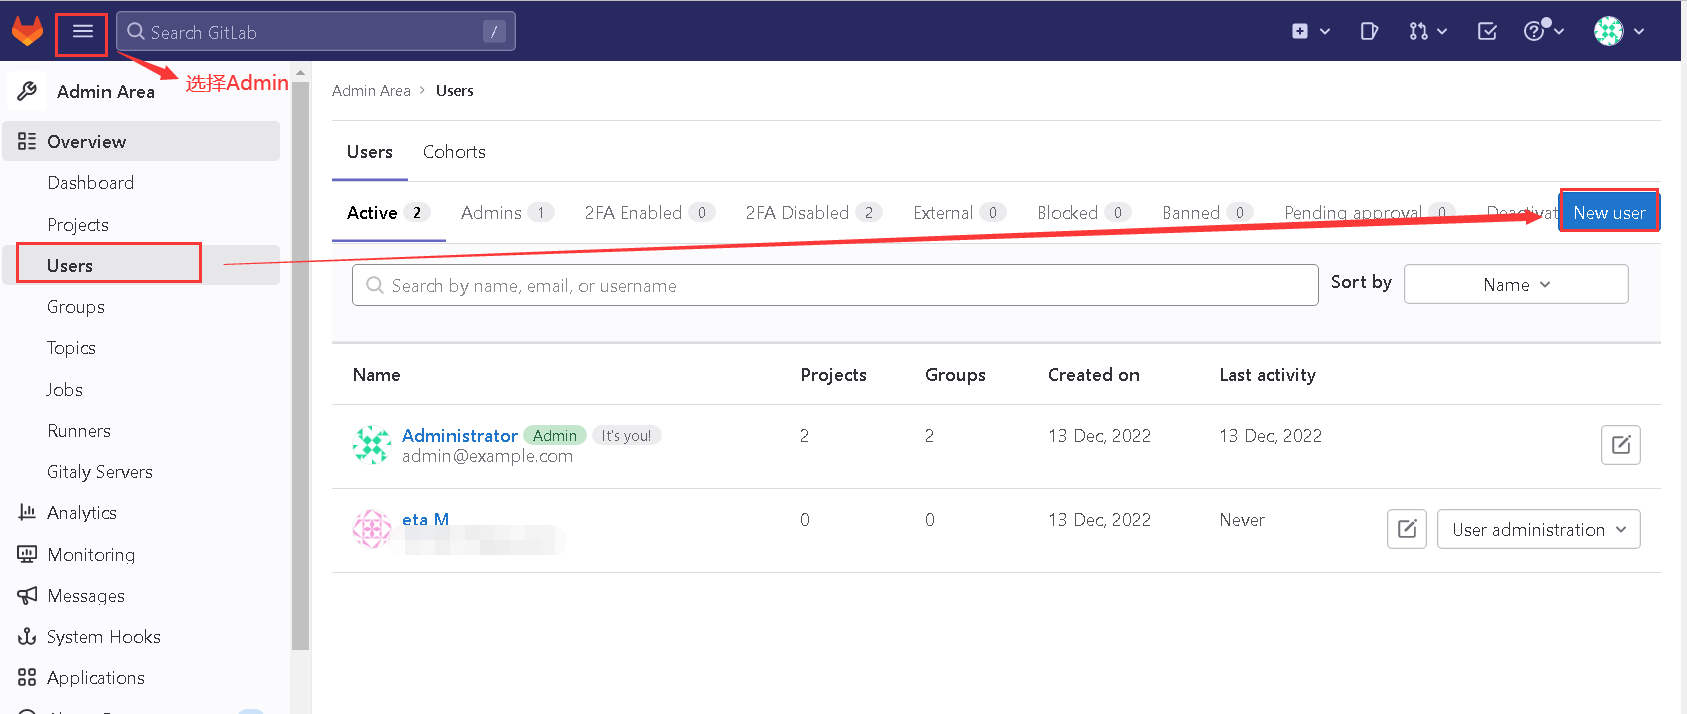
创建新用户(建议和GitHub账号密码一致)
添加用户入组
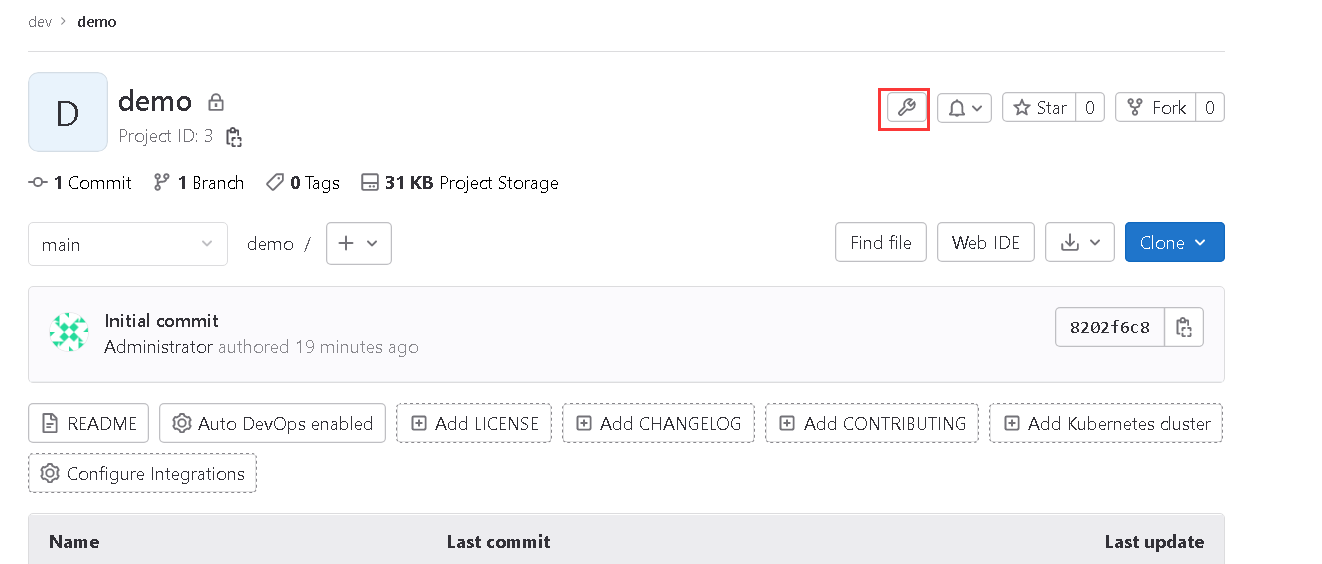


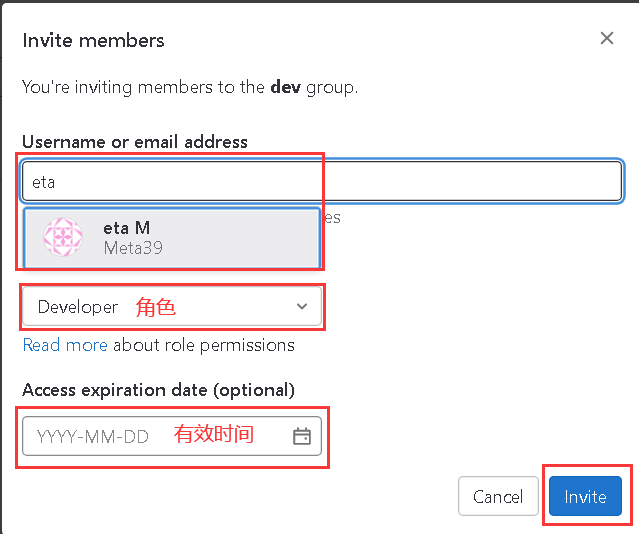
git拉取项目
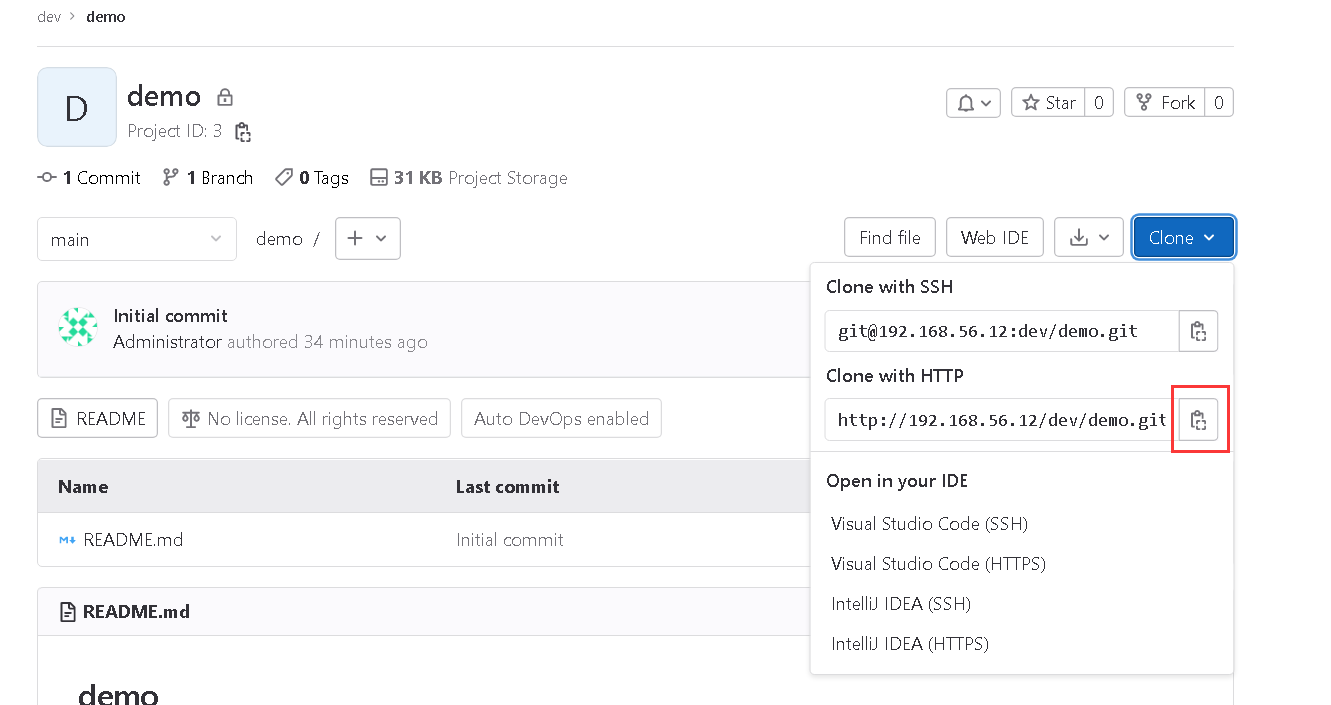
复制代码地址
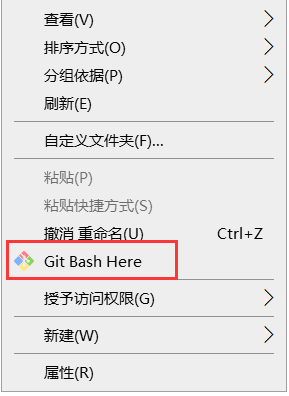
打开git命令窗口
git clone http://192.168.56.12/dev/demo.git
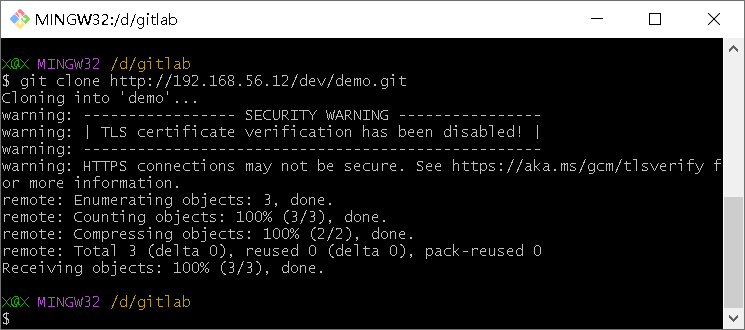
输入GitLab注册的用户名和密码
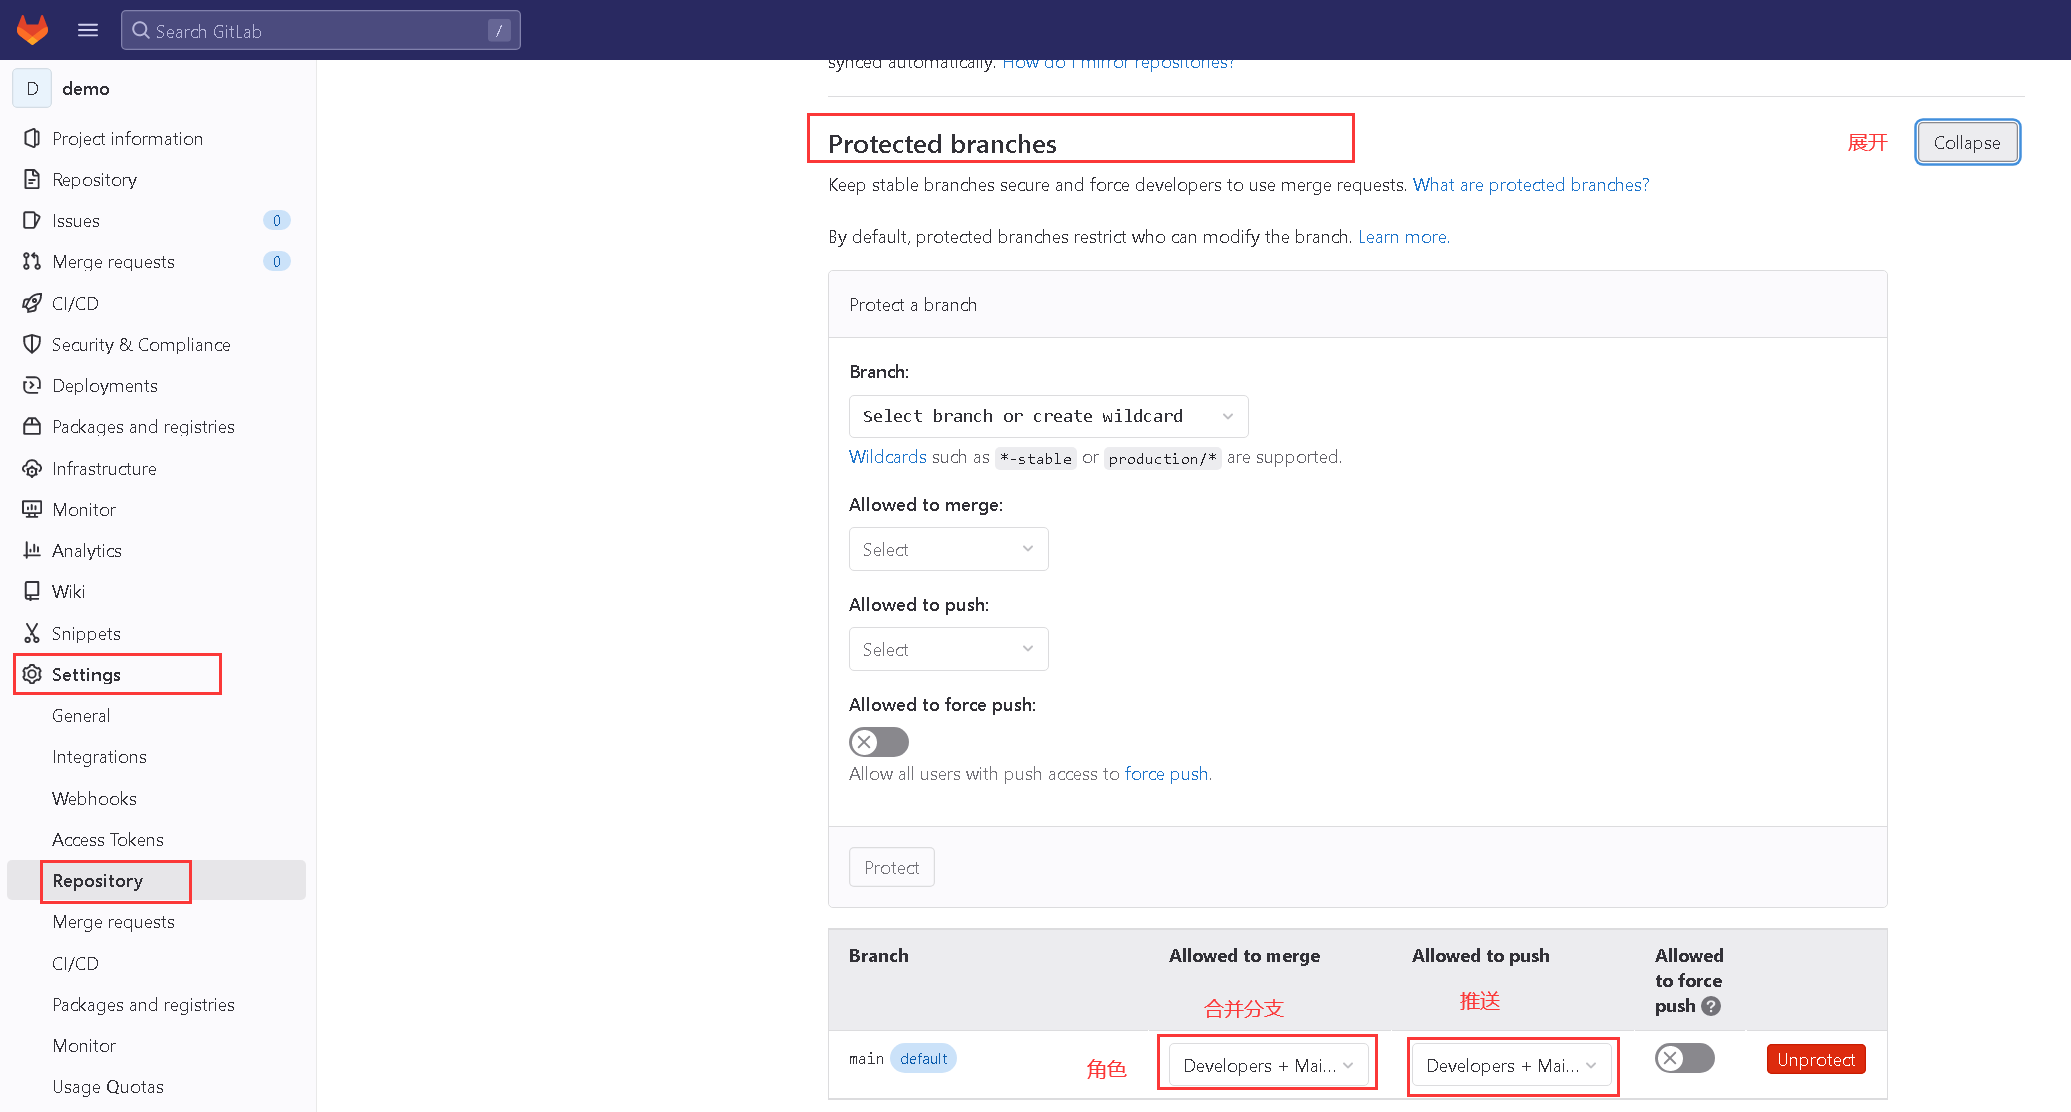
防止无法推送和合并分支





![[036]基于Vue+Nodejs的网上作业批改系统(含源码、数据库、万字课设报告)](https://img-blog.csdnimg.cn/9b1b3923f13d4601ab4f0d3a3549b9ce.png)


