写在开始:一个搬砖程序员的随缘记录
上一章写了从零开始Vue+SpringBoot后台管理系统:Vue3+TypeScript项目搭建
Vue+TypeScript的前端项目已经搭建完成了
这一章的内容是引入element-plus和axios实现页面的布局和前后端数据的串联,实现一个登陆的功能,跳转到首页
现在前端项目的一个结构目录

文章目录
- 一、引入element-plus
- 1、登录页面构建
- 2、登录页面加入校验
- 二、引入axios
- 1、下载axios
- 2、配置axios
- 3、请求后端数据跨域处理
- 4、首页
- 5、实现登录
一、引入element-plus
npm i element-plus
在src/main.js中加入element-plus
import { createApp } from 'vue'
import App from './App.vue'
import router from './router'
import ElementPlus from 'element-plus'
import 'element-plus/dist/index.css'

createApp(App).use(router).use(ElementPlus).mount('#app')
1、登录页面构建
修改登陆页面src/views/Login.vue
<template>
  <el-form ref="form" :model="loginUser" label-width="55px" class="loginForm">
    <h3 class="login_title">登录</h3>
    <el-form-item label="用户名">
      <el-input v-model="loginUser.username" placeholder="请输入用户名"></el-input>
    </el-form-item>
    <el-form-item label="密码">
      <el-input v-model="loginUser.password" type="password" placeholder="请输入密码"></el-input>
    </el-form-item>
    <el-form-item style="width: 100%">
      <el-button type="primary" style="width: 100%;background: #505458;border: none">登录</el-button>
    </el-form-item>
  </el-form>
</template>


<script lang="ts">
import { reactive } from 'vue'

export default {
  name: 'Login',
  setup() {
    // 表单字段
    const loginUser = reactive({
      username: '',
      password: ''
    })
    return { loginUser }
  },
}
</script>

<style>
.loginForm {
  border-radius: 15px;
  background-clip: padding-box;
  margin: 90px auto;
  width: 350px;
  padding: 35px 35px 35px 35px;
  background: #fff;
  border: 1px solid #eaeaea;
  box-shadow: 0 0 25px #cac6c6;
}

.login_title {
  margin: 0px auto 40px auto;
  text-align: center;
  color: #505458;
}

</style>
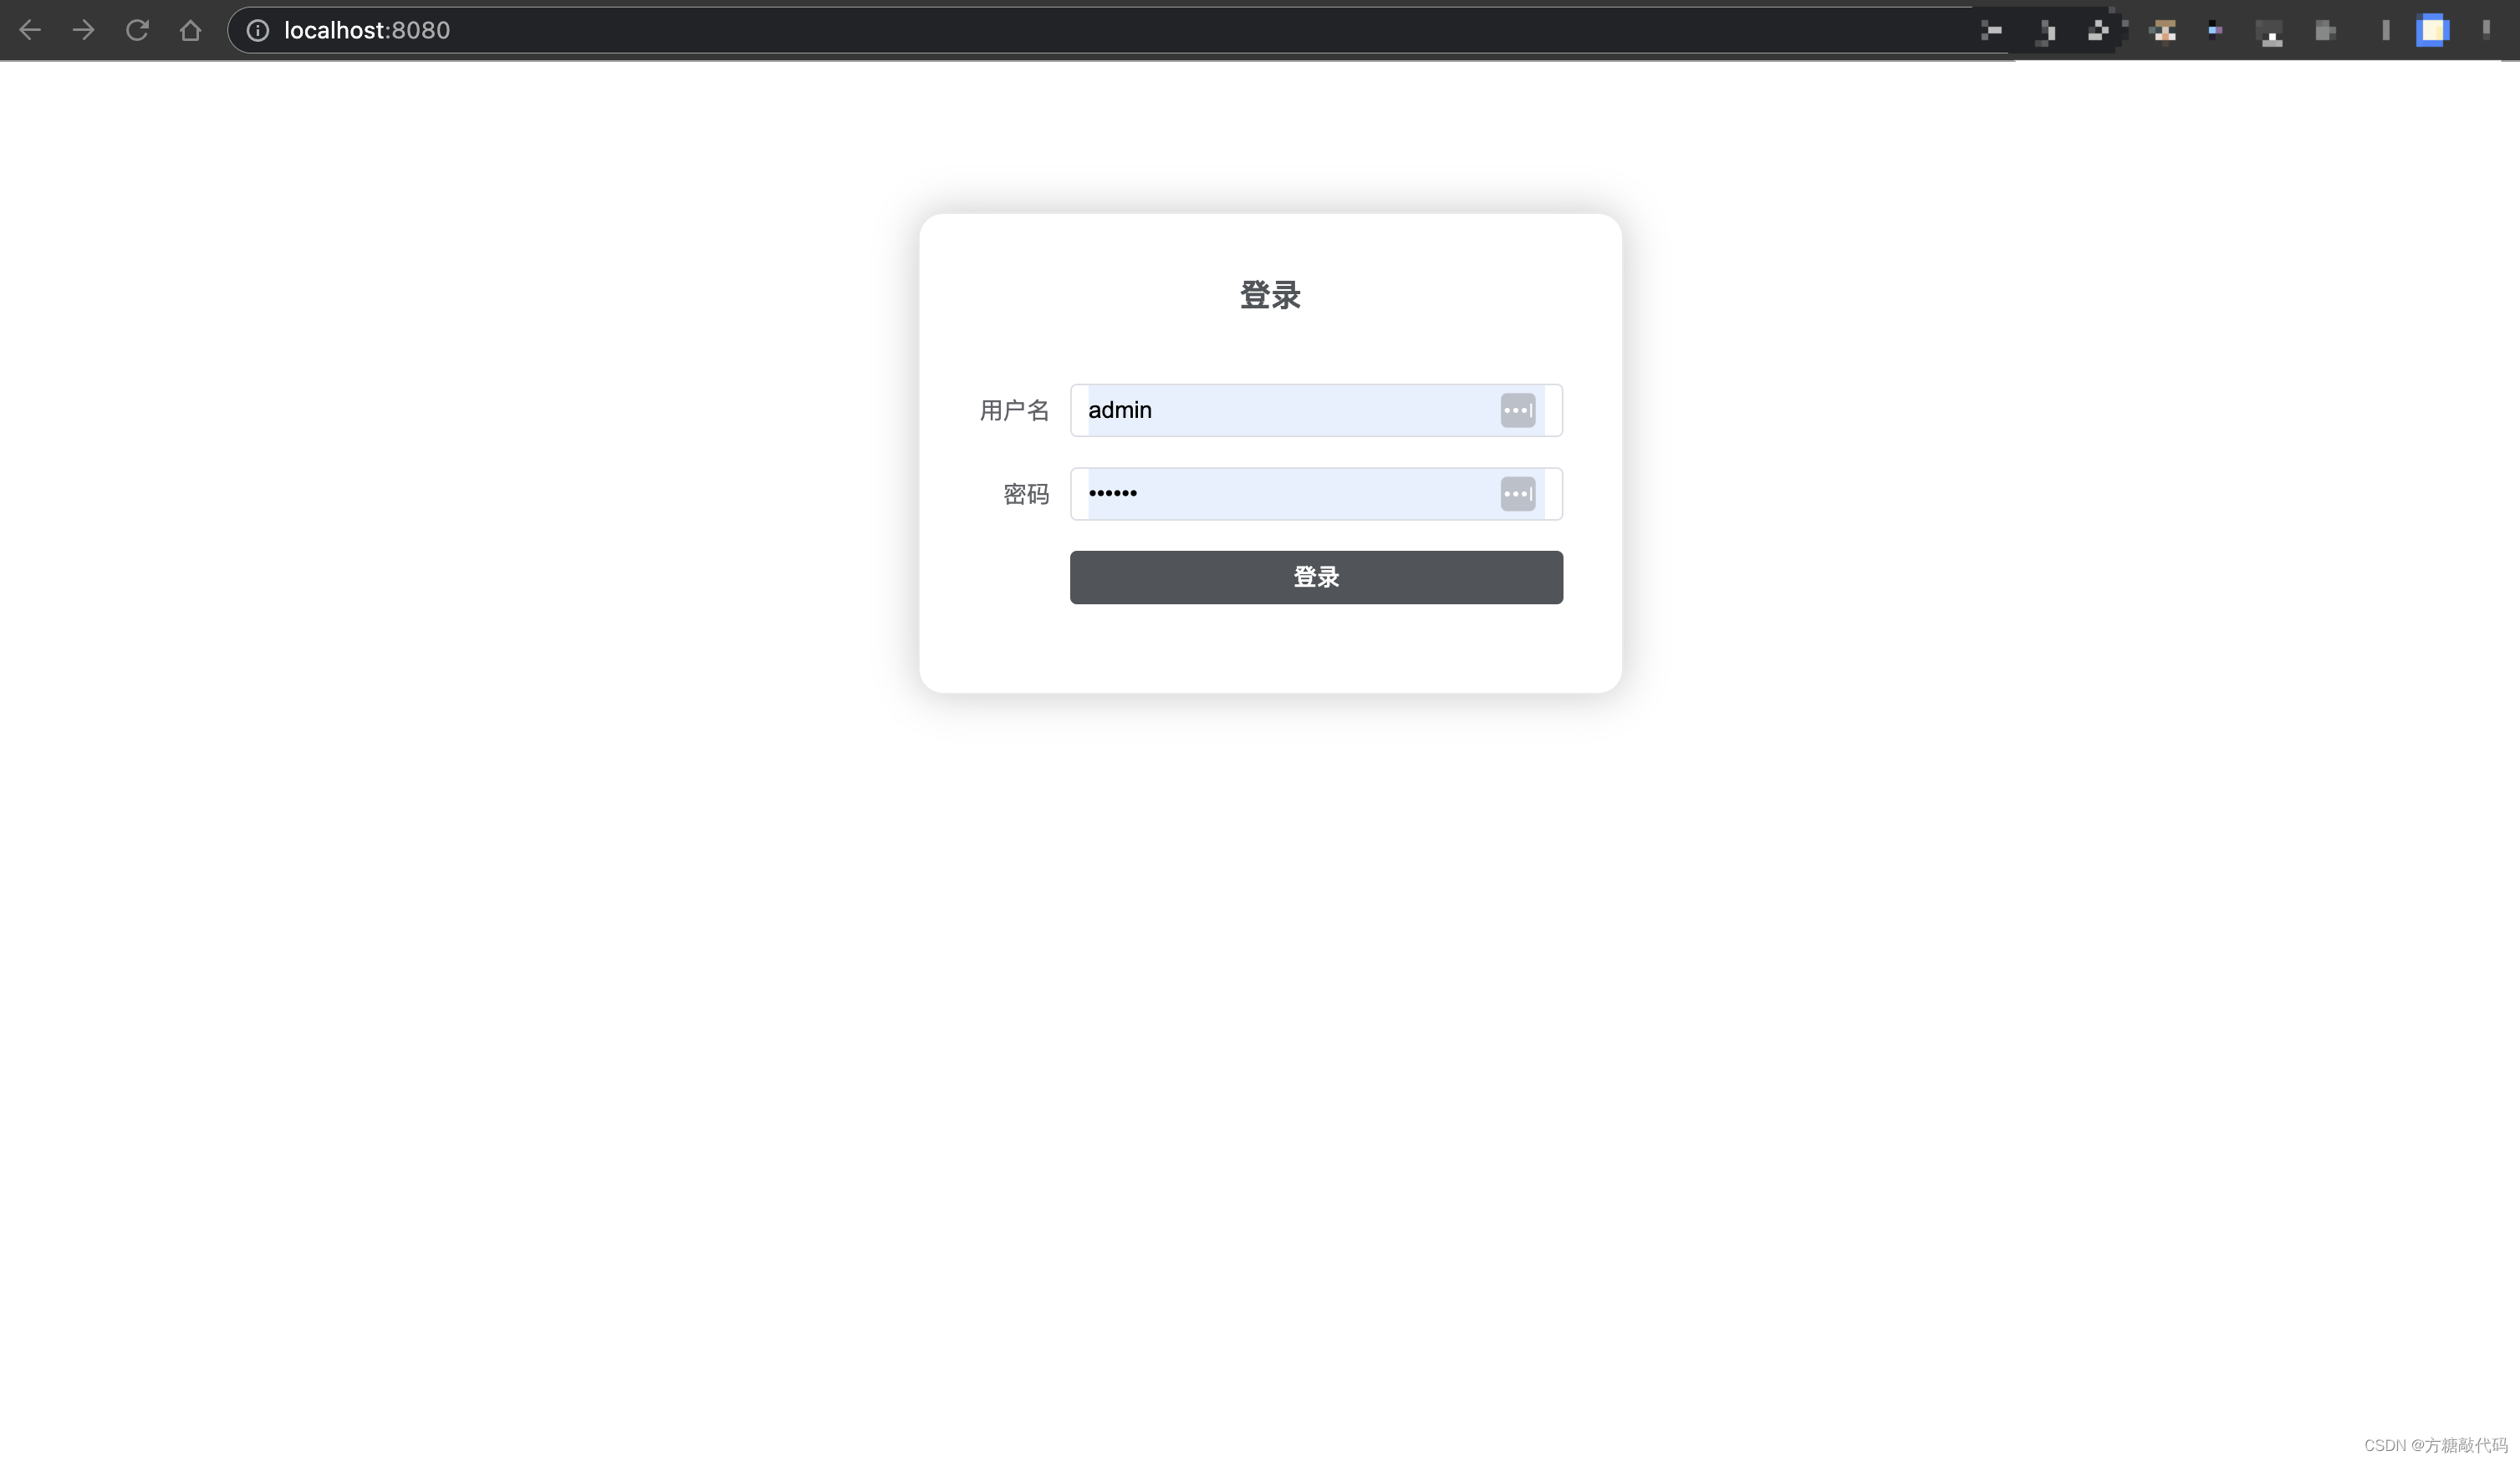
运行项目可以看到现在的登录界面算比较美观了
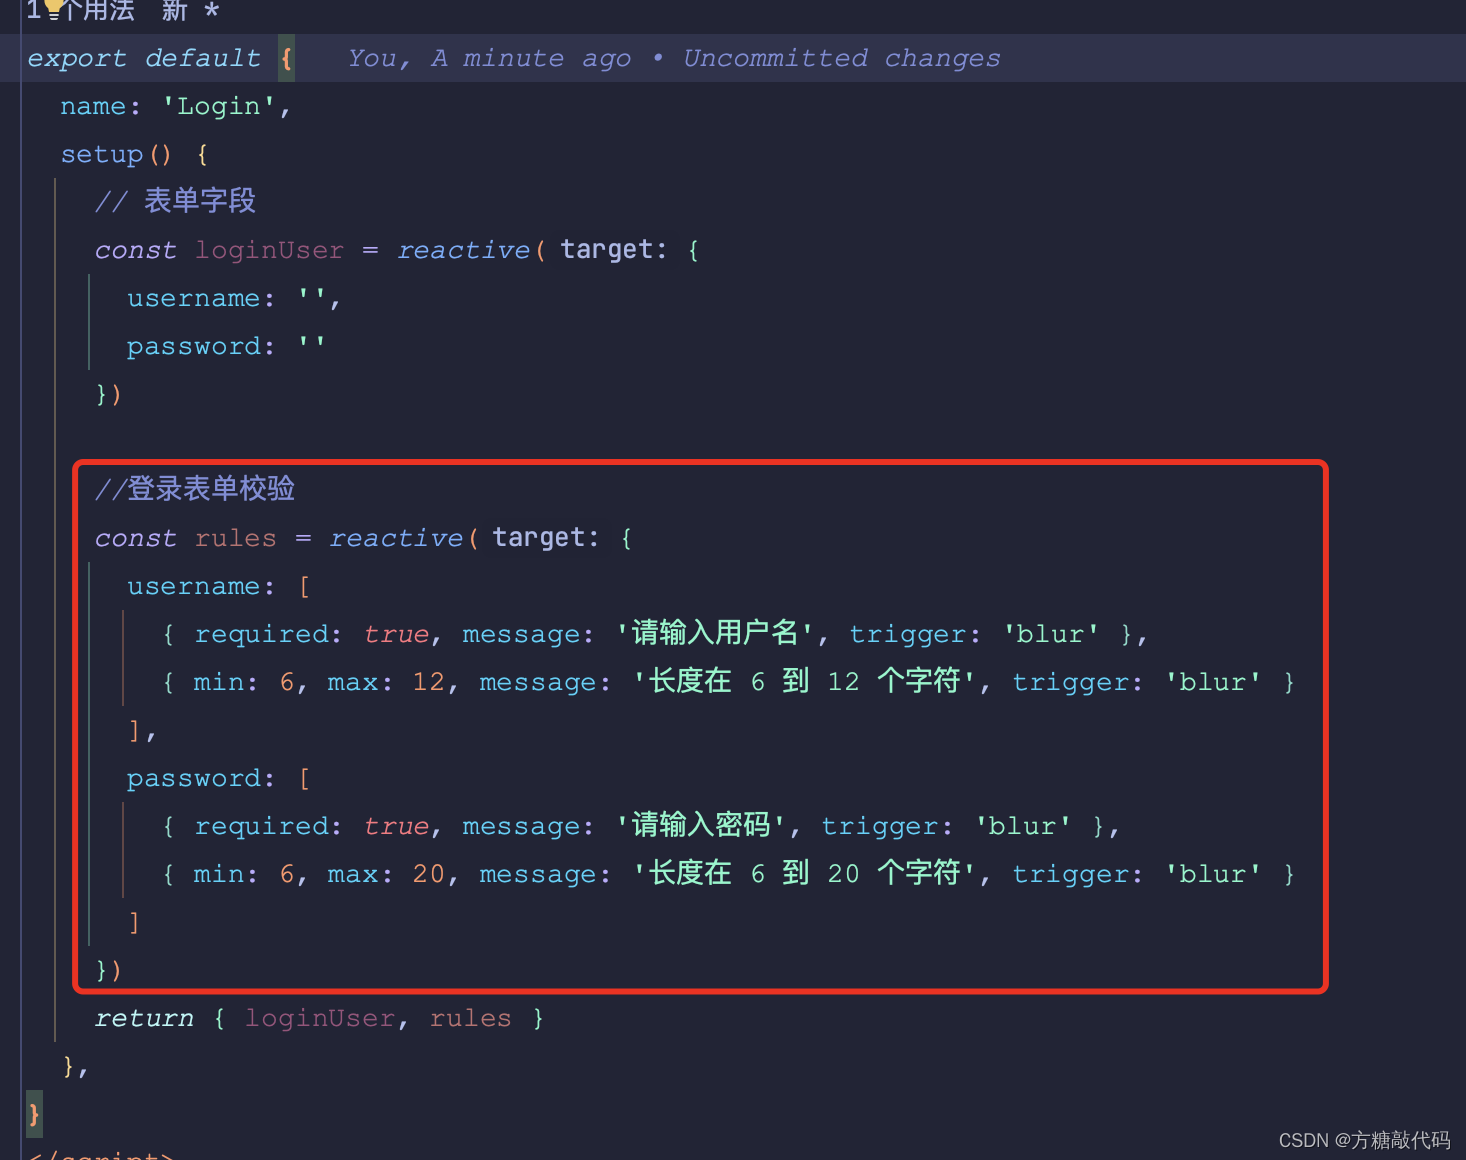
2、登录页面加入校验
现在给登录页面表单添加简单的校验规则
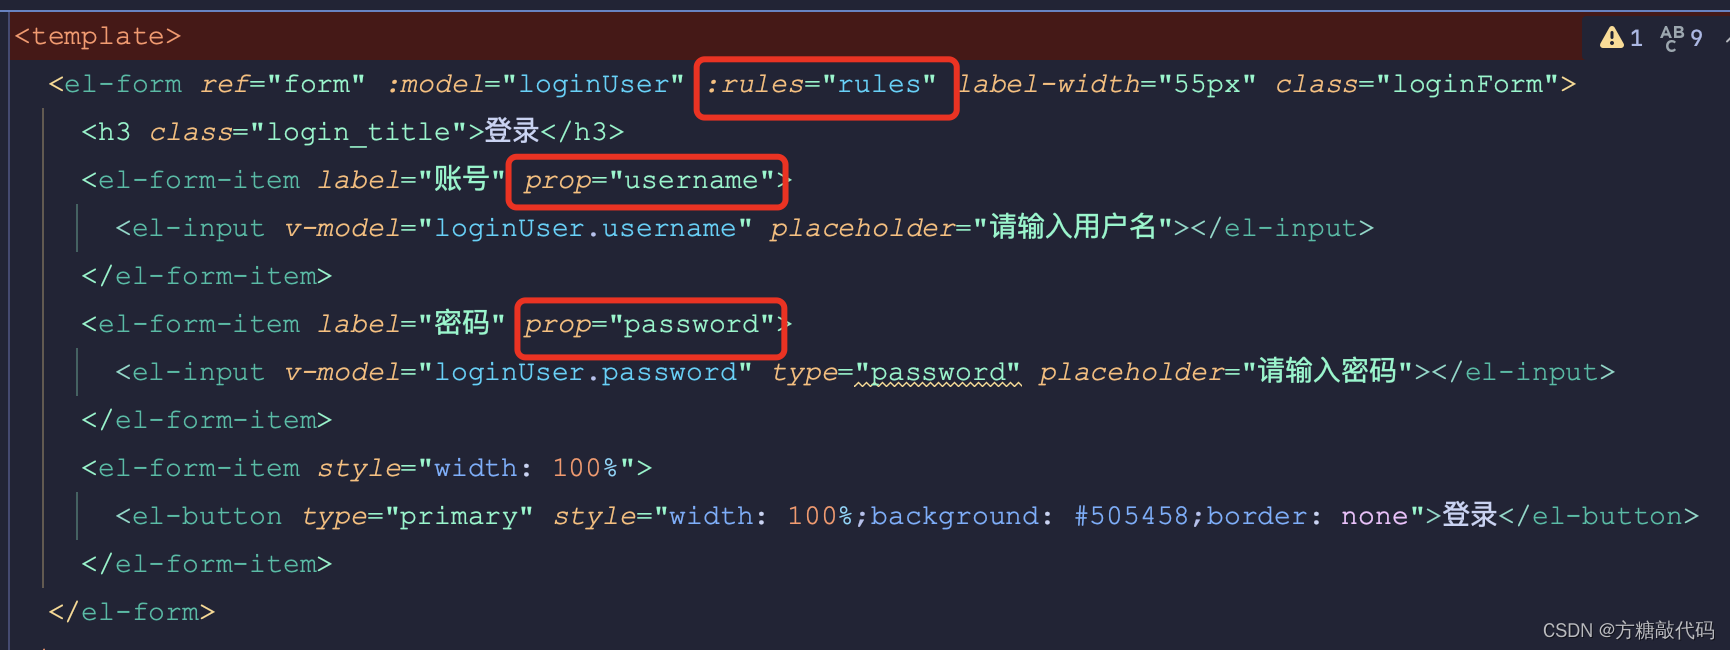
关键点:
script部分
template部分
加入表单校验Login.vue完整代码
<template>
  <el-form ref="form" :model="loginUser" :rules="rules" label-width="55px" class="loginForm">
    <h3 class="login_title">登录</h3>
    <el-form-item label="账号" prop="username">
      <el-input v-model="loginUser.username" placeholder="请输入用户名"></el-input>
    </el-form-item>
    <el-form-item label="密码" prop="password">
      <el-input v-model="loginUser.password" type="password" placeholder="请输入密码"></el-input>
    </el-form-item>
    <el-form-item style="width: 100%">
      <el-button type="primary" style="width: 100%;background: #505458;border: none">登录</el-button>
    </el-form-item>
  </el-form>
</template>


<script lang="ts">
import { reactive } from 'vue'

export default {
  name: 'Login',
  setup() {
    // 表单字段
    const loginUser = reactive({
      username: '',
      password: ''
    })

    //登录表单校验
    const rules = reactive({
      username: [
        { required: true, message: '请输入用户名', trigger: 'blur' },
        { min: 6, max: 12, message: '长度在 6 到 12 个字符', trigger: 'blur' }
      ],
      password: [
        { required: true, message: '请输入密码', trigger: 'blur' },
        { min: 6, max: 20, message: '长度在 6 到 20 个字符', trigger: 'blur' }
      ]
    })
    return { loginUser, rules }
  },
}
</script>

<style>
.loginForm {
  border-radius: 15px;
  background-clip: padding-box;
  margin: 90px auto;
  width: 350px;
  padding: 35px 35px 35px 35px;
  background: #fff;
  border: 1px solid #eaeaea;
  box-shadow: 0 0 25px #cac6c6;
}

.login_title {
  margin: 0px auto 40px auto;
  text-align: center;
  color: #505458;
}

</style>
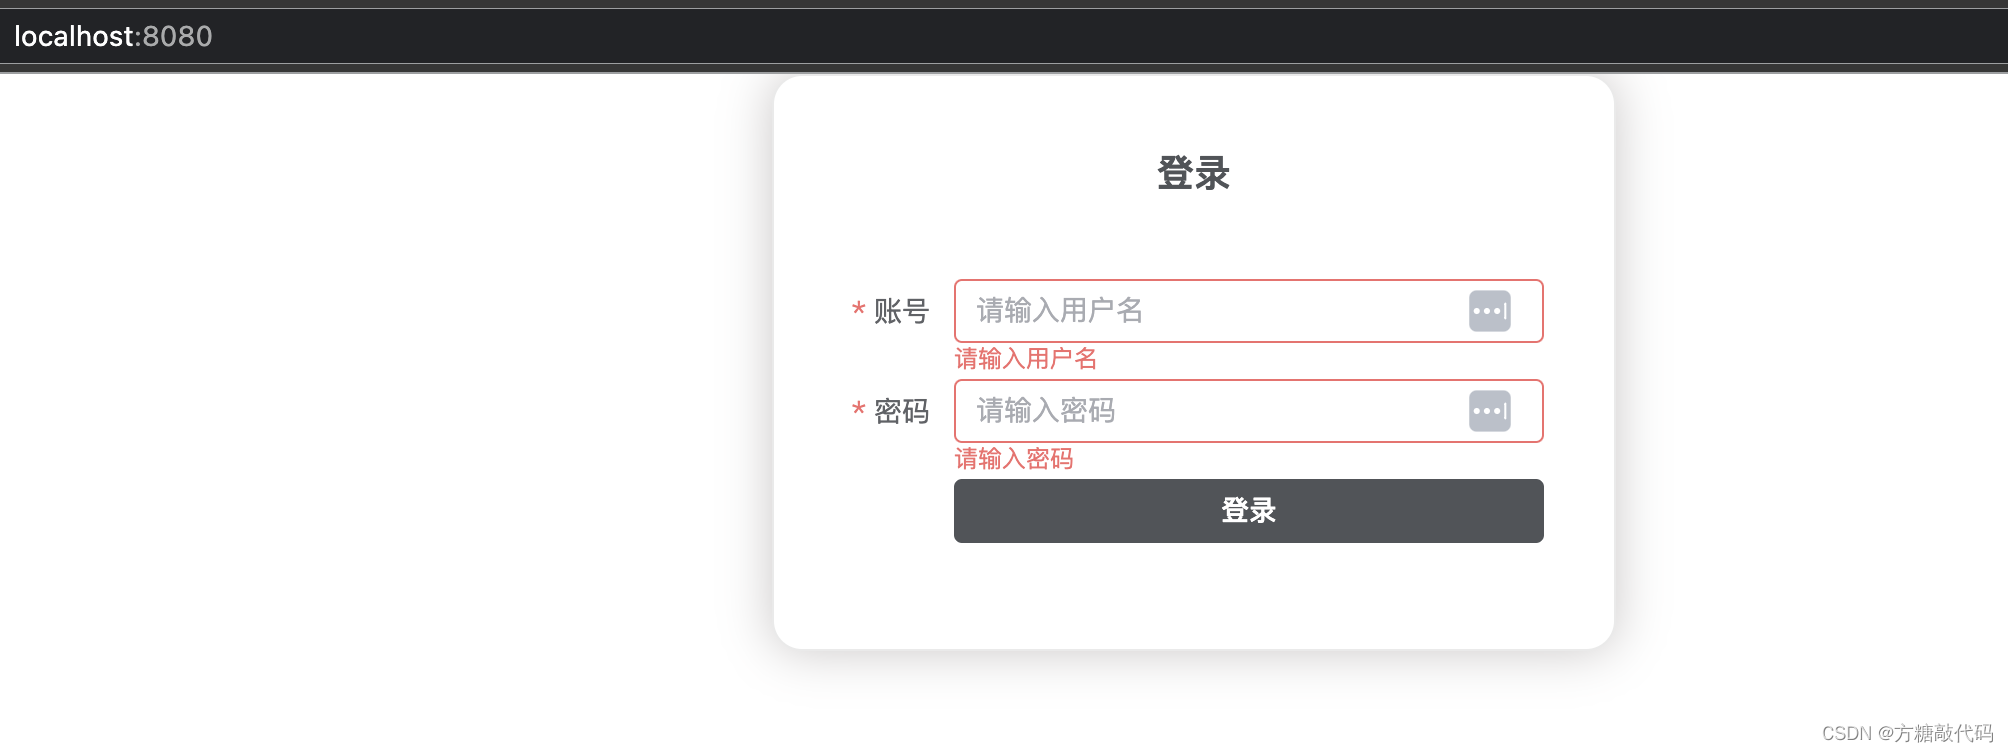
登录页面效果
二、引入axios
1、下载axios
npm i axios
2、配置axios
在src下新建api文件夹,在api文件夹下新建request.ts
import axios,{InternalAxiosRequestConfig,AxiosResponse} from 'axios'
import { ElLoading } from 'element-plus'
import { ElMessage } from 'element-plus'

let loading:any;
const startLoading = () =>{
    interface Options{
        lock: boolean;
        text: string;
        background: string;
    }
    const options:Options = {
        lock: true,
        text: 'Loading',
        background: 'rgba(0, 0, 0, 0.7)'
    }
    loading = ElLoading.service(options)
}
const endLoading = ()=>{
    loading.close()
}


// 请求拦截
axios.interceptors.request.use((config:InternalAxiosRequestConfig<any>)=>{
    // 开始Loading
    startLoading()
    return config
})

//请求响应拦截
axios.interceptors.response.use((res:AxiosResponse<any, any>)=>{
    endLoading()
    // 成功直接返回响应数据
    if(res.status === 200){
        return res.data
    }
},error=>{
    endLoading()
    const { response: res } = error
    const msg = typeof res.data === 'string' ? res.data: res.data.error || '请求错误,请稍后重试'
    ElMessage.error(msg)
    // 错误提醒
    return Promise.reject(error)
})

export default axios
在main.ts中引入axios,全局挂载axios
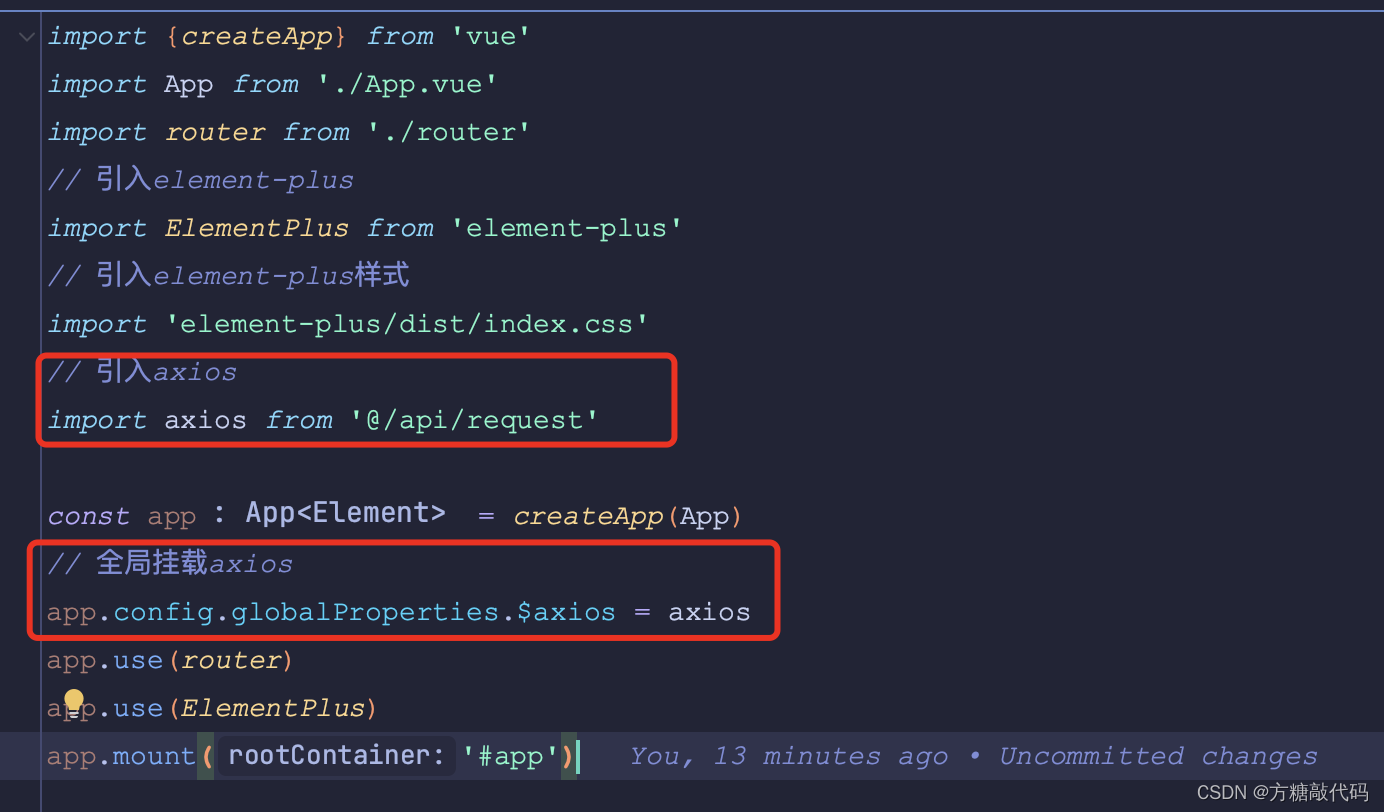
main.ts完整代码
import {createApp} from 'vue'
import App from './App.vue'
import router from './router'
// 引入element-plus
import ElementPlus from 'element-plus'
// 引入element-plus样式
import 'element-plus/dist/index.css'
// 引入axios
import axios from '@/api/request'

const app = createApp(App)
// 全局挂载axios
app.config.globalProperties.$axios = axios
app.use(router)
app.use(ElementPlus)
app.mount('#app')
3、请求后端数据跨域处理
在项目根目录新建 vue.config.js 文件
module.exports = {
    devServer: {
        open: true,
        //前端项目域名
        host: 'localhost',
        //前端项目端口
        port: 8081,
        https: false,
        //配置跨域
        proxy: {
            '/api': {
                //后端项目请求接口地址
                target: 'http://localhost:8082/api/',
                //如果要代理 websockets,配置这个参数
                ws: true,
                //允许跨域
                changOrigin: true,
                pathRewrite: {
                    //请求的时候使用这个api就可以
                    '^/api': ''
                }
            }

        }
    }
}
4、首页
在src/views下新建首页页面Home.vue
<template>
    <div>首页</div>
</template>

<script>
    export default {
        name: 'Index'
    }
</script>
5、实现登录
加入请求登录方法

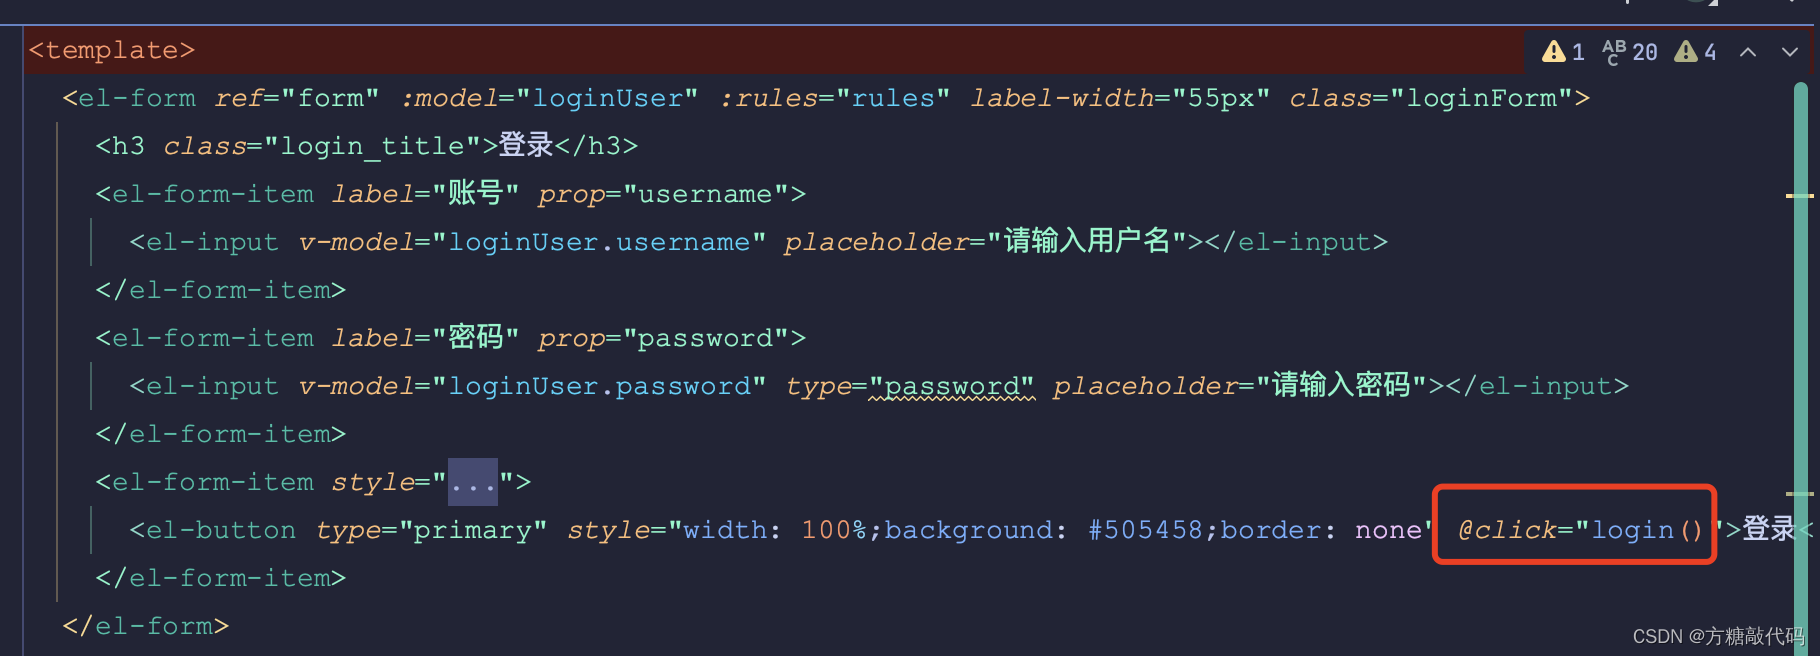
在页面中点击登录按钮时请求登录方法
登录方法代码
const login = () => {
      proxy.$axios({
        url: '/api/user/login',
        method: 'post',
        data: loginUser
      }).then((res: any) => {
        if (res.code == 200) {
          proxy.$message({
            message: '登录成功',
            type: 'success'
          })
          router.push('/home')
        } else {
          proxy.$message({
            message: res.data.msg,
            type: 'error'
          })
        }
      })
      console.log('login')
    }
Login.vue整体代码
<template>
  <el-form ref="form" :model="loginUser" :rules="rules" label-width="55px" class="loginForm">
    <h3 class="login_title">登录</h3>
    <el-form-item label="账号" prop="username">
      <el-input v-model="loginUser.username" placeholder="请输入用户名"></el-input>
    </el-form-item>
    <el-form-item label="密码" prop="password">
      <el-input v-model="loginUser.password" type="password" placeholder="请输入密码"></el-input>
    </el-form-item>
    <el-form-item style="width: 100%">
      <el-button type="primary" style="width: 100%;background: #505458;border: none" @click="login()">登录</el-button>
    </el-form-item>
  </el-form>
</template>


<script lang="ts">
import {reactive, getCurrentInstance} from 'vue'
import {useRouter} from 'vue-router'

export default {
  name: 'Login',
  setup() {
    // @ts-ignore
    const {proxy} = getCurrentInstance()
    // 表单字段
    const loginUser = reactive({
      username: '',
      password: ''
    })

    //登录表单校验
    const rules = reactive({
      username: [
        {required: true, message: '请输入用户名', trigger: 'blur'},
        {min: 6, max: 12, message: '长度在 6 到 12 个字符', trigger: 'blur'}
      ],
      password: [
        {required: true, message: '请输入密码', trigger: 'blur'},
        {min: 6, max: 20, message: '长度在 6 到 20 个字符', trigger: 'blur'}
      ]
    })

    const router = useRouter()

    const login = () => {
      proxy.$axios({
        url: '/api/user/login',
        method: 'post',
        data: loginUser
      }).then((res: any) => {
        if (res.code == 200) {
          proxy.$message({
            message: '登录成功',
            type: 'success'
          })
          router.push('/home')
        } else {
          proxy.$message({
            message: res.data.msg,
            type: 'error'
          })
        }
      })
      console.log('login')
    }

    return {loginUser, rules, login}
  },
}
</script>

<style>
.loginForm {
  border-radius: 15px;
  background-clip: padding-box;
  margin: 90px auto;
  width: 350px;
  padding: 35px 35px 35px 35px;
  background: #fff;
  border: 1px solid #eaeaea;
  box-shadow: 0 0 25px #cac6c6;
}

.login_title {
  margin: 0px auto 40px auto;
  text-align: center;
  color: #505458;
}
</style>
登录成功然后跳转到首页的功能就实现了
Over