目录
一、总述
二、前端部分
1. 调整查询调用
2. 关联分类
三、后端部分
四、总结
一、总述
之前是在商品的分类管理中直接使用的若依的逆向代码
有下面的几个问题:
1. 表格上面的参数填写之后,都是按照完全匹配进行搜索,没有模糊匹配
2. 分页有问题
上面的这两个问题只要是你不做任何的修改,就是这个样子
下面是这里品牌管理特殊的:
1. 每个品牌需要关联分类
总的来说
前端:
在前端上面,将api啊,请求参数啊配好,因为其实这里是为了规范,原本的话,这个若依逆向生成的,的表单数据除了本身的填写的那些信息,还有分页参数也填上去了。这样的话就一个参数,当然后端可以只用一个参数接收,但是这个参数类除了含品牌的信息还额外的需要分页信息,就不合理了,因此得拆分,所以前端需要修改一下
另外因为每个品牌需要关联分类,因此还得添加上关联分类的这个按钮
后端:
这里的话,还是发生了一些改变的,相比之前直接无脑用。
首先:
1. 查询要分页并且模糊查询
2. 其次删除接口不能只删品牌本身,其品牌分类的关联也要将其删除(要有这种意识,其实这种意识是最基本的,我之前还傻傻的没有意识到,写博文的时候重看才发现问题的)
然后对于品牌本身接口就这些修改。然后这里涉及到品牌-分类关联,因此
这里的话,这个关联的相关接口,要考虑是否需要对逆向生成的接口作修改
1. 通过需求,显示的时候需要显示分类名和品牌名
还好这个在关系表中都做了冗余存储,所以查的话正常查,不需要多次查啥的
2. 但是新增的时候,就需要查出品牌名和分类名,然后存入到关联表中
二、前端部分
两点:
1. 调整查询调用
现在需要分页(其实本来就可以分页的,只是这里规范一下子,其实也不知道是不是真的规范,但是我现在就这样弄吧!)
api:
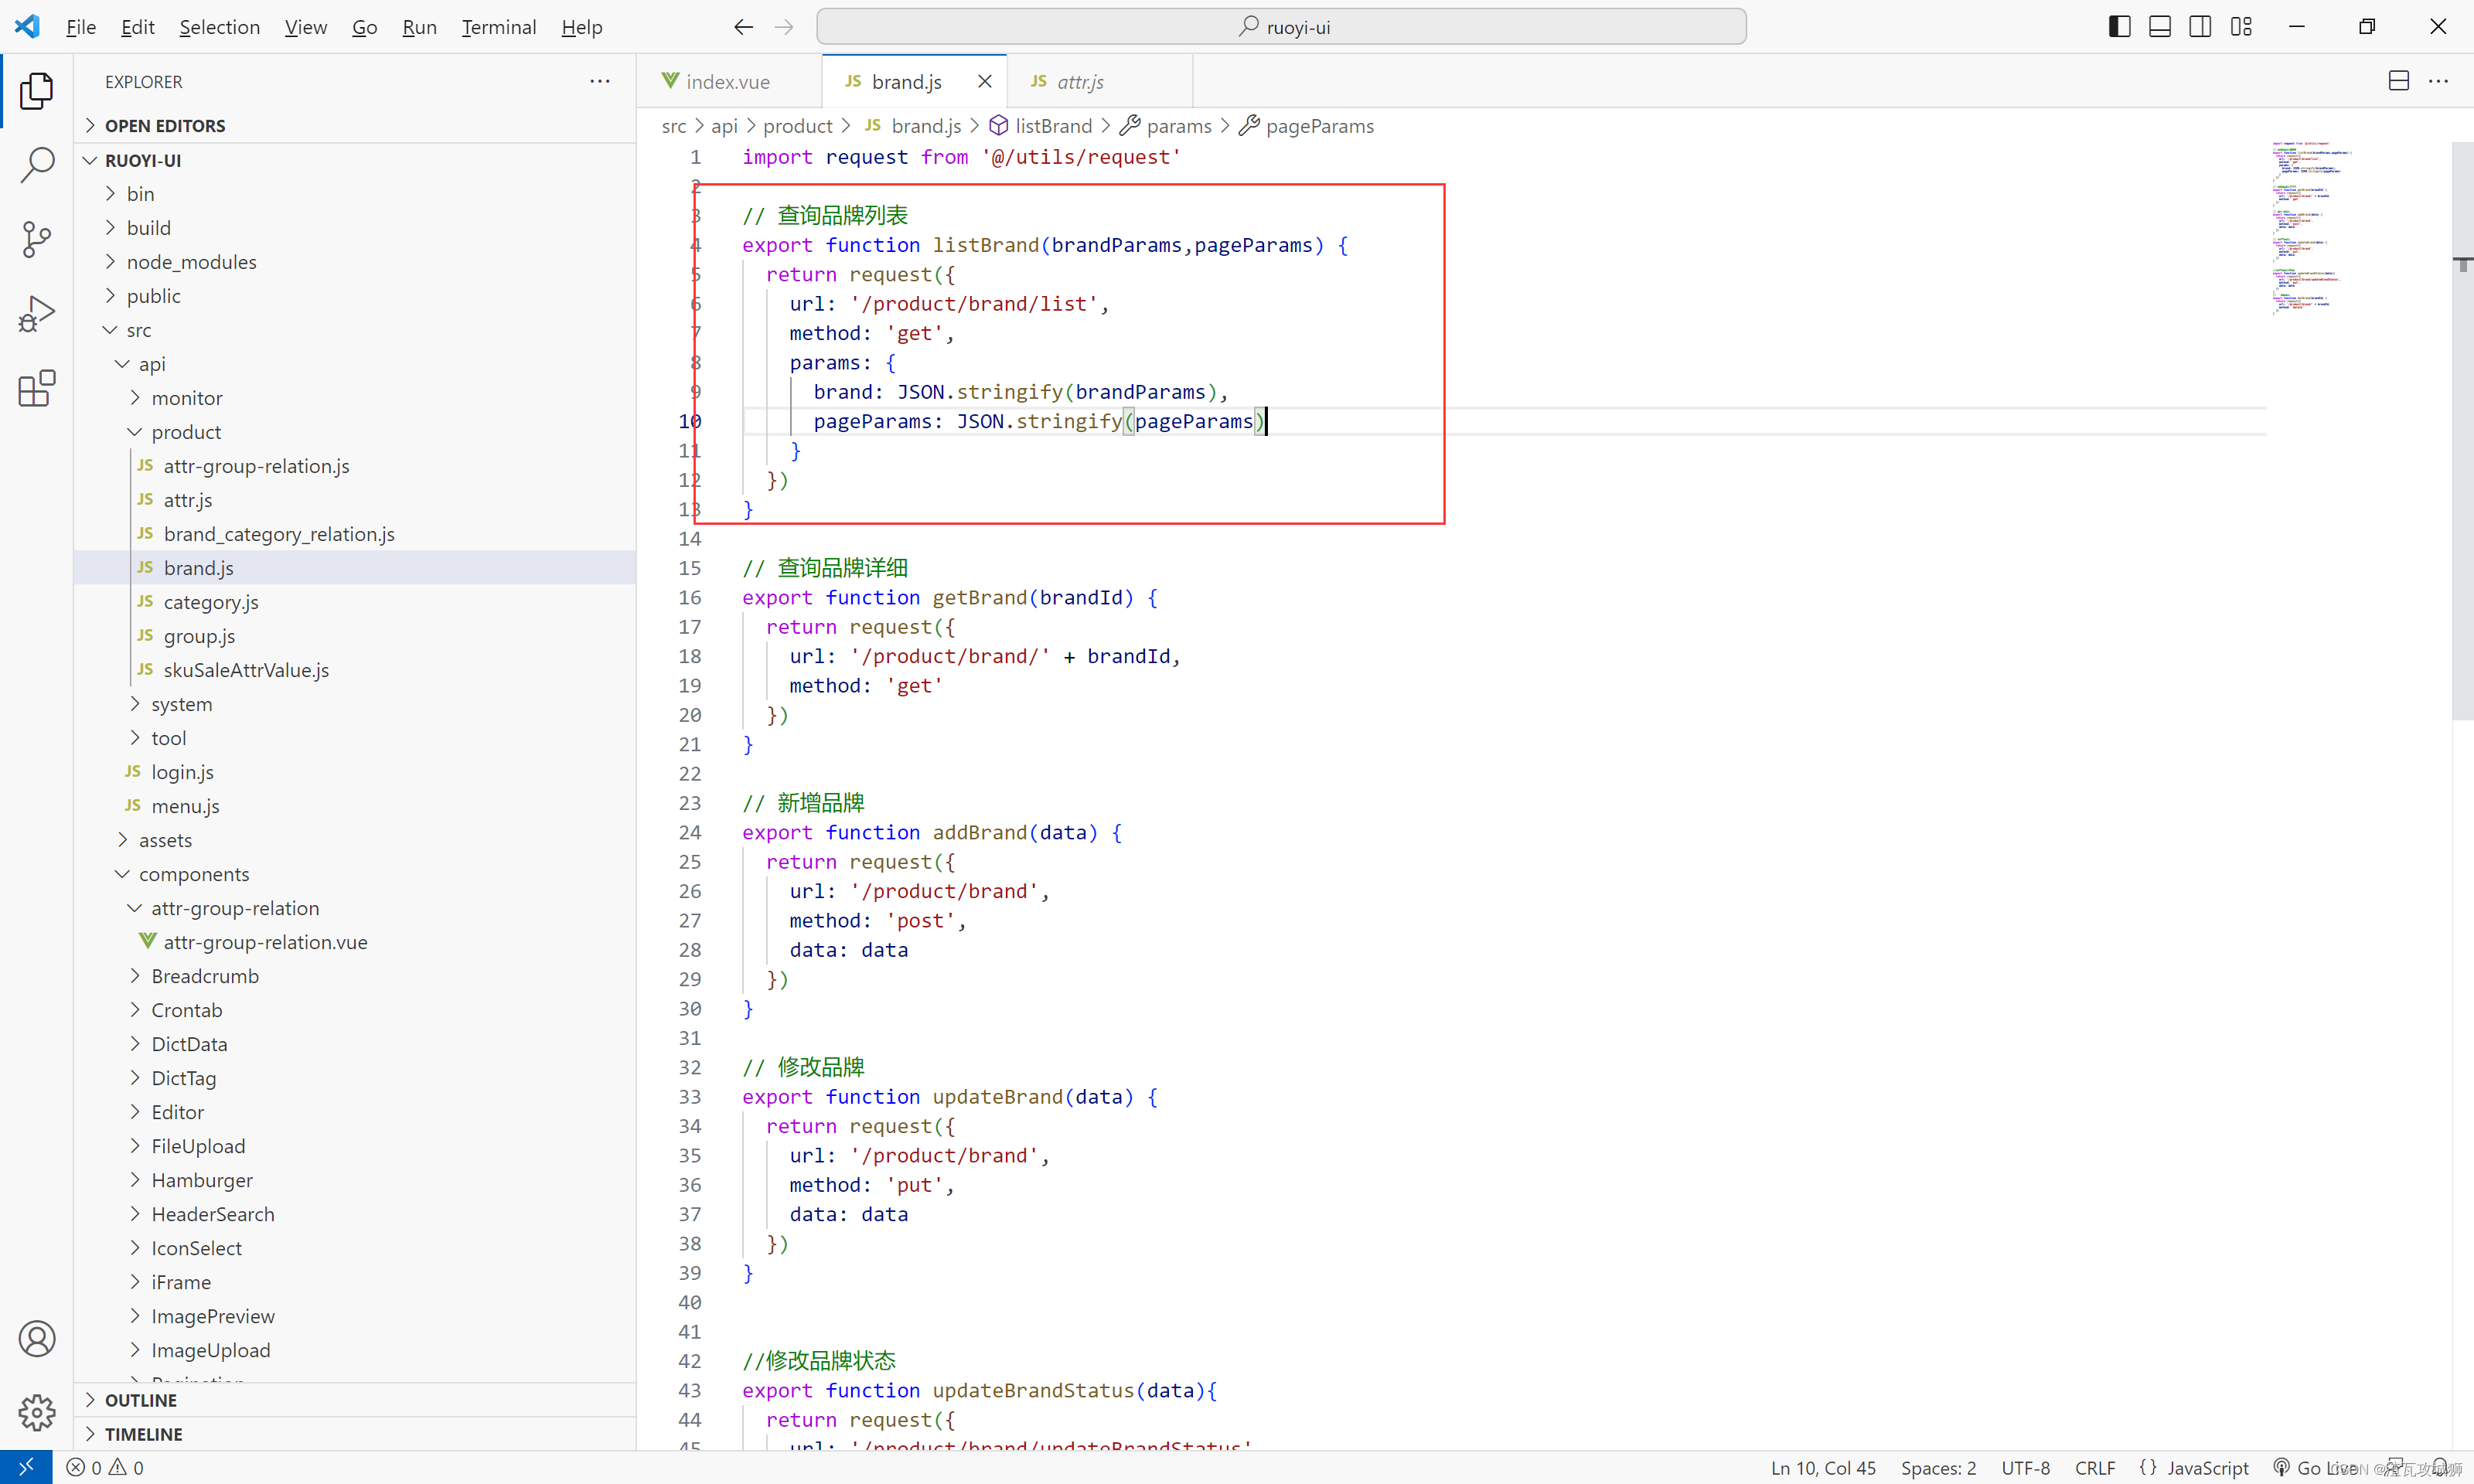
// 查询品牌列表
export function listBrand(brandParams,pageParams) {
  return request({
    url: '/product/brand/list',
    method: 'get',
    params: {
      brand: JSON.stringify(brandParams),
      pageParams: JSON.stringify(pageParams)
    }
  })
}
这里的话其实如果要想两个参数还是get请求的话,就必须得这样写,就是先将其转为字符串,
直接对象的话,我测试了后端接收不到。除非换成post请求,后端使用@RequestBody进行接收
调用:
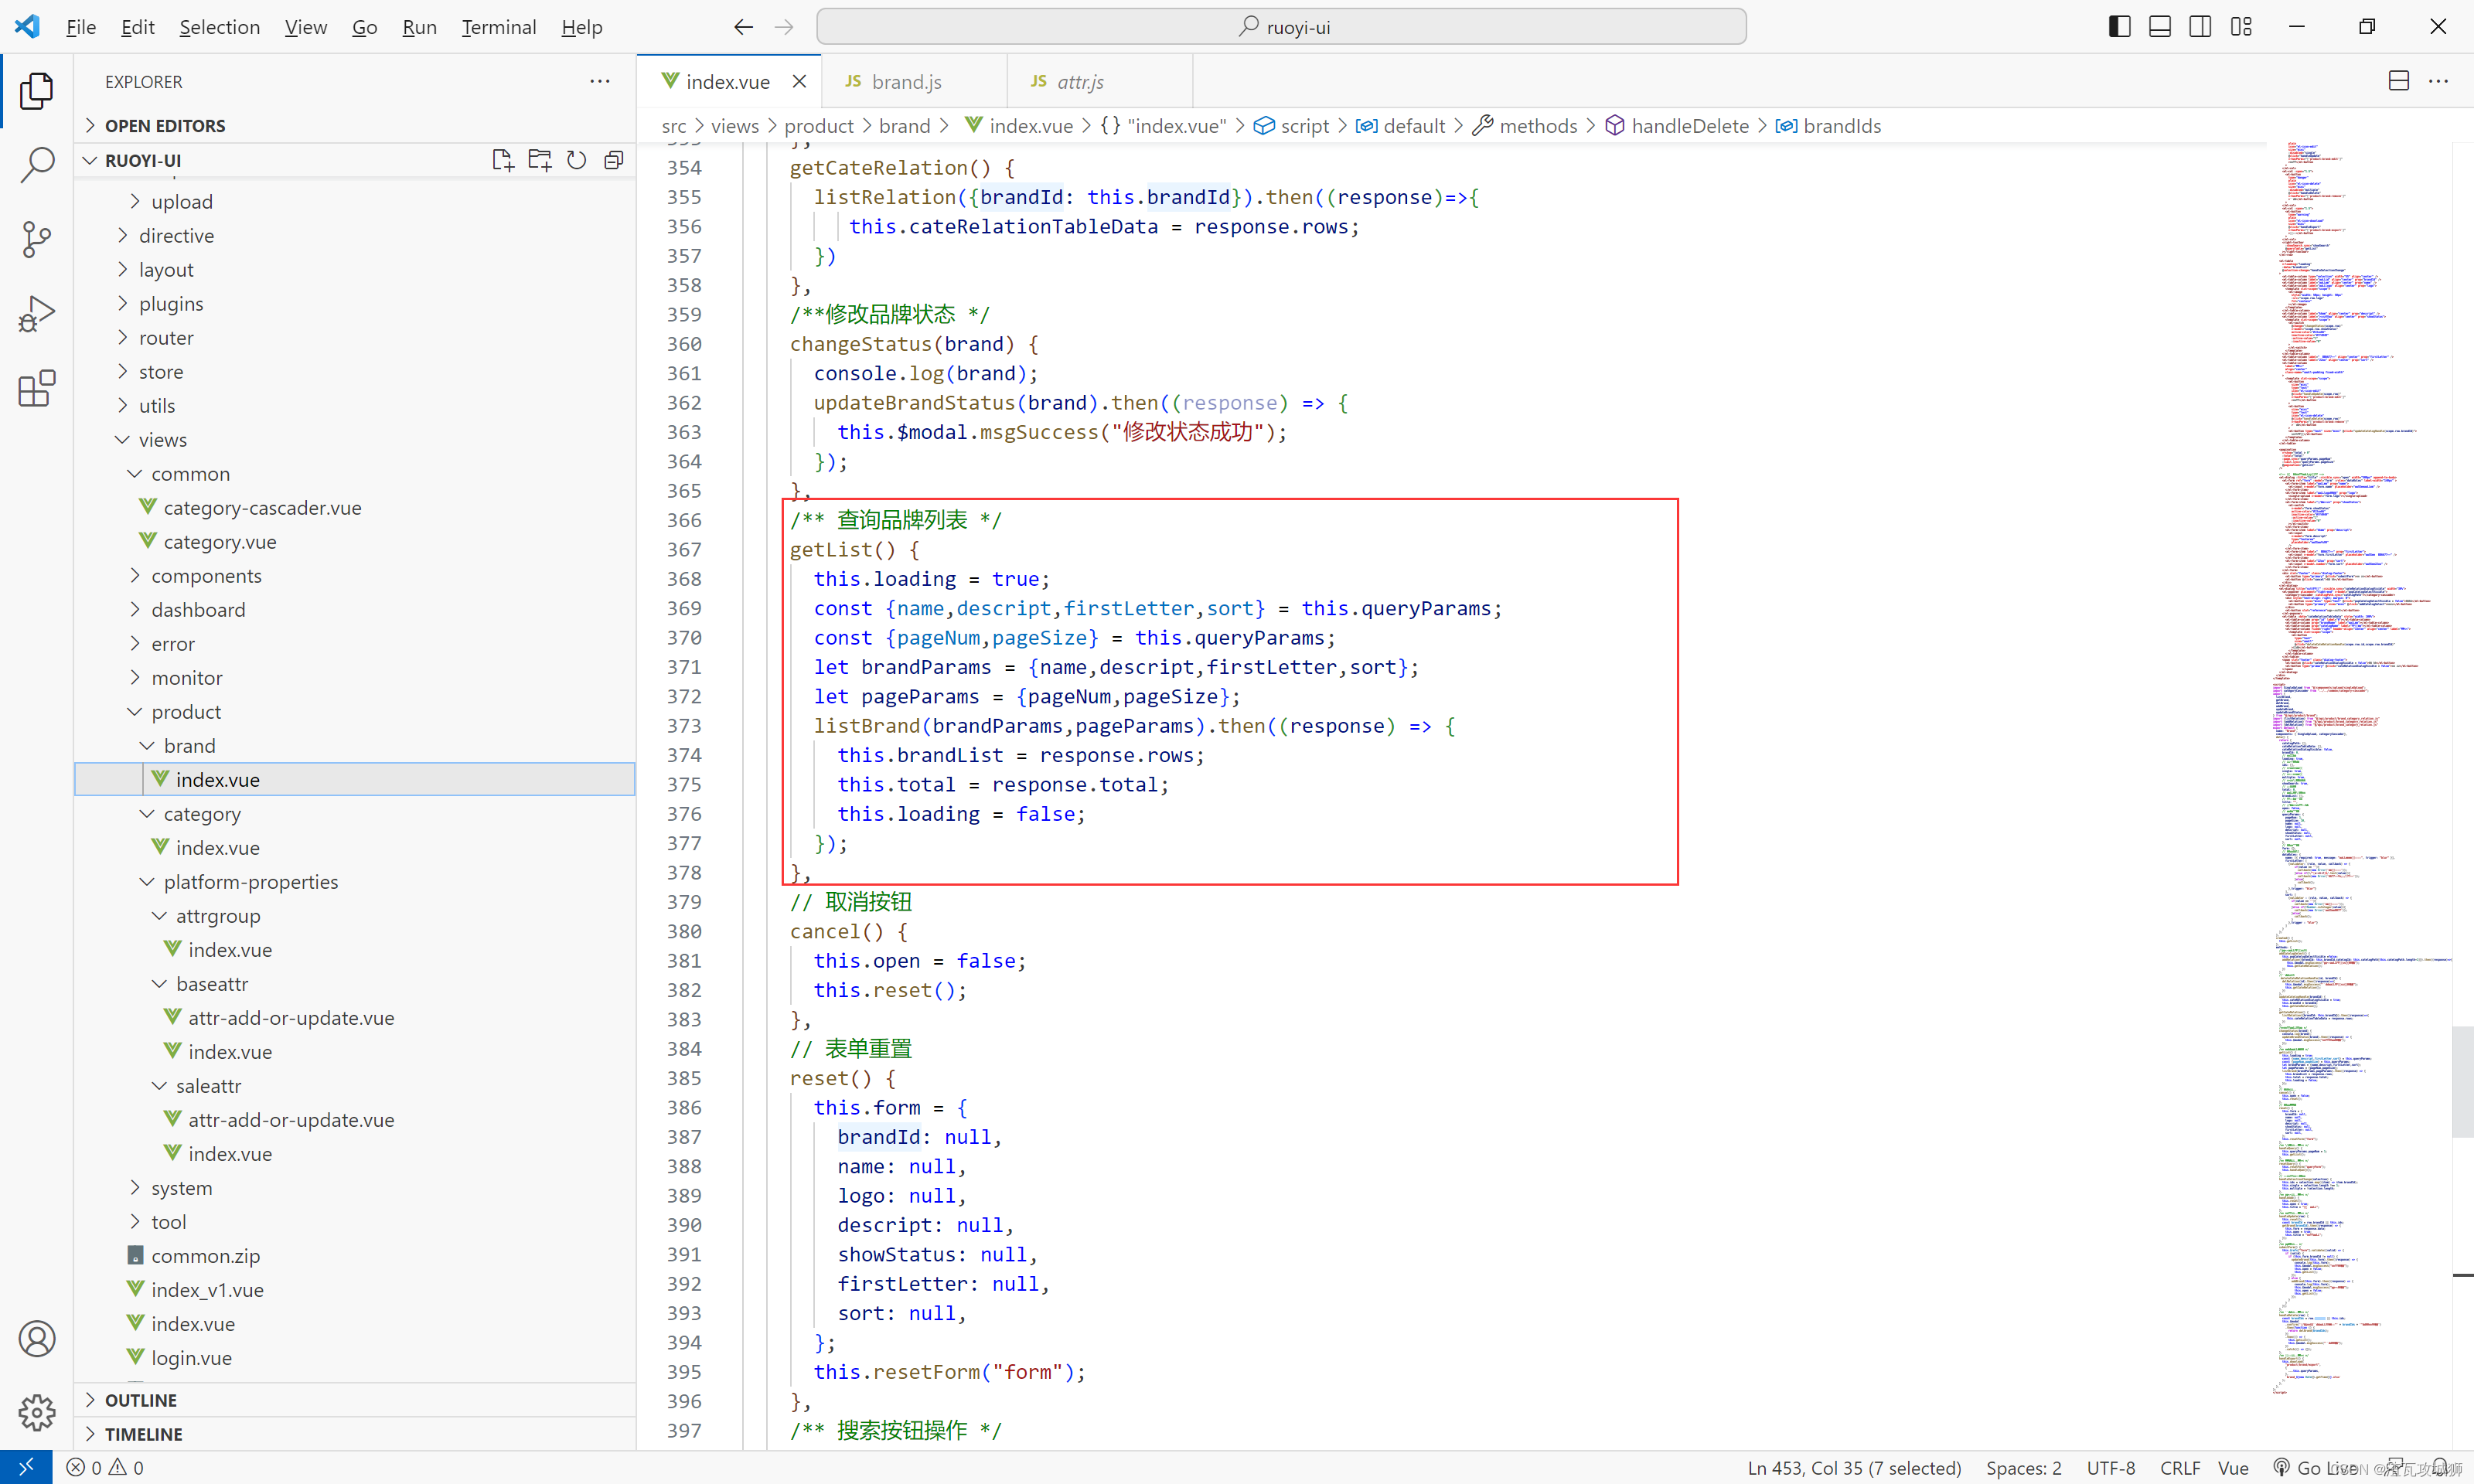
/** 查询品牌列表 */
    getList() {
      this.loading = true;
      const {name,descript,firstLetter,sort} = this.queryParams;
      const {pageNum,pageSize} = this.queryParams;
      let brandParams = {name,descript,firstLetter,sort};
      let pageParams = {pageNum,pageSize};
      listBrand(brandParams,pageParams).then((response) => {
        this.brandList = response.rows;
        this.total = response.total;
        this.loading = false;
      });
    },
2. 关联分类
1. 从老师给的代码中选取相关构件(有基本样子)
1. 1 将其”关联分类“按钮放好
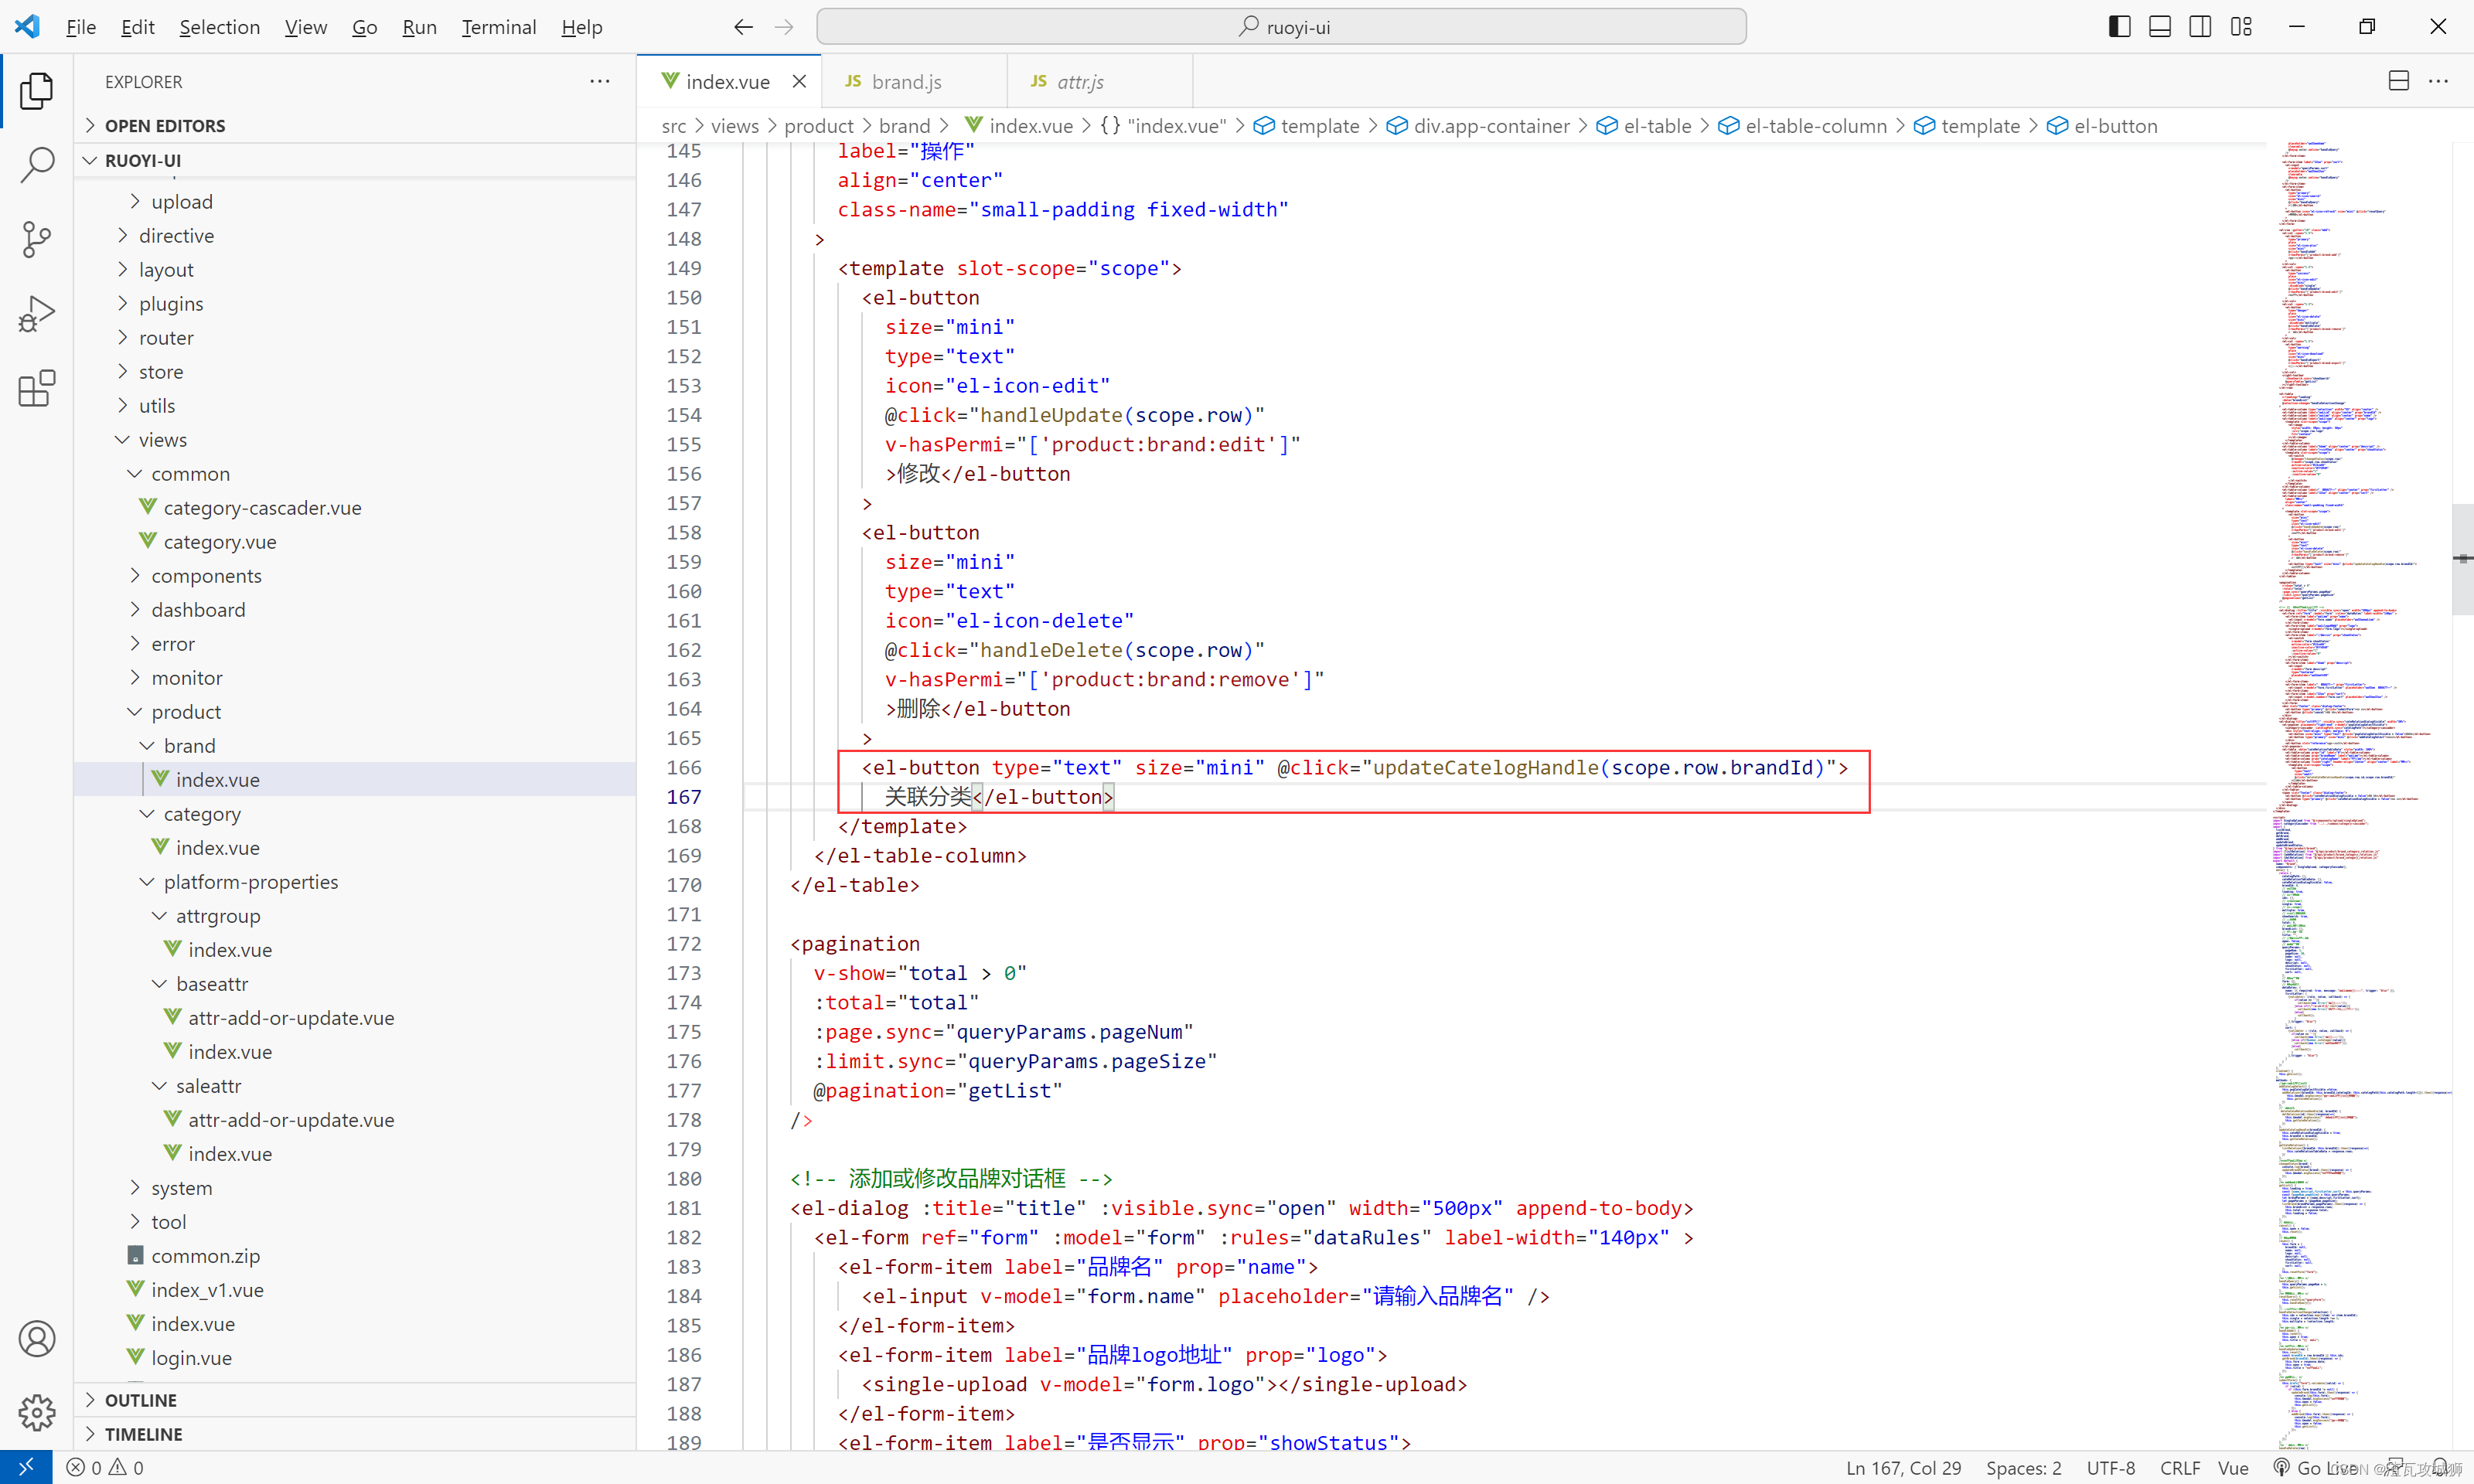
<el-button type="text" size="mini" @click="updateCatelogHandle(scope.row.brandId)">
            关联分类</el-button>
1.2 弹窗代码放置好

 <el-dialog title="关联分类" :visible.sync="cateRelationDialogVisible" width="30%">
      <el-popover placement="right-end" v-model="popCatelogSelectVisible">
        <category-cascader :catelogPath.sync="catelogPath"></category-cascader>
        <div style="text-align: right; margin: 0">
          <el-button size="mini" type="text" @click="popCatelogSelectVisible = false">取消</el-button>
          <el-button type="primary" size="mini" @click="addCatelogSelect">确定</el-button>
        </div>
        <el-button slot="reference">新增关联</el-button>
      </el-popover>
      <el-table :data="cateRelationTableData" style="width: 100%">
        <el-table-column prop="id" label="#"></el-table-column>
        <el-table-column prop="brandName" label="品牌名"></el-table-column>
        <el-table-column prop="catelogName" label="分类名"></el-table-column>
        <el-table-column fixed="right" header-align="center" align="center" label="操作">
          <template slot-scope="scope">
            <el-button
              type="text"
              size="small"
              @click="deleteCateRelationHandle(scope.row.id,scope.row.brandId)"
            >移除</el-button>
          </template>
        </el-table-column>
      </el-table>
      <span slot="footer" class="dialog-footer">
        <el-button @click="cateRelationDialogVisible = false">取 消</el-button>
        <el-button type="primary" @click="cateRelationDialogVisible = false">确 定</el-button>
      </span>
    </el-dialog>
注意到,它这里用了一个popover标签,这其实就是弹出窗
还是嵌套弹出窗。我把最后的效果拿出来:
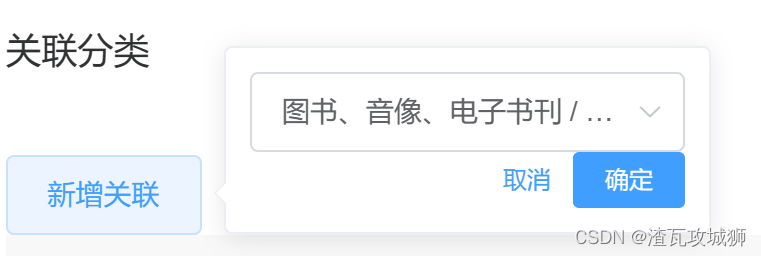
至于这个分类怎么出来的,就是下面这一句:
<category-cascader :catelogPath.sync="catelogPath"></category-cascader>这里的sync的作用是当选择的分类发生变化的时候,父组件中的catelogPath也将动态的变化
所以得在父组件也就是引用这个组件的组件,也就是在品牌的这个组件中,在数据域中声明好:catelogPath这个属性
这里就是一个分类组件,自己封装的,因为很多地方需要使用
要正确使用还是那三步:
1. 抽取组件
这里之前第十天的时候添加属性分组的时候,已经抽取出来了:
但是我那个比较简单,没有涉及到categoryPath的动态感应
没什么好说的,直接用老师的:
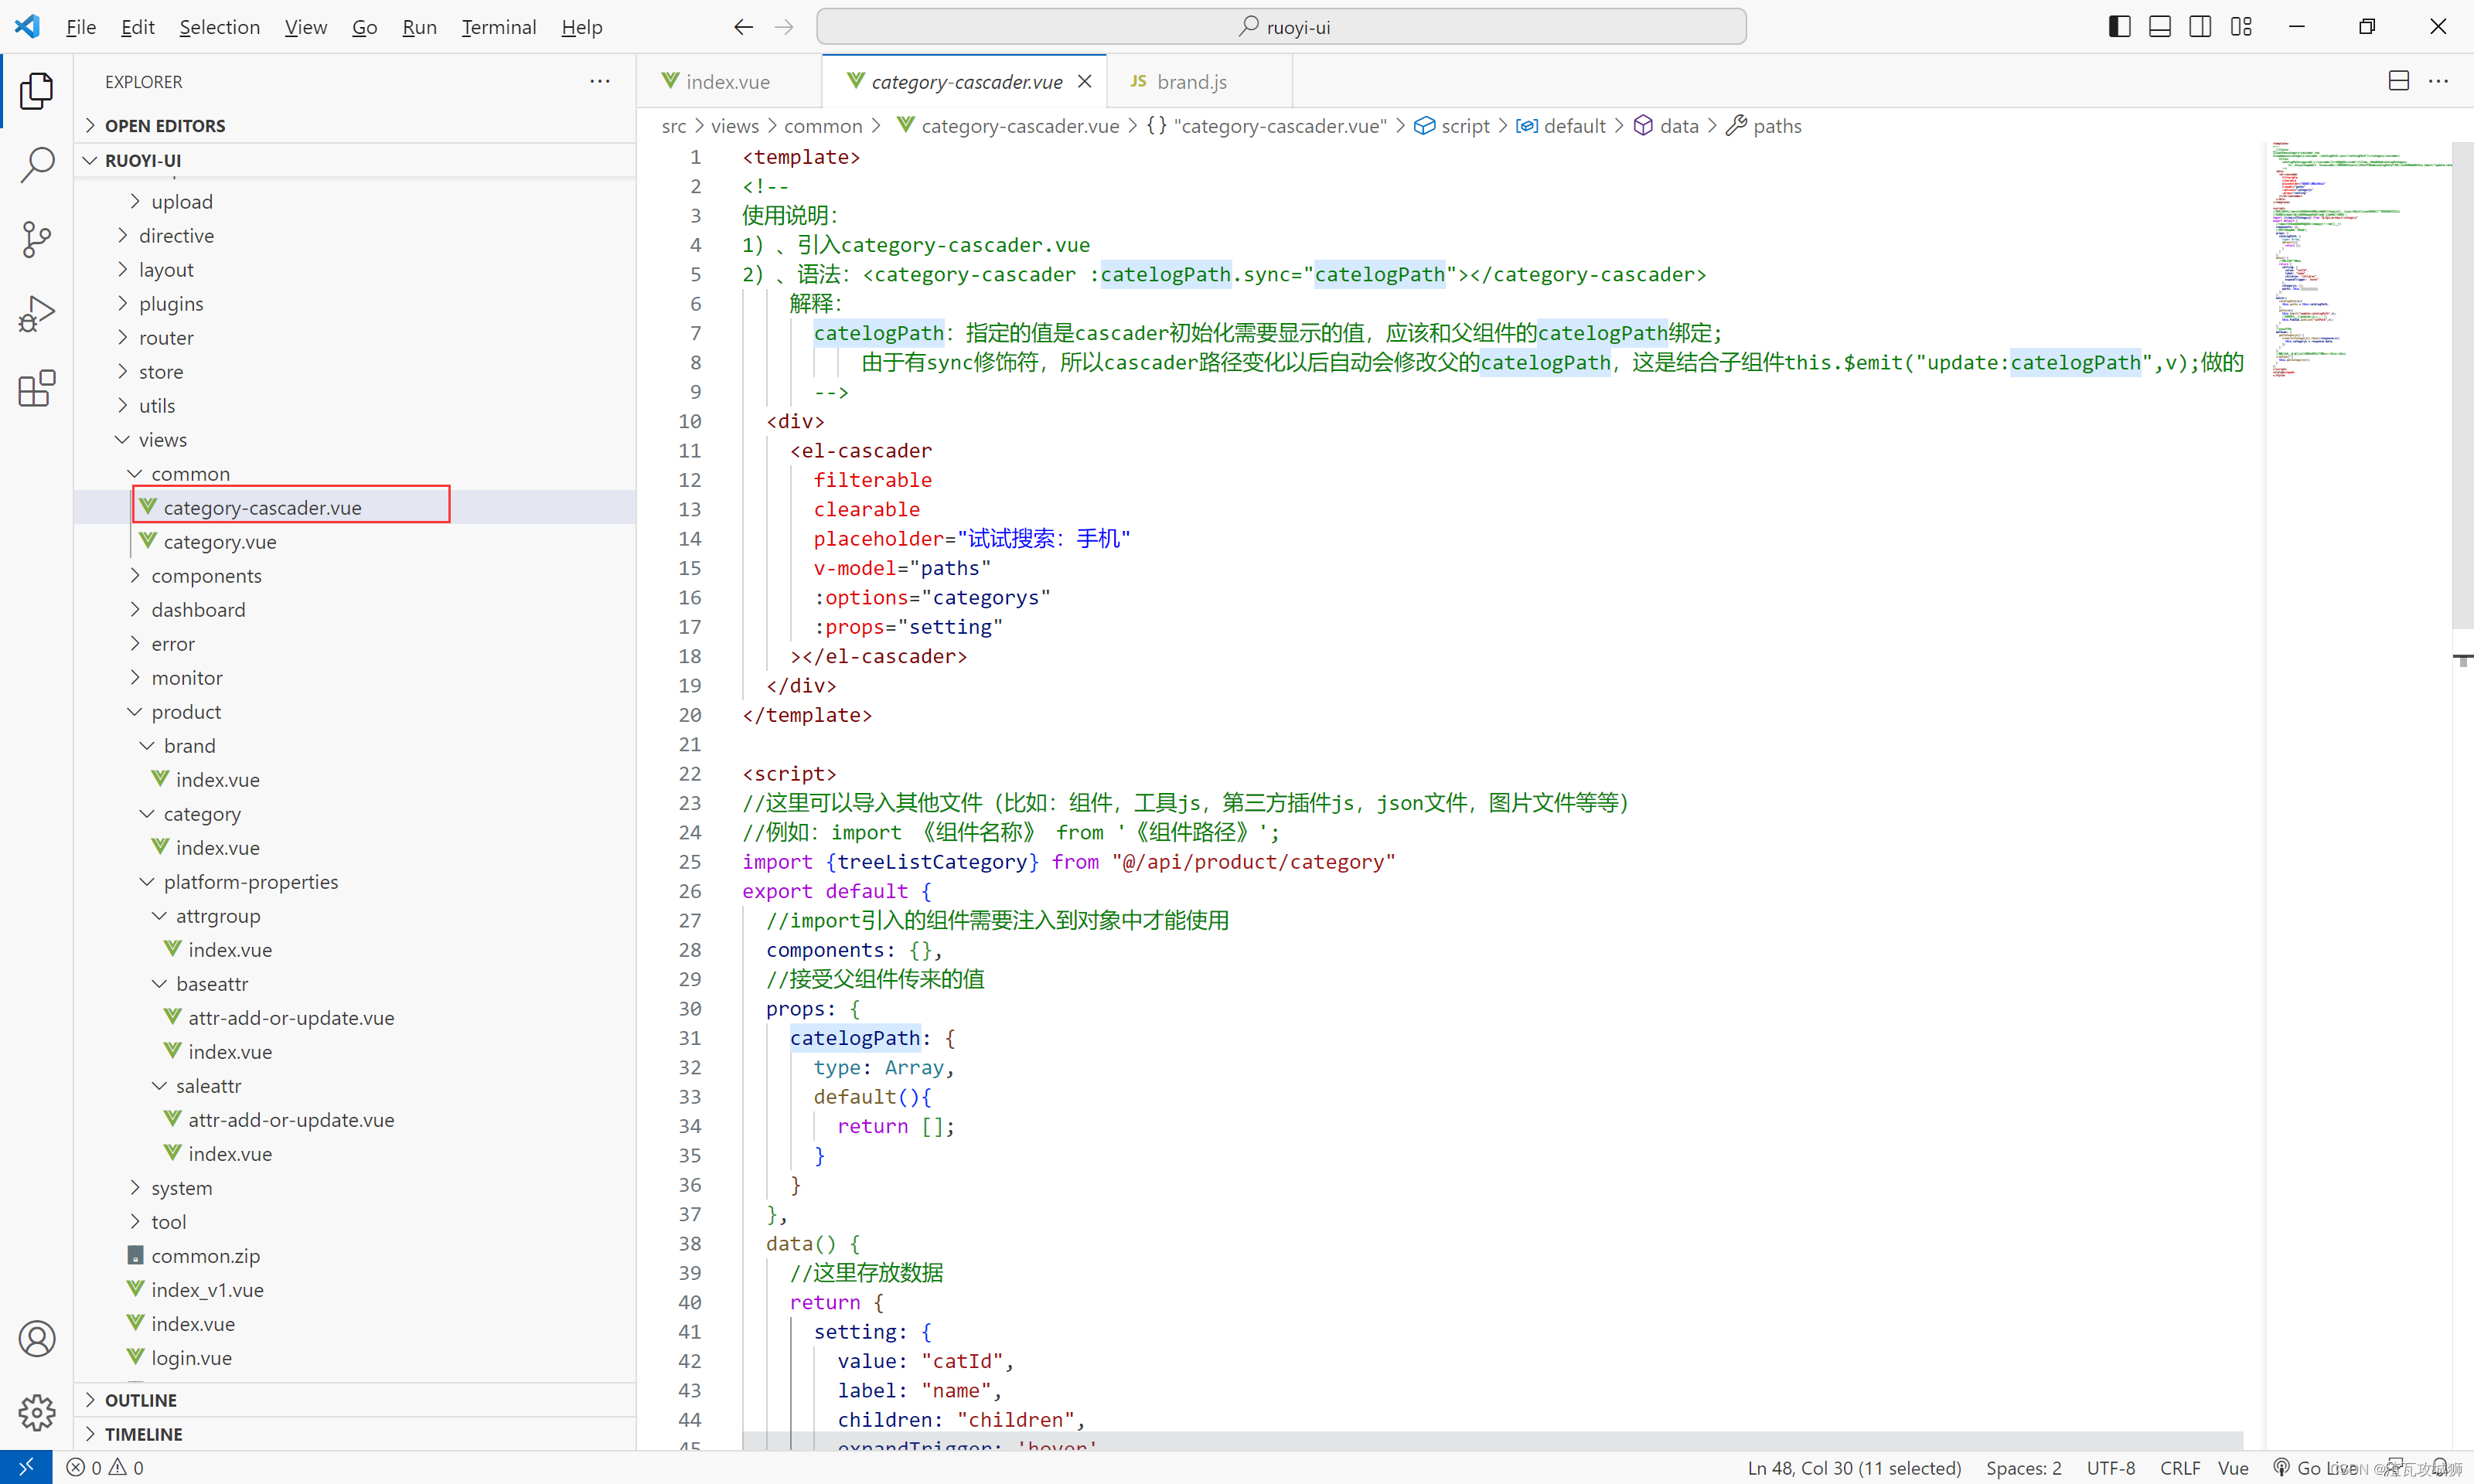
<template>
<!--
使用说明:
1)、引入category-cascader.vue
2)、语法:<category-cascader :catelogPath.sync="catelogPath"></category-cascader>
    解释:
      catelogPath:指定的值是cascader初始化需要显示的值,应该和父组件的catelogPath绑定;
          由于有sync修饰符,所以cascader路径变化以后自动会修改父的catelogPath,这是结合子组件this.$emit("update:catelogPath",v);做的
      -->
  <div>
    <el-cascader
      filterable
      clearable
      placeholder="试试搜索:手机"
      v-model="paths"
      :options="categorys"
      :props="setting"
    ></el-cascader>
  </div>
</template>

<script>
//这里可以导入其他文件(比如:组件,工具js,第三方插件js,json文件,图片文件等等)
//例如:import 《组件名称》 from '《组件路径》';
import {treeListCategory} from "@/api/product/category"
export default {
  //import引入的组件需要注入到对象中才能使用
  components: {},
  //接受父组件传来的值
  props: {
    catelogPath: {
      type: Array,
      default(){
        return [];
      }
    }
  },
  data() {
    //这里存放数据
    return {
      setting: {
        value: "catId",
        label: "name",
        children: "children",
        expandTrigger: 'hover'
      },
      categorys: [],
      paths: this.catelogPath
    };
  },
  watch:{
    catelogPath(v){
      this.paths = this.catelogPath;
    },
    paths(v){
      this.$emit("update:catelogPath",v);
      //还可以使用pubsub-js进行传值
      this.PubSub.publish("catPath",v);
    }
  },
  //方法集合
  methods: {
    getCategorys() {
      treeListCategory().then((response)=>{
        this.categorys = response.data;
      })
    }
  },
  //生命周期 - 创建完成(可以访问当前this实例)
  created() {
    this.getCategorys();
  }
};
</script>
<style scoped>
</style>
2. 导入组件
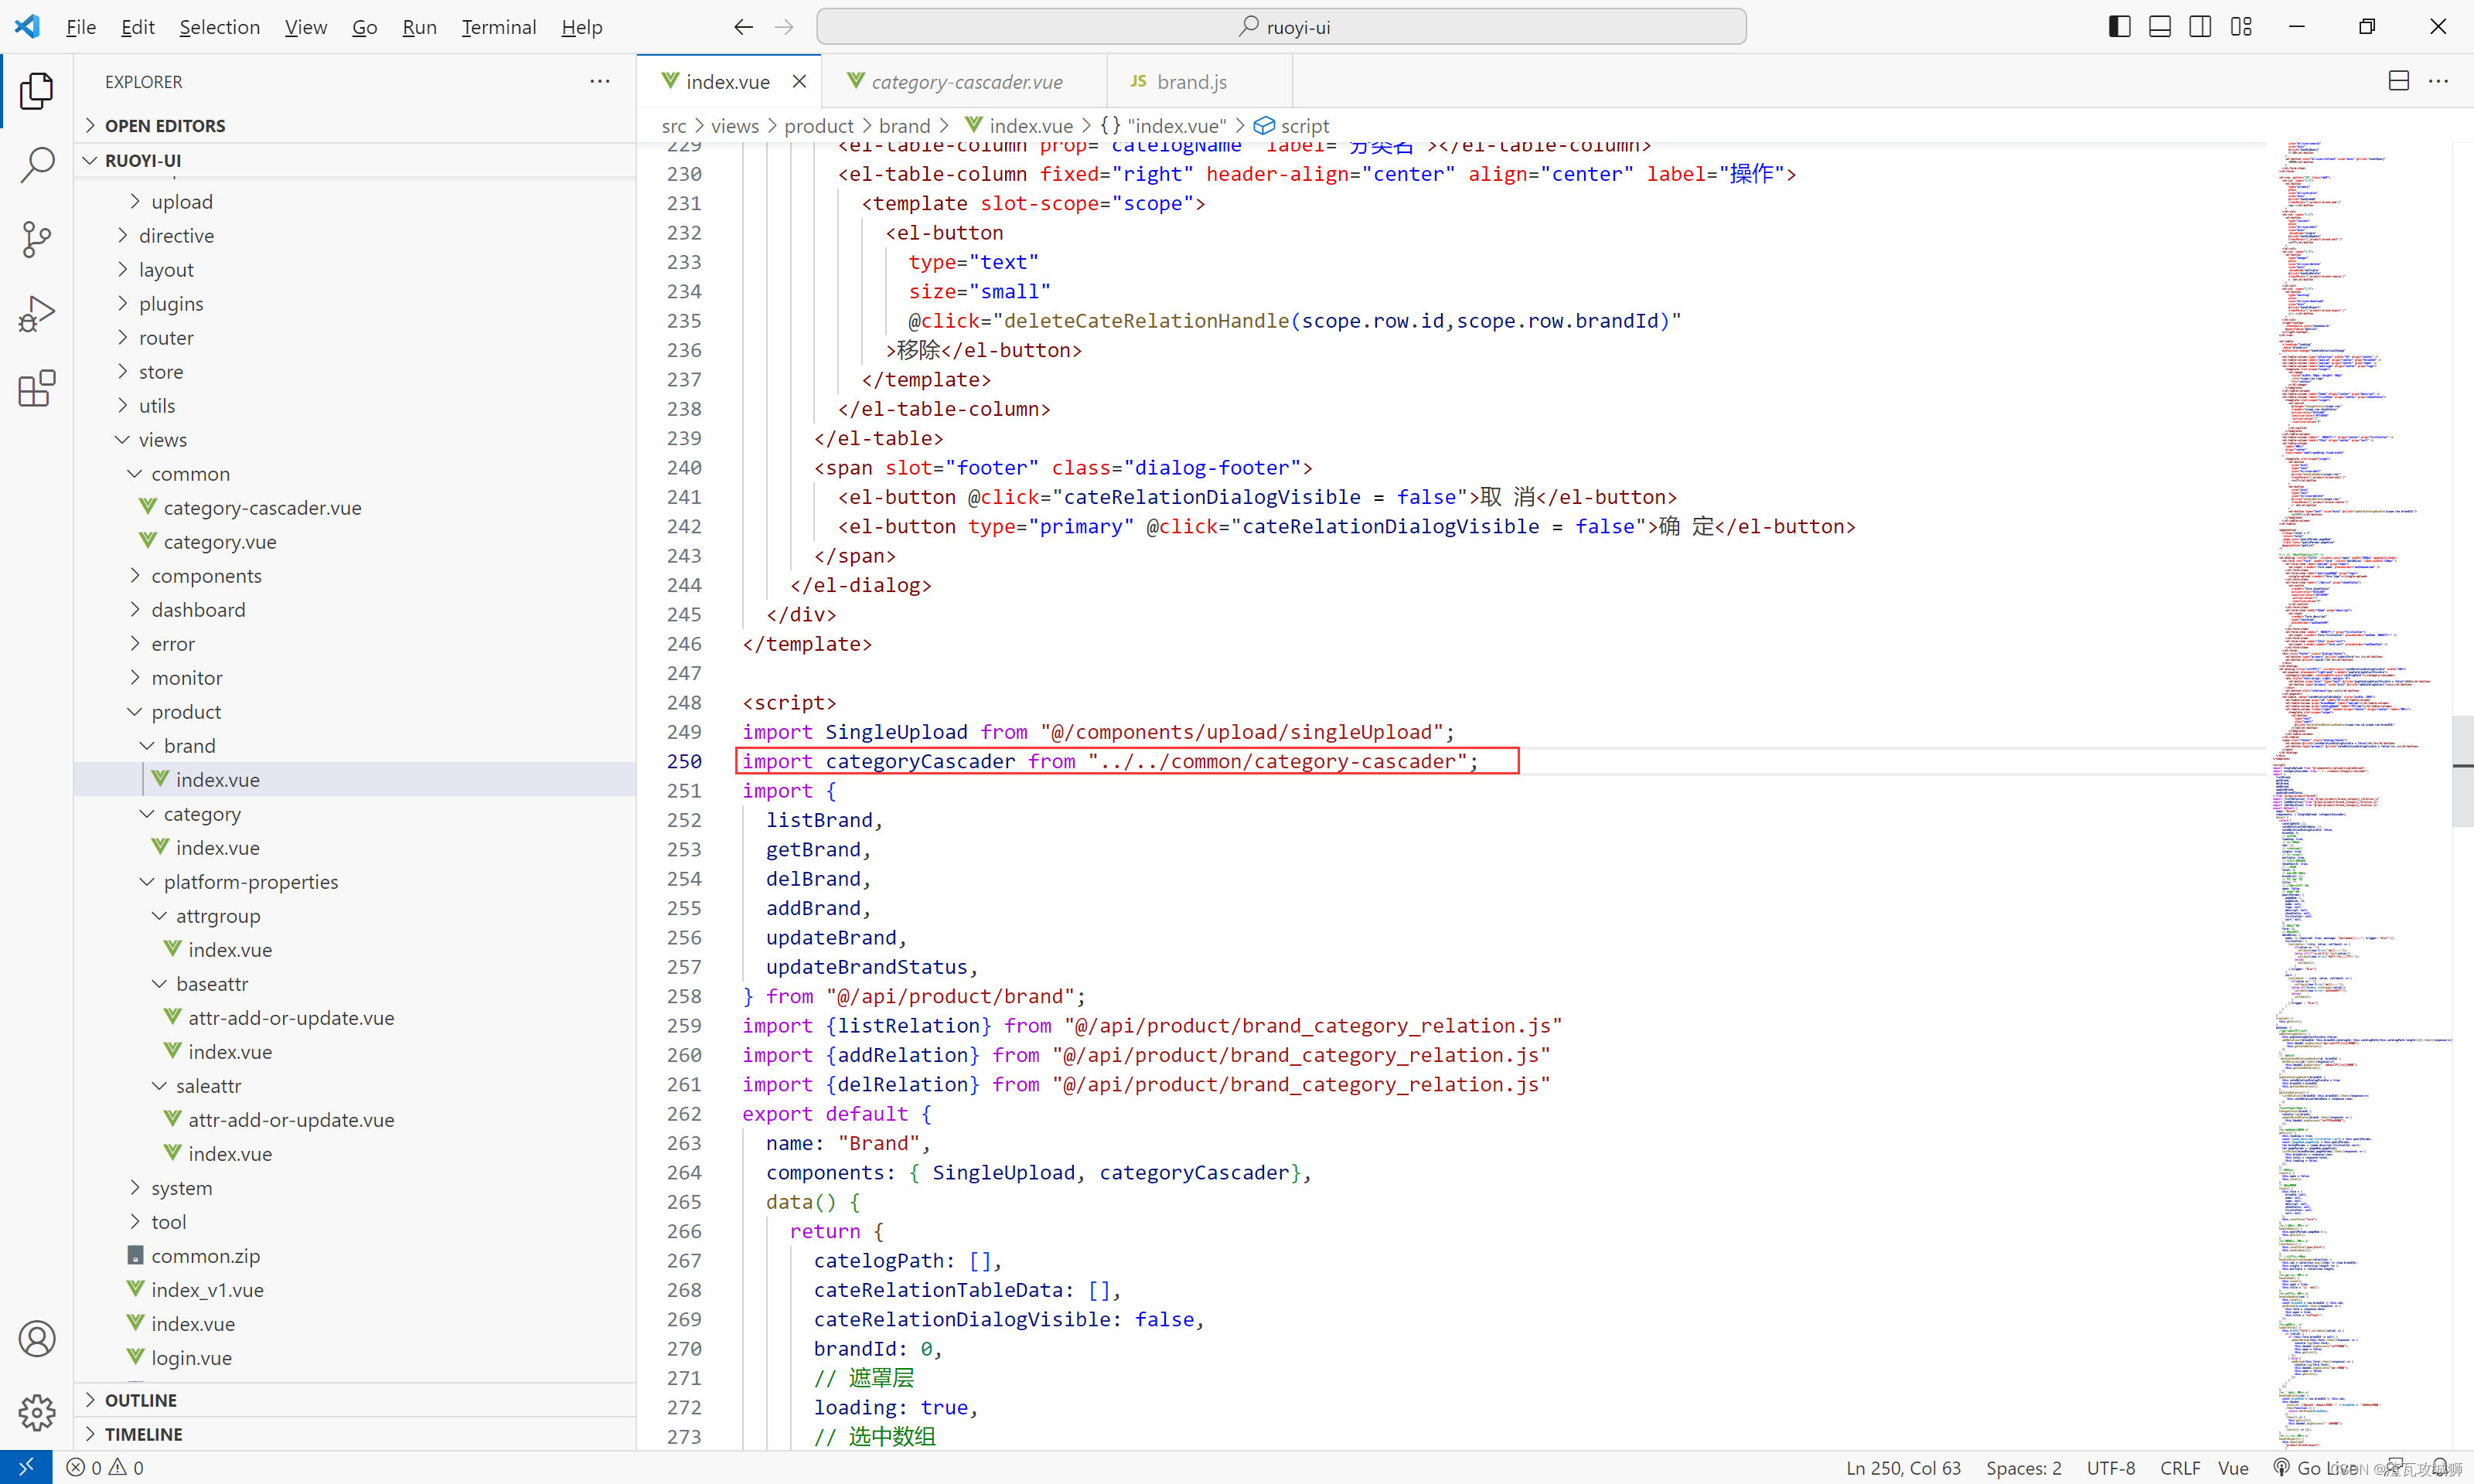
3. 使用组件
2. 从模板中提取好数据,绑定到数据域中

无非就是一些 弹窗的标志值还有数据

3. 修改方法
就是对老师给的方法看是不是要修改一下,无非就是修改一下数据格式,逻辑基本上不需要修改,无非就是请求那里使用自己的,导入一下自己的api,调用自己的请求对象
1.
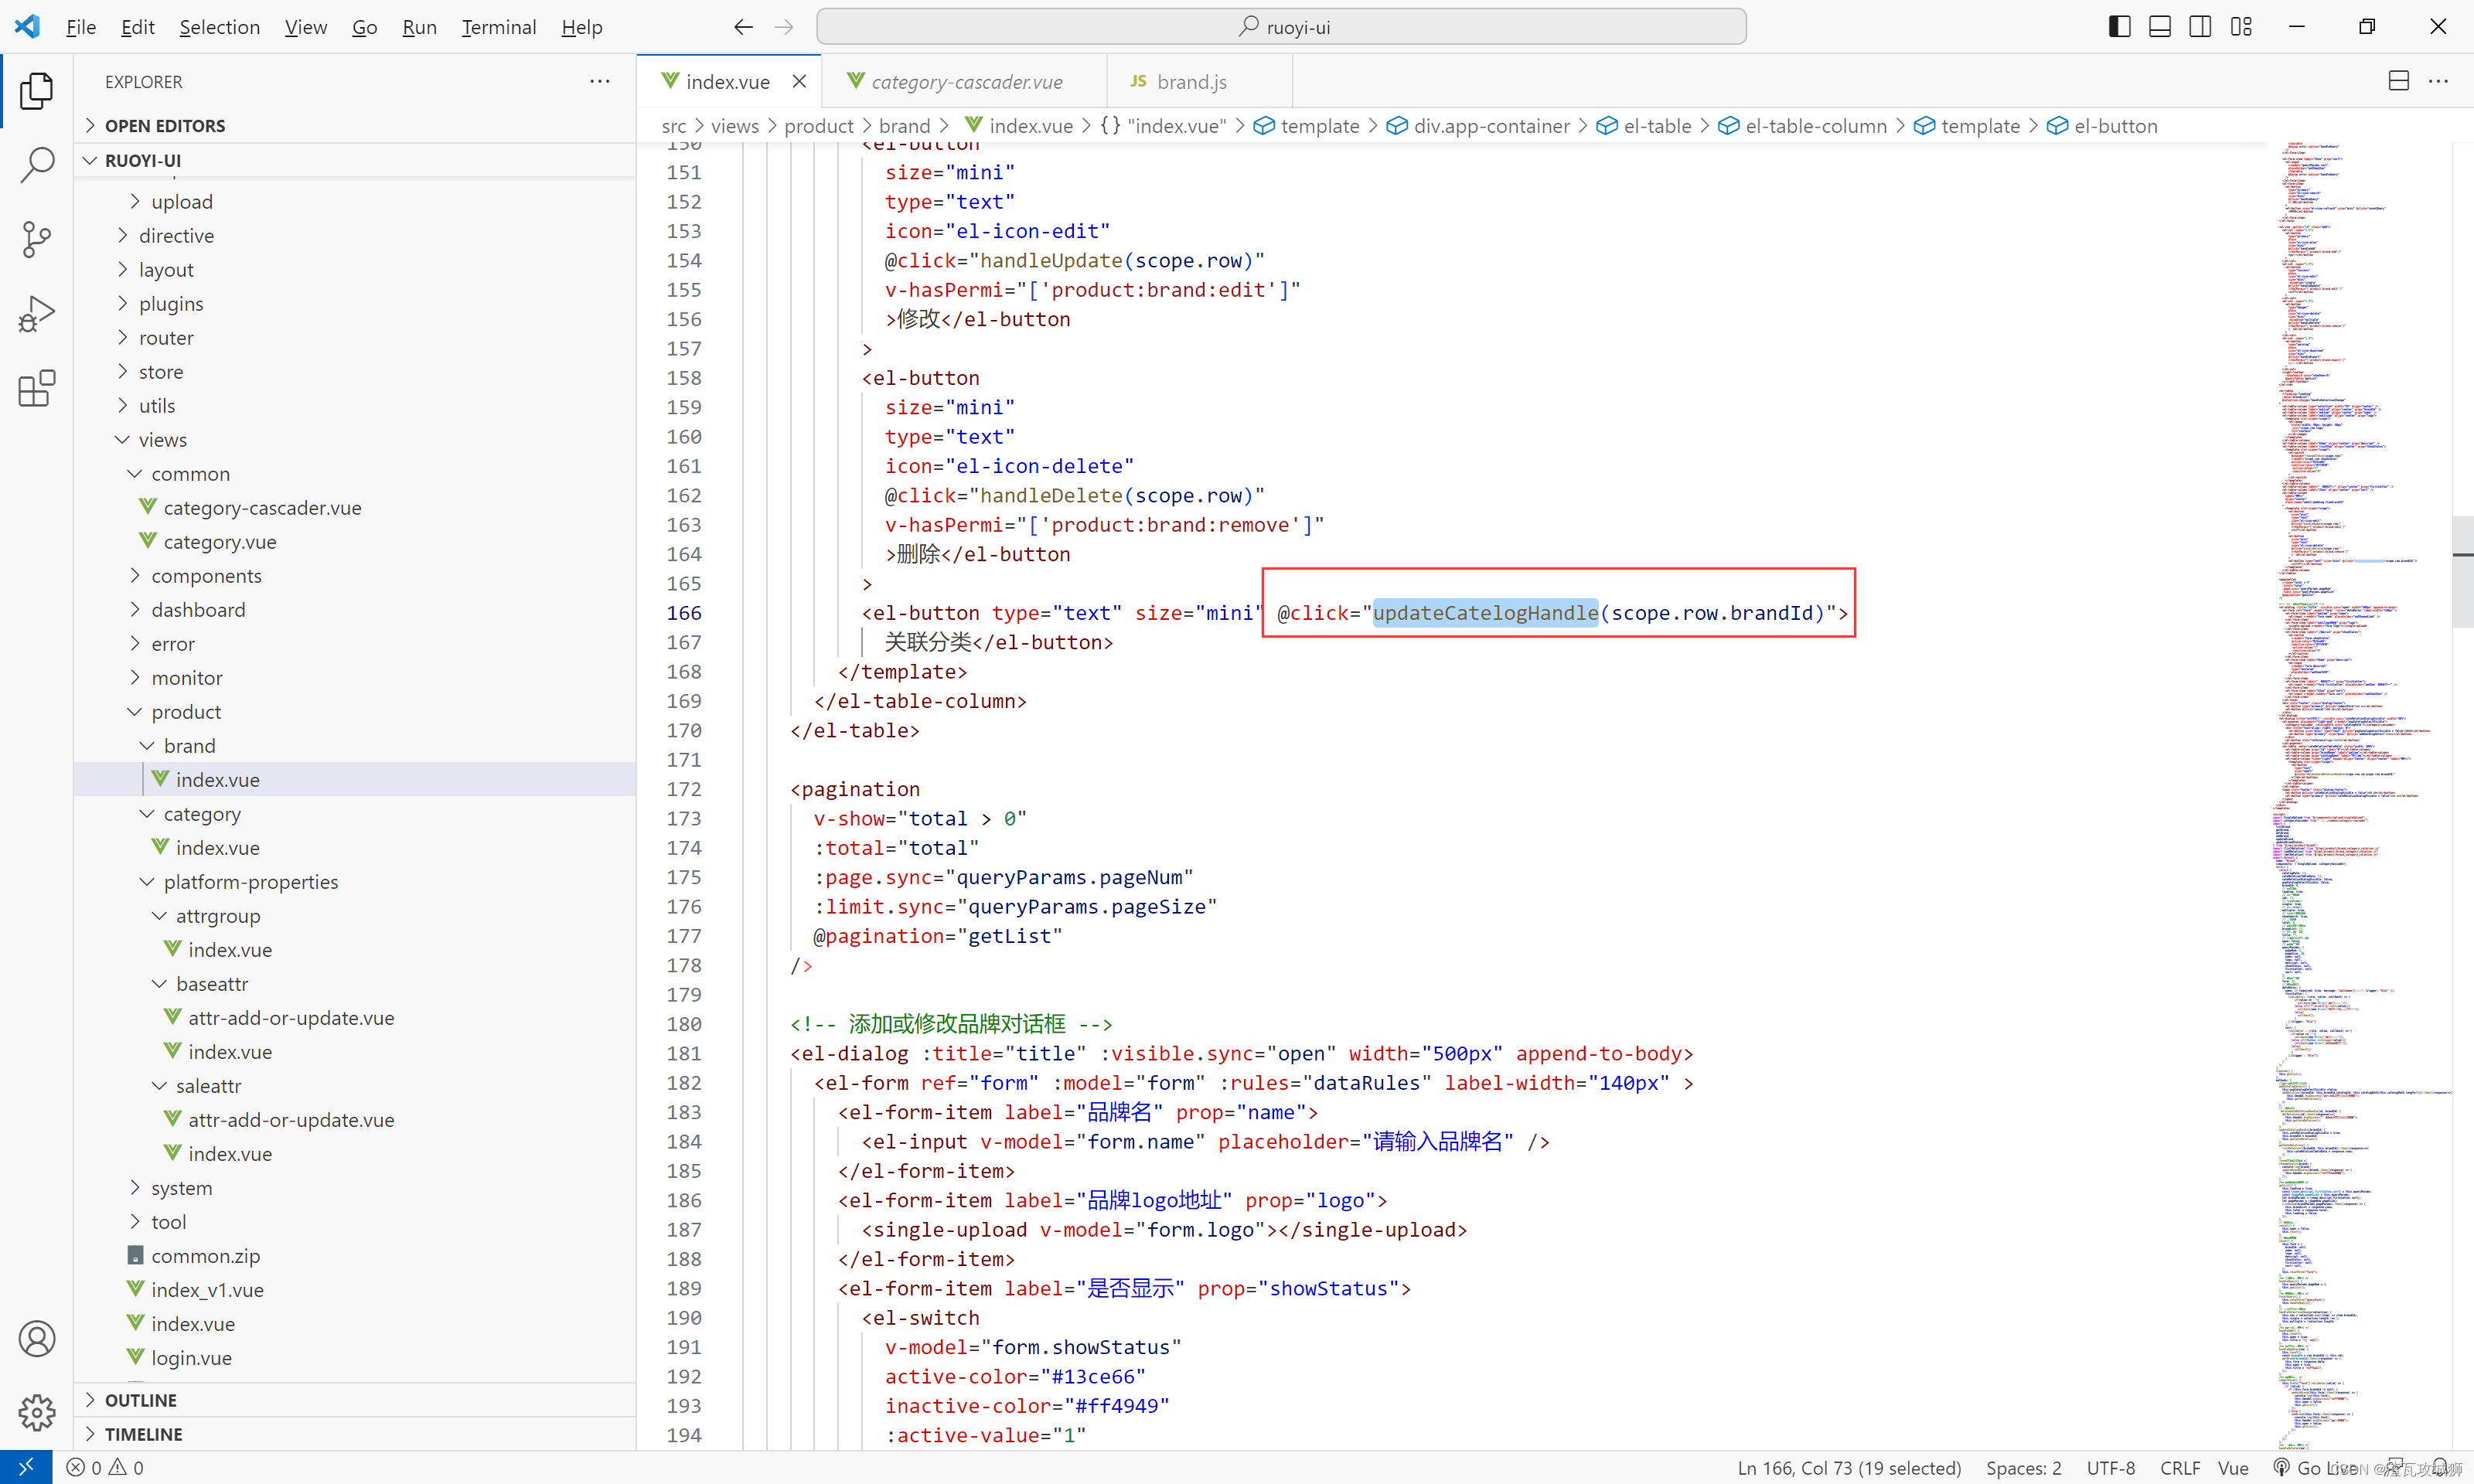
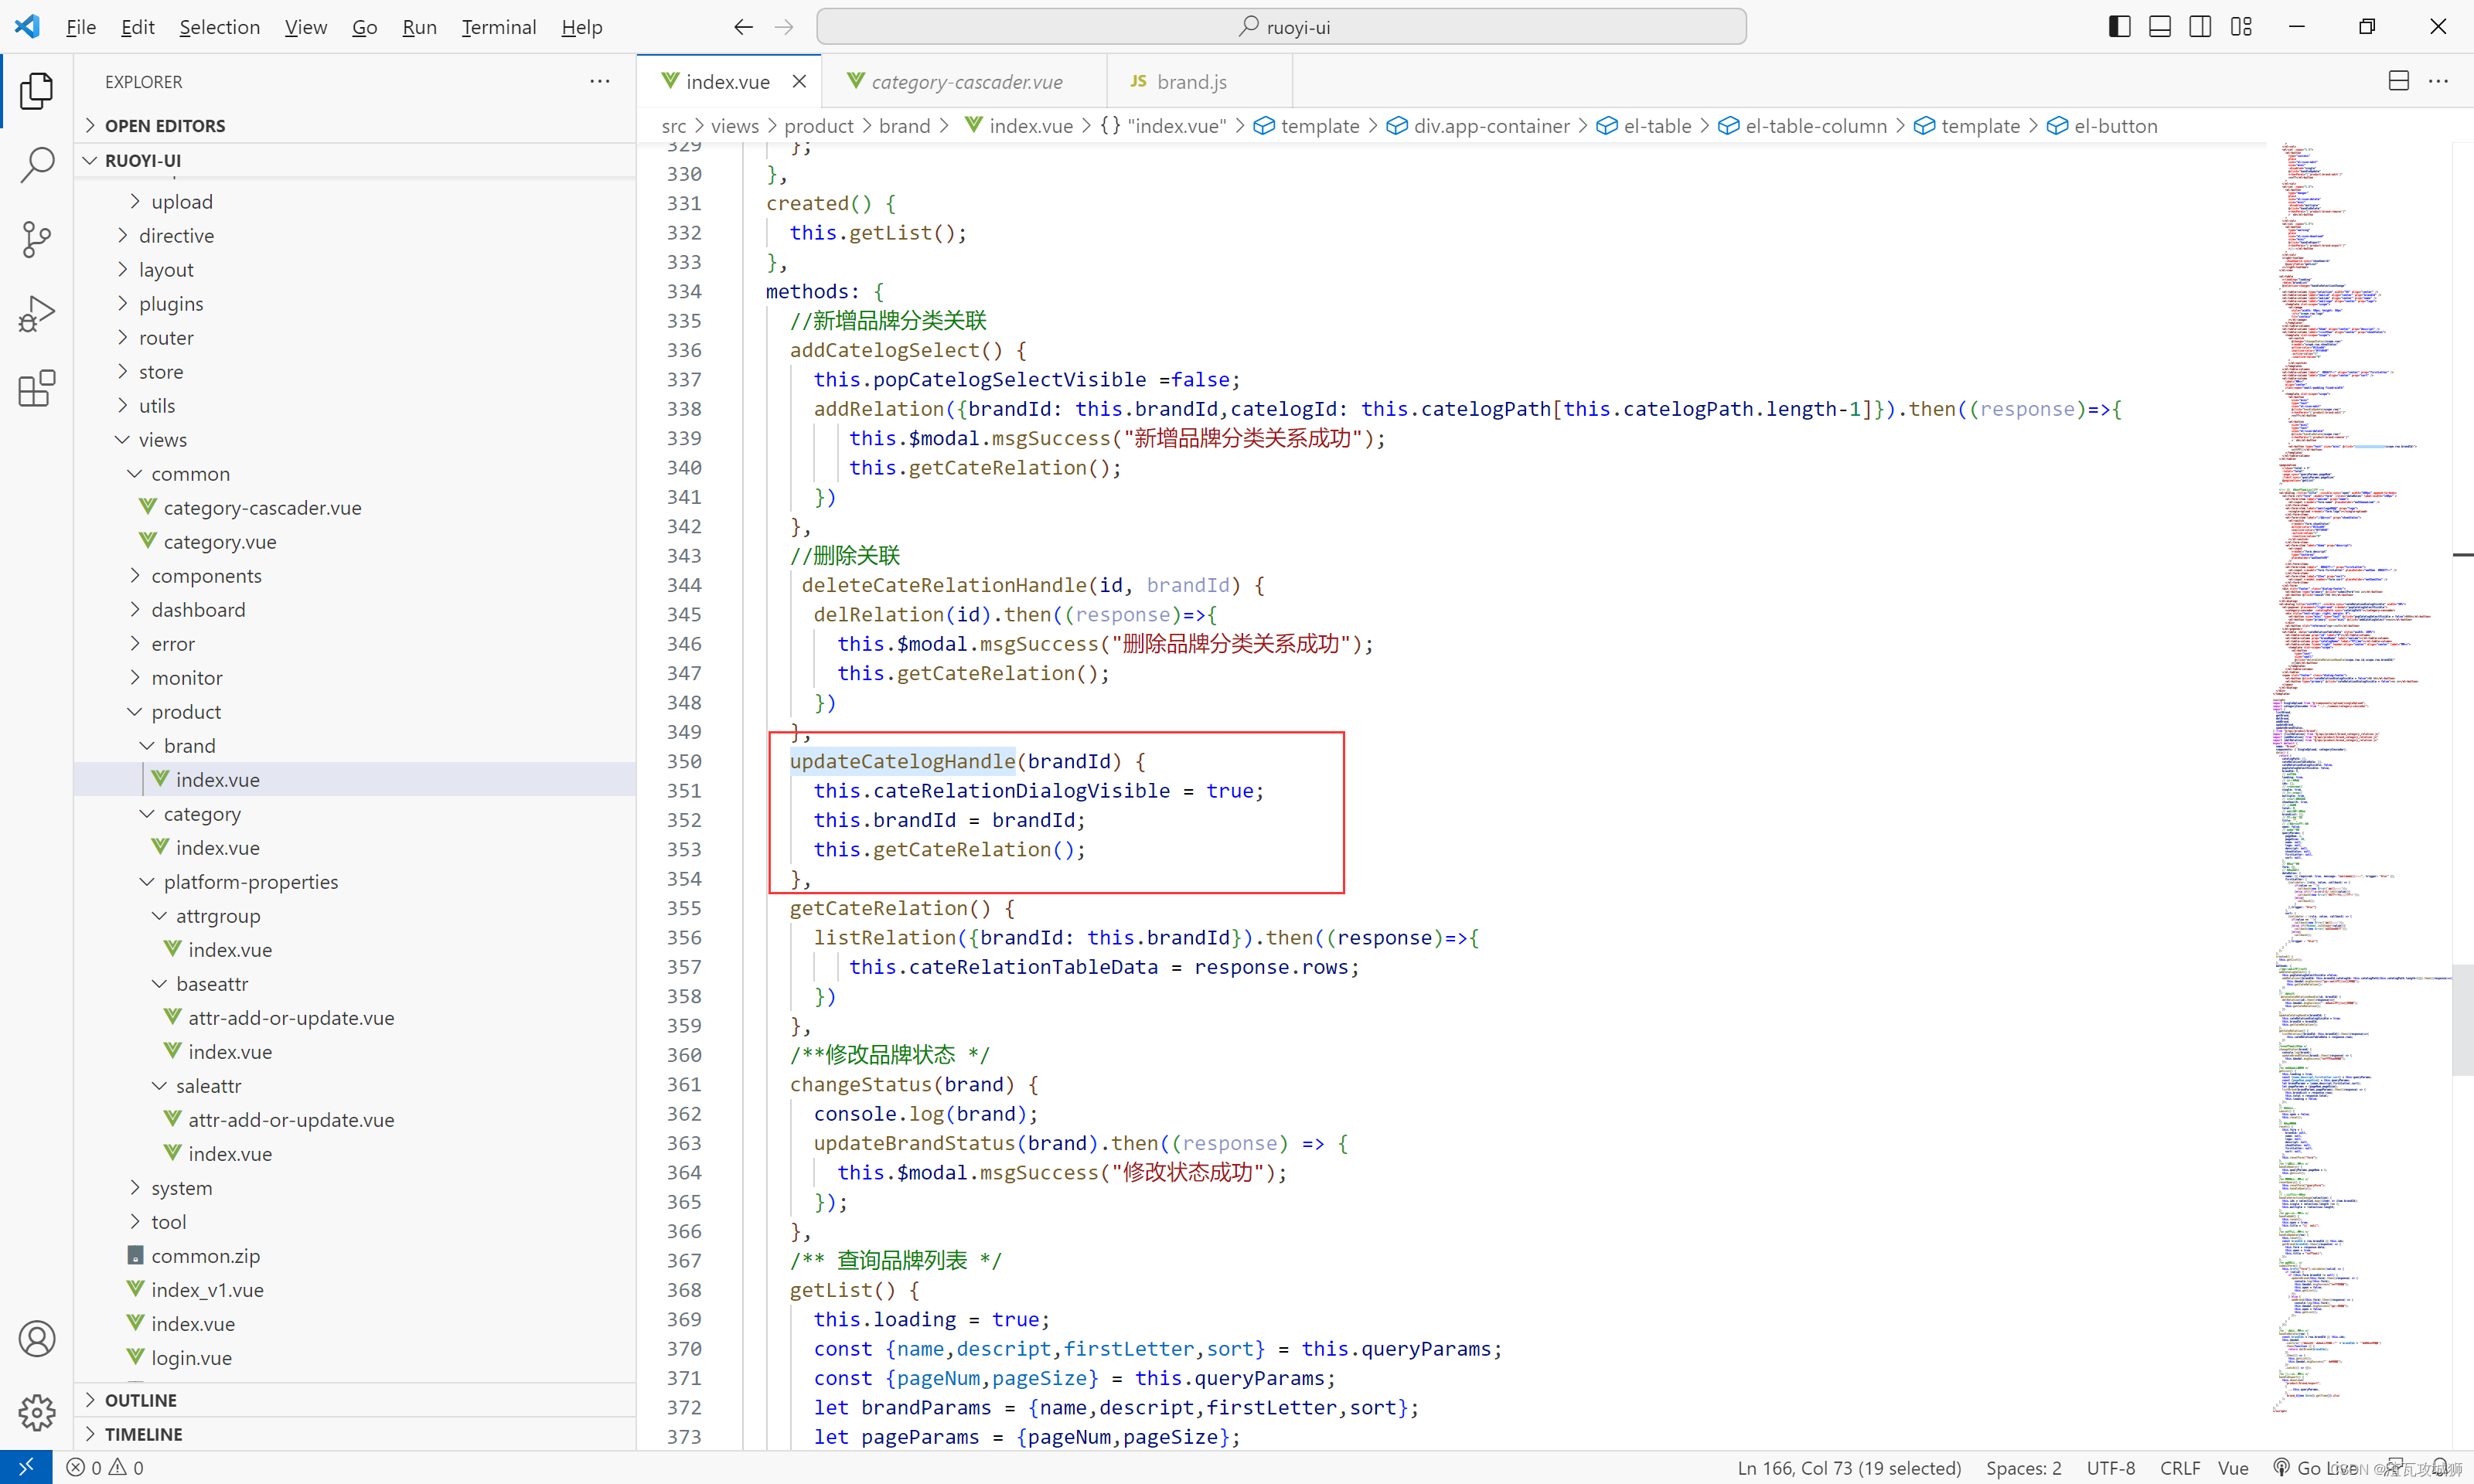 这个没什么好说的,不要修改,就是打开一下弹窗,并且记录当前那一行的品牌id,为以后查关联作铺垫
2. 获取关联列表
到这里,直接把查曾删都全部导入进来

 这个没什么好说的,主要是记得若依框架的查询接口,最终是以TableDataInfo对象返回的,所以得拿到里面的row才是真正的数据,这里的话不涉及到分页,所以拿到这个row真正的数据就行了。
//查询关联列表
    getCateRelation() {
      listRelation({brandId: this.brandId}).then((response)=>{
         this.cateRelationTableData = response.rows;
      })
    },
3. 新增关联
没什么好说的,传上品牌id和分类id即可
//新增品牌分类关联
    addCatelogSelect() {
      this.popCatelogSelectVisible =false;
      addRelation({brandId: this.brandId,catelogId: this.catelogPath[this.catelogPath.length-1]}).then((response)=>{
        if(response.code == 200){
          this.$modal.msgSuccess("新增品牌分类关系成功");
          this.getCateRelation();
        }else{
          this.$modal.confirm("新增品牌分类关系失败");
        }
      })
    }
4. 删除关联
也没什么好说的,直接传入关联id也就是当前这条记录的id即可
//删除关联
     deleteCateRelationHandle(id) {
      delRelation(id).then((response)=>{
        if(response.code == 200){
          this.$modal.msgSuccess("删除品牌分类关系成功");
          this.getCateRelation();
        }else{
          this.$modal.confirm("删除品牌分类关系失败");
        }
      })
    }
三、后端部分
1. 首先品牌本身
1.1 分页模糊查询
这个得话使用MP带的分页功能,因为若依自带的我还没弄明白。
需要注意的是要使用MP带的分页,就得配置一下,不然不起作用:
@Configuration
@EnableTransactionManagement
public class MyBatisPlusConfig {
    @Bean
    public MybatisPlusInterceptor mybatisPlusInterceptor() {
        MybatisPlusInterceptor interceptor = new MybatisPlusInterceptor();
        PaginationInnerInterceptor paginationInnerInterceptor = new PaginationInnerInterceptor();
        paginationInnerInterceptor.setOptimizeJoin(true);
        paginationInnerInterceptor.setDbType(DbType.MYSQL);
        paginationInnerInterceptor.setOverflow(true);
        interceptor.addInnerInterceptor(paginationInnerInterceptor);
        OptimisticLockerInnerInterceptor optimisticLockerInnerInterceptor = new OptimisticLockerInnerInterceptor();
        interceptor.addInnerInterceptor(optimisticLockerInnerInterceptor);
        return interceptor;
    }
}
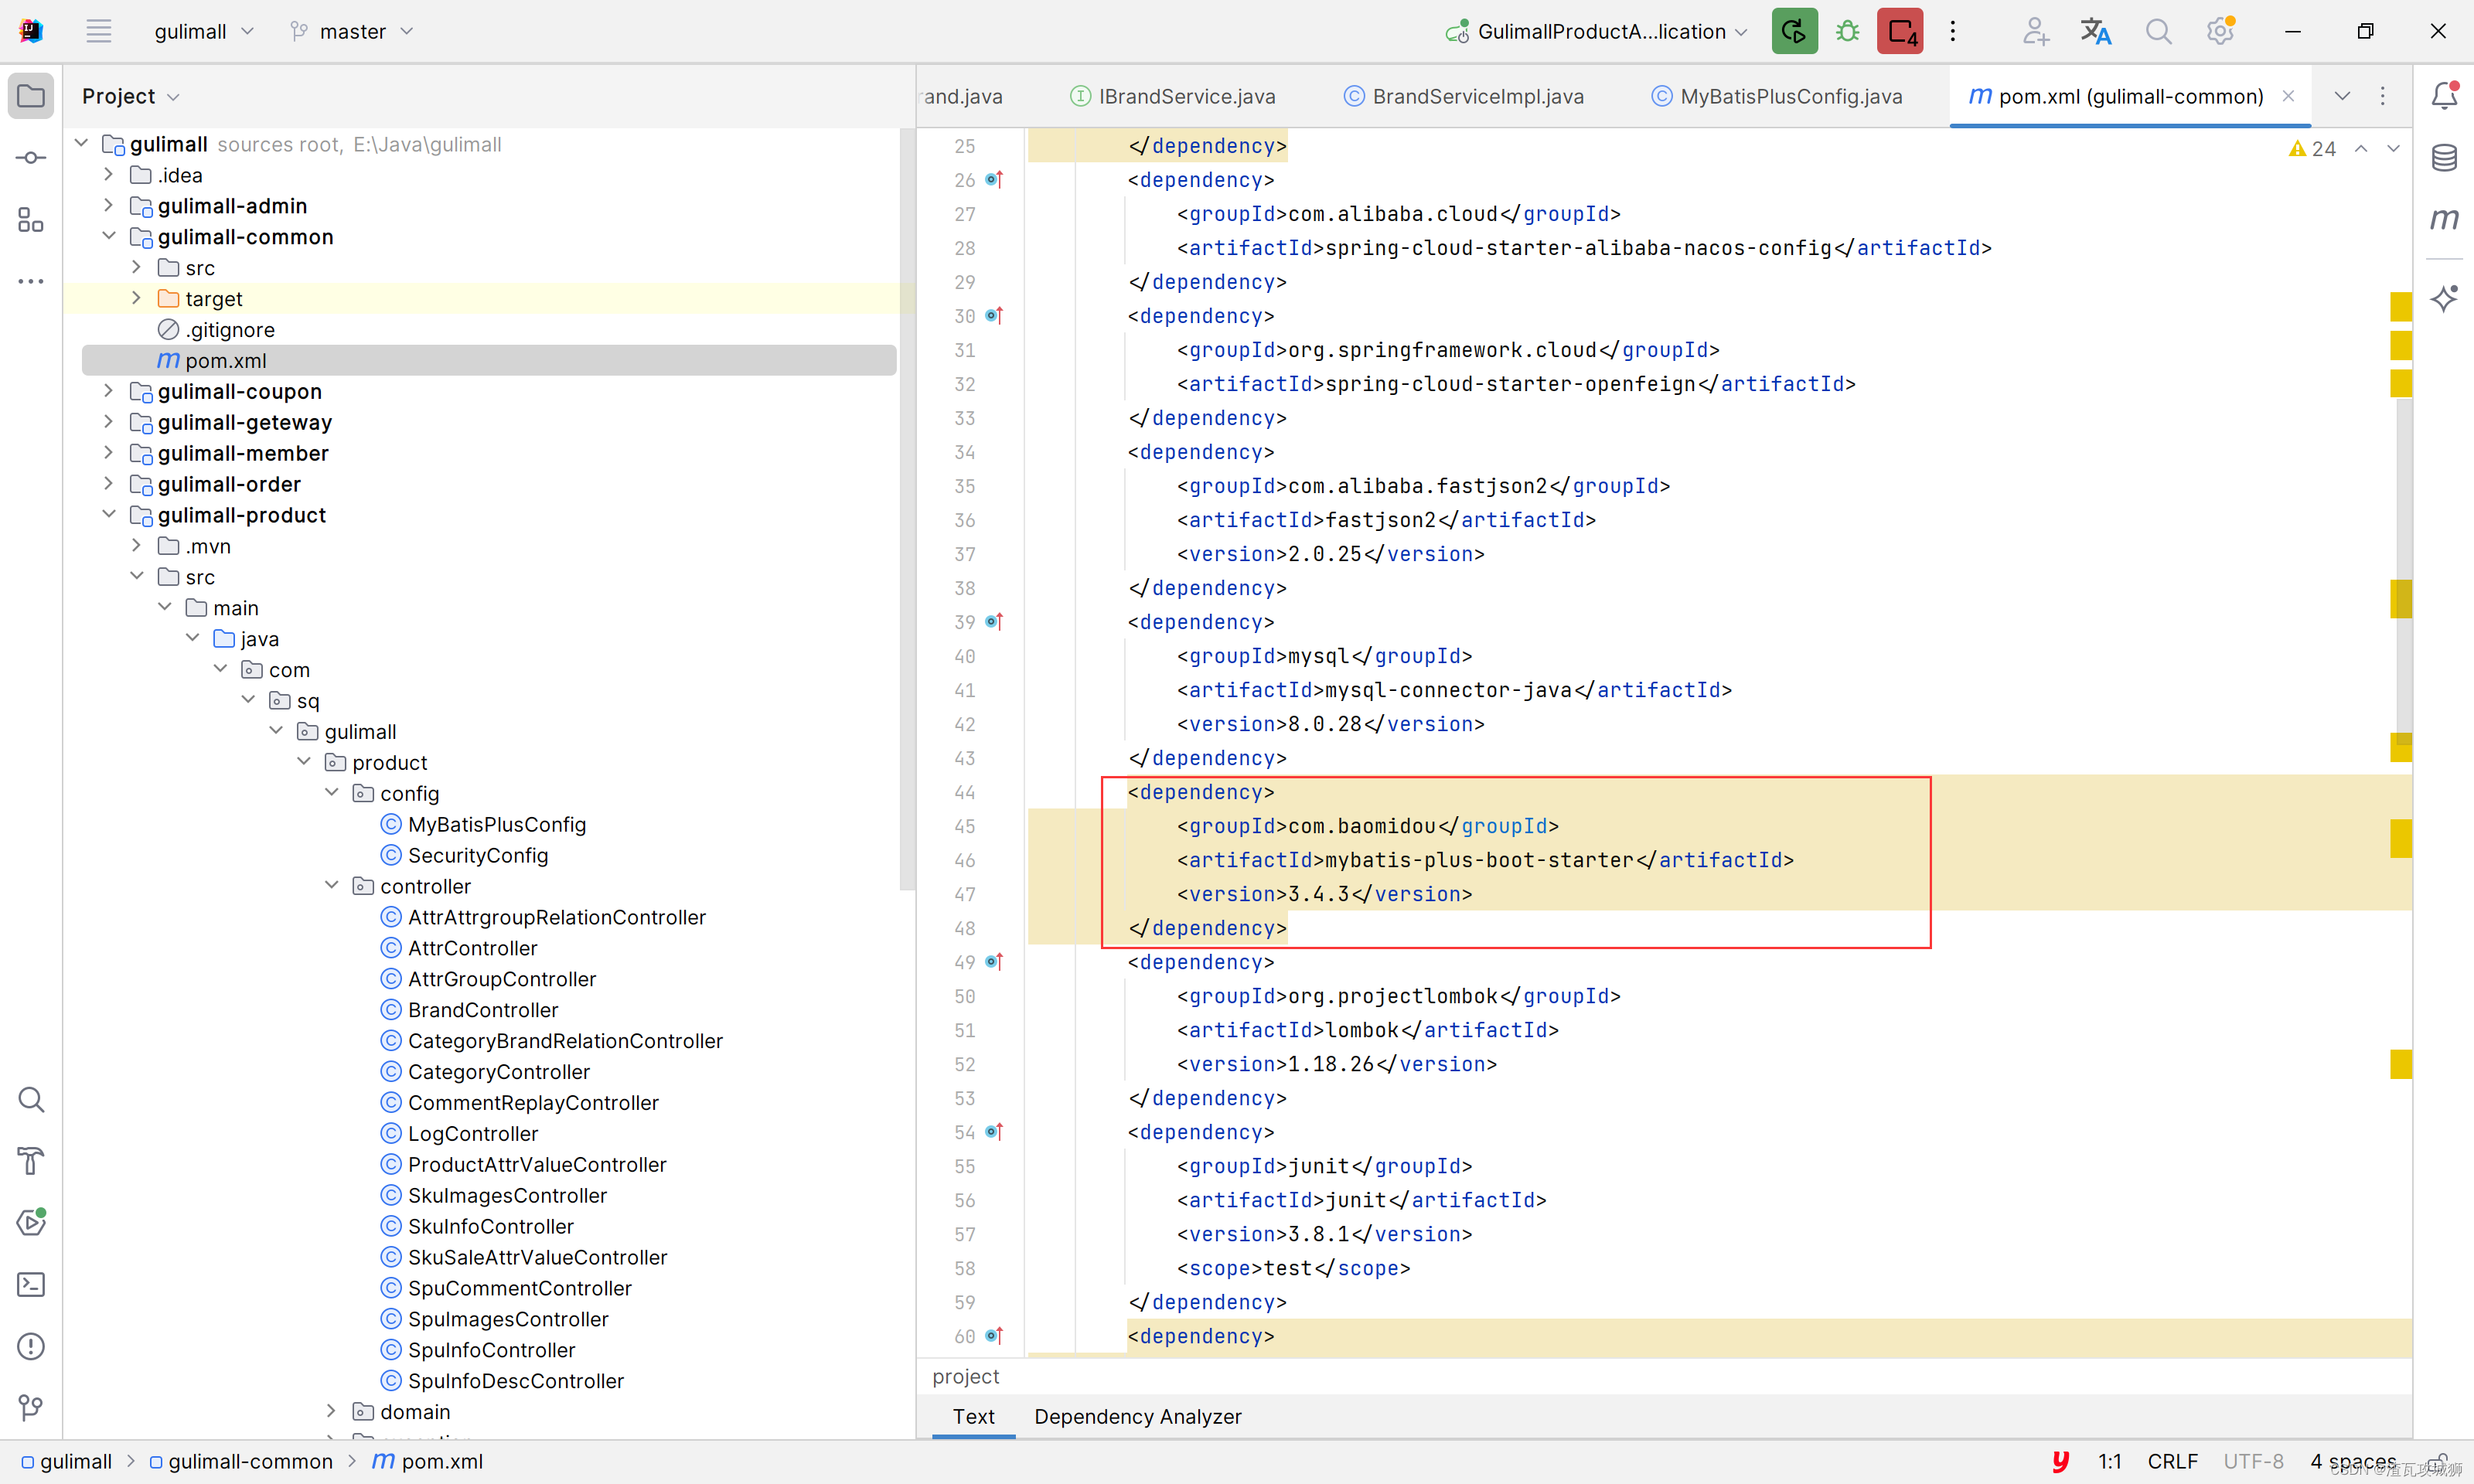
反正我用的3.4.3版本的MP是需要这个的:
 接口:
接口:
/**
 * 查询品牌列表
 */
@ApiOperation("查询品牌列表")
//@PreAuthorize("@ss.hasPermi('product:brand:list')")
@GetMapping("/list")
    public TableDataInfo list(@RequestParam("brand") String brandJson,
                              @RequestParam("pageParams") String pageParamsJson) {
        Brand brand = new Gson().fromJson(brandJson, Brand.class);
        PageParamsDto pageParamsDto = new Gson().fromJson(pageParamsJson, PageParamsDto.class);
        TableDataInfo tableDataInfo = brandService.pageList(brand,pageParamsDto);
        return tableDataInfo;
    }
当前端需要传递两个参数还需要是get请求的时候,后端参数就是用字符串接收,然后使用Gson类进行解析
前端部分接口:
// 查询品牌列表
export function listBrand(brandParams,pageParams) {
  return request({
    url: '/product/brand/list',
    method: 'get',
    params: {
      brand: JSON.stringify(brandParams),
      pageParams: JSON.stringify(pageParams)
    }
  })
}
后端接口实现:
/**
     * 分页并且模糊查询获取品牌列表
     *
     * @param brand
     * @param pageParamsDto
     * @return
     */
    @Override
    public TableDataInfo pageList(Brand brand, PageParamsDto pageParamsDto) {
        LambdaQueryWrapper<Brand> wrapper = new LambdaQueryWrapper<>();
        wrapper.like(StringUtils.hasText(brand.getName()),Brand::getName,brand.getName());
        wrapper.eq(brand.getFirstLetter()!=null,Brand::getFirstLetter,brand.getFirstLetter());
        wrapper.eq(brand.getSort()!=null,Brand::getSort,brand.getSort());
        wrapper.eq(Brand::getShowStatus,1);
        wrapper.like(StringUtils.hasText(brand.getDescript()),Brand::getDescript,brand.getDescript());
        Page<Brand> page = new Page<>(pageParamsDto.getPageNum(),pageParamsDto.getPageSize());
        page(page,wrapper);
        return new TableDataInfo(page.getRecords(),page.getTotal());
    }
1.2 删除需要注意关系也要删除
接口:
/**
     * 删除品牌
     */
    @ApiOperation("删除品牌")
    //@PreAuthorize("@ss.hasPermi('product:brand:remove')")
    @Log(title = "品牌", businessType = BusinessType.DELETE)
    @DeleteMapping("/{brandIds}")
    public AjaxResult remove(@PathVariable Long[] brandIds) {
        return toAjax(brandService.removeMore(Arrays.asList(brandIds)));
    }
实现:
@Override
    @Transactional
    public boolean removeMore(List<Long> list) {
        boolean remove = removeByIds(list);
        AtomicBoolean flag = new AtomicBoolean(true);
        list.stream().forEach(item->{
            LambdaQueryWrapper<CategoryBrandRelation> wrapper = new LambdaQueryWrapper<CategoryBrandRelation>().eq(CategoryBrandRelation::getBrandId, item);
            if(categoryBrandRelationService.list(wrapper).size()!=0){
                boolean remove1 = categoryBrandRelationService.remove(wrapper);
                if (!remove1) {
                    flag.set(false);
                }
            }
        });
        return remove&& flag.get();
    }
这里操作了多张表,加上@Transactional注解
注意这里是存在关系再去进行删除,而非对每个都去删除,当不存在的时候去删除就是false,最终就会返回false了,就出错了。
2. 关联那边的
2.1 查询列表
很简单,直接逆向的,因为不涉及分页模糊
/**
 * 查询品牌分类关联列表
 */
@ApiOperation("查询品牌分类关联列表")
//@PreAuthorize("@ss.hasPermi('product:relation:list')")
@GetMapping("/list")
    public TableDataInfo list(CategoryBrandRelation categoryBrandRelation) {
        startPage();
        List<CategoryBrandRelation> list = categoryBrandRelationService.list(new QueryWrapper<CategoryBrandRelation>(categoryBrandRelation));
        return getDataTable(list);
    }
2.2 新增
接口:
/**
     * 新增品牌分类关联
     */
    @ApiOperation("新增品牌分类关联")
    //@PreAuthorize("@ss.hasPermi('product:relation:add')")
    @Log(title = "品牌分类关联", businessType = BusinessType.INSERT)
    @PostMapping
    public AjaxResult add(@RequestBody CategoryBrandRelation categoryBrandRelation) {
        return categoryBrandRelationService.saveDetails(categoryBrandRelation);
    }
实现:
@Override
    public AjaxResult saveDetails(CategoryBrandRelation categoryBrandRelation) {
        //先判断当前的关联关系是否已存在
        LambdaQueryWrapper<CategoryBrandRelation> wrapper = new LambdaQueryWrapper<>(categoryBrandRelation);
        CategoryBrandRelation relation = getOne(wrapper);
        if (relation != null) {
            return AjaxResult.error("当前分类关联已存在");
        }
        Brand brand = brandService.getById(categoryBrandRelation.getBrandId());
        Category category = categoryService.getById(categoryBrandRelation.getCatelogId());
        categoryBrandRelation.setBrandName(brand.getName());
        categoryBrandRelation.setCatelogName(category.getName());
        boolean save = save(categoryBrandRelation);
        if (save) {
            return AjaxResult.success();
        }else{
            return AjaxResult.error();
        }
    }
这里要为两个冗余字段附上值,以便查询的时候不要多表去查,提高效率
2.3 删除
没什么好说的,利用传来的关联id集合,直接使用MP的批量删除就行了
/**
     * 删除品牌分类关联
     */
    @ApiOperation("删除品牌分类关联")
    //@PreAuthorize("@ss.hasPermi('product:relation:remove')")
    @Log(title = "品牌分类关联", businessType = BusinessType.DELETE)
    @DeleteMapping("/{ids}")
    public AjaxResult remove(@PathVariable Long[] ids) {
        return toAjax(categoryBrandRelationService.removeByIds(Arrays.asList(ids)));
    }
四、总结
前端就是引入那个分类关联相关的东西,该导入的组件导好,该导入的方法导好,把数据域配好,方法修改好就行了
总结前端开发步骤:
1. 导入好组件相关的基本构件,就是那三部分
别的组件、方法等
2. 看数据域是否要增添
3. 看方法是否要修改
这里后端的话:
1. 要知道分页模糊查询,这是最基本的,知道配合若依开发
2. 要对增删改接口有全局的意识,这点很重要,比如说增加的话,是不是需要额外的添加属性
删除的话,是不是还要删其他表,修改的话是不是也要动其他表
3. 了解若依的返回逻辑,对于增删改,若依是以toAjax()这种顶级封装的方式进行返回的,按照布尔值,选择是success还是error。而对于查询,是以TableDataInfo对象返回的,我们可以根据自己的需要,也可以改变这种方式,在service实现中来返回request对象,这样可以增加异常信息返回给前端。
