目录
- 0 相关资料:
- 1 Gradio介绍
- 2 环境搭建
- 3 Gradio+YOLOv5
- 4 Gradio+YOLOv7
- 5 源码解释
0 相关资料:
Gradio-YOLOv5-Det:https://gitee.com/CV_Lab/gradio_yolov5_det
【手把手带你实战YOLOv5-入门篇】YOLOv5 Gradio搭建Web GUI: https://www.bilibili.com/video/BV1LP411Z7nk
YOLOv5 Gradio 搭建Web GUI:https://blog.csdn.net/weixin_41987016/article/details/129891804
How to Load local YOLOv7 model using PyTorch torch.hub: https://androidkt.com/how-to-load-local-yolov7-model-using-pytorch-torch-hub/
1 Gradio介绍
官网:https://www.gradio.app/
Gradio是一个开源的Python库,用于构建机器学习演示和Web应用。内置丰富的组件,并且实现了前后端的交互逻辑,无需额外编写代码。
2 环境搭建
开始前,我用conda创建了虚拟环境yolo,然后安装了torch
这里还需要安装gradio
pip install gradio
还需要安装yolov5
git clone https://gitee.com/YFwinston/yolov5.git
cd yolov5
pip install -r requirements.txt
测试是否安装成功
python detect.py --source ./data/images/bus.jpg
yolov7的安装方法类似,就不重复了
3 Gradio+YOLOv5
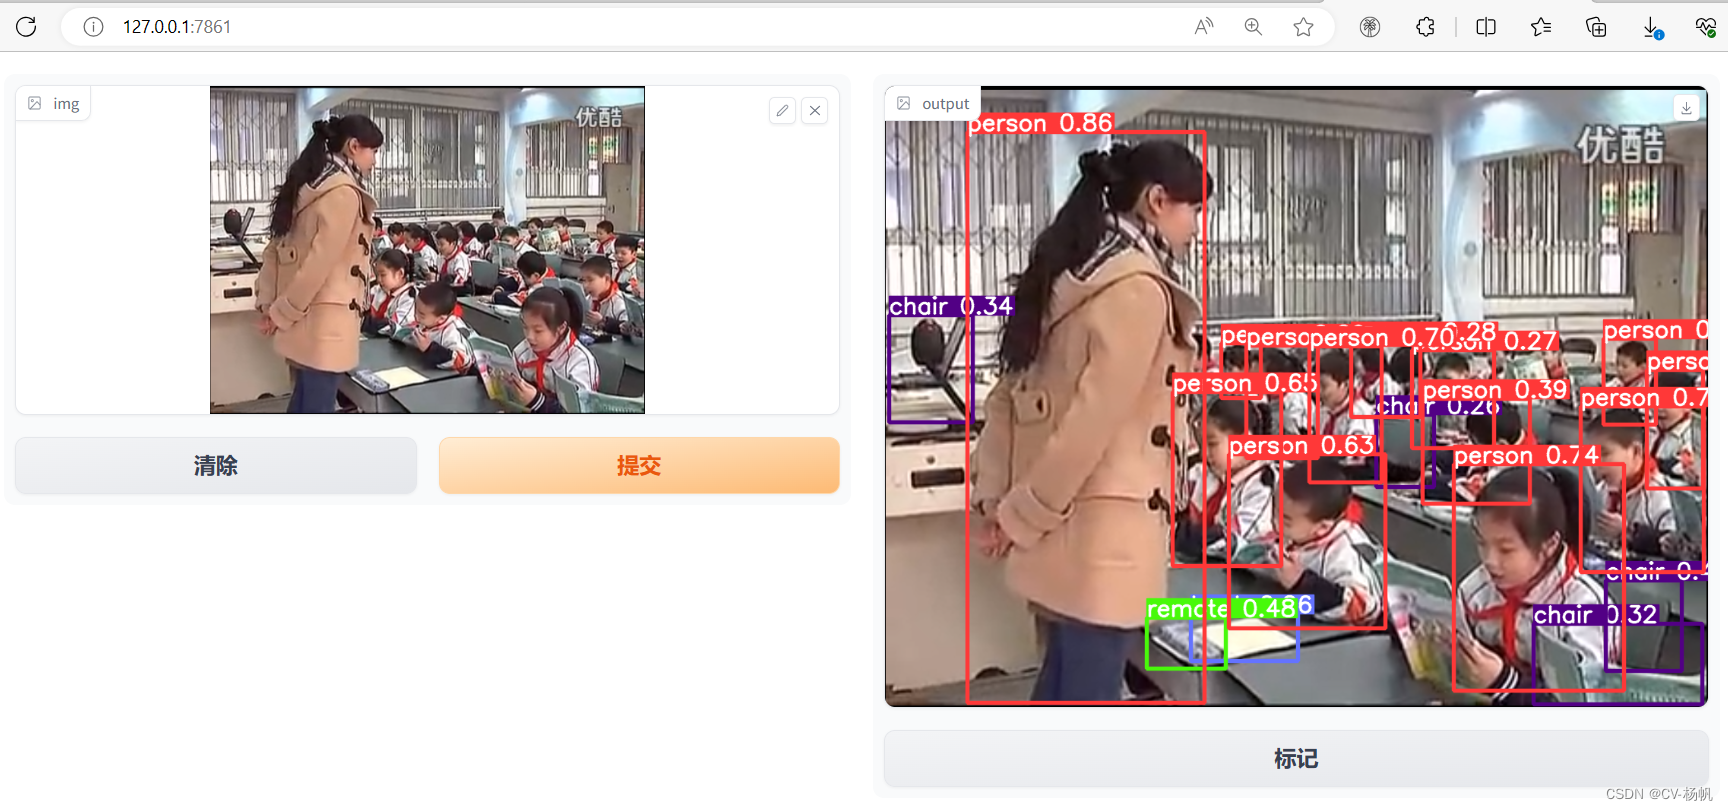
在yolov5的目录下,创建main.py,内容如下:
import torch
import gradio as gr

model = torch.hub.load("./","custom",path="yolov5s.pt",source="local")
gr.Interface(inputs=["image"],outputs=["image"],fn=lambda img:model(img).render()[0]).launch()
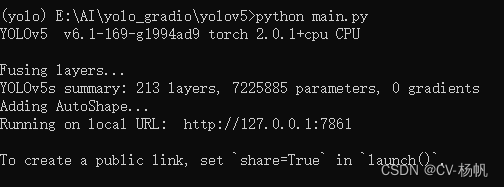
执行:
python main.py
4 Gradio+YOLOv7
在yolov7的目录下,创建main.py,内容如下:
import torch
import gradio as gr

model = torch.hub.load('./', 'custom', 'yolov7_HRW_4.2k.pt',force_reload=True, source='local',trust_repo=True)
gr.Interface(inputs=["image"],outputs=["image"],fn=lambda img:model(img).render()[0]).launch()
备注:这里我用的我自己训练的yolov7模型yolov7_HRW_4.2k.pt
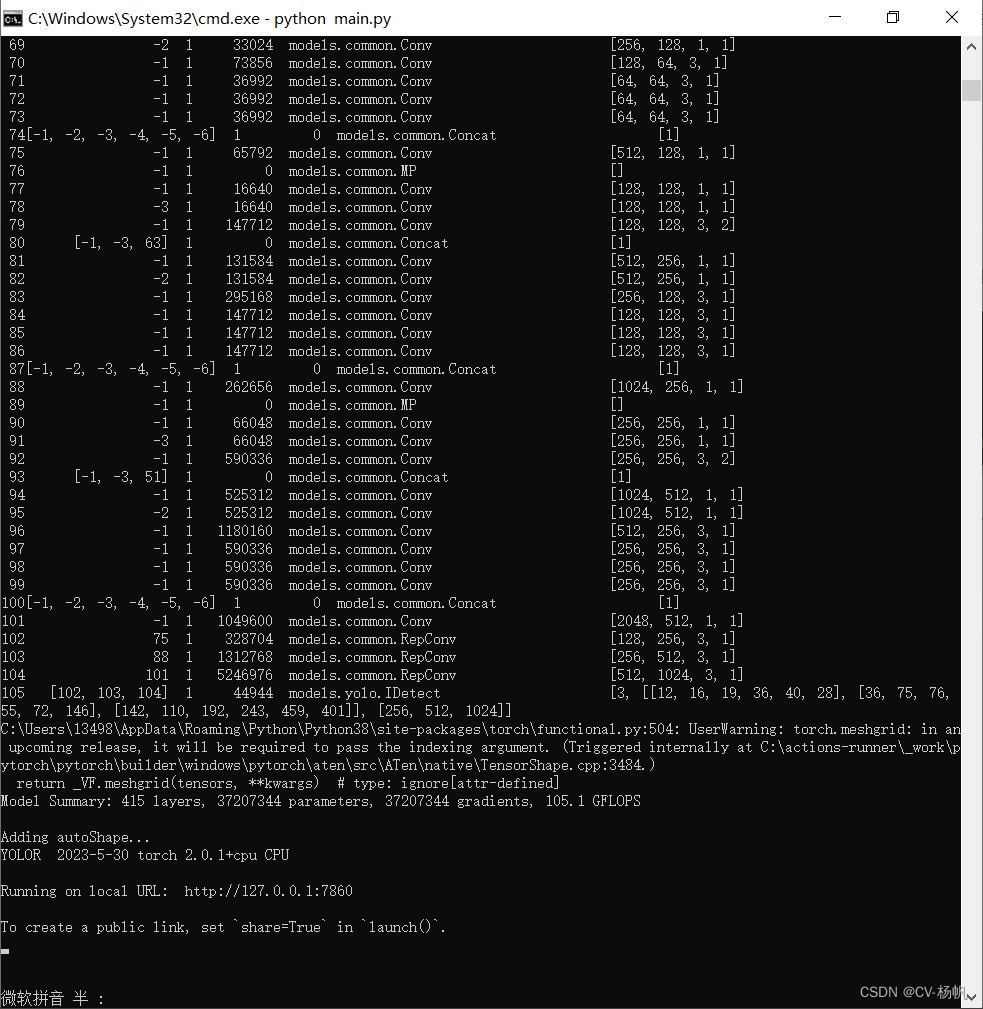
执行:
python main.py
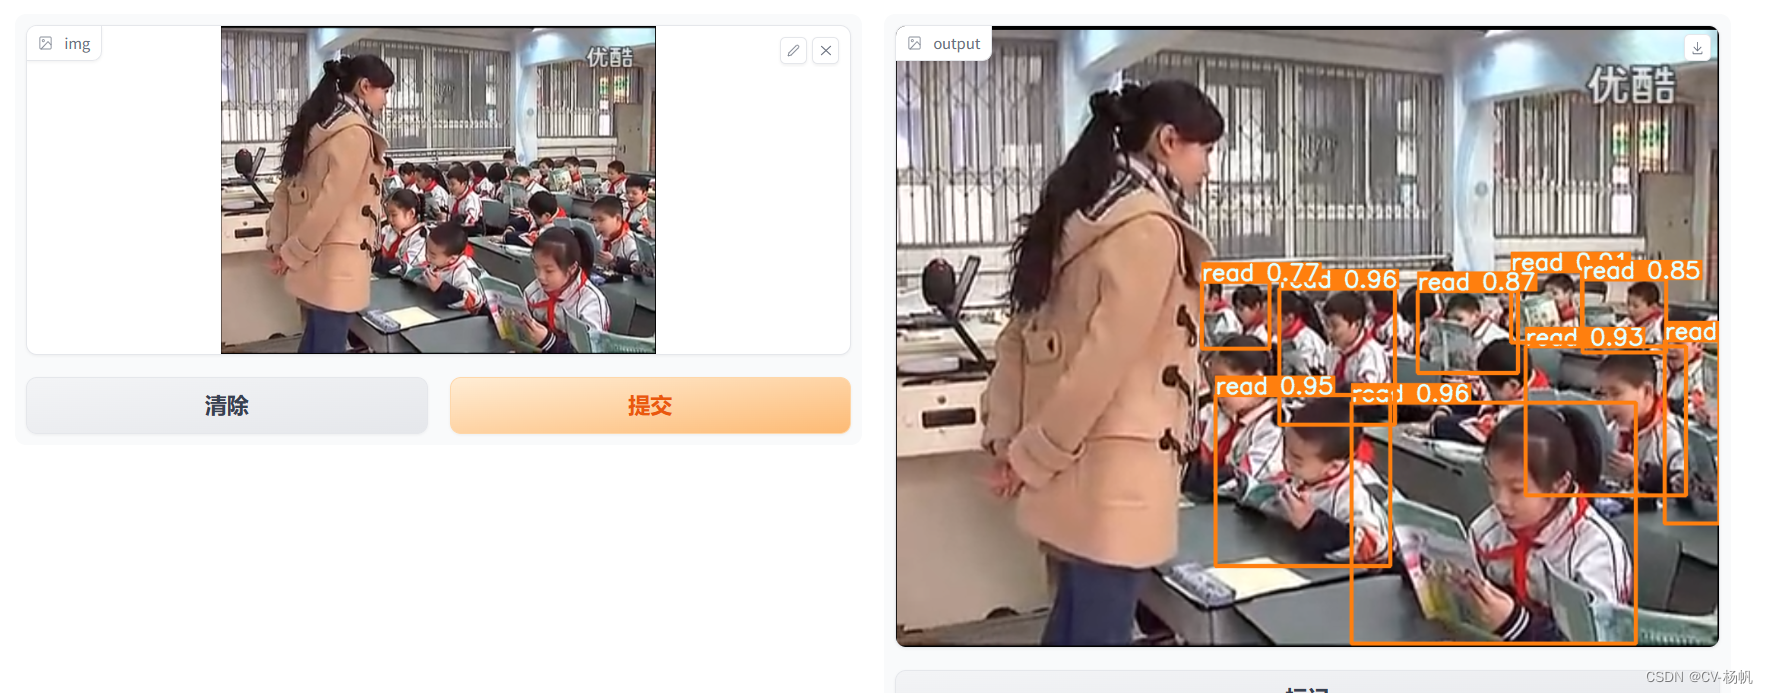
5 源码解释
import torch
import gradio as gr

model = torch.hub.load("./","custom",path="yolov5s.pt",source="local")
gr.Interface(inputs=["image"],outputs=["image"],fn=lambda img:model(img).render()[0]).launch()
当中的各个参数的意思如下:
-
torch.hub.load()是用于从 Torch Hub 加载预训练模型的函数。它的参数如下:"./":指定模型所在的本地文件路径。可以根据实际情况修改为正确的路径。"custom":指定要加载的模型的名称。path="yolov5s.pt":指定要加载的模型文件的路径。在此示例中,yolov5s.pt是模型文件的名称。source="local":指定模型文件的来源。在此示例中,模型文件是从本地加载的。
-
gr.Interface()是 Gradio 库中用于创建交互式界面的类。它的参数如下:inputs=["image"]:指定输入的类型和名称。在此示例中,输入是一个图像,名称为 “image”。outputs=["image"]:指定输出的类型和名称。在此示例中,输出是一个图像,名称为 “image”。fn=lambda img:model(img).render()[0]:指定要在用户输入上执行的函数。在此示例中,该函数接受一个图像作为输入,并使用加载的模型对图像进行推断,然后返回推断结果中的第一个图像。launch():启动 Gradio 接口,使其可以在浏览器中访问。
注意:以上是对参数的解释,实际上的参数值可能需要根据具体情况进行修改。
import torch
import gradio as gr

model = torch.hub.load('./', 'custom', 'yolov7_HRW_4.2k.pt',force_reload=True, source='local',trust_repo=True)
gr.Interface(inputs=["image"],outputs=["image"],fn=lambda img:model(img).render()[0]).launch()
当中的各个参数的意思如下:
torch.hub.load()是用于从 Torch Hub 加载预训练模型的函数。它的参数如下:"./":指定模型所在的本地文件路径。可以根据实际情况修改为正确的路径。"custom":指定要加载的模型的名称。"yolov7_HRW_4.2k.pt":指定要加载的模型文件的路径。在此示例中,yolov7_HRW_4.2k.pt是模型文件的名称。force_reload=True:强制重新加载模型文件,即使已经存在缓存的模型。source="local":指定模型文件的来源。在此示例中,模型文件是从本地加载的。trust_repo=True:信任 Torch Hub 仓库,以便加载模型文件。
gr.Interface()是 Gradio 库中用于创建交互式界面的类。它的参数如下:inputs=["image"]:指定输入的类型和名称。在此示例中,输入是一个图像,名称为 "image"。outputs=["image"]:指定输出的类型和名称。在此示例中,输出是一个图像,名称为 "image"。fn=lambda img:model(img).render()[0]:指定要在用户输入上执行的函数。在此示例中,该函数接受一个图像作为输入,并使用加载的模型对图像进行推断,然后返回推断结果中的第一个图像。launch():启动 Gradio 接口,使其可以在浏览器中访问。
注意:以上是对参数的解释,实际上的参数值可能需要根据具体情况进行修改。









![[数据分析与可视化] Python绘制数据地图4-MovingPandas入门指北](https://img-blog.csdnimg.cn/img_convert/3711cd7b2cb4b66cb768c04dd1e7b45f.png)

