第一步:引入jar包
<dependency>
      <groupId>com.alibaba.cloud</groupId>
      <artifactId>spring-cloud-starter-alibaba-nacos-config</artifactId>
</dependency>
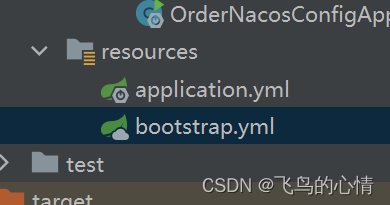
第二步:在resources下创建一个bootstrap.yml文档

bootstrap.yml中就不再指定项目名称了
spring:
  cloud:
    nacos:
      config:
        server‐addr: 127.0.0.1:8848
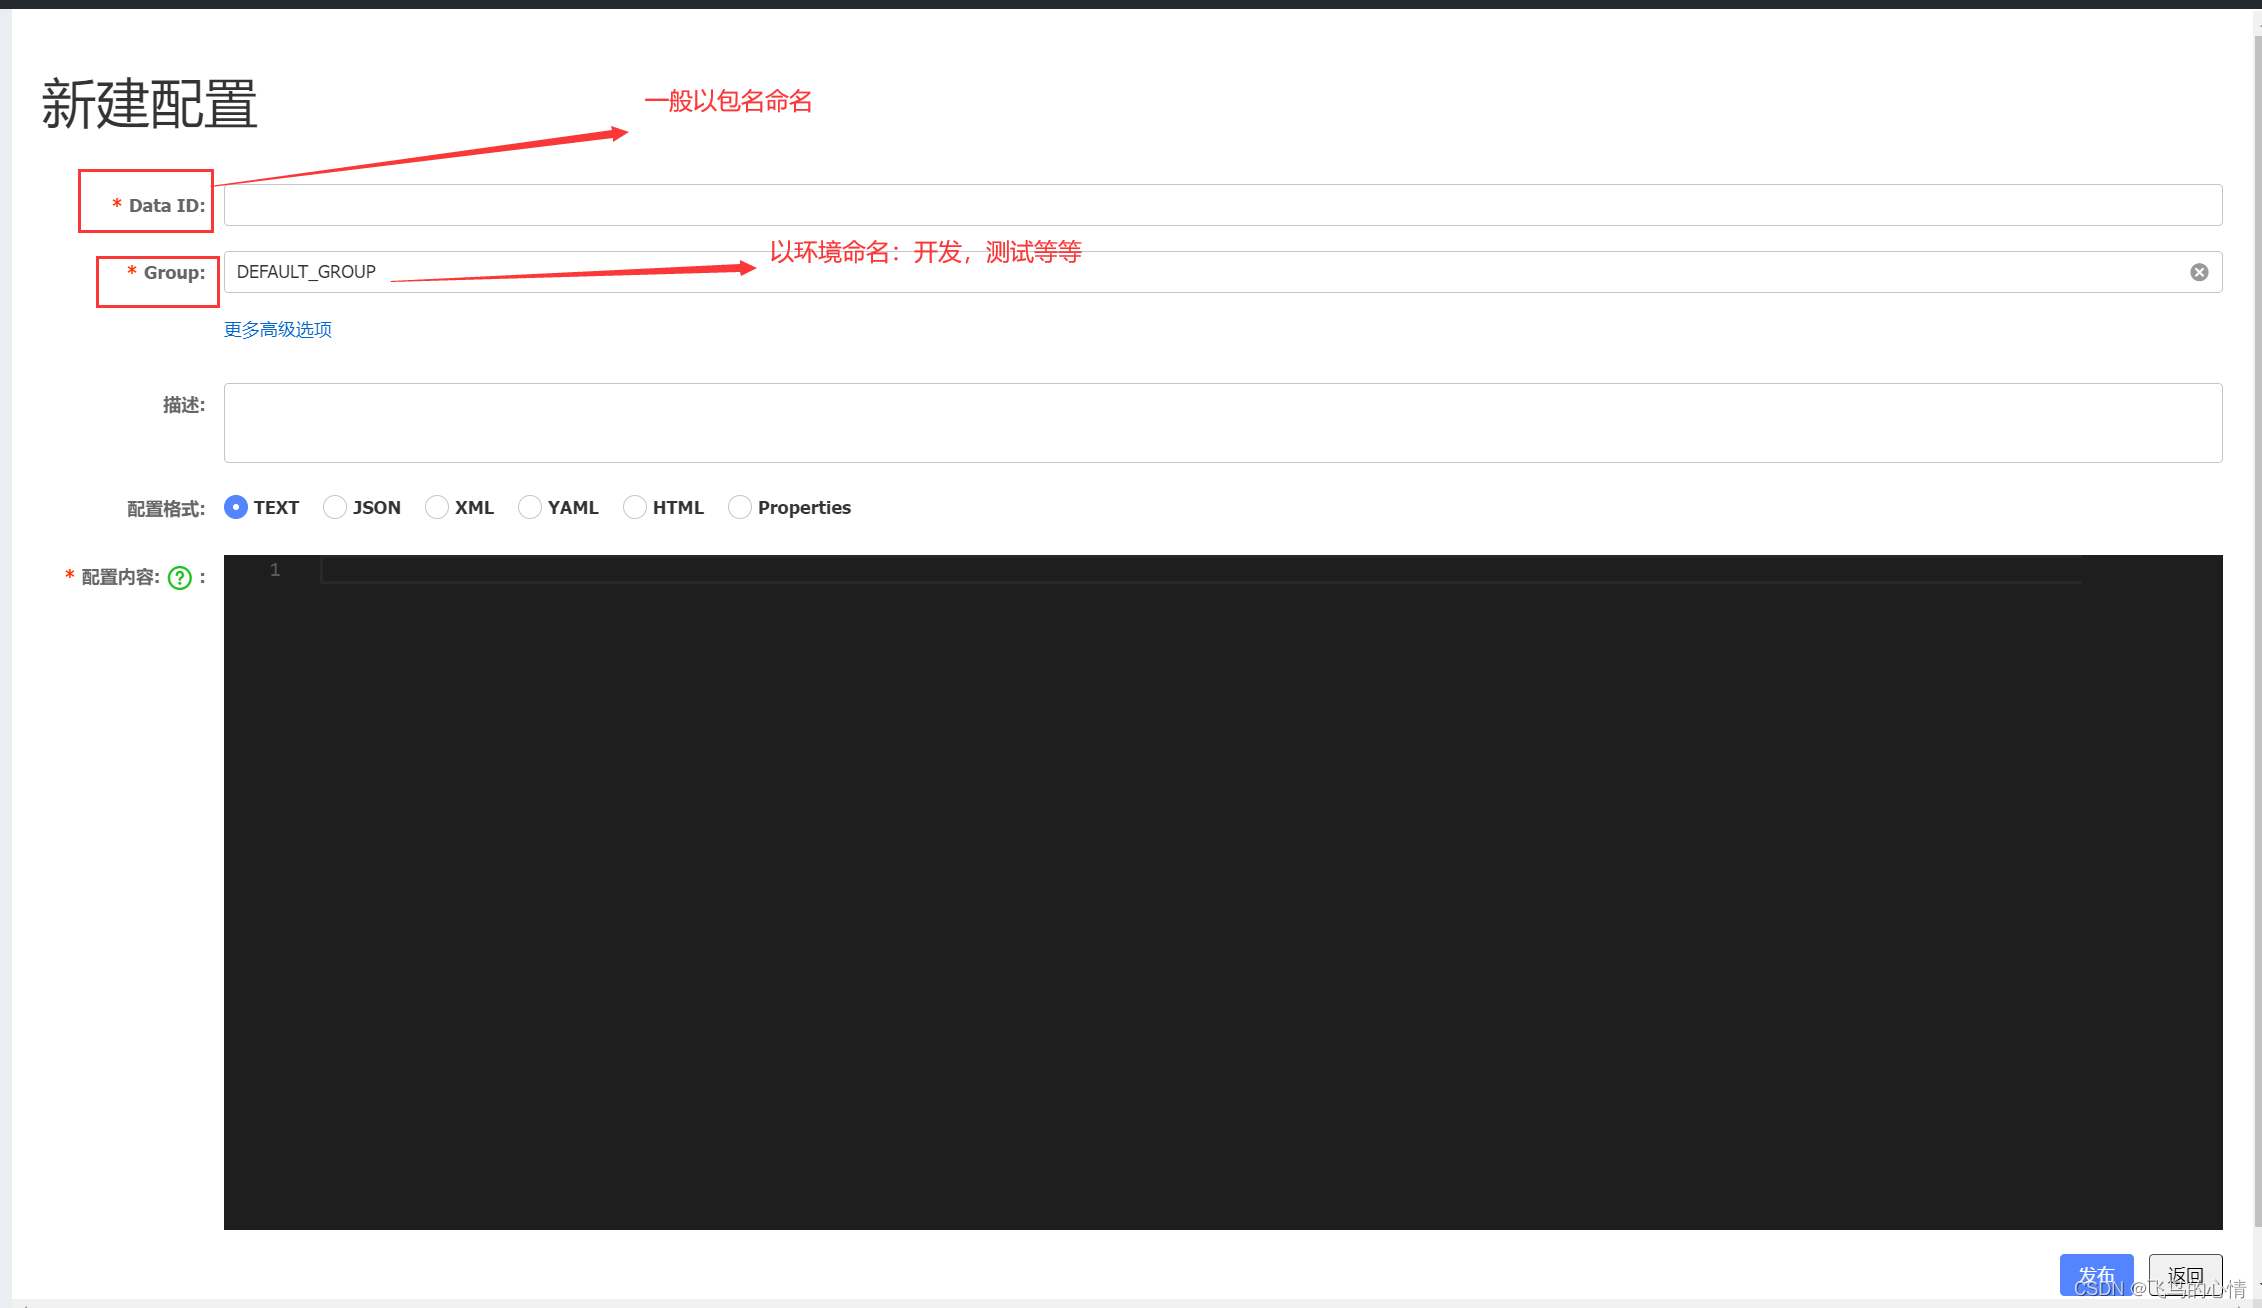
第三步: 在nacos控制台新增加一个配置
注意:Data ID和项目名称相同才能读取到配置,Data ID也输入order-nacos


添加属性
user.name: xss
user.age: 23
主启动类中加入:
@SpringBootApplication
@EnableFeignClients
public class OrderNacosConfigApplication {

    public static void main(String[] args) throws InterruptedException {
        ConfigurableApplicationContext run = SpringApplication.run(OrderNacosConfigApplication.class, args);

        while(true){
            String name = run.getEnvironment().getProperty("user.name");
            String age = run.getEnvironment().getProperty("user.age");
            System.out.println(name+"  "+age);
            TimeUnit.SECONDS.sleep(5);
        }

    }

}
-----------------------------------------------------------------------------------------------------------------------------
关于配置:
看看具体的设置:
bootstrap.yml中配置的是和配置中心有关的内容
比如:配置中心的地址,核心配置文件的扩展名等等。 bootstrap.yml
spring:
  cloud:
    nacos:
      config:
        server‐addr: 127.0.0.1:8848
        file-extension: yaml
        namespace: dev
        group: DEVELOP_GROUP
其中,file-extension默认是properties,如果nacos控制台中使用的是yaml这里一定要配置
注意:其中的file-extension: yaml只针对的是默认配置文件和profile文件
制定开发环境的配置文件 application.yml
server:
  port: 8086
spring:
  application:
    name: order-nacos
  cloud:
    nacos:
      server-addr: 127.0.0.1:8848
      discovery:
        username: nacos
        password: nacos
  profiles:
    active: dev
这里指定了 profiles.active=dev ,那么我们一定要创建一个DataId为 ${默认的配置文件名}-${环境标识}.${扩展后缀名} 的文件 如:order-nacos-dev.yaml
如果想引入多个配置文件:加extension或shared
bootstrap.yml配置如下:
注意:这里的配置文件可以是properties结尾的,也可以是yaml结尾的,不受 file-extension: yaml限制。
spring:
  cloud:
    nacos:
      config:
        server‐addr: 127.0.0.1:8848
        file-extension: yaml
        namespace: dev
        group: DEVELOP_GROUP
        shared-configs:
          - data-id: common.properties
            group: DEFAULT_GROUP
        extension-configs[0]:
            data-id: common02.properties
            group: DEFAULT_GROUP

配置文件的优先级:
profile>默认>extension>shared


![python——案例8:设定列表:listl=[0,1,2,3,4,5],求列表之和](https://img-blog.csdnimg.cn/e25ef78fe8274056a78e34cbc20d4cf8.png)


