目录
1.多对一
2.一对多
3.⼀对多延迟加载
4.逆向工程
1.多对一
多种⽅式,常⻅的包括三种:
- 第⼀种⽅式:⼀条SQL语句,级联属性映射。
- 第⼆种⽅式:⼀条SQL语句,association。
- 第三种⽅式:两条SQL语句,分步查询。(这种⽅式常⽤:优点⼀是可复⽤。优点⼆是⽀持懒加载。)
多对一 多个员工对应一个部门 查找部门的所有员工
 <resultMap id="queryEmployee" type="Employee">
        <id property="id" column="id"></id>
        <result property="empname" column="emp_name" ></result>
        <result property="emppwd" column="emp_pwd"></result>
        <association property="dept" fetchType="lazy" column="dept_tid"
                     select="com.hu.mapper.DeptMapper.queryDeptById" >
        </association>
        <!--  <collection property="dept"
                    fetchType="lazy"
                    select="com.hu.mapper.DeptMapper.selectByStep1"
                    column="dept_id"
        ></collection>-->

    </resultMap>
    <select id="getEmployeeList" resultMap="queryEmployee">
        select * from employee where dept_id=#{id};
    </select>
在association的column是第一步查出来的结果 然后传给下一步查询 查出来全部的empoyee 返回resultmap 然后使用返回的dept_tid 值 传给 第二步select
<resultMap id="queryDept" type="Dept">
    <id property="id" column="id"></id>
    <result property="deptname" column="dept_name"></result>
</resultMap>

    <select id="queryDeptById" resultMap="queryDept">
        select * from dept where id=#{id};
    </select>
要想⽀持延迟加载,⾮常简单,只需要在association标签中添加fetchType="lazy"即可。 修改StudentMapper.xml⽂件:
2.一对多
⼀对多的实现,通常是在⼀的⼀⽅中有List集合属性。
一为部门表是主表
 <resultMap id="queryDept" type="Dept">
         <id property="id" column="id"></id>
         <result property="deptname" column="dept_name"></result>
       <collection property="employeeList"
                  select="com.hu.mapper.EmployeeMapper.getEmployeeList"
                   column="id">
        </collection>
     </resultMap>
    <select id="selectByStep1"  resultMap="queryDept">
        select * from dept where id=#{id};
    </select>
员工表xml
<resultMap id="queryEmployee" type="Employee">
        <id property="id" column="id"></id>
        <result property="empname" column="emp_name" ></result>
        <result property="emppwd" column="emp_pwd"></result>
        <result property="deptid" column="dept_id"></result>

    </resultMap>
    <select id="getEmployeeList" resultMap="queryEmployee">
        select * from employee where dept_id=#{id};
    </select>
3.⼀对多延迟加载
⼀对多延迟加载机制和多对⼀是⼀样的。同样是通过两种⽅式:
第⼀种:fetchType="lazy"
第⼆种:修改全局的配置setting,lazyLoadingEnabled=true,如果开启全局延迟加载,想让某个 sql不使⽤延迟加载:fetchType="eager"
4.逆向工程
所谓的逆向⼯程是:根据数据库表逆向⽣成Java的pojo类,SqlMapper.xml⽂件,以及Mapper接⼝类 等。
使⽤这个插件的话,需要给这个插件配置哪些信息
pojo类名、包名以及⽣成位置。 SqlMapper.xml⽂件名以及⽣成位置。 Mapper接⼝名以及⽣成位置。 连接数据库的信息。 指定哪些表参与逆向⼯程。 ......
使用步骤
1.
第⼀步:基础环境准备
新建模块:RockyMaven
打包⽅式:jar
<groupId>com.rocky.mybatis</groupId>
    <artifactId>MyBatisDemo</artifactId>
    <version>1.0-SNAPSHOT</version>
    <packaging>jar</packaging>
第⼆步:在pom中添加逆向⼯程插件
 <!--配置MyBatis的逆向工程的插件-->
    <!--定制构建过程-->
    <build>
        <!--可配置多个插件-->
        <plugins>
            <!--其中的⼀个插件:mybatis逆向⼯程插件-->
            <plugin>
                <!--插件的GAV坐标-->
                <groupId>org.mybatis.generator</groupId>
                <artifactId>mybatis-generator-maven-plugin</artifactId>
                <version>1.4.2</version>
                <!--允许覆盖-->
                <configuration>
                    <overwrite>true</overwrite>
                </configuration>
                <!--插件的依赖-->
                <dependencies>
                    <!--mysql驱动依赖-->
                    <dependency>
                        <groupId>mysql</groupId>
                        <artifactId>mysql-connector-java</artifactId>
                        <version>8.0.33</version>
                    </dependency>
                </dependencies>
            </plugin>
        </plugins>
    </build>
第三步:配置generatorConfig.xml
该⽂件名必须叫做:generatorConfig.xml 该⽂件必须放在类的根路径下。
<?xml version="1.0" encoding="UTF-8"?>
<!DOCTYPE generatorConfiguration
        PUBLIC "-//mybatis.org//DTD MyBatis Generator Configuration 1.0//EN"
        "http://mybatis.org/dtd/mybatis-generator-config_1_0.dtd">
<generatorConfiguration>
    <!--
    targetRuntime有两个值:
    MyBatis3Simple:⽣成的是基础版,只有基本的增删改查。
    MyBatis3:⽣成的是增强版,除了基本的增删改查之外还有复杂的增删改查。
    -->
    <context id="DB2Tables" targetRuntime="MyBatis3">
        <!--防⽌⽣成重复代码-->
        <plugin type="org.mybatis.generator.plugins.UnmergeableXmlMappersPlugin"/>

        <commentGenerator>
            <!--是否去掉⽣成⽇期-->
            <property name="suppressDate" value="true"/>
            <!--是否去除注释-->
            <property name="suppressAllComments" value="true"/>
        </commentGenerator>
        <!--连接数据库信息-->
        <jdbcConnection driverClass="com.mysql.cj.jdbc.Driver"
                        connectionURL="jdbc:mysql://localhost:3306/test"
                        userId="root"
                        password="renyanlei115">
        </jdbcConnection>
        <!-- ⽣成pojo包名和位置 -->
        <javaModelGenerator targetPackage="com.rocky.mybatis.pojo" targetProject="src/main/java">
            <!--是否开启⼦包-->
            <property name="enableSubPackages" value="true"/>
            <!--是否去除字段名的前后空⽩-->
            <property name="trimStrings" value="true"/>
        </javaModelGenerator>
        <!-- ⽣成SQL映射⽂件的包名和位置 -->
        <sqlMapGenerator targetPackage="com.rocky.mybatis.mapper" targetProject="src/main/resources">
            <!--是否开启⼦包-->
            <property name="enableSubPackages" value="true"/>
        </sqlMapGenerator>
        <!-- ⽣成Mapper接⼝的包名和位置 -->
        <javaClientGenerator
                type="xmlMapper"
                targetPackage="com.rocky.mybatis.mapper"
                targetProject="src/main/java">
            <property name="enableSubPackages" value="true"/>
        </javaClientGenerator>
        <!-- 表名和对应的实体类名-->
        <table tableName="t_car" domainObjectName="Car"/>
    </context>
</generatorConfiguration>
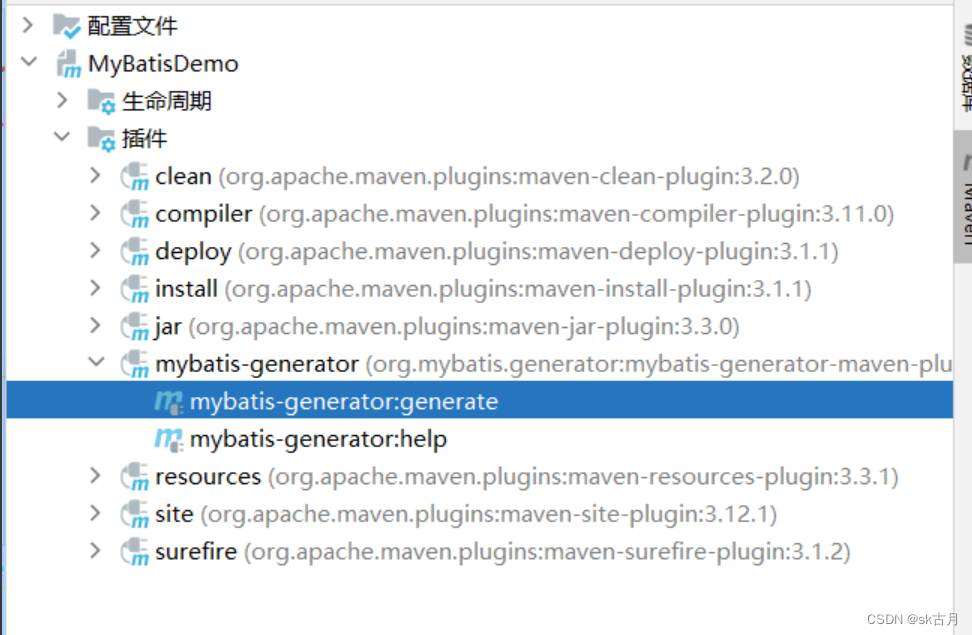
第四步:运⾏插件
五测试逆向工程生成的是否好用
Example类的作用:一个用于筛选复杂条件的类,Example类中查询方法的介绍。
导入核心配置文件
QBC编程
  @Test
    public void selectTest() throws IOException {
        SqlSessionFactoryBuilder sqlSessionFactoryBuilder = new SqlSessionFactoryBuilder();
        SqlSessionFactory build = sqlSessionFactoryBuilder.build(Resources.getResourceAsStream("mybatis-config.xml"));
        SqlSession sqlSession = build.openSession(true);
        CarMapper mapper = sqlSession.getMapper(CarMapper.class);

        //创建对象条件对象
        CarExample carExample = new CarExample();
        // carExample.createCriteria(); 创建查询条件 链式编程 QBC风格
        CarExample.Criteria haha = carExample.createCriteria().andBrandEqualTo("宝马E");
        //执行查询
        List<Car> cars = mapper.selectByExample(carExample);
       cars.forEach(new Consumer<Car>() {
           @Override
           public void accept(Car car) {
               System.out.println(car);
           }
       });
        sqlSession.close();

    }
