canvas实现图片平移,缩放的例子

news2024/11/16 0:45:25

最近有个水印预览的功能,需要用到canvas 绘制,canvas用的不是很熟,配合chatAI 完成功能。
效果如下
在这里插入图片描述

代码如下

原先配置是响应式的,提出来了就不显示操作了,模拟值都写死的 界面给大家参考阅读。

<!DOCTYPE html>
<html>

<head>
    <title>Canvas :平移和缩放</title>
</head>

<body>
    <div style="width:580px; height:440px">
        <canvas id="canvas"></canvas>
    </div>
    <script>
        class PreviewImage {
            el = null
            ctx = null
            image = null
            scale = 1
            translateX = 0
            translateY = 0
            dragging = 0
            drag_sx = 0
            drag_sy = 0
            ratio = window.devicePixelRatio || 1

            constructor(el, options = {}) {
                this.el = el
                this.options = options
                this.init()
            }

            init() {
                const { el, w, h } = this
                this.ctx = el.getContext('2d')
                el.width = w
                el.height = h
                this.createImage()
                this.bindEvent()
            }

            update(options) {
                this.options = options
                this.createImage()
            }

            bindEvent() {
                const { el } = this
                this.mousedownBound = this.mousedown.bind(this)
                this.mousemoveBound = this.mousemove.bind(this)
                this.mouseupBound = this.mouseup.bind(this)
                this.wheelBound = this.wheel.bind(this)

                el.addEventListener('mousedown', this.mousedownBound, false)
                document.addEventListener('mouseup', this.mouseupBound, false)
                document.addEventListener('mousemove', this.mousemoveBound, false)
                el.addEventListener('wheel', this.wheelBound, false)
            }

            mousedown(evt) {
                const { clientX, clientY } = evt
                this.drag_sx = clientX
                this.drag_sy = clientY
                this.dragging = 1
                document.body.style.cursor = 'move'
                document.body.style.userSelect = 'none'
            }

            mouseup() {
                this.dragging = 0
                document.body.style.cursor = 'auto'
                document.body.style.userSelect = 'auto'
            }

            mousemove(evt) {
                const { clientX, clientY } = evt
                const { dragging, drag_sx, drag_sy } = this
                if (!dragging) return

                const dx = clientX - drag_sx
                const dy = clientY - drag_sy
                this.drag_sx = clientX
                this.drag_sy = clientY
                this.translate(dx, dy)
            }

            translate(dx, dy) {
                const { image } = this
                const { translateX, translateY } = this
                const { width, height } = image
                const x = translateX + dx
                const y = translateY + dy
                this.translateX = Math.min(Math.max(x, width * 0.1 - width), width - width * 0.1)
                this.translateY = Math.min(Math.max(y, height * 0.1 - height), height - height * 0.1)
                this.draw()
            }

            wheel(evt) {
                evt.preventDefault()
                const { el } = this
                const { clientX, clientY, deltaY } = evt
                const x = clientX - el.offsetLeft
                const y = clientY - el.offsetTop

                const dampeningFactor = 0.05
                const minScale = 0.3
                const maxScale = 1.5
                const scale = 1.0 + dampeningFactor * (deltaY > 0 ? -1 : 1)
                const currentScale = Math.min(Math.max(this.scale * scale, minScale), maxScale)

                this.zoom(currentScale, x, y)
            }

            zoom(s, x, y) {
                const { translateX, translateY } = this

                if (s < 1.02 && s > 0.98) s = 1

                const offsetX = (x - translateX) / s
                const offsetY = (y - translateY) / s
                this.translateX = x - offsetX * s
                this.translateY = y - offsetY * s
                this.scale = s
                this.draw()
            }

            get w() {
                return this.el.parentNode?.offsetWidth || 0
            }

            get h() {
                return this.el.parentNode?.offsetHeight - (30 + 45) || 0
            }

            async createImage() {
                const { ratio, options } = this
                try {
                    const img = await this.loadImage(options.src)
                    img.width = options.imageWidth
                    img.height = options.imageHeight
                    this.image = img
                    this.draw()
                } catch (error) {
                    console.error(error)
                }
            }

            wheel(evt) {
                evt.preventDefault()
                const { el } = this
                const { clientX, clientY, deltaY } = evt
                const x = clientX - el.offsetLeft
                const y = clientY - el.offsetTop

                const dampeningFactor = 0.05
                const minScale = 0.3
                const maxScale = 1.5
                const scale = 1.0 + dampeningFactor * (deltaY > 0 ? -1 : 1)
                const currentScale = Math.min(Math.max(this.scale * scale, minScale), maxScale)

                this.zoom(currentScale, x, y)
            }

            zoom(s, x, y) {
                const { translateX, translateY, options, ratio } = this

                if (s < 1.02 && s > 0.98) s = 1

                const offsetX = (x - translateX) / s
                const offsetY = (y - translateY) / s
                this.translateX = x - offsetX * s
                this.translateY = y - offsetY * s
                this.image.width = options.imageWidth * ratio * s
                this.image.height = options.imageHeight * ratio * s
                this.scale = s
                this.draw()
            }

            draw() {
                const { ctx, ratio, w, h, image, translateX, translateY, scale } = this
                ctx.clearRect(0, 0, w, h)
                this.drawBackground()
                ctx.save()
                ctx.translate(translateX, translateY)
                const imageX = (w - image.width * scale * ratio) / 2
                const imageY = (h - image.height * scale * ratio) / 2
                ctx.drawImage(image, imageX, imageY, image.width * scale, image.height * scale)
                this.drawTexts()
                ctx.restore()
                this.scaling()
            }

            drawTexts() {
                const { ctx, ratio, image, options, scale, w, h } = this
                const { texts, textStyles } = options
                const { fontSize, fontFamily, fontColor, textAlign = 'center', lineX, lineY, lineAngle, textBaseline = 'top' } = textStyles
                ctx.font = `${fontSize * ratio * scale}px ${fontFamily || 'sans-serif'}`
                ctx.fillStyle = fontColor || '#303133'
                ctx.textAlign = textAlign
                ctx.textBaseline = textBaseline

                const text = this.transformText(texts)
                const imageX = (w - image.width * scale * ratio) / 2
                const imageY = (h - image.height * scale * ratio) / 2
                const posx = imageX + image.width * scale * ratio * (lineX / 100)
                const posy = imageY + image.height * scale * ratio * (lineY / 100)
                const angle = (lineAngle / 180) * Math.PI
                ctx.fillText(text, posx, posy)

            }

            scaling() {
                const { ctx, w, scale } = this
                if (scale < 1.03 && scale > 0.97) return
                ctx.save()
                ctx.font = `12px  xsans-serif`
                ctx.fillStyle = '#303133'
                ctx.textAlign = 'center'
                ctx.textBaseline = 'top'
                const text = `${(scale * 100).toFixed(0)}%`
                ctx.fillText(text, w - ctx.measureText(text).width + 10, 10)
                ctx.restore()
            }

            loadImage(url) {
                return new Promise((resolve, reject) => {
                    const image = new Image()
                    image.onload = () => {
                        resolve(image)
                    }
                    image.onerror = () => {
                        reject(new Error('无法加载图片: ' + url))
                    }
                    image.src = url
                })
            }

            drawBackground() {
                const { ctx, ratio, w, h } = this
                const posx = (0 / 100) * w * ratio
                const posy = (0 / 100) * h * ratio
                const width = (100 / 100) * w * ratio
                const height = (100 / 100) * h * ratio
                ctx.beginPath()
                ctx.fillStyle = '#F2F6FC'
                ctx.fillRect(posx, posy, width, height)
            }

            transformText(arr) {
                arr = Array.isArray(arr) ? arr : [arr]
                const keywods = {
                    '${timestamp}': new Date().toLocaleString(),
                    '${consumerName}': '消费者名称',
                    '${terminalIP}': '127.0.0.1',
                }
                return arr.join('-').replace(/\$\{timestamp\}|\$\{consumerName\}|\$\{terminalIP\}/g, matched => keywods[matched])
            }
            destroy() {
                this.el.removeEventListener('mousedown', this.mousedownBound)
                document.removeEventListener('mousemove', this.mousemoveBound)
                document.removeEventListener('mouseup', this.mouseupBound)
                this.el.removeEventListener('wheel', this.wheelBound)
            }
        }


        var dialog = {
            visible: false,
            predefine: ['#ff4500', '#ff8c00', '#ffd700', '#90ee90', '#00ced1', '#1e90ff', '#c71585', '#cd5c5c', '#000000', '#ffffff'],
            title: '新增',
            controlled_width: 800,
            controlled_height: 600,
            form: {
                name: '',
                content: ['127.0.0.1'],
                lineX: 50,
                lineY: 10,
                lineAngle: 0,
                fontSize: 25,
                fontColor: '#ff4500',
                fontFamily: '',
            },
        }
        var picture = {
            images: ['https://images.pexels.com/photos/1784914/pexels-photo-1784914.jpeg?auto=compress&cs=tinysrgb&w=1600'],
            active: 0,
        }
        const { controlled_width, controlled_height, form } = dialog
        const { fontSize, fontColor, fontFamily, lineX, lineY, lineAngle } = form
        const { images, active } = picture
        const textStyles = {
            fontSize,
            fontColor,
            fontFamily,
            lineX,
            lineY,
            lineAngle,
        }
        const options = {
            src: images[active],
            imageWidth: controlled_width,
            imageHeight: controlled_height,
            texts: dialog.form.content,
            textStyles,
        }
        var canvas = document.getElementById('canvas')
        var priviewImage = new PreviewImage(canvas, options)
    </script>
</body>

</html>
本文来自互联网用户投稿,该文观点仅代表作者本人,不代表本站立场。本站仅提供信息存储空间服务,不拥有所有权,不承担相关法律责任。如若转载,请注明出处:http://www.coloradmin.cn/o/818225.html

如若内容造成侵权/违法违规/事实不符,请联系多彩编程网进行投诉反馈,一经查实,立即删除!

相关文章

springboot基础--springboot配置说明

一、springboot中的配置文件 1、springboot为什么还需要用配置文件 方便我们修改springboot默认的配置;我们有其他的信息需要保存在配置文件中; 2、springboot中的配置文件有哪些 properties配置文件;yml配置文件; 3、springboot中的配置文件使用中注意事项 文件放入在sr…

黑客技术(网络安全)学习笔记

一、网络安全基础知识 1.计算机基础知识 了解了计算机的硬件、软件、操作系统和网络结构等基础知识&#xff0c;可以帮助您更好地理解网络安全的概念和技术。 2.网络基础知识 了解了网络的结构、协议、服务和安全问题&#xff0c;可以帮助您更好地解决网络安全的原理和技术…

Java版本spring cloud + spring boot企业电子招投标系统源代码+ 支持二次开+定制化服务

&#xfeff; 电子招标采购软件 解决方案 招标面向的对象为供应商库中所有符合招标要求的供应商&#xff0c;当库中的供应商有一定积累的时候&#xff0c;会节省大量引入新供应商的时间。系统自动从供应商库中筛选符合招标要求的供应商&#xff0c;改变以往邀标的业务模式。招…

在当下Android 市场下行时,能拿到offer实属不易~

作者&#xff1a;六哥 如今 Android 已不是前几年那么风光&#xff0c;但它的市场还在&#xff0c;“它”还是那个Android&#xff0c;还是那个我赖以生存、夜以继日陪伴着我的朋友。所以&#xff0c;我永远不会抛弃它。 好了&#xff0c;情感已经抒发的差不多了&#xff0c;我…

SecureCRT配置id_rsa和id_rsa格式问题

选项->会话选项 在弹出的窗口中继续&#xff1a; 连接->SSH2->公钥->属性 在属性会话框中证书文件里输入id_rsa路径&#xff1a; 一般情况下确定就可以了&#xff0c;但可能提示&#xff1a; Could not load the public key from the private key file使用ssh…

学习笔记23 stack和queue

一、stack概念 stack是一种按先进后出方法存放和取出数据的数据结构 java提供了一个stack类&#xff0c;其中有以下几种方法&#xff1a; 看个例子&#xff1a; import java.util.*;/*** This program demonstrates the java.util.Stack class.*/public class StackDemo1 {p…

Android 创建 Gradle Task 自动打包并上传至蒲公英

前言 Android 项目日常开发过程中&#xff0c;经常需要打包给到非开发人员验收或调试&#xff0c;例如测试阶段&#xff0c;就要经常基于测试服务器地址&#xff0c;打包安装包&#xff0c;给到组内测试人员进行测试&#xff0c;并且 BUG 修复完成之后也需要再次打包给到测试人…

极验4代滑块验证码破解(补环境直接强暴式拿下)

目录 前言一、分析二、验证总结借鉴 前言 极验第四代好像简单了特别多&#xff0c;没有什么技巧&#xff0c;环境党直接5分钟拿下。 网址: aHR0cHM6Ly93d3cuZ2VldGVzdC5jb20vYWRhcHRpdmUtY2FwdGNoYS1kZW1v 一、分析 直接去它官网&#xff0c;滑动滑块打开控制台瞅瞅 可以看…

Flask学习笔记_异步论坛(四)

Flask学习笔记_异步论坛&#xff08;四&#xff09; 1.配置和数据库链接1.exts.py里面实例化sqlalchemy数据库2.config.py配置app和数据库信息3.app.py导入exts和config并初始化到app上 2.创建用户模型并映射到数据库1.models/auth.py创建用户模型2.app.py导入模型并用flask-mi…

解决Debian10乱码以及远程连接ssh的问题

文章目录 解决Debian10乱码Debian10配置ssh 解决Debian10乱码 下载locales apt-get install locales配置语言 dpkg-reconfigure locales输入上述命令后会进入到以下页面【空格为选中&#xff0c;回车下一个页面】 在这个页面里我们按空格选中如图的选项&#xff0c;然后回…

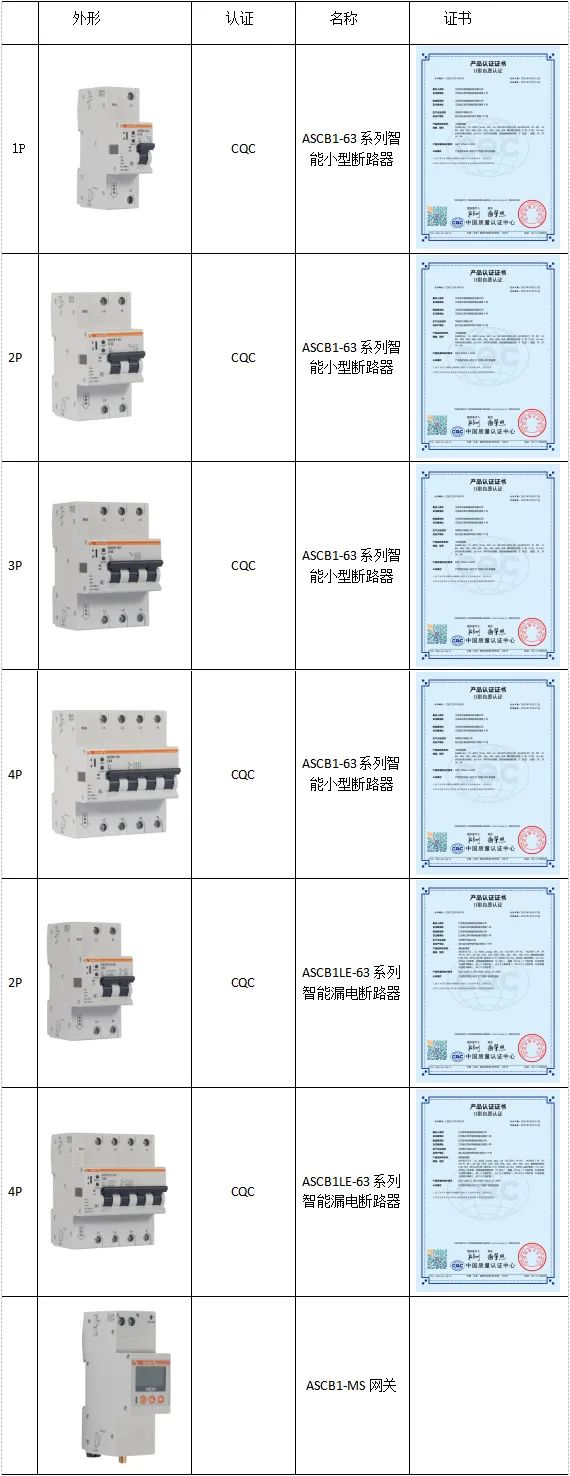
安科瑞智慧空开微型断路器在银行的应用-安科瑞黄安南

应用场景 智能微型断路器与智能网关组合应用于末端回路 功能 1.计量功能&#xff1a;实时上报电压、电流、功率、电能、漏电、温度、频率等电参量&#xff1b; 2.报警功能&#xff1a;过压报警、欠压报警、过流报警、过载报警、漏电报警、超温报警、三相电缺相报警&#xff…

Jetson Docker 编译 FFmpeg 支持硬解nvmpi和cuvid

0 设备和docker信息 设备为NVIDIA Jetson Xavier NX&#xff0c;jetpack版本为 5.1.1 [L4T 35.3.1] 使用的docker镜像为nvcr.io/nvidia/l4t-ml:r35.2.1-py3,详见https://catalog.ngc.nvidia.com/orgs/nvidia/containers/l4t-ml 使用下列命令拉取镜像: sudo docker pull nvcr…

windows查看 jar包进程号指令

1 打开cmd 2 : 9898 jar包对应的端口号 netstat -aon|findstr 9898 3 &#xff1a;打开任务管理器 根据搜索出的23700 找到对应进程

【C++】STL——vector的模拟实现、常用构造函数、迭代器、运算符重载、扩容函数、增删查改

文章目录 1.模拟实现vector1.1构造函数1.2迭代器1.3运算符重载1.4扩容函数1.5增删查改 1.模拟实现vector vector使用文章 1.1构造函数 析构函数 在C中&#xff0c;vector是一个动态数组容器&#xff0c;可以根据需要自动调整大小。vector类提供了几个不同的构造函数来创建和初…

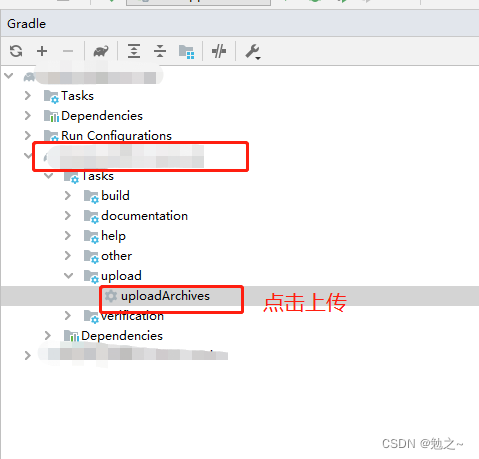
gradle项目上传项目依赖到远程仓库

gradle项目上传项目依赖到远程仓库 第一步&#xff1a;在需要上传的项目的bulid.gradle下添加maven插件&#xff0c;并配置连接远程仓库的信息以及项目的三要素信息&#xff0c;如下所示 dependencies {implementation org.mapstruct:mapstruct:1.4.2.Final } apply plugin: …

Linux - make/Makefifile

0.背景 会不会写makefile&#xff0c;从一个侧面说明了一个人是否具备完成大型工程的能力 一个工程中的源文件不计数&#xff0c;其按类型、功能、模块分别放在若干个目录中&#xff0c;makefile定义了一系列的规则来指定&#xff0c;哪些文件需要先编译&#xff0c;哪些文件需…

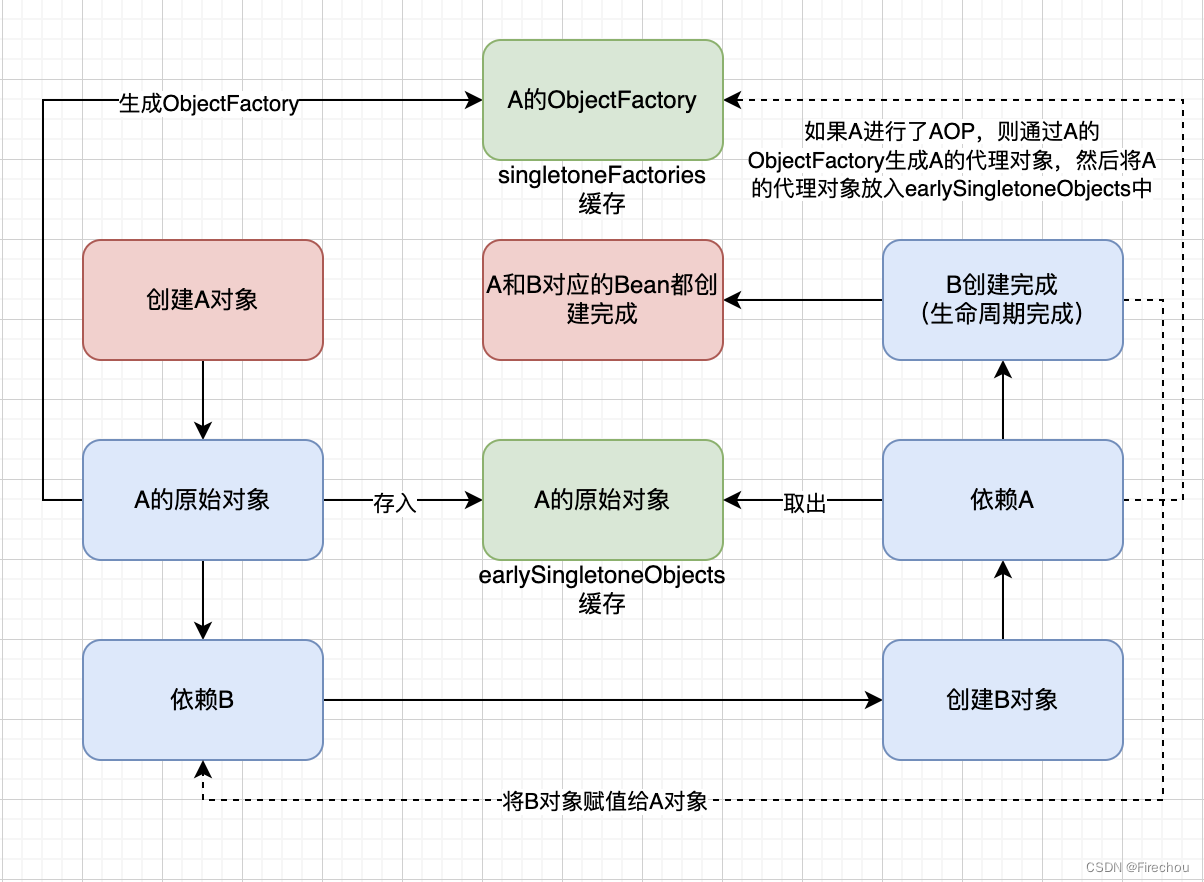
【Spring】Spring之循环依赖底层源码解析

什么是循环依赖 A依赖了B&#xff0c;B依赖了A。 示例&#xff1a; // A依赖了B class A{public B b; }// B依赖了A class B{public A a; }其实&#xff0c;循环依赖并不是问题&#xff0c;因为对象之间相互依赖是很正常的事情。示例&#xff1a; A a new A(); B b new B…

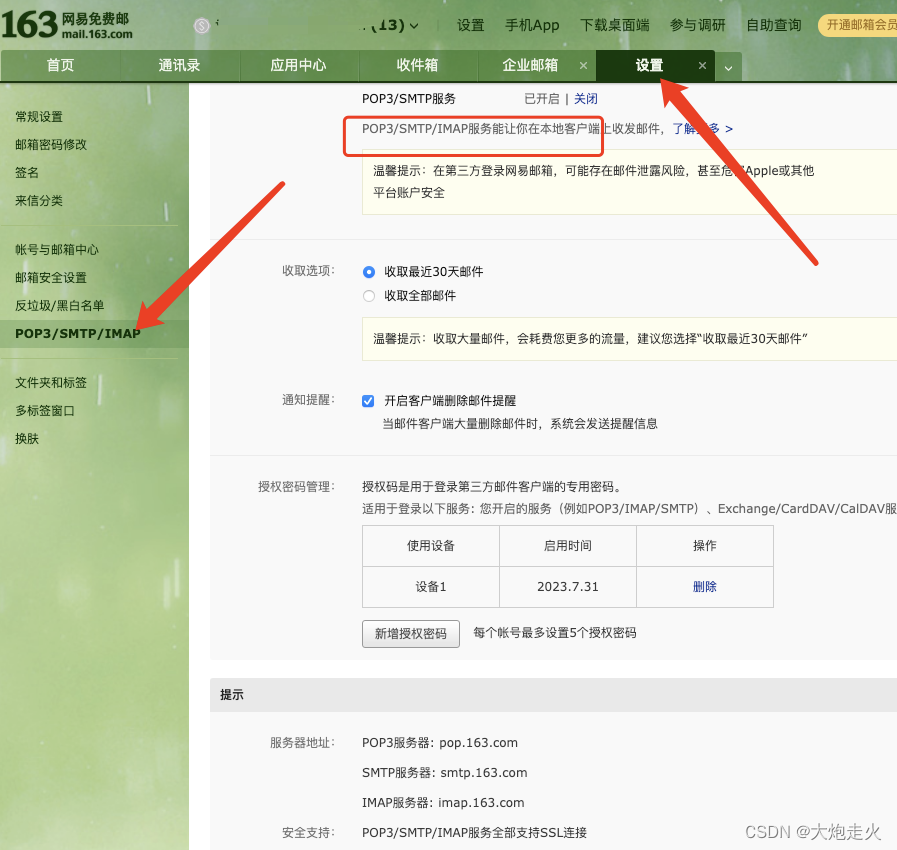
5分钟快手入门laravel邮件通知

第一步&#xff1a; 生成一个邮件发送对象 php artisan make:mail TestMail 第二步&#xff1a; 编辑.env 添加/修改&#xff08;没有的key则添加&#xff09; MAIL_DRIVERsmtp MAIL_HOSTsmtp.163.com &#xff08;这里用163邮箱&#xff09; MAIL_PORT25 &#xff08;163邮箱…

Bug记录: CUDA error_ device-side assert triggered

Bug记录&#xff1a; CUDA error: device-side assert triggered 在接触AIGC算法的过程中偶尔会遇到这样的bug&#xff1a;RuntimeError: CUDA error: device-side assert triggered return torch._C._cuda_synchronize() RuntimeError: CUDA error: device-side assert trig…

Qt实现引导界面UITour

介绍 最近做了一款键鼠自动化&#xff0c;想第一次安装打开后搞一个引导界面&#xff0c;找了好多资料没啥参考&#xff0c;偶然发现qt有引导界面如下图。 Qt整挺好&#xff0c;但是未找到源码&#xff0c;真的不想手撸&#xff0c;无奈实在找不到&#xff0c;下图是仿照qt实现…