概述
我的spring-boot版本:2.7.7
我的spring-boot-admin版本:2.7.10
jdk:1.8
平时测试环境服务不多的情况下,用linux命令看下日志和堆栈也不麻烦。但是要是服务数量上来了,有10几个服务这个时候用命令看已经有点麻烦了。特别是对于上了微服务的项目来说,服务更多。
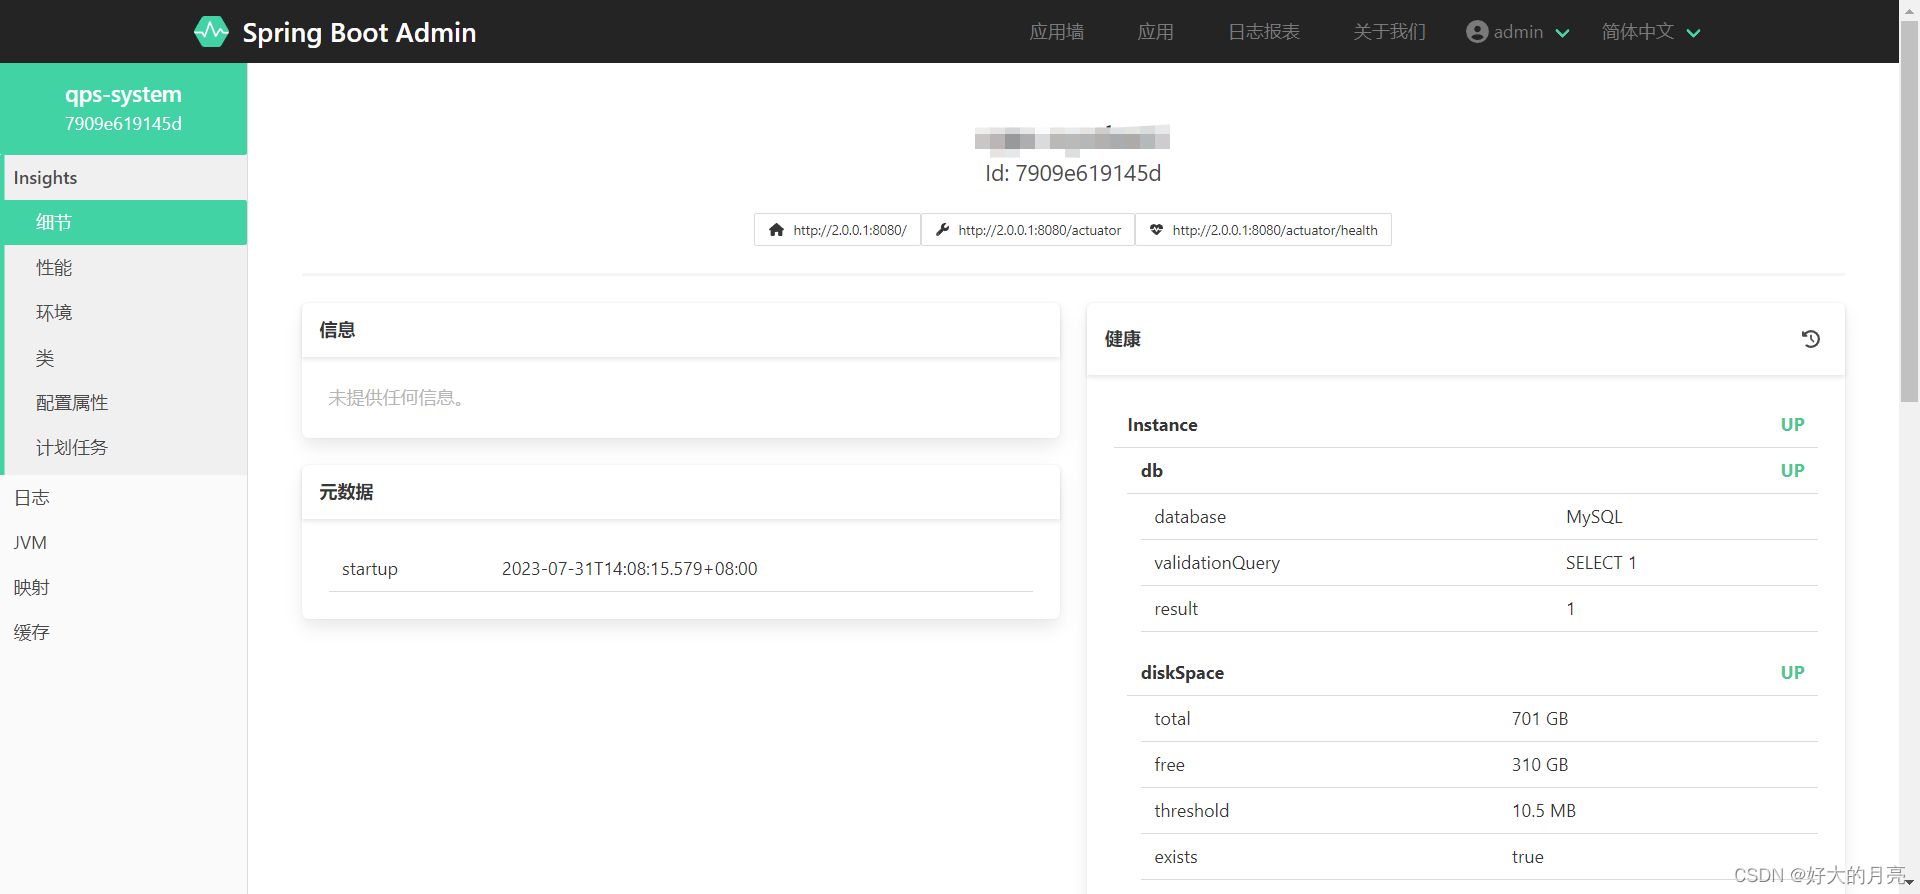
可以用springBootAdmin方便我们日常监控服务情况.
springBootAdmin大致就是起一个服务端接收客户端的注册,然后通过利用springboot的actuator接口抓取客户端的具体服务信息.
server
先上pom依赖,我这边对应的版本号声明在父pom的dependencyManagement中了,要单独部署的话,需要声明下version.
        <dependency>
            <groupId>org.springframework.boot</groupId>
            <artifactId>spring-boot-starter</artifactId>
        </dependency>

        <dependency>
            <groupId>de.codecentric</groupId>
            <artifactId>spring-boot-admin-starter-server</artifactId>
        </dependency>

        <dependency>
            <groupId>org.springframework.boot</groupId>
            <artifactId>spring-boot-starter-web</artifactId>
        </dependency>


        <!--springboot admin 安全相关-->
        <dependency>
            <groupId>org.springframework.boot</groupId>
            <artifactId>spring-boot-starter-security</artifactId>
        </dependency>
yml配置
为了安全搞了个密码,需要配置下拦截器
server:
  port: 9090
spring:
  application:
    name: adminserver
  security:
    user:
      name: admin
      password: ccc123456
拦截器
package com.xxx.xxx.config;

import de.codecentric.boot.admin.server.config.AdminServerProperties;
import org.springframework.context.annotation.Configuration;
import org.springframework.security.config.annotation.web.builders.HttpSecurity;
import org.springframework.security.config.annotation.web.configuration.WebSecurityConfigurerAdapter;
import org.springframework.security.web.authentication.SavedRequestAwareAuthenticationSuccessHandler;
import org.springframework.security.web.csrf.CookieCsrfTokenRepository;

@Configuration
public class SecuritySecureConfig extends WebSecurityConfigurerAdapter {

    private final String adminContextPath;

    public SecuritySecureConfig(AdminServerProperties adminServerProperties) {
        this.adminContextPath = adminServerProperties.getContextPath();
    }

    @Override
    protected void configure(HttpSecurity http) throws Exception {
        SavedRequestAwareAuthenticationSuccessHandler successHandler = new SavedRequestAwareAuthenticationSuccessHandler();
        successHandler.setTargetUrlParameter("redirectTo");
        successHandler.setDefaultTargetUrl(adminContextPath + "/");
        http.authorizeRequests()
                //1.配置所有静态资源和登录页可以公开访问
                .antMatchers(adminContextPath + "/assets/**").permitAll()
                .antMatchers(adminContextPath + "/login").permitAll()
                .anyRequest().authenticated()
                .and()
                //2.配置登录和登出路径
                .formLogin().loginPage(adminContextPath + "/login").successHandler(successHandler).and()
                .logout().logoutUrl(adminContextPath + "/logout").and()
                //3.开启http basic支持,admin-client注册时需要使用
                .httpBasic().and()
                .csrf()
                //4.开启基于cookie的csrf保护
                .csrfTokenRepository(CookieCsrfTokenRepository.withHttpOnlyFalse())
                //5.忽略这些路径的csrf保护以便admin-client注册
                .ignoringAntMatchers(
                        adminContextPath + "/instances",
                        adminContextPath + "/actuator/**"
                );
    }

}
然后访问 localhost:9090就可以用配置的name和password登录spring-boot-admin的监控了.
client
client就比较简单了,
先上springBootAdmin相关依赖
<dependency>
   <groupId>org.springframework.boot</groupId>
   <artifactId>spring-boot-starter-actuator</artifactId>
</dependency>

<dependency>
   <groupId>de.codecentric</groupId>
   <artifactId>spring-boot-admin-starter-client</artifactId>
</dependency>
yml配置
--- # Actuator 监控端点的配置项
management:
  endpoints:
    web:
      exposure:
        include: '*'
  endpoint:
    health:
      show-details: ALWAYS
    logfile:
      external-file: /logs/xxx-xxx/sys-console.log


--- # 监控中心配置
spring.boot.admin.client:
  # 增加客户端开关
  enabled: true
  url: http://localhost:9090
  instance:
    service-host-type: IP
  #和server端的配置对应
  username: admin
  password: ccc123456
运行client后就可以在spring boot admin的管理界面看到服务注册上来了,然后就能在界面上看到日志,堆栈相关信息了
