文章目录
- 小项目介绍
- 源码分析
- main.go
- router.go
- models/user.go
- models/Post.go
- models/comment.go
- controllers/post.go
- controllers/comment.go
- 接口测试
- 测试增加帖子
- 测试查看帖子
- 测试增加评论
- 测试查看评论
小项目介绍
经过对需求的分析,我增加了一些额外的东西,比如增加了user用户,因为我考虑到帖子或者是评论(跟回帖差不多)都会有作者,主要的功能有增加帖子、查看所有或单个帖子、增加评论、查看某个帖子的所有评论或单个评论。数据我是将它存在数据库中,而不是内存中。
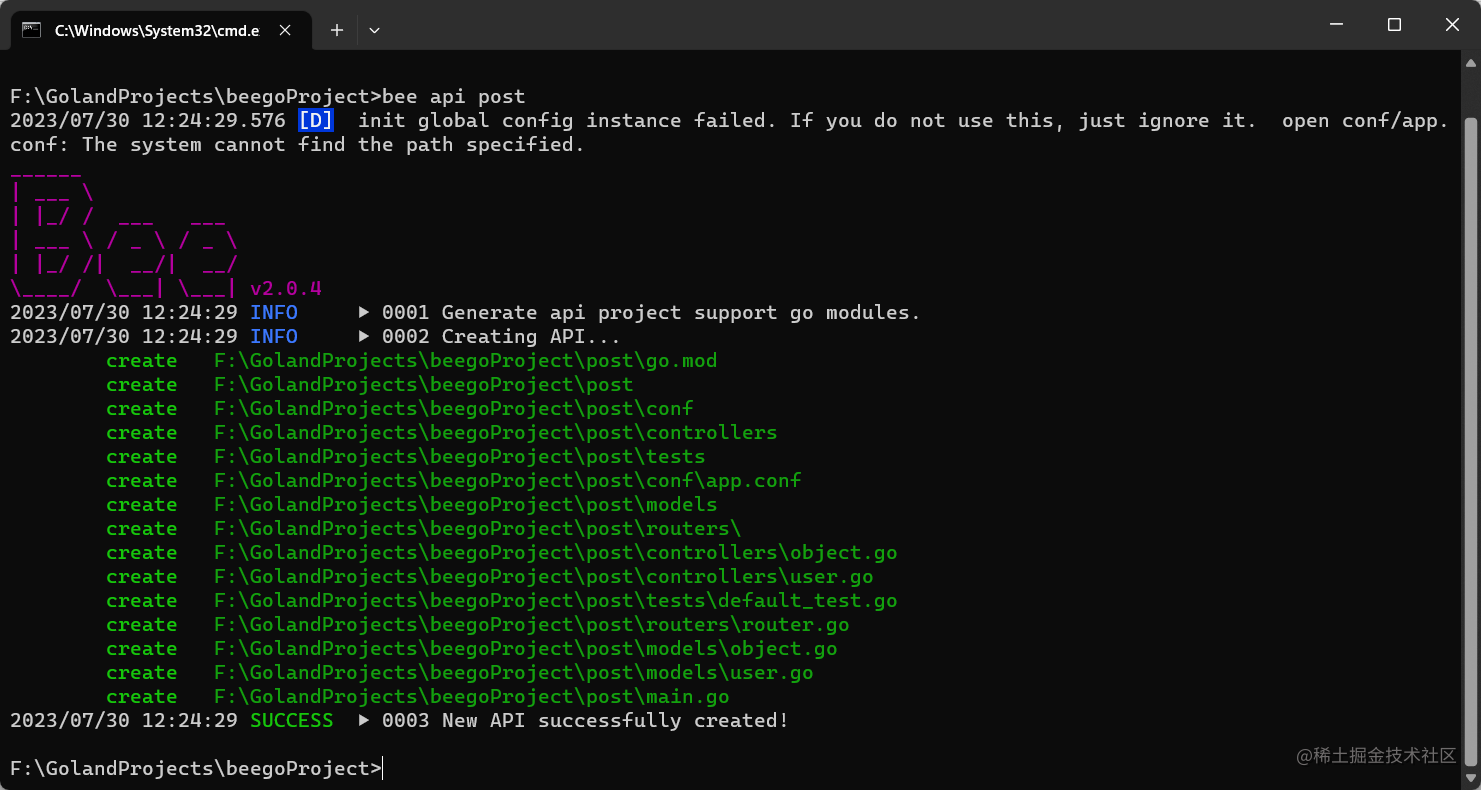
首先终端运行bee api apiname新建一个beego项目,api命令可以让我们很方便地实现API应用。
在IDE打开生成的项目,并配置app.conf中关于数据库的部分。
数据库我选用MySQL,app.conf文件如下:
appname = post
httpport = 8080
runmode = dev
autorender = false
copyrequestbody = true
EnableDocs = true

username = root
password =
host = 127.0.0.1
port = 3306
database = post
数据库命名为post,因此我先在Navicat软件中创建该数据库,编码规则为utf8mb4,以方便后续操作。

最后的项目结构如下:
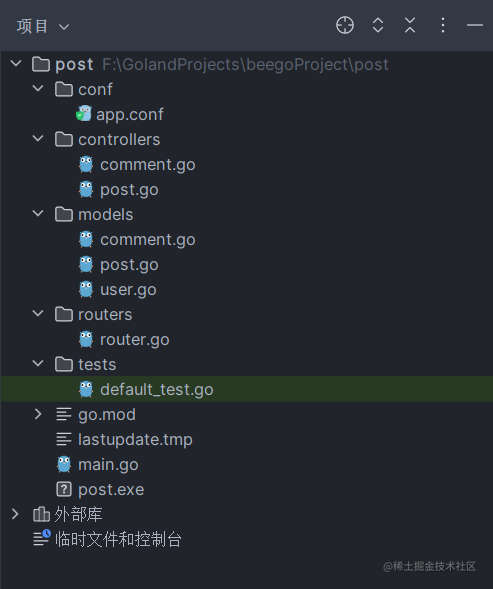
conf文件夹包含项目配置文件,controllers文件夹负责处理业务逻辑,models文件夹与数据库模型相关,routers文件夹包含项目的所有路由,tests文件夹含有测试文件,而在本篇文章我打算使用postman来进行接口测试。
源码分析
接下来对每个文件进行源码展示与分析。
main.go
package main

import (
    "fmt"
    "github.com/beego/beego/v2/client/orm"
    "github.com/beego/beego/v2/server/web"
    _ "github.com/go-sql-driver/mysql"
    "github.com/prometheus/common/log"
    _ "post/models"
    _ "post/routers"
)

func init() {
    username, _ := web.AppConfig.String("username")
    password, _ := web.AppConfig.String("password")
    host, _ := web.AppConfig.String("host")
    port, _ := web.AppConfig.String("port")
    database, _ := web.AppConfig.String("database")

    datasource := fmt.Sprintf("%s:%s@tcp(%s:%s)/%s?charset=utf8mb4&loc=Local", username, password, host, port, database)
    err := orm.RegisterDataBase("default", "mysql", datasource)
    if err != nil {
       log.Fatal(err)
    }

    err = orm.RunSyncdb("default", false, true)
    if err != nil {
       log.Fatal(err)
    }

}

func main() {
    orm.RunCommand()
    web.Run()
}
- 导入包: 代码开始时导入了一些必要的包:
- “fmt” 用于格式化的输入输出。
- “github.com/beego/beego/v2/client/orm” 是 Beego ORM 包。
- “github.com/beego/beego/v2/server/web” 是 Beego Web 服务器包。
- “github.com/go-sql-driver/mysql” 是 MySQL 数据库驱动。
- “github.com/prometheus/common/log” 用于日志记录。
- “post/models” 和 “post/routers” 用于导入模型和路由配置。 (这些仅用于副作用,因为它们可能在初始化过程中注册模型和路由。)
init()函数:init()函数在程序启动时自动调用。在这个函数中,代码使用Beego配置读取了MySQL数据库的凭据(用户名、密码、主机、端口和数据库名),并构建了连接数据库的数据源字符串。datasource变量包含连接字符串。
然后,代码使用 orm.RegisterDataBase() 函数将 MySQL 数据库注册到 Beego ORM 中。此函数的参数为:
- “default”:这是数据库连接的别名,在应用的其他部分中会以 “default” 作为引用。
- “mysql”:MySQL 数据库的驱动名称。
datasource:之前构建的数据源字符串。
接下来,调用 orm.RunSyncdb() 函数,根据 post/models 包中的模型定义来创建数据库表。此函数的参数为:
- “default”:用于创建表的数据库连接别名。
false:此参数指示是否在创建新表之前删除现有表。在这里设置为false,表示不会删除现有表。true:此参数指示是否在表不存在时创建表。设置为true,所以会在表不存在时创建它们。
- main() 函数:
main()函数是程序的入口点。它调用了两个函数:
orm.RunCommand():此函数解析与 ORM 相关的命令行参数,并执行相应的操作。例如,它可以根据 ORM 配置生成模型文件、控制器或数据库迁移脚本。web.Run():此函数启动 Beego Web 服务器,并处理传入的 HTTP 请求。
该应用程序会监听传入的 HTTP 请求,默认端口为 8080,将其路由到适当的控制器动作,这些动作在路由配置中定义。
router.go
package routers

import (
    "github.com/beego/beego/v2/server/web"
    "post/controllers"
)

func init() {
    web.Router("/post", &controllers.PostController{}, "get:PostList;post:PostAdd")
    web.Router("/comment", &controllers.CommentController{}, "get:CommentList;post:CommentAdd")

}
这段代码定义了 Beego 框架中的路由配置。路由配置用于将不同的 URL 路径映射到相应的控制器和处理函数上。
让我们来解释一下这段代码:
- 导入包: 代码中导入了两个包:
- “github.com/beego/beego/v2/server/web”:这是 Beego 框架的 Web 服务器包,用于设置路由和处理 HTTP 请求。
- “post/controllers”:这是自定义的控制器包,用于处理不同的请求。
- init() 函数:
init()函数在该包被导入时自动调用。在此函数中,我们定义了两个路由规则:
-
第一个路由规则:
web.Router("/post", &controllers.PostController{}, "get:PostList;post:PostAdd")web.Router("/post":这表示将路径 “/post” 映射到后面的控制器和处理函数上。&controllers.PostController{}:这是PostController的实例,用于处理与 “/post” 路径相关的请求。"get:PostList;post:PostAdd":这是路由规则字符串,它指定了请求方法和对应的处理函数。在这里,“get:PostList” 表示将 GET 请求映射到PostController的PostList方法上,“post:PostAdd” 表示将 POST 请求映射到PostController的PostAdd方法上。
-
第二个路由规则:
web.Router("/comment", &controllers.CommentController{}, "get:CommentList;post:CommentAdd")web.Router("/comment":这表示将路径 “/comment” 映射到后面的控制器和处理函数上。&controllers.CommentController{}:这是CommentController的实例,用于处理与 “/comment” 路径相关的请求。"get:CommentList;post:CommentAdd":这是路由规则字符串,指定了请求方法和对应的处理函数。“get:CommentList” 表示将 GET 请求映射到CommentController的CommentList方法上,“post:CommentAdd” 表示将 POST 请求映射到CommentController的CommentAdd方法上。
models/user.go
package models

import (
    "github.com/beego/beego/v2/client/orm"
    "time"
)

type User struct {
    Id         int        `orm:"pk;auto"`
    Name       string     `orm:"description(用户名)"`
    Posts      []*Post    `orm:"reverse(many)"`
    Comments   []*Comment `orm:"reverse(many)"`
    CreateTime time.Time  `orm:"auto_now_add;type(datetime);description(创建时间)"`
}

func init() {
    // 需要在init中注册定义的model
    orm.RegisterModel(new(User), new(Post), new(Comment))
}
这段代码定义了三个数据模型:User、Post、和Comment,并使用 Beego ORM 包进行了注册。
让我们逐步解释这段代码:
- 导入包: 代码中导入了两个包:
- “github.com/beego/beego/v2/client/orm”:这是 Beego ORM 包,用于进行数据库操作和对象关系映射。
- “time”:这是 Go 标准库中的时间包,用于处理时间相关的操作。
- User 结构体: 定义了名为 User 的结构体,表示数据库中的用户表。
Id int orm:"pk;auto":Id 字段是主键,“pk” 表示主键,“auto” 表示自增。Name string orm:"description(用户名)":Name 字段是用户名字段,“description(用户名)” 是对字段的描述。Posts []*Post orm:"reverse(many)":Posts 是用户与帖子之间的一对多反向关系,表示一个用户可以有多个帖子。Comments []*Comment orm:"reverse(many)":Comments 是用户与评论之间的一对多反向关系,表示一个用户可以有多个评论。CreateTime time.Time orm:"auto_now_add;type(datetime);description(创建时间)":CreateTime 字段是创建时间字段,“auto_now_add” 表示在创建新记录时自动设置为当前时间,“type(datetime)” 表示字段类型为 datetime,“description(创建时间)” 是对字段的描述。
- init() 函数:
init()函数在包被导入时自动调用。在这里,代码调用orm.RegisterModel()函数来注册定义的模型,以便在应用程序运行时与数据库表进行映射。
orm.RegisterModel(new(User), new(Post), new(Comment)):注册 User、Post、和 Comment 三个模型,这样 Beego ORM 就知道它们的结构和与数据库表之间的映射关系。
models/Post.go
package models

import "time"

type Post struct {
    Id         int        `orm:"pk;auto"`
    Title      string     `orm:"description(帖子标题)"`
    Content    string     `orm:"size(4000);description(帖子内容)"`
    ReadNum    int        `orm:"description(阅读量);default(0)"`
    Author     *User      `orm:"rel(fk);description(作者)"`
    Comments   []*Comment `orm:"reverse(many);description(评论)"`
    CreateTime time.Time  `orm:"auto_now_add;type(datetime);description(创建时间)"`
}

func PostData(posts []Post) (data []interface{}) {

    for _, post := range posts {
       data = append(data, map[string]interface{}{
          "id":          post.Id,
          "title":       post.Title,
          "author":      post.Author.Name,
          "content":     post.Content,
          "read_num":    post.ReadNum,
          "create_time": post.CreateTime.Format("2006-1-2 15:04"),
       })
    }
    return
}
这段代码定义了一个名为 Post 的数据模型,并提供了一个函数 PostData,用于将 Post 结构体的数据转换为特定格式的数据。
让我们来逐步解释这段代码:
Post结构体:Post是一个数据模型,表示数据库中的帖子表。
Id int orm:"pk;auto":Id字段是主键,“pk” 表示主键,“auto” 表示自增长。Title string orm:"description(帖子标题)":Title字段是帖子标题字段,“description(帖子标题)” 是对字段的描述。Content string orm:"size(4000);description(帖子内容)":Content字段是帖子内容字段,“size(4000)” 表示字段最大长度为 4000,“description(帖子内容)” 是对字段的描述。ReadNum int orm:"description(阅读量);default(0)":ReadNum字段是阅读量字段,“description(阅读量)” 是对字段的描述,“default(0)” 表示默认值为 0。Author *User orm:"rel(fk);description(作者)":Author字段是一个指向User结构体的外键关联字段,表示这篇帖子的作者。Comments []*Comment orm:"reverse(many);description(评论)":Comments字段是一个指向Comment结构体的一对多反向关联字段,表示这篇帖子可以有多条评论。CreateTime time.Time orm:"auto_now_add;type(datetime);description(创建时间)":CreateTime字段是创建时间字段,“auto_now_add” 表示在创建新记录时自动设置为当前时间,“type(datetime)” 表示字段类型为 datetime,“description(创建时间)” 是对字段的描述。
PostData函数:PostData函数接收一个[]Post切片,该切片包含多个Post结构体。函数的目的是将这些结构体的数据转换为一个特定格式的切片[]interface{}。
在函数中,通过遍历 posts 切片,将每个 Post 结构体的字段值存储在一个 map[string]interface{} 中,然后将该 map 添加到 data 切片中。
具体转换的字段如下:
- “id”: 帖子的
Id字段。 - “title”: 帖子的
Title字段。 - “author”: 帖子的作者的姓名,通过访问
post.Author.Name获取。 - “content”: 帖子的
Content字段。 - “read_num”: 帖子的
ReadNum字段。 - “create_time”: 帖子的
CreateTime字段,格式化为形式类似 “2006-1-2 15:04” 的字符串。
最后,函数返回转换后的 data 切片。
models/comment.go
package models

import "time"

type Comment struct {
    Id         int       `orm:"pk;auto"`
    Content    string    `orm:"size(4000);description(评论内容)"`
    Post       *Post     `orm:"rel(fk);description(帖子外键)"`
    Author     *User     `orm:"rel(fk);description(评论人)"`
    CreateTime time.Time `orm:"auto_now_add;type(datetime);description(创建时间)"`
}

func CommentData(comments []Comment) (data []interface{}) {

    for _, comment := range comments {
       data = append(data, map[string]interface{}{
          "id":          comment.Id,
          "author":      comment.Author.Name,
          "content":     comment.Content,
          "create_time": comment.CreateTime.Format("2006-1-2 15:04"),
       })
    }
    return
}
这段代码定义了一个名为 Comment 的数据模型,并提供了一个函数 CommentData,用于将 Comment 结构体的数据转换为特定格式的数据。
让我们逐步解释这段代码:
Comment结构体:Comment是一个数据模型,表示数据库中的评论表。
Id int orm:"pk;auto":Id字段是主键,“pk” 表示主键,“auto” 表示自增长。Content string orm:"size(4000);description(评论内容)":Content字段是评论内容字段,“size(4000)” 表示字段最大长度为 4000,“description(评论内容)” 是对字段的描述。Post *Post orm:"rel(fk);description(帖子外键)":Post字段是一个指向Post结构体的外键关联字段,表示该评论所属的帖子。Author *User orm:"rel(fk);description(评论人)":Author字段是一个指向User结构体的外键关联字段,表示该评论的作者。CreateTime time.Time orm:"auto_now_add;type(datetime);description(创建时间)":CreateTime字段是创建时间字段,“auto_now_add” 表示在创建新记录时自动设置为当前时间,“type(datetime)” 表示字段类型为 datetime,“description(创建时间)” 是对字段的描述。
CommentData函数:CommentData函数接收一个[]Comment切片,该切片包含多个Comment结构体。函数的目的是将这些结构体的数据转换为一个特定格式的切片[]interface{}。
在函数中,通过遍历 comments 切片,将每个 Comment 结构体的字段值存储在一个 map[string]interface{} 中,然后将该 map 添加到 data 切片中。
具体转换的字段如下:
- “id”: 评论的
Id字段。 - “author”: 评论的作者的姓名,通过访问
comment.Author.Name获取。 - “content”: 评论的
Content字段。 - “create_time”: 评论的
CreateTime字段,格式化形式类似为 “2006-1-2 15:04” 的字符串。
最后,函数返回转换后的 data 切片。
controllers/post.go
package controllers

import (
    "github.com/beego/beego/v2/client/orm"
    "github.com/beego/beego/v2/server/web"
    "post/models"
)

type PostController struct {
    web.Controller
}

func (c *PostController) PostList() {
    o := orm.NewOrm()

    postId, _ := c.GetInt("post_id", 0)
    if postId == 0 {
       var posts []models.Post
       if _, err := o.QueryTable(new(models.Post)).RelatedSel().All(&posts); err == nil {
          c.Data["json"] = map[string]interface{}{"code": 200, "count": len(posts), "data": models.PostData(posts)}
          c.ServeJSON()
       } else {
          c.Data["json"] = map[string]interface{}{"code": 400, "msg": "获取帖子列表失败"}
          c.ServeJSON()
       }
    } else {
       var post models.Post

       qs := o.QueryTable(new(models.Post)).Filter("id", postId)

       if err := qs.RelatedSel().One(&post); err == nil {
          // 阅读数+1
          qs.Update(orm.Params{"read_num": post.ReadNum + 1})

          c.Data["json"] = map[string]interface{}{"code": 200, "data": models.PostData([]models.Post{post})}
          c.ServeJSON()
       } else {
          c.Data["json"] = map[string]interface{}{"code": 400, "msg": "获取帖子失败"}
          c.ServeJSON()
       }
    }
}

func (c *PostController) PostAdd() {
    title := c.GetString("title")
    content := c.GetString("content")
    author := c.GetString("author_id")
    if title == "" || content == "" || author == "" {
       c.Data["json"] = map[string]interface{}{"code": 400, "msg": "参数错误"}
       c.ServeJSON()
       return
    }

    o := orm.NewOrm()
    user := models.User{}
    if err := o.QueryTable(new(models.User)).Filter("id", author).One(&user); err != nil {
       c.Data["json"] = map[string]interface{}{"code": 400, "msg": "用户不存在"}
       c.ServeJSON()
       return
    }

    post := models.Post{
       Title:   title,
       Content: content,
       Author:  &user,
    }

    if _, err := o.Insert(&post); err == nil {
       c.Data["json"] = map[string]interface{}{"code": 200, "msg": "添加帖子成功"}
    } else {
       c.Data["json"] = map[string]interface{}{"code": 400, "msg": "添加帖子失败"}
    }

    c.ServeJSON()

}
这段代码定义了一个名为 PostController 的控制器,并实现了两个处理函数:PostList() 和 PostAdd(),用于处理与帖子相关的请求。
让我们逐步解释这段代码:
- 导入包: 代码中导入了一些包:
- “github.com/beego/beego/v2/client/orm”:这是 Beego ORM 包,用于进行数据库操作和对象关系映射。
- “github.com/beego/beego/v2/server/web”:这是 Beego Web 服务器包,用于处理请求和响应。
- “post/models”:这是自定义的
models包,用于操作数据模型。
PostController结构体:PostController是一个控制器结构体,继承了web.Controller。PostList()函数:PostList()是一个处理函数,用于获取帖子列表或单个帖子详情。
- 首先,通过
orm.NewOrm()创建一个新的 ORM 对象o,用于进行数据库操作。 - 检查是否有
post_id参数,如果没有,则返回帖子列表。在数据库中查询所有的帖子,并使用models.PostData()函数将帖子列表转换成特定格式的数据。 - 如果有
post_id参数,表示要获取单个帖子的详情。在数据库中查询该post_id对应的帖子,并将其阅读数加 1,然后将帖子详情转换成特定格式的数据。 - 最后,将处理结果以 JSON 格式返回。
PostAdd()函数:PostAdd()是一个处理函数,用于添加新的帖子。
- 获取请求参数
title、content和author_id,如果这些参数有为空的情况,则返回参数错误。 - 创建一个新的 ORM 对象
o,用于进行数据库操作。 - 根据
author_id查询对应的用户,如果用户不存在,则返回用户不存在的错误。 - 创建一个新的
Post结构体,填充帖子的标题、内容和作者。 - 将帖子插入数据库,如果插入成功,则返回添加帖子成功的消息,否则返回添加帖子失败的消息。
- 最后,将处理结果以 JSON 格式返回。
controllers/comment.go
package controllers

import (
    "github.com/beego/beego/v2/client/orm"
    "github.com/beego/beego/v2/server/web"
    "post/models"
)

type CommentController struct {
    web.Controller
}

func (c *CommentController) CommentList() {
    o := orm.NewOrm()

    postId, _ := c.GetInt("post_id", 0)
    commentId, _ := c.GetInt("comment_id", 0)
    if postId == 0 {
       c.Data["json"] = map[string]interface{}{"code": 400, "msg": "参数错误"}
       c.ServeJSON()
       return
    }
    if commentId == 0 {
       var comments []models.Comment
       if _, err := o.QueryTable(new(models.Comment)).RelatedSel().Filter("post_id", postId).All(&comments); err == nil {
          c.Data["json"] = map[string]interface{}{"code": 200, "count": len(comments), "data": models.CommentData(comments)}
          c.ServeJSON()
       } else {
          c.Data["json"] = map[string]interface{}{"code": 400, "msg": "获取评论列表失败"}
          c.ServeJSON()
       }
    } else {
       var comment models.Comment

       if err := o.QueryTable(new(models.Comment)).Filter("id", commentId).RelatedSel().One(&comment); err == nil {

          c.Data["json"] = map[string]interface{}{"code": 200, "data": models.CommentData([]models.Comment{comment})}
          c.ServeJSON()
       } else {
          c.Data["json"] = map[string]interface{}{"code": 400, "msg": "获取评论失败"}
          c.ServeJSON()
       }
    }
}

func (c *CommentController) CommentAdd() {
    postId := c.GetString("post_id")
    content := c.GetString("content")
    author := c.GetString("author_id")
    if postId == "" || content == "" || author == "" {
       c.Data["json"] = map[string]interface{}{"code": 400, "msg": "参数错误"}
       c.ServeJSON()
       return
    }

    o := orm.NewOrm()
    user := models.User{}
    post := models.Post{}
    if err := o.QueryTable(new(models.User)).Filter("id", author).One(&user); err != nil {
       c.Data["json"] = map[string]interface{}{"code": 400, "msg": "用户不存在"}
       c.ServeJSON()
       return
    }
    if err := o.QueryTable(new(models.Post)).Filter("id", postId).One(&post); err != nil {
       c.Data["json"] = map[string]interface{}{"code": 400, "msg": "帖子不存在"}
       c.ServeJSON()
       return
    }

    comment := models.Comment{
       Content: content,
       Post:    &post,
       Author:  &user,
    }

    if _, err := o.Insert(&comment); err == nil {
       c.Data["json"] = map[string]interface{}{"code": 200, "msg": "添加评论成功"}
    } else {
       c.Data["json"] = map[string]interface{}{"code": 400, "msg": "添加评论失败"}
    }

    c.ServeJSON()
}
这段代码定义了一个名为 CommentController 的控制器,并实现了两个处理函数:CommentList() 和 CommentAdd(),用于处理与评论相关的请求。
让我们逐步解释这段代码:
- 导入包: 代码中导入了一些包:
- “github.com/beego/beego/v2/client/orm”:这是 Beego ORM 包,用于进行数据库操作和对象关系映射。
- “github.com/beego/beego/v2/server/web”:这是 Beego Web 服务器包,用于处理请求和响应。
- “post/models”:这是自定义的
models包,用于操作数据模型。
CommentController结构体:CommentController是一个控制器结构体,继承了web.Controller。CommentList()函数:CommentList()是一个处理函数,用于获取评论列表或单个评论详情。
- 首先,通过
orm.NewOrm()创建一个新的 ORM 对象o,用于进行数据库操作。 - 检查是否有
post_id参数和comment_id参数,如果post_id参数为空,则返回参数错误。 - 如果
comment_id参数为空,则返回帖子的评论列表。在数据库中查询post_id对应的帖子的所有评论,并使用models.CommentData()函数将评论列表转换成特定格式的数据。 - 如果
comment_id参数不为空,则表示要获取单个评论的详情。在数据库中查询该comment_id对应的评论,并将其转换成特定格式的数据。 - 最后,将处理结果以 JSON 格式返回。
CommentAdd()函数:CommentAdd()是一个处理函数,用于添加新的评论。
- 获取请求参数
post_id、content和author_id,如果这些参数有为空的情况,则返回参数错误。 - 创建一个新的 ORM 对象
o,用于进行数据库操作。 - 根据
author_id查询对应的用户,如果用户不存在,则返回用户不存在的错误。 - 根据
post_id查询对应的帖子,如果帖子不存在,则返回帖子不存在的错误。 - 创建一个新的
Comment结构体,填充评论的内容、帖子和作者。 - 将评论插入数据库,如果插入成功,则返回添加评论成功的消息,否则返回添加评论失败的消息。
- 最后,将处理结果以 JSON 格式返回。
接口测试
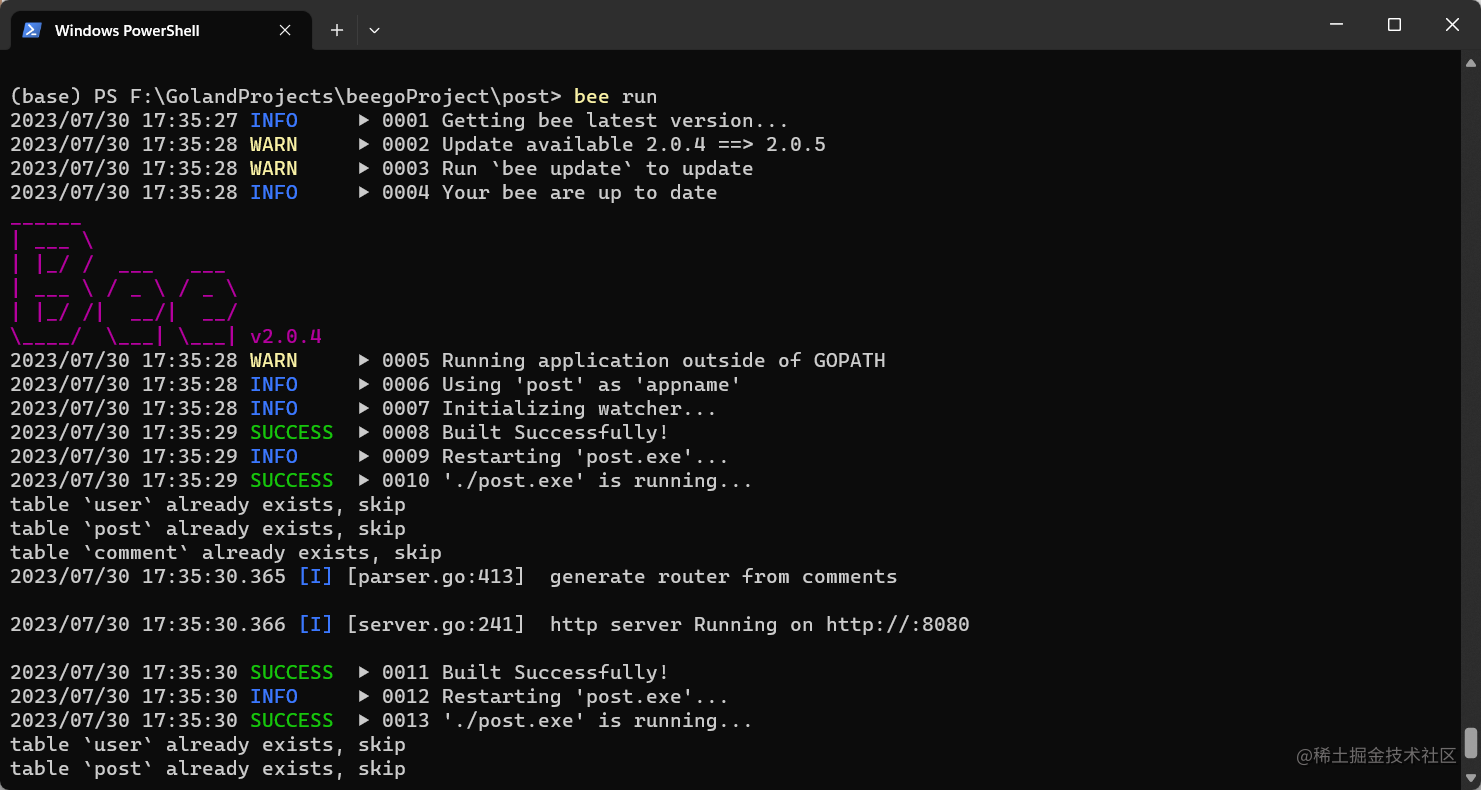
运行该beego项目,命令为bee run,然后使用postman软件进行接口测试。
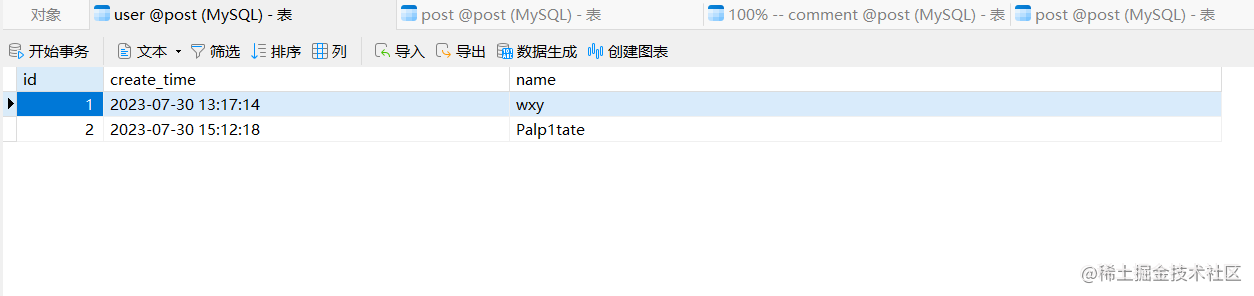
首先我在数据库插入了两条用户数据,方便后续的接口测试:
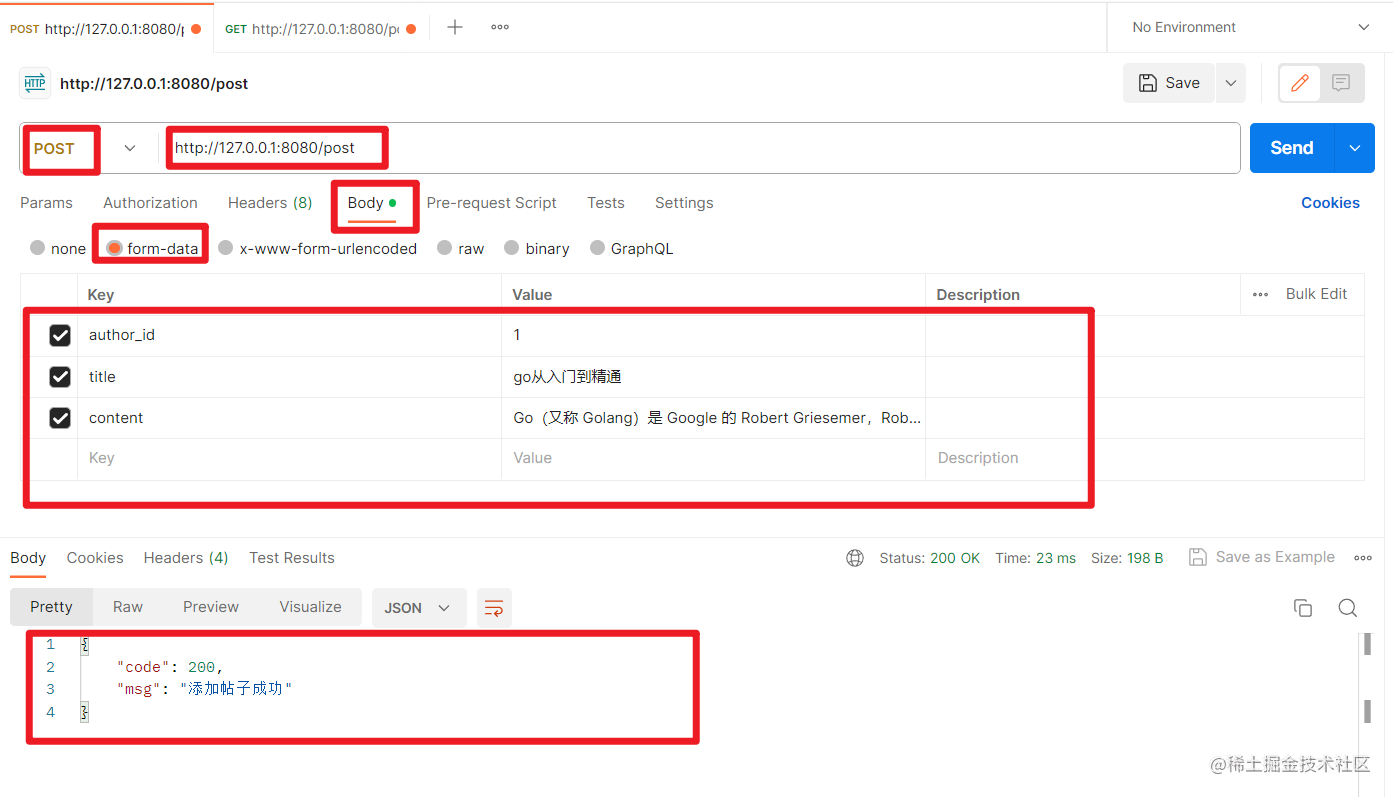
测试增加帖子
在表单输入正确的参数:
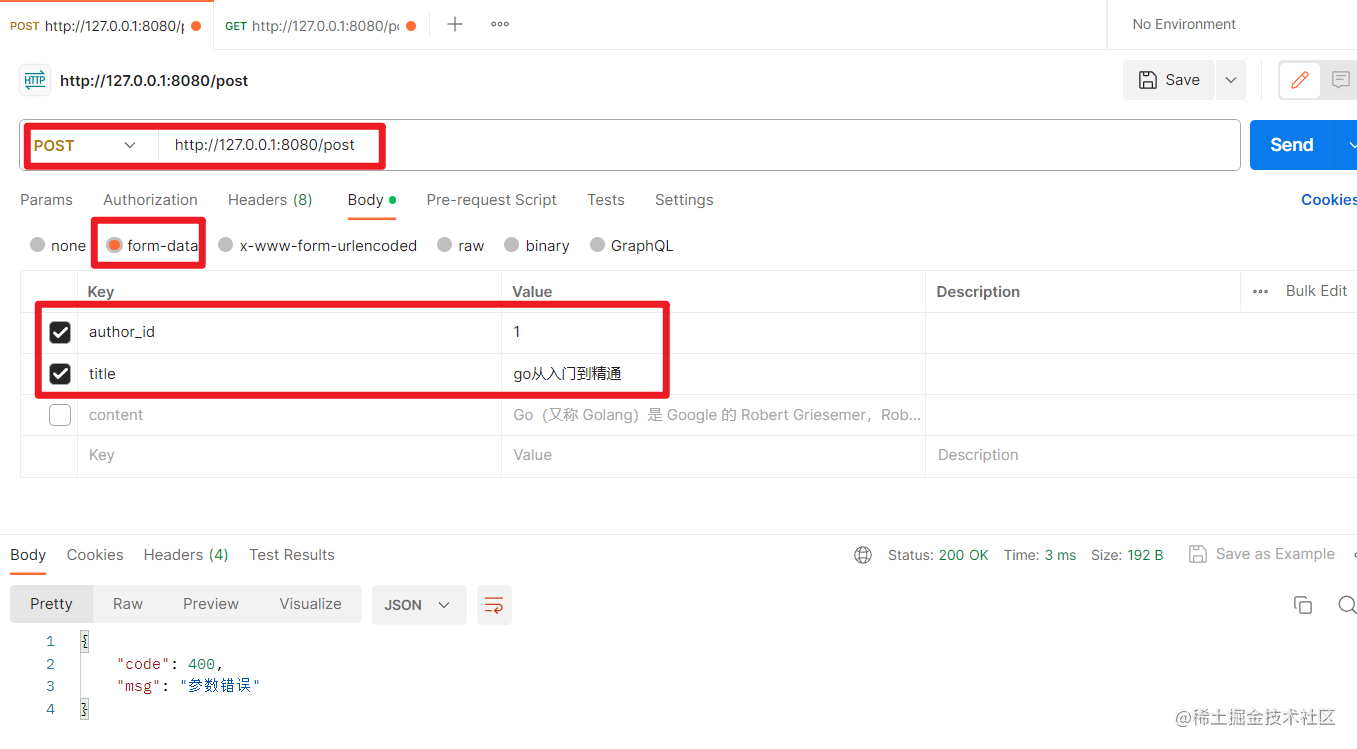
在表单输入错误的参数(没有提交content):
增加帖子接口测试成功。
测试查看帖子
不加参数,查询所有帖子:
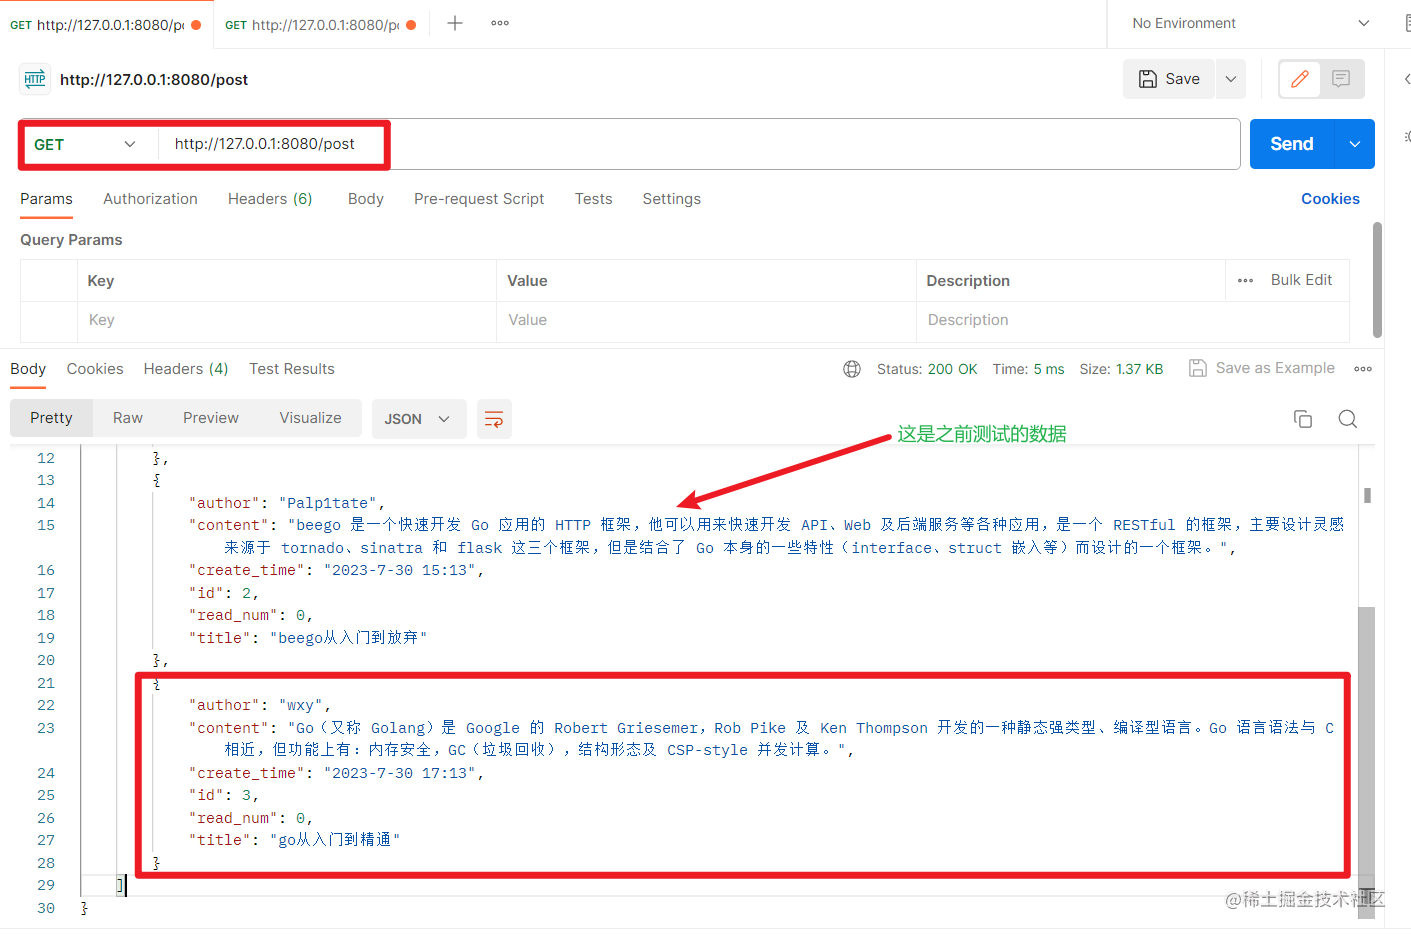
加入post_id参数,查询单个帖子:
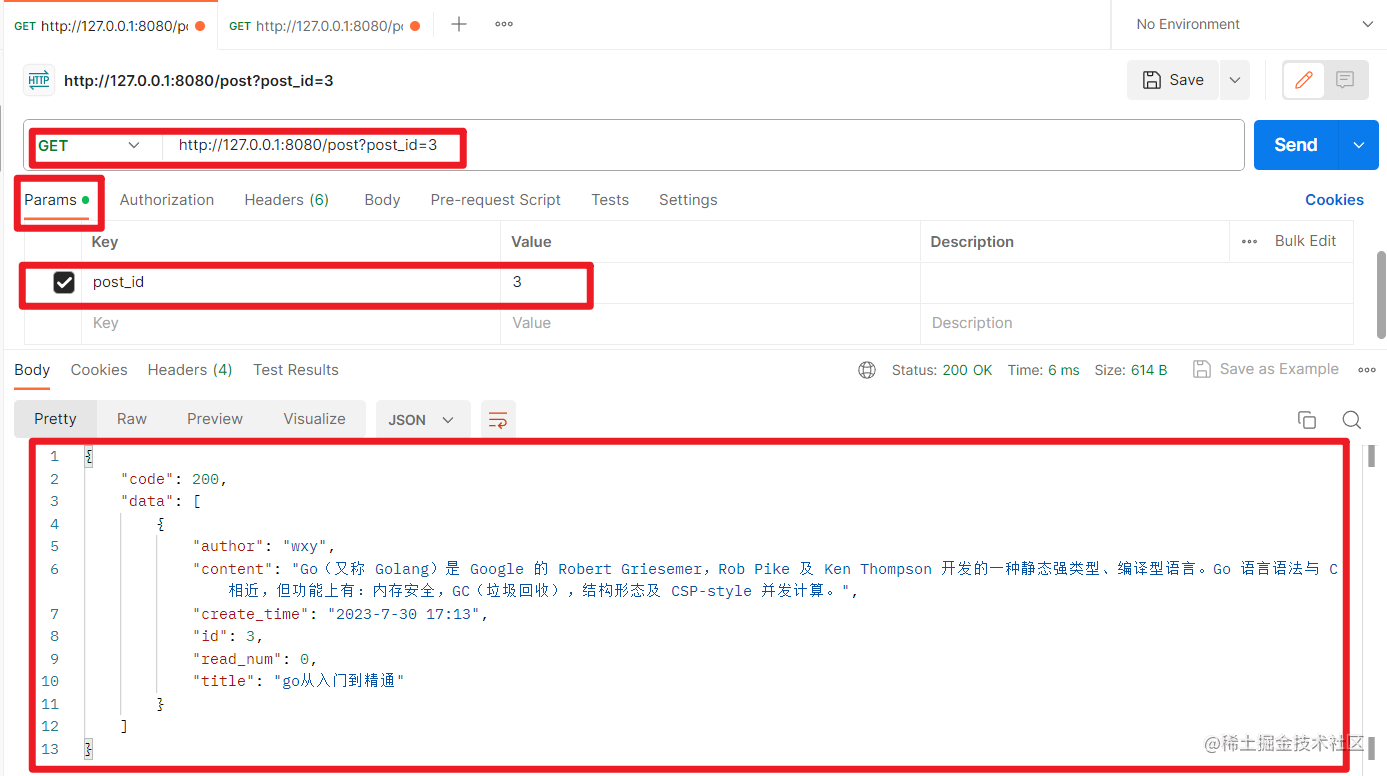
查看帖子接口测试成功。
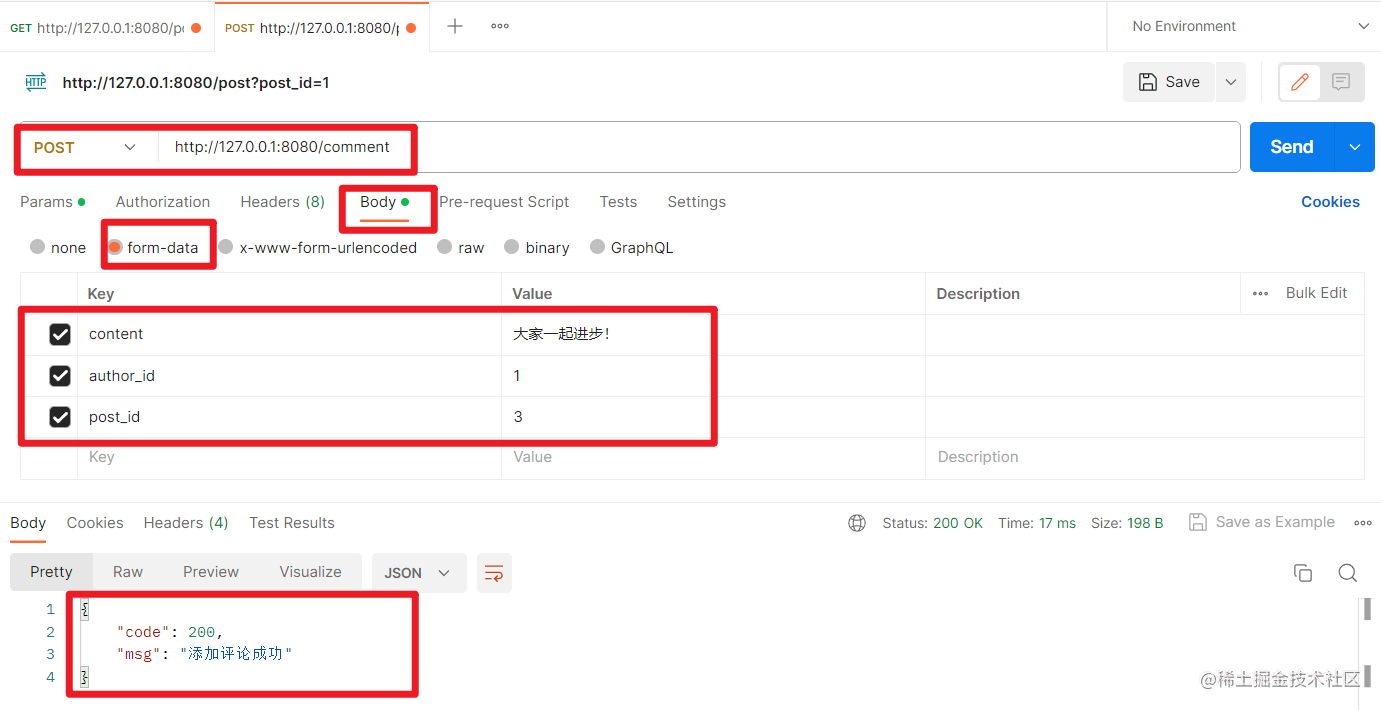
测试增加评论
如果用户不存在:

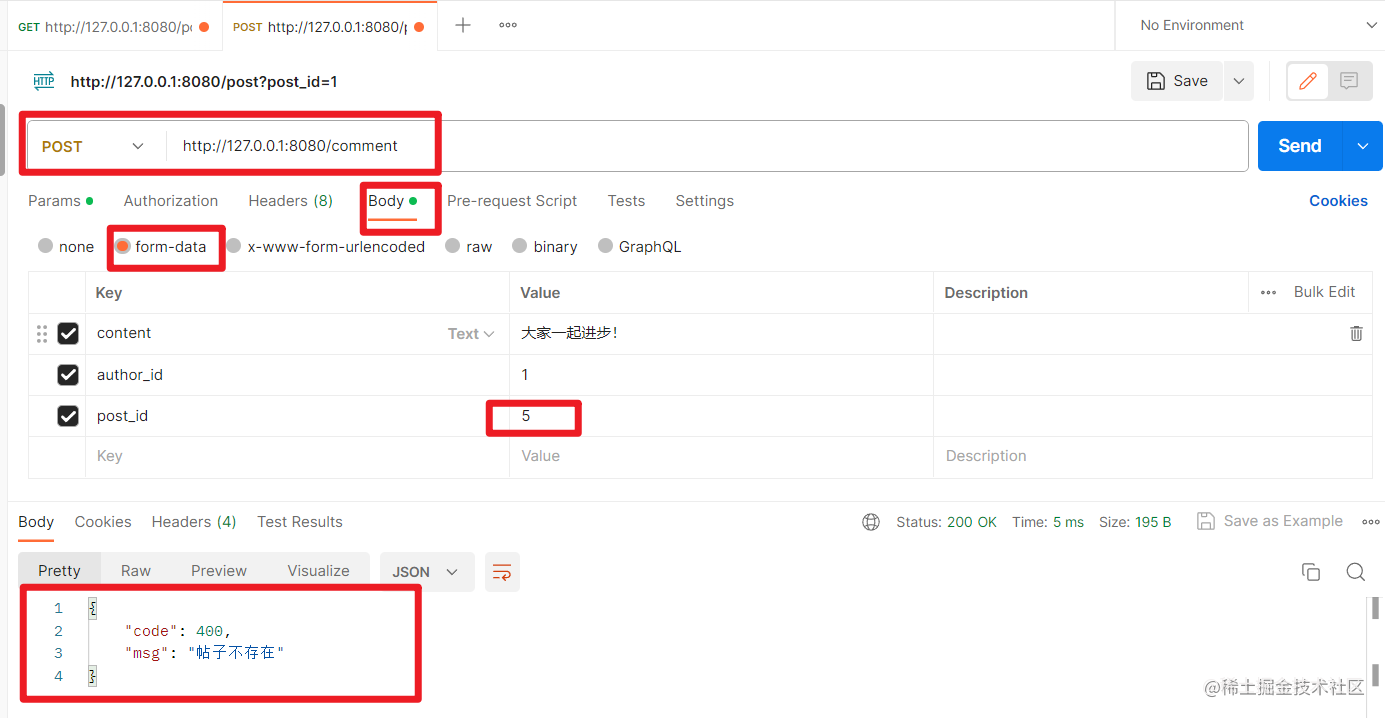
如果帖子不存在:
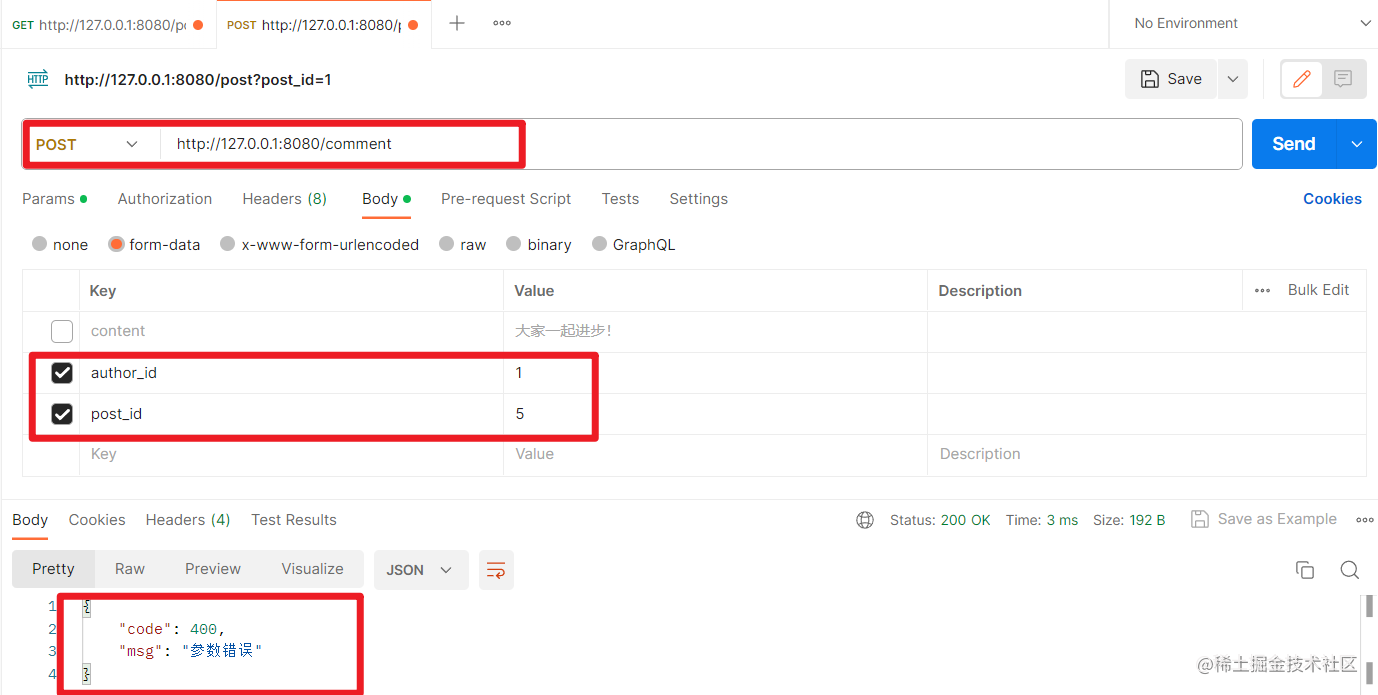
如果缺少参数:
增加评论接口测试成功。
测试查看评论
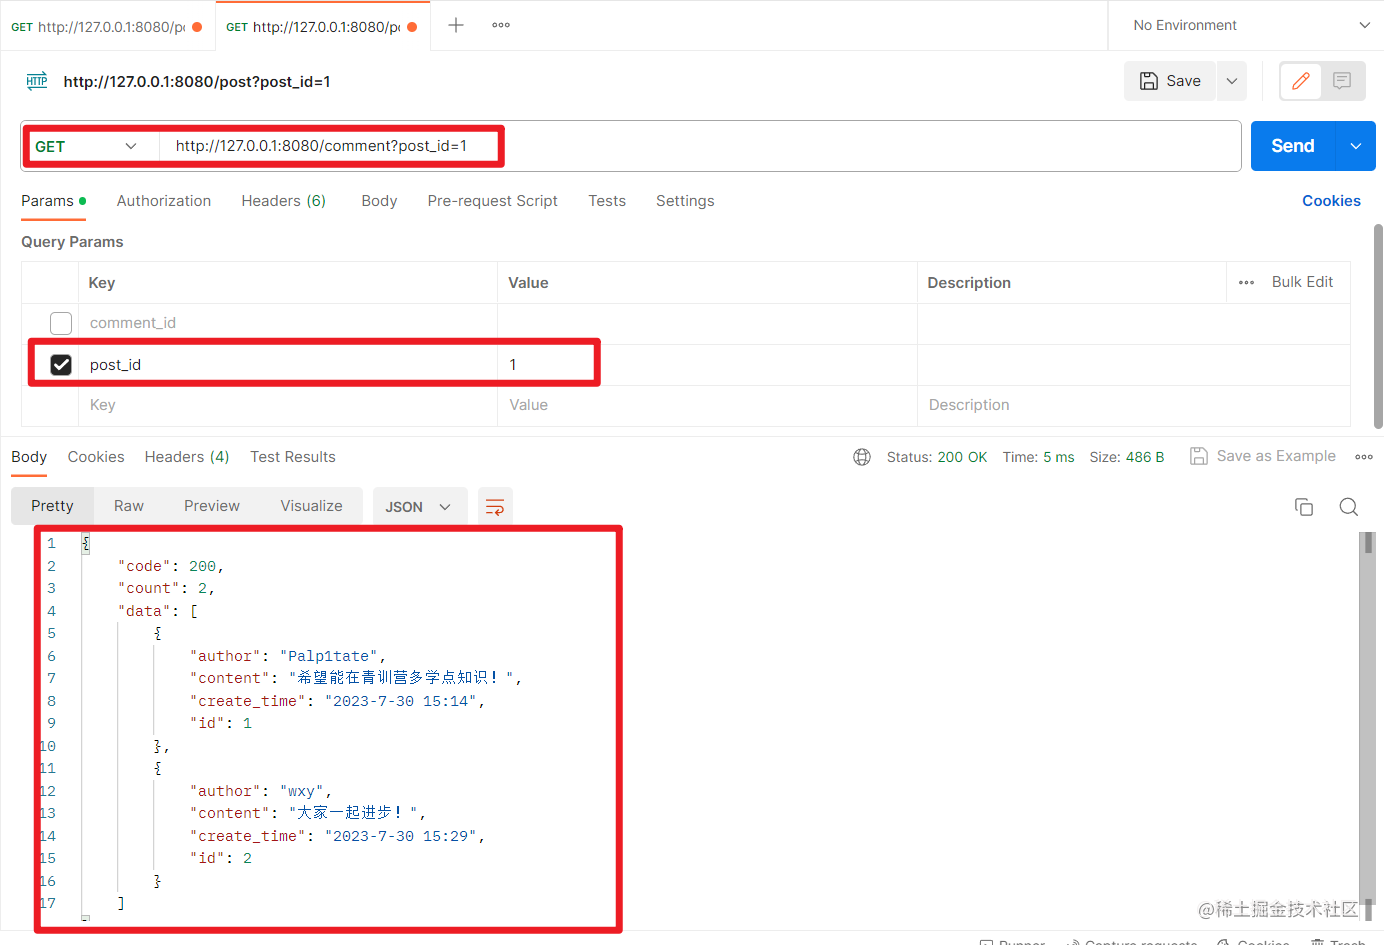
查看某个帖子的所有评论:
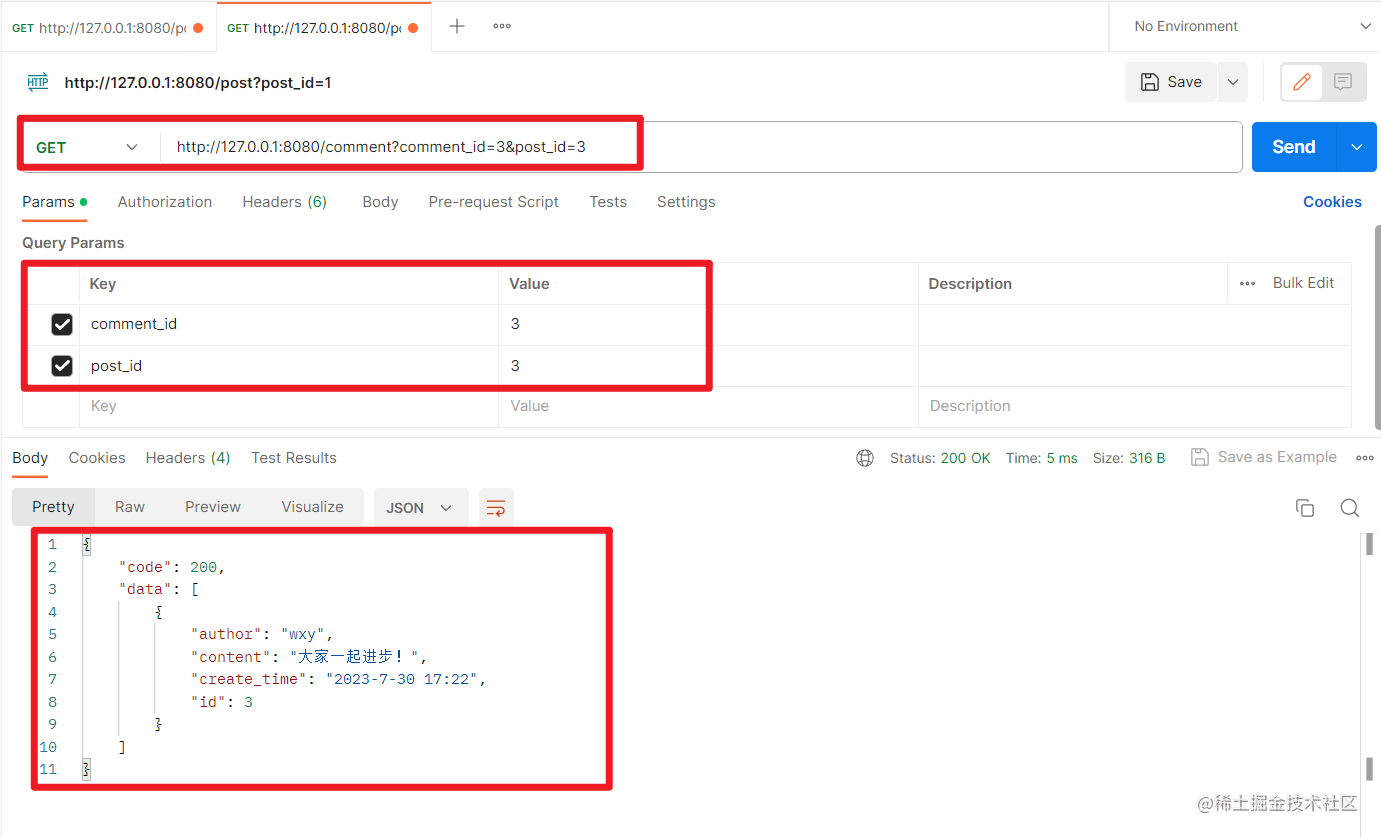
查看某个帖子的某条评论:
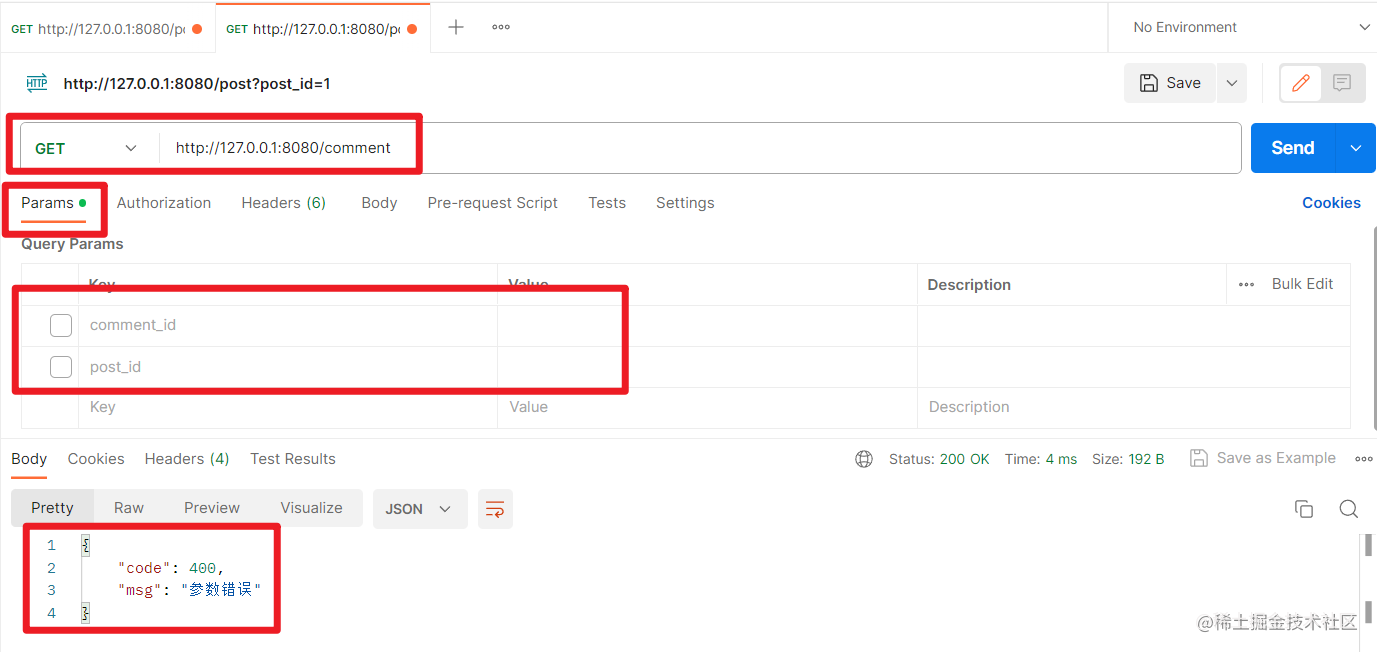
不传入post_id:
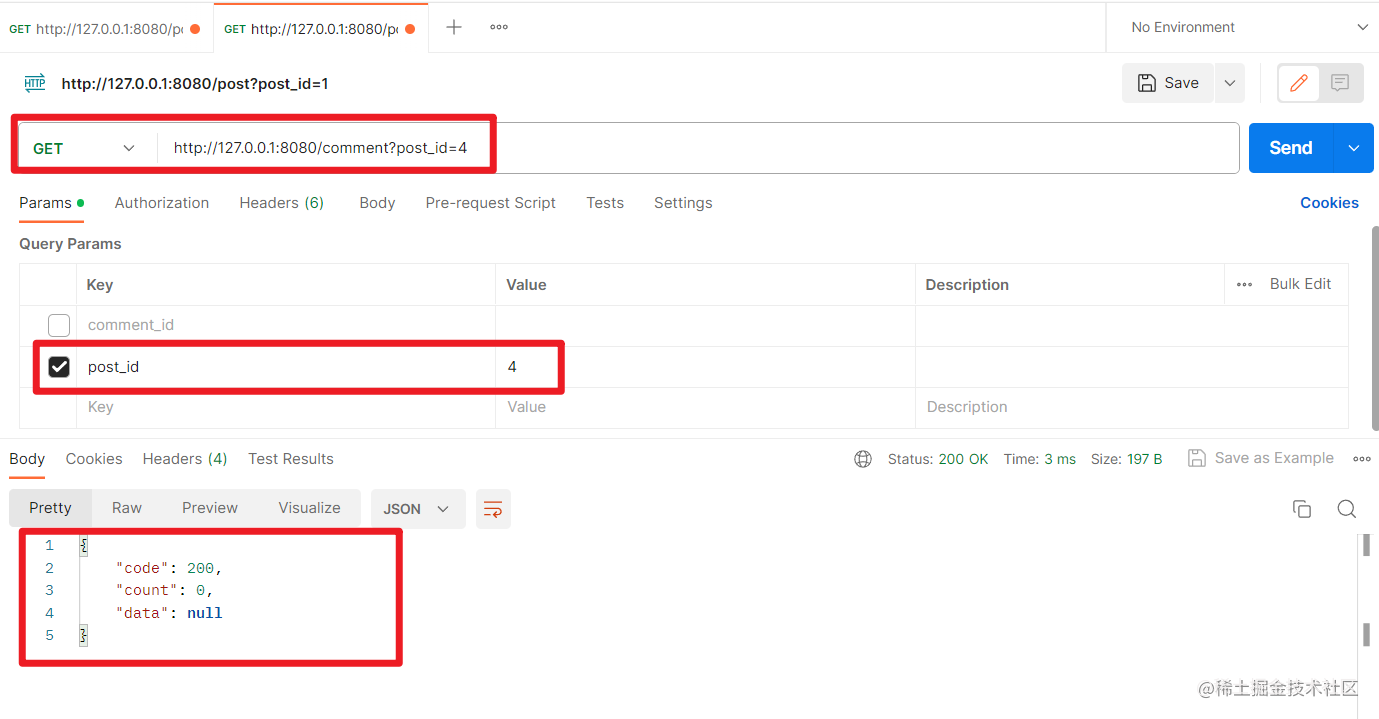
传入不存在的post_id显示没有评论(也可以修改代码,返回帖子不存在的消息):
查看评论接口测试成功。


![网络编程 IO多路复用 [epoll版] (TCP网络聊天室)](https://img-blog.csdnimg.cn/4013737ceef2416282cdeb3c2e6a0a34.png)