内容介绍
| 1、医院列表功能(接口) 4、医院列表功能(前端) 5、更新医院上线状态功能 6、医院详情 7、GateWay网关 8、医院排班管理需求分析 9、查看医院所有科室接口、前端 |
医院列表功能(接口)
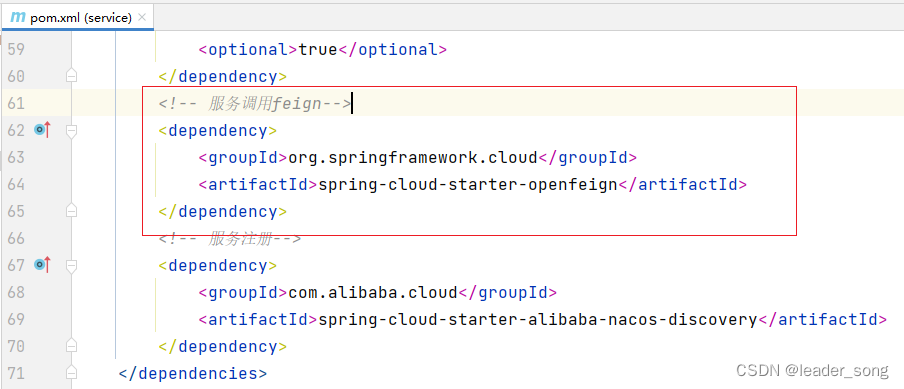
(1)在service下添加依赖
(2)在hosp下添加依赖 <dependency>
<groupId>com.atguigu</groupId>
<artifactId>service_cmn_client</artifactId>
<version>0.0.1-SNAPSHOT</version>
</dependency> (3)启动类添加注解 @EnableFeignClients(basePackages = "com.atguigu")
(5)实现跨模块翻译 @Autowired
private DictFeignClient dictFeignClient; //带条件带分页查询医院列表
@Override
public Page<Hospital> selectPage(Integer page, Integer limit,
HospitalQueryVo hospitalQueryVo) {
//1创建分页对象
//1.1创建排序对象
Sort sort = Sort.by(Sort.Direction.ASC,"hoscode");
//1.2创建分页对象
Pageable pageable = PageRequest.of((page-1),limit,sort);
//2创建条件模板
//2.1封装查询条件
Hospital hospital = new Hospital();
BeanUtils.copyProperties(hospitalQueryVo,hospital);
//2.2模板构造器
ExampleMatcher matcher = ExampleMatcher.matching()
.withStringMatcher(ExampleMatcher.StringMatcher.CONTAINING)
.withIgnoreCase(true);
//2.3创建模板
Example<Hospital> example = Example.of(hospital,matcher);
//3实现带条件带分页查询
Page<Hospital> pageModel = hospitalRepository.findAll(example, pageable);
//4 遍历集合翻译字段
pageModel.getContent().forEach(item->{
this.packHospital(item);
});
return pageModel;
}
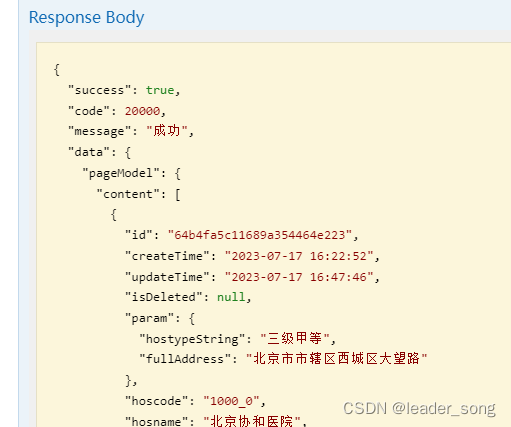
//翻译医院信息
private Hospital packHospital(Hospital hospital) {
//1翻译医院等级
String hostypeString = dictFeignClient.getName(DictEnum.HOSTYPE.getDictCode(), hospital.getHostype());
//2翻译地址信息
String provinceString = dictFeignClient.getName(hospital.getProvinceCode());
String cityString = dictFeignClient.getName(hospital.getCityCode());
String districtString = dictFeignClient.getName(hospital.getDistrictCode());
//3封装数据返回
hospital.getParam().put("hostypeString", hostypeString);
hospital.getParam().put("fullAddress", provinceString + cityString + districtString + hospital.getAddress());
return hospital;
} (6)测试
4、创建cmn接口 (1)分析接口 *参数:dictCode *返回值:R(List<Dict>) (2)实现controller @ApiOperation(value = "根据dictCode获取下级节点")
@GetMapping(value = "/findByDictCode/{dictCode}")
public R findByDictCode(
@PathVariable String dictCode) {
List<Dict> list = dictService.findByDictCode(dictCode);
return R.ok().data("list",list);
} (3)实现service //根据dictCode获取下级节点
@Override
public List<Dict> findByDictCode(String dictCode) {
//1 根据dictCode查询字典信息
Dict parentDict = this.getByDictCode(dictCode);
//2 根据父id查询子数据
LambdaQueryWrapper<Dict> wrapper = new LambdaQueryWrapper<>();
wrapper.eq(Dict::getParentId,parentDict.getId());
List<Dict> list = baseMapper.selectList(wrapper);
return list;
} (4)测试
|


医院列表功能(前端)
| 1、添加路由 2、添加页面保存路由
3、添加api接口方法 6、测试
|


更新医院上线状态功能
| 1、分析需求 医院排班管理需求分析
查看医院所有科室接口、前端
2、实现接口 (1)分析接口 *参数:id、status *返回值:R.ok() (2)实现controller 3、对接前端 (1)确认入口
(2)添加api (3)确认页面
(4)实现js (5)测试
|


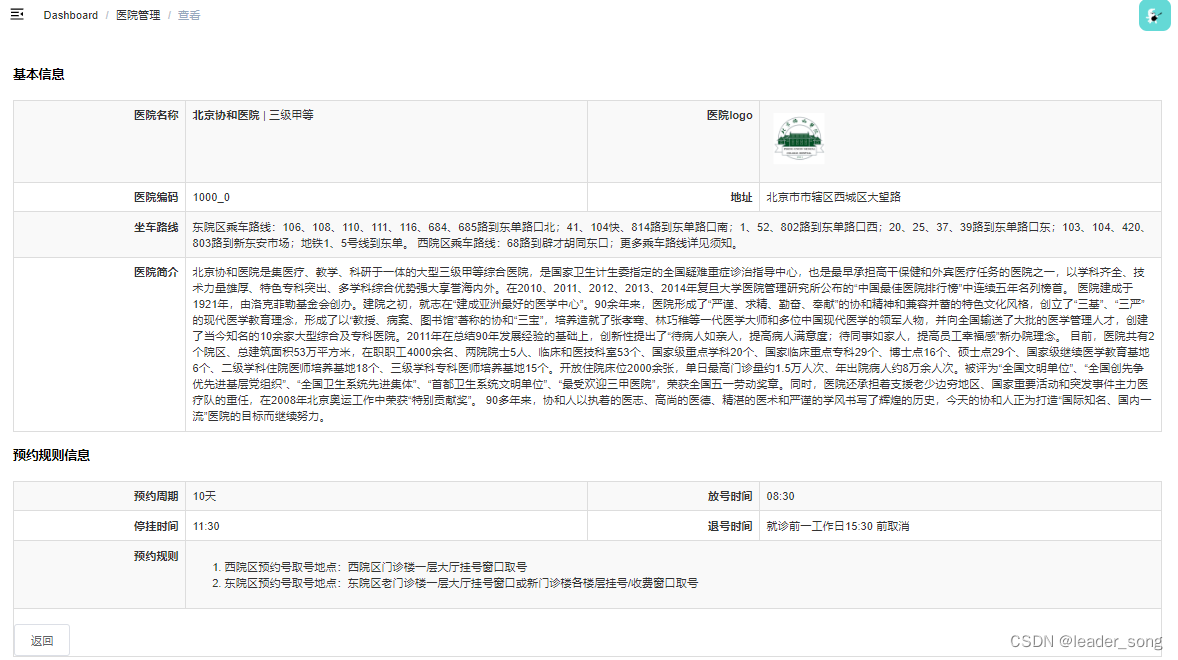
医院详情查询实现
| 1、实现接口 (1)分析接口 *参数:id *返回值:R(map(医院基本信息、预约规则)) (2)实现controller @ApiOperation(value = "获取医院详情")
@GetMapping("show/{id}")
public R show(
@PathVariable String id) {
Map<String,Object> map = hospitalService.show(id);
return R.ok().data(map);
} (3)实现service //获取医院详情
@Override
public Map<String, Object> show(String id) {
Hospital hospital = this.packHospital(hospitalRepository.findById(id).get()) ;
BookingRule bookingRule = hospital.getBookingRule();
hospital.setBookingRule(null);
Map<String, Object> result = new HashMap<>();
result.put("hospital",hospital);
result.put("bookingRule",bookingRule);
return result;
} (4)测试
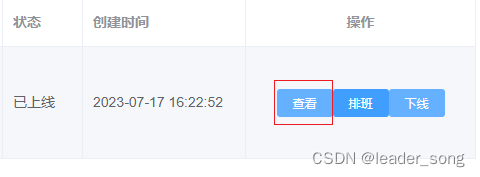
2、对接前端 (1)确认入口
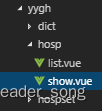
(3)创建页面,保存路由
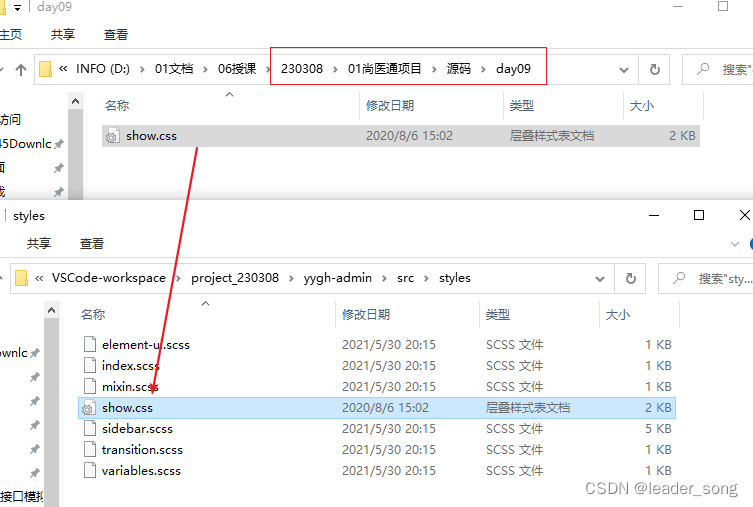
(7)添加css 第一、将show.css文件复制到src/styles目录
第二、在src/main.js文件添加引用 import '@/styles/show.css'
|


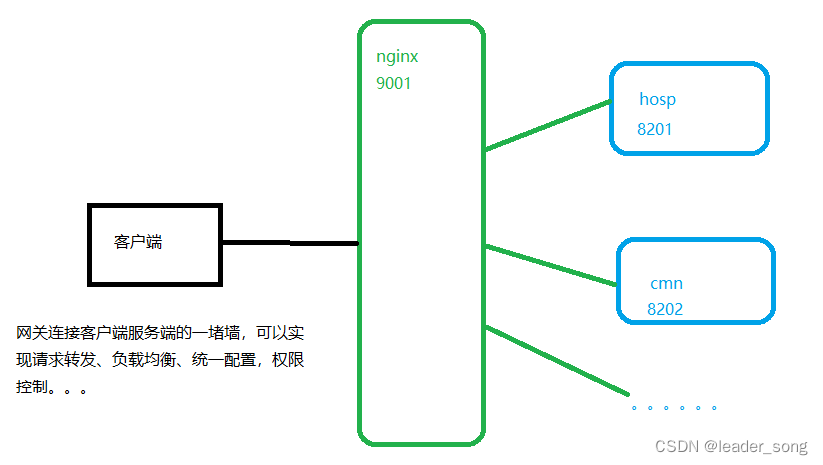
Spring Cloud GateWay网关搭建
| 1、是什么
2 Spring Cloud Gateway (1)架构图
(2)核心概念 路由。路由是网关最基础的部分,路由信息有一个ID、一个目的URL、一组断言和一组Filter组成。如果断言路由为真,则说明请求的URL和配置匹配 断言。Java8中的断言函数。Spring Cloud Gateway中的断言函数输入类型是Spring5.0框架中的ServerWebExchange。Spring Cloud Gateway中的断言函数允许开发者去定义匹配来自于http request中的任何信息,比如请求头和参数等。 过滤器。一个标准的Spring webFilter。Spring cloud gateway中的filter分为两种类型的Filter,分别是Gateway Filter和Global Filter。过滤器Filter将会对请求和响应进行修改处理 3、创建service_gateway模块(网关服务) (1)创建模块
(2)导入依赖 <dependencies>
<dependency>
<groupId>com.atguigu</groupId>
<artifactId>common_utils</artifactId>
<version>0.0.1-SNAPSHOT</version>
</dependency>
<dependency>
<groupId>org.springframework.cloud</groupId>
<artifactId>spring-cloud-starter-gateway</artifactId>
</dependency>
<!-- 服务注册 -->
<dependency>
<groupId>com.alibaba.cloud</groupId>
<artifactId>spring-cloud-starter-alibaba-nacos-discovery</artifactId>
</dependency>
</dependencies> (3)编写application.properties配置文件 # 服务端口
server.port=8200
# 服务名
spring.application.name=service-gateway
# nacos服务地址
spring.cloud.nacos.discovery.server-addr=127.0.0.1:8848
#使用服务发现路由
spring.cloud.gateway.discovery.locator.enabled=true
#设置路由id
spring.cloud.gateway.routes[0].id=service-hosp
#设置路由的uri
spring.cloud.gateway.routes[0].uri=lb://service-hosp
#设置路由断言,代理servicerId为auth-service的/auth/路径
spring.cloud.gateway.routes[0].predicates= Path=/*/hosp/**
#设置路由id
spring.cloud.gateway.routes[1].id=service-cmn
#设置路由的uri
spring.cloud.gateway.routes[1].uri=lb://service-cmn
#设置路由断言,代理servicerId为auth-service的/auth/路径
spring.cloud.gateway.routes[1].predicates= Path=/*/cmn/** (4)添加主目录、启动类
@SpringBootApplication

  public class ApiGatewayApplication {

    public static void main(String[] args) {

        SpringApplication.run(ApiGatewayApplication.class, args);

    }
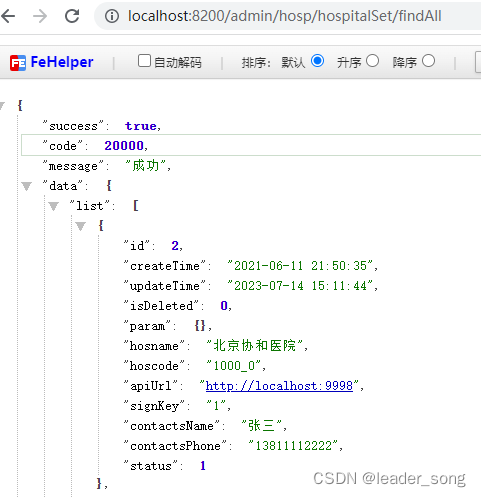
} (5)启动模块测试
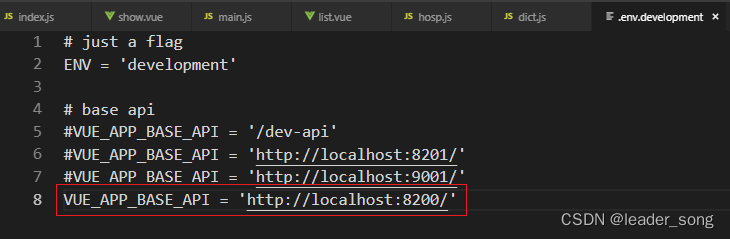
(6)改造前端配置
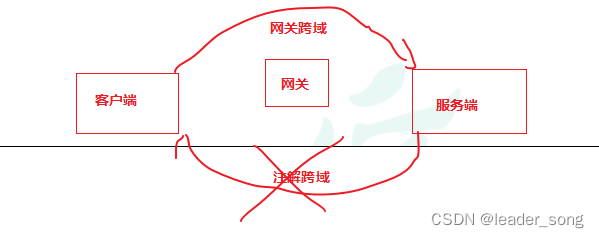
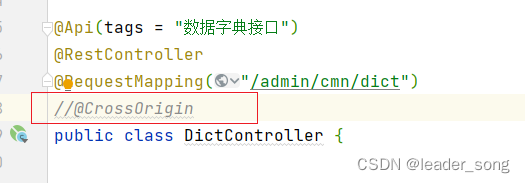
重启生效 4、扩展功能 实现跨域功能 (1)添加配置类 @Configuration
public class CorsConfig {
@Bean
public CorsWebFilter corsFilter() {
CorsConfiguration config = new CorsConfiguration();
config.addAllowedMethod("*");
config.addAllowedOrigin("*");
config.addAllowedHeader("*");
UrlBasedCorsConfigurationSource source = new UrlBasedCorsConfigurationSource(new PathPatternParser());
source.registerCorsConfiguration("/**", config);
return new CorsWebFilter(source);
}
} (2)测试
|


医院排班管理需求分析
| 1、分析需求
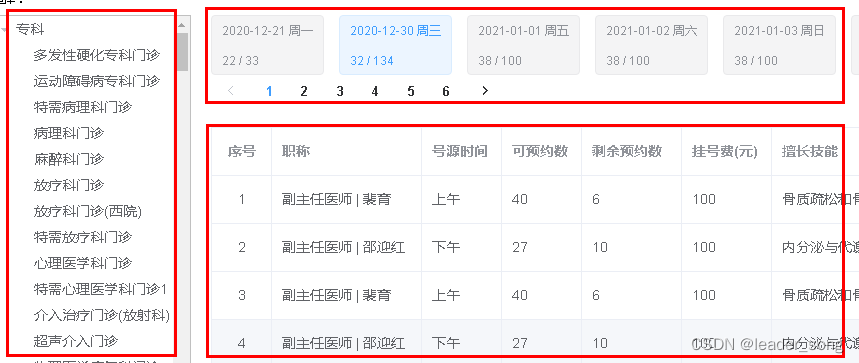
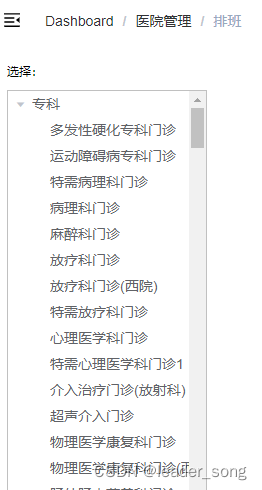
(3)根据医院、科室、排班日期查询排班集合 2、实现方案 (1)使用el-tree展现树形科室信息 (2)根据hoscode、depcode筛选数据,根据排班日期进行带分页带排序的聚合查询。使用工具推算周几 (3)根据医院、科室、排班日期查询排班集合 3、实现步骤 虽然是一个页面展示所有内容,但是页面相对复杂,我们分步骤实现 第一,先实现左侧科室树形展示; 第二,其次排班日期分页展示 第三,最后根据排班日期获取排班详情数据 |
查看医院所有科室接口、前端
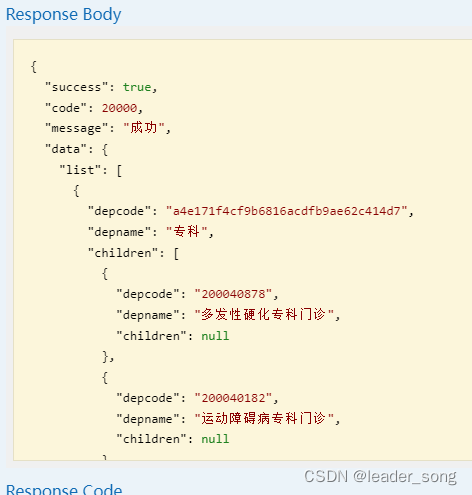
| 1、分析需求
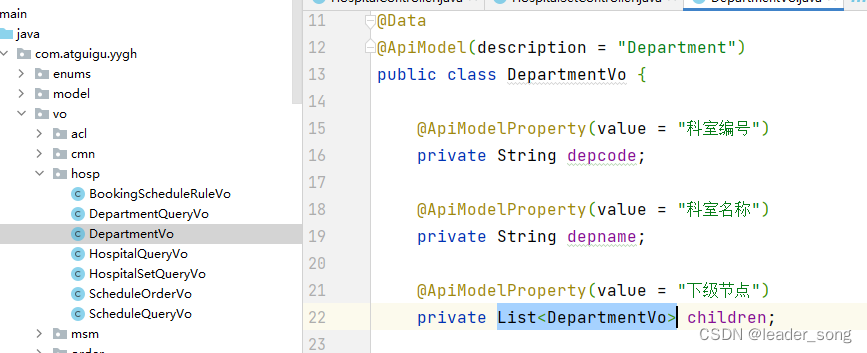
2、实现接口 (1)分析接口 *参数:hoscode *返回值:R(树形结构展示科室集合List<DepartmentVo>)
(2)创建controller (3)如果是mysql如何实现 #查询大科室集合 SELECT d.bigcode ,d.bigname,COUNT(d.id) FROM Department d GROUP BY d.bigcode ,d.bigname; #遍历大科室集合,根据bigcode查询小科室集合 SELECT * FROM Department d WHERE d.bigcode = '大科室编码'; (4)梳理实现步骤 (6)测试
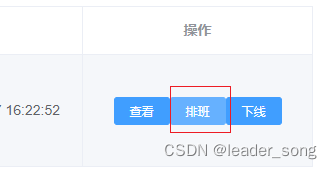
3、对接前端 (1)确认入口
(3)创建页面
(7)测试
|


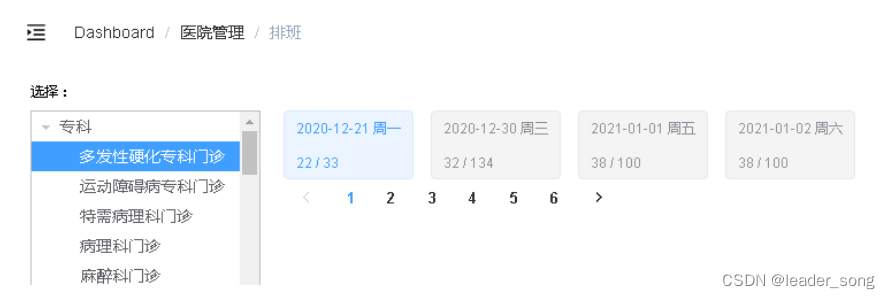
排班日期统计列表
| 1确认需求
(1)根据医院、科室、日期带分页聚合查询 (2)根据排班日期推算周几 2、实现接口 (1)分析接口 *参数:page、limit、hoscode、depcode *返回值:R(Map(total、List<BookingScheduleRuleVo>。。。)) (2)创建controller @Api(tags = "排班管理")
@RestController
@RequestMapping("/admin/hosp/schedule")
public class ScheduleController {
@Autowired
private ScheduleService scheduleService;
//根据医院编号 和 科室编号 ,查询排班规则数据
@ApiOperation(value ="查询排班规则统计数据")
@GetMapping("getScheduleRule/{page}/{limit}/{hoscode}/{depcode}")
public R getScheduleRule(@PathVariable long page,
@PathVariable long limit,
@PathVariable String hoscode,
@PathVariable String depcode) {
Map<String,Object> map = scheduleService.getScheduleRule(page,limit,hoscode,depcode);
return R.ok().data(map);
}
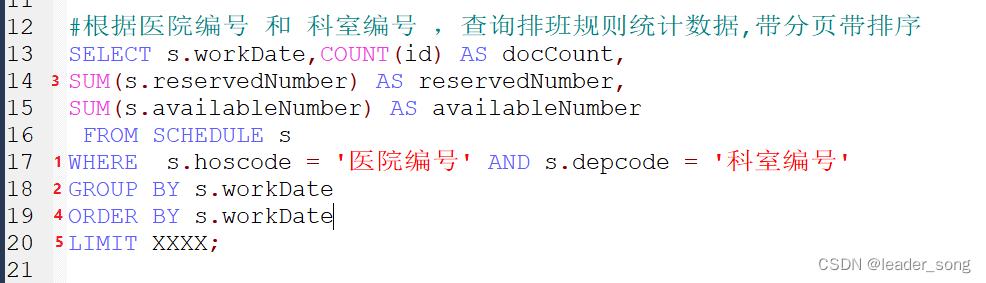
} (3)如果是mysql如何实现 #根据医院编号 和 科室编号 ,查询排班规则统计数据,带分页带排序 SELECT s.workDate,COUNT(id) AS docCount, SUM(s.reservedNumber) AS reservedNumber, SUM(s.availableNumber) AS availableNumber FROM SCHEDULE s WHERE s.hoscode = '医院编号' AND s.depcode = '科室编号' GROUP BY s.workDate ORDER BY s.workDate LIMIT XXXX;
|